
Ali Edwards's Blog, page 96
April 8, 2021
Day In The Life™ 2021 | Special Guest CJ Flynn
Hi everyone. I’m CJ! I am thrilled to share my Day in the Life™ album along with how I approached this project. First off, I want to thank Ali and her team for asking me to share here but more importantly for creating amazing products to document life.

Reason Why
2020 was my first full year of documenting my life chronologically. While my approach was similar to the Project Life® style, most of my memory keeping focused on specific moments throughout each month. I decided to participate in Day in the Life™ as it offered a completely new approach in documenting one single day. There is a beauty in capturing every day details paired with the feelings and memories that come from these moments. I think my completed album will gain more meaning as life evolves and I will be able to flip back through years from now.

My Process (step-by-step)
In early January, I made a list of projects that I wanted to participate and invest in. I decided to give Day in the Life™ a try this year. Here are the steps that I took to make this album.
Step 1: Research
I first visited Ali’s blog to view previous product offerings and her completed projectsI then went to Instagram and searched the hashtag #aedayinthelife to get more ideas I also watched Ali’s YouTube videos and fell in love with her Day In The Life™ 2020 album – I was inspired by her design formula using patterned paper I tend to work in smaller albums as they seem to work better for me to complete projects. My time is limited so I often only document on the weekend. I had originally planned to use a 4x4 album from my stash, but when Ali shared the 4x6 album bundle I changed my mind.
Step 2: Set a reminder to order product the day it hits the shop
To ensure that I would get the products that I wanted, I set reminders on both my phone and in Google calendar. This is extremely important as some items can go fast!
Step 3: Before the new products arrived, I put together an initial design plan
With all new projects, I create a base template in Adobe InDesign that mimics the page sizes of the album.
Since I planned to work outside the page protector, I set up a 7.125” x 4.25” template so I could pull in previously purchased digitals and “comps.” “Comps” are photos I save of physical or digital products before I purchase them or before the physical product arrives.

By putting together this template, I am able to arrange spreads to see how my album might come together. I also went through my digital and physical stash for what might work (patterned paper from Studio Calico shown above). My plan was to cut down the 3x4 “TODAY” cards into squares, add handwritten journaling, and zigzag stitch to the clear page protectors.
Step 4: New product arrives
Once my kit and new products arrived, I organized them into a container together with any other items in my stash including patterned paper that I thought might work. I also ordered the Day in the Life™ June 2017 Spring Release Kit that was offered as an add-on to my March Ali Edwards Stories By The Month™ kit subscription. [Patterned paper from scrapbook.com and Studio Calico shown below.]

Step 5: Take photos
Because I had a huge project launching at work in March, I opted to take photos in February.
Camera: I used my iPhone 12 Pro Max to take all my photos for this project. Photo App: Every photo on my phone uploads to my Shutterfly account via an app. Selecting photos: At my computer, I logged into my Shutterfly account and ran through all the possible photos I might like to use. I download them into a folder saved on my computer for my Day in the Life™ project.
Here are a few images that didn’t make the cut:

Step 6: Begin digital layout
Now that I had several photos taken and downloaded, I started working in my template that I created. I pulled in photos, digital papers, and started typing my journaling.

I also tested my plan to cut down 3x4 cards into squares and sew to clear page protectors. Here is the prototype using Day in the Life™ June 2017 Spring Release Mini Kit cards.

At this point, I decided that I didn’t want to use the clear page protectors in this way and changed my plan to use the left side of my spread for patterned paper and journaling that I could type out and print on white paper.
I still wanted to use a zigzag stitch for added texture. I thought the best way to incorporate this texture was to stitch together the patterned paper and the journaling cards. [Digital pattern paper in this draft layout is from Push Print Studio]

Step 7: Finalizing my design formula
Since I opted not to use the 3x4 “time cards”, my next step was to figure out how to include the time for each spread. I opted to stamp the times on with black ink using the Day in the Life™ January 2021 4x6 Number Stamp Set.
My next consideration was how to incorporate the colorful Day in the Life™ felt messy circles which seemed too busy when combined with the color patterned paper. At this point, I opted for black and white bold patterns. This is where my design formula came together.

Black & White Patterns // I went through my stash of black and white digitals and found one from Studio Calico [11:25am] and one from LifeLovePaper [12:30pm]. For the remainder, I purchased from Youandigraphics . Journaling & Sentiments // For the journaling cards, I selected digital sentiments from previous purchases from Ali’s shop to add to the top of each card. I typed my journaling using the Adobe Typeka font. 2x3 “TODAY” cards // Mimicking Ali’s cards that came with the kit, I created my own as I needed them to be smaller. I also wanted to type my journaling vs. handwrite it. Printers // The patterns and photos were printed using my Epson PictureMate PM400 on photo paper. My black and white journaling cards were then printed using my laser printer on standard every day paper. I knew that I would be stamping the times on the bottom and then adhering to the photo from the previous time so there would be enough paper thickness.

Once I had my black and white journaling cards and digital patterns printed, I went into production mode and pulled out my sewing machine to stitch together the left side panels. I used a Janome New Home Turbo Teal Sewing Machine. (To thread it, I watched this Stitchless Tv YouTube video).

For adhering pages back to back, I used a Scotch Adhesive Dot Roller. To adhere felt messy circles to the patterned paper, I used Two-Sided Adhesive Tape. Once everything was sewn or and adhered together, it was time to embellish. (My favorite part!) Featured below are the chipboard tabs.

A favorite combination for me is wonky chipboard hearts with Ali’s messy life line digitals as shown below. I also included a chipboard piece from the February 2021 Stories By The Month™ kit with the perfect sentiment: all the gratitude for these regular, mundane days.

This was the only spread that included a page protector which holds two clothing tags. I also used a stitched tab from Whimsy Fox Crafts and stamped the word “WEARING” using the 2017 Day in the Life™ Daily Phrases Roller Stamp.

Here are a few more detailed photos:


Thanks for taking a look. You can find me on Instagram @cjflynn09design or visit my website at cjflynn09design.com


April 6, 2021
Hello Story 3 Workshop | Now Open For Registration

Ali is super excited to be back with another round of the Hello Story series of workshops.
Hello Story 3 features three storytelling structures/techniques that will bring both creativity and clarity to your documenting process: no-photo layouts, cut paper collage, and repetition. Through in-depth explorations of each topic Ali will share with you how she uses each of the story structures to get stories told.
In this workshop you'll be encouraged to play, think outside the box, and use your stash while getting your stories told. Each lesson will include three traditional layouts and a pocket page example (very similar to the format presented in the previous two workshops).
Registration is now open and the first lesson will be available on April 20th.
A bundle of the original Hello Story and Hello Story 2 is also available here. Hello Story is the original workshop and set the foundation for the series. It's recommended but not required before taking Hello Story 2 or Hello Story 3.

April 2, 2021
In Case You Missed It | April 2

Happy Friday, friends! Welcome to the latest, In Case You Missed It. Just a reminder that this is a quick post that will happen every Friday afternoon with all the updates and links that have happened throughout the week. So, let's get to it:
It’s the first Friday of the month and that means we have new digitals in the shop! Head over to the shop now to check out the new digitals, including our 2021 Week in the Life™ digital collection. Find them here.
You haven’t missed it….yet! Starting Monday, April 5th through Sunday, April 11th, Ali will be embarking on Pieces of Me, a fun self-portrait adventure and we invite you to play along with. Find out more about the project and the supporting collection here. There are new Guest Storytellers in Bloom Classroom. The first of the month means we have two new lessons in the BLOOM classroom. This month we are delighted to welcome Ginny Hughes and Kim Chaffin as Guest Storytellers. Learn more here. Stories Revisited Sale: Digital Kits & Classes! Starting April 2nd through the 12th, we’ll be offering past Digital Story Kits™ for $14.99 and Story Classes for $10. Moving forward, we’re changing up our Stories Revisited Sales. This sale will include previous Story Classrooms, digital Story Kits and digital add ons and later this summer we will offer our previous physical Story Kit and Story Stamps in Stories Revisited: Kits & Stamps. Find it here.
In this week's Craft The Story video (Episode 13) Ali is sharing tips + things to think about related to self-portraits and our community documenting project Pieces Of Us. Find it here.
We’re so grateful to have you all as members of this community! Thanks for joining me today and have a great weekend!

Self-Portrait + Pieces Of Me Project Tips
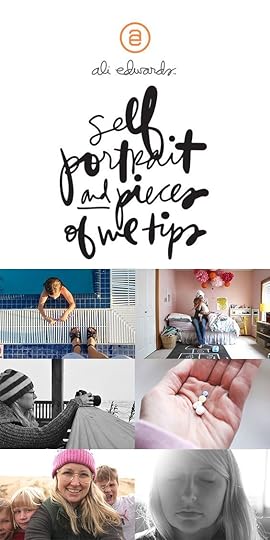
In this week's Craft The Story video (Episode 13) I'm sharing some tips and ideas for self-portraits as many of us get ready to embark on our community Pieces Of Us project next week.
Let's dive right in:
Pieces Of Us 2021 Details
Pieces Of Me Notebook + Folio Bundle
Pieces Of Me Notebook
Blog Post With Self Portrait Examples
Lens Of Joy Workshop
Pieces Of Life Blog Archives (includes many examples of how Creative Team documented their photos + words last year)

April 1, 2021
Projects + Product Releases | April

Hi Friends! Can you believe it's April? Because of the great response to our weekly In Case You Missed It Series, we wanted to try a new monthly preview of upcoming projects and product releases. Moving forward, be on the lookout for this post on the first of every month. Please understand that some of these release dates may change and more information will be available prior to an individual release. This post is just to serve as a snapshot of things to come later in the month. This information will also be available in the Craft the Story Group.
New Guest Storytellers in Bloom Classroom // The first of the month means we have two new lessons in the BLOOM classroom. This month we are delighted to welcome Ginny Hughes and Kim Chaffin as Guest Storytellers. Learn more here. Stories Revisited Sale: Digital Kits & Classes // Starting April 2nd through the 12th, we’ll be offering past Digital Story Kits and Story Classes for $10. Moving forward, we’re changing up our Stories Revisited Sales. This sale will include previous Story Classrooms, digital Story Kits and digital add ons and later this summer we will offer our previous physical Story Kit and Story Stamps in Stories Revisited: Kits & Stamps. More information to come.Pieces of Me // Starting Monday, April 5th through Sunday, April 11th, Ali will be embarking on this fun self-portrait adventure again next week and we invite you to play along. Find out more here. Hello Story 3 // We’re excited to share that Hello Story 3 is coming to the AE Classroom this month. Registration will open April 6th and class starts April 20th. More details to come.
Hello Story 3 Chat // Ali will be LIVE on the Ali Edwards Design Inc Instagram account on Tuesday, April 6th to talk about Hello Story 3. Tune in to ask questions and get more insight into her creative process. Time to be determined.
Story Chat // We’re introducing a new monthly event: Story Chat. Beginning April 12th, We’ll be hosting a LIVE conversation on the Ali Edwards Design Inc. Instagram account to discuss the new story kit theme and possible story ideas. For our first discussion, we’re excited to have Ali and creative team members Lisa Varshine, Laura Wonsik, and Amy Gretchen. Stay tuned for the final time!
April Story Kit // On the 13th we’ll be revealing a new Story Kit theme, Evening. We can’t wait to share this one with you.
Stamp Restock // From April 19th to April 25th, we’ll be restocking some of your favorite stamps in the store. More information to come. Storytelling Basics Sale // From April 26th to April 30th, we’ll be offering a discount on our entire Storytelling Basics Collection. More information to come.
We're excited for all that's in store this month. As always, thank you for being here!

March 30, 2021
AE Creative Team | March Stories By The Month™ Digital Kits
March is all about fresh starts and saying hello to spring, and we love the way our Creative Team documented their stories using our March Stories by the Month™ Digital Kits.
Also, just as a reminder, our Retiring Digitals Sale ends tomorrow, March 31st. This is your last chance to save 50% on Ali's classic digital designs and digital products older than two years old. (PLEASE NOTE: We will not be retiring past Digital Stories By The Month kits, and all past digital purchases will remain in your My Digitals account here on the site.)


[image error]


As always, we are so grateful to our Creative Team for sharing their stories and creative inspiration with all of us!

Pieces Of Me 2021 | Self Portrait Community Project Starts Next Monday

Last year many of you joined me in a fun self-portrait adventure project: Pieces Of Us. I'll be embarking on this project again next week and you are invited to play along with me.
WHEN
Monday, April 5th through Sunday, April 11th.
To get yourself in the story. Literally. To play and experiment with your camera (most likely I'll just be using my iPhone). To practice developing your own photo voice. To practice loving ourselves using the lens of our cameras. I love this as a February project. To play along with a community of storytellers. SCHEDULE
Here's the schedule for next week as we capture pieces of ourselves:
Monday: Feet Tuesday: Hands Wednesday: Face Forward (let your face fill the frame) Thursday: Eyes Closed Friday: 1/2 face (take a photo or crop a photo to only include a portion of your face) Saturday: Full body Sunday: Reflection

This year, in addition to sharing on Instagram using the hashtag #aepiecesofus, I'll be using the Pieces Of Me notebook we designed specially for this project. It's a simple + easy way to capture the photo and words you document during the week. The folio cover will hold another notebook we are creating for later this year when we host a Pieces Of Home community documenting day.
INSPIRATION TO GET YOU IN THE MOOD
Here are a list of posts you can refer to in order to learn more about this project:
Self Portrait Ideas + Inspiration (lots of past examples of photos I've taken) Pieces Of Us + Pieces Of Me Free Digital Word Art How I documented Pieces Of Me in 2020Pieces Of Us/Pieces Of Life Archive (includes a bunch of posts from Creative Team members who participated in this project last year) 50 Creative Self Portrait Photography Ideas
10 Creative Self Portrait Techniques That Will Inspire You To Create Your Own (there were some particularly cool ideas included in this one)
Also, if you want to learn more about my own photo philosophy + photo workflow check out my workshop Lens Of Joy.

March 26, 2021
Week In The Life™ 2021 | Collection Preview

Welcome to the collection preview post for Week In The Life™ 2021. The 2021 Week In The Life™ collection launches Monday, March 29th at 9am PST. These products are in the warehouse and ready to ship to you.
Since 2005 I've been taking a week each year to specifically document what happens over a seven day period. I've done this in good times + in bad times and it's always been something that adds meaning to my life as I document what is real. If you are brand new to this project I suggest checking out the Week In The Life™ project page for background information.
DOCUMENTING WEEK: I will be documenting my week starting on Monday, May 10th, 2021. We generally select a timeframe that is a month or more out from when we release and begin shipping the products.
PREP DAY: Week In The Life™ Prep Day for 2021 will happen on Saturday, May 8th, 2021. More information to come in the next few weeks. You can check out the schedule for last year's event here to get an idea of what that online event entailed. New content will be created for this year.
SHIPPING SPECIAL: US customers will receive free shipping on any item included the Week In The Life™ shop category if you spend $60+ dollars. International customers will receive $20 flat rate shipping on any purchase over $60 as well. Use the code "WITL2021SHIP" at the checkout to receive these special shipping offers. *Shipping offer valid through 11:59pm EST on 4/12/21. Must enter promo code at checkout to receive special shipping offer. Cart must include a minimum subtotal of $60 from the Week in the Life™ shop category to qualify. Offer subject to change.
DIGITAL RELEASE: Week In The Life™ 2021 digital products will be released on Friday, April 2nd (we release new digital products on the first Friday of each month).
Last year we tried a new concept for Week In The Life™ with the introduction of Mini Kits vs. a Main Kit. This was well received so we are moving forward with that again this year. For 2021 we are super excited to have Liz Tamanaha of Paislee Press designing the second Mini Kit.


Below are additional new products you'll find under the Week In The Life™ shop category.
6x8 POLKA DOT ALBUM BUNDLE // $35.99


6x8 YELLOW LINEN ALBUM // $26.99


This year we are offering one 3x4 stamp, three 4x6 stamps, and two 4x6 stamps.
WHILE SUPPLIES LAST: Purchase the Album Bundle (dot album with dividers) and one Mini Kit and receive this 3x4 stamp set when you use the code FREEWITLSTAMP. We have a limited number of these for this promotion.


In Case You Missed It | March 26

Happy Friday, friends! Welcome to the latest, In Case You Missed It. Just a reminder that this is a quick post that will happen every Friday afternoon with all the updates and links that have happened throughout the week. So, let's get to it:
You haven’t missed it….yet! Ali will be embarking on the Pieces of Me project the week of April 5th. Last year, it was a community self-portrait project that invited us all to document pieces of ourselves over the course of seven days (one "piece" per day). It was so fun and awesome to see all the different photos taken over the course of the week and then all the different ways that people chose to document their photos and words. We hope you'll consider joining us again this year. Find out more about the project and the supporting collection here.Our new class, Hybrid All Year Round, led by creative team member Jennie Rey, is live in the AE classroom. The initial feedback has been amazing! It’s not too late to register. Find out more here. Did you catch Ali’s finished DITL album? Make sure to check out her blog post including tons of photos and a process video. Find it here.This week we kicked off our Retirement sale for the Story Planner Collection. Grab pieces from this collection for up to 70% off! Find the collection here. We’re entering the final days of our month-long retiring digitals sale. We’re offering 50% off select digitals from now till the 31st. We're retiring some of our older digital items, but before we do, we want to give you one last chance to shop them—now through the end of the month. Please note, this does not affect digitals you have already purchased. Find them here. In this week's Craft The Story video (Episode 12) Ali is talking about one of her favorite journaling techniques which is focused on including both facts + feelings in your storytelling. Find it here.
We’re so grateful to have you all as members of this community! Thanks for joining me today and have a great weekend!

Using Facts + Feelings To Organize Your Story

In this week's Craft The Story video (Episode 12) I'm talking about one of my favorite journaling techniques which is focused on including both facts + feelings in your storytelling.
Whenever I'm asked for a journaling tip one of my go-to answers is to talk about focusing specifically on including both the facts and the feelings from an event or experience. The facts are generally the who, what, where, + when and the feelings often relate to the why. You can also think of the feelings as the things you might not know/see (or be able to tell) by looking at a photo and to me they are often the most meaningful part of our storytelling adventures.
Adding more feelings to your journaling doesn't have to be hard. In today's video I talk about some simple + direct ways to include more feelings alongside those facts in scrapbooking.
Let's dive in to the video:
In the video I mention three different ways to organize your story when using fact + feeling journaling. A super easy way to do this, especially when you are getting started incorporating more than just facts, is to be really literal and include the word "fact" and the word "feeling" to help you identify those pieces of the story. You can do this in a list, by paragraph, or within a paragraph.

Here's a look at the project I make in this week's video:

To show one of the ways I use the literal facts and feelings in my storytelling I created a layout telling the story of a recent ski day with our family.
For this project I used products from the March Stories By The Month™ kit subscription (digital version here) and other products from my stash. I went with 12x12 full page photo foundations as the base for this story (read more about full page photo foundations here).

I cut up one of the 4x6 cards from the March Stories By The Month™ kit so that each of my three photos on the second page had two journal spots - one for a fact and the other for a feeling. I used an old One Little Word® stamp set to stamp both fact and feeling onto the journal card and adhered those using foam adhesive squares.

Along the top of each of those journaling spots I added a chipboard tab from my stash (see how I organized my chipboard recently here).

In the video you'll see me change my mind a few times about this area of my project. I ended up using pattern paper from the Heart Scrapbook Kit with one of the March Stories By The Month™ 3x4 cards on top. Journaling was done use a Micron Pen. Along the edge I added a sticker tab from the One Little Word® Mini Kit #2 (similar available here) and used an old December Daily® number stamp set on top for the date.

On the top of the first page I added some chipboard circles and half-circles from my stash.
Epson XP15000 PrinterEpson 13x19 Photo PaperMarch 2021 Stories By The Month Kit (digital version here)Fiskars Paper TrimmerStazOn Black InkRolling Date Stamp Chipboard from stashStorage BoxesTab Stickers One Little Word® Mini Kit #2 (similar tabs available here)Past December Daily® Stamp SetPast One Little Word® Stamp SetHeart Scrapbook Kit Pattern PaperFoam Adhesive SquaresMicron Pen SetScotch Rolling AdhesiveA FEW OTHER FACT + FEELINGS EXAMPLES
Here are a couple other past layouts I've done using facts + feelings for my journaling:

Another 2-page full photo foundation with content built on top of my photos. This layout was created for the Black + White Story Kit classroom.

A partial look at a layout from Hybrid Product Play. I love using "facts + feelings" as the jumping off point for my journaling even if it's not as literal as I've shown above.

Another project from Hybrid Product Play which was also a great use of my chipboard circle stash. This is also a good example of a really fun no-photo layout.
As always, thanks so much for being a part of this community!


