
Ali Edwards's Blog, page 177
June 22, 2016
Spark Your Story | Scrapbook & Cards Today Summer 2016
The new summer issue of Scrapbook & Cards Today magazine is now available and this year my column in each issue will include a traditional layout and a Project Life® spread and a fun "summer manifesto" download (click here to see all the free downloads from this issue).
Today I'm sharing the full images of my layouts from this article here but invite you to
click over and download your own FREE digital copy of the magazine and read my full article that includes much more about the concept and ideas related to each layout. You can also become a subscriber and have it delivered to your home address (awesome) or pick it up at Barnes & Noble. They have even set it up where you can download just a PDF of my article: Spark Your Story.
Here's a look at the pages I created for this issue with a focus on creating a summer manifesto and documenting the stories of your summer. Those of you who have been reading for awhile might remember my manifesto from last summer - I created a layout to go along with that intention. My hope is to come up with a new manifesto for this summer and share it here soon.
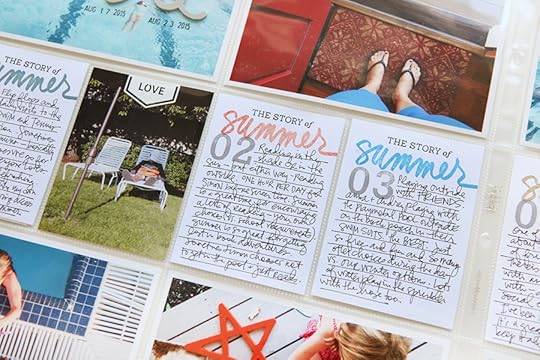
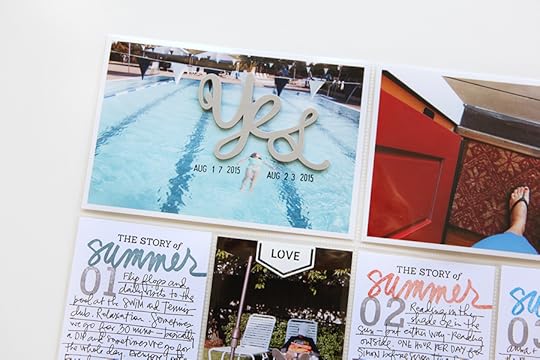
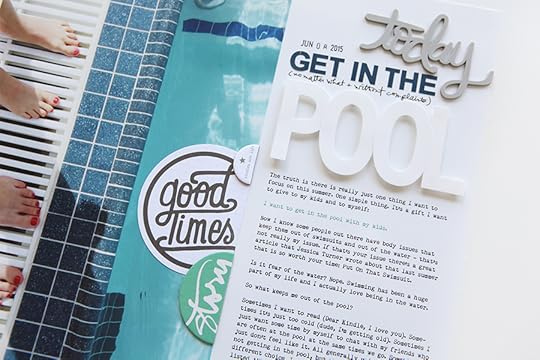
First up, a Project Life® spread for a week during last August (2015):
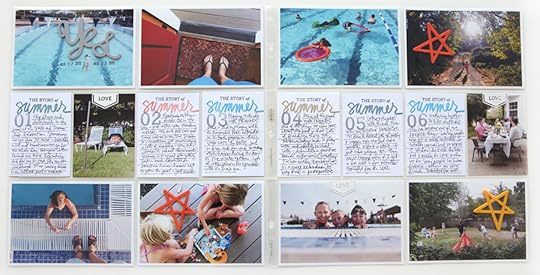
For this spread I documented a series of summer stories - you could totally do this even if you don't do a regular weekly Project Life® spread. I paired photos with white borders + a series of repeated journal cards created using my 3x4 Numbers Stamp and my Seasons Stamp Set.
I love the idea of looking for summer stories, one per day, over the course of a week.
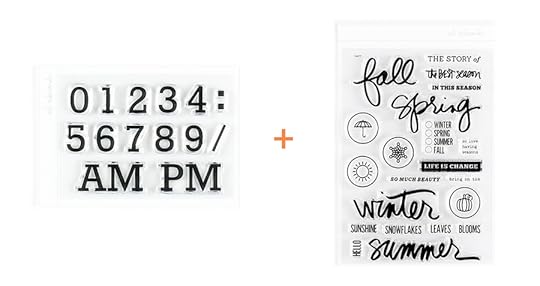
Project Life® Design A Page ProtectorsAE 3x4 Numbers StampAE Seasons Stamp Set ("summer" + "the story of") Freckled Fawn Shine Embellishment Kit (stars)Freckled Fawn Lovely Embellishment Kit (white metal labels)Studio Calico Homespun Documenter Kit (yes rubber word)Inks: Memento Luxe Pistachio, Grey Flannel, Black StazOnAE Precision PenRolling Date Stamp
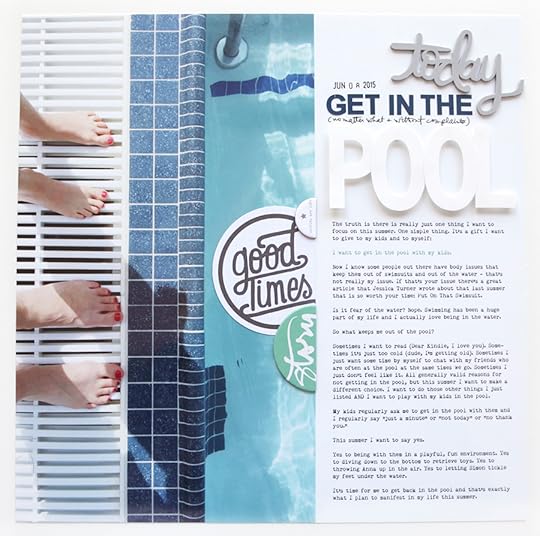
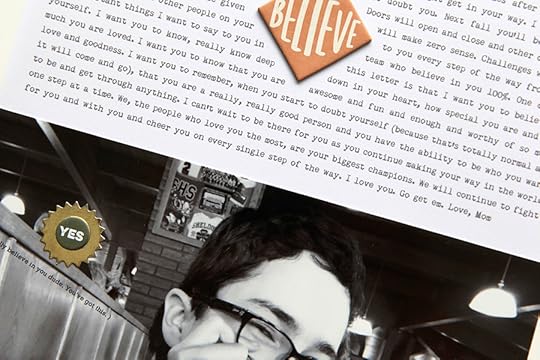
Studio Calico Homespun Documenter Kit (today rubber word)AE Deschutes 8x6 Alpha Stickers ("get in the")Large white alpha stickers from Me & My Big IdeasChipboard pieces from past Story Kits™"Good Times" from a past Studio Calico kit + circle punched


June 20, 2016
Celebrating Simon
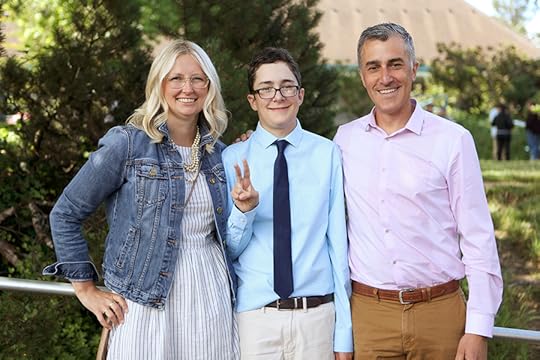
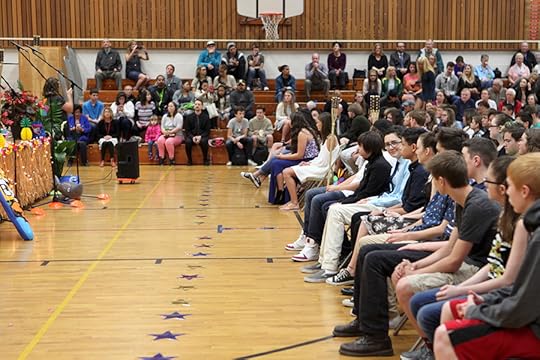
Last Thursday Simon finished 8th grade.
As I thought of all the different angles and lenses through which I could tell you this story, the one I came back to again and again is about celebrating.
When Simon was diagnosed with autism (around 2.5 to 3 years old) we had no idea what that meant for the years ahead. The beginning, right after the diagnosis, was so very hard. So many questions with no answers and we are the kind of people who like answers. We worried about everything. We worried he would reach a certain point in his development and not move past it. We worried about how other people and his peers would treat him. We worried about how he would treat his peers. We worried about what his life would look like twenty years down the road and two months from now.
If there was something to worry about we probably worried about it.
And yet, very early on we made an important decision that made a difference for all of us. Rather than hyper-focusing on all our worries and fears and what-if's we focused on one simple thing: helping him find "success" in whatever that was going to mean to him at each step along the way. And with every little success we celebrated. Most of all though, we simply celebrated him, and still do, for who he is vs. trying to make him into someone he is not. Memory keeping has been one of the most visible ways I have celebrated Simon over the years and I can tell you without a doubt it has made a difference.
Because isn't that what we all want in our lives? People to celebrate and love us simply for who we are - for the crazy combination of our quirks and awesomeness.
As we lovingly say around here, go Simon go.
Over the years we've gotten really good at picking battles. Some weeks and months and years have been focused on behavior issues, some on working through transitions, some on academic pieces, some on social supports, some on regulating screen time, some on encouraging a wider range of foods, some on establishing and maintaining routines, some on physical activity, some on managing tics and anxiety, and in other times we've simply rested and just let it all be. There is no way we could ever deal with everything all at the same time. Instead we've focused on what was most needed at any particular time and celebrated the heck out of every little success.
One day at a time. One issue at a time. One month at a time. One year at a time.
This is what we continue to do today as well.
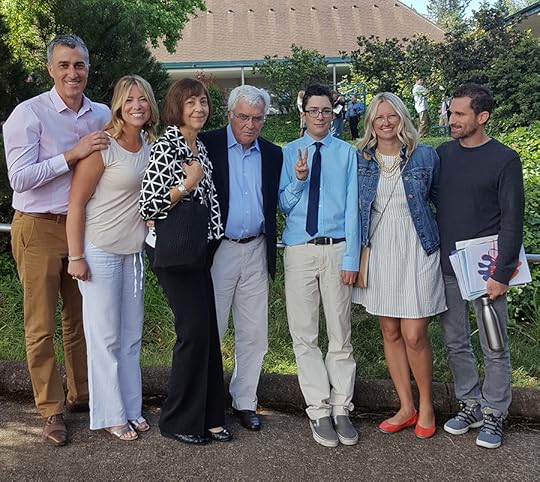
Early on we also learned the importance of a team. The people sitting around the table - either in the classroom or in our homes - have been so very important along the way in all coming together to celebrate Simon for being Simon (and often times to strategize how to best help him find successes in any given situation via pre-teaching, redirection, etc). For us that included family and friends and teachers and supporters and mentors both in and out of the classroom. It's included Katie & Peter. It's included my parents and Chris' parents. Later on it included Tiffany & her family and then Aaron and his children. It includes local friends who have embraced him as a friend especially now that he is starting to desire to communicate with them more and more. It has even included so many of you who have cheered him on over the years as I've shared pieces of his story in this space.
He is ridiculously loved and celebrated and I'm so thankful for that.
We have also learned very acutely that our voices do matter and, as people told me from the very beginning, we are his best advocates. We know the value of clear communication and the value of challenging our own assumptions. We have also learned, as is true in so many things, that there is no right or wrong answers for what is best for each individual kid. We still have fears. We don't want to underestimate him and we don't want to overestimate him. We still don't know how the next chapters will unfold.
What we do know is that we will continue to show up and continue to celebrate every little thing every step of the way.
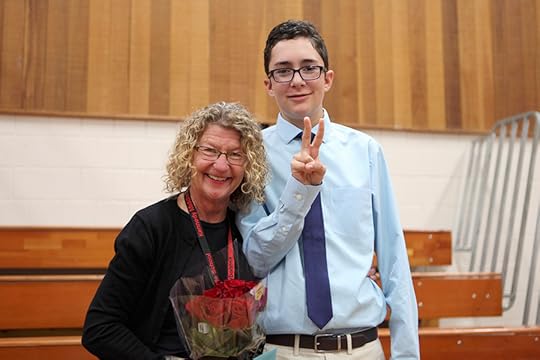
I want to publicly thank Simon's amazing (and that isn't a word to be thrown around lightly) main teacher for the last three years: Amy Burrows. For the last 20 years she has tirelessly worked at this middle school with kids with a wide range of special needs as their teacher, their advocate, their cheerleader, and their friend. Amy was a big reason we wanted Simon placed at this middle school in the beginning based on her reputation as one of the best. We felt very, very lucky that he was able to learn from her because what he learned was so much more than academics. She is retiring this year after impacting so many lives in the most positive ways. We all cried.
Amy, thank you for sharing you gift with our family.
This kid.
He makes people smile. If you get the pleasure of meeting him these days he will shake your hand and say, "Hi. My name is Simon. Do you have a dog?"
He makes other people better people just by knowing him.

He is loving and kind and wants to connect with others.
Especially by telling you the entire last episode of whatever show it was he just watched.
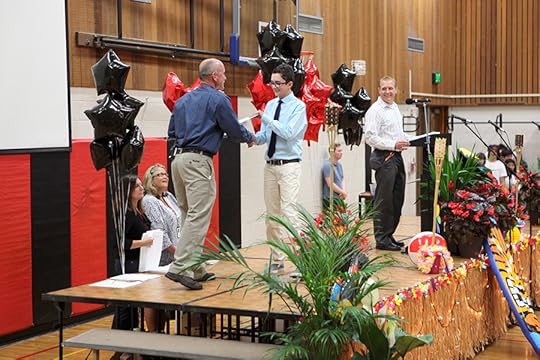
His teachers and administrators absolutely cared for him and cheered him on in all the best ways, including when it was hard.
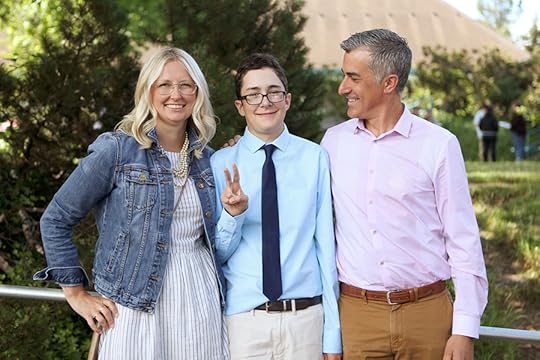
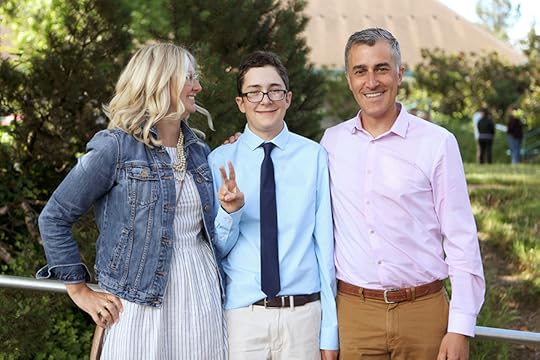
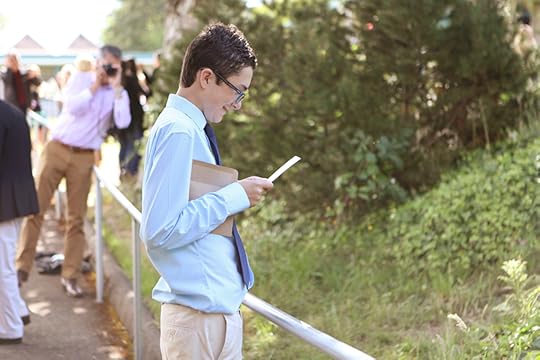
He is leaving middle school happy and excited for high school.
Simon, you are a gift.

June 17, 2016
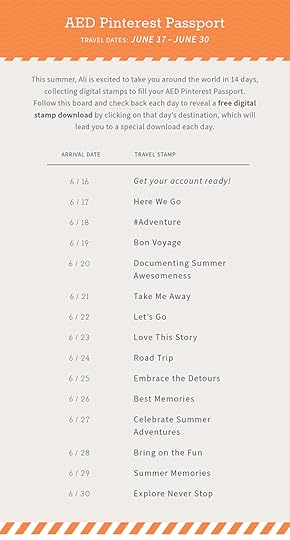
Celebrating Summer | AED Pinterest Passport

To help celebrate the start of summer here in the northern hemisphere I created 14 new digital word art stamps to say thank you for being a part of this community.
Each day for the next 14 days at 11am EST (starting on 6/17) I'll be sharing a new free digital word art download via a Pinterest board called AED Pinterest Passport. Clicking the link each day will bring you over here to download the word art to your My Digital Files. Make sure you have a user account here in order to download the word art.
As an added adventure, we'll be gifting one pinner a 6 month subscription to Ali's Story Kit™. Details on how to enter that can be found here. We'll be using the hashtag #AEDPinterestPassport to celebrate.
Here's a look at the digital word art stamps I'll be sharing:
We sent out an email yesterday with additional details that you can check out here.
Again, thank you for being part of this community!

June 15, 2016
New Story Theme Now Available | Believe
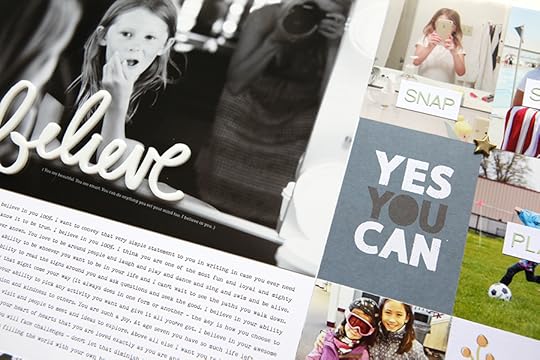
Today I'm excited to introduce you to the next story theme: Believe.
Because believing in something is part of what makes the world go round. Because sometimes it’s hard to believe in something better or greater or simpler. Because we believe in so many big and little things over the course of our lives. Because believing in ourselves is so very important. This month we are exploring stories related to the things we believe in and embracing an opportunity to make love visible.
If you are already a subscriber to you can now access the content in the classroom (make sure you are logged in to your account).
If you are new to the Story Subscription program, check out all the details here.
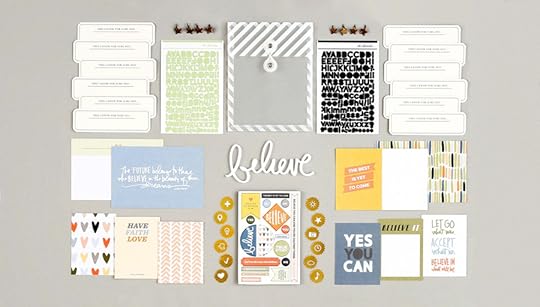
Here's a look at the Story Kit™ contents for Believe:
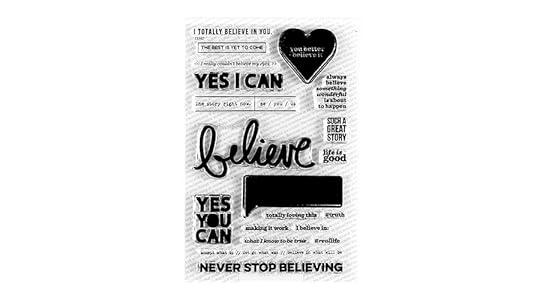
And the Believe Story Stamp™:
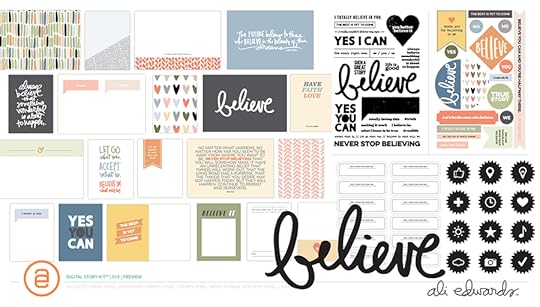
We also have a
Digital Story Kit™ subscription available that includes access to the classroom content. Here's a look at what's included for Believe (which also shows all the designs for the journal cards included in the printed version of the kit):
Here's a video overview of the products included in the kits this month:
PLEASE NOTE : In the video I mention two sheets of alpha stickers. I made a mistake - each kit includes ONE sheet of alpha stickers.
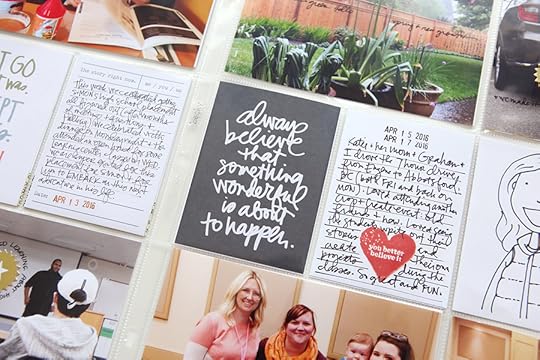
And a couple peeks at the layouts I created with the kits this month (
full details, including process videos and how-to handout, are included with subscription):
Again, thanks so much for subscribing and/or considering my Story Subscription program!

June 9, 2016
Supply Organization | Breaking Up My Story Kits™
A week or so ago I responded to a question in the Craft The Story™ Facebook group (open to anyone who wants to chat about my products and memory keeping projects) about organizing my past Story Kits™ and I wanted to share them here as well.
Lately, these are the two things that I'm focusing on in regards to organization: (1) be the boss of my supplies and (2) have less stuff. I'm of the belief that having more stuff doesn't mean I will tell more stories. Telling stories and celebrating life through the combination of words + photos + some fun products is my goal. Too many choices can sometimes be a barrier to actually using the products to get memories documented. I actually go into more detail about this topic in my Storytelling With Project Life® workshop - I'll run that class again next January but if you really want to take it now you can start a conversation with my Customer Service Team now and they can get you set up.
Each month in the Story Subscription classroom (included with the subscription) I share a couple layouts and a Project Life® spread using the products. When the month is over I've found that breaking up the kits vs. keeping the leftover products in their cute little envelope works the best for me.
Here's how I'm organizing those products at this time:
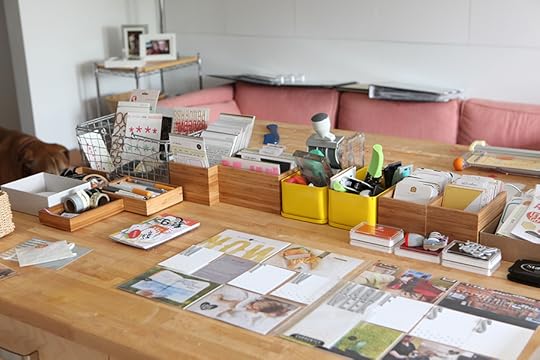
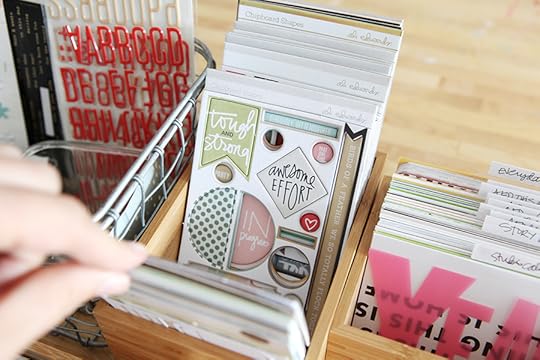
Each month the kit usually includes a sheet of word/phrase stickers and a sheet of chipboard pieces. I store those together in these small wood boxes (Dragan) from Ikea. They can be found in the bathroom organization section and work great for 3x4 and 4x6 cards.
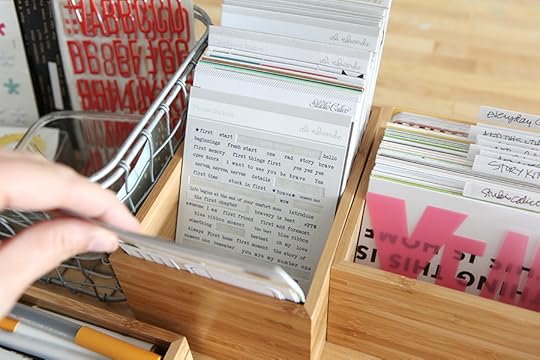
Having them out and available on my table makes them easy to flip through and incorporate into my projects.
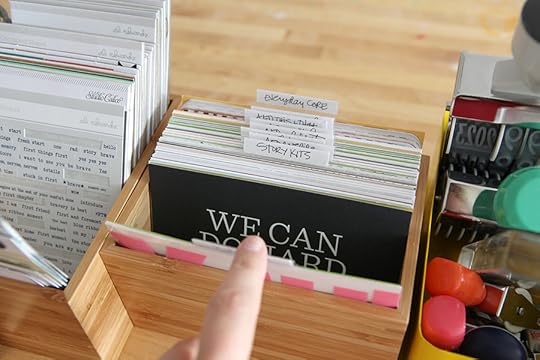
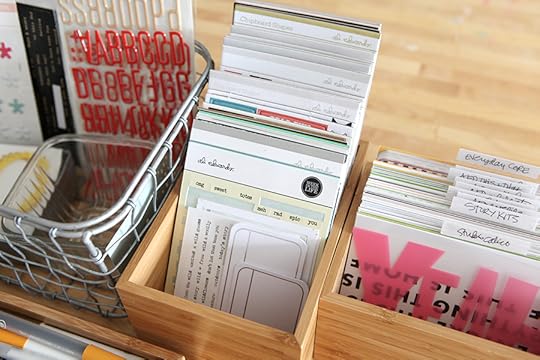
4x6 cards are kept in the same boxes and labeled with Index Tabs (now available in my shop). I keep all the Story Kit™ cards in one section. Other sections include other journal card sets from my shop + the Everyday Core Kit.
3x4 cards are stored in the smaller of the two box sizes. One box for the Everyday Core Kit and one for cards from the Story Kits™ and in my shop.
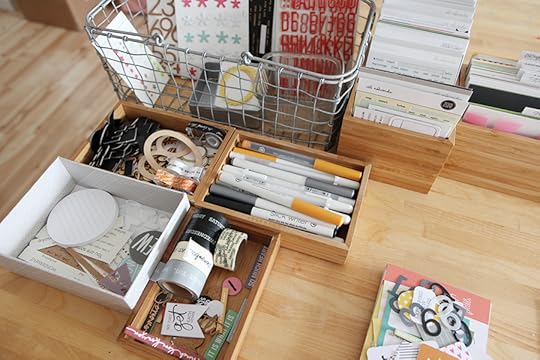
Extras from the kits (chipboard pieces I've punched out but not used, etc) I'm just storing in the lids of the Dragan boxes at this time. Again, if they are sitting on my table like this I'm more likely to grab one of them to add to a spread.
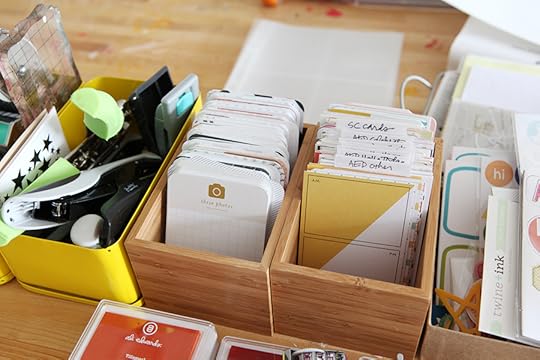
You might also notice I store my pens laying down. I've found that they last longer and stay in better working order that way.
The wire basket you see on my table here is from West Elm.
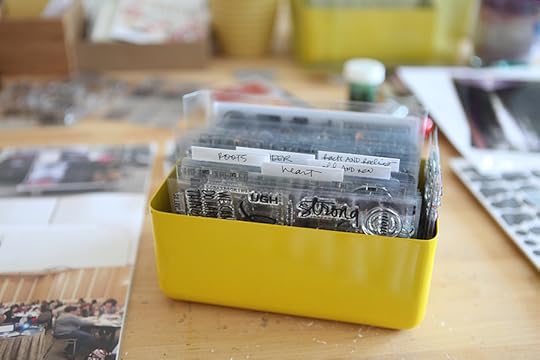
I store my Story Stamps™ in a yellow container from West Elm (purchased a few years ago on clearance). I'm in the process of labeling the sides of the stamps using the Index Tabs.
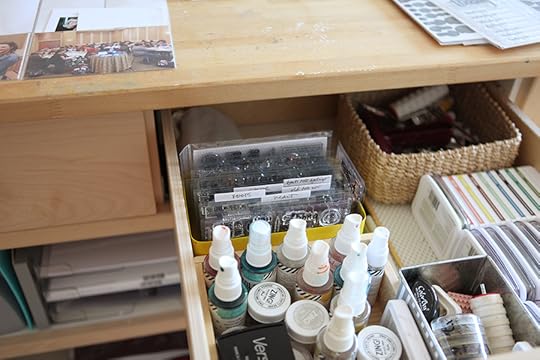
These are generally stored in one of the large drawers of my table (also from Ikea and no longer available - it's actually a kitchen island). You can see more about our Office Projects (tables, etc) here.
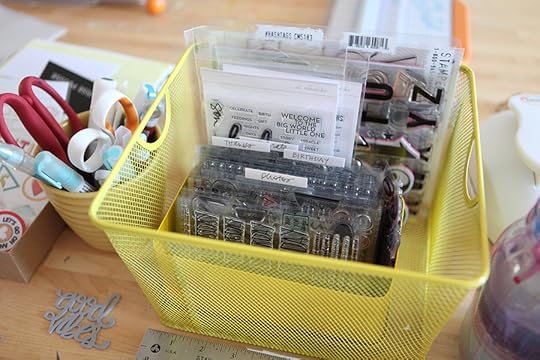
I also store my shop stamps on the top of my table (also in a yellow box) in a yellow basket. I'm in the process of labeling all the edges of these stamps too to make them easier to identify.
How about you? Are you keeping them together or breaking them up? What's working for you right now?

June 8, 2016
AE Digital Creative Team | Read Digital Story Kit™
Happy Wednesday!
Today I'm sharing awesome layouts made by my
Digital Creative Team using the Read Digital Story Kit™. These layouts are seriously some of my favorites - might be the topic at hand or it might be the way the team has such an awesome way of telling their own stories. I'm so excited to share them with you today.
Also, be sure to check out our Creative Team Gallery where you can go to see how the team is crafting their stories using my products - including additional images from the projects we are sharing below. We'll be updating it a couple times a month.
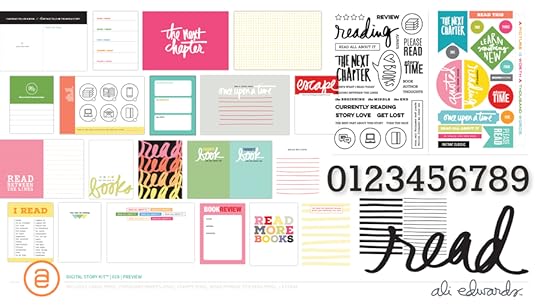
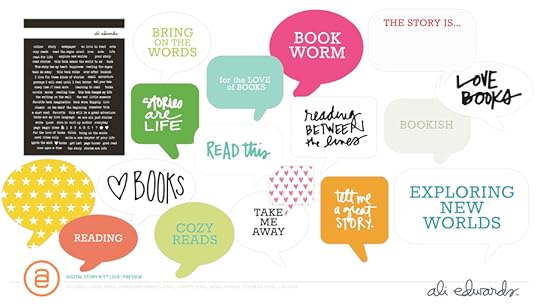
This month the team is sharing stories they crafted using the Read Digital Story Kit™ which is available for a few more days (last day to start a subscription is the 14th). Remember that all subscriptions, including the digital subscription, includes a classroom with specific ideas for working with each theme.
Just a heads up again that most of my team uses the digital kit to create paper projects - meaning they print out the digital pieces and add them to paper layouts/pockets (vs. completely digital projects).
These projects make my heart so, so happy.
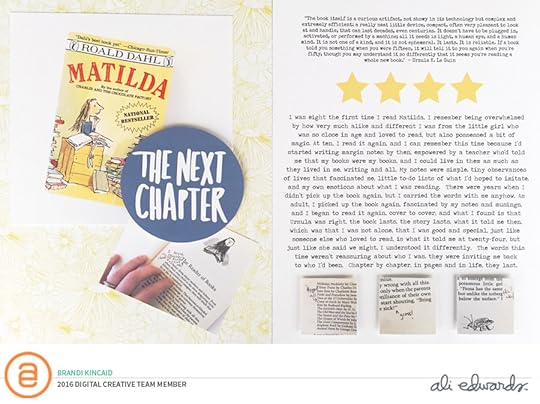
Brandi Kincaid // I love how Brandi went BIG with the "the next chapter" circle paired with enlarged "four stars" to document her story about the book Matilda.
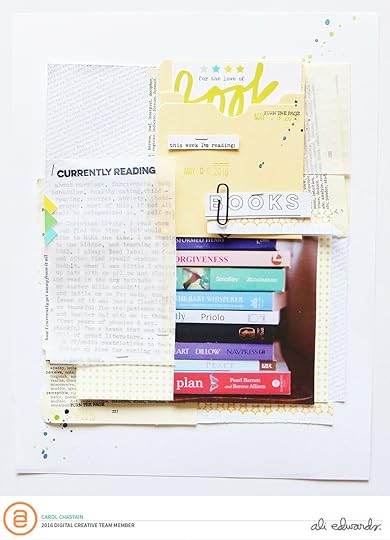
Carol Chastain // Carol did awesome layering here that includes a page from a dictionary, a photo of the books she's reading now, journaling on vellum with "currently reading" stamped on top, a library pocket that holds a printed journal card, and a paper clip with the word books and additional stars underneath. So fun.
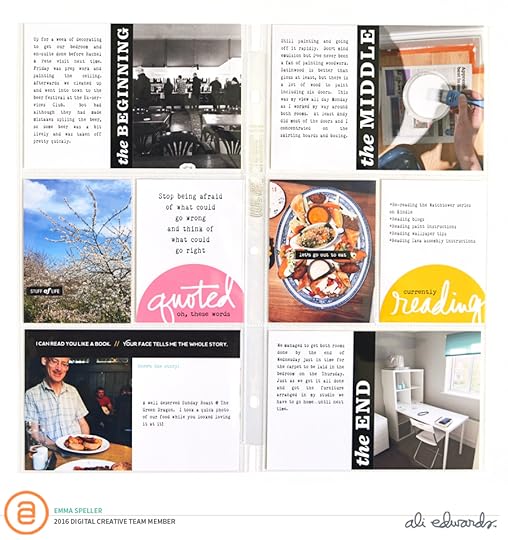
Emma Speller // Emma used "the beginning" + "the middle" + "the end" to document a story about some updates they were making to her house. Love that idea.
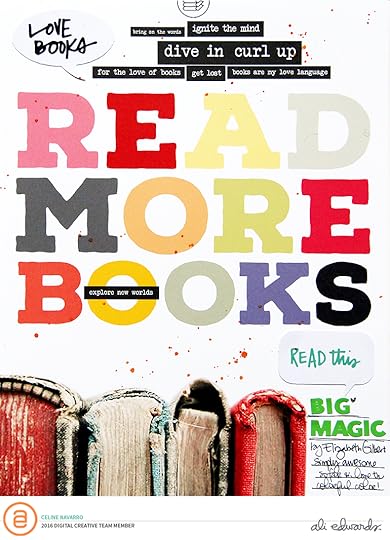
Celine Navarro // Going big for the win. I love the paint splatters too.
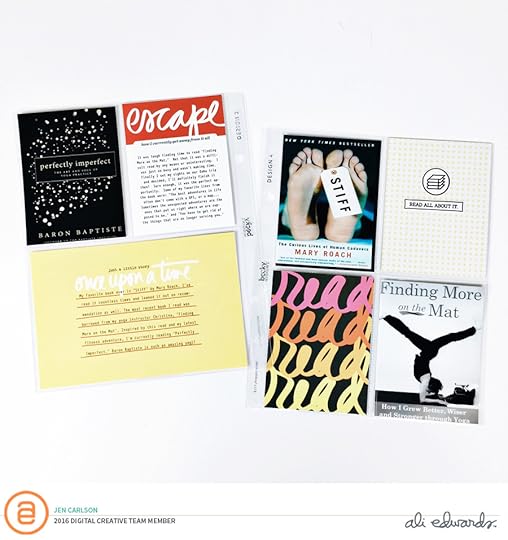
Jen Carlson // Jen used the kit to document what she's reading right now.

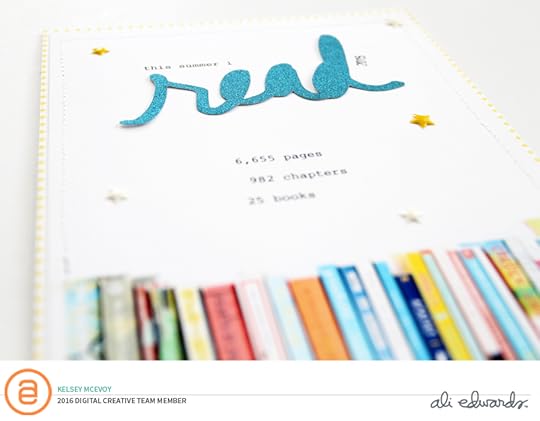
Kelsey McEvoy // Not all stories have to be long and involved. I love this one from Kelsey where she highlighted some reading numbers from last summer.
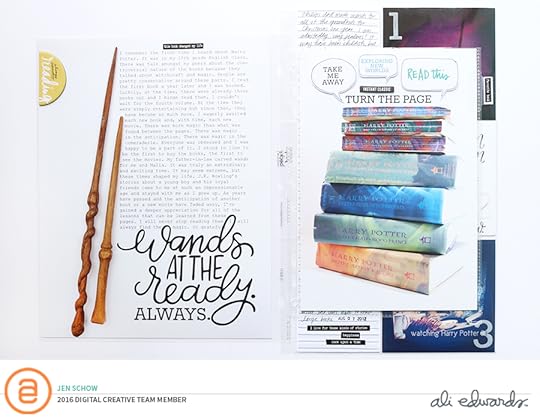
Jen Schow (see more photos and a process video here) // This is an awesome interactive layout from Jen about her passion for the Harry Potter series. Yes. Yes. Yes.
Hope you all have a great rest of the week!
Check out the Creative Team Gallery for more detailed photos of each members projects.
Interested in learning more about working with digtal scrapbooking products? Check out my free series on Getting Started With Digital Scrapbooking here.
Check out all my digital/printable scrapbooking supplies here

June 3, 2016
June Digital Release

Happy June!
In February we announced that we were changing up the way we release digital products from weekly to monthly. This month we are releasing 6 brand new products geared towards Summer, reading/books and the digital versions of the past few months of Story Stamps™. We've also brought back over 25 Classic AE products from my past collection previously offered at Designer Digitals (Classic AE products are designated with a grey box around the product preview and have their own category here).
Click here to see all new products added as part of the
June Digital Release. We also created a new category in the digital section of our shop that includes all the new (excluding the Classic AE) products for the last couple months, as well a category where you can find all of the previous Digital Story Stamps™.
NEW PRODUCT BREAKDOWN FOR MAY
Read Messy Circles Filled
Summer Messy Circles Filled
Book Journal Cards
Summer Memories Journal Cards
Read Digital Story Stamp™
Wild Digital Story Stamp™
If you are looking for more information on Getting Started With Digital Scrapbooking check out my free series of posts
here.
CLASSIC AE
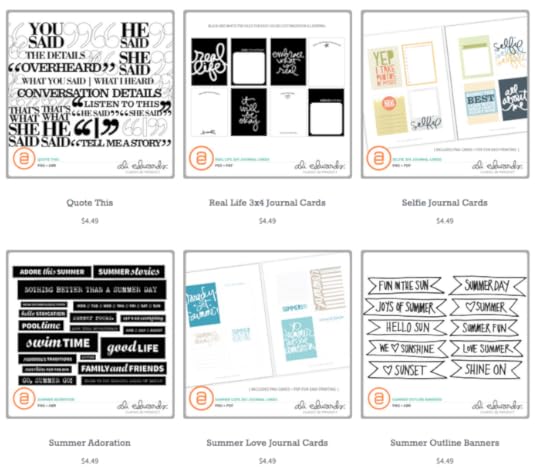
We have over 25 new
Classic AE products in the shop this month focusing on Summer, Father's Day, journal cards, and everyday memory keeping products.
Thanks for your support and here's to telling more stories together!

June 2, 2016
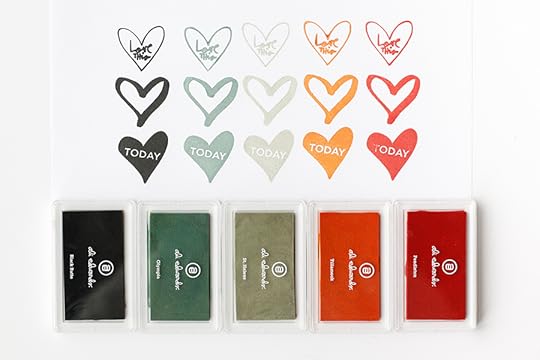
Say Hello To Crafter's Inks
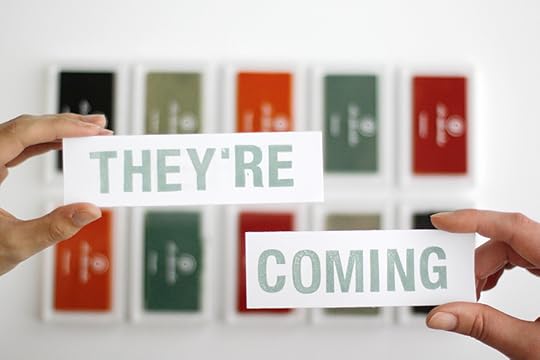
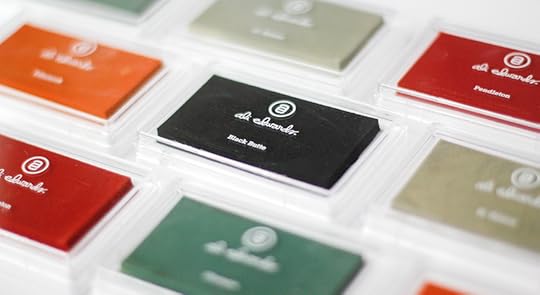
For the last year or so we've been working on a set of inks that are to my liking. I'm excited to announce that it's happened and we are now ready to share them with you.
We're calling them Crafter's Inks and they are similar to pigment inks in terms of consistency and stamping style (a "wetter" ink). I've recorded a couple videos to share with you below so you can see how they stamp on cardstock and how they stamp on the Epson photo paper I use here at home with the Epson PictureMate PM400 printer.
The first bundle of five colors are now available for preorder and will ship in late June (your credit card will be charged at the time the ink bundle ships). Once the shipment arrives we will also begin offering the ink pads individually. Ink bundles ships for free domestically and $4 international.
Also, to celebrate the release of these new inks we are also offering free domestic shipping & $5 flat rate international shipping on all my stamps through the month of June.
Here's a 6-minute overview about working with these new inks:
Stamps featured in the video above include Love, Stories of Life, and Sans-Serif Alpha.
And here's a video that talks about stamping with these inks on photos:
Ali Edwards Design Inc | Crafter's Inks On Photos from Ali Edwards on Vimeo.
Stamps featured in this photo include Seasons, Beach, and Travel.
Stamp featured in the image above is Love.
Thanks for the enthusiasm related to these new inks and I look forward to seeing how you guys use them in your projects!

June 1, 2016
Week In The Life™ 2016 | Completed Album Overview & Final Thoughts
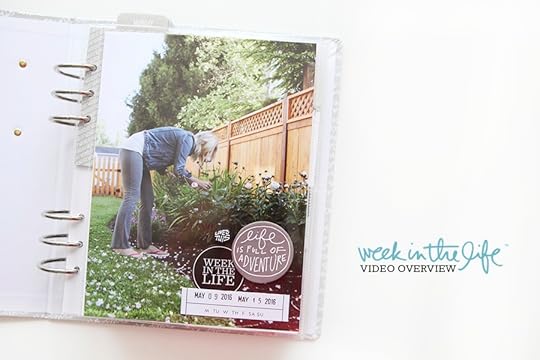
We've reached the end of another Week In The Life™ adventure.
Some of you are finished, some are finishing, some are in-progress, some have piles, some ordered photos, some are just starting, and some of you are still thinking about starting it someday. No matter where you are in this project I hope you are enjoying it. I hope you are embracing the life you are living right now. I hope that by bringing all the pieces together you are able to celebrate all the good stuff that is vs. wishing for something that isn't.
There is always so much more to these projects than what you might see on the surface.
FINAL THOUGHTSAs I wrap up my participation for 2016 here are a few thoughts:
I can't wait to see what life looks like next year. I'll be doing it around the same time - maybe a bit earlier - but still sometime in the spring. It's a nice time of year for me that's away from December Daily®. Next year Simon will be in high school - that in and of itself will change a whole bunch of things around here (driving, activities, etc). Sometimes the changes from year to year are small and sometimes they are huge - sometimes you know what's coming and other times it takes your breath away.
I was so happy with the thicker album spine this year. Definitely the right size for this project. I'm still loving the 6x8 size.
Repetition continues to be one of my most favorite things. This isn't new, as most of you know, but it takes so much thought out of bringing these projects together. I don't have to re-think every single page. I establish a format and I follow it. I hit on that topic again in the video below. I really loved seeing all the sharing this year surrounding this project, particularly on the Facebook group. I love how it motivates people to keep going and I love the sharing of ideas and inspiration from around the world. I've found a decent rhythm for myself with this project that feels now like an old friend. This was my 10th year (if I remember correctly) embarking on this project and there are truly crazy and wonderful things captured in the pages of these albums. I hope you find a similar rhythm in your own project. Next year I'd like to put some kind of workshop together that reviews past albums similar to Storytelling With December Daily® that highlights in a more concrete way the processes, tips, etc that I've gathered over the years. There is so much to learn just from going back and re-examining past projects.
You can see all my 2016 posts about Week In The Life™ via my archives here.
Thank you again for being part of this storytelling and memory keeping community!

May 31, 2016
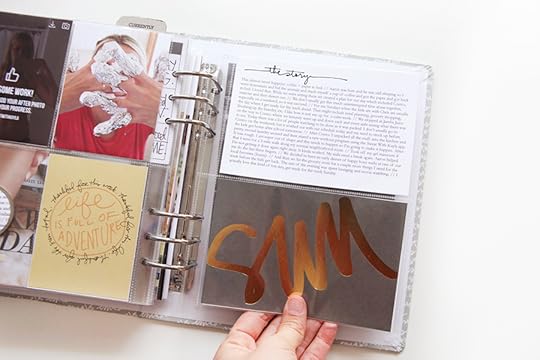
Week In The Life™ 2016 | Sunday In Album
Finishing up the review of my daily content within my Week In The Life™ album today with a look at Sunday.
Tomorrow I'll share a full video overview and some final thoughts on finishing up this project.
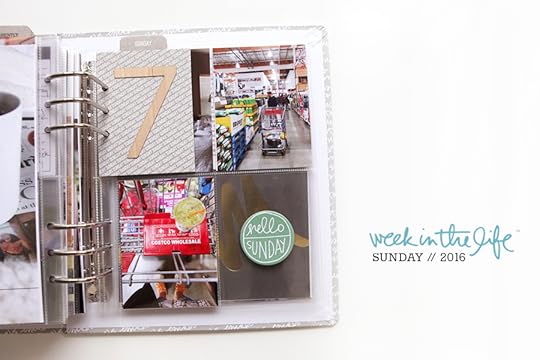
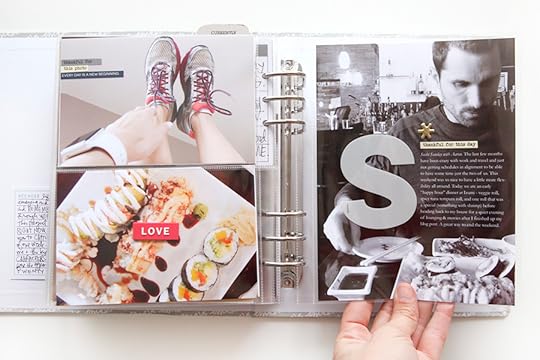
Here's how Sunday looks in my album:
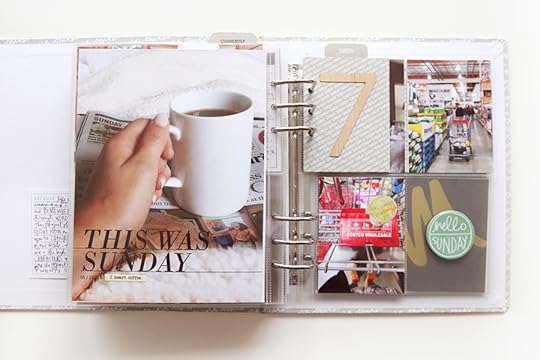
Coffee + paper in bed for the win. That is not a regular thing around here but I love the idea of it.
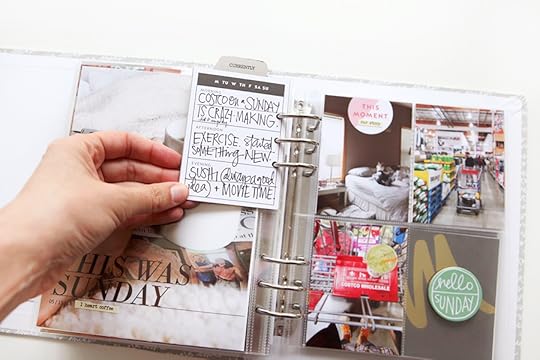
As my stories got shorter, my handwritten text got bigger. And Costco on a Sunday - no idea what I was thinking (except that it's easier to go when the kids aren't here and the timing worked out to go with Aaron).

Again, just like Saturday, I have a 4x6 for journaling + the gold-foil daily card that was able to fit inside the pockets because I had less photos.
I wrote around the "life is full of adventure" card for a little personalization.
Super thankful to be wrapping this project up again for this year. I love doing it and then I love putting it away and getting back to my regular projects. I spent some time the other day printing out photos for the last few weeks of Project Life® so I'm excited to get going on that one as well.
As I mentioned above, tomorrow I'll share a video walk-through and a few final thoughts.
SUPPLIESWeek In The Life™ 2016 Kit + AlbumWeek In The Life™ 6x8 Layered Templates Vol. 3Days Of The Week Chipboard DividersDays Of The Week Stamp SetAvery Index TabsRed Line Tape 1/4 InchTiny AttacherAED SlickWriter PenGold Chipboard ShapesPast Story Kit™ Word/Phrase Stickers (some are currently available for a limited time/while supplies last via the Stories Revisited sale )1.5 inch Circle PunchCrop-A-Dile


