
Heather Solos's Blog, page 34
August 23, 2015
Shredded Pork Burrito Bowls
 Heather says
We’ve been working hard to reduce our meals out. We’ve come a long way since we first started dating and I’m thrilled about that. However, we both sometimes miss items found at certain *cough* Chipotle *cough* restaurants.
We’ve agreed to work on finding meals or recipes that satisfy those urges without breaking our budget. A meal out is fine when it’s one or two people. In our case, one or two turns into six people and that’s just not happening, except for special occasions.
Here’s how we get our Chipotle fix for significantly less than half the cost, with plenty of leftovers for school lunches.
I picked up a pork shoulder, also called a picnic cut. It comes with the skin on but that will be discarded. A picnic shoulder is great for classic pulled pork, Texas-style pulled pork, or we can go Tex-Mex as we did today.
Get your crockpot out about 8 – 10 hours before you plan to eat. The pork takes a while to become fork-tender, so please plan accordingly.

1 picnic or pork shoulder (usually you buy these by the 1/2, you’ll want a cut that is 3 – 4 pounds, bone-in is fine)
1 can green chilies
1 can chipotle peppers in adobo sauce
Place the pork fat / skin side up in the crockpot. Dump the green chilies over the meat and add one or two chipotle peppers.* Cover and cook on low until fork tender (8 – 10 hours).
Once the pork has finished cooking, remove the meat from the crockpot and place in a large bowl. It will be falling apart, do this carefully to avoid splashing yourself with the drippings. Remove the skin, fat cap, and bone(s) and set those aside. Take two forks and shred the meat, adding a little bit of the drippings and peppers if you would like.
To make burrito bowls you’ll also need:
rice**
beans –pinto or black–
shredded lettuce or cabbage slaw
pico de gallo or salsa
sour cream or chipotle sauce***
*Set one chipotle pepper aside for the sauce, lay the remaining peppers on a sheet of wax paper and freeze. Once they are frozen solid, remove them from the paper and place in a ziploc bag. There’s no need to buy a new can each time you only need one or two peppers.
**We like to make cilantro lime rice. That’s rice, made in the usual way, with a generous squeeze of lime juice and a tsp or so of chopped cilantro for every 1/2 cup of uncooked rice. Sometimes I will stir in the lime juice and cilantro after cooking if I forget. It’s not critical, find the method you prefer
Chipotle Sauce
You’ll need a blender, I find an immersion blender easier as I can serve it from the cup it was made in, but a regular blender will do. (I’d put it in something nicer for company)
1 chipotle pepper in adobo sauce
2 TBSP mayonnaise
2 TBSP sour cream
1 garlic clove, smashed
1 squeeze of lime or lemon juice
1 tsp chopped cilantro (optional)
Blend the ingredients until smooth. Refrigerate for at least 20 minutes to allow the flavors to develop.
Final Assembly:
Fill the bottom of the bowl with rice, add beans, shredded pork, slaw, pico de gallo or salsa, and chipotle sauce.
Guac is extra, even at home.
Enjoy!


August 20, 2015
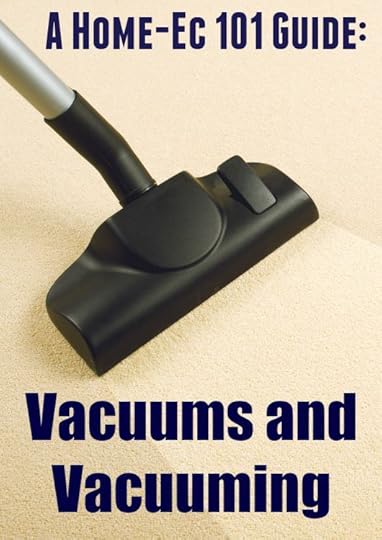
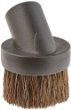
Vacuums / Vacuuming: A Home-Ec 101 Guide
Vacuums are good for many things – carpet, hard floors, cars, refrigerator coils, vents, and more! You’ll want to have a good vacuum that doesn’t cost all of your savings, but still does what you want it to do. It is one of those areas where the saying “You get what you pay for” definitely applies. Following are some tips, tricks, and reviews to help you make wise decisions about which vacuum to get and how to take care of that vacuum once it’s in your house. Click on the title of the article you want to read more of.
How Do I Keep Long Hair From Clogging The Vacuum
Okay so the long hair isn’t exactly clogging the vacuum, it’s all over the brush thingy and doesn’t work as well. What can I do to stop this from happening; it’s a pain in the butt.
How Often Do I Have To Vacuum Anyway
How often should you vacuum? I want to know to settle a debate and I’m going to have to vacuum my friend’s place if I’m wrong. And can you tell us WHY I’m right?
How To Clean The Filter Of A Bagless Vacuum
What I can’t figure out, nor find online, is how the heck to clean the filter. Everything says, “clean the filter,” but then i see, “don’t touch the filter.” How does one clean the filter of a bagless vac? I’m pretty confident I’m getting lower performance because the filter is, um, gross.
How To Deal With Dry Wall Dust And Construction Clean Up
Lost the ceiling in my kitchen – drop ceiling, light fixture, older (plaster?) ceiling above it, and about 18 inches of blown insulation. … Anyway, now that the drywall is up for the ceiling (it still needs to be painted), I have to clean EVERYTHING, including the surrounding rooms.
I’m Considering A Roomba
I can get a new Roomba 530 for a great post-Christmas price. In my rental place, we have vertical blinds. I was worried how the machine would cope with those. I have tiles all through except the bedrooms that have thick, soft carpet. Your advice is appreciated.
iRobot Rooma 530 Review
I am far too fond of this vacuum, heck it even has a name. Internetz meet Gertie, my newest minion.
Recommendations For A Vacuum Cleaner That Would Be Comparable To A Dyson But Cost Less
I’ve been thinking about purchasing one but the only thing holding me back is the fact that my house isn’t covered in carpet except for the basement which isn’t a very large space. Can anyone recommend a vacuum cleaner that would be comparable to Dyson but cost less?
Review of Bissell PRO Lite Vacuum
First thing that impressed me about the PRO Lite vacuum is the fact that it has a limited five year warranty. If I’m going to pay for something I need to know that it’s not going to crap out right away.
Review of Bissell Steam & Sweep Hard Floor Cleaner
Hardwood flooring has its own set of issues, one of which is that most chemicals for sanitizing are a definite no and vinegar falls into a grey area of maybe, but not too much, and rinse again after use.
Should I Use My Vacuum On Construction Dust Clean-up?
This might sound lazy of me, I do like to cut corners when I can, but will it damage the vacuum to use it for this or just fill up the bag quickly?
Should I Vacuum Or Dust First?
My mother says you dust after you vacuum, my mother-in-law says you dust then vacuum. I’d rather knit sweaters for my cat from the dust bunnies, but could you settle the debate?
Vacuuming Long Hair And Pet Hair
I’m curious to know what’s the best vacuum for someone with long hair and a cat that has short hair. I’ve got a nice Kenmore canister vac, but my hair bogs up the roller constantly. And I ain’t cuttin’ my hair.
Vacuum Recommendations From The Home-Ec 101 Audience
I am in the market for a new vacuum, and would love feedback on what everyone has and likes. I know you have a Dyson and love it, but not sure if my budget is Dyson or not. I read Consumer Reports, and they seemed to favor the Hoovers.
Vacuuming Refrigerator Coils
Vacuuming the refrigerator coils not only extends the life of your refrigerator, but it helps save electricity, because a dusty fridge has to work harder.
Bonus: Carpet Care 101
The basics of carpet cleaning are pretty standard. However, it is important to adhere to your manufacturer’s recommendations or you run the risk of voiding the warranty and who wants to do that?
Anything else you need to know about vacuums / vacuuming? Send your questions to helpme@home-ec101.com.

Click the picture for more tips!

Click the picture for more tips!


August 19, 2015
The Ants Come Marching One by One
Okay, so. I hate ants. Hate. Hate.
My realistic side knows the fact that I have ants in my house right now has more to do with the heat, humidity and rain than my house being messy or full of crumbs (otherwise they’d be in my kitchen, right?). I have been using a spray that is kid and pet safe but it only works for a short period of time… and it freaking smells gross.
I can’t use those Raid Ant bait things because to put them in enough places means they are where my dog could eat them. And he’s eaten one. Fortunately, he’s a big dog and it didn’t make him sick – but they’re apparently toxic, and so.
HOW DO I MAKE THE ANTS GO AWAY?
There’s not a ton. But honestly, it only takes one before I start feeling gross… there’s a handful. I’ve sprayed, but it’s supposed to be 90+ degrees this weekend and I need to show those suckers who is boss.
Signed,
Creepy-Crawling in CrawfordHeather says
The good news is there is a commercial bait trap out there that is inexpensive, has low toxicity, and zero smell to humans. I’ve used it on occasion over the years as some houses were more prone to ants than others. While it may not be as satisfying as spritzing the little buggers with chemicals, it does work. The product is good old Terro Ant Killer.
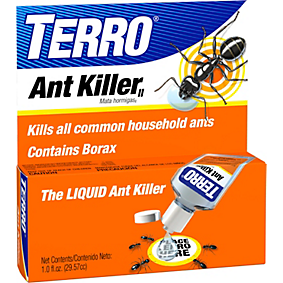 The active ingredient is good old borax. The bait solution also has both a sweet and greasy ingredient to attract your household invaders. Ants prefer a liquid food source as it’s easier for them to consume and transport.
When you spot an ant or a trail of ants, follow them. Ants leave chemical markers to find their way back to the nest. (It’s dual acting and also an invisible trail of breadcrumbs inviting everyone to the party near the water dish or toothpaste fleck or whatever it is they are after in your home)
Place the ant bait as close the the entrance point as possible. While borax has low toxicity you don’t want Fido disturbing the trap. Place your trap and do your best cartoon villain impersonation –it increases the satisfaction of the process. I prefer either a hand-rubbing, “Excellent” a la Mr. Burns or a cackle followed by, “I’ll get you, my pretties!” Your mileage may vary, of course.
Next step, get rid of the ant trail past the bait station. Dampen a paper towel with some white vinegar and wipe down the area that has seen ant activity. IMPORTANT: Do not wipe down the area between the entrance point and your bait station.
While you’re down on the floor wiping away the trail, it’s a good idea to take a good look around (under the oven perhaps) to see if the ants were after anything else that might compete with the bait station as a lure. If the ants are attracted to your pet’s water dish, it may be a good idea to at least temporarily relocate the source. If you have children, they are notorious for hiding food in strange places. Follow the ants wherever they may go and see if you can determine why they came in the first place.
Keep in mind that ant colonies do go through breeding cycles where they are less interested in food. In general, you’ll find a temporary increase in ant activity as they are attracted to the bait and then a decline over the next 3 – 4 days as the nest, the source of the issue, begins to die off. In that breeding cycle, it may take closer to ten, be patient and keep refueling the bait station as the bait dries out.
Additionally, I’ve heard but not tested, that peppermint oil used near the entrance point may deter ants. I would only try this trick after the current invasion has ended.
Submit your household questions to helpme@home-ec101.com


CommentsI found that Ortho Home Defense works great – they advertise ... by PhillipFor some ants, and believe it was black ants, who had set up ... by Ebby
August 18, 2015
Crockpot Friendly Sticky Chicken Recipe
Heather says
I honestly don’t know why this recipe is called “sticky chicken”, I have the feeling it is a recipe that has evolved over the years and doesn’t exactly resemble its origins or maybe it was a family nickname. This recipe for chicken in the crockpot was a favorite on a message board I frequented a decade ago and the printed out scrap has followed me around through a few moves. It is time to share it on Home Ec 101.
If you have a large slow-cooker, you can use a bigger bird and an oven bag will work just fine in place of the plastic wrap.

: Slow-Cooker Sticky Chicken
: Tender “roast” chicken in the crockpot
1 fully-thawed roasting chicken (as opposed to a fryer)
1 cup chopped onion
2 peeled cloves of garlic
4 tsp salt
2 tsp paprika
1 tsp cayenne pepper (omit if you would prefer)
1 tsp onion powder
1 tsp thyme
1 tsp garlic powder
1/2 tsp ( a few grinds) of black pepper
Enough carrots or carrots and celery to layer on the bottom of your slow-cooker. This will vary based on the size of your appliance.
The morning or evening before:
In a small bowl combine all of the spices.
Remove the giblets from your chicken and set aside (for some other recipe if you would like).
Rinse the chicken, including the cavity well. Inspect your chicken for any remaining feathers, pluck and discard.
Rub the spice mixture all over the chicken, yes, even up inside the cavity.
Place the chicken either in a large resealable plastic bag or a bowl covered in plastic wrap and place back in the refrigerator until you’re ready to cook it.
Day of:
Layer the carrots and celery in the bottom of your slow-cooker and turn it to low.
Smash the garlic cloves or chop them roughly
Remove the chicken from the refrigerator and plastic.
Place the chopped onions and garlic in the cavity of the chicken.
Set the chicken in the slow-cooker, cover, and cook for 8 – 10 hours.
If you prefer a crisper skin, you can carefully remove the chicken from the slow cooker and place it under the broiler for a few minutes.
This is a matter of personal preference only.
Serve with the cooked vegetables. (And the drippings make an excellent gravy)
Enjoy!


August 17, 2015
Menu Monday – Back to School
Heather says
It’s that day of the year, when I try to have everyone look their best and start out with all of the correct school supplies (I’m sorry teachers, but there were NO blue, vinyl, two pocket and pronged folders anywhere to be found, please deal with the black folder. It’s my fault not his.) and get out the door on time. It’s also the start of our youth football season, which means packed evenings with dinner often eaten in the car.
I’ve tried to stack the odds [ever] in our favor. I actually planned our menu on Friday before I went grocery shopping for all of the back to school food related items. (Retrospectively Amazon would have been easier, if a little more expensive) When I created the menu, I also created calendar reminders to do important things like take the chicken out of the freezer, make the marinade, and when to put things in the crockpot.
Early bedtimes for the youngest mean early dinners, which will help us stay on track.
If I expect my middle schooler to be disciplined, I have to be, too. Last night I spent a lot of my winding down time reading a thread on Reddit about the difference between being motivated and being disciplined. It boils down to this over-simplification: Motivation is what makes you want to do something and discipline is what makes you do something even when you have no desire.
I’ve been trying to motivate myself when what I’ve needed to focus on is self-discipline.
How do you get it all done? You start by doing something.

Let’s work together on taking small steps toward our goals.
Have you planned your menu this week? Is there anything you’re looking forward to having? (Recipes will be linked as they are added to the website this week)
Monday: Crockpot Sticky Chicken, rice, broccoli
Tuesday: Chili over Baked Potatoes, Mixed Green Salad
Wednesday: Tacos (here is our homemade taco spice mix), Refried Beans (working on a no-fry, lower fat technique this week), Pico de Gallo, Salad
Thursday: Chicken Tikka Masala, Curried Potatoes, Curried Okra, no wheat naan
Friday: Shredded Pork Bowls (think pulled pork, but a more Tex Mex flavor)
Saturday: CORN (Clean Out Refrigerator Night)
Sunday: Steak or Brisket (depends on what I can find for what price) over salads
If you need help getting started, we’ve got a whole series on how to get started menu planning.
Have a great week!


August 13, 2015
A Guide to Kitchen Disinfection
Hi Home-Ec 101,
I just read your article on Hydrogen Peroxide. I just love your website!
I was wondering what you use to disinfect/sanitize your kitchen counters with. I am trying to find something natural and am having a hard time finding information on what actually kills bacteria, germs, etc.
I read one way to kill bacteria/germs is to first spray with vinegar and wipe and then spray with hydrogen peroxide and wipe. But no info on how long you leave it on before you wipe.
Do you know? Do you know if this kills bad stuff?
Thanks for your help; I really appreciate it!
Signed,
Squeaky Clean in SquamishHeather says:
Thank you for your kind words. When it comes to food safety I think it’s important to understand that while I understand not wanting to expose ourselves to unnecessary chemicals. I also know that food poisoning can be a nightmare, especially in infants or those with compromised immune systems.
Important note:
If you take an acid inhibitor, you have a compromised immune system.
The pH level of your stomach is one of the body’s first lines of defense against food borne pathogens. All of those guidelines about under-cooked shellfish, meat, and eggs are referring to you.
While your body’s defenses are not as compromised as someone undergoing chemotherapy or taking anti-rejection medications, it does matter.
What microorganisms are you most likely going to run into in a kitchen?*
Keep in mind, this is just a brief overview and should not be used to cram for your microbiology exam.
First we have our good friend E.coli. This guy is actually a diverse range of bacteria. Just like people, some are helpful and friendly and then there are a few who are not. Infectious strains of E. coli can be transferred on produce, by people who are sick, and on raw meat. An E. coli infection is generally mild–but don’t tell someone currently suffering that diarrhea and cramps are “mild”– an adult will usually recover in about a week, but children and the elderly take a little longer and are more likely to develop a complication that affects the kidneys.
Next up we have Sal. . . you know, salmonella? This bacteria is associated strongly with the intestinal tract of chickens and contamination can occur from the meat or eggs. This nasty bacteria also produces diarrhea and cramps. Salmonellosis is a bit more severe and it can take a bit longer for everything to return to normal and reactive arthritis is a potential complication. Again, young children and the elderly are more at risk with this bacteria. A word of warning, reptiles are also known carriers of salmonella and generally young children and infants should be kept away from them.
These are the two most widely recognized kitchen pathogens, but there are a few more out there
Campylobacter is another diarrhea causing bacteria. This one is probably the most common, but most people don’t go to the doctor over it, so it is believed to be widely unreported. While it doesn’t take many of these little guys to make a person sick, these bacteria are also extremely fragile and the most basic hygiene practices will generally prevent an issue.
Listeria is more complicated only about 1600 people a year become infected with listeria annually. But this bacteria is especially problematic for pregnant women, the infection can cause miscarriage, and is the 3rd leading cause of death by food poisoning. As listeria is most commonly associated with foods that are not cooked, the CDC and public health services work to identify and eliminate the source of outbreaks quickly. It is a special snowflake and there is not much you, as an average consumer can do to avoid listeria other than not eat foods most commonly linked to the bacteria. That said, even some produce has been listed as the source of an outbreak. Follow guidelines and hope for the best, sometimes as people, we’re just in the wrong place at the wrong time. Not too long ago, Blue Bell Ice Cream was the source of an outbreak.
To keep your kitchen safe and clean there are a few basic guidelines to follow:
WASH YOUR HANDS
This one doesn’t even get a number. Wash your hands before you cook, after touching raw meat or eggs, before you handle cooked foods, and again just one more time to be sure. Plain old soap and warm water will do, anti-bacterial soaps may do more harm than good in the long run.
The FDA has a campaign called Fight Bac that breaks food safety down simply.
1. Keep refrigerated foods refrigerated.
Cold temperatures do not kill the bacteria, but they do reduce the rate at which they reproduce. A person is less likely to get sick if they only come in contact with a couple of bacteria than if the bacteria has the chance to grow unhindered.
2. Wash your produce.
Bacteria are not super villains. If bacteria is on produce, it can generally be rinsed off.
3. Prevent cross-contamination.
When chicken or other raw meats are in your refrigerator, they should be stored on the lowest possible shelf to prevent any liquid from dripping onto other food products.
Use separate cutting boards, different colors are super useful to prevent accidental contamination.
Wash cutting boards thoroughly with warm, soapy water, rinse, and sanitize. This three step process ensures that bacteria are removed from the surface and any hiding in tiny crevices are killed, too.
4. Avoid the bacterial danger zone.**
This is especially important when serving food. If a food should be refrigerated, it should not be at room temperature for more than two hours. If a food is served hot, it should not be below 130°F for more than two hours.
The range in-between 40°F and 130°F is known as the danger zone.
5. Reheat leftovers thoroughly.
Get those leftovers above the bacterial danger zone to kill anything that may have set up camp in your food.
Cleaning Up
Finally to get to the specifics of your question.
When sanitizing your cutting boards and counters you have three solid options to prevent contamination.
1. Distilled 5% vinegar –
Undiluted – heated to 130°F
Spray on the surface and allow to sit for one minute before wiping.
Room temperature distilled vinegar needs to sit for 10 minutes and is not effective against either Listeria or E. coli.
2. Dilute Bleach – (read about diluting chlorine bleach properly)
The solution should be sprayed on the surface and allowed to sit for one minute before wiping.
3. Food Grade 3% Hydrogen Peroxide
Heated to 130°F – sprayed on the surface and allowed to sit for one minute
Room temperature hydrogen peroxide is effective against salmonella after ten minutes but not E. coli or listeria.
Please note that food grade hydrogen peroxide is not the peroxide you find in the pharmacy. Be careful with undiluted food grade hydrogen peroxide and follow all instructions to the letter.
My personal choice is to use diluted chlorine bleach. I’m comfortable with the process after spending years in commercial kitchens.
*I’m not covering parasites today, we’ll save that fun for another day.
**Yes, I have Top Gun flashbacks every time I write the phrase “Danger Zone”
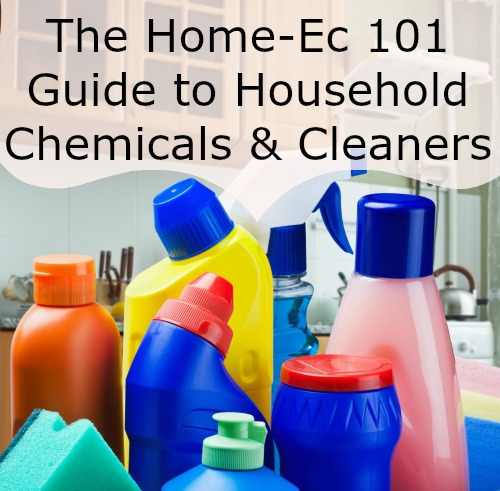
Click this picture to learn more about cleaners!
Send your questions to helpme@home-ec101.com
References:
http://www.cdc.gov/
http://www.mayoclinic.org/diseases-co...
https://food.unl.edu/safety/salmonella
http://www.phac-aspc.gc.ca/lab-bio/re...
http://www.fda.gov/Food/FoodborneIlln...


August 2, 2015
Buffalo Chicken Dip
Heather says:
Buffalo chicken dip is a favorite around here. It’s also ridiculously simple and worth knowing how to make in case you’re ever invited to a sportsball potluck type event. Go team go.
I’ve had buffalo chicken on the brain recently and I was poking around Plain Chicken -a client from my day job and remembered that I’ve been meaning to make this recipe for Home Ec 101.
I go with the classic Frank’s Red Hot Sauce recipe, but there are two import things to remember.
1. Use Bobbie’s Blue Cheese Dressing
2. Ignore everything about the oven. You don’t need the oven. You want to heat the dip gently so the cheese melts but doesn’t break. Buffalo chicken dip is great, but not so awesome once it’s been sitting on a chafing dish for a while.

: Buffalo Chicken Dip
2 cups shredded cooked chicken
1 (8 oz. pkg.) cream cheese, softened
1/2 cup FRANK’S® RedHot® Original Cayenne Pepper Sauce or FRANK’S® RedHot® Buffalo Wings Sauce
1/2 cup blue cheese blue cheese dressing*
1/2 cup crumbled blue cheese*
Directions
Instructions:
In a heavy sauce pan melt the cream cheese over low heat, stir in the chicken and Frank’s®
As the mixture becomes easier to stir add in the blue cheese dressing and blue cheese.
Stir until hot, but don’t let it come to a boil.
Pour into a serving dish and top with green onions and more blue cheese.
Serve with vegetables and chips or crackers.
I suppose if you’re one of those people who just abhor blue cheese that you could use homemade ranch dressing and your favorite cheese instead. It’s up to you.
Enjoy!


July 30, 2015
Laundry Lessons: Colors Bright and Whites White
Dear Home-Ec 101,
It seems lately my whites or mostly whites have been coming out dingy and faded. I don’t want to use bleach on them because a lot of them have colored sections as well. What can I do to keep the whites sparkling without taking effecting the rest of the color on these garments? And what can I do to prevent the dinginess before it starts?
Thank You,
Dingy Darling
Heather says:
You are absolutely right to not reach for regular chlorine bleach. When concerned about preserving color, oxygen bleach is your go to, not chlorine. Both chlorine and oxygen bleach work through the same kind of chemical reactions. These reactions are oxidizing reactions that break the weak bonds of molecules that produce color. Chlorine bleach, in the chemical world it’s known as sodium hypochlorite, is a much stronger oxidizing agent. It releases lots of oxygen that bounces around in your washing machine seeking the ruin of souls, I mean color.

Sodium perborate or sodium percarbonate are both sold commercially as oxygen bleach and this is what you need to bleach colored items. Both sodium perborate and sodium percarbonate react in water to create hydrogen peroxide which his quite unstable and breaks down into water and oxygen molecules. Since not as many oxygen atoms are zipping around in your washing machine, they settle for the easiest prey, which is usually the weak bonds on stains.
Fluorescent Whitening Agents
Products like Clorox 2 usually contain more than just the color busting oxygen molecules. Frequently these type of laundry additives also contain fluorescent brighteners, commonly referred to -in laundry nerd circles at least- as FWAs or flourescent whitening agents. These chemicals make whites reflect light more brilliantly.
Have you ever had an item of clothing look dazzlingly bright in the sun, to the point it was difficult to look at? That’s FWAs at work. FWAs are used both by clothing and laundry detergent manufacturers. We as consumers are so used to whites looking crisp and bright that anything less appears dull and dingy.
Soaking your striped and mixed color items in a solution of color safe bleach (like Clorox 2) and water may restore much of the missing brightness. This isn’t fool proof, it may take a couple trips through this laundry cycle or it may be beyond repair.
Preventing Dinginess
To keep your mixed items -that sounds vaguely insulting, doesn’t it?- from becoming dingy over time you’ll need to use either oxygen bleach or for best results a product that also includes those FWAs.
Don’t overload your washer.
Just as an FYI a frequent cause of dingy laundry is overloading your washer’s capacity. Clothing will develop a layer of residue if the washer is overloaded. If there are too many items -or simply too much dirt- in your washing machine the rinse water won’t be able to bring those molecules back into solution in the rinse cycle. This is especially true for those of you who live in areas with hard water.
Good luck!
Submit your questions to helpme@home-ec101.com.


CommentsI found a website that sells Cascade with phosphates. I just ... by bookchick@Narey I am. I was sort of hoping some of my RC brethren may ... by HeatherSolos@HeatherSolos My dh was set on a HE and that is one of my main ... by NareyFantastic Thank you!! by bororythorandmagnusRecently there has been a move to remove phosphates from ... by freetousePlus 7 more...
July 29, 2015
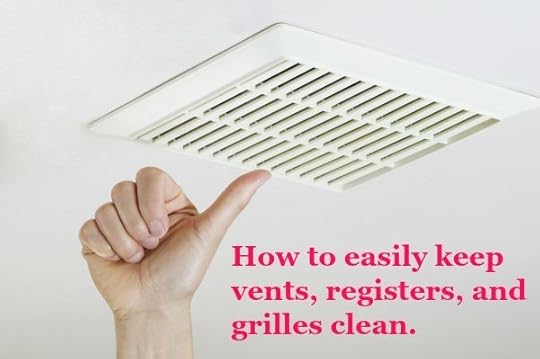
How to Clean Air Vents / Registers That Cannot Easily Be Removed
Hello –
When our house was built, the builder sealed all the air vents leading from the HVAC systems out into the house with something resembling the sealer around the top of the baseboards.
I have never lived in a house where I could not remove those vents, clean them and them put them back up.
Removing the vents by breaking the seal is going to make a big mess I can tell.
Is there any way to clean those vents myself without removing them?
Thanks for your help.
Signed,
Dustin in DenverHeather says:
The good thing about the air register situation in your house is that it is newer construction. If you practice good habits from the beginning, the vents won’t need to be taken down for a very long time.
The sealer that you’re looking at is caulk. The good news is that if you absolutely have to remove the air registers to clean or replace them, you can. You’ll just need a utility knife to zip around the seam and then re-caulk it after re-installing it.
Yes, this is absolutely a hassle and if you aren’t careful you can mess up the paint. Let’s figure out a way to ensure the air registers do not need a frequent, thorough cleaning.
These tips work well for any grate, grille, fan cover, or register in your home.
Regular dusting will extend the time between major cleanings by years.
 If you’re short and the vent is inconveniently high, you can buy a universal extension for the vacuum. Please measure the diameter of your vacuum’s hose before ordering. Alternately, there are dusters with long arms and extension poles out there. You don’t have to use a disposable option, there are microfiber and wool options, too.
Generally, vent and air register dusting does not have to be a huge event. Knocking the dust off of it on a regular basis is all that is needed.
If you follow the weekly chore schedule around here, you’ll just need to add a small habit to your routine. In our example, Tuesdays are floors, which also means the weekly thorough vacuuming. Whatever room is getting the most focus that week, grab the brush attachment for your vacuum and give the register a quick once over before vacuuming the floor. This order of operations ensures that the dust the vacuum didn’t manage to suck up while the vent was being cleaned, has a second chance to be caught on the floor.
Be aware that if you keep your windows open during high pollen season, you will need to increase the frequency of your dusting. Pollen is sticky and will need to be wiped off before it gets comfortable and forms an unholy bond with your register. In this instance, you may need to break out the next level of cleaning: the damp rag.
Additionally:
Every time you cook run the vent. The fewer sticky particles floating around the house, the better.
Change your HVAC filter on time. This makes sense, right? Right.
Really that’s all that needs to be done to keep your air registers and vents clean. When you next paint the ceiling, by all means, pull the vents down and give it a thorough cleaning, but I guarantee it will be in much better shape than one that has never seen the business end of a vacuum brush.
Submit your questions to helpme@home-ec101.com


July 27, 2015
Menu Monday – I’ve been busy
Heather says,
I hope everyone had a great weekend. If you visit the site itself, you may notice some changes. I switched to a more mobile friendly menu which should make reading on phones a bit easier. I also finally, after 8 years, found a real solution to my how do I organize the recipes in a way that makes sense problem. It’s a large project as it takes a lot of manual tweaking on the back-end –tee hee– of the website, but it’s definitely worth the time.
When you click through to the new recipe indexes, if you see a lot of images of the book’s cover, those are just image placeholders. I’ve also started project re-photograph all the things. Over the next few weeks you’ll see a lot more of these and fewer book covers.


What will you be having for dinner this week?
Monday – Pork Chops, Green Beans, Cabbage, Apples, and Onion
Tuesday – Chicken Curry, Curried Okra
Wednesday – out
Thursday – Chicken fingers, Mashed Potatoes, Gravy, Roasted Broccoli
Friday – Fish Tacos, Cabbage Slaw, Mexican Street Fair Corn
Saturday – Two Bean Tamale Pie, Chopped Salads
Sunday – Roast Chicken, Roasted Vegetables, Rice and Peas
This list is pretty ambitious, but Ray and I have been working on a system to get recipes photographed and on the table in a reasonable amount of time. If I have to put in over-time at work, that will take precedence.
Once I have the recipes that already exist on Home-Ec101 re-photographed, my plan is to focus on budget menus and tutorials explaining various cooking skills and how learning these skills allows a home cook to expand on the recipes they already know.
My eldest has found Chopped on Netflix, I’m hoping he finds Good Eats soon. (If he discovers it on its own, it’s cool, if I introduce it, the show must be terrible.) Kids.
Have a great week, tip your servers, and try the veal.


Heather Solos's Blog

- Heather Solos's profile
- 12 followers

