
Tess Challis's Blog, page 4
May 14, 2012
Homemade Zero Calorie Vanilla Soda
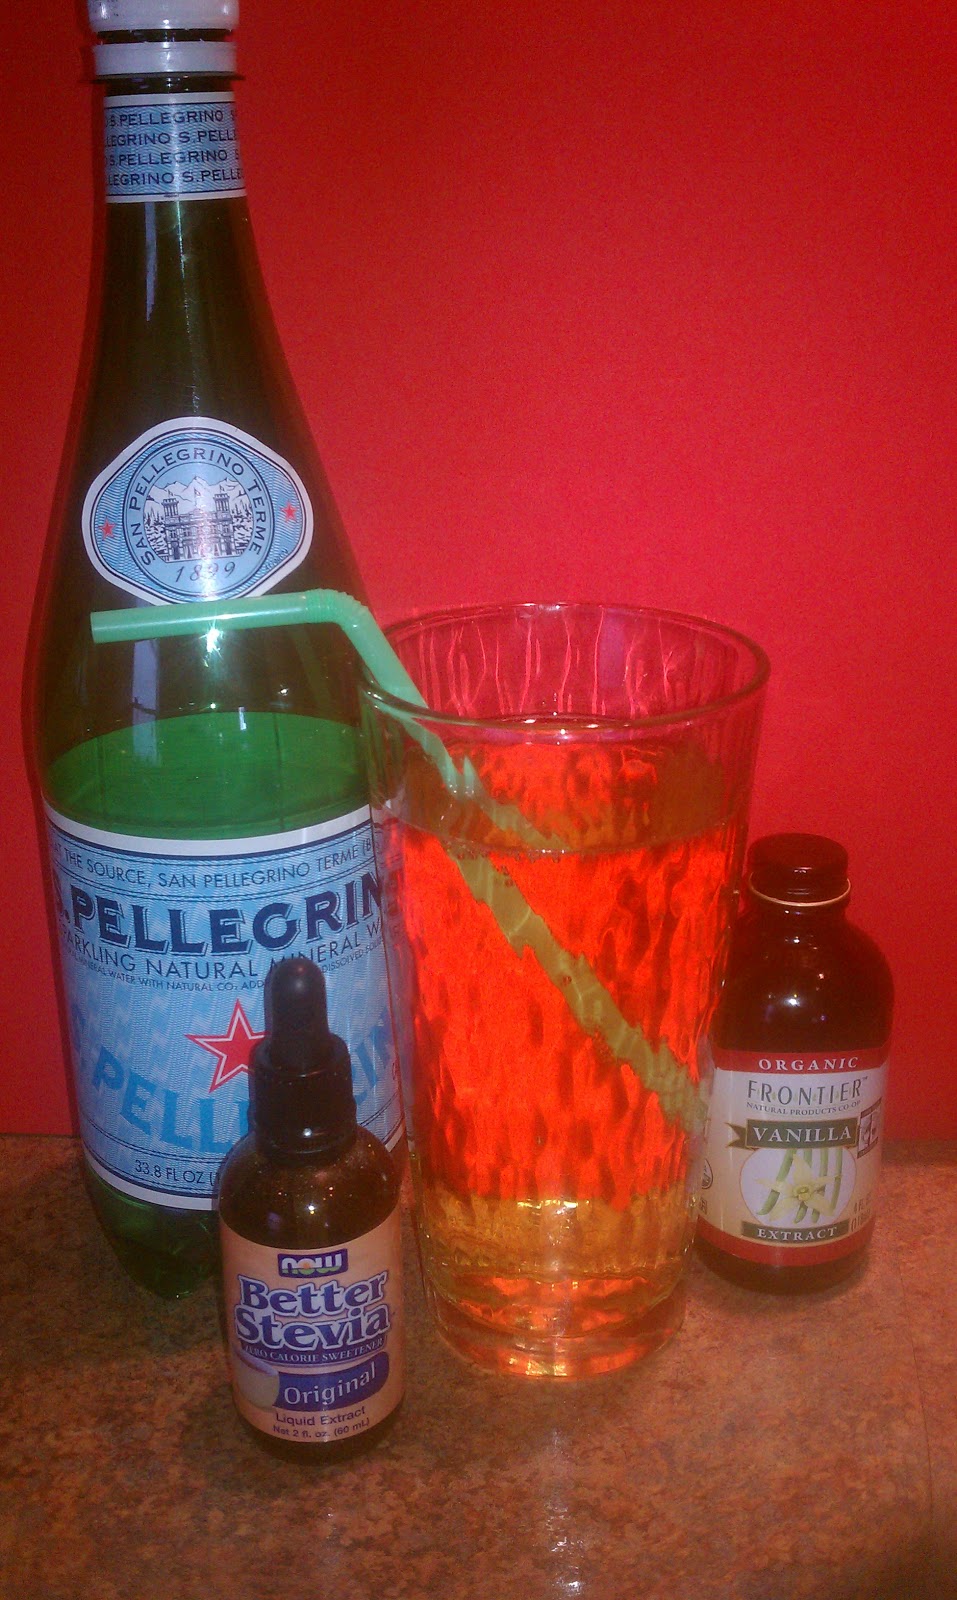
This recipe could not be more simple! Plus, it's not just easy and quick, it's also totally guilt-free. Stevia is honestly the one sugar-free sweetener that I'm totally convinced is safe. This became clear to me when I saw it growing (in all its cute and innocent glory) outside my friend's house! It's just a sweet green plant that, in liquid form, makes a great sweetener for beverages. Just make sure not to use too much - it's strong stuff! Personally, I've been enjoying one of these every day. They totally fulfill that craving for a bubbly, fun treat - but leave me feeling great afterwards! : )
1 teaspoon vanilla extract
1/4 teaspoon liquid stevia (or a wee bit more if you prefer it sweeter)
2 cups cold sparkling water or sparkling mineral water
To make, just place the vanilla and stevia in a large glass. Add the water, stir, and serve!
Serves 1
GF/SF/Green (according to the health guidelines in my books)


May 3, 2012
Sprouted Cinnamon Crisps
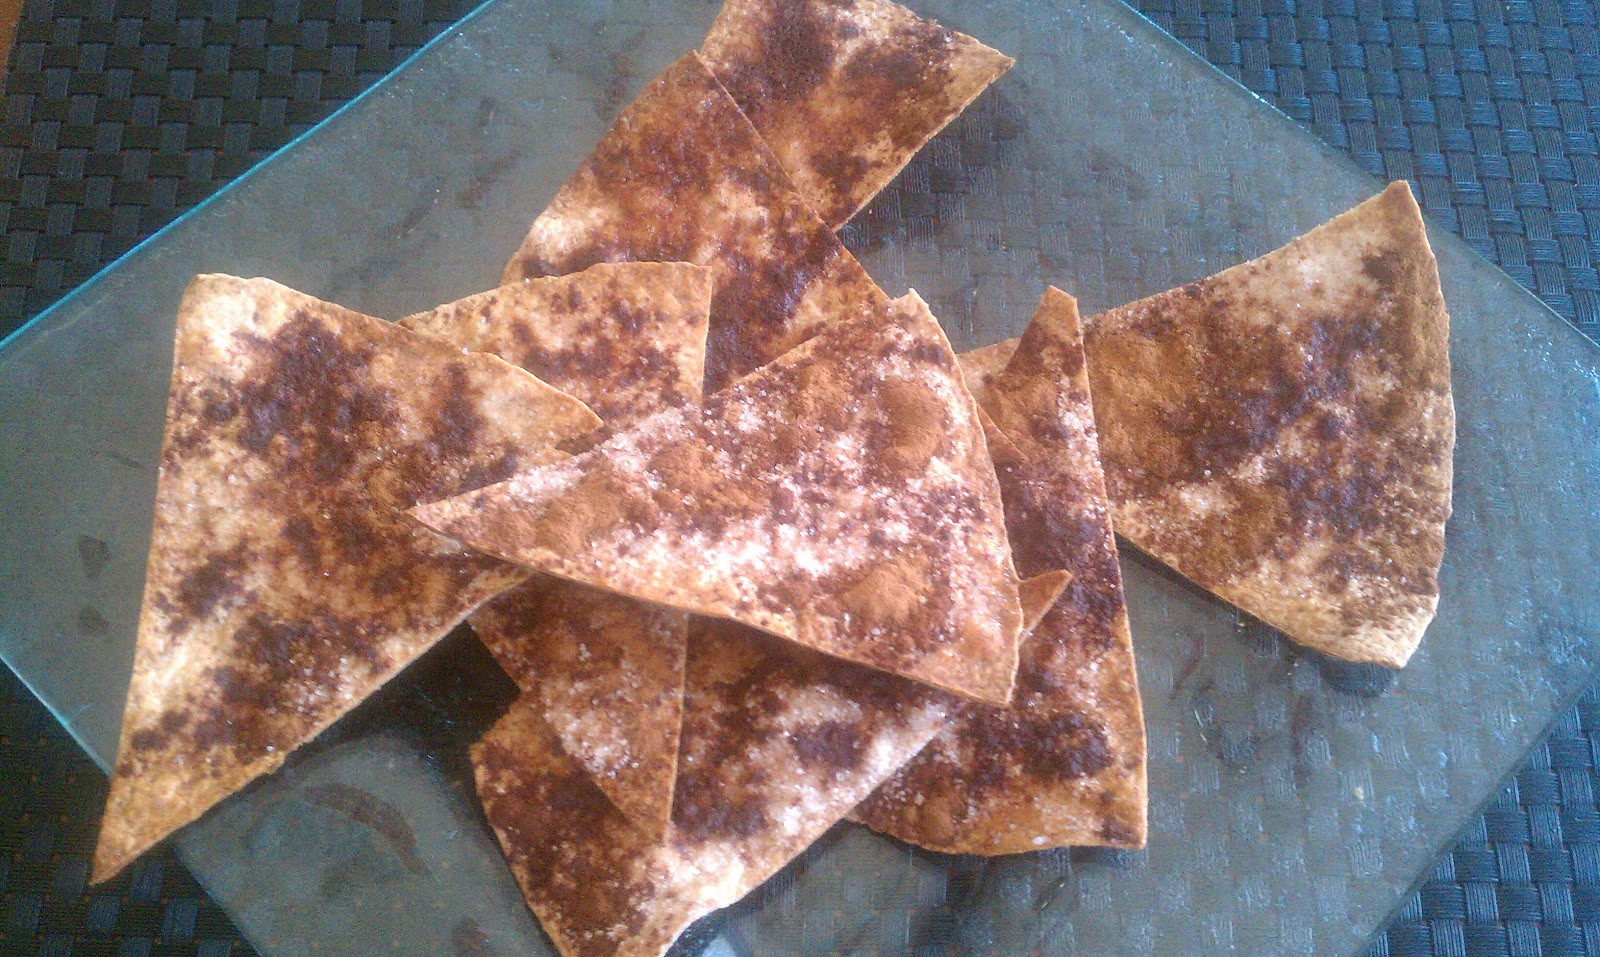
Yes, I'm at it again! Coming up with five-minute desserts that are also health supporting. We all have some semblance of a sweet tooth, right? Am I alone on this? So, here's a fun and benign way I've been indulging mine lately! Hope you dig it too. : )
- One sprouted grain tortilla (I use Ezekiel 4:9 sprouted tortillas, but you can use a gluten-free tortilla if you're gluten-intolerant)
- 1 teaspoon coconut oil
- 1 tablespoon organic granulated sugar
- Ground cinnamon (I use 2 teaspoons on mine, but my daughter prefers about 1 teaspoon)
1. Preheat your oven to 400 F.
2. Spread your tortilla evenly with the coconut oil. Cut into eight wedges (like a pizza). Sprinkle evenly with the sugar, then the cinnamon. Spread out on a baking sheet.
3. Bake for about 5 minutes, or until the tortilla is lightly browned and crisp. Enjoy!
Serves 1-2
GF (if using a gluten-free tortilla)/SF/Blue (according to the health guidelines in my books )

April 22, 2012
Watermelon Strawberry Lime Toss
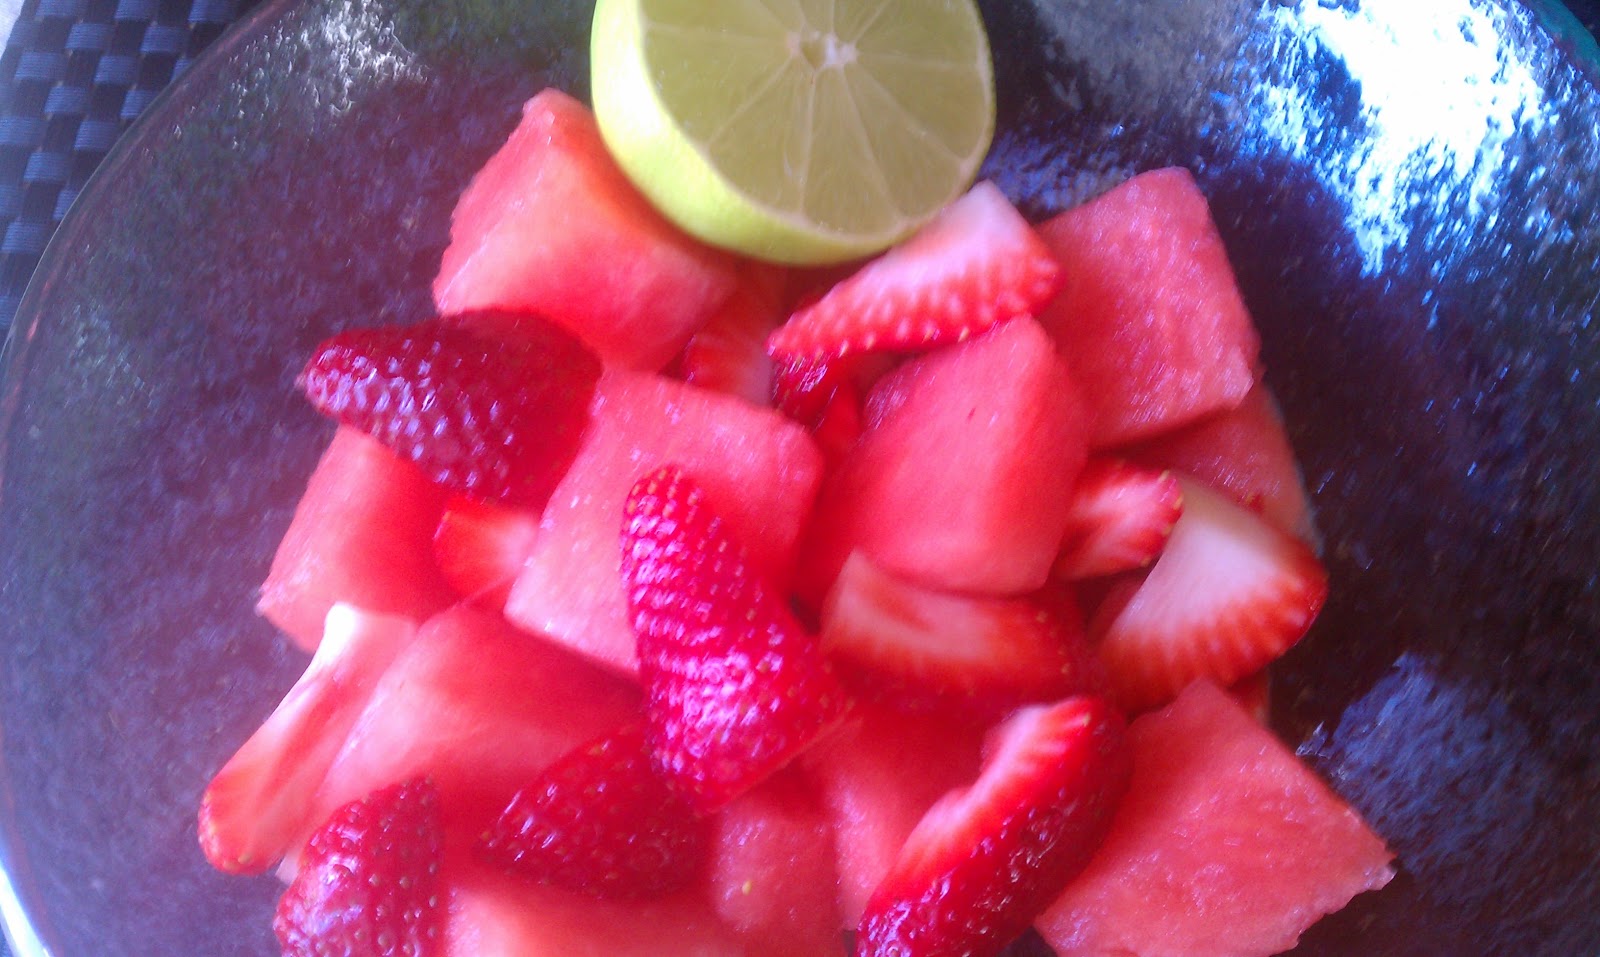
So, how exciting is this??! This vitalizing salad only has three (THREE, people) ingredients but somehow it still manages to be a party in your mouth! I've made this a small recipe (serves only 1-2), but it can be easily multiplied (if you can do basic math and/or have a calculator) for larger groups.
2 cups chopped watermelon (bite-sized cubes)
1 cup sliced strawberries (fresh)
1 tablespoon lime juice (for the love of all that is good and holy, use fresh limes!)
Toss all ingredients together gently and serve.
Serves 1-2
GF/SF/R/Green (according to the health guidelines in my books)

April 13, 2012
Rosemary Rose Stevia Lemonade
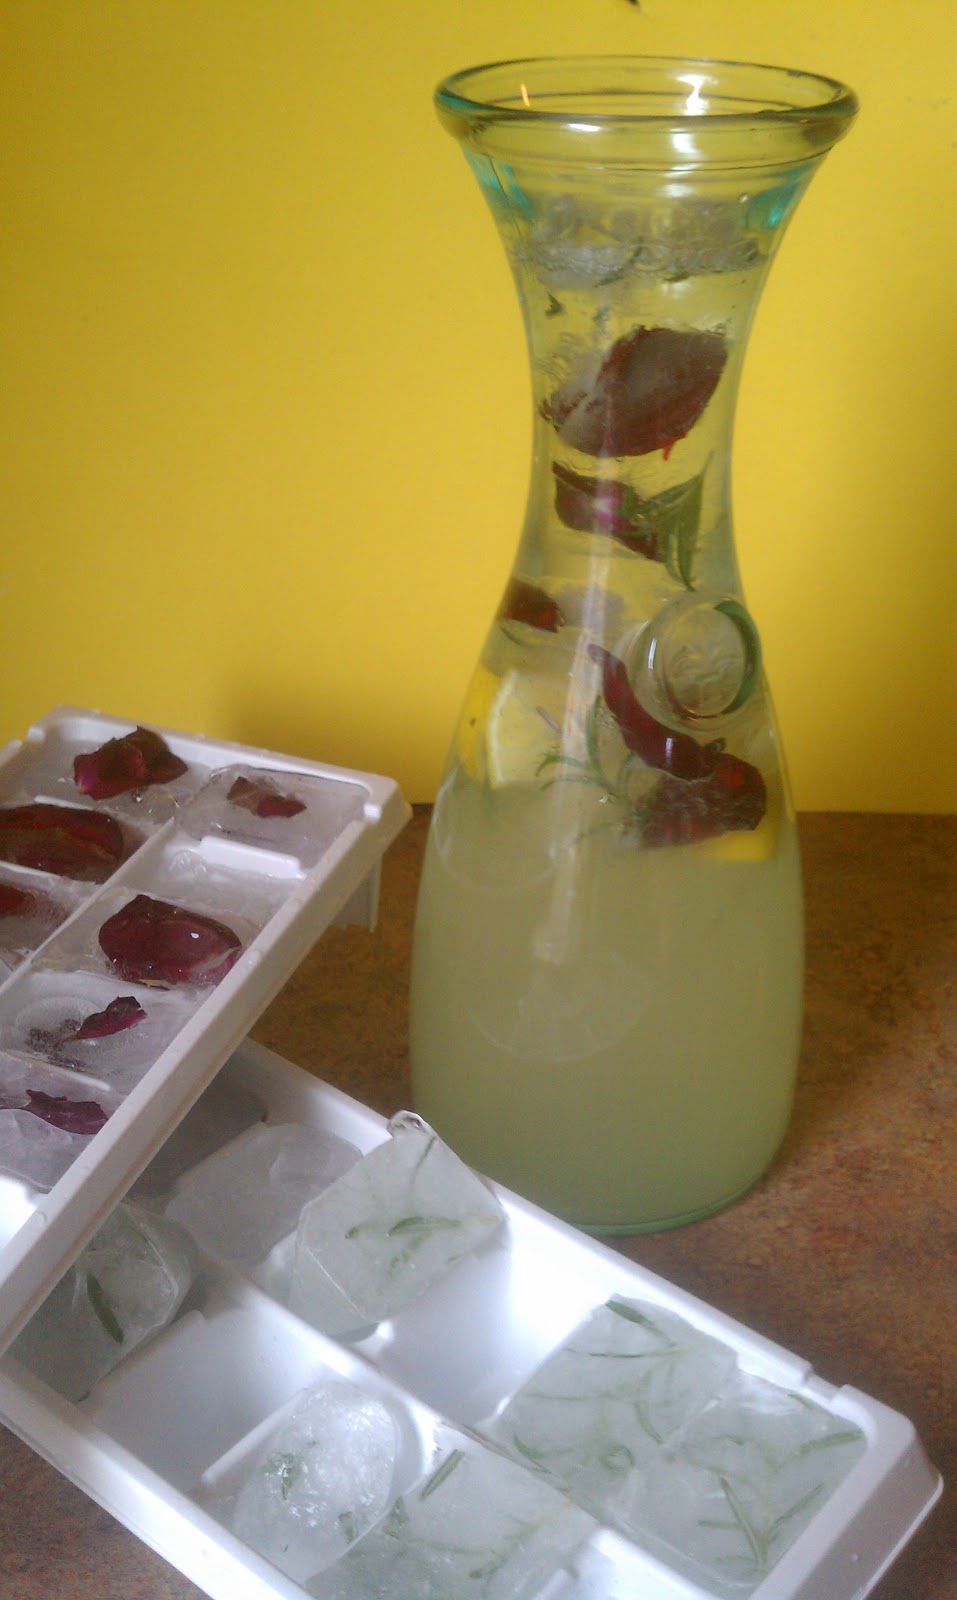
Today, I was in the mood for some pretty! I also wanted to use up a bunch of organic lemons (those things go bad way too fast). So, my daughter and I whipped up a batch of lemonade. But not just any lemonade! I also had a rose that was dead (there's no great way to say that) and lots of rosemary growing in a pot indoors. Not to mention the fact that I love fun, vitalizing, low-to-no calorie beverages. So, voila! This idea was born.
Here's the how-to...
First, my daughter and I put some fresh rosemary in an ice cube tray and filled it up with water. Froze that thang. Next, in went the rose petals to another tray (one petal per cube). We found that the rose petals are so airy and light that it's best to fill it up with water only halfway, add the rose petals, then freeze. Once mostly frozen, remove and fill up the rest of the way with water. Otherwise, the rose petals won't be encased in the ice.
Next, combine the following:
▪ 4 cups pure water▪ 3/4 cup fresh lemon juice
▪ 1/2 teaspoon liquid stevia (or slightly more, for a sweeter lemonade)
Place in a pretty glass pitcher along with your frozen ice cubes (and perhaps a few lemon wedges) and enjoy! This beverage is not only pretty, it's also a fantastic way to alkalinize your system, get lots of vitamin C, and detoxify. Yeah!!!
Serves 4 (or me)
GF/SF/R/Green (according to the health guidelines in my books)

April 10, 2012
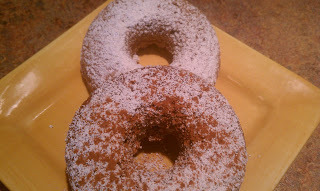
Baked Whole Grain Vegan Donuts
Yeah, the title makes these sound like they taste healthy, right? Baked? Whole Grain? Vegan? Boring, right? WRONG! I promise you'll be amazed at how delish these are, while still ditching the deep-fried-white-flour-cholesterol-laden-ness that most donuts boast. And, of course, those of you who are familiar with my books have already found out that healthy vegan food can actually be the most delicious kind on the planet! But don't take my word for it... Try these bad boys and find out for yourself!
Dry Ingredients:
1 cup whole wheat pastry flour
1/2 cup organic sugar
1/2 tablespoon baking powder
1 teaspoon EACH: cinnamon and nutmeg
1/4 teaspoon sea salt
Wet Ingredients:
One "Flegg" (2 tablespoons flaxseed meal mixed with 3 tablespoons water)
1/2 cup nondairy milk
3 tablespoons non-virgin coconut oil (you can use virgin if you want them to taste like coconut)
2 teaspoons vanilla
1/2 teaspoon lemon juice or apple cider vinegar
Final Bit: Organic powdered sugar
1. Preheat your oven to 350 F and lightly oil a donut baking pan (that makes 6 regular sized donuts).
2. Combine the dry ingredients together thoroughly. Set aside.
3. For the Flegg, stir the flaxseed meal (ground flaxseeds) and water together and then let the mixture sit til thoroughly gooey, about 5 minutes. Then, stir the remaining wet ingredients into the Flegg until well combined.
4. Gently stir the wet mixture into the dry just until thoroughly combined. Place the mixture evenly into the donut cups, spreading it out evenly using your fingers or a spoon. Smooth out the tops and bake for about 10-15 minutes, or until a toothpick inserted into the center of one comes out clean. Note: the tops may not be browned.
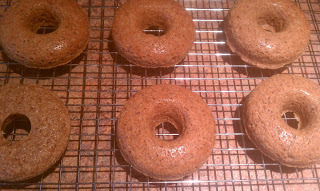 5. Place the donut pan, upside-down, on top of a cooling rack or clean counter. The donuts should come right out, but if not, you may tap the pan gently to release your circular newborns.
6. Dust the tops with organic powdered sugar and voila! Delicious, warm donuts up in your world!! Enjoy!
Makes 6 donuts (6 servings)
SF/Blue (according to the health guidelines in my books )
FINAL NOTES: I haven't tried it yet, but for my gluten-free friends, I might suggest a gluten-free all-purpose flour instead of the whole wheat pastry. I don't see why it wouldn't work! : )
Also, if you prefer a cinnamon spice donut, use only 1/4 teaspoon nutmeg and up the cinnamon to 2 tablespoons. When done, dust the tops with both powdered sugar and cinnamon. YUM!!
April 4, 2012
GreenYa Colada

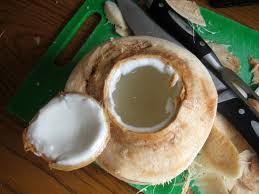
Well, there are basically two reasons this drink HAD to be born. One - I was able to find lots of young Thai coconuts on my travels recently and did some fun, yummy, healthy experimenting. Two - the name. Enough said.
For those of you who've never used a young Thai coconut, please don't be intimidated. You can often find them in health food stores and they're relatively easy to open. However, I will warn you - once you've tasted their fresh, electrolyte-rich, rejuvenating coconut water you may never want to buy packaged coconut water again.
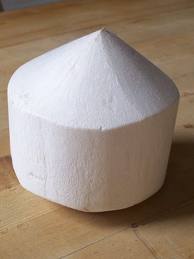
How to open said magic fruit? All you'll need is confidence and a very big knife. Towards the top (say, 2 inches down from the peak), jab with your knife. You may have to do this a few times til you break the surface. Continue to do this all around the top in a circle til you can remove the top. From there, you'll pour out the water and then spoon out the freakishly tender coconut meat (with, yes, a spoon). And be sure to sample a bit of the meat before you blend it up...it's heavenly!!
GreenYa Colada!
- The water and flesh of one young Thai coconut
- 3 cups EACH: baby spinach, frozen (or fresh) pineapple chunks, and frozen (very ripe) bananas
Place all of the ingredients together in a blender. It'll look a little something like this:
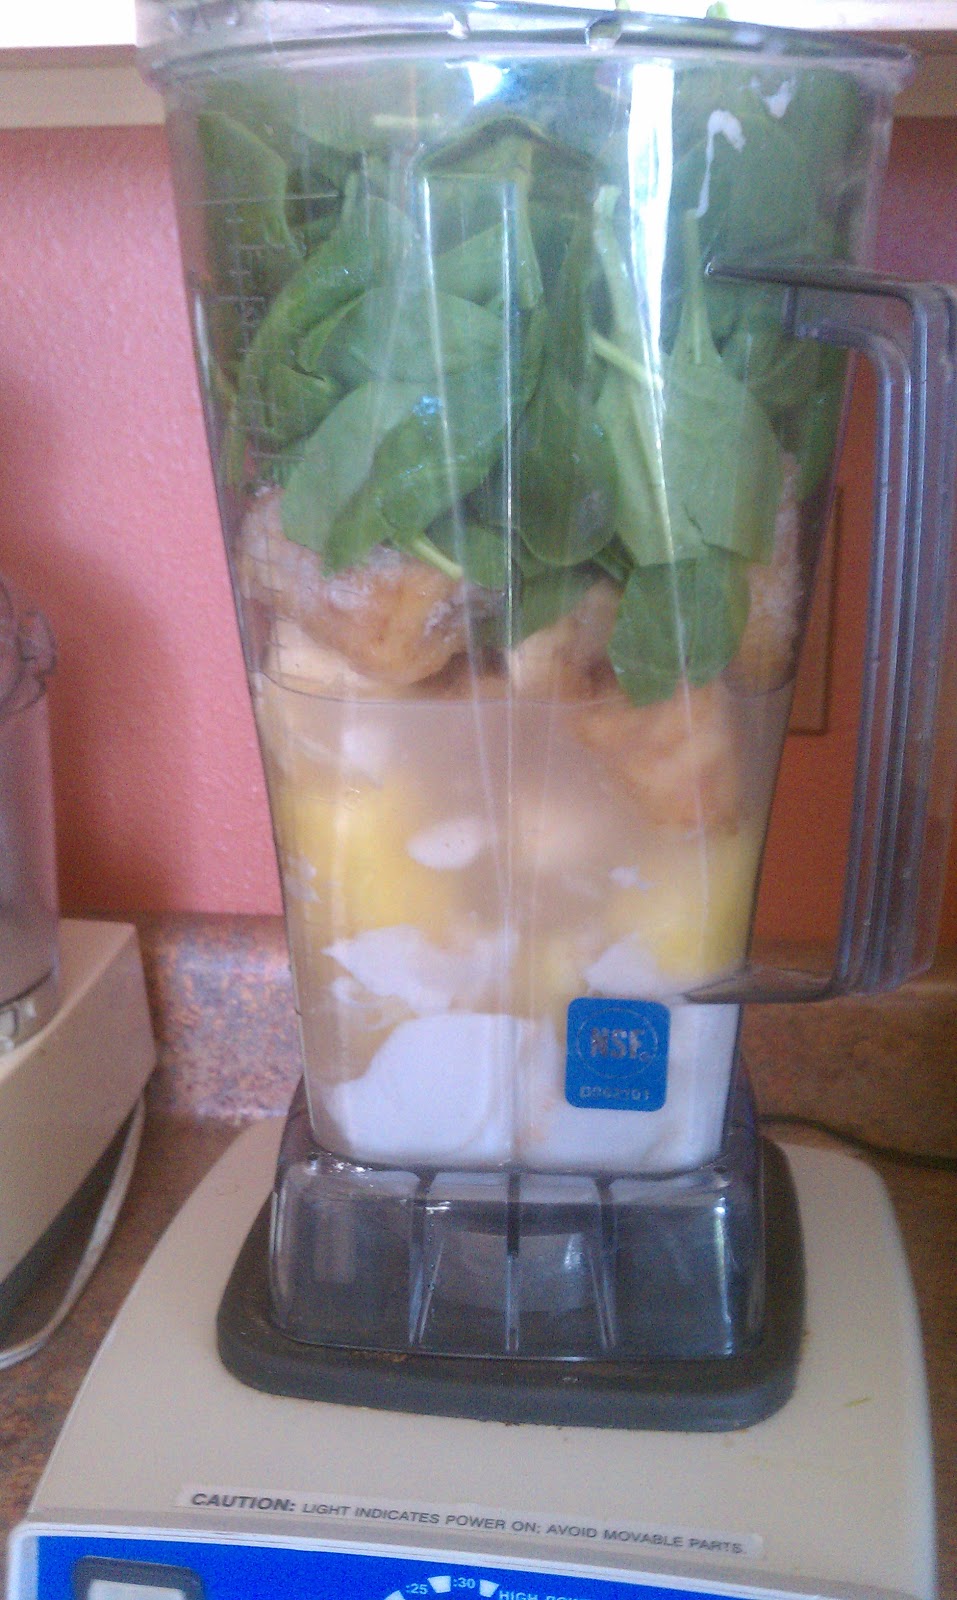
Next, blend very well. Serve immediately. Enjoy your healthy paradise! : D
Serves 3-4
GF/SF/R/Green (according to the health guidelines in my books)

April 2, 2012
Spicy Vegan Pumpkin Pie Shake
Part dessert, part breakfast, this shake will give your skin a glow and your brain a boost. Recipe from Radiance 4 Life - my most recent cookbook that's all about honoring nutrient-dense superfoods.

▪ 2 frozen bananas (frozen when very ripe)
▪ 1¼ cups cooked pumpkin, very cold
▪ 1 cup cold nondairy milk
▪3 tablespoons maple syrup, cold
▪1 tablespoon pumpkin pie spice
▪½teaspoon vanilla
In a blender, combine all of the ingredients until thoroughly smooth and emulsified. Serve immediately, you pumpkin lover you.
Serves 2
GF/SF/Blue/HR/F (according to the health guidelines in my books)
30 Minutes or Under!Superstars: pumpkin, almonds
March 8, 2012
Fresh Almond Milk Made Easy
Fresh almond milk!!!!!!!!!!!
!!!!
Yes, it's that exciting, trust me. Why is it that a simple concoction should yield such explosive excitement? Well, for starters, it's extremely nutritious. Almonds are the most alkalizing of all nuts - they're also rich in healthy fats and other nutrients that keep our skin and hair healthy and glowing. Almond milk, made fresh, is also very affordable and ridiculously easy to make.
Homemade almond milk is minimally processed and is environmentally-friendly as it doesn't require you to buy excess packaging - I store mine in reusable glass containers. It also happens to look so lovely in all its white, creamy glory, sitting in your fridge! Just looking at freshly made almond milk in my fridge gives me waves of happiness. Yeah, I'm actually serious. : )
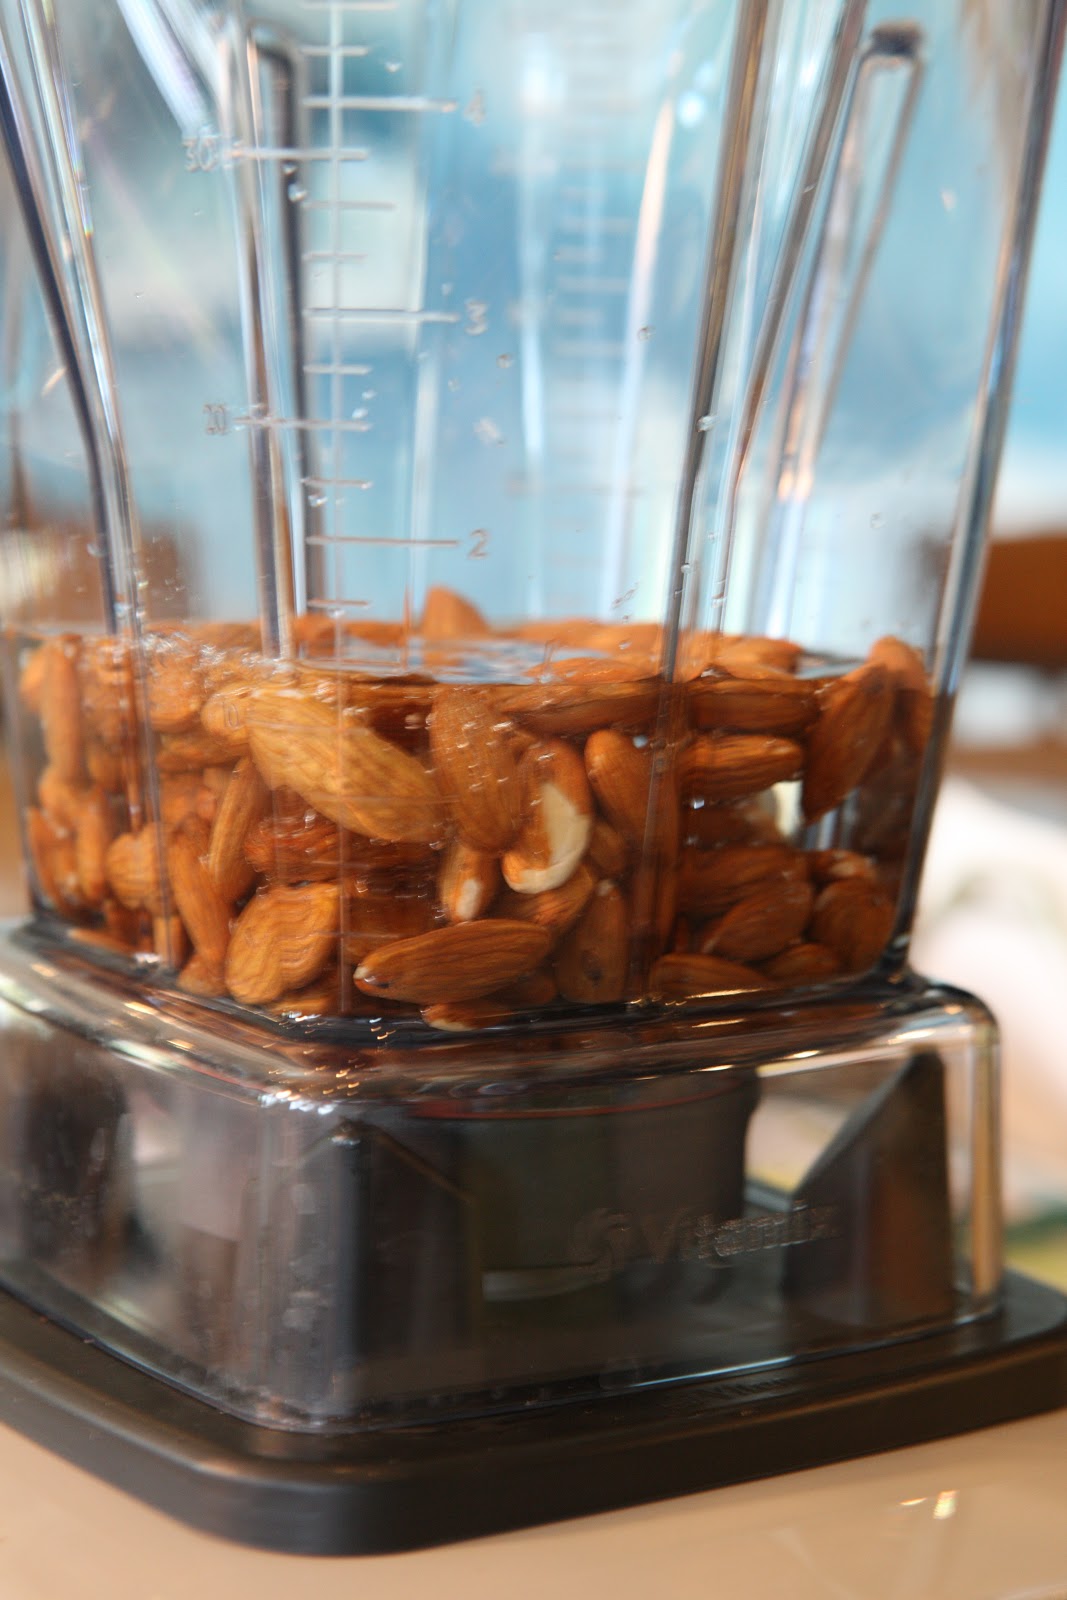
1. First, you start with one cup of raw, organic almonds. You then have two options with which to proceed. You can either soak the almonds in water for several hours (or overnight) or simply proceed to step two.
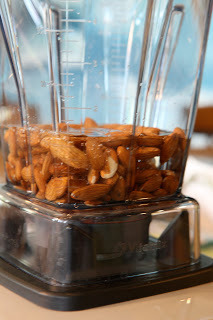
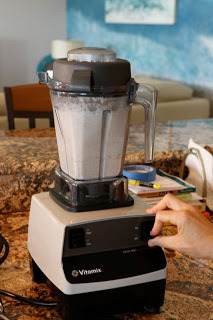
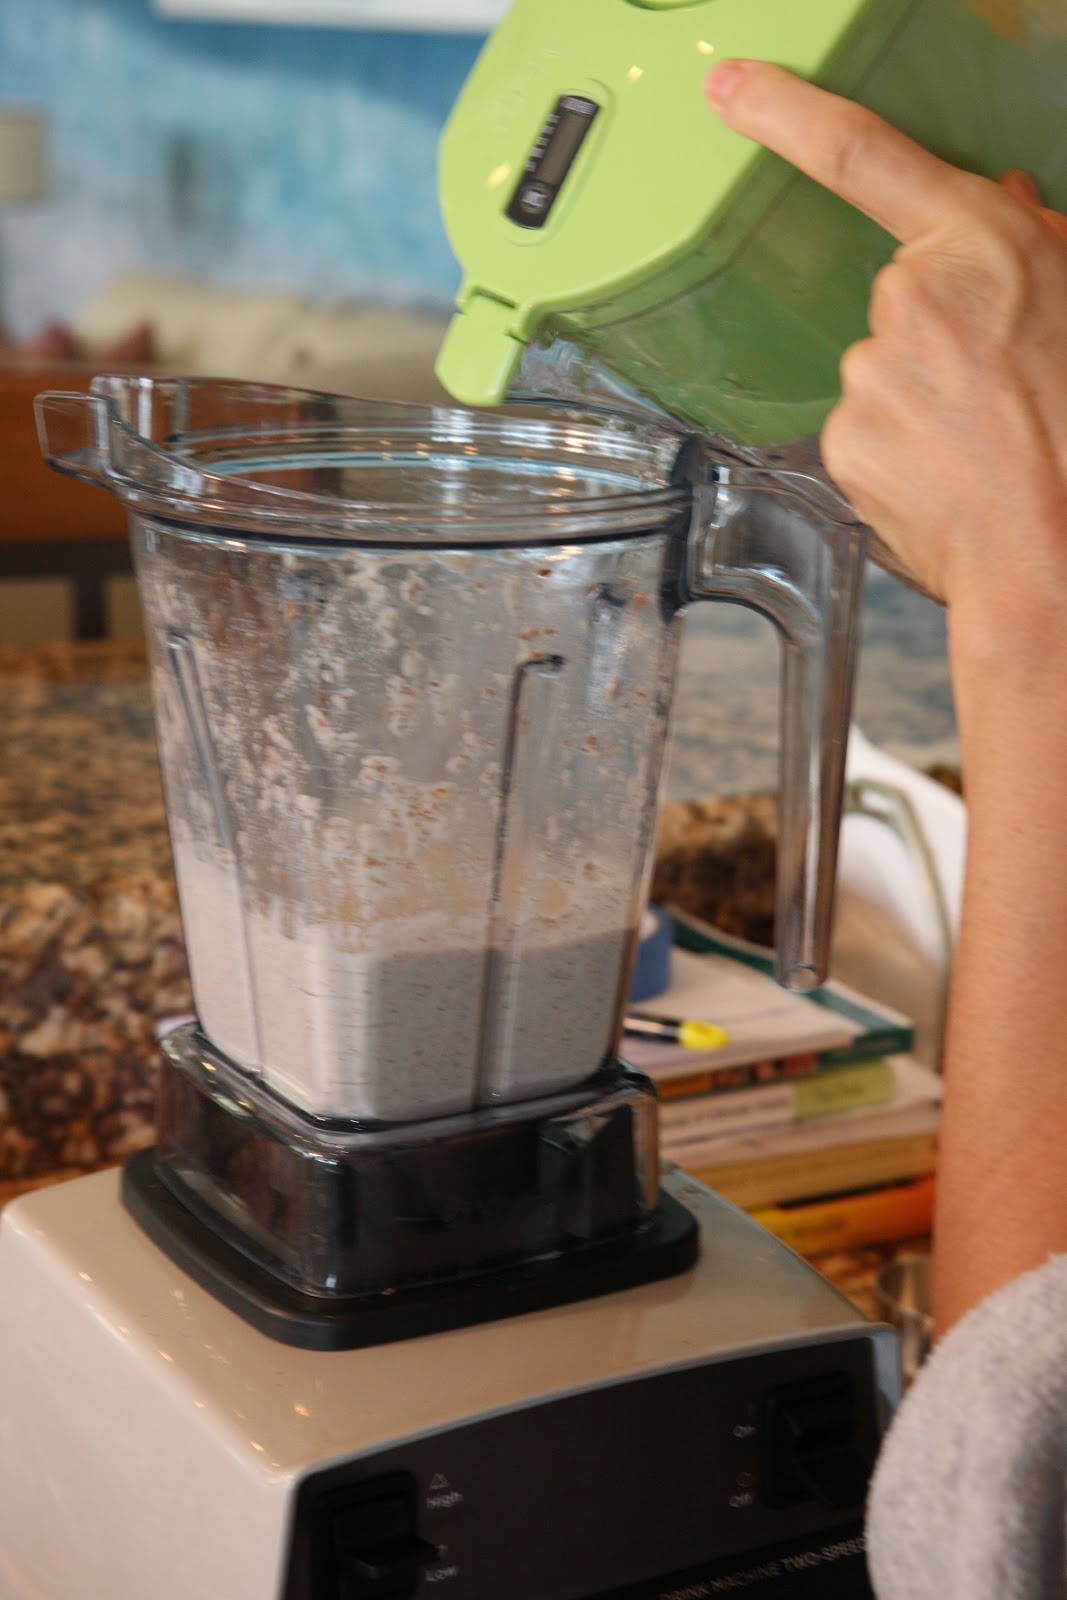
2. Place the almonds in a blender or Vitamix with just enough water so that your blender will cooperate. Blend the almonds and water together really well. Like, really, really....really well. Then, maybe blend again.
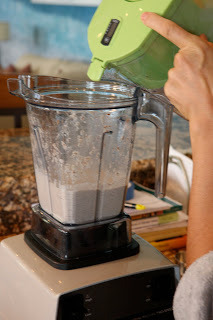
3. Next, add 3-4 cups of water, depending on how creamy you want your milk to be. The less water you add, the richer, creamier, and more ridiculously awesome your milk will be. The more water you add, the lower in fat and calories - plus, it will stretch further. In fact, you can even add 5 cups of water if you're like me and have an almond milk vacuum in your house (my 8-yr-old daughter goes through a batch of this every few days!!!). So, choose your potion and BLEND. Blend well, my friend.
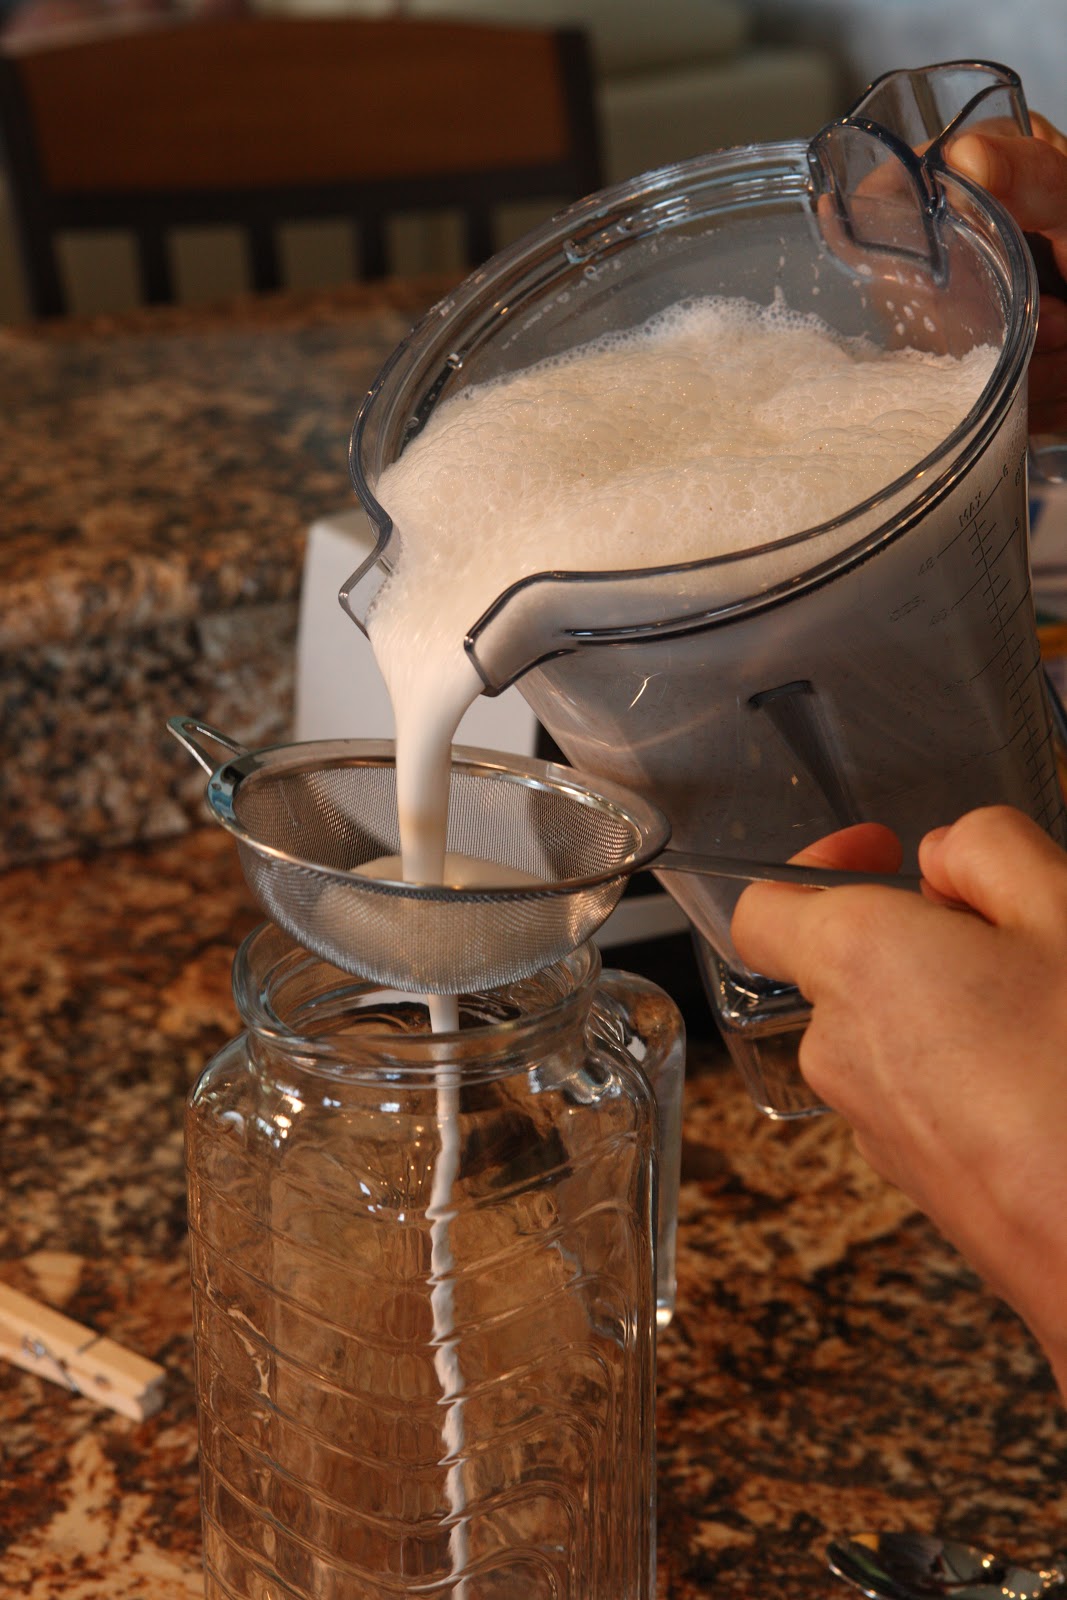
4. Next, you'll need a fine mesh strainer, spoon (soup spoons work great), and wide-mouth container.
5. Pour the almond milk through the strainer into the container to remove the pulp. My daughter totally loves doing this and begs to "un-pulp the milk."
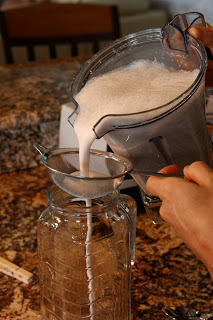
6. You will have to do this in a few batches. Once the strainer is full, use your spoon to smoosh down the pulp that's in the strainer so that you get all the milk out of it.
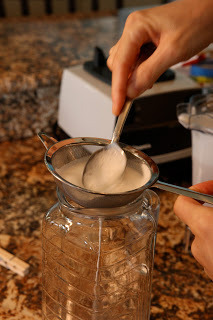
7. Rinse the pulp from your strainer and spoon and keep straining til all your milk is "un-pulped." Well, friends, there you have it!! THAT IS IT. You now have some seriously awesome almond milk to set your fridge aglow. Personally, I don't add anything to it, but you might enjoy some of the following additions: a pinch of salt, tablespoon of vanilla, and/or a squirt of stevia (or other natural sweetener).
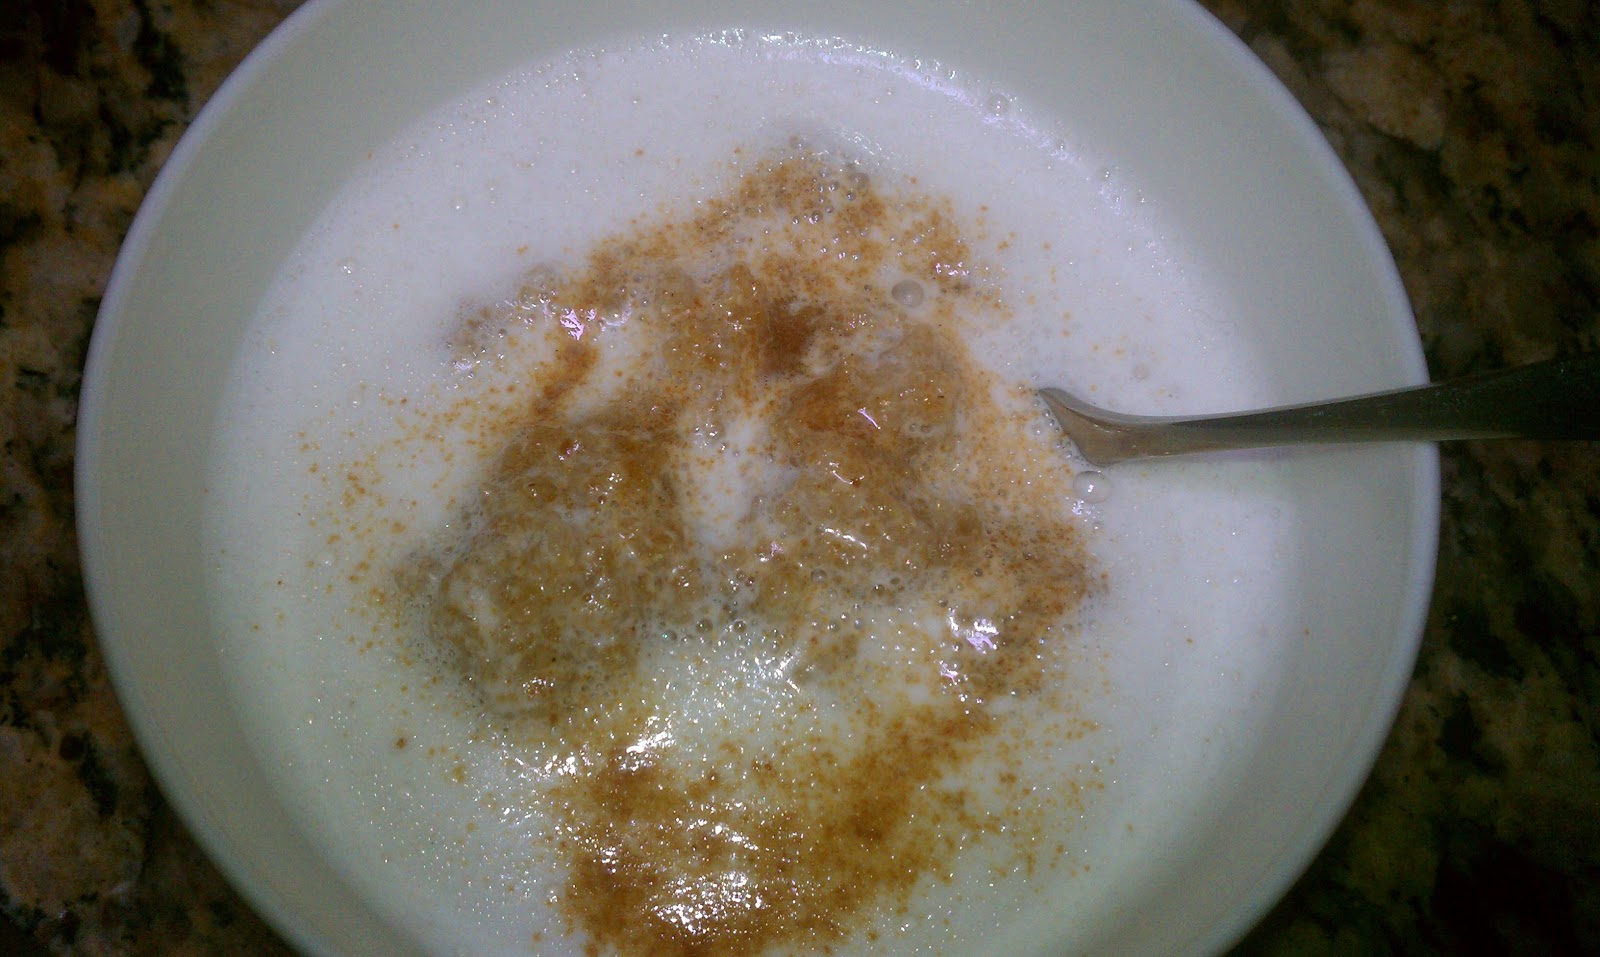
8. Enjoy!!! Here's one of my favorite ways to enjoy almond milk - this is a bowl of rolled oats, rolled quinoa, and amaranth, topped with fresh almond milk, cinnamon, and coconut sugar. BLISS.

This recipe makes about one quart of almond milk, depending on the amount of water that you use.
GF/SF/Blue (according to the health guidelines in my books)
!!!!
Yes, it's that exciting, trust me. Why is it that a simple concoction should yield such explosive excitement? Well, for starters, it's extremely nutritious. Almonds are the most alkalizing of all nuts - they're also rich in healthy fats and other nutrients that keep our skin and hair healthy and glowing. Almond milk, made fresh, is also very affordable and ridiculously easy to make.
Homemade almond milk is minimally processed and is environmentally-friendly as it doesn't require you to buy excess packaging - I store mine in reusable glass containers. It also happens to look so lovely in all its white, creamy glory, sitting in your fridge! Just looking at freshly made almond milk in my fridge gives me waves of happiness. Yeah, I'm actually serious. : )
1. First, you start with one cup of raw, organic almonds. You then have two options with which to proceed. You can either soak the almonds in water for several hours (or overnight) or simply proceed to step two.
2. Place the almonds in a blender or Vitamix with just enough water so that your blender will cooperate. Blend the almonds and water together really well. Like, really, really....really well. Then, maybe blend again.
3. Next, add 3-4 cups of water, depending on how creamy you want your milk to be. The less water you add, the richer, creamier, and more ridiculously awesome your milk will be. The more water you add, the lower in fat and calories - plus, it will stretch further. In fact, you can even add 5 cups of water if you're like me and have an almond milk vacuum in your house (my 8-yr-old daughter goes through a batch of this every few days!!!). So, choose your potion and BLEND. Blend well, my friend.

4. Next, you'll need a fine mesh strainer, spoon (soup spoons work great), and wide-mouth container.
5. Pour the almond milk through the strainer into the container to remove the pulp. My daughter totally loves doing this and begs to "un-pulp the milk."
6. You will have to do this in a few batches. Once the strainer is full, use your spoon to smoosh down the pulp that's in the strainer so that you get all the milk out of it.

7. Rinse the pulp from your strainer and spoon and keep straining til all your milk is "un-pulped." Well, friends, there you have it!! THAT IS IT. You now have some seriously awesome almond milk to set your fridge aglow. Personally, I don't add anything to it, but you might enjoy some of the following additions: a pinch of salt, tablespoon of vanilla, and/or a squirt of stevia (or other natural sweetener).
8. Enjoy!!! Here's one of my favorite ways to enjoy almond milk - this is a bowl of rolled oats, rolled quinoa, and amaranth, topped with fresh almond milk, cinnamon, and coconut sugar. BLISS.
This recipe makes about one quart of almond milk, depending on the amount of water that you use.
GF/SF/Blue (according to the health guidelines in my books)
March 1, 2012
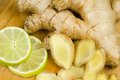
Zero Calorie Lime Ginger Soda
Those of you who know me know that I'm a total junkie for fizzy, fun, nutritious beverages. I'm a hopeless booch (kombucha) addict, and also love some of the new stevia-sweetened drinks out there. However, the thought of making my own soda gets me even more excited! Partly because it's SO easy to do, inexpensive, healthy, and chock-full of vitalizing superfoods. Plus, when you make it yourself, you KNOW there are no iffy ingredients or not-so-healthy sweeteners.
The soda I whipped up today is no exception. Personally, I totally dig the benefits of fresh lime and ginger. They're not only vitalizing, but also highly detoxifying, immune-boosting, and vitamin-packed. Think of this as a fun and fizzy drink that will supercharge you! So...hold onto the handrails, this is gonna get wild! ; )

Zero Calorie Lime Ginger Soda
* 1 tablespoon ginger juice (from about a 4-inch piece of ginger) - NOTE: this will yield a strong ginger flavor. If you prefer your drink more mild, add less.
* 18 oz. very cold fizzy water (I picked up some sparkling mineral water at Trader Joe's which did the trick nicely)
* 3 1/2 tablespoons fresh lime juice (about 1 1/2 limes worth)
* 1/2 teaspoon (or ever-so-slightly more, if you prefer) liquid stevia (don't use flavored stevia or powdered stevia)
To extract the juice from the ginger, simply grate the ginger (skin and all) with a fine grater. Squeeze out the juice, using your fingers. Place the ginger juice in a container and add all of the other ingredients. Stir, serve, and enjoy!
Serves 1-2
GF/SF/Green/Raw (according to the health guidelines in my books)

The soda I whipped up today is no exception. Personally, I totally dig the benefits of fresh lime and ginger. They're not only vitalizing, but also highly detoxifying, immune-boosting, and vitamin-packed. Think of this as a fun and fizzy drink that will supercharge you! So...hold onto the handrails, this is gonna get wild! ; )
Zero Calorie Lime Ginger Soda
* 1 tablespoon ginger juice (from about a 4-inch piece of ginger) - NOTE: this will yield a strong ginger flavor. If you prefer your drink more mild, add less.
* 18 oz. very cold fizzy water (I picked up some sparkling mineral water at Trader Joe's which did the trick nicely)
* 3 1/2 tablespoons fresh lime juice (about 1 1/2 limes worth)
* 1/2 teaspoon (or ever-so-slightly more, if you prefer) liquid stevia (don't use flavored stevia or powdered stevia)
To extract the juice from the ginger, simply grate the ginger (skin and all) with a fine grater. Squeeze out the juice, using your fingers. Place the ginger juice in a container and add all of the other ingredients. Stir, serve, and enjoy!
Serves 1-2
GF/SF/Green/Raw (according to the health guidelines in my books)
February 13, 2012
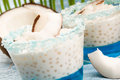
Pure and Simple Vegan Tapioca Pudding
I've been messing around with this recipe for about 15 years, so I was bound to get it right one of these decades! The thing that I was missing for far too long was the importance of simplicity in this dish. Previously, I was cluttering it up with things like maple syrup, raisins, and cinnamon. All fine ingredients otherwise, but they simply muddied the pure, delicate flavor that you're looking for in a vanilla tapioca pudding.
That said, it's really important to use high quality ingredients, as there are so few ingredients in this dish. First of all, start with your tapioca. Personally, I prefer whole tapioca simply for the fun texture - but you can also use instant. (Instant is often easier to find as well)

So, what you'll want to do is place 1/4 cup of either whole tapioca (shown above) or instant in 3 cups nondairy milk. Now, this... THIS...is a crucial step, my friends! If you use sub-par milk, your pudding will not taste fabulous. Personally, I like to use homemade almond milk. If you're so inclined, you could also use coconut milk or another high quality nondairy milk - the fresher the better!
If you're using whole tapioca, let it sit in the milk for about 2 hours. If you're using instant, proceed with the next step.
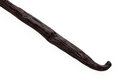
Next, place the tapioca and milk mixture in a medium pot. Add your vanilla. You can either use one tablespoon vanilla extract or a luscious vanilla bean (or two if you're really a vanilla lover!). Obviously, using the whole vanilla bean will elevate this to another level. To use, simply score it down one side (lengthwise) with a sharp knife and then scrape out all the innards with the back of a spoon. Heaven.
Next, add 1/2 cup of organic sugar (basically, the healthier version of white sugar) and 1/4 teaspoon sea salt. Stir well with a whisk and bring to a boil over medium-high heat. Reduce heat to low and simmer, stirring often, for about ten minutes.
Remove from heat, let cool, then refrigerate. Before serving, stir again. Enjoy!
Serves 4
GF/SF/Blue (according to the health guidelines in my books)

Tess Challis's Blog
- Tess Challis's profile
- 7 followers
Tess Challis isn't a Goodreads Author
(yet),
but they
do have a blog,
so here are some recent posts imported from
their feed.

