
Jennifer L. Scott's Blog, page 52
October 8, 2018
3 Creamy Chicken Freezer Casseroles | Comfort Food | Jennifer L. Scott
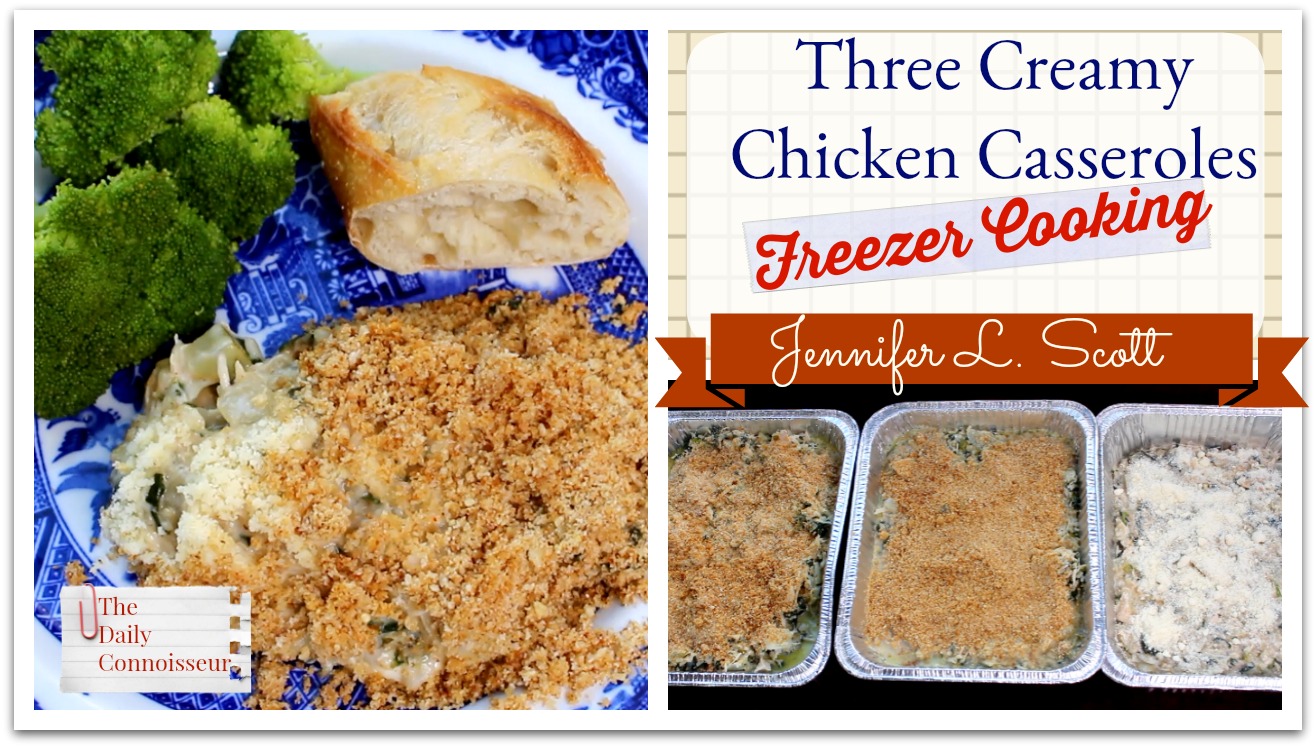
You know my motto, being chic is being prepared. I have a large catalogue of freezer meals I have shared with you in the past and today, I'm making three comfort food casseroles featuring lots of chicken and vegetables for fall.
I shot this video before having the baby and am just now getting around to posting it. These meals have really come in handy!

My philosophy with freezer cooking is to use what you have and not worry about following a recipe too rigidly. There is freedom in opening your pantry and deciding what you'd like to use. For these freezer meals, I had nearly 5lbs of organic chicken breast, a 2 lb bag of spinach, 2 large onions, a giant zucchini from our garden, and a lot of brown rice.

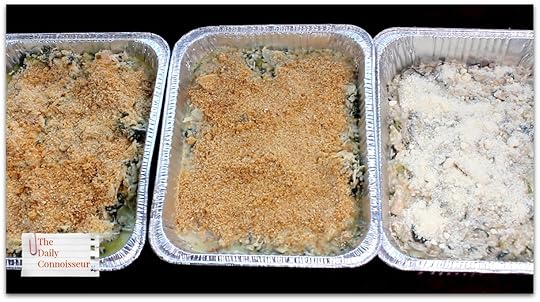
With this combination, I make three different creamy chicken casseroles that freeze well and taste even better. I essentially make three variations on the same casserole to give you options depending on what you have in your pantry. If you make these, you can feel free to make all of the same kind, or do all three that I make for variety.

I have included the printable recipes below, but first let's talk about the chicken/ vegetable base. I sautéed the chopped onion in extra virgin olive oil and added 3 large spoonfuls of minced garlic. Then I added the chopped spinach and zucchini. You can use whatever vegetables you have on hand. To this, I added my nearly 5 lbs of shredded chicken that I cooked in the Instant Pot. This provides a very large base to make your three casseroles from. I used roughly 1/3 of the chicken mixture for each casserole.

Feel free to get creative. Use whatever vegetables you like. Top these casseroles with whatever you fancy. I used toasted breadcrumbs and parmesan cheese, but you could do any type of shredded cheese.
Here I am listing the printable recipes for your convenience. Feel free to share these on Pinterest, or with your friends who could use some freezer meal inspiration!
3 Creamy Chicken Freezer Mealshttps://youtu.be/oD4Tg1U2Ifohttps://4...Yield: Serves 6Author: Jennifer L. ScottPrint RecipeWith ImageWithout Image
 Creamy Chicken Ranch Freezer Casseroleprep time: 35 minscook time: 1 hourtotal time: 1 hours and 35 mins
This is one of three freezer meals I have made using the large batch of chicken and vegetables cooked. I cooked nearly 5lbs of chicken breast and shredded it. I added it to a mixture of 2 sautéed onions, 2lbs of chopped spinach, 3 tablespoons of chopped garlic and one large chopped zucchini. You can use whatever vegetables you have on hand. For this recipe, use 1/3 of the chicken mixture.
ingredients:1/3 of the shredded chicken vegetable mixture (roughly 1 1/2 lbs of chicken)1/4 cup Ranch seasoning mix1 1/2 cups milk1 cup water1/4 cup melted butterbread crumbs for topping (toasted with a dab of melted butter)Equipment Used Aluminum baking pan (for freezing) Instant Pot (where I cooked and shredded the chicken before making this meal)instructions:Place 1/3 of the chicken vegetable mixture into a large bowl. Add the Ranch seasoning mix, milk, water, and melted butter. Stir to combine. If the mixture is too watery, add more of the chicken mixture. Transfer to a greased casserole dish or freezer pan. Top with bread crumbs that have been browned in butter. To bake the same day, bake in a 350 degree F oven for 25 minutes. To freeze, cover the casserole with aluminum foil. Label with the contents and the date. When you are ready to enjoy your freezer meal, you can thaw it the night before in the refrigerator and cook at 350 degrees F for 50 minutes. To cook from frozen, cook at 350 degrees F for 1 1/2 to 1 hour and 45 minutes. Enjoy!Please note: if you would like to make 3 of these, simple triple the seasonings and liquids and add them to the entire chicken vegetable mixture you cooked. Divide between 3 casserole dishes and freeze accordingly. Created using The Recipes Generator.recipe-inner{text-align:left;max-width:620px;border:6px double #009BFF;padding:20px;background:#f2f2f2;margin: 40px auto;font-family:Lato, sans-serif;}.recipe-keywords,.recipe-categories,.recipe-cuisine,.recipe-video{display:none;visibility:hidden;}.recipe-inner a{color: #4193f0;}#recipe .recipe-name{font-size: 21px;}#recipe .info{position:relative;font-size:13px;text-transform:capitalize;border-bottom:2px solid #000;padding-bottom:7px;margin-bottom:20px}.info:after{content:'';display:table;clear:both}#recipe .info span:first-child{margin-right:30px}#printbutton{border:0;margin:0;color:#fff;float:right;background:#555; padding:5px;border-radius:3px;cursor:pointer}#recipe .time{text-transform:uppercase;font-size:12px;text-align:center;background:#fff;padding:15px 0;margin-bottom:20px}#recipe .time span:not(:last-child){margin-right:12px}#recipe .time span:not(:last-child):after{content:'';display:inline-block;height:10px;width:1px;background:#000;vertical-align:middle;margin-left:12px}#recipe .summary{line-height:1.7;font-style:italic;font-size: 15px !important;font-family:Lato, sans-serif !important;}.ingredients,.instructions{line-height:1.7;clear:both;font-size: 15px !important;font-family: 'Roboto','Open Sans', Lato, sans-serif;}.ingredients *, .instructions * { font-size: inherit !important; font-family: inherit !important; }.ingredients h3,.instructions h3,.notes h3{font-size:20px !important;font-weight:400 !important;margin-bottom:0;color:#000;text-transform: uppercase;}.ingredients ul{margin:0!important;margin-top:5px !important;}.instructions li{margin-bottom:15px !important;line-height:1.6;text-align:left;}.ingredients li{text-align:left}#recipe .instructions{margin-top: 30px;}#recipe .instructions ol,#recipe .instructions ol li {list-style:decimal !important;}#recipe .instructions ol{padding-left:39px;margin:0!important;margin-top:6px !important;}.posturl{border-top:1px solid #ccc;padding-top:10px;}.ing-section{padding-left:20px;margin: 10px 0;}.ing-section > span{font-weight:700}.recipe-credit{font-size:13px;border-top: 1px solid #ccc;padding:10px;text-align:center;background:#ffffff;margin:-20px;margin-top:15px;}.recipe-credit a{color:blue;text-decoration:none;}.copyright-statement{font-size: 13px;font-style:italic;border-top: 1px solid #ccc;margin-top:15px;padding-top:15px;line-height:1.6;}.notes pre{font-size: 15px;margin: 10px 0;padding-left: 20px;font-family: inherit;line-height: 1.7;white-space: pre-line;}.notes h3{margin: 0}.nutrition-info{font-size: 0;margin: 20px 0;padding: 10px;background: #fff;}.nutrition-info>div {display: inline-block;font-size: 14px;width: 20%;text-align: center;}.nutrition-info>div:nth-child(5) ~ div{margin-top: 20px;}.nutrition-info>div p{margin-top: 0;margin-bottom: 7px;}.print-options {display:none;position: absolute; top: 0; right: 0; background: #fff; border: 1px solid #ccc;z-index: 1;}.show-print-options{display:block}.print-options button { display: block; background: transparent; border: 0; cursor: pointer; padding: 10px; width: 100%; text-align: left; } .print-options button:hover { background: #555; color: #fff;}.ing-section > br, .recipe-inner .time br{display: none}#recipe .image{text-align:center;margin-bottom:25px}#recipe .image img{max-width:100%}#recipe .recipe-name{line-height:1.6;text-transform:uppercase;margin-top:0;letter-spacing:1px;text-align:center;margin-bottom:20px}#recipe .time{border-top:1px dashed #000;border-bottom:1px dashed #000;border-right:0;border-left:0}#recipe .summary{margin-bottom:30px}#recipe .summary:after{content:'';display:block;width:50px;height:2px;background:#000;margin:auto;margin-top:10px}#recipe .instructions{margin-top:30px}#recipe .instructions ol{padding-left:39px;margin-top:6px}
Yield: serves 6Author: Jennifer L. ScottPrint RecipeWith ImageWithout Image
 Creamy Butter Chicken Freezer Casseroleprep time: 30 minscook time: 1 hourtotal time: 1 hours and 30 mins
This is one of three freezer meals I have made using the large batch of chicken and vegetables cooked. I cooked nearly 5lbs of chicken breast and shredded it. I added it to a mixture of 2 sautéed onions, 2lbs of chopped spinach, 3 tablespoons of chopped garlic and one large chopped zucchini. You can use whatever vegetables you have on hand. For this recipe, use 1/3 of the chicken mixture.
ingredients:1/3 of the shredded chicken/ vegetable mixture (see note above)1 1/2 cups chicken broth or stock1/4 melted butter1/3 cup all purpose flour1 cup milkchopped fresh or dried herbs to taste1 tsp salttoasted bread crumbs for toppingAluminum baking pans (handy for freezing)Instant Pot (what I used to cook and shred the chicken)instructions:In a large bowl, place 1/3 of the chicken vegetable mixture (around 1 1/2 lbs of chicken). Stir in the broth, butter, flour, milk, herbs, and salt. Stir to combine. Place in a greased casserole dish or freezer pan. Top with toasted breadcrumbs.If you plan to eat this the same day, heat in a 350 degrees F oven for 25 minutes. If you plan to freeze this, cover with aluminum foil, label your meal, and freeze. When you are ready to eat, thaw the casserole in the refrigerator the night before. Bake at 350 degrees F for 50 to 60 minutes. If baking from frozen, the time will increase to 1 1/2 hours to 1 hour 45 minutes.
If you would like to use this recipe for the entire bulk chicken you prepared, simply triple the broth, butter, flour, milk, herbs and salt. If you do that, this will make 3 large casseroles. Created using The Recipes Generator.recipe-inner{text-align:left;max-width:620px;border:6px double #009BFF;padding:20px;background:#f2f2f2;margin: 40px auto;font-family:Lato, sans-serif;}.recipe-keywords,.recipe-categories,.recipe-cuisine,.recipe-video{display:none;visibility:hidden;}.recipe-inner a{color: #4193f0;}#recipe .recipe-name{font-size: 21px;}#recipe .info{position:relative;font-size:13px;text-transform:capitalize;border-bottom:2px solid #000;padding-bottom:7px;margin-bottom:20px}.info:after{content:'';display:table;clear:both}#recipe .info span:first-child{margin-right:30px}#printbutton{border:0;margin:0;color:#fff;float:right;background:#555; padding:5px;border-radius:3px;cursor:pointer}#recipe .time{text-transform:uppercase;font-size:12px;text-align:center;background:#fff;padding:15px 0;margin-bottom:20px}#recipe .time span:not(:last-child){margin-right:12px}#recipe .time span:not(:last-child):after{content:'';display:inline-block;height:10px;width:1px;background:#000;vertical-align:middle;margin-left:12px}#recipe .summary{line-height:1.7;font-style:italic;font-size: 15px !important;font-family:Lato, sans-serif !important;}.ingredients,.instructions{line-height:1.7;clear:both;font-size: 15px !important;font-family: 'Roboto','Open Sans', Lato, sans-serif;}.ingredients *, .instructions * { font-size: inherit !important; font-family: inherit !important; }.ingredients h3,.instructions h3,.notes h3{font-size:20px !important;font-weight:400 !important;margin-bottom:0;color:#000;text-transform: uppercase;}.ingredients ul{margin:0!important;margin-top:5px !important;}.instructions li{margin-bottom:15px !important;line-height:1.6;text-align:left;}.ingredients li{text-align:left}#recipe .instructions{margin-top: 30px;}#recipe .instructions ol,#recipe .instructions ol li {list-style:decimal !important;}#recipe .instructions ol{padding-left:39px;margin:0!important;margin-top:6px !important;}.posturl{border-top:1px solid #ccc;padding-top:10px;}.ing-section{padding-left:20px;margin: 10px 0;}.ing-section > span{font-weight:700}.recipe-credit{font-size:13px;border-top: 1px solid #ccc;padding:10px;text-align:center;background:#ffffff;margin:-20px;margin-top:15px;}.recipe-credit a{color:blue;text-decoration:none;}.copyright-statement{font-size: 13px;font-style:italic;border-top: 1px solid #ccc;margin-top:15px;padding-top:15px;line-height:1.6;}.notes pre{font-size: 15px;margin: 10px 0;padding-left: 20px;font-family: inherit;line-height: 1.7;white-space: pre-line;}.notes h3{margin: 0}.nutrition-info{font-size: 0;margin: 20px 0;padding: 10px;background: #fff;}.nutrition-info>div {display: inline-block;font-size: 14px;width: 20%;text-align: center;}.nutrition-info>div:nth-child(5) ~ div{margin-top: 20px;}.nutrition-info>div p{margin-top: 0;margin-bottom: 7px;}.print-options {display:none;position: absolute; top: 0; right: 0; background: #fff; border: 1px solid #ccc;z-index: 1;}.show-print-options{display:block}.print-options button { display: block; background: transparent; border: 0; cursor: pointer; padding: 10px; width: 100%; text-align: left; } .print-options button:hover { background: #555; color: #fff;}.ing-section > br, .recipe-inner .time br{display: none}#recipe .image{text-align:center;margin-bottom:25px}#recipe .image img{max-width:100%}#recipe .recipe-name{line-height:1.6;text-transform:uppercase;margin-top:0;letter-spacing:1px;text-align:center;margin-bottom:20px}#recipe .time{border-top:1px dashed #000;border-bottom:1px dashed #000;border-right:0;border-left:0}#recipe .summary{margin-bottom:30px}#recipe .summary:after{content:'';display:block;width:50px;height:2px;background:#000;margin:auto;margin-top:10px}#recipe .instructions{margin-top:30px}#recipe .instructions ol{padding-left:39px;margin-top:6px}
3 Creamy Chicken Freezer Mealshttps://youtu.be/oD4Tg1U2Ifohttps://4...Yield: serves 4 to 6Author: Jennifer L. ScottPrint RecipeWith ImageWithout Image
 Creamy Mushroom Chicken Freezer Casseroleprep time: 30 minscook time: 1 hourtotal time: 1 hours and 30 mins
This is one of three freezer meals I have made using the large batch of chicken and vegetables cooked. I cooked nearly 5lbs of chicken breast and shredded it. I added it to a mixture of 2 sautéed onions, 2lbs of chopped spinach, 3 tablespoons of chopped garlic and one large chopped zucchini. You can use whatever vegetables you have on hand. For this recipe, use 1/3 of the chicken mixture.
ingredients:1/3 of the chicken vegetable mixture (see the note above)1 can of cream of mushroom soup, undiluted1 cup chicken broth1 tablespoon melted butter1 tsp saltpepper to taste2 teaspoons paprika grated parmesan cheese for toppingEquipment UsedInstant Pot is how I cooked and shredded the chickenAluminum freezer pans instructions:In a large bowl, place the remaining chicken/ vegetable mixture (roughly 1/3 of the mixture. Add the cream of mushroom soup, chicken broth, butter, salt, pepper, and paprika. Mix to combine. Transfer the casserole to a dish. Top with grated parmesan cheese. (You can also top with bread crumbs.) Cook at 350 degrees F for 25 minutes.If you are planning on freezing this, cover with aluminum foil and label. Freeze. When ready to eat, thaw in the refrigerator overnight and then cook at 350 degrees F for 50 to 60 minutes. If cooking from frozen, cook for 1 1/2 hours to 1 hour 45 minutes.
If you plan on making three of this casserole, simply use all of the chicken vegetable mixture, and triple the rest of the ingredients (i.e. 3 cans of cream of mushroom soup, 3 cups of broth, etc.)
Created using The Recipes Generator.recipe-inner{text-align:left;max-width:620px;border:6px double #009BFF;padding:20px;background:#f2f2f2;margin: 40px auto;font-family:Lato, sans-serif;}.recipe-keywords,.recipe-categories,.recipe-cuisine,.recipe-video{display:none;visibility:hidden;}.recipe-inner a{color: #4193f0;}#recipe .recipe-name{font-size: 21px;}#recipe .info{position:relative;font-size:13px;text-transform:capitalize;border-bottom:2px solid #000;padding-bottom:7px;margin-bottom:20px}.info:after{content:'';display:table;clear:both}#recipe .info span:first-child{margin-right:30px}#printbutton{border:0;margin:0;color:#fff;float:right;background:#555; padding:5px;border-radius:3px;cursor:pointer}#recipe .time{text-transform:uppercase;font-size:12px;text-align:center;background:#fff;padding:15px 0;margin-bottom:20px}#recipe .time span:not(:last-child){margin-right:12px}#recipe .time span:not(:last-child):after{content:'';display:inline-block;height:10px;width:1px;background:#000;vertical-align:middle;margin-left:12px}#recipe .summary{line-height:1.7;font-style:italic;font-size: 15px !important;font-family:Lato, sans-serif !important;}.ingredients,.instructions{line-height:1.7;clear:both;font-size: 15px !important;font-family: 'Roboto','Open Sans', Lato, sans-serif;}.ingredients *, .instructions * { font-size: inherit !important; font-family: inherit !important; }.ingredients h3,.instructions h3,.notes h3{font-size:20px !important;font-weight:400 !important;margin-bottom:0;color:#000;text-transform: uppercase;}.ingredients ul{margin:0!important;margin-top:5px !important;}.instructions li{margin-bottom:15px !important;line-height:1.6;text-align:left;}.ingredients li{text-align:left}#recipe .instructions{margin-top: 30px;}#recipe .instructions ol,#recipe .instructions ol li {list-style:decimal !important;}#recipe .instructions ol{padding-left:39px;margin:0!important;margin-top:6px !important;}.posturl{border-top:1px solid #ccc;padding-top:10px;}.ing-section{padding-left:20px;margin: 10px 0;}.ing-section > span{font-weight:700}.recipe-credit{font-size:13px;border-top: 1px solid #ccc;padding:10px;text-align:center;background:#ffffff;margin:-20px;margin-top:15px;}.recipe-credit a{color:blue;text-decoration:none;}.copyright-statement{font-size: 13px;font-style:italic;border-top: 1px solid #ccc;margin-top:15px;padding-top:15px;line-height:1.6;}.notes pre{font-size: 15px;margin: 10px 0;padding-left: 20px;font-family: inherit;line-height: 1.7;white-space: pre-line;}.notes h3{margin: 0}.nutrition-info{font-size: 0;margin: 20px 0;padding: 10px;background: #fff;}.nutrition-info>div {display: inline-block;font-size: 14px;width: 20%;text-align: center;}.nutrition-info>div:nth-child(5) ~ div{margin-top: 20px;}.nutrition-info>div p{margin-top: 0;margin-bottom: 7px;}.print-options {display:none;position: absolute; top: 0; right: 0; background: #fff; border: 1px solid #ccc;z-index: 1;}.show-print-options{display:block}.print-options button { display: block; background: transparent; border: 0; cursor: pointer; padding: 10px; width: 100%; text-align: left; } .print-options button:hover { background: #555; color: #fff;}.ing-section > br, .recipe-inner .time br{display: none}#recipe .image{text-align:center;margin-bottom:25px}#recipe .image img{max-width:100%}#recipe .recipe-name{line-height:1.6;text-transform:uppercase;margin-top:0;letter-spacing:1px;text-align:center;margin-bottom:20px}#recipe .time{border-top:1px dashed #000;border-bottom:1px dashed #000;border-right:0;border-left:0}#recipe .summary{margin-bottom:30px}#recipe .summary:after{content:'';display:block;width:50px;height:2px;background:#000;margin:auto;margin-top:10px}#recipe .instructions{margin-top:30px}#recipe .instructions ol{padding-left:39px;margin-top:6px}
I hope you enjoy the recipes featured in today's video.
News

Check out my interview on Dina Cataldo's Soul Roadmap podcast. We discuss all things Madame Chic and life after Paris.
Thank you to everyone who continues to take and comment on my eCourses, Create Your Own Ten-Item Wardrobe, and Chic Financial Principles for Debt-Free Living. I really enjoy connecting with you over these courses.
On Instagram
Polish Your Poise with Madame Chic in Poland...
A post shared by Minimalistic Girl (@minimalisticgirlblog) on May 10, 2018 at 10:44pm PDT
Comment of the Week
On last week's Natural Home with Jennifer video, Marielle writes, "Hi Jennifer, Thank you for using non-toxic products to clean your oven. A very easy way to clean the oven racks is to put one or two large towels on the bottom of your bathtub and put the oven racks on the towels to avoid scratching your bathtub. Cover the oven racks with very hot water and add 1/2 cup of dish soap or 3/4 cup of laundry detergent. Let everything soak overnight. Then, simply wipe the oven racks clean. The dirt, grease and grime will come right off without any scrubbing. If you want the exact method, you can Google it up and you will find it right away. Since discovering this method several years ago, that’s the way I clean my oven racks and it saves me a lot of time and energy."
What a great tip. Thank you, Marielle!
I hope you enjoyed today's freezer cooking video. I'll see you on Thursday for a reader Q&A...
Visit my Author Website
*New* Shop my favorite things
Facebook facebook.com/JenniferLScottAuthor
Twitter @JL_Scott
Instagram @dailyconnoisseur
Take my eCourse on the Ten-Item Wardrobe
Take my eCourse Chic Financial Principles for Debt-Free Living
Sign up for my Seasonal Author Newsletter
FTC: This is not a sponsored post. All opinions are my own. This post may contain affiliate links.


October 5, 2018
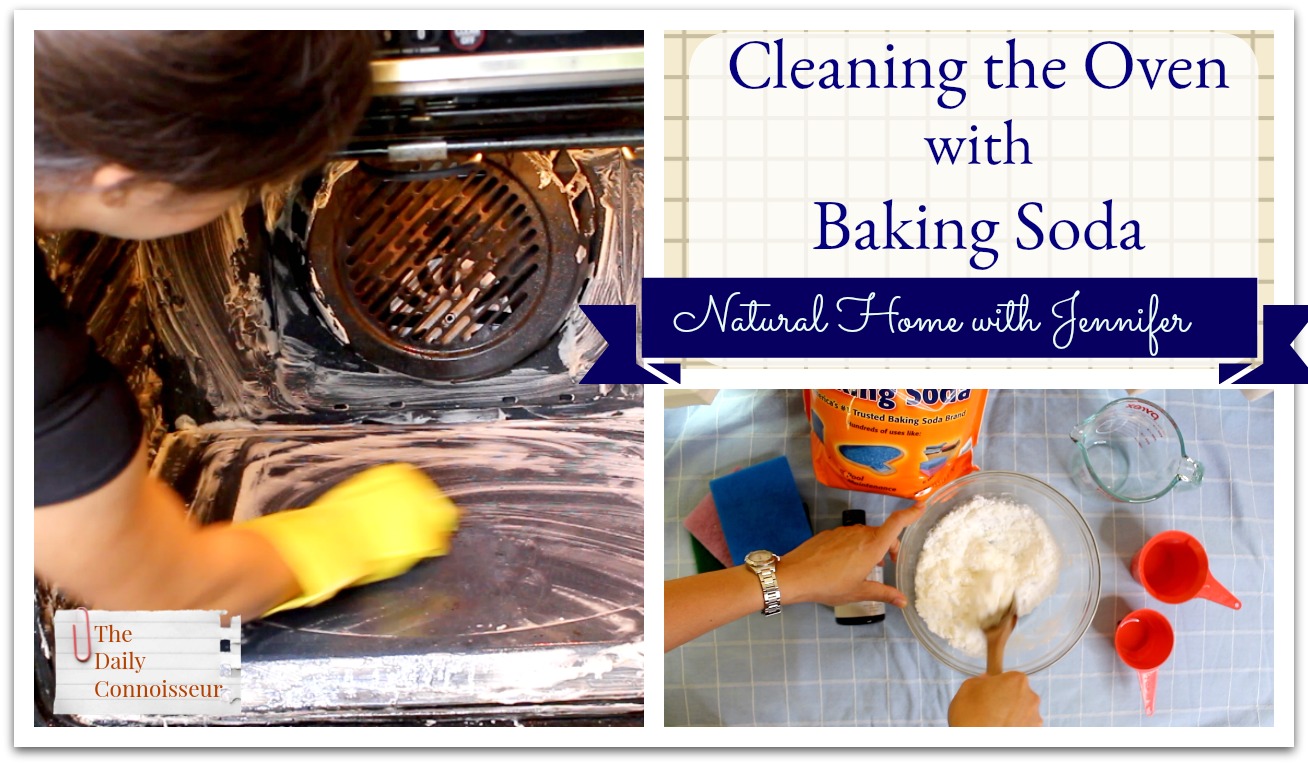
Cleaning the Oven with Baking Soda | Natural Home with Jennifer
If you cook at home a lot like we do, your oven can get dirty, really fast. After a few seasons of baking and roasting, our oven was covered with grease and stains.
When we bought our house last year we inherited all of the appliances, which were heavily used and around 14 years old. Our oven is partially broken- the convection feature does not work and neither does the self-cleaning feature. Because of this, I clean my oven by hand. Of course, I like to use the most natural ingredients to clean it since our food is cooked in there.
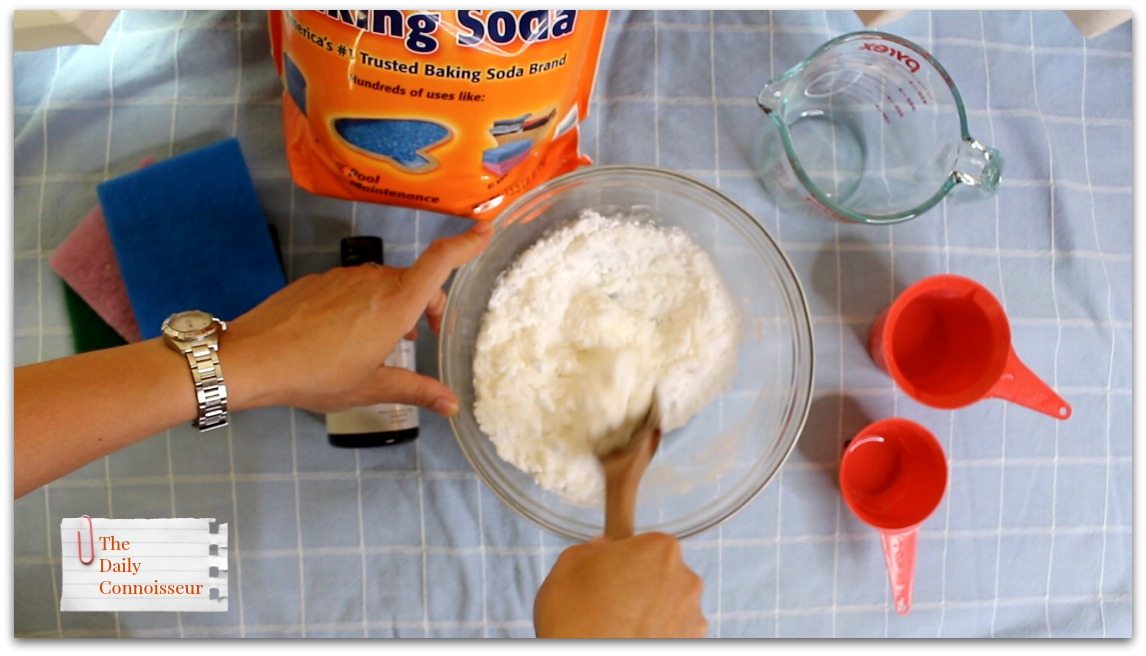
Today, I'm sharing my simple baking soda paste recipe with you. It uses baking soda, water, and Castile soap. Castile soap is a very natural, all-purpose soap that you can find anywhere. One of the most popular Castile soap brands is Dr. Bronner's (which I have used in the past... it's great!). Today, I'm using the lavender Castile soap from Grove Collaborative. I received it as a free gift this summer for being a VIP member with Grove. Their Castile soap is great too and has a refreshing lavender scent.
Here is my Baking Soda paste recipe:
Author: Jennifer L. ScottPrint RecipeWith ImageWithout Image
 Baking Soda Paste for Cleaning
This multi-purpose cleaning paste is all-natural and uses ingredients you likely already have in your pantry.
ingredients:2 cups baking soda1/2 cup liquid Castile soap1/2 cup waterinstructions:Mix all ingredients together. Use this for all of your natural cleaning needs.Created using The Recipes Generator.recipe-inner{text-align:left;max-width:620px;border:6px double #009BFF;padding:20px;background:#f2f2f2;margin: 40px auto;font-family:Lato, sans-serif;}.recipe-keywords,.recipe-categories,.recipe-cuisine,.recipe-video{display:none;visibility:hidden;}.recipe-inner a{color: #4193f0;}#recipe .recipe-name{font-size: 21px;}#recipe .info{position:relative;font-size:13px;text-transform:capitalize;border-bottom:2px solid #000;padding-bottom:7px;margin-bottom:20px}.info:after{content:'';display:table;clear:both}#recipe .info span:first-child{margin-right:30px}#printbutton{border:0;margin:0;color:#fff;float:right;background:#555; padding:5px;border-radius:3px;cursor:pointer}#recipe .time{text-transform:uppercase;font-size:12px;text-align:center;background:#fff;padding:15px 0;margin-bottom:20px}#recipe .time span:not(:last-child){margin-right:12px}#recipe .time span:not(:last-child):after{content:'';display:inline-block;height:10px;width:1px;background:#000;vertical-align:middle;margin-left:12px}#recipe .summary{line-height:1.7;font-style:italic;font-size: 15px !important;font-family:Lato, sans-serif !important;}.ingredients,.instructions{line-height:1.7;clear:both;font-size: 15px !important;font-family: 'Roboto','Open Sans', Lato, sans-serif;}.ingredients *, .instructions * { font-size: inherit !important; font-family: inherit !important; }.ingredients h3,.instructions h3,.notes h3{font-size:20px !important;font-weight:400 !important;margin-bottom:0;color:#000;text-transform: uppercase;}.ingredients ul{margin:0!important;margin-top:5px !important;}.instructions li{margin-bottom:15px !important;line-height:1.6;text-align:left;}.ingredients li{text-align:left}#recipe .instructions{margin-top: 30px;}#recipe .instructions ol,#recipe .instructions ol li {list-style:decimal !important;}#recipe .instructions ol{padding-left:39px;margin:0!important;margin-top:6px !important;}.posturl{border-top:1px solid #ccc;padding-top:10px;}.ing-section{padding-left:20px;margin: 10px 0;}.ing-section > span{font-weight:700}.recipe-credit{font-size:13px;border-top: 1px solid #ccc;padding:10px;text-align:center;background:#ffffff;margin:-20px;margin-top:15px;}.recipe-credit a{color:blue;text-decoration:none;}.copyright-statement{font-size: 13px;font-style:italic;border-top: 1px solid #ccc;margin-top:15px;padding-top:15px;line-height:1.6;}.notes pre{font-size: 15px;margin: 10px 0;padding-left: 20px;font-family: inherit;line-height: 1.7;white-space: pre-line;}.notes h3{margin: 0}.nutrition-info{font-size: 0;margin: 20px 0;padding: 10px;background: #fff;}.nutrition-info>div {display: inline-block;font-size: 14px;width: 20%;text-align: center;}.nutrition-info>div:nth-child(5) ~ div{margin-top: 20px;}.nutrition-info>div p{margin-top: 0;margin-bottom: 7px;}.print-options {display:none;position: absolute; top: 0; right: 0; background: #fff; border: 1px solid #ccc;z-index: 1;}.show-print-options{display:block}.print-options button { display: block; background: transparent; border: 0; cursor: pointer; padding: 10px; width: 100%; text-align: left; } .print-options button:hover { background: #555; color: #fff;}.ing-section > br, .recipe-inner .time br{display: none}#recipe .image{text-align:center;margin-bottom:25px}#recipe .image img{max-width:100%}#recipe .recipe-name{line-height:1.6;text-transform:uppercase;margin-top:0;letter-spacing:1px;text-align:center;margin-bottom:20px}#recipe .time{border-top:1px dashed #000;border-bottom:1px dashed #000;border-right:0;border-left:0}#recipe .summary{margin-bottom:30px}#recipe .summary:after{content:'';display:block;width:50px;height:2px;background:#000;margin:auto;margin-top:10px}#recipe .instructions{margin-top:30px}#recipe .instructions ol{padding-left:39px;margin-top:6px}If you clean your oven with baking soda, please remember a few things: always read your oven manual before cleaning your oven. Never put the cleaning solution on the heating rods, leave those alone. I tend to just scrub the areas that have collected grease and stains and avoid the heating rods entirely. Never use too much water to wipe out the baking soda.
[image error] [image error]
I use the Grove Collaborative lavender liquid Castile soap, which cleans well and has a wonderful scent.

I'm also linking the Dr. Bronner's liquid Castile soap in lavender, from Amazon, which is another great brand that I have used in the past.
Before applying the paste and letting it sit, I vacuum out all of the larger crumbs with our wet dry vac.
[image error] [image error]
Once the paste is applied, it's best to let it sit for as long as you can (overnight is ideal). In this video, I only let it sit for two hours because I had limited time, but as you can see with the results, it worked wonders to get the greasy stains out.
I hope you enjoy today's video and feel encouraged to clean your home with natural ingredients that you probably already have on hand.
Thank you for watching. Today, I would love to know how you clean your oven...
Have a wonderful weekend and I'll see you on Monday!
Visit my Author Website
*New* Shop my favorite things
Facebook facebook.com/JenniferLScottAuthor
Twitter @JL_Scott
Instagram @dailyconnoisseur
Take my eCourse on the Ten-Item Wardrobe
Take my eCourse Chic Financial Principles for Debt-Free Living
Sign up for my Seasonal Author Newsletter
FTC: This is not a sponsored post. All opinions are my own. This post contains affiliate links.
October 4, 2018
Fall Le No Makeup Look | Tired Mom Edition | Jennifer L. Scott

When you've only had four hours of sleep and you'd like to look rested, what do you turn to? Le No Makeup Look, of course! In today's video, I share my le no makeup look for fall: tired mom edition! I include a few tips on how to look awake when you are anything but.
I hope you enjoy today's video.

Before I even think about makeup, I think about coffee. I drink mine in an insulated cup because it takes me forever to finish my morning cup. Does anyone else have that problem?
[image error] [image error]
And now on to the makeup used...
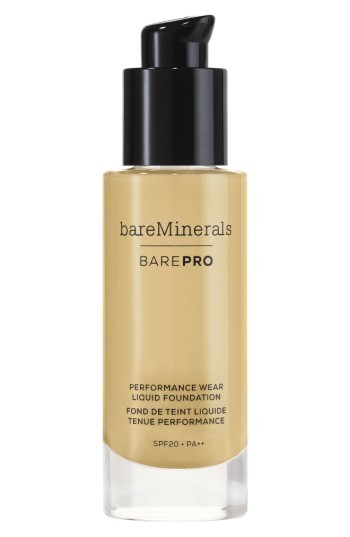
BarePro Performance Wear Liquid Foundation in Sandstone 16


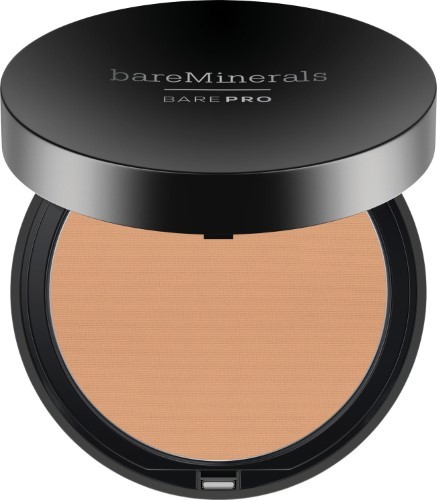
bareMinerals Bare pro Performance Wear Powder Foundation, Sandstone

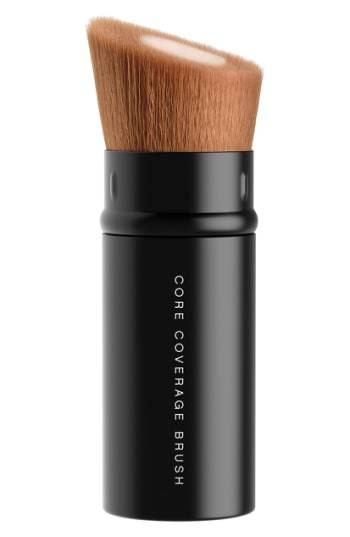
bare Minerals Core Coverage Brush

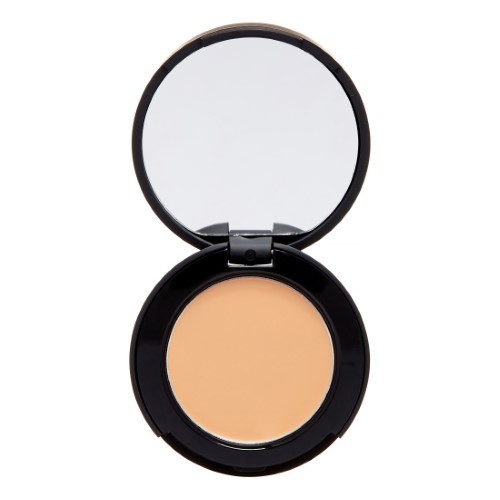
bareMinerals Correcting Concealer Broad Spectrum SPF 20, Medium 2, 0.07 Oz

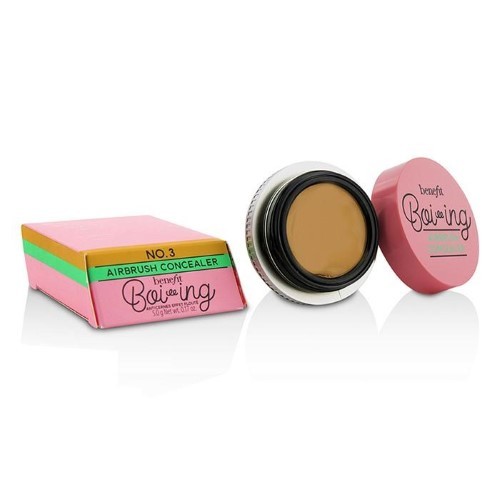
Benefit Boi ing Airbrush Concealer - # 03 (Medium) 5g/0.17oz

My eyeshadow palette was the one by Kate that I purchased in Japan (but is available on Amazon).
[image error] [image error]
L'Oreal Voluminous Primer Mascara
[image error] [image error]
L'Oreal Paris Voluminous mascara in deep burgundy.
[image error] [image error]
Also used: bare Minerals blush in thistle, Chanel eyeliner in ambre.
The lip gloss is bare Minerals in hype
On my nails, Londontown's Jane Austen. (Use code JenniferS for 25% off your order with Londontown).
My earrings are by Ana Luisa. Use code Jennifer15 to get $15 off your first order.
News
I was a guest on Dina Cataldo's Soul Roadmap Podcast. We discussed all things Madame Chic and Paris. I hope you enjoy my interview!
Robin from Faith and Flour YouTube channel shares her fall Ten-Item Wardrobe. Be sure to check out her video and tell her I said, "hello". Thank you, Robin!
Thank you to everyone who continues to take and comment on my eCourses, Create Your Own Ten-Item Wardrobe, and Chic Financial Principles for Debt-Free Living. I really enjoy connecting with you over these courses.
On Instagram
Madame Chic in Poland...
View this post on Instagram
October 1, 2018
Our Birth Story | 4th Baby | Natural Birth

It's wonderful to be back on the blog. Thank you to everyone for your well-wishes after we had the baby. I have thoroughly enjoyed the past few weeks as we got to know the newest member of our family.
I'm excited to share the birth story with you in today's video. It is very raw, honest, and even funny at times! That is family life!

View this post on InstagramA post shared by Jennifer L. Scott (@dailyconnoisseur) on Sep 8, 2018 at 10:27am PDT
After initially being turned away at the hospital, I gave birth 13 hours later. Our son came so quickly there was no time to get an epidural. This was my first 'natural' birth without an epidural. I could have made it into an episode of Natural Home with Jennifer! (just kidding) :)
View this post on InstagramA post shared by Jennifer L. Scott (@dailyconnoisseur) on Sep 16, 2018 at 10:24am PDT
In today's video I share what I said while delivering (I scared Mr. Connoisseur a bit), and the whole experience from start to finish. Ultimately, I am so happy that our baby boy was born healthy and that I was able to quickly recover.
Childbirth is such a special, beautiful, and individual experience. I'd love to hear from you. What were your experiences giving birth? What funny things did you say while you were delivering your baby (ies)? Let us know and your comment could be chosen as comment of the week on the blog.
Mentioned in the video
My plan for getting back into shape involves walking everyday, and eventually getting back on the rebounder. Everyone else in my family uses the rebounder and I can't wait to get back on!
Also, I frequently get questions about what nail color I am wearing. In today's video, I'm wearing the beautiful Jane Austen color from Londontown. (Use code JenniferS for 25% off your order with Londontown).
On Instagram
A beautiful shot of the Madame Chic books...
Feeling very ‘chic’ this Monday morning after finishing the last Madame Chic book last night
September 14, 2018
Pregnancy Updates | Skin + Diet | & Going on Maternity Leave

In today's final video before going on maternity leave, I share a brief update for skin, diet, and how I was doing at the end of the pregnancy.
This video was shot three days before I gave birth. Those of you who follow me on Instagram know that I delivered last week, a healthy baby boy! We are so thrilled with our little man.
View this post on InstagramA post shared by Jennifer L. Scott (@dailyconnoisseur) on Sep 8, 2018 at 10:27am PDT
I plan to take a few weeks off from the blog and channel to spend more time with my family. When I return, I look forward to sharing the birth story with you, as well as kicking off a new fall season on The Daily Connoisseur.
If you miss the blog while I'm away, and you haven't taken one of my eCourses yet, consider doing so. Create Your Own Ten-Item Wardrobe and Chic Financial Principles for Debt-Free Living are my two courses.

They are packed with hours of video instruction, notes, and quizzes, plus a lively comment section with other fellow daily connoisseurs. There is a wonderful community over there. I also try to actively engage with every student who leaves questions and comments.

Here are some testimonials on the eCourses:
This course was amazing! I am debt-free, but you have inspired me to save more, love my home life, be happy with what I already have, etc. Thank you, Jennifer! Everything you produce is of such a high quality and truly gives so much value to your audience. I am looking forward to your next course! -Nora
I so appreciate you and the financial e-course! I loved the encouragement and can do attitude!! I encourage everyone to take it, the quizzes at the end of each lecture were fun and helpful!!! - Laura
I'm a long time subscriber and just want to say how much I enjoyed this course! I really like the direction your channel is going in while maintaining your chic sensibility. Thank you for all the great work you do. -DeAnna
I have enjoyed the course and your blog. It has helped me tremendously as I down size my wardrobe and home. Thank you! - Mary Ann
Jennifer, thank you so much for your time, advice, and inspiration. I've gained a lot by taking this course and am even sad that it has ended. I know I will revisit lectures when I need a refresher. I also know I will come back and update on any new debt-free milestones I may reach in hopes that it will inspire others. God bless! - Melissa
WOW! What can I say that others haven't?! It has been a pleasure watching this course other the last few days. It has been an eye opener for sure. The exercise at the beginning to open up and share your debt story. That was a first for me. I never comment on anything and I have felt such appreciation throughout this course, that I couldn't hold back from commenting. I will be doing my best to apply all your principles and tips. All the best to all your course attendees and a HUGE thank you to you, Jennifer. -Candice
Jennifer, thank you so much for this course. Your books and vlog have improved my life in so many ways! I'm struggling to create my Ten-Item Wardrobe but with your help I've cleaned out my closet and discovered my personal style. -Terri
I just completed your e course on Chic finances and it’s incredible! Thank you for sharing your wisdom and inspiration- it’s a course where everyone can get something great that will improve their life and their finances. I love your “Yes, we can do this AND live well,” mindset, Jennifer. You’re a treasure! -
tandcocoapuff
These are just a few of the amazing testimonials that have come from the eCourses. Thank you to everyone who has joined us in the connoisseur community over there.
I appreciate each and every one of you who reads this blog and watches my videos. Thank you for your support. I look forward to returning to you soon. Until next time, as Lucia would say, *Au Reservoir* :)
With love,
Jennifer
Visit my Author Website
*New* Shop my favorite things
Facebook facebook.com/JenniferLScottAuthor
Twitter @JL_Scott
Instagram @dailyconnoisseur
Take my eCourse on the Ten-Item Wardrobe
Take my eCourse Chic Financial Principles for Debt-Free Living
Sign up for my Seasonal Author Newsletter
FTC: This is not a sponsored post. All opinions are my own. This post contains affiliate links.
September 13, 2018
What's In My Hospital Bag? | Baby #4 | Jennifer L. Scott

By request, I'm sharing what's in my hospital bag in today's video.
I shot this video over Labor Day weekend before I delivered the baby. Those of you who follow me on Instagram know that I gave birth three weeks early to our sweet baby boy! I sure am glad I had my hospital bag packed and ready :)
View this post on InstagramA post shared by Jennifer L. Scott (@dailyconnoisseur) on Sep 8, 2018 at 10:27am PDT
This is my fourth labor and delivery and I have found that you really do not need to bring much to the hospital. A special outfit for the baby, plus a few comfortable onesies (some prefer to bring a tee shirt for the baby, instead of a onesie, to not irritate the umbilical chord/ belly button), socks, pants, and a hat are nice to have. I also bring swaddling cloths as well. You can also bring newborn diapers, although they have always provided them for us in the hospital.

As for mama, I like to bring reading materials, presentable pajamas, and two outfits to wear. Additionally I pack minimal toiletries, socks, undergarments (nursing bra and suitable underwear), and a small bag of makeup. Although, I always add a bit of eccentricity to things, so I'm also bringing an Amish cookbook and a shirt for my husband, who doesn't like to pack bags. :)
For your reference, I am listing and linking (where I can) everything that I am bringing below. I would love to know, if you had hospital births, what you found helpful to bring in your hospital bag. Please let us know in the comment section so other future mothers can benefit from your advice.
(Please note: I wrote this post before delivering the baby, which explains the tenses used :) )
[image error] [image error]
Kindle I have always had a lot of downtime during my hospital stays so I like to come equipped with lots of reading material, which is conveniently stored on my kindle.
Aden + Anais swaddle cloths I have a lot of these and I find them to be essential. The ones I show in the video are years old and I can't find the exact pattern, but I have linked the newest ones they have.
Navy dot dress This is one of the new dresses I featured in my recent ten-item wardrobe prep video.
Hello Miz nursing top was purchased from zulily and fold-over black knit skirt This combination is comfortable, nursing-friendly and presentable.

nursing nightgown 2-pack with built-in bras These nightgowns are fantastic for their built-in nursing bra. I will cover them with the dressing gown (listed below) or oversized sweater robe. *Update* these were fantastic in the hospital. I only stayed one night, so I wore the black one. It was perfect for what I needed.

navy dressing gown (robe) with lace trim This is a great dressing gown. Very simple and presentable with a lace trim.
nursing coverup with wire I've had this nursing coverup since my first child was born and find it necessary for when visitors are around while nursing. They no longer make the exact pattern I have, but I have linked the most similar one.
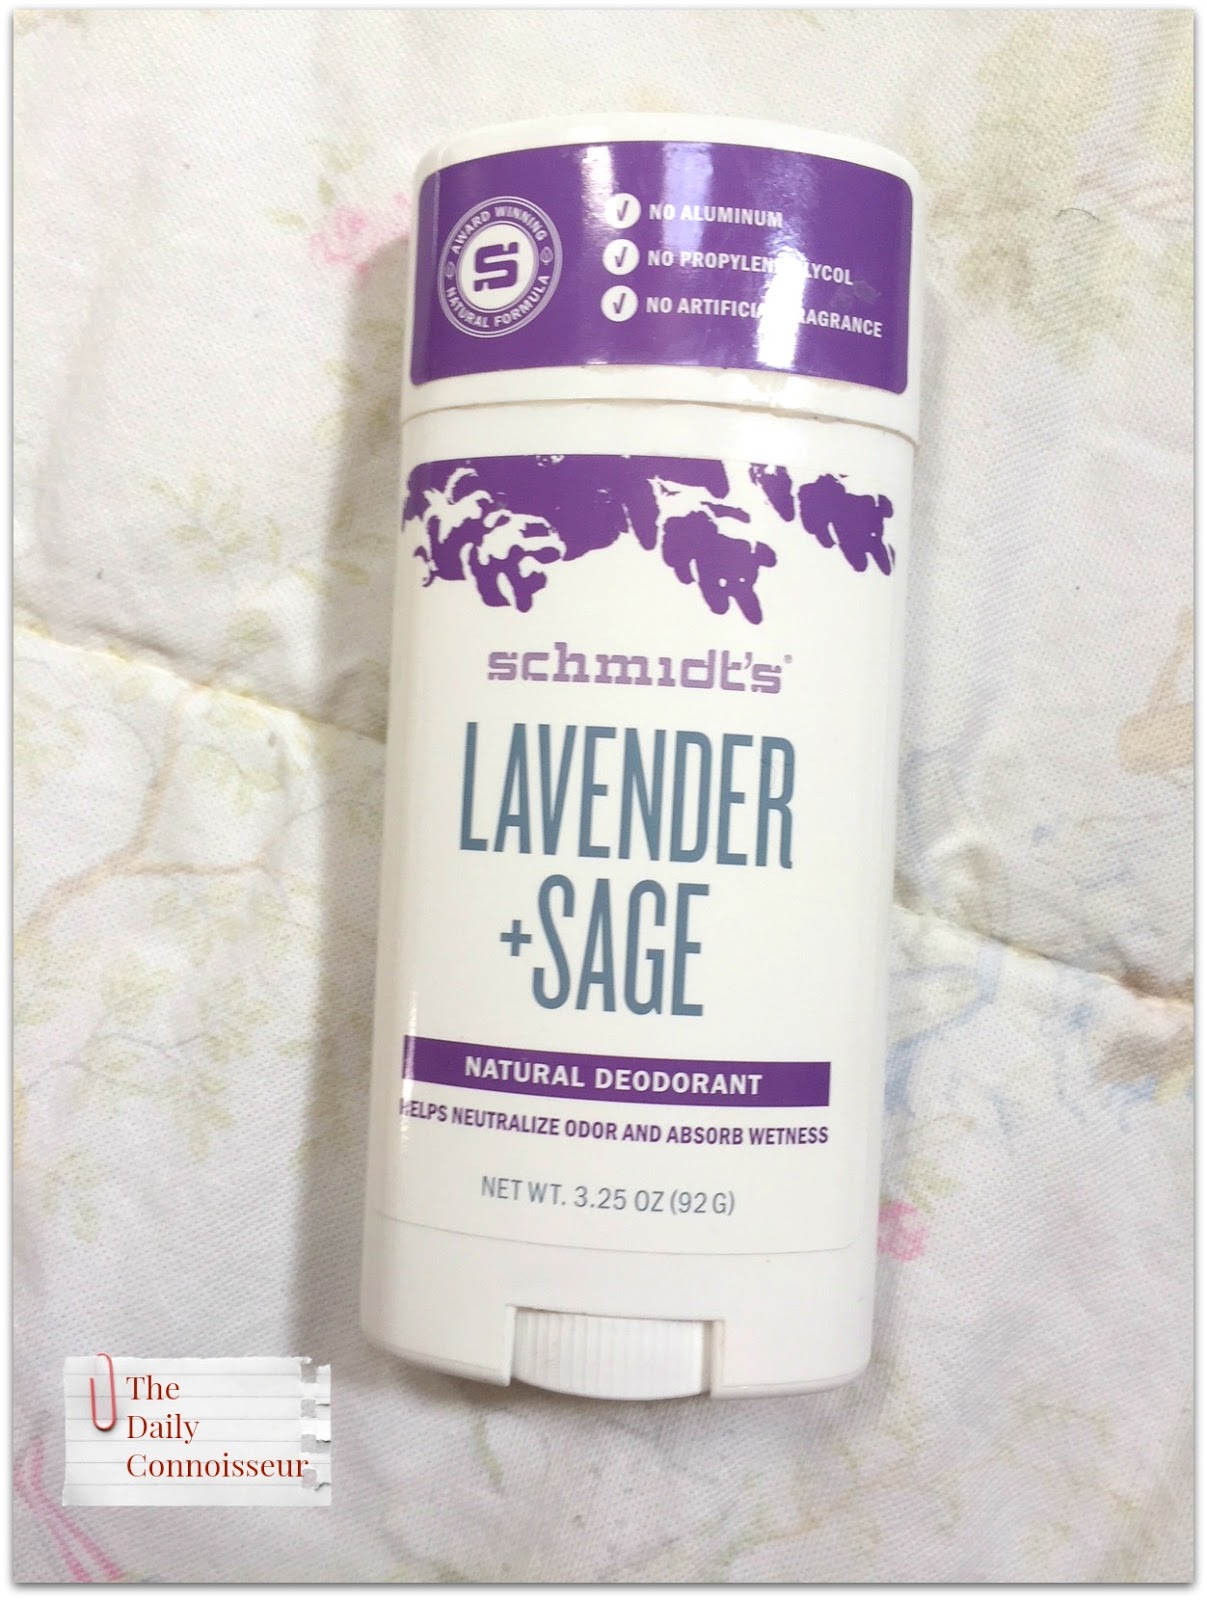
Schmidt's deodorant 2-pack on Amazon (I purchased my deodorant on Grove) This is a great natural deodorant that I have reviewed on a past Natural Home with Jennifer .

Pellu skincare I love this natural skincare line. I have reviewed it in the past (it used to be called Nudu, they changed their name to Pellu). I plan to bring the cream cleanser and day moisturizer.

Bend Soap coconut goat milk lotion (if you order from them, enter code DC10 at checkout for 10% off). I suffer from dry skin and I love this goat milk lotion and recently reviewed it. The coconut scent is so nice. *Please note: I also packed a travel size goat milk soap from Bend. I forgot to pack it before shooting this video. Bringing soap is essential. The hospital soap is very lacking.
For links to the bare Minerals makeup, visit my bare minerals haul blog
Chanel Les Beiges stick (no. 21) I'm bringing this blush because it doesn't require a brush applicator and is easy to apply.
bare Minerals Gen Nude eyeshadow primer in low key and basic These primer/ eyeshadows are easy to apply without a brush too. This helps with my minimal packing goal.
**Update** I didn't wear much makeup in the hospital this time, just concealer and lip balm, but in past hospital trips I did apply makeup. I attribute that to the condition of my skin. I barely had any melasma this time around so I didn't feel the need to cover it up. For all my past pregnancies, my melasma had been very heavy.
[image error] [image error]
Lansinoh nursing pads (a must!) These nursing pads are an absolute must. I find I use them everyday for at least the first four months after postpartum, to prevent leaks. You might not need these in the hospital as it takes a few days for your milk supply to come in. But it's better to be prepared by bringing a few and having them ready at home.
honey belle lip balm When I forget to pack lip balm, I am miserable as my lips can get really dry. This Eucalyptus lip balm is so nice and natural.
I'm also bringing baby clothes, one outfit for returning home from the hospital, and two onesies with two footed pants. For more on the baby and delivery, stay tuned for my delivery story, which I will do in a future post.
On my nails: Londontown Jane Austen. This color has bumped Essie Mademoiselle aside. I absolutely love this opaque neutral. Londontown always give my readers a discount. Use code JenniferS for 25% off your order.
I hope you enjoy today's video. Plus, Mr. Connoisseur's appearance. :)
News
I'll be going on maternity leave soon. If you will miss the blog, consider taking one of my eCourses, Create Your Own Ten-Item Wardrobe and Chic Financial Principles for Debt-Free Living. Packed with hours of video instruction, accompanying text, quizzes, and a lively comment section, you have a wonderful community of support with other fellow connoisseurs.
On Instagram
Lessons from Madame Chic in Russia...
Увидела эту книгу у @avapuha и стало любопытно, что это за такая Мадам Шик и какие у неё секреты
September 10, 2018
Londontown 9-Free Nail Polish Unboxing | FW 2018-2019 | Jennifer L. Scott

Thank you so much to everyone for your well-wishes about the baby. We had our baby last week and we have had such a wonderful weekend. I have a few blogs and videos that I pre-recorded from before the birth, including today's video, that I will publish this week. After that, I will go on a brief maternity leave from the blog. When I return, I will definitely share a video about our birth story. Thank you, again, for your wonderful wishes on social media after we announced the birth of our baby boy.
In today's video, I'm doing an unboxing of Londontown's fall/ winter collection for 2018/ 2019. This is a gorgeous collection with unique colors. I've been wearing them for the past few weeks and many of you have asked about my nail colors so here they are. Londontown love The Daily Connoisseur readers and are generously offering 25% off your order when you use the code JenniferS.

I love Londontown's nail polishes because they have Florium Complex enriching botanicals infused into their beautiful colors, which are also 9-free, cruelty-free, and vegan.
What does 9-free mean? It means that the polishes are free of 9 potentially harmful chemicals: formaldehyde, camphor, toluene, DBP (dibutyl pthalate and phthalates), formaldehyde resin, xylene, ethyl tosylamide, parabens, and lead.

They have a new brush in their latest collection, which makes application even easier. I can honestly say that my nail polish lasts 7 to 10 days without a chip. They are high-quality colors.

Iconic is a bold and vibrant electric blue...

Kissed by Rose Gold is a gorgeous metallic rose gold color. It's beautiful...

Jane Austen is a light pink toned lavender crème fit for a heroine. This was the color I was wearing when I delivered our baby. It's so pretty!

Vendetta is a deep scarlet red hinted with a slight blue undertone.
I would love to know what your favorite color is from Londontown's fall/ winter collection.
I hope you enjoyed today's video. Thank you to Londontown for your generous discount code for the readers of The Daily Connoisseur.
I'll see you on Thursday for a What's In My Hospital Bag? video. Thankfully, I packed my hospital bag early because I sure did need it! :) See you then.
With love,
Jennifer
Visit my Author Website
*New* Shop my favorite things
Facebook facebook.com/JenniferLScottAuthor
Twitter @JL_Scott
Instagram @dailyconnoisseur
Take my eCourse on the Ten-Item Wardrobe
Take my eCourse Chic Financial Principles for Debt-Free Living
Sign up for my Seasonal Author Newsletter
FTC: This is not a sponsored post. All opinions are my own. This post contains affiliate links.
September 6, 2018
Building an Arch Trellis for Our Totally Out-of-Control Vegetable Garden | Family Vlog

In today's family blog, Ben builds two arch trellises for our totally out-of-control vegetable garden. If you watched our previous vegetable garden video, you know that we made many mistakes this year, including not properly propping up our tomatoes and climbing vegetables.
Ben has a solution and builds his own DIY trellis. He and I truly are clueless gardeners, but we sure do have fun with our hobby.

The following are the supplies we used for anyone who is interested in building their own arch trellis.
First of all, let's start off with the most important supplies:

His Lordship mug

to go with my Her Ladyship mug
And now that we've gotten the coffee out of the way... Here are the other supplies we used to build the trellis:
[image error] [image error]
Wire Mesh Fence
[image error] [image error]
18 inch stakes These are the stakes Ben used to secure the fencing into the ground.
[image error] [image error]
Wire cutters
[image error] [image error]
Sledge hammer
We plan to document our garden the whole year, so we will definitely update you on the success of the arch trellis. We get heavy winds in the area we live, so I'm curious to see how the trellises hold up. I hope you enjoy the shenanigans in today's video.
Please note: the music used in the video is Dvorak no 12 in F Major Op 96 and Kingdom of Baghk.
News

I posted Natural Home with Jennifer yesterday (instead of Friday) so anyone who is interested can take advantage of Grove Collaborative's fall scented cleaning products. Some people have told me that the mum scent has already sold out, but my favorite, apple cider, is still available. To see my honest review from yesterday (and yes, my daughter had some funny describing words for the pumpkin scent) click here.
Thank you to everyone who continues to take and comment on my eCourses, Create Your Own Ten-Item Wardrobe, and Chic Financial Principles for Debt-Free Living. I really enjoy connecting with you over these courses.
On Instagram
Lessons from Madame Chic in Russia...
A post shared by Катя Лукашевич (@katerinaluka) on Aug 13, 2018 at 5:50am PDT
Comment of the Week
On last week's parenting chat, Hana G writes,
"You know it's funny, I still remember my mum saying to me once when I finished making my bed, that out of all of our family, I was the one who made it look the most neat and stylish. To this day, I still remember this comment and really enjoy making my bed every morning :-D (I am 30 now) Affirmations are really powerful!"
Hi Hana, I agree! We really do remember the things we were encouraged in as children. Affirmations for our children are very powerful, indeed.
I hope you enjoyed today's video. Please let me know if you'd like to see more family vlogs from the Connoisseur family.
I would love to know... do you have a kitchen garden? What tips do you have for us clueless gardeners? Thanks for joining us.
Visit my Author Website
*New* Shop my favorite things
Facebook facebook.com/JenniferLScottAuthor
Twitter @JL_Scott
Instagram @dailyconnoisseur
Take my eCourse on the Ten-Item Wardrobe
Take my eCourse Chic Financial Principles for Debt-Free Living
Sign up for my Seasonal Author Newsletter
FTC: This is not a sponsored post. All opinions are my own. This post contains affiliate links.
September 5, 2018
Reviewing The Mrs. Meyer's Fall Scents | Natural Home with Jennifer

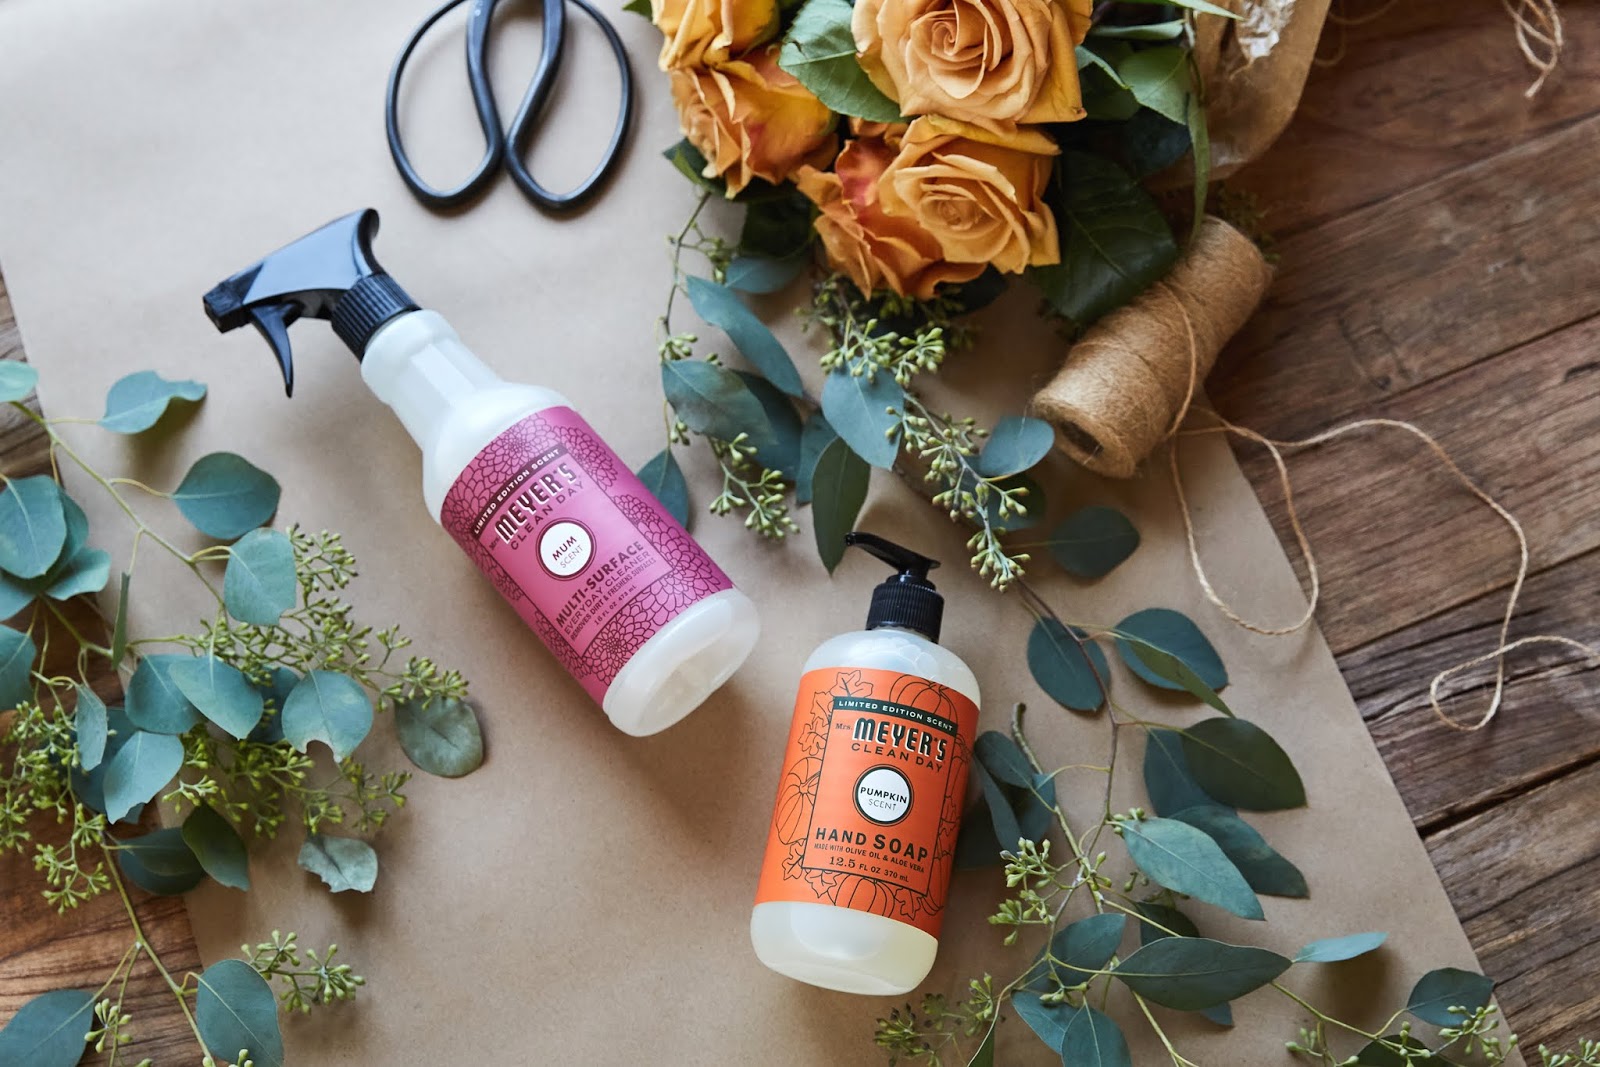
In today's Natural Home with Jennifer, I'm reviewing the Mrs. Meyer's Clean Day fall scented cleaning products. We discuss, pumpkin, apple cider, and mum. I'm posting this video on a Wednesday so you can take advantage of Grove Collaborative's free fall gift set before the best scents sell out.

The pumpkin scent has a very authentic pumpkin aroma. It is spicy and aromatic, not sweet. This scent will not be for everyone. When you watch my video, you'll find out what my daughter thought of it! It does remind me of fall, however. If you like strong pumpkin smell without the sweetness, you might like this scent.

The mum scent (short for chrysanthemum) is a sweet, floral fall scent with a hint of blackberry. It's really delightful. Right now I only have this in the hand soap, but I am looking forward to trying the dish soap and multi-surface spray too. This one is great! A lovely floral for fall.

My absolute favorite is the Mrs. Meyer's apple cider. It perfectly captures a hot, steaming cup of apple cider, spiced with cinnamon. It's a sweet, tart, delightful fall scent. If I were to recommend one scent for fall, this would be it!
I would love to know... have you tried the Mrs. Meyer's fall scents? Which one is your favorite?
I get my natural cleaning products from Grove Collaborative. Grove has a wonderful promotion for September for new customers where they are giving away a free Mrs. Meyer's dish soap, hand soap, and multi-surface spray in whatever fall scent you choose (pumpkin, apple cider, or mum). Plus, you get a Grove replaceable head dish brush. Existing customers get a Grove walnut scrubber sponge.
I hope you enjoyed today's Natural Home with Jennifer. Which Mrs. Meyer's fall scent is your favorite?
I'll see you tomorrow for a fun family vlog involving our totally out-of-control vegetable garden :)
Visit my Author Website
*New* Shop my favorite things
Facebook facebook.com/JenniferLScottAuthor
Twitter @JL_Scott
Instagram @dailyconnoisseur
Take my eCourse on the Ten-Item Wardrobe
Take my eCourse Chic Financial Principles for Debt-Free Living
Sign up for my Seasonal Author Newsletter
FTC: This is not a sponsored post. All opinions are my own. This post contains affiliate links.
September 3, 2018
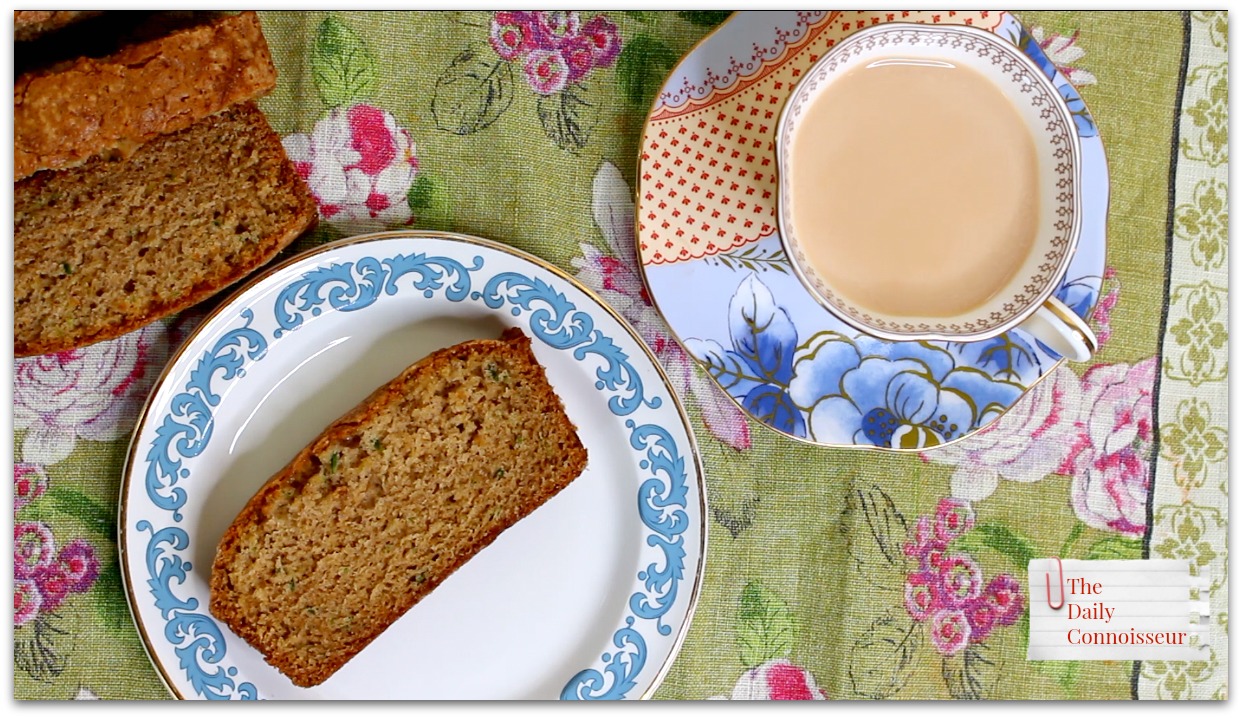
Pumpkin Spice Zucchini Bread | End-of-Summer Recipe | Jennifer L. Scott

Summer is coming to a close and fall is nearly here. Today I have the perfect seasonal transition recipe for you: my pumpkin spice zucchini bread.
If you watched my vegetable garden tour video, you know that we produced a lot of zucchini in our garden this year. I have made everything from zucchini lasagna to zucchini noodles, and everything in between. This zucchini bread, however, is my favorite recipe.
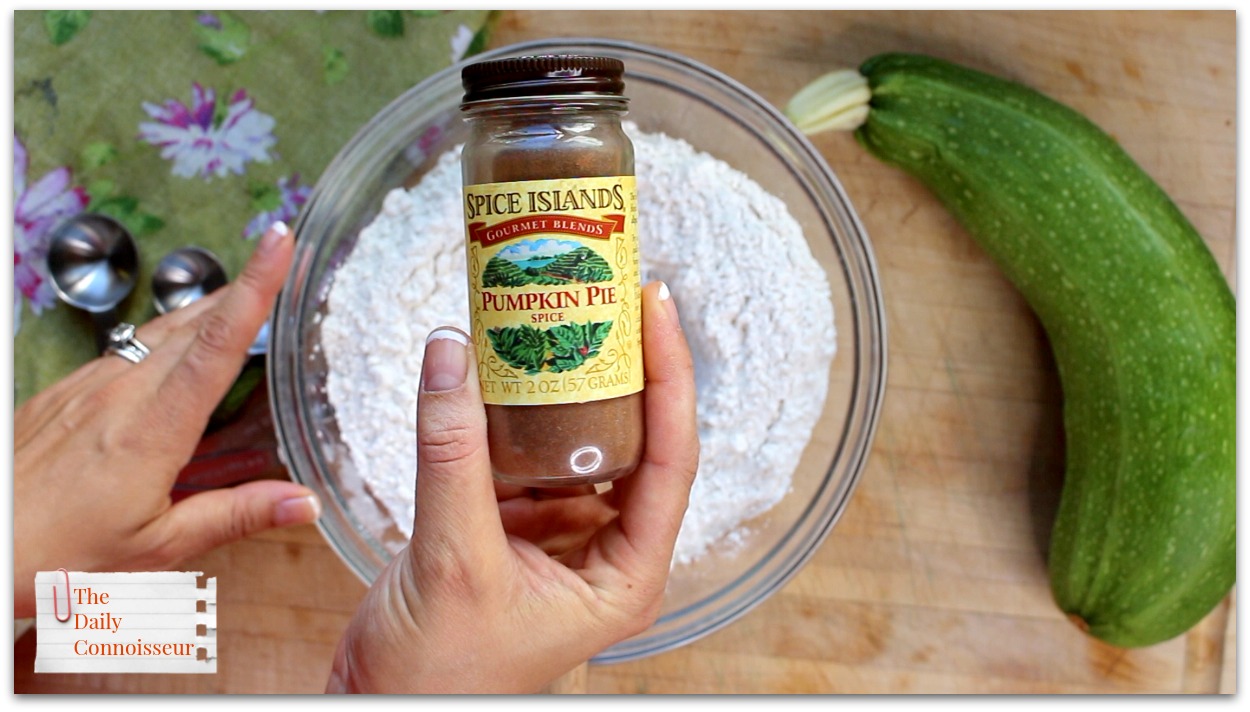
The secret ingredient is pumpkin pie spice. I use a tablespoon in this recipe. If you are not a fan of pumpkin spice, you can substitute this with cinnamon. I have tried both versions and they are both delicious.

You will need two cups of shredded zucchini for this recipe. That was one giant zucchini for us, but you might need two smaller ones to make two cups.

This bread is moist and delicious. It also freezes really well. My recipe makes two loaves so you can enjoy one today and freeze one for later.
Yield: 2 loavesAuthor: Jennifer L. ScottPrint RecipePin itWith ImageWithout Image
 Pumpkin Spice Zucchini Breadprep time: 20 minscook time: 1 hourtotal time: 1 hours and 20 mins
a moist and delicious seasonal dessert bread
ingredients:3 cups all purpose flour1 teaspoon baking soda1 teaspoon baking powder1 teaspoon salt1 tablespoon pumpkin pie spice3 eggs1 cup vegetable oil2 cups sugar3 teaspoons vanilla extract2 cups shredded zucchiniinstructions:Preheat the oven to 325 degrees F. Grease two loaf pans. Set aside. In a medium bowl, mix together the flour, baking soda, baking powder, salt, and pumpkin pie spice. Set aside. In a large mixing bowl, combine the eggs, oil, sugar and vanilla extract. Mix well. Add the shredded zucchini and combine. Sift the dry ingredients into the wet ingredients and mix once more. Divide the batter evenly into the two prepared loaf pans . Cook for one hour, or until an inserted toothpick comes out dry.Appliances used: with this recipe I use my Kitchen Aide.
Created using The Recipes Generator.recipe-inner{text-align:left;max-width:620px;border:6px double #009BFF;padding:20px;background:#f2f2f2;margin: 40px auto;font-family:Lato, sans-serif;}.recipe-keywords,.recipe-categories,.recipe-cuisine,.recipe-video{display:none;visibility:hidden;}.recipe-inner a{color: #4193f0;}#recipe .recipe-name{font-size: 21px;}#recipe .info{position:relative;font-size:13px;text-transform:capitalize;border-bottom:2px solid #000;padding-bottom:7px;margin-bottom:20px}.info:after{content:'';display:table;clear:both}#recipe .info span:first-child{margin-right:30px}#printbutton{border:0;margin:0;color:#fff;float:right;background:#555; padding:5px;border-radius:3px;cursor:pointer}#recipe .time{text-transform:uppercase;font-size:12px;text-align:center;background:#fff;padding:15px 0;margin-bottom:20px}#recipe .time span:not(:last-child){margin-right:12px}#recipe .time span:not(:last-child):after{content:'';display:inline-block;height:10px;width:1px;background:#000;vertical-align:middle;margin-left:12px}#recipe .summary{line-height:1.7;font-style:italic;font-size: 15px !important;font-family:Lato, sans-serif !important;}.ingredients,.instructions{line-height:1.7;clear:both;font-size: 15px !important;font-family: 'Roboto','Open Sans', Lato, sans-serif;}.ingredients *, .instructions * { font-size: inherit !important; font-family: inherit !important; }.ingredients h3,.instructions h3,.notes h3{font-size:20px !important;font-weight:400 !important;margin-bottom:0;color:#000;text-transform: uppercase;}.ingredients ul{margin:0!important;margin-top:5px !important;}.instructions li{margin-bottom:15px !important;line-height:1.6;text-align:left;}.ingredients li{text-align:left}#recipe .instructions{margin-top: 30px;}#recipe .instructions ol,#recipe .instructions ol li {list-style:decimal !important;}#recipe .instructions ol{padding-left:39px;margin:0!important;margin-top:6px !important;}.posturl{border-top:1px solid #ccc;padding-top:10px;}.ing-section{padding-left:20px;margin: 10px 0;}.ing-section > span{font-weight:700}.recipe-credit{font-size:13px;border-top: 1px solid #ccc;padding:10px;text-align:center;background:#ffffff;margin:-20px;margin-top:15px;}.recipe-credit a{color:blue;text-decoration:none;}.copyright-statement{font-size: 13px;font-style:italic;border-top: 1px solid #ccc;margin-top:15px;padding-top:15px;line-height:1.6;}.notes pre{font-size: 15px;margin: 10px 0;padding-left: 20px;font-family: inherit;line-height: 1.7;white-space: pre-line;}.notes h3{margin: 0}.nutrition-info{font-size: 0;margin: 20px 0;padding: 10px;background: #fff;}.nutrition-info>div {display: inline-block;font-size: 14px;width: 20%;text-align: center;}.nutrition-info>div:nth-child(5) ~ div{margin-top: 20px;}.nutrition-info>div p{margin-top: 0;margin-bottom: 7px;}.print-options {display:none;position: absolute; top: 0; right: 0; background: #fff; border: 1px solid #ccc;z-index: 1;}.show-print-options{display:block}.print-options button { display: block; background: transparent; border: 0; cursor: pointer; padding: 10px; width: 100%; text-align: left; } .print-options button:hover { background: #555; color: #fff;}.ing-section > br, .recipe-inner .time br{display: none}#recipe-pinit {float: right; background: #BD081B !important; border-radius: 4px; margin-right: 5px !important; color: #fff !important; max-height: 25px !important; padding: 2px 10px !important; text-decoration: none !important; display: -webkit-box; display: -ms-flexbox; display: flex; -webkit-box-align: center; -ms-flex-align: center; align-items: center;} #recipe-pinit svg { display: inline-block; width: 16px; height: 16px; margin-right: 4px;}#recipe .image{text-align:center;margin-bottom:25px}#recipe .image img{max-width:100%}#recipe .recipe-name{line-height:1.6;text-transform:uppercase;margin-top:0;letter-spacing:1px;text-align:center;margin-bottom:20px}#recipe .time{border-top:1px dashed #000;border-bottom:1px dashed #000;border-right:0;border-left:0}#recipe .summary{margin-bottom:30px}#recipe .summary:after{content:'';display:block;width:50px;height:2px;background:#000;margin:auto;margin-top:10px}#recipe .instructions{margin-top:30px}#recipe .instructions ol{padding-left:39px;margin-top:6px}
I hope you enjoy today's video.
News
You asked and I listened. I am now making my recipes printable for you on the blog. Please let me know if you like this new format. Also, my posts and recipes are now shareable on Pinterest.
I am enjoying connecting with everyone on my eCourses, Create Your Own Ten-Item Wardrobe, and Chic Financial Principles for Debt-Free Living.
On Instagram
A beautiful photo of Polish Your Poise with Madame Chic...


