
Claire Garland's Blog, page 22
March 11, 2016
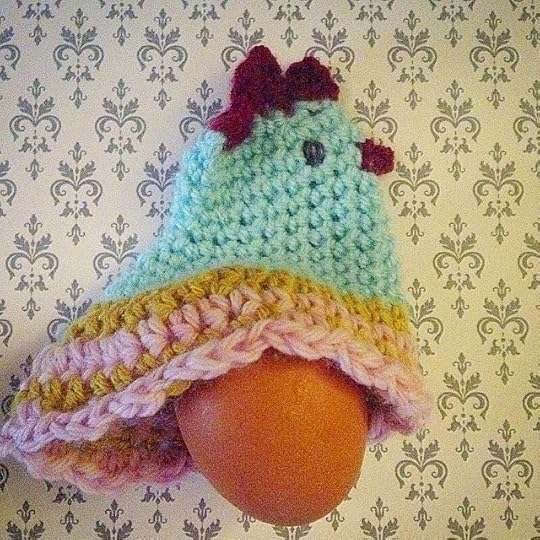
#freebeefridayknits

Each Friday I'm going to be giving away any one of my patterns for free - old ones and new ones like this one - more pictures see @dotpebbles Instagram


February 23, 2016
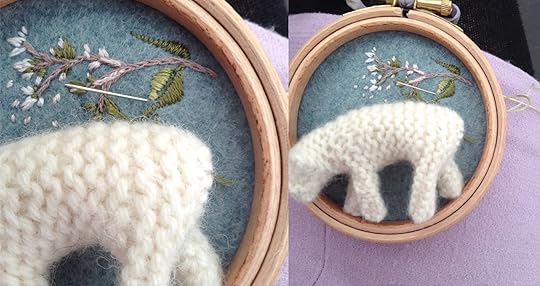
slow up... slow living
Years ago I wrote an embroidery book (Embroidererd Treasures - out of print now I think) but then I got into knitting and crochet and kind of tucked my threads and sharps away
- until now, thanks to fabulous embroidery artists like Sarah Benning I feel inspired to go slow and have another go - combining it with knitting of course! More pics here
- until now, thanks to fabulous embroidery artists like Sarah Benning I feel inspired to go slow and have another go - combining it with knitting of course! More pics here

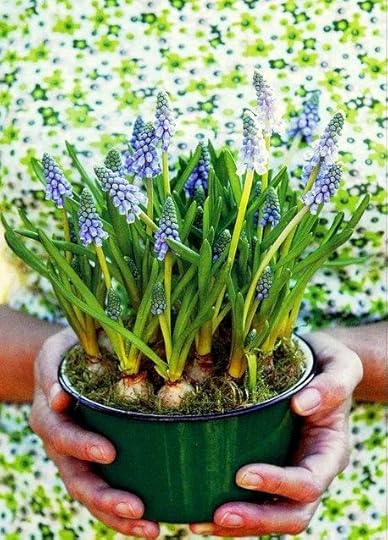
January 14, 2016
Snowdrop season
Especially to celebrate these special first-of-the-year (here in the UK anyway) flowers here's a snowdrop inspired sweater design for Pixie! Get it here or here...
On a more morbid note - did-you-know that snowdrops are associated with death? Such beauty of certain things and certain people will never die...
On a more morbid note - did-you-know that snowdrops are associated with death? Such beauty of certain things and certain people will never die...

April 28, 2015
March 31, 2015

March 29, 2015

March 24, 2015
Simply cannot live without…
I have a Pinterest board of the same name which every time I pin something on it I think how lucky we are to be living as we do! Here are a few of my favourites so far…
Simply cannot live without…
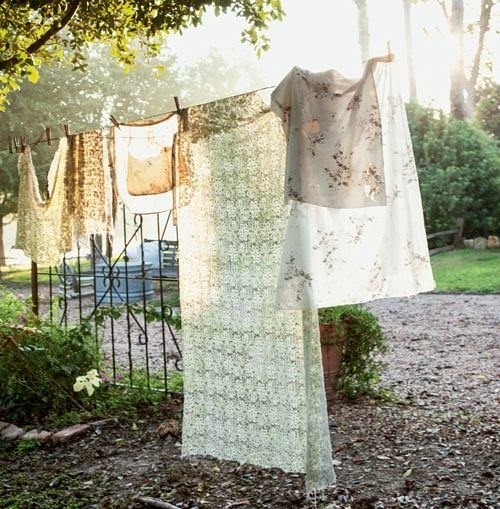
Laundry on a fine day
Spring
Life
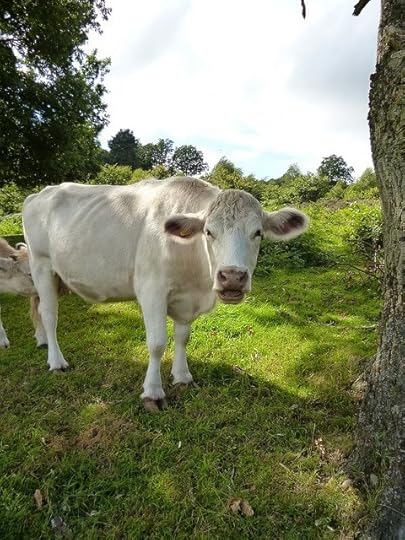
Cows!
Home
Simply cannot live without…

Laundry on a fine day

Spring

Life

Cows!

Home
February 14, 2015
new for you…
I have a new blog to coincide with the spring opening of our shop - it's http://linenandclay.blogspot.co.uk and will run alongside this blog… here's a new pattern which also features on the new blog -

December 30, 2014


December 19, 2014
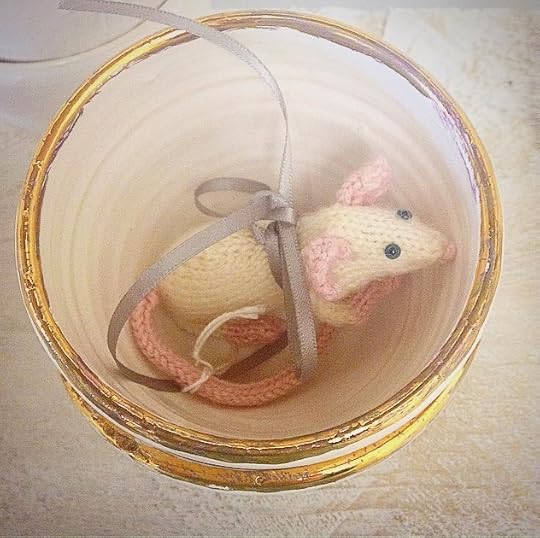
a surprise gift!
It's Christmas at the shop and here's a little surprise just waiting for someone to buy…
or free pattern below!
Use sock yarn or 4 ply yarn in white (MC) and pink for tail feet and tail
you will also need two tiny toy eyes, or tiny seed beads or just embroidery thread worked as french knots and small amount of toy filling or spare yarn for stuffing.
Head, front legs,
body, back legs and tail make as one
piece
Using 2.5 mm (US size 1) needles
and yarn MC cast on 2 sts.
Next row (inc row)
(RS) (Knit into front and back of st - called Kfb), twice. (4 sts)
Next row (inc row)
(WS) *Purl into front, knit into back of st - called Pfkb, rep from *
across. (8 sts)
Next row (inc row)
(RS) (Kfb) twice, K4, (Kfb) twice. (12 sts)
Next row (inc row)
(WS) Pfkb, P to last st, Pfkb. (14 sts)
Next row (inc row)
(RS) Kfb, K to last st, Kfb. (16 sts)
Beg with a P row, cont in stocking st for 7 rows, so ending
with a WS row.
Top of head shaping
Next row (RS) K11,
turn.
Next row (WS) Sl1,
P5, turn.
Next row (RS) Sl1,
K4, turn.
Next row (WS) Sl1,
P3, turn.
Next row (RS) K9
sts across to end.
Next row (inc row)
(WS) (Pfkb) twice, P to last 2 sts, (Pfkb) twice. (20 sts)
Next row (inc row)
(RS) Kfb, K to last st, Kfb. (22 sts)
Beg with a P row, cont in stocking st for 3 rows, so ending
with a WS row.
Divide for front legs
Next row (RS) (Kfb)
three times, slip next 5 sts off needle onto a small safety pin, (Kfb) 6 times,
slip next 5 sts off needle onto a small safety pin, (Kfb) three times - keep
tension tight to avoid large gaps as you knit beneath the sts held on the pins.
(24 sts)
Beg with a P row, cont in stocking st for 3 rows, so ending
with a WS row.
Next row (inc row) (RS) K12,
M1, K12. (25 sts)
Next row (WS) P.
Next row (inc row) (RS) K12,
M1, K1, M1, K12. (27 sts)
Next row (WS) P.
Next row (inc row) (RS) K13,
M1, K1, M1, K13. (29 sts)
Next row (WS) P.
Next row (inc row) (RS) K14,
M1, K1, M1, K14. (31 sts)
Next row (WS) P.
Next row (inc row) (RS) K15,
M1, K1, M1, K15. (33 sts)
Next row (WS) P.
Next row (inc row) (RS) K16,
M1, K1, M1, K16. (35 sts)
Next row (WS) P.
Next row (dec row) (RS) K16,
K3 tog, K16. (33 sts)
Next row (WS) P.
Next row (dec row) (RS) K15,
K3 tog, K15. (31 sts)
Next row (WS) P.
Next row (dec row) (RS) K14,
K3 tog, K14. (29 sts)
Next row (WS) P.
Next row (dec row) (RS) K13,
K3 tog, K13. (27 sts)
Next row (WS) P.
Next row (dec row) (RS) K12,
K3 tog, K12. (25 sts)
Next row (WS) P.
Divide for back legs
Next row (dec row) (RS) K3,
slip next 6 sts off needle onto a small safety pin, K7, slip next 6 sts off
needle onto a small safety pin, K3 - keep tension tight to avoid large gaps as
you purl in front of the sts held on the pins. (13 sts)
Next row (WS) P.
Divide for tail
Next row (dec row) (RS) (K2
tog) twice, K1, slip next 3 sts off needle onto a small safety pin, K1, (K2
tog) twice - keep tension tight to avoid too large a gap as you knit beneath
the sts held on the pin. (6 sts)
Break yarn, thread end through rem
sts, pull up tightly and secure thread.
Front legs
Slip 5 sts held on safety pins for
Front Legs onto 2 mm (US size 0) dpns. RS facing, rejoin pink yarn, K5 work
as i cord for 6 rows or until leg measures 1 inch.
Cast off.
Back legs
Slip 6 sts held on safety pins for
Back Legs onto 2 mm (US size 0) dpns. RS facing, rejoin pink yarn, K5 work as i cord for 6 rows or until leg measures 1 inch.
Cast off.
Tail
Slip 3 sts from safety pin onto
2mm (US size 0) dons rejoin pink yarn cont with i cord until tail measures about 3 inches.
Break yarn, thread end through rem
sts, pull up tightly and secure thread. Weave in the end to inside.
Ears make 2 alike
Using 2, 2 mm (US size 0) dpns
and yarn MC (main body colour) cast on 5 sts, leaving a long tail with which to
sew ear to head.
Next row (inc row)
(RS) Kfb, K3, Kfb. Turn. (7 sts)
Next row (WS) P. Turn.
Next row (dec row)
(RS) K2, K3 tog, K2. Turn. (5 sts)
Next row (WS) P. Turn.
Next row (inc row)
(RS) K1, K3 tog, K1. (3 sts)
Break yarn, thread end through rem
sts, pull up tightly and secure thread.
To make up
Following
the manufacturer’s guidelines snap eyes in place (if using) either side of the nose (or sew on beads or embroider french knots), stuff the mouse's head and body then sew backstitch, RS facing. Sew ears to top of the head.
Oversew to close any gaps left under the arms., Bend the fore legs un towards the body and sew in place as you can see in the photograph.
or free pattern below!

Use sock yarn or 4 ply yarn in white (MC) and pink for tail feet and tail
you will also need two tiny toy eyes, or tiny seed beads or just embroidery thread worked as french knots and small amount of toy filling or spare yarn for stuffing.
Head, front legs,
body, back legs and tail make as one
piece
Using 2.5 mm (US size 1) needles
and yarn MC cast on 2 sts.
Next row (inc row)
(RS) (Knit into front and back of st - called Kfb), twice. (4 sts)
Next row (inc row)
(WS) *Purl into front, knit into back of st - called Pfkb, rep from *
across. (8 sts)
Next row (inc row)
(RS) (Kfb) twice, K4, (Kfb) twice. (12 sts)
Next row (inc row)
(WS) Pfkb, P to last st, Pfkb. (14 sts)
Next row (inc row)
(RS) Kfb, K to last st, Kfb. (16 sts)
Beg with a P row, cont in stocking st for 7 rows, so ending
with a WS row.
Top of head shaping
Next row (RS) K11,
turn.
Next row (WS) Sl1,
P5, turn.
Next row (RS) Sl1,
K4, turn.
Next row (WS) Sl1,
P3, turn.
Next row (RS) K9
sts across to end.
Next row (inc row)
(WS) (Pfkb) twice, P to last 2 sts, (Pfkb) twice. (20 sts)
Next row (inc row)
(RS) Kfb, K to last st, Kfb. (22 sts)
Beg with a P row, cont in stocking st for 3 rows, so ending
with a WS row.
Divide for front legs
Next row (RS) (Kfb)
three times, slip next 5 sts off needle onto a small safety pin, (Kfb) 6 times,
slip next 5 sts off needle onto a small safety pin, (Kfb) three times - keep
tension tight to avoid large gaps as you knit beneath the sts held on the pins.
(24 sts)
Beg with a P row, cont in stocking st for 3 rows, so ending
with a WS row.
Next row (inc row) (RS) K12,
M1, K12. (25 sts)
Next row (WS) P.
Next row (inc row) (RS) K12,
M1, K1, M1, K12. (27 sts)
Next row (WS) P.
Next row (inc row) (RS) K13,
M1, K1, M1, K13. (29 sts)
Next row (WS) P.
Next row (inc row) (RS) K14,
M1, K1, M1, K14. (31 sts)
Next row (WS) P.
Next row (inc row) (RS) K15,
M1, K1, M1, K15. (33 sts)
Next row (WS) P.
Next row (inc row) (RS) K16,
M1, K1, M1, K16. (35 sts)
Next row (WS) P.
Next row (dec row) (RS) K16,
K3 tog, K16. (33 sts)
Next row (WS) P.
Next row (dec row) (RS) K15,
K3 tog, K15. (31 sts)
Next row (WS) P.
Next row (dec row) (RS) K14,
K3 tog, K14. (29 sts)
Next row (WS) P.
Next row (dec row) (RS) K13,
K3 tog, K13. (27 sts)
Next row (WS) P.
Next row (dec row) (RS) K12,
K3 tog, K12. (25 sts)
Next row (WS) P.
Divide for back legs
Next row (dec row) (RS) K3,
slip next 6 sts off needle onto a small safety pin, K7, slip next 6 sts off
needle onto a small safety pin, K3 - keep tension tight to avoid large gaps as
you purl in front of the sts held on the pins. (13 sts)
Next row (WS) P.
Divide for tail
Next row (dec row) (RS) (K2
tog) twice, K1, slip next 3 sts off needle onto a small safety pin, K1, (K2
tog) twice - keep tension tight to avoid too large a gap as you knit beneath
the sts held on the pin. (6 sts)
Break yarn, thread end through rem
sts, pull up tightly and secure thread.
Front legs
Slip 5 sts held on safety pins for
Front Legs onto 2 mm (US size 0) dpns. RS facing, rejoin pink yarn, K5 work
as i cord for 6 rows or until leg measures 1 inch.
Cast off.
Back legs
Slip 6 sts held on safety pins for
Back Legs onto 2 mm (US size 0) dpns. RS facing, rejoin pink yarn, K5 work as i cord for 6 rows or until leg measures 1 inch.
Cast off.
Tail
Slip 3 sts from safety pin onto
2mm (US size 0) dons rejoin pink yarn cont with i cord until tail measures about 3 inches.
Break yarn, thread end through rem
sts, pull up tightly and secure thread. Weave in the end to inside.
Ears make 2 alike
Using 2, 2 mm (US size 0) dpns
and yarn MC (main body colour) cast on 5 sts, leaving a long tail with which to
sew ear to head.
Next row (inc row)
(RS) Kfb, K3, Kfb. Turn. (7 sts)
Next row (WS) P. Turn.
Next row (dec row)
(RS) K2, K3 tog, K2. Turn. (5 sts)
Next row (WS) P. Turn.
Next row (inc row)
(RS) K1, K3 tog, K1. (3 sts)
Break yarn, thread end through rem
sts, pull up tightly and secure thread.
To make up
Following
the manufacturer’s guidelines snap eyes in place (if using) either side of the nose (or sew on beads or embroider french knots), stuff the mouse's head and body then sew backstitch, RS facing. Sew ears to top of the head.
Oversew to close any gaps left under the arms., Bend the fore legs un towards the body and sew in place as you can see in the photograph.
Claire Garland's Blog

- Claire Garland's profile
- 10 followers
Claire Garland isn't a Goodreads Author
(yet),
but they
do have a blog,
so here are some recent posts imported from
their feed.

