
Beth Cato's Blog, page 136
December 12, 2013
Can't sleep, copyedits will eat me... can't sleep...
I am now at the next stage on my journey to publication: COPYEDITS. This involves lots of necessary nitpicking to fix grammatical issues and inconsistencies, and I'm learning a great deal about how I abuse the English language.
My deadline is tight--this is due before Christmas--and I must read through the book a few times. The holidays are always kinda crazy, but this year? Oh, boy.
To paraphrase the great Red Green, I need to keep my stick on the ice. You people take care. I'll say hi when I can.
My deadline is tight--this is due before Christmas--and I must read through the book a few times. The holidays are always kinda crazy, but this year? Oh, boy.
To paraphrase the great Red Green, I need to keep my stick on the ice. You people take care. I'll say hi when I can.


December 11, 2013
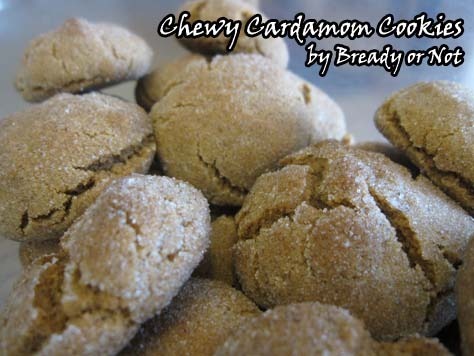
Bready or Not: Chewy Cardamom Cookies
Are you on the lookout for a new spice cookie recipe for holidays? Allow me to introduce you to something yummy.
I've mentioned before that I have a stockpile of clipped recipes. It often gets ignored because of the "OOOH SHINY" aspect of food blogs and Pinterest. I've been making a special effort to try more of those forgotten recipes--or simply shove them in the recycling bin.
I had a cardamom cookie recipe tucked away since 2005. My 3rd grader was a baby back then. We lived in our first house in Washington state. My husband had a second deployment looming. Life has changed a lot in the past eight years. I looked at the recipe and realized it needed to change, too.
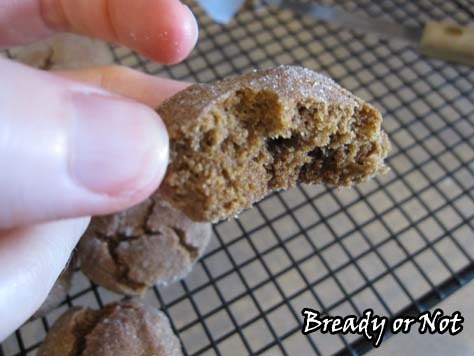
See, I love cardamom. The problem with the old recipe was that it made crispy cookies. I'm not a crispy cookie gal. Gimme soft and chewy. Therefore, I tweaked the recipe by making it with a mixture of butter and shortening for texture, and then amping up the spices.
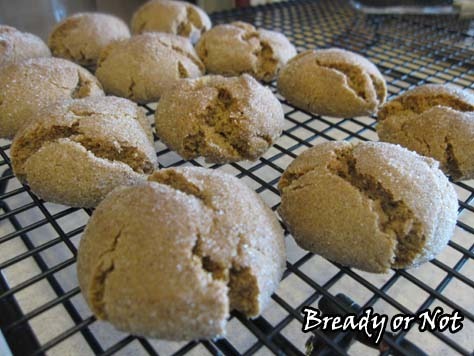
The result: plump, spicy pillows of pure goodness.
This recipe smells like Christmas. It tastes like Christmas. It fattens you up like a Christmas goose. It makes your pleasure centers of the brain light up like a Christmas tree.
Try it. Seriously.
Chewy Cardamom Cookies
Modified from Better Homes and Gardens, December 2005.
Ingredients:
1/4 cup melted butter, unsalted
1/2 cup shortening
1 cup brown sugar, packed
1 teaspoon baking soda
1 1/2 teaspoons cardamom
1 heaping teaspoon ground cinnamon
1/4 cup molasses [could try substituting honey]
1 egg, room temperature
2 1/4 cups flour
1/4 cup sugar
1/2 teaspoon cardamom
Directions:
1) Preheat oven to 375 degrees. In a mixing bowl, blend the butter and shortening until creamy. Add in the brown sugar, baking soda, cardamom, and cinnamon.
2) Add the molasses and egg, and once that's combined, slowly mix in the flour.
3) Using a teaspoon scoop or spoon, shape dough into small balls and roll in the cardamom and sugar.
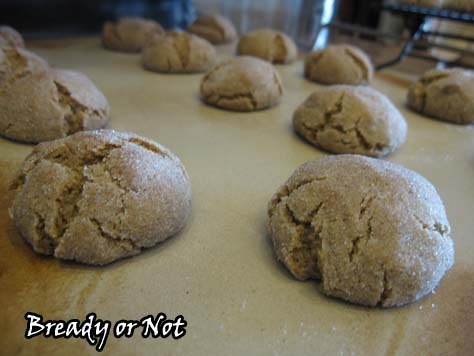
4) Bake cookies for about 10 minutes or until edges are set and tops are slightly cracked. They will be pillowy--if too much so, flatten the next batch with a spatula or glass, if you wish.
Makes about 45 cookies, teaspoon-size.
OM NOM NOM.
I've mentioned before that I have a stockpile of clipped recipes. It often gets ignored because of the "OOOH SHINY" aspect of food blogs and Pinterest. I've been making a special effort to try more of those forgotten recipes--or simply shove them in the recycling bin.
I had a cardamom cookie recipe tucked away since 2005. My 3rd grader was a baby back then. We lived in our first house in Washington state. My husband had a second deployment looming. Life has changed a lot in the past eight years. I looked at the recipe and realized it needed to change, too.
See, I love cardamom. The problem with the old recipe was that it made crispy cookies. I'm not a crispy cookie gal. Gimme soft and chewy. Therefore, I tweaked the recipe by making it with a mixture of butter and shortening for texture, and then amping up the spices.
The result: plump, spicy pillows of pure goodness.
This recipe smells like Christmas. It tastes like Christmas. It fattens you up like a Christmas goose. It makes your pleasure centers of the brain light up like a Christmas tree.
Try it. Seriously.
Chewy Cardamom Cookies
Modified from Better Homes and Gardens, December 2005.
Ingredients:
1/4 cup melted butter, unsalted
1/2 cup shortening
1 cup brown sugar, packed
1 teaspoon baking soda
1 1/2 teaspoons cardamom
1 heaping teaspoon ground cinnamon
1/4 cup molasses [could try substituting honey]
1 egg, room temperature
2 1/4 cups flour
1/4 cup sugar
1/2 teaspoon cardamom
Directions:
1) Preheat oven to 375 degrees. In a mixing bowl, blend the butter and shortening until creamy. Add in the brown sugar, baking soda, cardamom, and cinnamon.
2) Add the molasses and egg, and once that's combined, slowly mix in the flour.
3) Using a teaspoon scoop or spoon, shape dough into small balls and roll in the cardamom and sugar.
4) Bake cookies for about 10 minutes or until edges are set and tops are slightly cracked. They will be pillowy--if too much so, flatten the next batch with a spatula or glass, if you wish.
Makes about 45 cookies, teaspoon-size.
OM NOM NOM.
December 8, 2013
Auction for Worldbuilders
I have never been one of the cool kids. Never. But when I was at Worldcon, the awesome folks at reddit/Fantasy invited me to sign a steel great helm to be auctioned for Worldbuilders. I took the marker in my hand and had the distinct feeling that I had just sneaked onto some millaire's yacht--I so did not belong there. But hey. I signed the helm.
It's now up for auction with a few hours left. You can actually see my signature on picture 5, right in the middle. Apparently I'm one of the more legible ones, because I also get mentioned in the auction right up.
I'm not worthy! BUT I'M THERE. In Sharpie.

It's now up for auction with a few hours left. You can actually see my signature on picture 5, right in the middle. Apparently I'm one of the more legible ones, because I also get mentioned in the auction right up.
I'm not worthy! BUT I'M THERE. In Sharpie.
Sunday Quote loves cardamom
"A novel can educate to some extent. But first, a novel has to entertain--that's the contract with the reader: you give me ten hours and I'll give you a reason to turn the page. I have a commitment to accessibility. I believe in plot. I want an English professor to understand the symbolism while at the same time I want one of my relatives--who's never read anything but the Sears catalogue--to read my books." ~Barbara Kingsolver
December 4, 2013
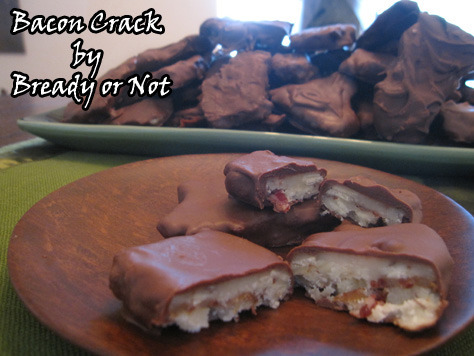
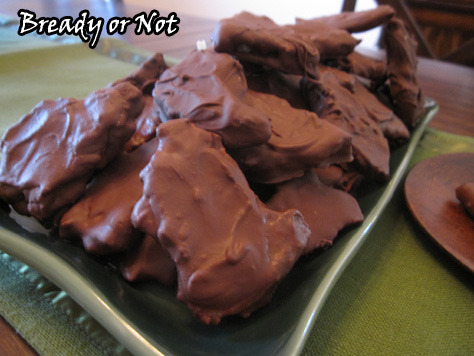
Bready or Not: Chocolate Covered Bacon Toffee (aka Bacon Crack)
I love kitchen tools. I am scared of some of my kitchen tools.
Case in point: the candy thermometer.
I like doing no-bake candies and such, but I've taken care to avoid any that need a thermometer. That does limit me, though. Pinterest has shown me way too many goodies than require an exact temperature reading. Therefore, last Christmas I asked for a digital candy thermometer. I got it.
It sat in a drawer, unused, for most of the year.
This is the recipe that finally made me test myself. BACON CRACK. How could I resist a recipe dubbed bacon crack?
My husband was a little leery, though. He's the sort of guy who doesn't let his foods mingle on the plate. Bacon=awesome. Chocolate=awesome. Together? Um. I told him it was a sweet-salty thing, and he was game to try it.
I made a convert.
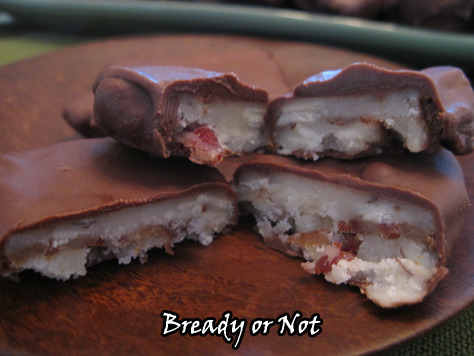
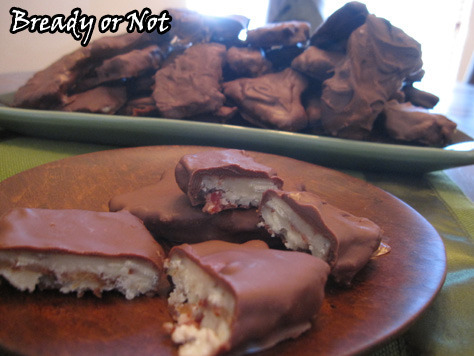
The first thing you taste is chocolate, then the sweet of toffee, and then the smoky, salty taste of the bacon. The pieces are small and it's easy to keep popping them in your mouth.
It's called bacon crack for a reason.
Chocolate Covered Bacon Toffee (aka Bacon Crack)
from Wine and Glue
Ingredients:
2 cups butter
2 cups white sugar
1/4 tsp salt
1 cup sliced almonds
10 slices bacon, cooked and chopped (should make about one cup)
3 cups semi-sweet chocolate chips
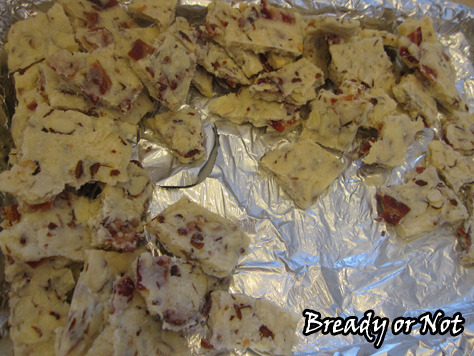
1) Prep the bacon and have it ready. Layer a jelly roll pan with aluminum foil and make sure you have a space where it will fit in the fridge.
2) It's toffee time. In a heavy bottomed pot over medium heat, melt the butter, sugar, and salt. Stir regularly until the mixture boils and comes to a 285 degrees F. (Yes, a candy thermometer is necessary here.) The temperature is slow to start but once it gets above boiling, it goes up quickly.
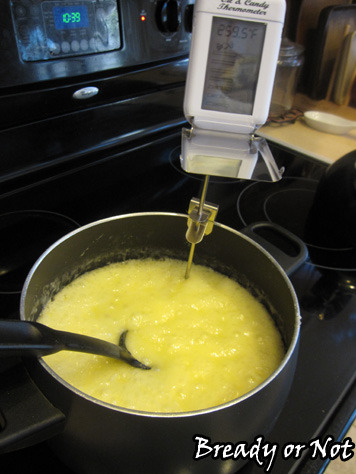
3) Once the mixture has reached the right temperature, quickly stir in the almonds, and then the bacon. The fat is going to melt off the bacon immediately and separate from the rest of the mixture.
4) Pour it all into the jelly roll pan. It will start to set quickly, and the bacon fat will be liquid and on top. If you can, lift the pan with one of the corners pointed down and pour off the fat into the glass measuring cup. Get as much of it as you can, turning the pan and dripping from the opposite corner as necessary. OR--because my mixture didn't set and wanted to slide off--grab some paper towels and blot the fat from the top.
5) Let the toffee set for at least two hours in the refrigerator. Move to the freezer for an hour. Once frozen, break it apart and store it in there as you prep the chocolate.
6) Melt the chocolate using the microwave or a double boiler. Taking a few pieces of toffee out of the freezer at a time, dip it in the chocolate, setting it on wax paper to set.
8) Store in an air tight container in the refrigerator.
OM NOM NOM.
Case in point: the candy thermometer.
I like doing no-bake candies and such, but I've taken care to avoid any that need a thermometer. That does limit me, though. Pinterest has shown me way too many goodies than require an exact temperature reading. Therefore, last Christmas I asked for a digital candy thermometer. I got it.
It sat in a drawer, unused, for most of the year.
This is the recipe that finally made me test myself. BACON CRACK. How could I resist a recipe dubbed bacon crack?
My husband was a little leery, though. He's the sort of guy who doesn't let his foods mingle on the plate. Bacon=awesome. Chocolate=awesome. Together? Um. I told him it was a sweet-salty thing, and he was game to try it.
I made a convert.
The first thing you taste is chocolate, then the sweet of toffee, and then the smoky, salty taste of the bacon. The pieces are small and it's easy to keep popping them in your mouth.
It's called bacon crack for a reason.
Chocolate Covered Bacon Toffee (aka Bacon Crack)
from Wine and Glue
Ingredients:
2 cups butter
2 cups white sugar
1/4 tsp salt
1 cup sliced almonds
10 slices bacon, cooked and chopped (should make about one cup)
3 cups semi-sweet chocolate chips
1) Prep the bacon and have it ready. Layer a jelly roll pan with aluminum foil and make sure you have a space where it will fit in the fridge.
2) It's toffee time. In a heavy bottomed pot over medium heat, melt the butter, sugar, and salt. Stir regularly until the mixture boils and comes to a 285 degrees F. (Yes, a candy thermometer is necessary here.) The temperature is slow to start but once it gets above boiling, it goes up quickly.
3) Once the mixture has reached the right temperature, quickly stir in the almonds, and then the bacon. The fat is going to melt off the bacon immediately and separate from the rest of the mixture.
4) Pour it all into the jelly roll pan. It will start to set quickly, and the bacon fat will be liquid and on top. If you can, lift the pan with one of the corners pointed down and pour off the fat into the glass measuring cup. Get as much of it as you can, turning the pan and dripping from the opposite corner as necessary. OR--because my mixture didn't set and wanted to slide off--grab some paper towels and blot the fat from the top.
5) Let the toffee set for at least two hours in the refrigerator. Move to the freezer for an hour. Once frozen, break it apart and store it in there as you prep the chocolate.
6) Melt the chocolate using the microwave or a double boiler. Taking a few pieces of toffee out of the freezer at a time, dip it in the chocolate, setting it on wax paper to set.
8) Store in an air tight container in the refrigerator.
OM NOM NOM.
December 2, 2013
If you want some insight into agents...
... check out the Hide and Create Podcast, where my agent Rebecca Strauss was recently featured as a guest. She'll be on another episode very soon, too.
December 1, 2013
Sunday Quote Welcomes December
"When I face the desolate impossibility of writing five hundred pages a sick sense of failure falls on me and I know I can never do it. This happens every time. Then gradually I write one page and then another. One day's work is all I can permit myself to contemplate and I eliminate the possibility of ever finishing." ~John Steinbeck
November 28, 2013
Thanksgiving
I have a lot to be thankful for this year.
Thank YOU for reading my blog. For being such a support. For the cat pictures (you know who you are!) and the kind comments on my quotes and the drooling over my recipe pictures, even if you can't eat the food. I've had some low moments this year, things I don't talk about in public, and those little shows of support can mean everything sometimes.
Thanks for being here. I hope you stick around.
November 27, 2013
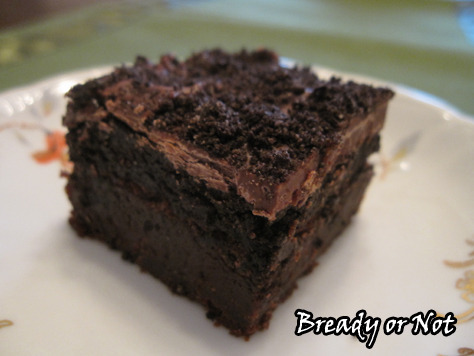
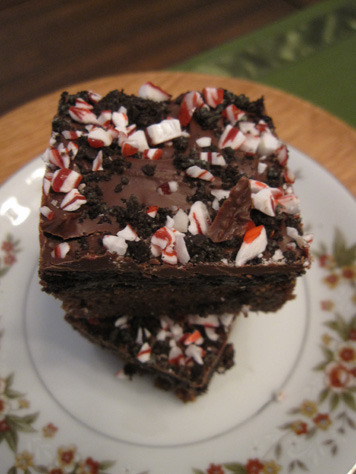
Bready or Not: Oreo Truffle Brownies & Peppermint Oreo Truffle Brownies
I love Oreo truffles; I HATE coating all the balls in chocolate.
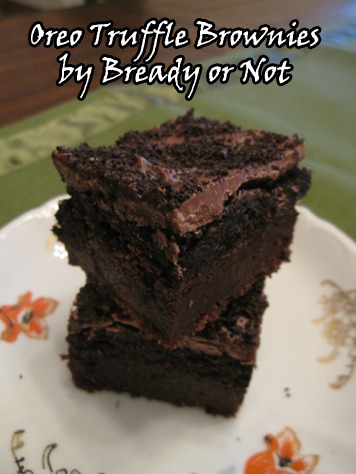
Therefore, I was thrilled to find Chef-in-Training's Oreo Truffle Brownie recipe. Actually, not only is it a heck of a lot easier to make, but I think they honestly taste better than the individual truffles. It's like a brownie covered with chocolate bark. WANT.
I made the original version and then I decided to tweak it using the holidays varieties of Oreos. I did it with Gingerbread Oreos, a blondie base, and white chocolate, and found the gingerbread flavor just wasn't as intense as I hoped it would be.
However, then I decided to go pepperminty. That was a success. My husband declared them to be the best brownies ever.
I am posting my slightly tweaked version of the original recipe and below that is peppermint. And now I'm pondering a version using maple creme cookies...

Oreo Truffle Brownies
modified from the original at Chef-in-Training
Ingredients
1 cup butter, softened
2 cups white sugar
4 eggs, room temperature
1 tsp vanilla extract
1/2 cup unsweetened cocoa
1 1/3 cups flour
1/2 tsp salt
1/2 tsp espresso powder (optional, but recommended)
1 package Oreos
8 oz cream cheese, softened
10 to 12 ounces of chocolate (semi-sweet, dark, or milk; suit your tastes)
Instructions
1) Line a 9x13 pan with aluminum foil and coat with nonstick spray or butter well.
2) In a mixing bowl, cream together butter and sugar. Add eggs and blend well. Add vanilla, salt, cocoa and flour. Don’t overbeat. Pour into the prepared pan. Bake at 350 F for 22-27 minutes. Allow to cool completely.
3) While brownies are cooling, make Oreo truffle layer. Crush Oreos finely in a food processor or by putting them in a sealed bag and smashing them until finely ground with a rolling pin. Reserve 1/4 cup of Oreos for topping. With the bulk of the crushed Oreos, use your hands or a big spoon to mash softened cream cheese and Oreos until well combined.
4) When the brownies have cooled completely, smooth layer of Oreo-cream cheese mix on top.
5) Melt the chocolate and pour and spread evenly over the top of the Oreo truffle layer. Top with reserved Oreo crumbles. Refrigerate until set, 10-15 minutes, then slice (if the chocolate gets too hard, it will crack as you cut it).
OM NOM NOM.
---
This recipe originally posted on BakeBakeBake.

Peppermint Oreo Truffle Brownies
modified from the original at Chef-in-Training
Ingredients
1 cup butter, softened
2 cups white sugar
4 eggs, room temperature
1 tsp vanilla extract
1/2 teaspoon peppermint extract
1/2 cup unsweetened cocoa
1 1/3 cups flour
1/2 tsp. salt
1 package Cool Mint Oreos*
8 oz cream cheese, softened
10 to 12 ounces of chocolate (mint, semi-sweet, dark, or milk; suit your tastes; add more peppermint extract if you wish)
crushed peppermints
*Note that if you don't have Cool Mint Oreos, you can use original and add 1/2 teaspoon peppermint extract to the Oreo or chocolate layers.
Instructions
1) Line a 9x13 pan with aluminum foil and coat with nonstick spray or butter well.
2) In a mixing bowl, cream together butter and sugar. Add eggs and blend well. Add vanilla, peppermint extract, salt, cocoa and flour. Don’t overbeat. Pour into the prepared pan. Bake at 350 F for 22-27 minutes. Allow to cool completely.
3) While brownies are cooling, make Oreo truffle layer. Crush Oreos finely in a food processor or by putting them in a sealed bag and smashing them until finely ground with a rolling pin. Reserve 1/4 cup of Oreos for topping. With the bulk of the crushed Oreos, use your hands or a big spoon to mash softened cream cheese and Oreos until well combined.
4) When the brownies have cooled completely, smooth layer of Oreo-cream cheese mix on top.
5) Melt the chocolate and pour and spread evenly over the top of the Oreo truffle layer. Top with reserved Oreo crumbles and peppermint bits. Refrigerate until set, 10-15 minutes, then slice (if the chocolate gets too hard, it will crack as you cut it).
OM NOM NOM again.
Therefore, I was thrilled to find Chef-in-Training's Oreo Truffle Brownie recipe. Actually, not only is it a heck of a lot easier to make, but I think they honestly taste better than the individual truffles. It's like a brownie covered with chocolate bark. WANT.
I made the original version and then I decided to tweak it using the holidays varieties of Oreos. I did it with Gingerbread Oreos, a blondie base, and white chocolate, and found the gingerbread flavor just wasn't as intense as I hoped it would be.
However, then I decided to go pepperminty. That was a success. My husband declared them to be the best brownies ever.
I am posting my slightly tweaked version of the original recipe and below that is peppermint. And now I'm pondering a version using maple creme cookies...
Oreo Truffle Brownies
modified from the original at Chef-in-Training
Ingredients
1 cup butter, softened
2 cups white sugar
4 eggs, room temperature
1 tsp vanilla extract
1/2 cup unsweetened cocoa
1 1/3 cups flour
1/2 tsp salt
1/2 tsp espresso powder (optional, but recommended)
1 package Oreos
8 oz cream cheese, softened
10 to 12 ounces of chocolate (semi-sweet, dark, or milk; suit your tastes)
Instructions
1) Line a 9x13 pan with aluminum foil and coat with nonstick spray or butter well.
2) In a mixing bowl, cream together butter and sugar. Add eggs and blend well. Add vanilla, salt, cocoa and flour. Don’t overbeat. Pour into the prepared pan. Bake at 350 F for 22-27 minutes. Allow to cool completely.
3) While brownies are cooling, make Oreo truffle layer. Crush Oreos finely in a food processor or by putting them in a sealed bag and smashing them until finely ground with a rolling pin. Reserve 1/4 cup of Oreos for topping. With the bulk of the crushed Oreos, use your hands or a big spoon to mash softened cream cheese and Oreos until well combined.
4) When the brownies have cooled completely, smooth layer of Oreo-cream cheese mix on top.
5) Melt the chocolate and pour and spread evenly over the top of the Oreo truffle layer. Top with reserved Oreo crumbles. Refrigerate until set, 10-15 minutes, then slice (if the chocolate gets too hard, it will crack as you cut it).
OM NOM NOM.
---
This recipe originally posted on BakeBakeBake.
Peppermint Oreo Truffle Brownies
modified from the original at Chef-in-Training
Ingredients
1 cup butter, softened
2 cups white sugar
4 eggs, room temperature
1 tsp vanilla extract
1/2 teaspoon peppermint extract
1/2 cup unsweetened cocoa
1 1/3 cups flour
1/2 tsp. salt
1 package Cool Mint Oreos*
8 oz cream cheese, softened
10 to 12 ounces of chocolate (mint, semi-sweet, dark, or milk; suit your tastes; add more peppermint extract if you wish)
crushed peppermints
*Note that if you don't have Cool Mint Oreos, you can use original and add 1/2 teaspoon peppermint extract to the Oreo or chocolate layers.
Instructions
1) Line a 9x13 pan with aluminum foil and coat with nonstick spray or butter well.
2) In a mixing bowl, cream together butter and sugar. Add eggs and blend well. Add vanilla, peppermint extract, salt, cocoa and flour. Don’t overbeat. Pour into the prepared pan. Bake at 350 F for 22-27 minutes. Allow to cool completely.
3) While brownies are cooling, make Oreo truffle layer. Crush Oreos finely in a food processor or by putting them in a sealed bag and smashing them until finely ground with a rolling pin. Reserve 1/4 cup of Oreos for topping. With the bulk of the crushed Oreos, use your hands or a big spoon to mash softened cream cheese and Oreos until well combined.
4) When the brownies have cooled completely, smooth layer of Oreo-cream cheese mix on top.
5) Melt the chocolate and pour and spread evenly over the top of the Oreo truffle layer. Top with reserved Oreo crumbles and peppermint bits. Refrigerate until set, 10-15 minutes, then slice (if the chocolate gets too hard, it will crack as you cut it).
OM NOM NOM again.
November 24, 2013
Sunday Quote cheers on Nano writers
"Our greatest weakness lies in giving up. The most certain way to succeed is to try just one more time." ~Thomas A. Edison


