
Beth Cato's Blog, page 134
January 15, 2014
Novelocity
A few weeks ago I mentioned I was part of a new site called Novelocity and that I'd talk about it more later. Guess what time it is?
Novelocity consists of ten novelists: Tina Connolly, Michael R. Underwood, J. Kathleen Cheney, Steve Bein, Tex Thompson, M.K. Hutchins, E.C. Ambrose, Fran Wilde, Lawrence M. Schoen, and me. We all have contracts with major publishers. Some of us have a few books out, while others (like me) are debuting this year or next. Our novels cover a full range of science fiction and fantasy. Our site motto is "For Voracious Readers." We want to talk about books.
Our topics thus far include:
- Our full introduction
- Books out in January
- Our favorite fantasy worlds part 1 and part 2
- Favorite reads from our late teens and early twenties
Please follow along on Novelocity's main blog, Facebook, or Twitter as @TeamNovelocity.


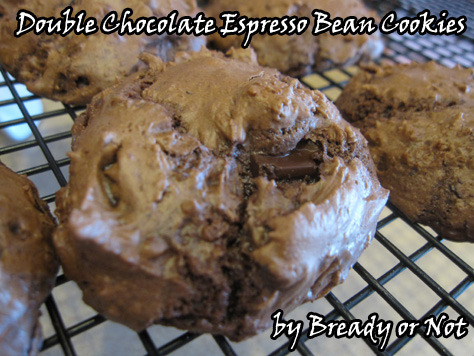
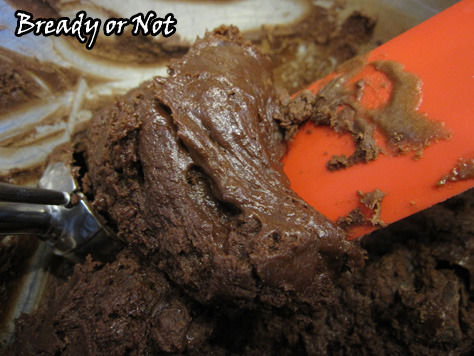
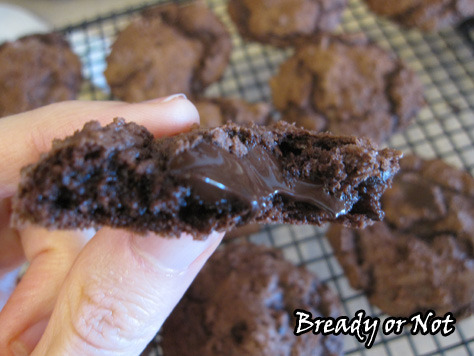
Bready or Not: Double Chocolate and Espresso Cookies
All hail the joy of post-holiday candy sales!
Because you know what I scored on clearance? Chocolate-covered espresso beans, baby. And you know what I already had at home? The original version of this recipe, all clipped out and ready.
Chocolate-covered espresso beans are crazy-expensive. It's definitely the kind of treat you want to get on a good sale (like the sort that will also happen after Valentine's Day, hint hint) or in the bulk bins at a retailer (Sprouts carries them near me).
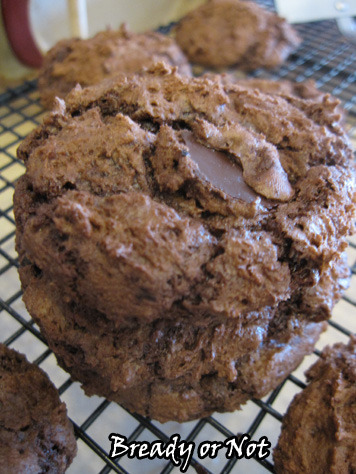
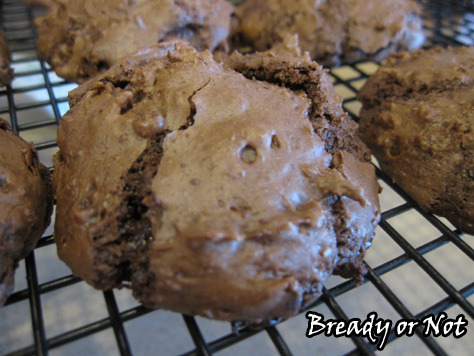
That double coffee whammy of this recipe comes through with the espresso beans and the espresso powder. The thing is, you don't see the flavor coming at all. These look like standard brownie cookies. Then you take a bite. WHAM! POW! The strong flavors of espresso and chocolate wallop you upside the head.
If you're really a chocolate nut, you could make these even stronger by using dark chocolate. As for me, I'm usually a milk chocolate kind of gal, but semi-sweet worked well here.
If you time things right, maybe you can nab the chocolate chips on sale, too.
Double Chocolate and Espresso Cookies
modified from Giada De Laurentiis's recipe in Martha Stewart Every Day Food, also found on Food Network
Ingredients
2/3 cup chocolate-covered espresso beans
2 cups flour
4 Tablespoons (1/4 cup) cocoa powder
1/2 teaspoon salt
2 teaspoons baking powder
1 bag semisweet chocolate (11-12 ounces)
4 Tablespoons unsalted butter
1 1/2 cups sugar
4 eggs, room temperature
2 teaspoons vanilla extract
1 cup semisweet chocolate chips or chunks
Directions
1) Preheat the oven to 300 degrees. Prepare a cookie sheet with parchment paper or silicone mats.
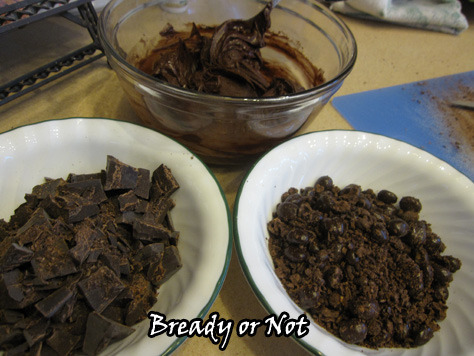
2) Using a double boiler or a bowl in microwave, carefully melt together the bag of chocolate chips and butter. Use special care in microwave as it can burn quickly.
3) Roughly chop the chocolate covered espresso beans. (If it's too fine, the chunks vanish in the cookies.)
4) Combine the chopped espresso beans, flour, cocoa powder, baking powder, and salt.
5) In another medium bowl, whisk together the sugar, eggs, water, and vanilla extract. Gradually add the dry ingredients and stir until thick and smooth. Fold in the melted chocolate. Stir in the chocolate chips.
6) Using a tablespoon cookie scoop--or for huge cookies, a 1/4 cup--to place dough on cookie sheet. Bake until slightly puffed and the tops begin to crack. For tablespoon size, this will be 13 to 15 minutes; for larger, 18 to 20 minutes. After baking, allow cookies to set for 10 to 15 minutes on the sheet before transitioning them to a rack.
OM NOM NOM.
Because you know what I scored on clearance? Chocolate-covered espresso beans, baby. And you know what I already had at home? The original version of this recipe, all clipped out and ready.
Chocolate-covered espresso beans are crazy-expensive. It's definitely the kind of treat you want to get on a good sale (like the sort that will also happen after Valentine's Day, hint hint) or in the bulk bins at a retailer (Sprouts carries them near me).
That double coffee whammy of this recipe comes through with the espresso beans and the espresso powder. The thing is, you don't see the flavor coming at all. These look like standard brownie cookies. Then you take a bite. WHAM! POW! The strong flavors of espresso and chocolate wallop you upside the head.
If you're really a chocolate nut, you could make these even stronger by using dark chocolate. As for me, I'm usually a milk chocolate kind of gal, but semi-sweet worked well here.
If you time things right, maybe you can nab the chocolate chips on sale, too.
Double Chocolate and Espresso Cookies
modified from Giada De Laurentiis's recipe in Martha Stewart Every Day Food, also found on Food Network
Ingredients
2/3 cup chocolate-covered espresso beans
2 cups flour
4 Tablespoons (1/4 cup) cocoa powder
1/2 teaspoon salt
2 teaspoons baking powder
1 bag semisweet chocolate (11-12 ounces)
4 Tablespoons unsalted butter
1 1/2 cups sugar
4 eggs, room temperature
2 teaspoons vanilla extract
1 cup semisweet chocolate chips or chunks
Directions
1) Preheat the oven to 300 degrees. Prepare a cookie sheet with parchment paper or silicone mats.
2) Using a double boiler or a bowl in microwave, carefully melt together the bag of chocolate chips and butter. Use special care in microwave as it can burn quickly.
3) Roughly chop the chocolate covered espresso beans. (If it's too fine, the chunks vanish in the cookies.)
4) Combine the chopped espresso beans, flour, cocoa powder, baking powder, and salt.
5) In another medium bowl, whisk together the sugar, eggs, water, and vanilla extract. Gradually add the dry ingredients and stir until thick and smooth. Fold in the melted chocolate. Stir in the chocolate chips.
6) Using a tablespoon cookie scoop--or for huge cookies, a 1/4 cup--to place dough on cookie sheet. Bake until slightly puffed and the tops begin to crack. For tablespoon size, this will be 13 to 15 minutes; for larger, 18 to 20 minutes. After baking, allow cookies to set for 10 to 15 minutes on the sheet before transitioning them to a rack.
OM NOM NOM.
January 12, 2014
CLOCKWORK CROWN... there are words
I've been scarce on LJ and most everywhere else online as I've been drowning in the new book. It occurred to me that hey, I haven't posted any public word count reports, and that I should do that.
Started on January 1st. Goal is a minimum of 2k a day.
Word count as of Saturday night on 1/11:

Keep in mind that this is pure draft vomit. I'm already making notes for the first round of revisions. Oh, the revisions... *shudder*
Started on January 1st. Goal is a minimum of 2k a day.
Word count as of Saturday night on 1/11:
Keep in mind that this is pure draft vomit. I'm already making notes for the first round of revisions. Oh, the revisions... *shudder*
Sunday Quote has a birthday tomorrow
"There is nothing beyond this book--nothing follows it. It must contain all in the world I know and it must have everything in it of which I am capable--all styles, all techniques, all poetry--and it must have in it a great deal of laughter." ~John Steinbeck, Journal of a Novel
January 10, 2014
Waylines Kickstarter
Since I'm now poetry editor at Waylines, it'd be really nice to be able to pay people. Toward that goal, the Waylines Magazine Kickstarter began today. Waylines is unique among the pro-paying genre magazines. This past year, they published short fiction AND short films (seriously awesome short films at that). With funding this forthcoming year, they will also publish poetry and comics.
You can check out year 1's issues here. The content is free. My story "An Echo in the Shell" is in issue #1. I'm also biased in favor of a lot of the later stories since I read the slush. One of my very favorites is "The Air That I Breathe" by Eric Del Carlo.
Please support if you can!
You can check out year 1's issues here. The content is free. My story "An Echo in the Shell" is in issue #1. I'm also biased in favor of a lot of the later stories since I read the slush. One of my very favorites is "The Air That I Breathe" by Eric Del Carlo.
Please support if you can!
January 8, 2014
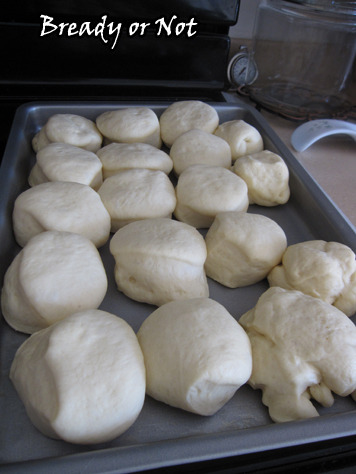
Bready or Not: Hawaiian Rolls
Have you ever had King's Hawaiian Rolls? If not, you are seriously missing out. This stuff is about the best bread you can find on the grocery store bread aisle. I say that, and I'm a total bread snob. I can't eat most other store breads now--I taste all the chemicals.

King's Hawaiian is different because it's ever so slightly sweet. It's not too sweet to be served with dinner, though. The rolls and sliced bread are excellent for things like ham, where that sweetness amps up the natural flavor.
I have tried several Hawaiian roll home recipes over the years. I wasn't thrilled with any of them. They either didn't rise well, or weren't sweet enough, or simply didn't keep well. Therefore, I finally decided to make one that did work.
The one consistent thing across all the Hawaiian roll recipes is that they use a small can of pineapple juice. I knew I wanted to keep that, though I did want to increase the sweetness some. I added more honey. I also wanted the texture to be closer to King's Hawaiian--soft, tender, yet strong enough to support juicy meat without becoming mush.
I studied my reliable soft rolls recipe and decided to modify that with the pineapple juice, honey instead of white sugar (and I also tried maple syrup and found it made zero difference in taste), and vital wheat gluten. I had to make about five batches as I tweaked things, but I finally created a Hawaiian roll recipe that did everything I wanted.
The other awesome thing? These freeze and thaw and taste like they're fresh. If they are stored in a sealed container, they also keep perfectly well for upwards of a week just like my other dinner roll recipe.
You can also make these in bun size or bake it as a full loaf!
Bread like this will make you feel like you're in paradise.

Hawaiian Rolls
A Bready or Not Original
Ingredients:
3/4 cup (1 small can) pineapple juice
1/4 cup water
1/4 cup vegetable oil
1 egg, beaten
3 Tablespoons honey or maple syrup (no difference in result)
3 1/3 cups bread flour
1 teaspoons salt
2 teaspoons gluten
2 teaspoon or one packet active yeast
butter for pan
Directions:
1) If you're using a bread machine, add all of the ingredients in the order it requires.
If you're making this with a mixer, combine all of the liquid ingredients and the beaten egg. In a small bowl, mix together the dry ingredients. With a dough hook on the machine (or using arm muscle), slowly add in the dry ingredients. Add more flour or water if needed. Mix five to ten minutes until smooth, then cover with plastic wrap or a towel. After an hour, beat it down gently and recover.
2) After two hours of rise, prepare a surface with a sprinkling of flour. Grease a large cookie sheet or casserole dish. Set the dough atop the flour and press it out to a uniform height. Use a circle cutter to create rolls and set them in the prepared pan.

3) Cover the pan with plastic wrap and let the rolls rise in a warm place, one hour to hour and a half.
4) Preheat oven to 375. Bake the rolls for 10-15 minutes until golden.
These rolls are fabulous to freeze and defrost. If kept in a sealed bag, will stay fresh for up to a week.
OM NOM NOM.
King's Hawaiian is different because it's ever so slightly sweet. It's not too sweet to be served with dinner, though. The rolls and sliced bread are excellent for things like ham, where that sweetness amps up the natural flavor.
I have tried several Hawaiian roll home recipes over the years. I wasn't thrilled with any of them. They either didn't rise well, or weren't sweet enough, or simply didn't keep well. Therefore, I finally decided to make one that did work.
The one consistent thing across all the Hawaiian roll recipes is that they use a small can of pineapple juice. I knew I wanted to keep that, though I did want to increase the sweetness some. I added more honey. I also wanted the texture to be closer to King's Hawaiian--soft, tender, yet strong enough to support juicy meat without becoming mush.
I studied my reliable soft rolls recipe and decided to modify that with the pineapple juice, honey instead of white sugar (and I also tried maple syrup and found it made zero difference in taste), and vital wheat gluten. I had to make about five batches as I tweaked things, but I finally created a Hawaiian roll recipe that did everything I wanted.
The other awesome thing? These freeze and thaw and taste like they're fresh. If they are stored in a sealed container, they also keep perfectly well for upwards of a week just like my other dinner roll recipe.
You can also make these in bun size or bake it as a full loaf!
Bread like this will make you feel like you're in paradise.
Hawaiian Rolls
A Bready or Not Original
Ingredients:
3/4 cup (1 small can) pineapple juice
1/4 cup water
1/4 cup vegetable oil
1 egg, beaten
3 Tablespoons honey or maple syrup (no difference in result)
3 1/3 cups bread flour
1 teaspoons salt
2 teaspoons gluten
2 teaspoon or one packet active yeast
butter for pan
Directions:
1) If you're using a bread machine, add all of the ingredients in the order it requires.
If you're making this with a mixer, combine all of the liquid ingredients and the beaten egg. In a small bowl, mix together the dry ingredients. With a dough hook on the machine (or using arm muscle), slowly add in the dry ingredients. Add more flour or water if needed. Mix five to ten minutes until smooth, then cover with plastic wrap or a towel. After an hour, beat it down gently and recover.
2) After two hours of rise, prepare a surface with a sprinkling of flour. Grease a large cookie sheet or casserole dish. Set the dough atop the flour and press it out to a uniform height. Use a circle cutter to create rolls and set them in the prepared pan.
3) Cover the pan with plastic wrap and let the rolls rise in a warm place, one hour to hour and a half.
4) Preheat oven to 375. Bake the rolls for 10-15 minutes until golden.
These rolls are fabulous to freeze and defrost. If kept in a sealed bag, will stay fresh for up to a week.
OM NOM NOM.
January 5, 2014
Sunday Quote gets used to writing 2014
"The craft or art of writing is the clumsy attempt to find symbols for the wordlessness." ~John Steinbeck, Journal of a Novel
January 3, 2014
Stuff that is cool
A year ago, I had my story "An Echo in the Shell" published in issue 1 of Waylines Magazine. Soon after that, I joined the magazine as a fiction slush reader. Now I am taking another big step. When Waylines opens for submissions in February, after their Kickstarter campaign, they will accept poetry. I am the poetry editor.
Yeah. Me, as an editor. Me, doing the rejecting for a change. Weird.
You'll be hearing a lot more about Waylines in the future as I talk about these things from a new perspective. If anyone has any questions, you can always drop a comment on my blog, or email, tweet, Facebook message, whatever. I try to be pretty open and friendly. It takes a lot to provoke me to bite. Usually.
I also had a story published today. My flash fic "Cold Beyond White" is in issue #13 of Stupefying Stories Showcase. This was something of an experimental story for me as I rarely write in present tense. Also, SNOWMAN GOLEMS. 'Nough said.
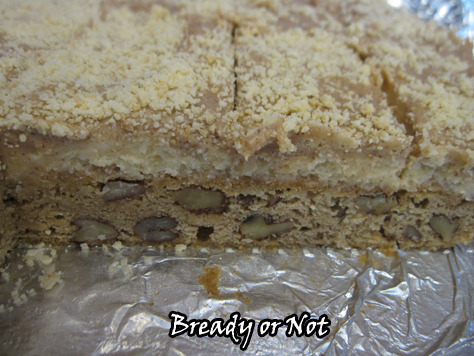
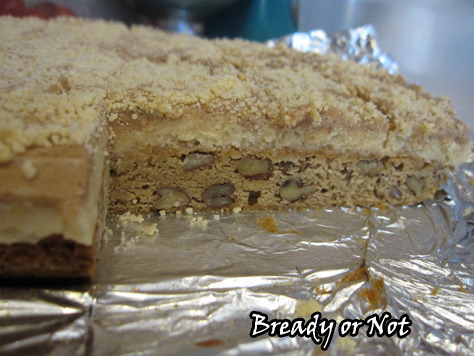
Bready or Not: Maple Truffle Blondies
I figure people had better things to do than read a new recipe on New Year's Day, so here's this week's Bready or Not!
Do your taste buds ever get stuck on a craving? Mine sure do. Thiswinter past six months has been all about maple for me. Since discovering the wonders of maple creme sandwich cookies, I've been plotting ways to adapt Oreo-based baked goodies to host maple instead.
Like this.
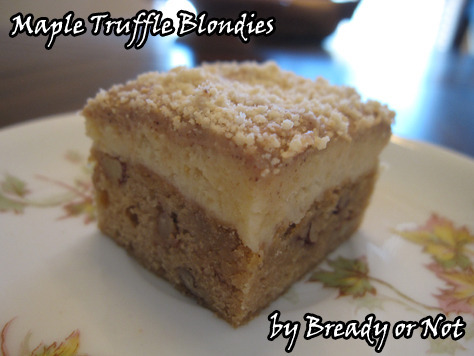
This is a take on Oreo Truffle Brownies, which has become a big favorite here. I had to search for a maple blondie base and found one at Baked Bree. In all honesty, these blondies are awesome all by themselves. The flavor is just fantastic. If you like maple but don't want something that is too sweet, just do the blondies.
But if you want to go all out, then let me show you.
Start the year with sweetness, and it will stay sweet all year long, right?
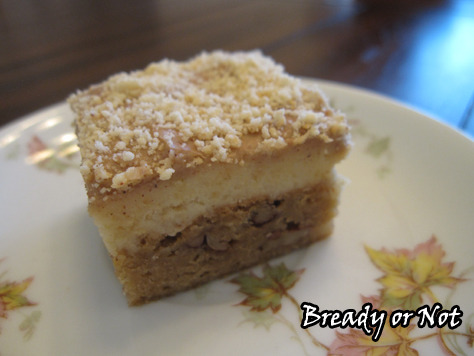
Maple Truffle Blondies
Maple blondie recipe from Baked Bree
Combination original to Bready or Not.
Ingredients for maple blondies:
2 cups flour
1 teaspoon baking powder
3/4 teaspoon salt
1/4 teaspoon baking soda
10 Tablespoons butter, melted
1 cup brown sugar, packed
1/2 cup pure maple syrup
2 eggs, room temperature
1 teaspoon vanilla
1 cup pecan pieces (or substitute another nut, or omit)
Ingredients for truffle layer:
1 box of maple creme cookies
8 ounces cream cheese
Ingredients for glaze:
2 cups powdered sugar, sifted
1 tsp cinnamon
2 Tb butter, melted
3/4 tsp maple flavoring (vanilla will do in a pinch)
2+ Tb milk (almond milk works!)
Directions:
1) Line a 9x13 pan with aluminum foil and apply nonstick spray. Preheat oven to 350-degrees.
2) Combine the dry ingredients in a bowl. Set aside.
3) In a mixing bowl, blend the butter, brown sugar, and maple syrup. Add the eggs and vanilla. Pour in the flour mix until just combined, then stir in the pecans.
4) Spread batter in the pan. Bake for 20 minutes, or until a toothpick comes out clean.
5) Let the blondie layer cool completely. Place in fridge for a while, if necessary.
After a few hours...
6) Finely crush cookies in a food processor or by putting them in a sealed bag and smashing them with a rolling pin until finely ground. [Reserve 1/4 cup of crumbs for topping.] With the bulk of the crushed maple cookies, use your hands or a big spoon to mash softened cream cheese and crumbs until well combined.
7) Smooth the cookie-cream cheese over the blondie layer. Make it as even as possible.
8) Combine all of the glaze ingredients in a bowl. Add enough milk so that the icing is spreadable but not runny. Immediately dollop over the cream cheese layer and smooth it out. It's okay if some crumbs stick out--this is a reason to reserve some cookie crumbs for the top. Completely cover with the icing, then immediately sprinkle on the reserved crumbs. Use fingers to gently press in.
9) Place pan in fridge to set for hour or two before slicing. Store in fridge.
OM NOM NOM.
Do your taste buds ever get stuck on a craving? Mine sure do. This
Like this.
This is a take on Oreo Truffle Brownies, which has become a big favorite here. I had to search for a maple blondie base and found one at Baked Bree. In all honesty, these blondies are awesome all by themselves. The flavor is just fantastic. If you like maple but don't want something that is too sweet, just do the blondies.
But if you want to go all out, then let me show you.
Start the year with sweetness, and it will stay sweet all year long, right?
Maple Truffle Blondies
Maple blondie recipe from Baked Bree
Combination original to Bready or Not.
Ingredients for maple blondies:
2 cups flour
1 teaspoon baking powder
3/4 teaspoon salt
1/4 teaspoon baking soda
10 Tablespoons butter, melted
1 cup brown sugar, packed
1/2 cup pure maple syrup
2 eggs, room temperature
1 teaspoon vanilla
1 cup pecan pieces (or substitute another nut, or omit)
Ingredients for truffle layer:
1 box of maple creme cookies
8 ounces cream cheese
Ingredients for glaze:
2 cups powdered sugar, sifted
1 tsp cinnamon
2 Tb butter, melted
3/4 tsp maple flavoring (vanilla will do in a pinch)
2+ Tb milk (almond milk works!)
Directions:
1) Line a 9x13 pan with aluminum foil and apply nonstick spray. Preheat oven to 350-degrees.
2) Combine the dry ingredients in a bowl. Set aside.
3) In a mixing bowl, blend the butter, brown sugar, and maple syrup. Add the eggs and vanilla. Pour in the flour mix until just combined, then stir in the pecans.
4) Spread batter in the pan. Bake for 20 minutes, or until a toothpick comes out clean.
5) Let the blondie layer cool completely. Place in fridge for a while, if necessary.
After a few hours...
6) Finely crush cookies in a food processor or by putting them in a sealed bag and smashing them with a rolling pin until finely ground. [Reserve 1/4 cup of crumbs for topping.] With the bulk of the crushed maple cookies, use your hands or a big spoon to mash softened cream cheese and crumbs until well combined.
7) Smooth the cookie-cream cheese over the blondie layer. Make it as even as possible.
8) Combine all of the glaze ingredients in a bowl. Add enough milk so that the icing is spreadable but not runny. Immediately dollop over the cream cheese layer and smooth it out. It's okay if some crumbs stick out--this is a reason to reserve some cookie crumbs for the top. Completely cover with the icing, then immediately sprinkle on the reserved crumbs. Use fingers to gently press in.
9) Place pan in fridge to set for hour or two before slicing. Store in fridge.
OM NOM NOM.
January 1, 2014
Goals 2014
Bready or Not will post on Friday the 3rd.
Things have changed. I mean, holy cow, I have a two-book deal with HarperCollins Voyager. I have a contract. The stuff I've emphasized in the past--short stories and poetry--isn't as much of a priority now, though I'll keep up with them if I can.
Here are my goals for 2014:
1) Complete Clockwork Dagger sequel rough draft by February 28th. Revise like crazy. Ultimate due date: June 1st.
2) Prepare comprehensive marketing plan for release of Clockwork Dagger in September. This includes a complete website overhaul, regular updates on my personal blog, scheduling interviews and blog posts for other blogs and sites, participation in Novelocity, and seizing other viable opportunities.
a) Don't have a mental breakdown.
3) Release Clockwork Dagger in September.
a) Don't have a mental breakdown.
4) Participate in Write 1 Sub 1's Light Ray option and write a new story (fiction or nonfiction) or poem each month, if balanced with novel obligations. Aim to have at least ten works on submission at all times.
5) Revise Breath of Earth to be submittable.
6) If viable, write a second novel later in the year.
7) Continue to participate in 50book challenge, LibraryThing, and Goodreads, reading at least 50 books during 2014 and posting reviews for all.
8) Attend several conventions; at this point, I am planning on Phoenix Comicon and World Fantasy, though nothing is set yet.
9) Be honest with myself about my stress and personal limits. Don't hold it all inside. Reach out to writer friends. Let my agent know what is going on. Take time out for my husband, son, cat, and family. Read. Bake. Go thrift store shopping.
10) Don't give up. I've come a long way in the past year and there's plenty of mountain left to climb. If tired of climbing, use dynamite.
What are your goals for 2014?


