
Helen Hiebert's Blog, page 68
November 1, 2013
The Key to My Heart
The title for this post was hard to decide on. I debated between this and “40 Days and 40 Nights” because today is day 40!
Don’t forget to enter the Giveaway if you haven’t already. The pile of papers just keeps growing!
#38
[image error]
© Helen Hiebert, 100 x 100 Paper Weavings, #38, 11″ x 7″, $100

In 2011, I co-taught a class at The Penland School with Alyssa Salomon, who specializes in alternative photographic techniques like cyanotype and van dyke. I had such fun experimenting with the techniques. This is a cyanotype. You can purchase cool maps of major cities at specialty paper stores. I bought this map of Manhattan at Two Hands Paperie. Do you see Central Park?
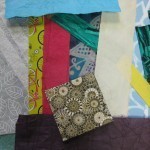
#39
[image error]
© Helen Hiebert, 100 x 100 Paper Weavings, #39, 10″ x 8″, $100
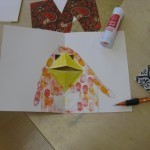
For Halloween, I decided to weave a Tootsie Pop wrapper into this printed key paper, also from Two Hands Paperie. The key paper reminded me of my freshman year of college, when I took 3D Design (and ate a lot of Tootsie Pops). One of our first assignments was to take an object and draw it from various perspectives. The paper brought up that memory.
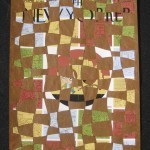
[image error]
© Helen Hiebert, 100 x 100 Paper Weavings, #40, 10″ x 8″, $100
Graphic Products Corporation imports papers from all over the world. I own their swatch books of over 800 papers! Just yesterday I received a nice donation from them including the two papers featured in this weaving: a Philippine Rice Hull paper and a Thai paper called Golden Leaves on Emerald. Graphic Product’s website is a great resource for choosing papers. And many paper stores around the country carry their papers – even my little art supply store here in the mountains of Colorado, which by the way, are covered with snow.
Related Posts
 Paper Giveaway!
 100 x 100 Paper Weavings + A Contest
 Warp, Weft, Watermark, Wood
[image error]
Her Fearful Symmetry
Warp, Weft, Watermark, Wood
[image error]
Her Fearful Symmetry
 The Physics of Weaving


October 29, 2013
Paper Giveaway!
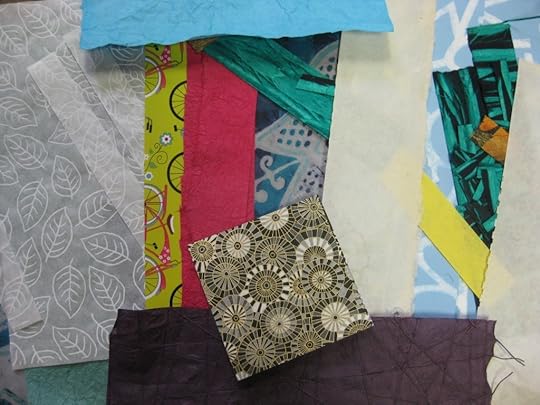
Decorative paper pieces from 100 x 100 Paper Weavings
I’m hosting a rafflecopter giveaway and invite you to join in on the fun! One lucky winner will receive an envelope full of incredible paper pieces that I’ve accumulated over the course of 100 x 100 Paper Weavings. This photo shows only a small portion of the prize… take a look through all of the weavings to date to get a glimpse of some of the unique papers you will receive.
#34
[image error]
© Helen Hiebert, 100 x 100 Paper Weavings, #34, 10″ x 8″, SOLD
This is a portion of another van dyke print by Alyssa Salomon on my abaca woven with Hiromi Paper’s brazilian banana paper in red. I love the crispness and translucency of this paper, which is most certainly related to abaca and shares its characteristics.
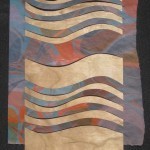
#35
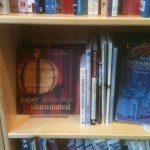
[image error]Acquiring Fine Papers
October 25, 2013
Acquiring Fine Papers
#31
[image error]
© Helen Hiebert, 100 x 100 Paper Weavings, #31, 10″ x 8″, $100
There are so many places to find and acquire papers! Do you make or decorate them yourself, do you purchase them at a store, do you buy from a warehouse or dealer? I’ve listed the companies that have contributed paper for this project in a sidebar on my web page. I also have a pinterest page featuring 50 places to shop for paper. Please leave a comment below if there is a resource you know of that I’ve missed!
The weaving pictured above features an eggplant colored paper with embedded strings that I purchased at The Artist’s Mercantile, an art supply store in Glenwood Springs. This particular shop orders all of its paper from Graphic Products Corporation/Black Ink, a paper distributor (their website is quite informative). I wove it with a gorgeous hand marbled paper by Steve Pittelkow. I’ve said this before: it is fascinating to watch Steve work his magic at the marbling tank.
#32
[image error]
© Helen Hiebert, 100 x 100 Paper Weavings, #32, 9″ x 9″, $100

#32 is double-sided!
Upcycling (giving something old a new life) is a great way to reuse interesting papers. Rockport Publishers, which published my book Playing With Paper, upcycles their print waste into these nifty blank books (and BTW, Rockport runs the Craftside Blog featuring projects from lots of their books). Paper Weaving #32 features upcycled paper from Lexi Boeger’s book Intertwined.

#33
[image error]
© Helen Hiebert, 100 x 100 Paper Weavings, #33, 10″ x 8″, $100
Designers often have their patterns reproduced on papers. I wove this blue paper designed by Debra Glanz of Reminiscence Papers. She sells a line of decorative papers in her Etsy Shop. Paper Connection International (PCI) imports papers from a variety of makers in Japan. The orange paper here, called Spokes on Tangerine, is from their Laurelai line designed by a couple of paperwomen exclusively for PCI.
I’m ramping up for another giveaway – this time an assortment of papers leftover from my weavings – be sure to read my next blog post for details!
Related Posts
Warp, Weft, Watermark, Wood
 By the Light of the Moon
 Weaving in the Midwest
The Physics of Weaving
[image error]
Weaving Through Life
Weaving in the Midwest
The Physics of Weaving
[image error]
Weaving Through Life
October 22, 2013
Weaving in the Midwest
#27
[image error]
© Helen Hiebert, 100 x 100 Paper Weavings, #27, 18″ x 9″, $100
I’ll make this brief, because I’m traveling and quite busy, but I have managed to make a weaving each day here in Missouri. I flew to St. Louis for the annual meeting of the Friends of Dard Hunter. Click the link to find out more about this renaissance man, particularly in the realm of paper.
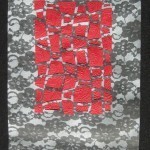
The lacy paper is made by one of my favorite hand papermakers, Andrea Peterson of Hook Pottery Paper. She makes these exquisite decorative sheets by using an airbrush to spray finely beaten pulp (in this case white) onto a base sheet through a piece of lace that she lays on top of the sheet. I brought along this embossed red floral paper that I picked out of the sale box at Two Hands Paperie.
#28
[image error]
© Helen Hiebert, 100 x 100 Paper Weavings, #28, 10″ x 8″, $100
I found these papers at Two Hands Paperie as well. The green paper is a printed wrapping paper (but I’m curious to know what else would you might use it for?). I love the cursive letters and was sad to hear that cursive isn’t being taught in school anymore. If this is truly the case, how will our future researchers be able to read old documents? I wove this with a printed Indian handmade paper.
#29
[image error]Art on the Walls
October 18, 2013
The Physics of Weaving
#24
[image error]
© Helen Hiebert, 100 x 100 Paper Weavings, #24, 14″ x 8″, $100
Hello from St. Louis, where I arrived today to attend the annual meeting of The Friends of Dard Hunter. I’m staying in a cute boutique hotel called The Moonrise, where all of the artwork pertains to … the moon!
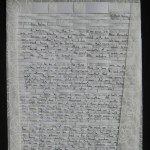
This project has been more nostalgic than I anticipated. I looked through a folder of old papers (not too many due to two facts: I’m not a hoarder and I’ve moved and purged so many times). My father (a nuclear physicist who now suffers from alzheimers) began writing this letter to me when I was 3-1/2 months old. It is quite moving (this is a photocopy, by the way) and I can barely start reading it without beginning to tear up. He gave it to me when I turned 21 (aka became an adult) and it is a piece of paper I will always cherish. The leaf printed paper is from Two Hands Paperie and reminds me of the season changing from summer to fall in East Texas where I grew up. My dad raked the leaves into piles in the back yard and we loved to jump into them.
[image error]
© Helen Hiebert, 100 x 100 Paper Weavings, #25, 12″ x 6″, $100
This is another handmade abaca paper with a pseudo watermarked alphabet layer in fine cotton. The kozo paper is from Hiromi Paper‘s colored kozo line (this is smoke) and is subtle and perfectly uniform (except for the wrinkles I made when weaving the thick bits through the thin slits).
[image error]
© Helen Hiebert, 100 x 100 Paper Weavings, #26, 10″ x 8″, $100
I covered a 4-panel lampshade for my daughter with four different beaded images similar to this one and gave it to her for Christmas one year. One of the panels popped off of the frame, and anyone who knows abaca knows that once it has contracted it will not expand, so finally I decided to remove (and save) the paper panels from the wire frame. This is one of them – the beads are embedded in between two sheets of paper. I wove it with pieces of painted tyvek (that stuff they use to wrap houses). I rubbed acrylic paint onto the tyvek’s surface, and the color picked up its fibrous texture.
Don’t forget that you can view all of the weavings to date here. I’d love to hear about which ones you are drawn to and why. Leave a comment below!
Related Posts
By the Light of the Moon
[image error]
Her Fearful Symmetry
Warp, Weft, Watermark, Wood
100 x 100 Paper Weavings + A Contest
 Art on the Walls
October 15, 2013
October 11, 2013
Warp, Weft, Watermark, Wood
#17
[image error]
© Helen Hiebert, 100 x 100 Paper Weavings #17, 10″ x 8″, $100
There are definitely a few crazy things that you find on the shelves in a paper store. This thin wood veneer caught my eye when I was working on my book Playing With Paper, but I didn’t find an opportunity to use it for the book. When looking through my flat files for this project, I was drawn to the way that the wood grain “matched” the pattern in this hand marbled paper by Tom Leech of Santa Fe, NM.

Tom Leech hand marbled paper on handmade paper, wood veneer
#18
[image error]
© Helen Hiebert, 100 x 100 Paper Weavings #18, 11″ x 8″, $100
On a recent visit to the hardware store, I noticed all of the paint swatches and decided they needed to be woven into this sheet of handmade cotton paper, which has a pseudo watermark on it. I made the watermark by pulling a very thin sheet of blue cotton paper, allowing the pulp to slip off of the alphabet resist that was adhered to the mould, and laminated that thin sheet to a base sheet of white cotton. I wonder who gets the job of naming the paint colors? And wouldn’t you know that the first swatch that jumped out at me was called Paper Lantern (see the top lefthand corner).
#19
[image error]
© Helen Hiebert, 100 x 100 Paper Weavings #18, 10″ x 8″, $100
Those of you who are familiar with my work know that I’m crazy about the shrinkage properties of handmade abaca paper. The white sheet here was made by sandwiching hemp cord between two sheets of abaca and allowing it to air dry. You can get an inkling about how this happens in the trailer for my film Water Paper Time. I wove strips of crinkled momigami paper (ogurashi blue/green from Paper Connection International) between the lines. I like how the textures of the papers complement each other. For those of you who are really interested in paper, Don Farnsworth wrote this great little book all about Japanese momigami (or kneaded) paper.
I’m working on a sales page that features all of the weavings. It isn’t quite up-to-date, but here’s a sneak peak for those of you who follow my blog. Thanks so much!
If you’ve enjoyed this post and aren’t already following along, type your e-mail address into the subscribe box above and you’ll find a new post in your in-box next Tuesday. And feel free to spread the word about this project to your paper-, weaving- and art-loving friends. Thanks!
Related Posts
100 x 100 Paper Weavings + A Contest
 Her Fearful Symmetry
By the Light of the Moon
Art on the Walls
Her Fearful Symmetry
By the Light of the Moon
Art on the Walls
 Weave, Wove, Wove
October 8, 2013
Her Fearful Symmetry

I have a fond recollection of this paper. I think it must be one of the first papers that I owned; perhaps purchased on a brief trip to Japan in 1989. I recognized it immediately in Paper Connection International‘s catalog, and I couldn’t resist getting a piece. The company, along with several other companies listed here, have generously donated papers for this project.
#13
[image error]
© 2013 Helen Hiebert, 100 x 100 Paper Weavings # 13, 4″ x 12″, $100
I wove the paper, Yuzen/grey wheels, with a piece of translucent abaca.
#14
[image error]
© 2013 Helen Hiebert, 100 x 100 Paper Weavings #14, 10″ x 8″, $100
Here is another Yuzen paper from Paper Connection International. There are a few companies that specialize in importing papers from Japan and this is one of them.
Do you ever wonder if you are a leader or a follower? I’d have to say that I followed the paper in this particular weaving of the Yuzen coral/blue waves and a piece of cooked kozo paper (which I pounded, stretched and dried). The two papers seemed right for each other, and the Yuzen paper “told me” where to make the cuts. This could be such a different weaving if you had done it. Here’s a peak at the two papers before they were woven.

#15
[image error]
© 2013 Helen Hiebert, 100 x 100 Paper Weavings #15, 10″ x 8″, $100
Elephant Hide is one of my favorite papers. It folds well, is supple and sturdy, and comes in a range of muted colors. It isn’t made anymore (was fabricated in Germany) but Talas still carries it (while supplies last). I purchased the yellow/green paper from Wet Paint in St. Paul, MN. I like this detail of the weaving:

#16
[image error]
© 2013 Helen Hiebert, 100 x 100 Paper Weavings #16, 10″ x 8″, $100
Okay, you are probably wondering about the title of this blog post. It is the title of an awesome book, Her Fearful Symmetry, by Audrey Niffenegger, about twin girls, a cemetery and ghosts (among other things). When I found the background paper in my drawer, I couldn’t stop seeing a portal in the trees. The portal is made from Cave Paper’s infamous Layered Indigo Day, which I wove into a print I made when I co-taught class at Penland with alternative photography whiz Alyssa Salomon. This is a cyanotype on handmade pigmented purple cotton paper.
BTW, Niffenegger also wrote The Time Traveler’s Wife, which features a hand papermaker as the heroine.
If you’ve enjoyed this post and would like to follow along, type your e-mail address into the subscribe box above and you’ll find the next post about this project in your in-box on Friday. And feel free to spread the word about this project to your paper-, weaving- and art-loving friends.
Related Posts
100 x 100 Paper Weavings + A Contest
By the Light of the Moon
Art on the Walls
Weave, Wove, Wove
 On the Bookshelf
October 4, 2013
Weave, Wove, Wove

Fall colors in Red Cliff
Doing something daily is meditative, like watching the leaves change colors. Doesn’t it seem like it just happens? One day everything is green and the next – boom: yellow, gold, orange, rust … What if we just sat down and watched the colors change? It would take a long time!
Thanks to everyone who participated in the drawing for a copy of Playing With Paper! Congratulations to the winner, Janet Osborn. Below are the front and back side of Weaving #2 which will confirm your guesses. (I took the photo of the back on a light box. See how the slits are accentuated by light? And for those of you who are really astute, the photo was taken before the little boxes were cut out).

As I’m creating these paper weavings, questions like this come to mind: How can I vary the cut of the line? How can I integrate two papers? How can I weave in new ways? And I always think about ingenuity in the history of craft … like today, when I attempted to weave a really long piece of spun paper into a warp. It was practically impossible (and would have taken too long for my patience level); I gave up and gave thanks for whomever invented the spool!
#10
[image error]
© 2013 Helen Hiebert Studio, 100 x 100 Paper Weavings, #10, 10″ x 8″, $100
And it isn’t just about two sheets of paper. I find myself looking through things in the studio, finding odd bits that could be woven into sheets of paper. Sorting through papers again and again, looking for two that go together, inspire me, call out to be entwined. There have been some failures, but I’m trying not to edit too much. Or to think too much. After all, I have 100 days!
#10 is a bit of a cheat. I got this colored sheet years ago from a colleague. It is some sort of plastic (I think she told me that plastic bags were melted down and made into these sheets). The texture of the plastic blends nicely with the texture of this piece of air-dried abaca I had in my sample drawer. When the sheet was wet, I cut it with a rotary cutter and then let it air dry into this shape, which happened to fit this sheet of plastic just right!
#11

#11 is made from a map (thanks to my son’s art teacher for sending a pile of them home). I had to go to Glenwood Springs last week to have my car serviced and stopped in the local art supply store, The Artists Mercantile & Gallery. I had a lovely conversation with one of the owners and was delighted to find an entire rack of papers in the shop. He orders his papers from Graphic Products, a large distributor of decorative papers from around the world. The colors in this sheet of paper remind me of the Aspen leaves here in Colorado now (although this morning we awoke to 4″ of snow). Can you guess what the cross in the middle of the sheet indicates? Here’s a clue:

#12
[image error]
© 2013 Helen Hiebert, 100 x 100 Paper Weavings #12, 10″ x 8″, $100
When I lived in NYC, Zelda Tanenbaum frequented Dieu Donné Papermill, where I worked, and created these embossed papers. She made the paper (this sheet is linen, I believe). Then she ran the wet, pressed sheet of paper through her etching press alongside a piece of lace. Zelda made high-end wedding invitations with these gorgeous embossed papers. The green and purple piece is an itajame dip-dyed sheet by Kristoferson Studio in Calgary, Alberta, Canada. You can read more about here process here, and I’ll be featuring more of her paper soon.
Don’t forget to check my pinterest board with images of all of the weavings so far… and here is another board which features places to shop for paper.
Please leave a comment below if you know of other places to buy papers! I’d love to add them to the board.
Related Posts
By the Light of the Moon
100 x 100 Paper Weavings + A Contest
Art on the Walls
 A New Paper = For the Birds!
 14: On the Twelfth Day of Paper…
October 1, 2013
Art on the Walls
#6
[image error]
© 2013 Helen Hiebert, 100 x 100 Paper Weavings #6, 10″ x 8″, $100
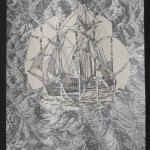
I taught a workshop at Walking Mountains Science Center last week, and when I inquired whether they had any paper (I stressed that it could be their trash) they gave me a lovely old topographic map of the state of Colorado. This is paired with an old book page featuring a wooden ship. I like the thought of this big ship sailing through the mountains of my landlocked state!

Paper Weavings on My Wall, #2, #3, #4, #6, #7
I grew up in a house with art on the walls. My mother loved supporting her artist friends by purchasing and commissioning their work and even hiring some of them to teach after school workshops for me and my friends.
We had a weaving hanging in our living room by one of my father’s cousins, Mary Buskirk, who lived in Monterey, California. It was a very non-traditional weaving – there were branches and holes in it – and that is why I liked it.
#7
[image error]
© 2013 Helen Hiebert, 100 x 100 Paper Weavings #7, 10″ x 8″, $100
A couple of weeks ago, I had a lovely drive through the mountains of southwestern Colorado when I taught a workshop at the Durango Arts Center. I stopped at the hardware store in Ouray and picked up this sandpaper for the workshop. I couldn’t stop thinking about integrating it into a weaving. Here you see it with a batiked Thai paper that I got from the arts center gift shop (they had an exquisite selection of these batiked papers that I’d never seen).
#8

© 2103 Helen Hiebert, 100 x 100 Paper Weavings #8, 10″ x 8″, $100
Can you see the brush strokes in the persimmon juice dyed paper? This coating (and a subsequent smoking process) makes the paper waterproof. It is used in Japan to coat umbrellas and stencil paper. Skilled artisans have cut intricate stencils for centuries to be used to print patterns on fabric and paper. Here it is woven with a marbled paper that I’ve had in my drawers for so long that I no longer recall who made it (my sincere apologies to the maker)!
#9

©2013 Helen Hiebert, 100 x 100 Paper Weavings #9, 11″ x 9″, $100
And finally, I employed an odd weaving technique, cutting 12 slits between the “numbers on the clock” and weaving vertical strips in and out of them. The papers are a bit mundane and nastaglic: a tabbed divider and a sheet of notebook paper.
Each of the weavings I’ve made so far fit perfectly into readymade 10″ x 8″ frames (or those matted for this size).

Don’t forget to leave a comment if you want to be entered into the drawing to win a copy of Playing With Paper! The lucky winner will be chosen at random tomorrow and he or she will be named in Friday’s blog post.
Related Posts
 By the Light of the Moon
100 x 100 Paper Weavings + A Contest
By the Light of the Moon
100 x 100 Paper Weavings + A Contest
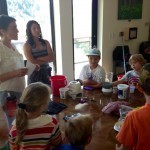 Kids Workshop at Walking Mountains
 The Paper Club
 7: Inflatable Paper


![[image error]](http://helenhiebertstudio.com/Blog/wp-content/uploads/2013/10/IMG_5597.jpg)
![[image error]](http://helenhiebertstudio.com/Blog/wp-content/uploads/2013/10/IMG_5604.jpg)
![[image error]](http://helenhiebertstudio.com/Blog/wp-content/uploads/2013/10/IMG_5607.jpg)
![[image error]](http://helenhiebertstudio.com/Blog/wp-content/uploads/2013/10/IMG_5592.jpg)
![[image error]Acquiring Fine Papers](http://helenhiebertstudio.com/Blog/wp-content/uploads/2013/10/IMG_5590.jpg)
![[image error]](http://helenhiebertstudio.com/Blog/wp-content/uploads/2013/10/IMG_5581.jpg)
![[image error]](http://helenhiebertstudio.com/Blog/wp-content/uploads/2013/10/Image-3.jpg)
![[image error]](http://helenhiebertstudio.com/Blog/wp-content/uploads/2013/10/IMG_5586.jpg)
![[image error]](http://helenhiebertstudio.com/Blog/wp-content/uploads/2013/10/IMG_5454.jpg)
![[image error]](http://helenhiebertstudio.com/Blog/wp-content/uploads/2013/10/IMG_5533.jpg)
![[image error]Art on the Walls](http://helenhiebertstudio.com/Blog/wp-content/uploads/2013/10/IMG_5536.jpg)
![[image error]](http://helenhiebertstudio.com/Blog/wp-content/uploads/2013/10/IMG_5439.jpg)
![[image error]](http://helenhiebertstudio.com/Blog/wp-content/uploads/2013/10/IMG_5446.jpg)
![[image error]](http://helenhiebertstudio.com/Blog/wp-content/uploads/2013/10/IMG_5450.jpg)
![[image error]Her Fearful Symmetry](http://helenhiebertstudio.com/Blog/wp-content/uploads/2013/10/IMG_5392.jpg)
![[image error]](http://helenhiebertstudio.com/Blog/wp-content/uploads/2013/10/IMG_54041.jpg)
![[image error]](http://helenhiebertstudio.com/Blog/wp-content/uploads/2013/10/IMG_5335.jpg)
![[image error]](http://helenhiebertstudio.com/Blog/wp-content/uploads/2013/10/Image.jpg)
![[image error]](http://helenhiebertstudio.com/Blog/wp-content/uploads/2013/10/IMG_5382.jpg)
![[image error]](http://helenhiebertstudio.com/Blog/wp-content/uploads/2013/10/IMG_5370.jpg)
![[image error]](http://helenhiebertstudio.com/Blog/wp-content/uploads/2013/10/IMG_5248.jpg)
![[image error]](http://helenhiebertstudio.com/Blog/wp-content/uploads/2013/10/IMG_5402.jpg)
![[image error]](http://helenhiebertstudio.com/Blog/wp-content/uploads/2013/10/IMG_5361.jpg)
![[image error]](http://helenhiebertstudio.com/Blog/wp-content/uploads/2013/10/IMG_5357.jpg)
![[image error]](http://helenhiebertstudio.com/Blog/wp-content/uploads/2013/09/IMG_5243.jpg)
![[image error]](http://helenhiebertstudio.com/Blog/wp-content/uploads/2013/09/IMG_5244.jpg)