Rebecca Firth's Blog, page 2
September 5, 2025
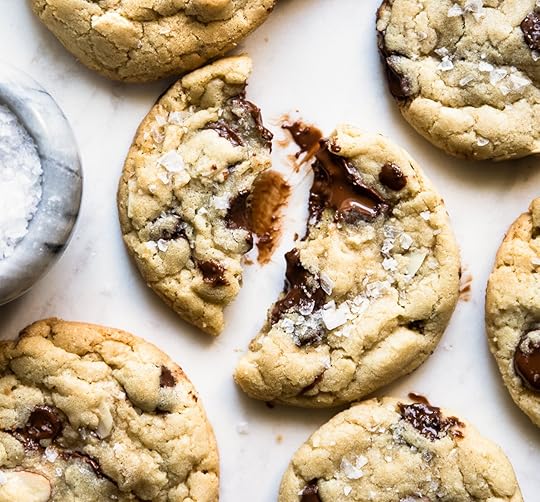
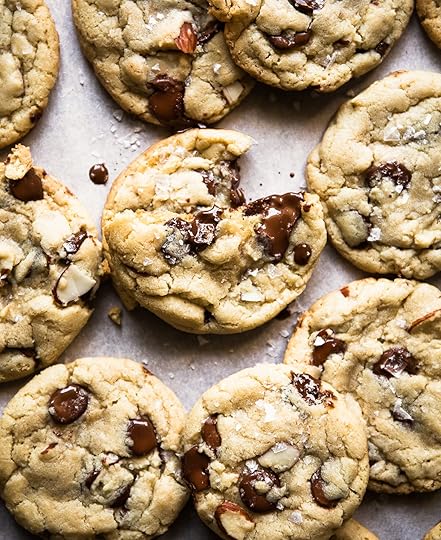
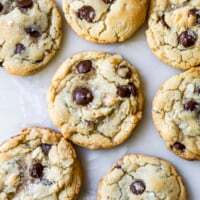
Easy Toasted Almond Chocolate Chip Cookie Recipe
I wanted to really play up the almond vibes in these best Almond Chocolate Chip Cookies, so I added a delicious combination of super fine almond flour, almond extract and toasted, sliced almonds. Bonus: these are also dairy-free and use only one bowl!
The texture in these is UNREAL–they are chewy in the center and crispy along the edges *and* stay deliciously so for days. You can bake these for less time to achieve a softer, chewier cookie. For a crispier, crunchier cookie, bake them for longer. See the Notes section below the recipe for more details.
I give instructions using an electric stand mixer (because I want the oil and the sugar to be well beaten), but you could also make these in a bowl with a whisk, as long as you really emulsify the sugar and oil in that first step.
If you’ve baked my cookies before, this texture is a bit different than my usual cookie. The all-oil cookie dough yields a crispier cookie and I’m here for it!
Enjoy this mega fabulous, mega delicious and easy chocolate chip cookie recipe with almonds!

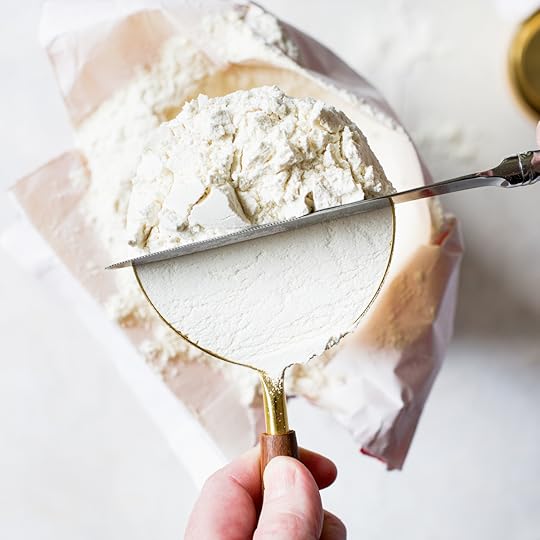 The Baker’s Guide to Measuring Flour
One of the biggest (and most common) mistakes in baking is how we measure flour. If you find yourself without a scale, see my top tips on how to properly measure flour for the perfect amount every time!
 My Favorite Pro Baking Tips
 for Perfect Triple Almond Chocolate Chip CookiesReally whip up the sugar and oil to help keep the cookie texture lightBe sure to use ‘super fine’ almond flour for the perfect cookie textureUse a cooking oil that has a delicious flavor! My recommendation would be for a light-flavored olive oil, sunflower seed oil or grapeseed oil
Let’s get to baking the best almond chocolate chip cookies recipe!
 Step-by-Step Photos (and Captions) to
 Make Perfect Chocolate Almond Cookies!
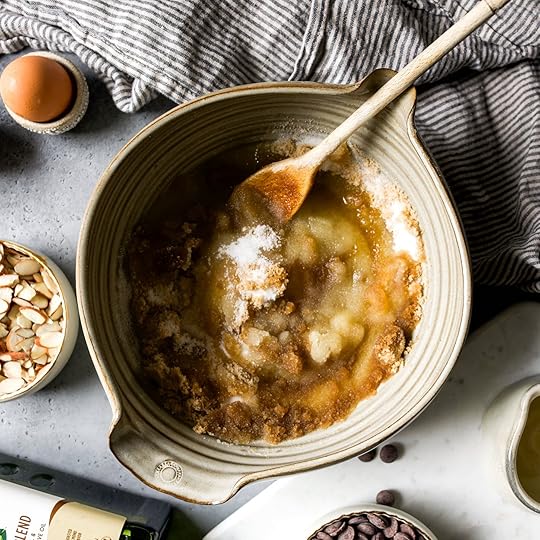 STEP 1: Mix the oil, sugar, brown sugar, vanilla and almond extract until well blended and light, about 3 to 4 minutes. You can also use a whisk for mixing this cookie dough.
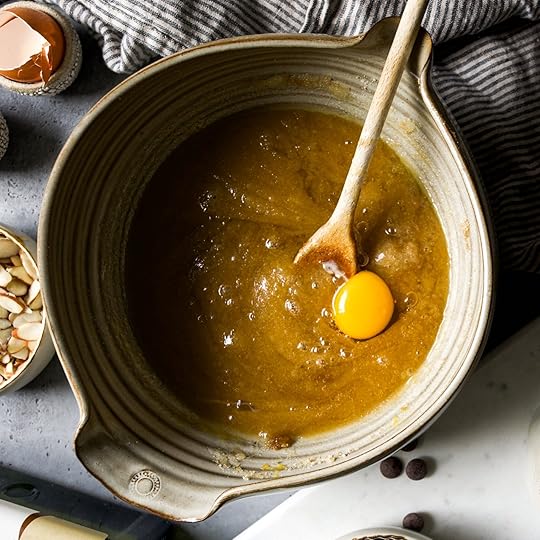 STEP 2: Add in the eggs, one at a time, completely mixing in the first egg before adding the second.
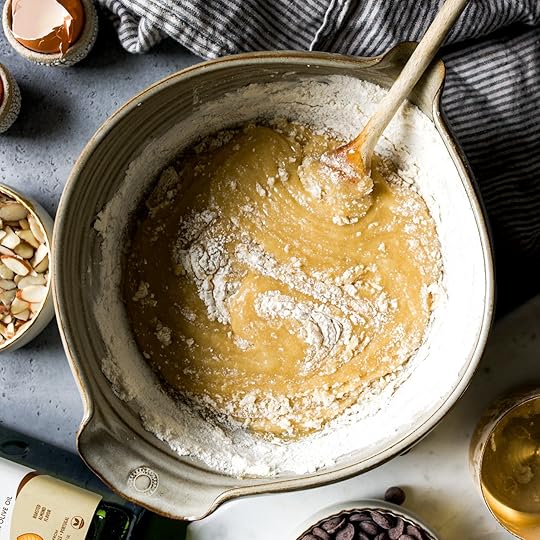 STEP 3: Stir in the almond flour, baking soda and salt…
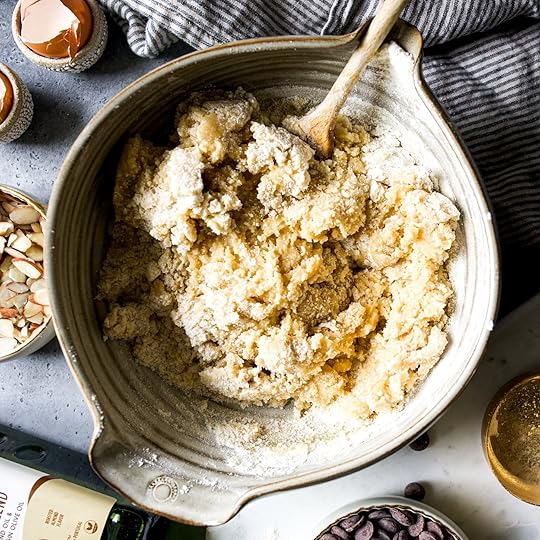 STEP 4: …then add in the flour until just mixed and you still see streaks of flour.
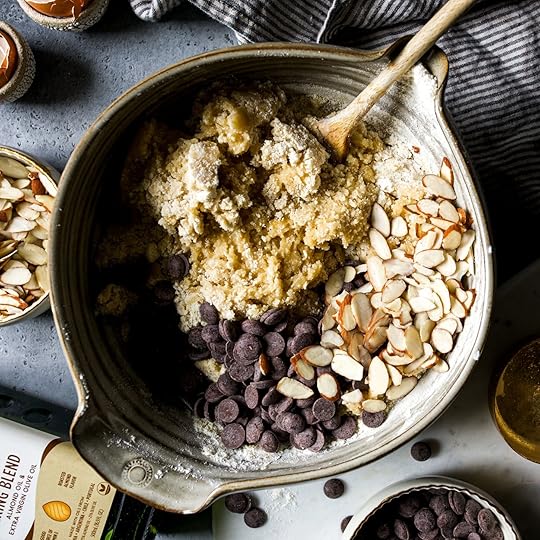 STEP 5: Gently mix in the chocolate and sliced almonds until just combined. Take care not to overmix the dough.
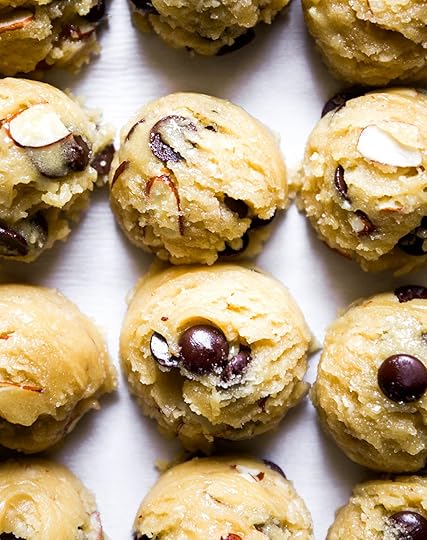
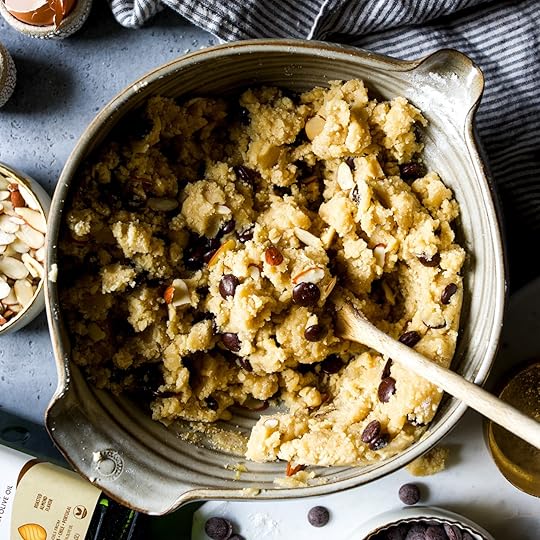 STEP 5: Your cookie dough will look like this!
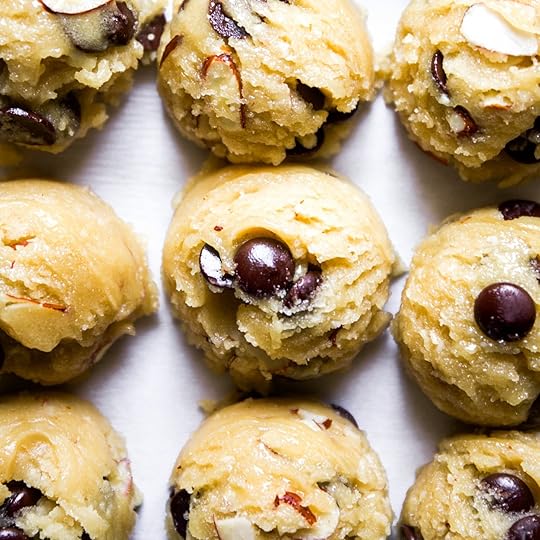 STEP 6: Scoop 2-tablespoon cookie dough scoops and bake for 11 minutes in the center of the oven.
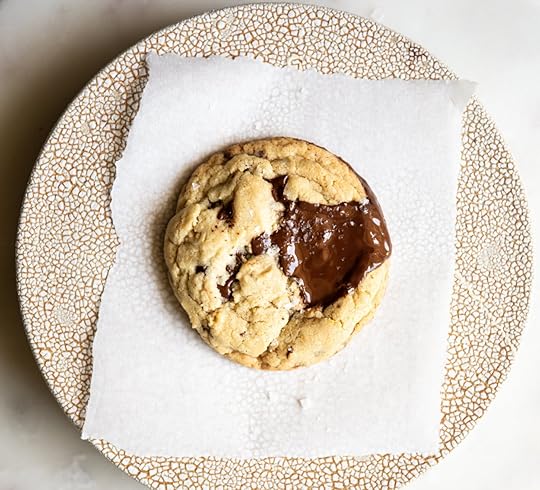
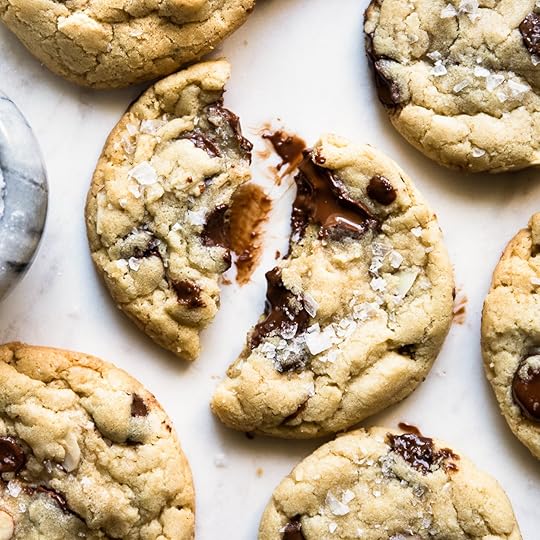 STEP 7: Let your cookies cool on the baking sheet for 10 minutes before transferring to a wire rack to finish cooling. Enjoy your cookies!
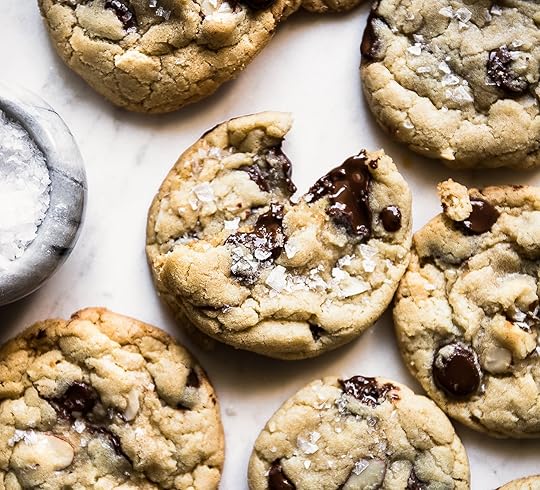 How I Recipe Tested This Almond Chocolate Chip Cookie
My original version of this cookie was baked at 350°F (177°C) for 11 minutes. This yielded a softer, slightly underbaked cookie. What I didn’t love was that it was very blonde (the lack of butter really takes away some of the cookie’s color).
Baking this almond cookie at a higher heat (375°F (191°C)) yields the perfect bronzed cookie color (it’s so pretty!) with a pretty fabulous crunch.
I also love the super fine almond meal that gives it this slightly underdone center (it doesn’t bake like traditional flour). Then there are layers and layers of almond flavor with the crunchy sliced almonds and the almond extract. If you’re a ‘less is more’ person, use 1 teaspoon of almond extract. If you’re in the ‘more is more’ category, then go for a full 2 teaspoons!
I can’t wait to hear what you think about this cookie! I love that it is a no-chill, no-butter, one-bowl wonder. Have fun!
 More Delicious Chocolate Chip Cookie Recipes!
I love chocolate chip cookies!! Check out my favorite Chewy Chocolate Chip Peanut Butter Cookies and these Salted Caramel Chocolate Chip Cookies that are a reader favorite!
You can find all of the chocolate chip cookie recipes here.
Enjoy this easy almond chocolate chip cookie recipe!
 PrintEasy Toasted Almond Chocolate Chip Cookie Recipe#wprm-recipe-user-rating-0 .wprm-rating-star.wprm-rating-star-full svg * { fill: #343434; }#wprm-recipe-user-rating-0 .wprm-rating-star.wprm-rating-star-33 svg * { fill: url(#wprm-recipe-user-rating-0-33); }#wprm-recipe-user-rating-0 .wprm-rating-star.wprm-rating-star-50 svg * { fill: url(#wprm-recipe-user-rating-0-50); }#wprm-recipe-user-rating-0 .wprm-rating-star.wprm-rating-star-66 svg * { fill: url(#wprm-recipe-user-rating-0-66); }linearGradient#wprm-recipe-user-rating-0-33 stop { stop-color: #343434; }linearGradient#wprm-recipe-user-rating-0-50 stop { stop-color: #343434; }linearGradient#wprm-recipe-user-rating-0-66 stop { stop-color: #343434; }#wprm-recipe-user-rating-0.wprm-user-rating-allowed.wprm-user-rating-not-voted:not(.wprm-user-rating-voting) svg * { fill-opacity: 0.3; }Almond flour, sliced almonds & almond extract are what make this one-bowl, dairy-free, Mega Almond Chocolate Chip Cookie recipe (that's CRUNCHY! CHEWY!) simply irresistible!Course Dessert, SnackCuisine AmericanPrep Time 12 minutes minutesCook Time 11 minutes minutesTotal Time 23 minutes minutesServings 28 CookiesAuthor Rebecca FirthEquipmentBaking ScaleBaking Sheets#40 2-TBSP Cookie ScoopIngredients1 cup (224 g) cooking oil my favorites: olive oil, sunflower seed oil or grapeseed oil; see Notes below recipe1 ½ cup (300 g) granulated sugar1/2 cup (110 g) light brown sugar packed2 teaspoons real vanilla extract2 teaspoons almond extract2 large eggs room temperature1/2 cup (48 g) super fine almond flour1 teaspoon baking soda1 teaspoon sea salt2 1/2 cups (338 g) all-purpose flour1 1/4 cups (213 g) dark chocolate chips¾ cup (85 g) sliced almonds toastedflaky sea salt optionalInstructionsPreheat your oven to 375°F (191°C) and line several baking sheets with parchment paper.To the bowl of an electric stand mixer fitted with the paddle attachment, add oil, granulated sugar and brown sugar. Run the machine on medium speed for 3-4 minutes, or until the mixture is completely combined.With the mixer on medium low, add in the eggs, one at a time, making sure the first is well blended before adding in the second. Scrape down the sides and bottom of the bowl to make sure everything is well combined.Finally, add the almond flour, baking soda, and salt, and run the machine for an additional 1 minute, or until well combined.Take the bowl out of the mixer stand and, using a spatula, fold the all-purpose flour into the dough until the mixture is almost combined but you still see traces of flour. Stir in the chips and fold several times more or until the chips are evenly distributed throughout the dough.Using a 2-tablespoon cookie scoop, scoop dough, roll into a ball and place on the prepared baking sheets, leaving 2 inches (5 cm) between each dough ball. Bake one sheet at a time in the center of the oven for 9 to 10 minutes. They should be lightly bronzed and may look slightly underbaked in spots; that's fine. The cookies will also be puffy fresh from the oven, and will then relax and crinkle as they cool.Let cool on the baking sheet for 5 minutes before transferring to wire racks to cool completely. Sprinkle with sea salt flakes if using.NotesThis is a Mixer-Optional RecipeThe step-by-step photos use a bowl and a wooden spoon to mix this recipe, while the recipe card references an electric stand mixer.Both of these options are viable. You could also use a handheld mixer.If you use a bowl, a silicone spatula, and/or a whisk would be great for mixing this dough.If you mix the cookie dough by hand, make sure to really mix the sugar and oil together for the perfect cookie texture.Choosing Oil for this Almond CookieI have made this cookie with both olive oil and sunflower seed oil, and I loved both. The olive oil may add some color to the cookie. Gluten-Free CookiesIf you’re looking to make this cookie gluten free, replace the all-purpose flour with a 1:1 gluten-free baking flour, such as King Arthur Baking Measure for Measure or Bob’s Red Mill 1-to-1.Cookie SizeIn the recipe, it lists a 2-tablespoon cookie scoop per cookie. However, if you’re looking for a large, bakery-style cookie, go for a 3-tablespoon cookie scoop. These are so beautiful as a big cookie!If you find that your cookie is a little puffier than you’d like, make sure you weighed your ingredients. Second, add more cookie dough to your cookies and tap the baking sheet on the counter to deflate the cookies a bit when they’re fresh from the oven. Remember, they will deflate and crinkle as they cool.Bake TimeFor a crispier cookie, bake for 11 minutes. For a softer, chewier cookie (that’s still crispy!), bake for 8 minutes. If you use the shorter bake time, you may need to leave them on the baking sheet for an extra 5 minutes to let them firm up.Cookie StorageStore your cookies in an airtight container, at room temperature, for up to 3 days.The cookies can be frozen for up to several months in an airtight container with parchment paper separating layers of cookies. Defrost in the fridge overnight and then set on the counter to come to room temperature.Cookie Dough StorageStored in an airtight container, this cookie dough can be stored in the refrigerator for up to 3 days.To freeze the dough, store it in the cookie dough wrapped tightly in plastic wrap and then stored in an airtight container for 2 to 3 months in the freezer. Defrost the cookie dough in the refridge overnight before setting it on the counter to come closer to room temperature.Cookie dough that has been stored in the freezer or the fridge will result in a cookie that’s a bit puffier and will need an extra minute or two of bake time.
The post Easy Toasted Almond Chocolate Chip Cookie Recipe appeared first on DisplacedHousewife.


August 27, 2025
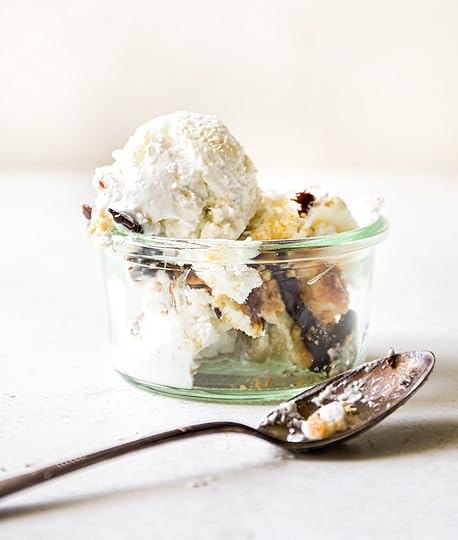
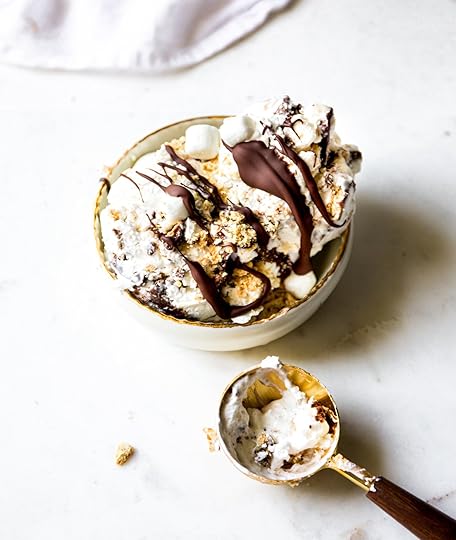
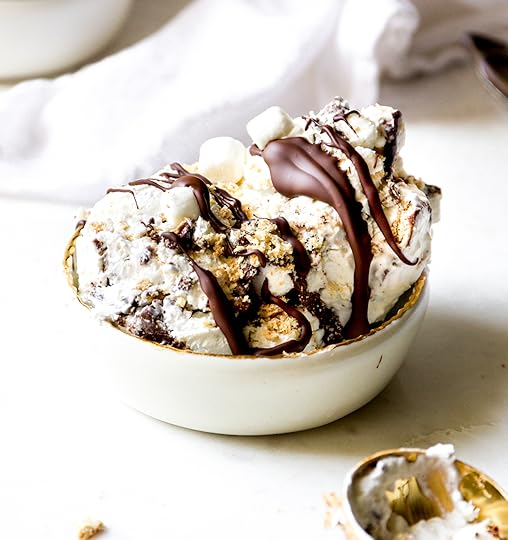
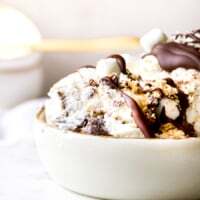
Easy Homemade S’mores Ice Cream (No-Churn Recipe)
Looking for the perfect no-fuss summer dessert? This No-Churn, Homemade S’mores Ice Cream recipe is the answer!
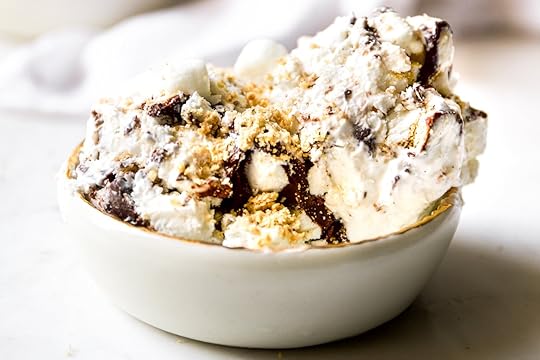
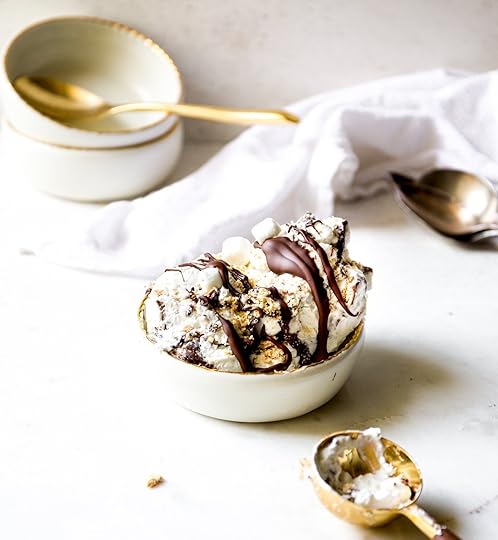
You don’t need an ice cream maker to create this easy, creamy and dreamy treat. In just 30 minutes, you can whip up a batch of this decadent ice cream, loaded with toasted marshmallows, crunchy graham crackers, and swirls of rich chocolate ganache.
After about six hours in the freezer, this ice cream is the perfect treat to celebrate the season—no campfire required!
I can’t wait to hear what you think!
 Delicious S’mores Ice Cream Can Be Yours In 3 Easy Steps!
First, Make Some Silky Ganache
First, you’ll melt some chocolate, along with heavy whipping cream. Set aside to cool
Second, Whip Up Some Whipped Cream
Next, you’ll whip up some heavy cream and stash it in the freezer while you do the next step…
Third, Fluff Up Some Marshmallow Meringue
Lastly, you’ll fluffy up some marshmallow meringue (my favorite!).
Fold the chilled whipped cream into the meringue, then gently mix in the marshmallows and graham cracker crumbs. And that’s it!
I love to char my marshmallows a bit for full campfire vibes, but this is optional and only takes a sec!
 My Favorite Pro Baking Tips for The Best S’mores Ice Cream!Melt the chocolate over low heat. Don’t overheat your chocolate while melting it, and remember that chocolate bars are better at melting than chocolate chips. Lastly, let your chocolate ganache cool completely before adding it to the vanilla ice cream base.Don’t over-beat the whipped cream. You’ll end up making butter, which we definitely don’t want here! Grab all of my favorite tips & tricks for
perfect whipped cream
.Cool the meringue before adding it to the whipped cream. You want to make sure the meringue is completely cool before adding it to the whipped cream, otherwise you’ll end up with a soupy mess and we don’t want that!Let your no-churn ice cream chill! It needs a solid six hours (ideally overnight) to get perfectly chilled through. When ready to serve, let it sit on the counter for about 5 minutes before scooping and serving.
My Favorite Pro Baking Tips for The Best S’mores Ice Cream!Melt the chocolate over low heat. Don’t overheat your chocolate while melting it, and remember that chocolate bars are better at melting than chocolate chips. Lastly, let your chocolate ganache cool completely before adding it to the vanilla ice cream base.Don’t over-beat the whipped cream. You’ll end up making butter, which we definitely don’t want here! Grab all of my favorite tips & tricks for
perfect whipped cream
.Cool the meringue before adding it to the whipped cream. You want to make sure the meringue is completely cool before adding it to the whipped cream, otherwise you’ll end up with a soupy mess and we don’t want that!Let your no-churn ice cream chill! It needs a solid six hours (ideally overnight) to get perfectly chilled through. When ready to serve, let it sit on the counter for about 5 minutes before scooping and serving.Have fun with this easy ice cream recipe!
 Check Out More Delicious Frozen Dessert Recipes!
Don’t sleep on my favorite Brown Sugar Ice Cream or this Neapolitan Ice Cream Cake. You can find all of the frozen dessert recipes here!
I hope you love this S’mores Ice Cream as much as we do!
 PrintEasy Homemade S’mores Ice Cream (No-Churn Recipe)#wprm-recipe-user-rating-0 .wprm-rating-star.wprm-rating-star-full svg * { fill: #343434; }#wprm-recipe-user-rating-0 .wprm-rating-star.wprm-rating-star-33 svg * { fill: url(#wprm-recipe-user-rating-0-33); }#wprm-recipe-user-rating-0 .wprm-rating-star.wprm-rating-star-50 svg * { fill: url(#wprm-recipe-user-rating-0-50); }#wprm-recipe-user-rating-0 .wprm-rating-star.wprm-rating-star-66 svg * { fill: url(#wprm-recipe-user-rating-0-66); }linearGradient#wprm-recipe-user-rating-0-33 stop { stop-color: #343434; }linearGradient#wprm-recipe-user-rating-0-50 stop { stop-color: #343434; }linearGradient#wprm-recipe-user-rating-0-66 stop { stop-color: #343434; }#wprm-recipe-user-rating-0.wprm-user-rating-allowed.wprm-user-rating-not-voted:not(.wprm-user-rating-voting) svg * { fill-opacity: 0.3; }Enjoy this no-churn S'mores Ice Cream that needs no ice cream maker, uses just 9 ingredients and is loaded with toasted marshmallows, crunchy grahams & rich ganache! Course Dessert, SnackCuisine AmericanKeyword Rebecca Firth, DisplacedHousewife Well-Tested Recipe, S’mores, Ice Cream, No-Churn, Graham Crackers, Chocolate, MarshmallowsPrep Time 20 minutes minutesFreezer Time 6 hours hoursTotal Time 6 hours hours 20 minutes minutesServings 6 ServingsAuthor Rebecca FirthEquipmentMy Favorite Ice Cream ScoopBaking Scale9 x 5-inch (23 x 13-cm) Loaf PanIngredientsFor the Chocolate Ganache¾ cup (128 g) dark chocolate finely chopped⅓ cup (75 g) heavy whipping creamFor the Ice Cream Base2 cups (480 g) heavy whipping cream cold3 large eggs1/2 cup (100 g) granulated sugar2 tablespoons (42 g) light corn syrup½ vanilla bean split and scraped or 2 teaspoons real vanilla extract1 teaspoon sea saltTo Assemble1/2 cup (65 g) graham crackers about 4 graham crackers, coarsely chopped2 cups (126 g) mini marshmallowsInstructionsFor the GanacheIn a medium, heat-safe bowl, add the chocolate and ⅓ cup heavy whipping cream and set over a medium saucepan of simmering water. Do not let the bowl touch the water or let the water boil. Stir frequently until melted and smooth. Place a towel on the counter, take the bowl off of the heat and pour it into another bowl. Set aside and stir periodically as the chocolate cools. For the Vanilla Ice Cream BaseIn an electric stand mixer fitted with the whisk attachment, add the cold whipped cream and whisk on medium until it’s holding stiff peaks; depending on the speed of your mixer, it should take about 3 minutes. Take care not to overbeat the cream or you’ll turn it to butter. Add to a metal or ceramic loaf pan, cover and place in the fridge to keep chilled. Clean and dry the mixer bowl and whisk.Add the eggs and sugar to the cleaned, electric stand mixer bowl and set it over a medium saucepan of simmering water. Do not let the bowl touch the water or let the water boil. Whisk until the mixture is frothy, opaque and when rubbed between two fingers, you don’t feel any grit from the sugar; about 4 to 6 minutes. Place the bowl in the mixer stand fitted with the whisk attachment, add the light corn syrup, vanilla bean and sea salt, and whisk on medium until the mixture has tripled in volume and is no longer warm.Once the egg and sugar mixture is cool to the touch, gently fold it into the chilled whipped cream until just combined. To AssembleFold in the marshmallows and crumbled graham crackers. Add 1/3 of the ice cream to the loaf pan and drizzle with 1/3 of the chocolate and repeat until all of the ice cream, chocolate, graham crackers and marshmallows are in the pan. Don’t let the chocolate get too thick in spots, or it will be difficult to scoop later. Wrap tightly with foil and place in the freezer for a minimum of 6 hours, ideally overnight. Let soften slightly for 10 minutes on the counter prior to scooping.NotesHow to Toast The MarshmallowsIf you’d like the marshmallows to be toasty, turn on the broiler in your oven, line a baking sheet with foil and grease. Sprinkle the prepared baking sheet with the marshmallows and place in the oven until they are lightly charred (or take it as far as you’d like); this shouldn’t take more than a minute. Set aside to cool before adding to your ice cream.If You Don’t Have a Mixer…Can be made with a hand-held mixer or with a whisk, bowl and your well-toned arms!Ice Cream SafetyTo keep your ice cream safe, bring the egg + sugar mixture to 160°F (71°C) and use pasteurized eggs.
 The post Easy Homemade S’mores Ice Cream (No-Churn Recipe) appeared first on DisplacedHousewife.
August 20, 2025
10 Irresistible Back-to-School Baking Recipes (Delicious & Easy)
These favorite, go-to, back-to-school baking recipes are perfect even if you don’t have little people going back to school (does that feeling ever leave us?!).
We’re making this transitional time a whole lot sweeter with 10 of our favorite, delicious & easy baking recipes.
These incredible everyday chocolate chip cookies are so easy, they’re the ultimate no-fuss bake, while our oh-so-popular decadent chocolate granola bars are great for after-school snacks, and our fluffy and moist blueberry muffins are a morning classic.
Enjoy these delicious pre-fall bakes!
 My Favorite Back-To-School Baking Tips!One-bowl baking recipes are ideal!
Limited bandwidth during this busy calls for a recipe that’s streamlined with minimal mess. Helloooo one-bowl baking. Check out the banana snacking cake and the decadent chocolate zucchini muffins!
Pick recipes that are quick (because we’re busy!).See note above! Our free time is limited, so check out some of our under 60 minutes recipes such as the lemon olive oil cake and these foolproof blueberry muffins that everyone will love (promise).
Make baked goods that can be served for multiple meals & travel well.Both the pizza and chocolate granola bars do double-duty as lunchbox treats and/or afterschool snacks!
Let’s get to the 10 favorite back-to-school baking recipes!
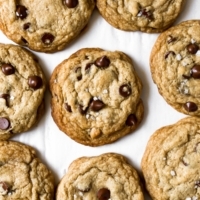
1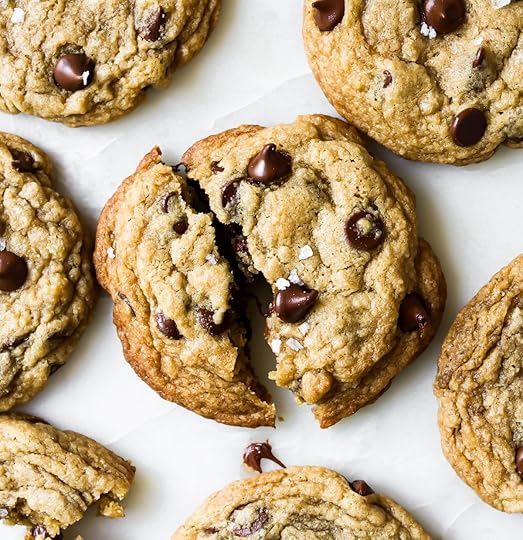 The Best Chewy Chocolate Chip Cookies Meet your new go-to Classic Chocolate Chip Cookie recipe for perfect, chewy, soft cookies any day of the week! This one-bowl recipe leans on brown sugar and vanilla for maximum flavor with minimal effort. Ready in under 30 minutes (zero rest time!) I promise this cookie will be your new favorite!
Scroll down for the full recipe!
Chocolate Chip Cookies 2
The Best Chewy Chocolate Chip Cookies Meet your new go-to Classic Chocolate Chip Cookie recipe for perfect, chewy, soft cookies any day of the week! This one-bowl recipe leans on brown sugar and vanilla for maximum flavor with minimal effort. Ready in under 30 minutes (zero rest time!) I promise this cookie will be your new favorite!
Scroll down for the full recipe!
Chocolate Chip Cookies 2 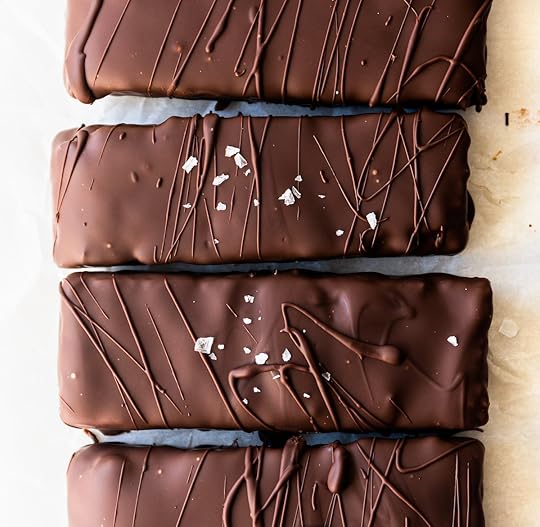 Soft & Chewy Chocolate Granola Bars These homemade Soft & Chewy Chocolate Granola Bars are a granola bar-meet-candy bar situation, and completely loaded with good-for-you stuff! Easily mixed and baked they are perfectly sweet and salty, naturally gluten free and 100% customizable. These will quickly become your new favorite snack! Granola Bars Recipe 3
 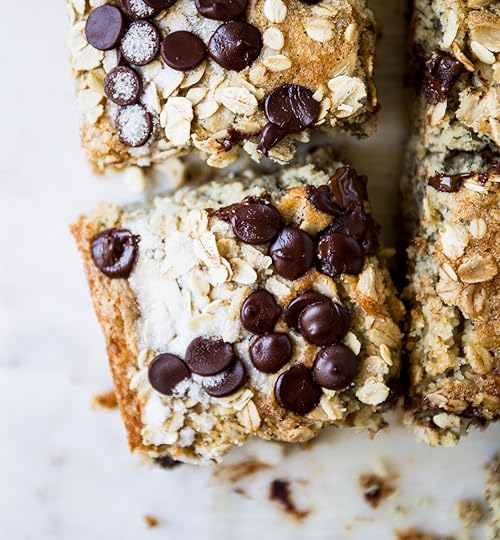 Banana Oat Snacking Cake Behold the wonder that is this one-bowl Fluffy Banana Oat Snacking Cake! Loaded with cozy flavors like vanilla, nutmeg, oats, bananas and brown sugar, it has a crumb that is soft, tender and fluffy (like you'd expect from anything banana!). Bonus, this cake doesn't need an electric mixer. The next time you're thinking of making banana bread, try this! Banana Snacking Cake 4
  The Very Best Chocolate Zucchini Muffins You Need to Bake ASAP! Rich chocolate flavor with a plush, mega-moist crumb are the hallmark characteristics of this super-simple, secretly veggie-packed Double Chocolate Zucchini Muffin one-bowl recipe, which is mixed and baked in under an hour! Zucchini Muffins Recipe 5
 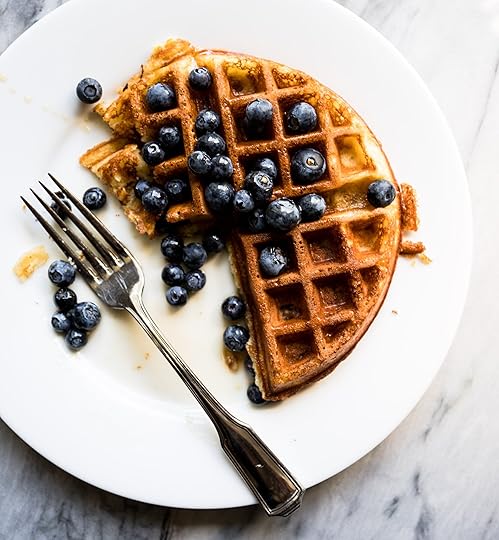 Crispy Buttermilk Waffles The BEST crispy buttermilk waffle recipe! Nothing fancy, just some pantry basics deliver a waffle that's crispy on the outside, soft and delicious on the inside. We love to pile them high with blueberries, drizzle with maple syrup and dust with confectioners' sugar. Buttermilk Waffles Recipe 6
  One-Bowl Lemon Olive Oil Cake This Mega Delish Lemon Olive Oil Cake is a one-bowl wonder that is mixed and baked in an hour! It is bright, moist, light and has mega lemon flavor. Feel free to play around with any citrus (or any combination). So delicious to eat that no one will know it was so flipping easy to make! Lemon Olive Oil Cake 7
 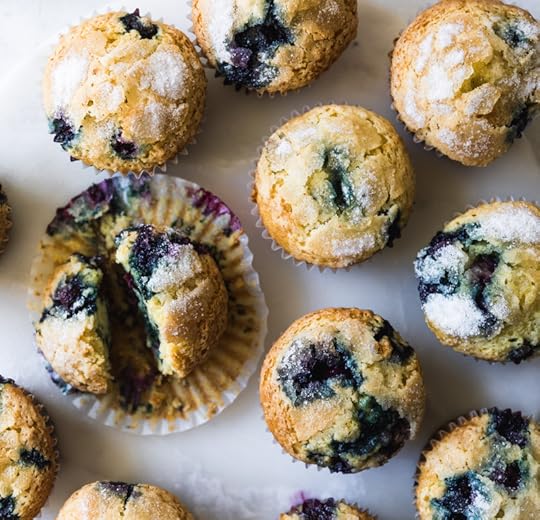 Homemade Blueberry Muffins These Perfect Easy Blueberry Muffins are a cozy classic with just 12 basic ingredients, no fancy ingredients, no crazy technique but HELLA delicious flavor. They're SUPERRRRR moist, loaded with juicy blueberries and the most tender crumb. Lemon Blueberry Muffins 8
 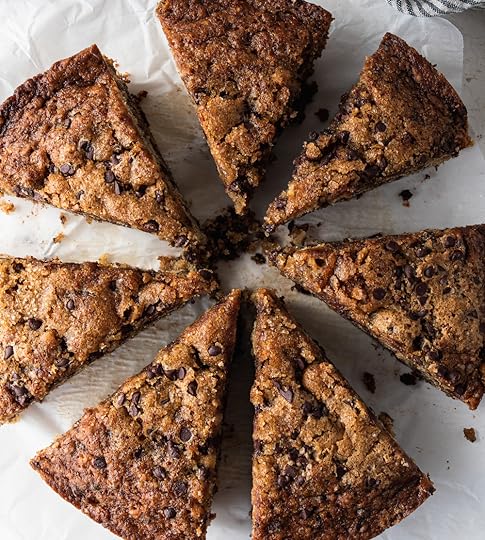 Bouncy Banana Chocolate Chip Skillet Cake A super delicious, banana-forward, easy peasy banana cake recipe! A one-bowl wonder that draws on browned butter, heaps of vanilla and a touch of nutmeg for the most delicious banana cake out there. Baked up in a skillet and sprinkled with dark chocolate and Demerara sugar (optional), it's like a fancier, casual-chic version of banana bread! Banana Skillet Cake 9
 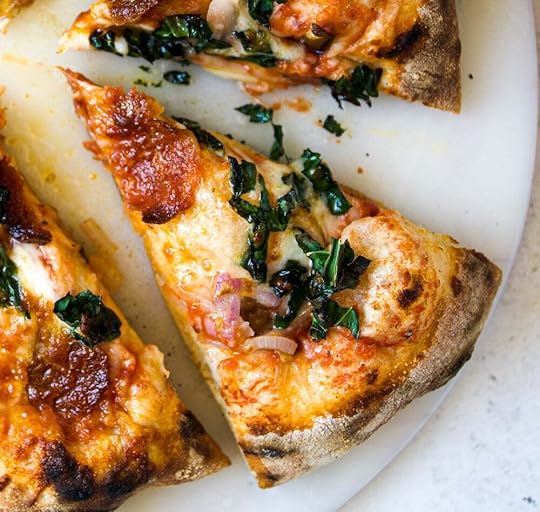 Easy Mushroom Pizza Recipe This is a great pizza dough recipe. You can customize the pizza toppings however you'd like! This delicious mushroom pizza is smothered in my favorite pizza sauce, sautéed mushrooms, onions and garlic, slivers of lacinato kale and layers of mozzarella and fresh-grated parmesan. The dough has same day as well as overnight options. You will love it! Pizza Dough Recipe 10
 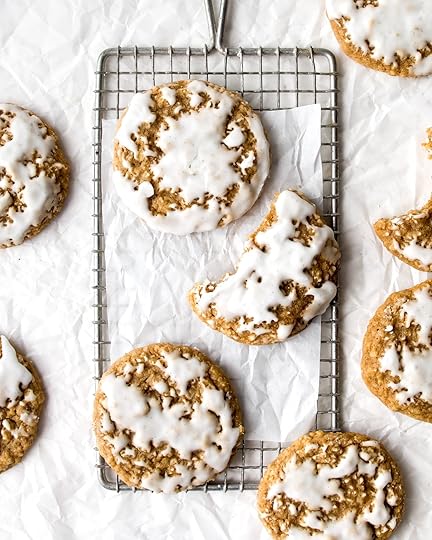 Old-Fashioned Iced Oatmeal Cookies These Homemade Soft & Chewy Iced Oatmeal Cookies are the ultimate nostalgic cookie! A brown sugar-rich cookie dough is loaded with oats, a touch of molasses and spices for mega flavor. The dough needs a short 20 minutes fridge rest prior to baking. The cooled cookies are dipped in a thick, vanilla glaze for the perfect old-fashioned iced oatmeal cookie! Iced Oatmeal Cookies
Enjoy your back-to-school baking!
 Print10 Irresistible Back-To-School Baking Recipes: The Best Chocolate Chip Cookie Recipe#wprm-recipe-user-rating-0 .wprm-rating-star.wprm-rating-star-full svg * { fill: #343434; }#wprm-recipe-user-rating-0 .wprm-rating-star.wprm-rating-star-33 svg * { fill: url(#wprm-recipe-user-rating-0-33); }#wprm-recipe-user-rating-0 .wprm-rating-star.wprm-rating-star-50 svg * { fill: url(#wprm-recipe-user-rating-0-50); }#wprm-recipe-user-rating-0 .wprm-rating-star.wprm-rating-star-66 svg * { fill: url(#wprm-recipe-user-rating-0-66); }linearGradient#wprm-recipe-user-rating-0-33 stop { stop-color: #343434; }linearGradient#wprm-recipe-user-rating-0-50 stop { stop-color: #343434; }linearGradient#wprm-recipe-user-rating-0-66 stop { stop-color: #343434; }#wprm-recipe-user-rating-0.wprm-user-rating-allowed.wprm-user-rating-not-voted:not(.wprm-user-rating-voting) svg * { fill-opacity: 0.3; }Grab our 10 favorite bake-to-school baking recipes to make right now! Grab your little ones and make the ultimate baked goods, snacks and desserts for lunchboxes, breakfasts and afterschool snacks. Be sure to make several batches of the best chocolate chip cookies (this dough freeze great!). Course Dessert, SnackCuisine AmericanKeyword Back-To-School Recipes, Rebecca Firth, DisplacedHousewife Well-Tested RecipePrep Time 20 minutes minutesCook Time 11 minutes minutesTotal Time 21 minutes minutesServings 27 CookiesAuthor Rebecca FirthEquipmentFavorite Handheld MixerBaking Scale#20 3-TBSP Cookie ScoopBaking SheetsIngredients2 cups (420 g) light or dark brown sugar packed16 tablespoons (226 g or 8 ounces) unsalted butter room temperature2 tablespoons (23 g) vanilla paste or real vanilla extract1 ½ tablespoons (21 g) extra virgin olive oil (or use any oil you have on hand)2 large eggs room temperature1 ½ teaspoons (9 g) sea salt1 teaspoon baking powder1 teaspoon baking soda3 cups + 2 tablespoons (423 g) all-purpose flour how to measure flour2 cups (340 g) dark, milk or semi-sweet chocolate chips, chunks or coarsely chopped barSea salt flakes for the tops optionalInstructionsPreheat your oven to 350°F (177°C) and line several baking sheets with parchment paper.In a large bowl, add the brown sugar, butter, vanilla, and olive oil, and beat with a spatula until the mixture is light and fluffy. The mixture should no longer appear dense, and its color should have lightened. This should take about 4 to 5 minutes.Add the eggs one at a time, ensuring the first is fully blended before adding the second. Add in the salt, baking powder and baking soda and mix for 30 seconds until fully combined.Gently fold in the flour, stopping when there are still visible traces of flour. Add in the chocolate and stir until evenly distributed throughout the dough, being careful to use as few strokes as possible so as not to overmix the dough.Scoop 3 tablespoons of dough (about 42 g) onto the prepared baking sheets, leaving 3 inches between cookie dough balls to allow for spreading. Bake for 11 to 12 minutes (see note below regarding bake time) in the center of the oven.As soon as they’re out of the oven, tap the baking sheet on the counter to slightly collapse the cookies, and then use the edge of a spatula to gently nudge the cookies back into a circle. Let cool completely on the baking sheet. Sprinkle with flaky sea salt if using.NotesUsing a Mixer with These CookiesThese cookies can be made using an electric stand mixer (with the paddle attachment) or with a handheld mixer. If you use a large mixing bowl and spatula make sure you really cream your butter and sugar so that you get that awesome light cookie texture.A Note About ChocolateFeel free to use dark chocolate, milk chocolate or semi-sweet chocolate chunks, chips and/or chopped-up candy bars. Also, I like to place extra chocolate chips over the tops of the cookies just before to baking.Chewy & Soft Chocolate Chip Cookies Bake TimeI like to underbake these cookies for 11 minutes. The cookies continue to bake as they cool on the warm baking sheet and I absolutely LOVE the texture.One of the recipe testers for this cookie preferred them with an extra minute or two of bake time. This will make the center a bit more set and the edges a touch crispier.If you have a cool oven (as oven temperatures vary) or you prefer a more baked cookie experience, then add that extra minute or two.Storing Chewy Chocolate Chip CookiesStore these chewy cookies in an airtight container at room temperatureStoring & Freezing this Chocolate Chip Cookie DoughThis is one of my favorite cookie doughs to store and have on hand, ready to bake!
If you plan on eating the cookies over the next few days, then stash the cookie dough in an airtight container in the fridge until ready to use. This can result in a puffier cookie, but that’s fine. We love that.If you want to enjoy fresh-baked cookies over the next month or two, follow this method… Portion out the cookie dough onto a parchment-lined cookie sheet and set in the freezer until frozen solid (about 1 to 2 hours). Then transfer the frozen cookie dough balls to an airtight container and set back in the freezer until ready to use.When you want to enjoy a cookie, set the frozen cookie dough ball on a prepared baking sheet and then pre-heat the oven. While the oven pre-heats, the cookie dough will start to thaw out. Bake according to the instructions above, adding an extra 2 minutes to the bake time.You can bake these delicious cookies directly from the freezer, but I prefer the results when I let the cookie dough sit out for about 15 minutes while the oven preheats. If you do bake them directly from the freezer, you’ll need to add additional bake time.How to Make Your Cookies Look PrettyI like how this cookie looks when scooped with a cookie scoop rather than rolling balls of dough (though both methods work). I also like to place 3 to 5 chocolate chips over the top of the cookie dough ball before baking so you can see some glossy chips over the tops of the cookies.As soon as the cookies come out of the oven, drop the baking sheet on the counter (nothing dramatic, just a bold tap) and then use the edge of a spatula to nudge the cookies into a round shape.Sprinkling with flaky sea salt not only makes them look gorgeous, but I love how the bite of salt really balances the sweetness of the cookie. This is optional.One last note, using dark brown sugar will give the cookies that rich, caramel color you see in these cookies. If using light brown sugar (which I do often), the cookies will have a blonder appearance.
The post 10 Irresistible Back-to-School Baking Recipes (Delicious & Easy) appeared first on DisplacedHousewife.
August 8, 2025
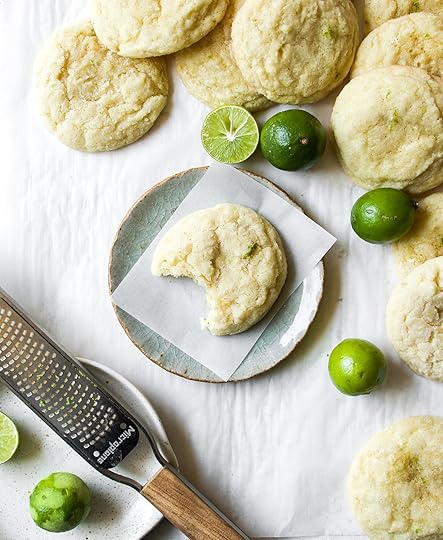
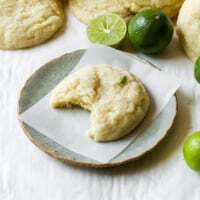
The Best Soft & Pillowy Key Lime Cookies Recipe You’ll Ever Make!
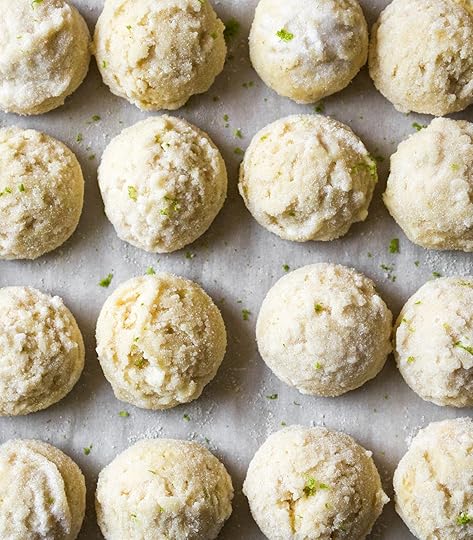
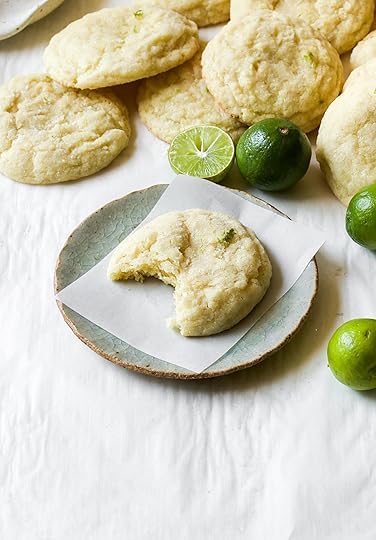
This soft, pillowy key lime cookies recipe is truly a showstopper!
Imagine a perfectly soft sugar cookie with a beautiful crinkled top, infused with the bright, zesty flavor of fresh key lime juice and zest. (Don’t have key limes? Regular limes work perfectly!)
This easy, no-chill cookie dough comes together in just one bowl and requires no mixer, so you can have warm cookies ready in under 30 minutes. It’s the perfect treat to satisfy your citrus cravings.
Enjoy this buttery, zesty sugar cookie—it’s a recipe you’ll want to make again and again!”
 My Favorite Pro Baking Tips for Making Perfect Key Lime CookiesZest Your Limes Carefully for the Best Flavor
When zesting, use a microplane to carefully remove just the green part of the fruit. Anything deeper will have a bitter taste.
You can adjust the amount of lime zest to your liking! I found that the zest from about eight key limes gives these cookies the perfect zesty flavor, but feel free to add more for a bolder taste.
Cream the Butter and Sugar for the Ultimate Key Lime Cookie TextureThe secret to the phenomenal soft and pillowy texture of these cookies is how you cream the butter and sugar.
Make sure you beat the butter and sugar together until the mixture is visibly lighter in both color and texture. This step incorporates air, which is crucial for perfectly soft cookies.
Substitute With Regular Limes in a Pinch!Key limes are known for their floral aroma and tart flavor, and their season runs from late summer into early fall.
If you can’t find key limes, don’t worry! Regular limes are a fantastic substitute for these easy key lime cookies. You’ll need fewer of them since they’re larger and contain more juice and zest.
 The Baker’s Guide to Measuring Flour
One of the biggest (and most common) mistakes in baking is how we measure flour. If you find yourself without a scale, see my top tips on how to properly measure flour for the perfect amount every time!
 Step-by-Step Instructions & Photos for
 Making This Delicious Key Lime Cookies Recipe
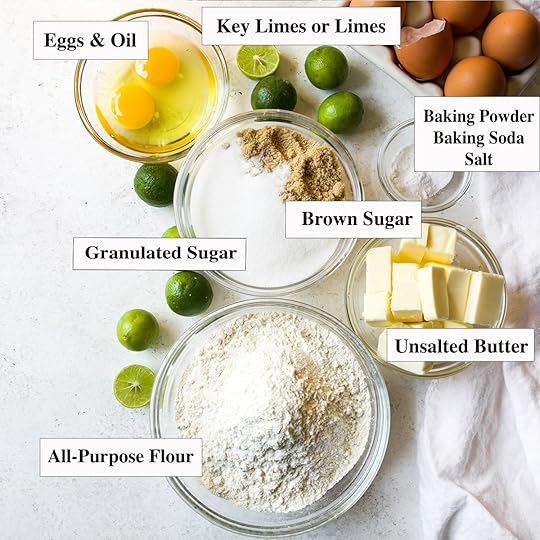 STEP 1: Gather your ingredients: Granulated sugar, unsalted butter, brown sugar, key lime zest, key lime juice, oil, eggs, baking powder, baking soda, salt and all-purpose flour.
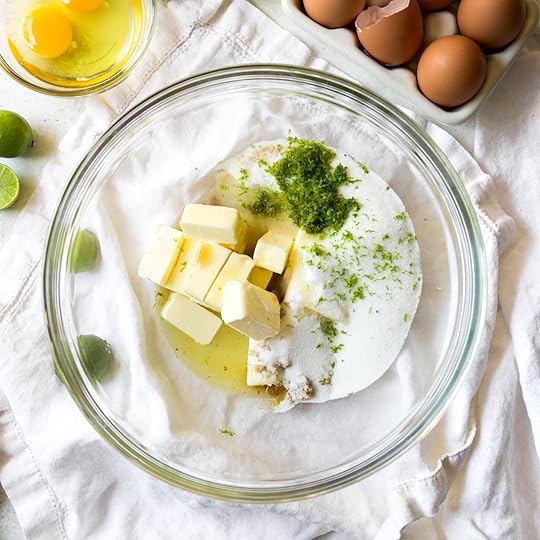 STEP 2: In a large mixing bowl, cream the granulated sugar, butter, brown sugar, key lime zest, key lime juice and oil until light and fluffy.
 STEP 3: Add the eggs, one at a time, mixing each addition until completely blended before adding the next.
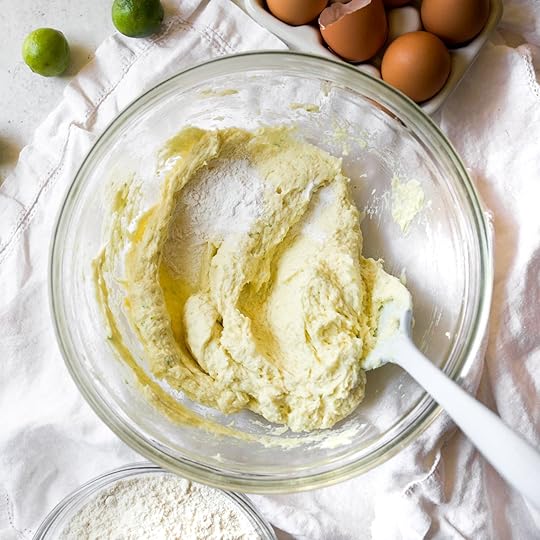 STEP 4: Stir in the baking powder, baking soda and salt.
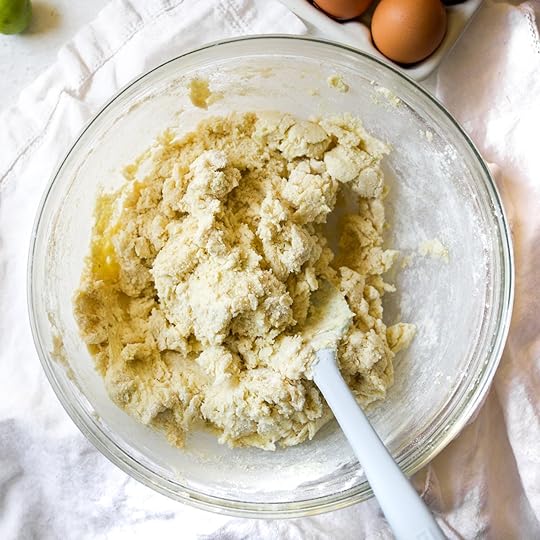 STEP 5: Mix in the flour until just barely combined. Check the bottom of the bowl to make sure all of the flour is incorporated.
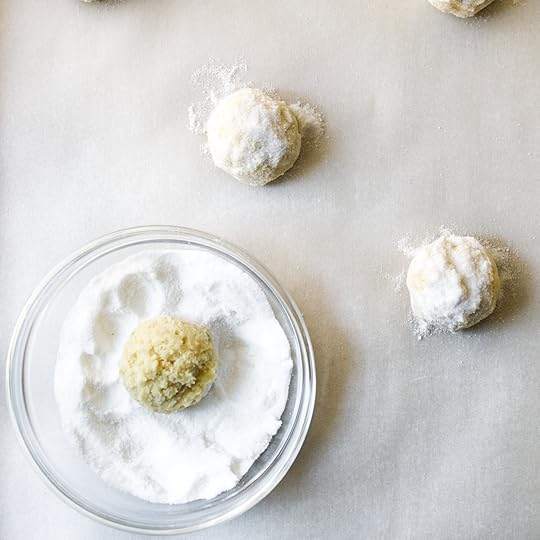 STEP 6: Cover 2-tablespoons of cookie dough in granulated sugar and then place on a baking sheet, leaving 2-inches (5-cm) of space between cookie dough balls.
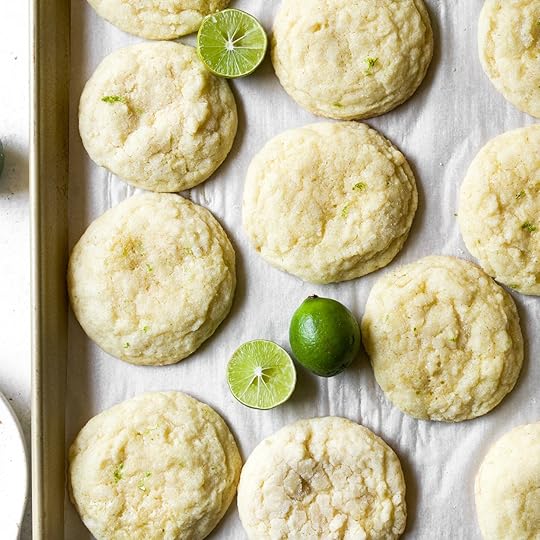 STEP 7: Let the cookies cool on the baking sheet for about 15 minutes. The cookies will be quite soft when they come out of the oven, and they need that extra time to firm up and be the perfect texture!
PRO BAKING TIP
Add more lime zest to the tops of the cookies just prior to baking so you can see pops of green over the tops of the cookies!
 More Delicious Cookie Recipes
I absolutely ADORE these Malted Chocolate Chip Cookies (it’s always a crowd pleaser!). And these Soft & Chewy Peanut Butter Cookies are TO DIE FOR.
You can find all of the cookie recipes here!
Enjoy the best key lime cookies recipe!!
 PrintThe Best Soft & Pillowy Key Lime Cookies You’ll Ever Bake!#wprm-recipe-user-rating-0 .wprm-rating-star.wprm-rating-star-full svg * { fill: #343434; }#wprm-recipe-user-rating-0 .wprm-rating-star.wprm-rating-star-33 svg * { fill: url(#wprm-recipe-user-rating-0-33); }#wprm-recipe-user-rating-0 .wprm-rating-star.wprm-rating-star-50 svg * { fill: url(#wprm-recipe-user-rating-0-50); }#wprm-recipe-user-rating-0 .wprm-rating-star.wprm-rating-star-66 svg * { fill: url(#wprm-recipe-user-rating-0-66); }linearGradient#wprm-recipe-user-rating-0-33 stop { stop-color: #343434; }linearGradient#wprm-recipe-user-rating-0-50 stop { stop-color: #343434; }linearGradient#wprm-recipe-user-rating-0-66 stop { stop-color: #343434; }#wprm-recipe-user-rating-0.wprm-user-rating-allowed.wprm-user-rating-not-voted:not(.wprm-user-rating-voting) svg * { fill-opacity: 0.3; }These Key Lime Cookies are soft, pillowy and perfectly flavored with mega key lime flavor! You'll love this one-bowl recipe that is mixed and baked in under 30 minutes!Course Dessert, SnackCuisine AmericanKeyword Key Lime, Cookies, Recipe, Rebecca Firth, DisplacedHousewife Well-Tested RecipePrep Time 10 minutes minutesCook Time 11 minutes minutesTotal Time 3 hours hours 21 minutes minutesServings 26 CookiesAuthor Rebecca FirthEquipmentBaking ScaleMixing BowlsSpatula#40 2-TBSP Cookie ScoopCookie SheetsMicroplaneIngredientsFor the Key Lime Cookie Dough1 1/4 cup (250 g) granulated sugar16 tablespoons (226 g) unsalted butter room temperature2 tablespoons (28 g) light brown sugar packed4 tablespoons fresh key lime zest about 8 key limes2 tablespoon (26 g) fresh key lime juice about 6 key limes1 tablespoon (14 g) your favorite cooking oil avocado, olive, sunflower or grapeseed oil would all work great here!2 large eggs room temperature1 teaspoon baking powder1 teaspoon baking soda1 teaspoon salt2 3/4 cups + 1 tablespoon (381 g) all-purpose flourTo Roll the Cookies1/3 cup (67 g) granulated sugarInstructionsFor the Cookie DoughPreheat your oven to 350°F (175℃). Line several baking sheets with parchment paper.In a large bowl, cream the sugar, butter, brown sugar, lime zest, key lime juice and oil until light and fluffy, about 4 to 5 minutes. You want both the color and texture of the mixture to lighten.Add in the eggs one at a time, taking care to fully blend the first before adding the second. Scrape the sides and bottom of the bowl to make sure everything is incorporated.Add in the baking powder, baking soda and salt and mix 1 minute more. Add the flour and mix until just barely combined.To Roll the Cookies & BakePlace the granulated sugar in a small bowl.Use a 2-tablespoon cookie scoop to portion the cookie dough balls. Don't roll the cookie dough into smooth balls. Leaving the surface rough will yield a more crinkly-topped cookie.Give the dough ball a generous coating of sugar and set on the baking sheet, allowing 2-inches (5-cm) of space between dough balls. Sprinkle any extra lime zest (if available) over the tops of the cookies.Bake in the center of the oven for 11 to 12 minutes. They will be barely golden brown around the bottom edges and puffed up. Use the edge of a spatula to nudge any misshapen cookies back into shape. I like to underbake these cookies a touch and let them finish baking on the warm cookie sheet.As the cookies cool, they will collapse and you'll start to see the pretty crinkles appear over the tops of the cookies. Let the baked cookies cool on the baking sheet for about 15 minutes before transferring to a wire rack to finish cooling.NotesCan I Use A Mixer?Yes, yes, you can! Feel free to use an electric stand mixer fitted with the paddle attachment (or a handheld mixer) for whipping up the cookie dough.Zesting TipAlso zest your fruit before you cut and juice it.Feel free to add more key lime zest for a more pronounced flavor. However, don’t add more key lime juice as it will alter the consistency of the cookie dough.*I don’t love using weight for measuring zest. Use the recommended quantities of key lime fruit for best results.Don’t Roll Your Cookie Dough BallsI love the crinkly tops of these cookies. If you roll your dough balls, you lose some of that texture.Ideally, scoop the two tablespoons of cookie dough and drop them in the granulated sugar. Sprinkle the sugar over the top of the dough ball and then set it on the baking sheet.Storing Key Lime CookiesStore the cookies in an airtight container at room temperature for up to 3 or 4 days, depending on the ambient temperature and humidity. If it’s warm and humid where you live, they won’t last as long at room temperature. Freezing Key Lime Cookie DoughThis cookie dough freezes great and can be stored as a large mass or as cookie dough balls. Take note that when baked from frozen, they lose some of the textured crinkle detail on the tops of the cookies.For More Key Lime FlavorSkip rolling the cookies in sugar, and use my favorite
Lime Glaze
recipe over the tops of the cookies. Substitute key limes for limes, 1:1, and halve the recipe for best results.
PrintThe Best Soft & Pillowy Key Lime Cookies You’ll Ever Bake!#wprm-recipe-user-rating-0 .wprm-rating-star.wprm-rating-star-full svg * { fill: #343434; }#wprm-recipe-user-rating-0 .wprm-rating-star.wprm-rating-star-33 svg * { fill: url(#wprm-recipe-user-rating-0-33); }#wprm-recipe-user-rating-0 .wprm-rating-star.wprm-rating-star-50 svg * { fill: url(#wprm-recipe-user-rating-0-50); }#wprm-recipe-user-rating-0 .wprm-rating-star.wprm-rating-star-66 svg * { fill: url(#wprm-recipe-user-rating-0-66); }linearGradient#wprm-recipe-user-rating-0-33 stop { stop-color: #343434; }linearGradient#wprm-recipe-user-rating-0-50 stop { stop-color: #343434; }linearGradient#wprm-recipe-user-rating-0-66 stop { stop-color: #343434; }#wprm-recipe-user-rating-0.wprm-user-rating-allowed.wprm-user-rating-not-voted:not(.wprm-user-rating-voting) svg * { fill-opacity: 0.3; }These Key Lime Cookies are soft, pillowy and perfectly flavored with mega key lime flavor! You'll love this one-bowl recipe that is mixed and baked in under 30 minutes!Course Dessert, SnackCuisine AmericanKeyword Key Lime, Cookies, Recipe, Rebecca Firth, DisplacedHousewife Well-Tested RecipePrep Time 10 minutes minutesCook Time 11 minutes minutesTotal Time 3 hours hours 21 minutes minutesServings 26 CookiesAuthor Rebecca FirthEquipmentBaking ScaleMixing BowlsSpatula#40 2-TBSP Cookie ScoopCookie SheetsMicroplaneIngredientsFor the Key Lime Cookie Dough1 1/4 cup (250 g) granulated sugar16 tablespoons (226 g) unsalted butter room temperature2 tablespoons (28 g) light brown sugar packed4 tablespoons fresh key lime zest about 8 key limes2 tablespoon (26 g) fresh key lime juice about 6 key limes1 tablespoon (14 g) your favorite cooking oil avocado, olive, sunflower or grapeseed oil would all work great here!2 large eggs room temperature1 teaspoon baking powder1 teaspoon baking soda1 teaspoon salt2 3/4 cups + 1 tablespoon (381 g) all-purpose flourTo Roll the Cookies1/3 cup (67 g) granulated sugarInstructionsFor the Cookie DoughPreheat your oven to 350°F (175℃). Line several baking sheets with parchment paper.In a large bowl, cream the sugar, butter, brown sugar, lime zest, key lime juice and oil until light and fluffy, about 4 to 5 minutes. You want both the color and texture of the mixture to lighten.Add in the eggs one at a time, taking care to fully blend the first before adding the second. Scrape the sides and bottom of the bowl to make sure everything is incorporated.Add in the baking powder, baking soda and salt and mix 1 minute more. Add the flour and mix until just barely combined.To Roll the Cookies & BakePlace the granulated sugar in a small bowl.Use a 2-tablespoon cookie scoop to portion the cookie dough balls. Don't roll the cookie dough into smooth balls. Leaving the surface rough will yield a more crinkly-topped cookie.Give the dough ball a generous coating of sugar and set on the baking sheet, allowing 2-inches (5-cm) of space between dough balls. Sprinkle any extra lime zest (if available) over the tops of the cookies.Bake in the center of the oven for 11 to 12 minutes. They will be barely golden brown around the bottom edges and puffed up. Use the edge of a spatula to nudge any misshapen cookies back into shape. I like to underbake these cookies a touch and let them finish baking on the warm cookie sheet.As the cookies cool, they will collapse and you'll start to see the pretty crinkles appear over the tops of the cookies. Let the baked cookies cool on the baking sheet for about 15 minutes before transferring to a wire rack to finish cooling.NotesCan I Use A Mixer?Yes, yes, you can! Feel free to use an electric stand mixer fitted with the paddle attachment (or a handheld mixer) for whipping up the cookie dough.Zesting TipAlso zest your fruit before you cut and juice it.Feel free to add more key lime zest for a more pronounced flavor. However, don’t add more key lime juice as it will alter the consistency of the cookie dough.*I don’t love using weight for measuring zest. Use the recommended quantities of key lime fruit for best results.Don’t Roll Your Cookie Dough BallsI love the crinkly tops of these cookies. If you roll your dough balls, you lose some of that texture.Ideally, scoop the two tablespoons of cookie dough and drop them in the granulated sugar. Sprinkle the sugar over the top of the dough ball and then set it on the baking sheet.Storing Key Lime CookiesStore the cookies in an airtight container at room temperature for up to 3 or 4 days, depending on the ambient temperature and humidity. If it’s warm and humid where you live, they won’t last as long at room temperature. Freezing Key Lime Cookie DoughThis cookie dough freezes great and can be stored as a large mass or as cookie dough balls. Take note that when baked from frozen, they lose some of the textured crinkle detail on the tops of the cookies.For More Key Lime FlavorSkip rolling the cookies in sugar, and use my favorite
Lime Glaze
recipe over the tops of the cookies. Substitute key limes for limes, 1:1, and halve the recipe for best results. The post The Best Soft & Pillowy Key Lime Cookies Recipe You’ll Ever Make! appeared first on DisplacedHousewife.
August 1, 2025
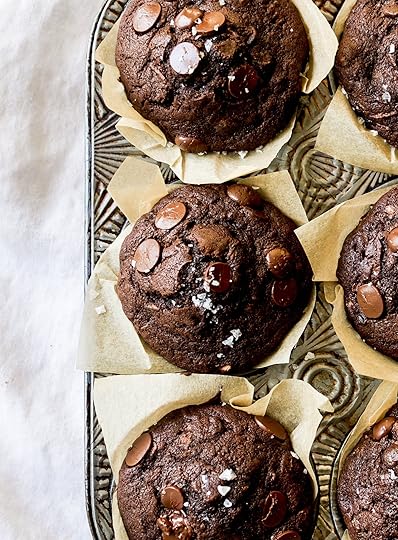
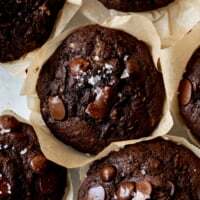
Double Chocolate Zucchini Muffins You Need to Make ASAP!
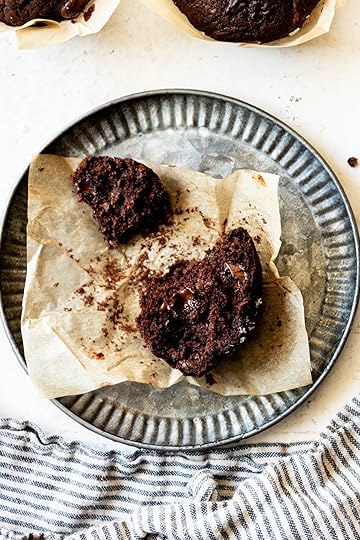
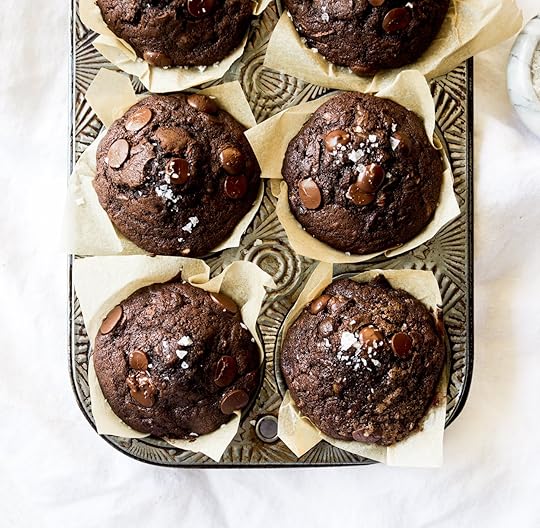
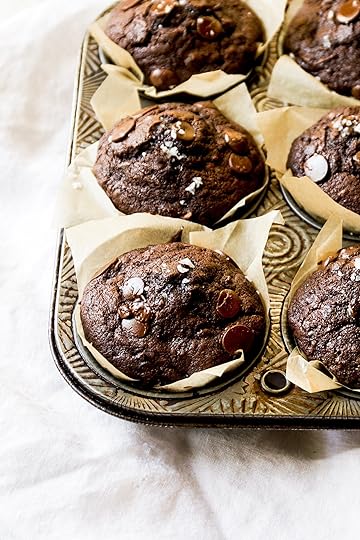
SO. MANY. THINGS to love about these Double Chocolate Zucchini Muffins! First, and most importantly, they’re probably one of the most DELICIOUS chocolate muffins you’ll ever bake. Period.
The secret is the ingredient we often try to use up at the end of summer: zucchini. Like banana, it lends incredible moisture to baked goods, but here’s the magic—it imparts absolutely no flavor. This means your friends and family will have no idea they’re enjoying a dose of veggies, unless they happen to spot a stray green fleck!
The texture of these muffins is nothing short of heaven. And I’m not even exaggerating. They are soft, plush, bouncy…all of my favorite words for a really perfectly textured muffin (or cake or cupcake). Loaded with moisture. They taste just as good on days two and three as they do fresh from the oven.
Even better, they’re an easy breezy one-bowl muffin recipe (no mixer needed!) that comes together quickly! I’m SO EXCITED for you to make these chocolate zucchini muffins! I hope you love them!
PS If you love streusel as much as I do, I *HIGHLY* recommend adding the blonde streusel from the Raspberry Muffins to this recipe! Scroll down to see a photo of the zucchini muffins with the streusel!
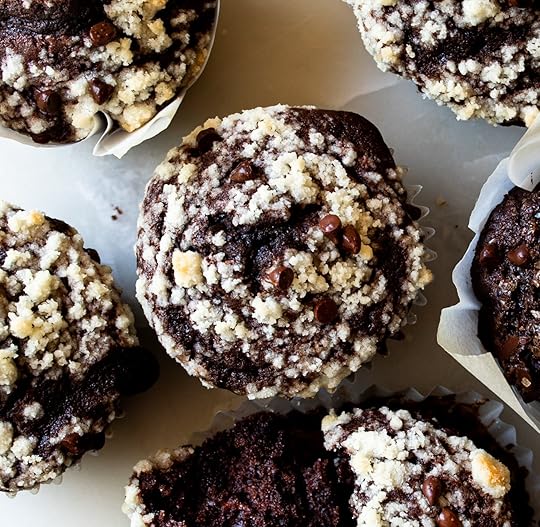 I tested one batch of zucchini muffins with the same streusel I use on my raspberry muffins, and it was delicious! Mix the streusel and refrigerate while you mix the muffin batter. Top just before baking, and they’ll look like this!
 My Favorite Pro Baking Tips for
 Perfect Chocolate Zucchini MuffinsDon’t squeeze your shredded zucchini.
Shred the zucchini onto several layers of paper towels and let it sit while you prepare the muffin batter. There’s no need to squeeze any moisture out of the zucchini; we want it in our muffins!
Let the chocolate zucchini batter sit for 20 minutes.Giving the gluten in the flour a bit of time to relax while also letting some of that moisture be absorbed by the flour will yield a really lovely muffin with a soft crumb and puffy crown. Everything we’re looking for in a muffin!
Careful getting them out of the muffin pan, they’re soft!If you try to get them out too soon, they’re likely to fall apart. This is a very soft zucchini muffin (the stuff of dreams, really). So gently get them out of the muffin tin!
 Step-by-Step Instructions & Photos for
 the Best Double Chocolate Zucchini Muffins of Your Dreams!
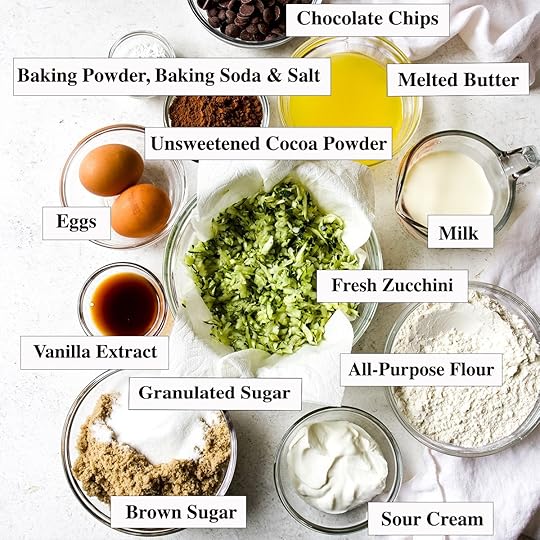 STEP 1: Gather your ingredients: zucchini, butter, brown sugar, granulated sugar, vanilla, eggs, unsweetened cocoa powder, sour cream, baking powder, baking soda, salt, all-purpose flour, milk and chocolate chips.
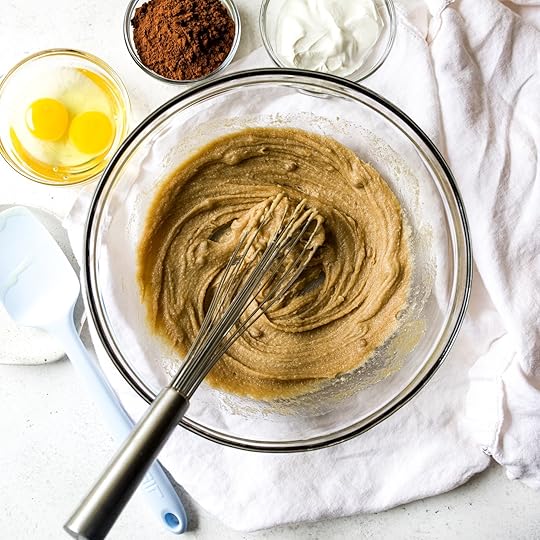 STEP 2: In a large mixing bowl, whisk together the brown sugar, melted and cooled butter, granulated sugar and vanilla.
 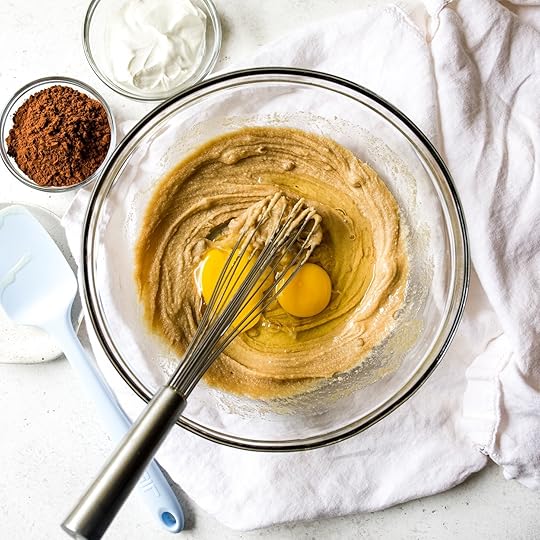 STEP 3: Whisk in the eggs…
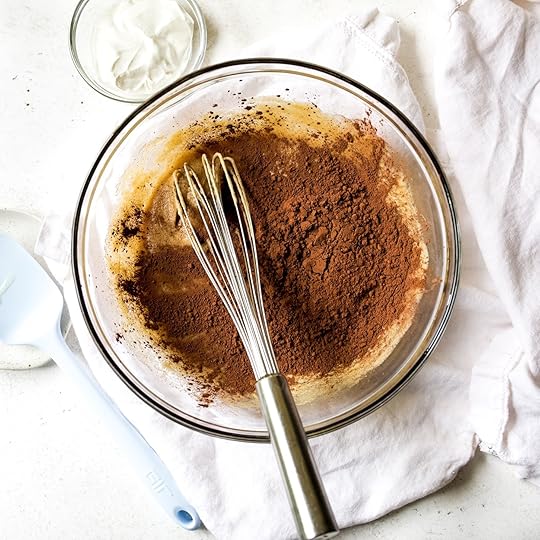 STEP 4: Whisk in the cocoa powder…
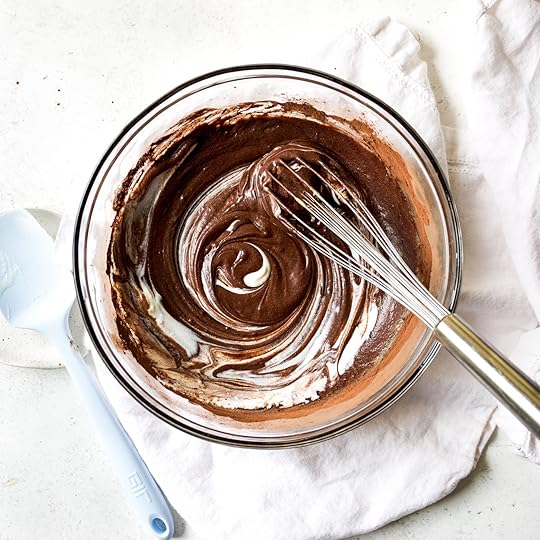 STEP 5: Add the sour cream, mixing until combined…
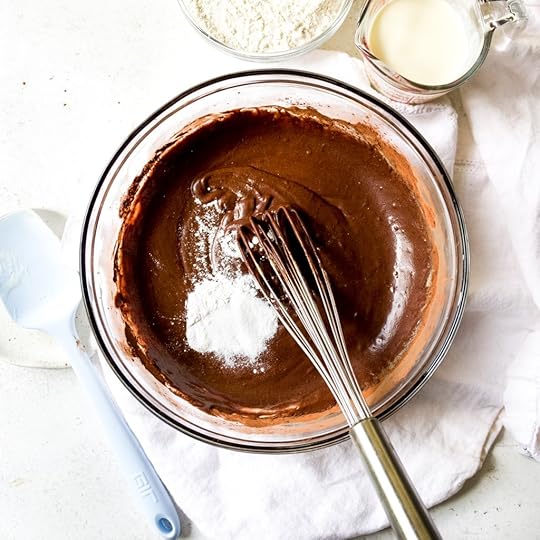 STEP 6: Add in the baking powder, baking soda and salt, whisking until thoroughly combined.
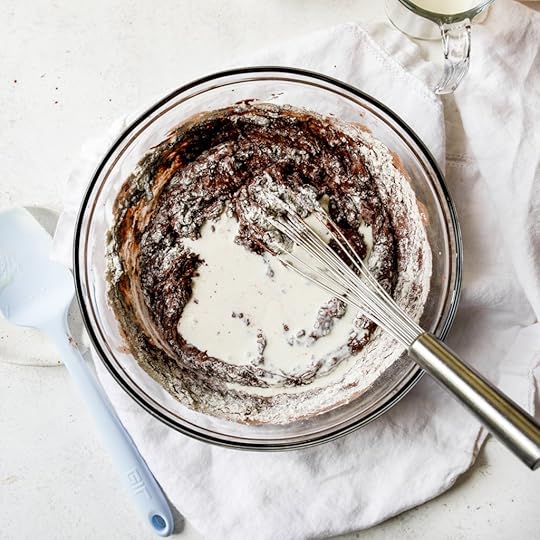 STEP 7: Alternating adding the milk and flour in two batches, mixing each addition…
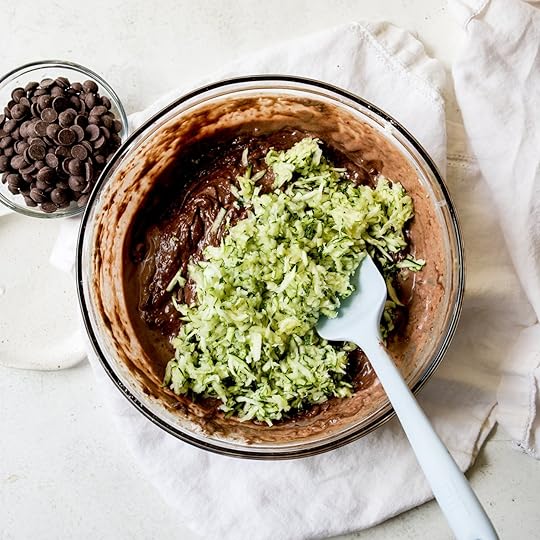
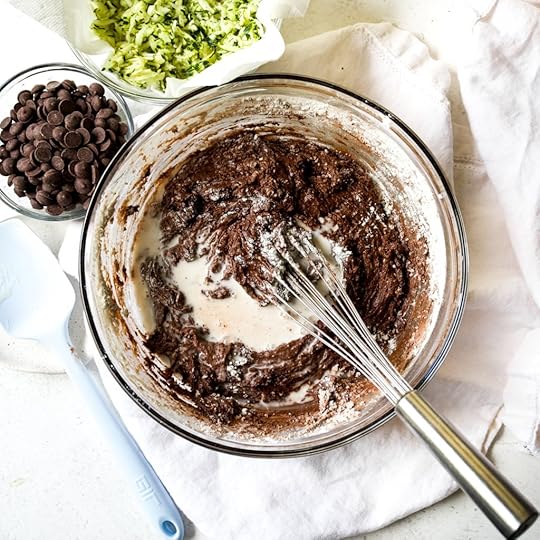 STEP 7: …until just combined.STEP 8: Grab a spatula and fold in the shredded zucchini.
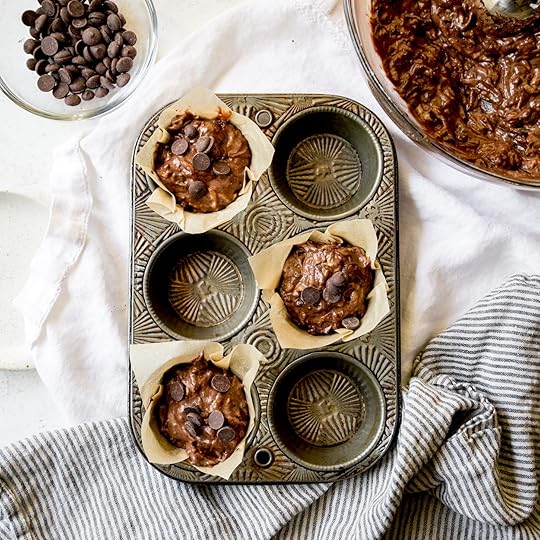 STEP 9: Line the muffin pan with muffin liners (if using) and fill each well 3/4s full.
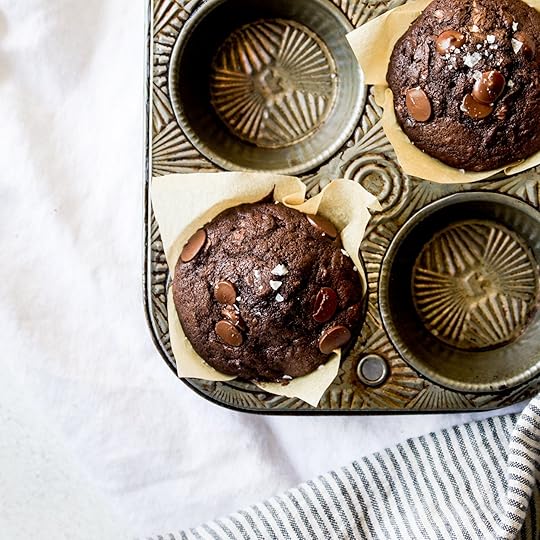
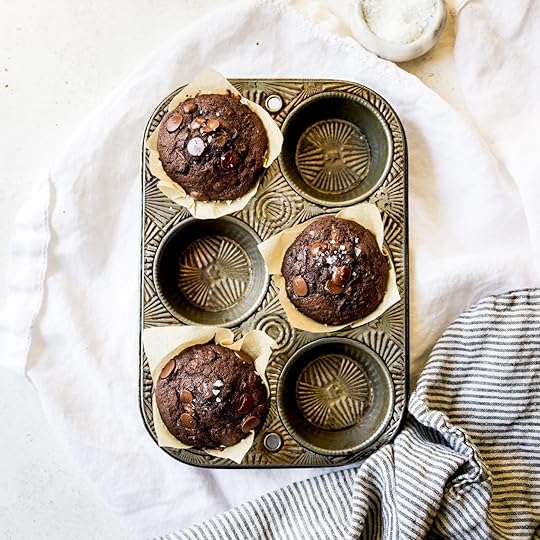 STEP 10: Let the muffins cool for about 10 minutes in the pan before transferring to a wire rack to finish cooling.
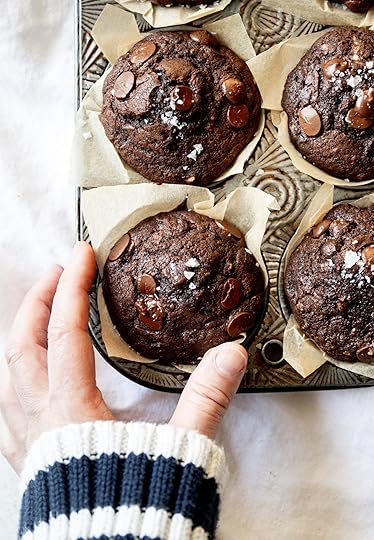
 More Delicious Muffin Recipes!
There’s nothing better to start the day (or snack on) than muffins! Check out fan favorite Raspberry Muffins and these ultra cozy Sour Cream Coffee Cake Muffins. You can find all of the muffin recipes here!
Enjoy these rich chocolate muffins made with zucchini!
 PrintThe Very Best Chocolate Zucchini Muffins!#wprm-recipe-user-rating-0 .wprm-rating-star.wprm-rating-star-full svg * { fill: #343434; }#wprm-recipe-user-rating-0 .wprm-rating-star.wprm-rating-star-33 svg * { fill: url(#wprm-recipe-user-rating-0-33); }#wprm-recipe-user-rating-0 .wprm-rating-star.wprm-rating-star-50 svg * { fill: url(#wprm-recipe-user-rating-0-50); }#wprm-recipe-user-rating-0 .wprm-rating-star.wprm-rating-star-66 svg * { fill: url(#wprm-recipe-user-rating-0-66); }linearGradient#wprm-recipe-user-rating-0-33 stop { stop-color: #343434; }linearGradient#wprm-recipe-user-rating-0-50 stop { stop-color: #343434; }linearGradient#wprm-recipe-user-rating-0-66 stop { stop-color: #343434; }#wprm-recipe-user-rating-0.wprm-user-rating-allowed.wprm-user-rating-not-voted:not(.wprm-user-rating-voting) svg * { fill-opacity: 0.3; }Rich chocolate flavor with a plush, mega-moist crumb are the hallmark characteristics of this super-simple, secretly veggie-packed Double Chocolate Zucchini Muffin one-bowl recipe, which is mixed and baked in under an hour!Course Breakfast, Brunch, SnackCuisine AmericanKeyword Double Chocolate, Zucchini, Muffins, Chocolate Chip, Summer Baking Recipe, Rebecca Firth, DisplacedHousewife Well-Tested RecipePrep Time 15 minutes minutesCook Time 17 minutes minutesMuffin Batter Rest 20 minutes minutesTotal Time 52 minutes minutesServings 13 MuffinsAuthor Rebecca FirthEquipmentBaking ScaleRegular Muffin Pan#20 3-TBSP Cookie ScoopMixing BowlsMy Favorite WhiskSpatulaIngredients2 cups (240 g) fresh zucchini grated; about 2 to 3 small zucchinis3/4 cup (165 g) light brown sugar packed8 tablespoons (113 g) unsalted butter melted and cooled¼ cup (50 g) granulated sugar1 tablespoon real vanilla extract2 large eggs room temperature½ cup (43 g) unsweetened Dutch-process cocoa powder1/3 cup (80 g) sour cream room temperature; use full-fat2 teaspoons baking powder1 teaspoon baking soda1 1/2 teaspoons sea salt1 3/4 cups + 1 tablespoon (246 g) all-purpose flour how to measure flour2/3 cup (160 g) whole milk room temperature (see Notes below for more info)1 cup (170 g) dark chocolate chips reserve about 1/3 cup (57 g) for the tops of the muffinsInstructionsPreheat the oven to 425°F (220°C). Line every other muffin well of your muffin pan with paper liners (if using); otherwise, thoroughly grease your muffin pan.Place grated zucchini on several layers of towels. You don't need to press out the excess moisture. Just let the towels soak up any moisture that drains off. Set aside.In a large mixing bowl, whisk together the brown sugar, cooled melted butter, sugar and vanilla until well blended. Add in the eggs and mix for 1 minute more or until thick and combined.Then add the cocoa powder, mixing until smooth. Mix in the sour cream, baking powder, baking soda and salt until completely combined.Alternate adding the flour and milk in two batches, mixing each addition until just barely combined. Fold in the zucchini and chocolate chips until just combined and evenly distributed throughout the muffin batter.Scrape the sides and bottom of the bowl to make sure the zucchini muffin batter is thoroughly blended. At this point, you can let your muffin batter rest for 20 minutes to achieve a higher muffin top and a tender crumb.Scoop the muffin batter into the prepared muffin tins, filling every other muffin liner at least 3/4 full. Jiggle the pan a little so that the muffin batter levels out in the cups (the more even it is here, the more even the muffin rise will be).Sprinkle the reserved chocolate chips over the tops of the muffins. Bake for 8 minutes in the center of the oven and then reduce the heat to 350℉ (177℃) and bake for 9 to 10 minutes more. When done, the tops will be puffed up tall; they should also bounce back when gently pressed in the center.Let the muffins cool in the muffin pan for about 10 minutes, then use a butter knife to gently remove them from the pan before transferring to a wire rack to finish cooling.NotesVariationsStreusel topping: I love adding the streusel topping from the
Raspberry Muffins
recipe. It gave them a funky look (see photo above the recipe) and the slightly crunchy top combined with the softness of the muffin crumb…delish. You can also use this brown sugar-based
5-Minute Streusel Topping
!Mini or Regular Chocolate Chips: I love mini chocolate chips, but preferred the look and taste/texture of the regular-size chocolate chips in these. Both will work.Demerara sugar: What am I even doing with my life if I’m not putting Demerara on everything? Fun to add a little sparkle to the tops if you’re feeling it!Flaky Sea Salt: Delish sprinkled over the top post baking!
PrintThe Very Best Chocolate Zucchini Muffins!#wprm-recipe-user-rating-0 .wprm-rating-star.wprm-rating-star-full svg * { fill: #343434; }#wprm-recipe-user-rating-0 .wprm-rating-star.wprm-rating-star-33 svg * { fill: url(#wprm-recipe-user-rating-0-33); }#wprm-recipe-user-rating-0 .wprm-rating-star.wprm-rating-star-50 svg * { fill: url(#wprm-recipe-user-rating-0-50); }#wprm-recipe-user-rating-0 .wprm-rating-star.wprm-rating-star-66 svg * { fill: url(#wprm-recipe-user-rating-0-66); }linearGradient#wprm-recipe-user-rating-0-33 stop { stop-color: #343434; }linearGradient#wprm-recipe-user-rating-0-50 stop { stop-color: #343434; }linearGradient#wprm-recipe-user-rating-0-66 stop { stop-color: #343434; }#wprm-recipe-user-rating-0.wprm-user-rating-allowed.wprm-user-rating-not-voted:not(.wprm-user-rating-voting) svg * { fill-opacity: 0.3; }Rich chocolate flavor with a plush, mega-moist crumb are the hallmark characteristics of this super-simple, secretly veggie-packed Double Chocolate Zucchini Muffin one-bowl recipe, which is mixed and baked in under an hour!Course Breakfast, Brunch, SnackCuisine AmericanKeyword Double Chocolate, Zucchini, Muffins, Chocolate Chip, Summer Baking Recipe, Rebecca Firth, DisplacedHousewife Well-Tested RecipePrep Time 15 minutes minutesCook Time 17 minutes minutesMuffin Batter Rest 20 minutes minutesTotal Time 52 minutes minutesServings 13 MuffinsAuthor Rebecca FirthEquipmentBaking ScaleRegular Muffin Pan#20 3-TBSP Cookie ScoopMixing BowlsMy Favorite WhiskSpatulaIngredients2 cups (240 g) fresh zucchini grated; about 2 to 3 small zucchinis3/4 cup (165 g) light brown sugar packed8 tablespoons (113 g) unsalted butter melted and cooled¼ cup (50 g) granulated sugar1 tablespoon real vanilla extract2 large eggs room temperature½ cup (43 g) unsweetened Dutch-process cocoa powder1/3 cup (80 g) sour cream room temperature; use full-fat2 teaspoons baking powder1 teaspoon baking soda1 1/2 teaspoons sea salt1 3/4 cups + 1 tablespoon (246 g) all-purpose flour how to measure flour2/3 cup (160 g) whole milk room temperature (see Notes below for more info)1 cup (170 g) dark chocolate chips reserve about 1/3 cup (57 g) for the tops of the muffinsInstructionsPreheat the oven to 425°F (220°C). Line every other muffin well of your muffin pan with paper liners (if using); otherwise, thoroughly grease your muffin pan.Place grated zucchini on several layers of towels. You don't need to press out the excess moisture. Just let the towels soak up any moisture that drains off. Set aside.In a large mixing bowl, whisk together the brown sugar, cooled melted butter, sugar and vanilla until well blended. Add in the eggs and mix for 1 minute more or until thick and combined.Then add the cocoa powder, mixing until smooth. Mix in the sour cream, baking powder, baking soda and salt until completely combined.Alternate adding the flour and milk in two batches, mixing each addition until just barely combined. Fold in the zucchini and chocolate chips until just combined and evenly distributed throughout the muffin batter.Scrape the sides and bottom of the bowl to make sure the zucchini muffin batter is thoroughly blended. At this point, you can let your muffin batter rest for 20 minutes to achieve a higher muffin top and a tender crumb.Scoop the muffin batter into the prepared muffin tins, filling every other muffin liner at least 3/4 full. Jiggle the pan a little so that the muffin batter levels out in the cups (the more even it is here, the more even the muffin rise will be).Sprinkle the reserved chocolate chips over the tops of the muffins. Bake for 8 minutes in the center of the oven and then reduce the heat to 350℉ (177℃) and bake for 9 to 10 minutes more. When done, the tops will be puffed up tall; they should also bounce back when gently pressed in the center.Let the muffins cool in the muffin pan for about 10 minutes, then use a butter knife to gently remove them from the pan before transferring to a wire rack to finish cooling.NotesVariationsStreusel topping: I love adding the streusel topping from the
Raspberry Muffins
recipe. It gave them a funky look (see photo above the recipe) and the slightly crunchy top combined with the softness of the muffin crumb…delish. You can also use this brown sugar-based
5-Minute Streusel Topping
!Mini or Regular Chocolate Chips: I love mini chocolate chips, but preferred the look and taste/texture of the regular-size chocolate chips in these. Both will work.Demerara sugar: What am I even doing with my life if I’m not putting Demerara on everything? Fun to add a little sparkle to the tops if you’re feeling it!Flaky Sea Salt: Delish sprinkled over the top post baking!Storing Zucchini MuffinsOnce baked, store these moist double chocolate zucchini muffins in an airtight container at room temperature. Muffin YieldDepending on the size of your muffin pan, the size of your muffin wrappers and how full you fill them, will impact the muffin quantity that this recipe makes. When I used a regular-sized muffin tin with regular muffin liners, I got 16 muffins. When I used homemade parchment paper liners and really filled them up, the recipe yielded 13 muffins.If You Don’t Have Butter (read this!)You can use 1/3 cup (75 g) of cooking oil. You can use any cooking oil. I tested them with olive oil and sunflower seed oil, and both worked great. Avocado oil would also be a good option!If You Don’t Have Sour Cream (read this!)This recipe was originally tested without sour cream. You can omit the sour cream and increase the whole milk to 3/4 cup (180 g).I loveee the plushness that the sour cream gives these muffins. So if you can, use it!If You Don’t Have Milk (read this!)This recipe was created without milk!! So you can absolutely use 3/4 cup (168 grams) of hot water in place of the milk (if not using sour cream) or 1/2 cup (112 g) of hot water with the sour cream.If you’re using the hot water, let the muffin batter sit for a bit longer to come back to room temperature; you’ll get the highest rise in the muffins this way. You can also use hot coffee or espresso in place of the milk or water. Do this if you love a chocolate-flavored muffin experience.Don’t add the chocolate chips until the muffin batter is closer to room temperature so that they don’t melt.
The post Double Chocolate Zucchini Muffins You Need to Make ASAP! appeared first on DisplacedHousewife.
July 25, 2025
Delicious Mixed Berry Crumble Recipe (Use Any Berries!)
Prepare yourself for the best Mixed Berry Crumble recipe you’ll ever make! This dessert is so incredibly delicious, you’ll want to grab a spoon and dig in straight from the dish (I did!).
I love the flexibility of this crumble recipe – use 6 to 7 cups (900-1100 g) of any mixed berries such as juicy blackberries, sweet blueberries, ripe strawberries and even tart cherries (technically not berries, but so good in here!)!
What takes this berry crumble to the next level? A touch of almond extract beautifully complements the fruit, adding incredible depth of flavor. Beyond taste, the classic crumble topping is elevated with a beautiful, crunchy layer of sliced almonds and sparkling Demerara sugar, ensuring a stunning and texturally delicious finish.
Did I mention that it’s prepared and baked in less than an hour?!
You will love this foolproof berry crumble! It’s sooo good with a scoop of vanilla ice cream (add that to the shopping list). Don’t forget to check the Notes section below the recipe for tips, customization and pan size recommendations.
Have fun with this one!
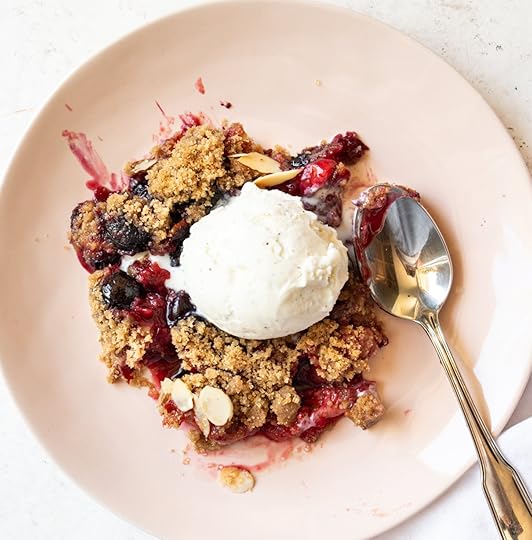 My Favorite Pro Baking Tips for Making
 The Best Berry Crumble!How to choose your crumble baking pan
A larger pan size (such as a 9 x 13-inch baking pan (23 x 33-cm)) will yield a thicker liquid base (more open space for liquid to evaporate). Additionally, you’ll have a thinner streusel top (but still, pretty perfect in my opinion!).
A smaller pan size (such as a 9-inch square baking dish (23-cm)) will yield a more juicy, liquid filling as there is less area for the liquid (moisture) to escape. Conversely, you’ll have a thicker streusel topping.
I tested this recipe in both sizes of baking dishes, and I liked them both for different reasons. If you have both pan sizes, pick whichever profile fits you. If you only have one pan size, you now know how it will impact your final crumble dessert.
Ideally, use fresh berries, though you can use frozen in a pinchFrozen berries will release more liquid into the crumble, yielding a more liquid berry base. Again, this is fine by me when it happens, but some people prefer a thicker berry base. Add an additional 1 tablespoon of corn starch if using frozen fruit.
Alright, let’s get to the berry crumble of your dreams!
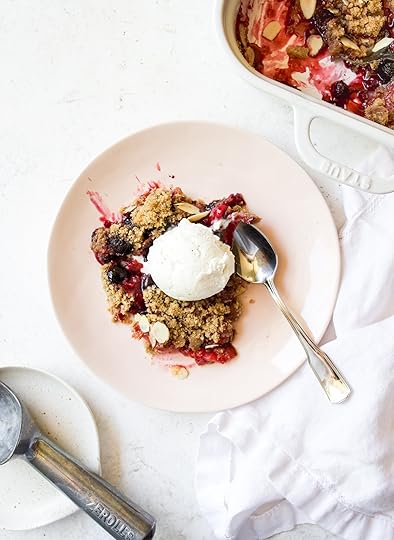 Step-by-Steps Instructions & Photos for
 Making a Perfect Berry Crumble!
 STEP 1: Gather your ingredients:
5-Minute Streusel Topping
(all-purpose flour, brown sugar, cinnamon, nutmeg, salt & butter), mixed berries, granulated sugar, corn starch and almond extract. Optional garnish: sliced almonds and Demerara sugar (please go the extra mile and add these!).
STEP 1: Gather your ingredients:
5-Minute Streusel Topping
(all-purpose flour, brown sugar, cinnamon, nutmeg, salt & butter), mixed berries, granulated sugar, corn starch and almond extract. Optional garnish: sliced almonds and Demerara sugar (please go the extra mile and add these!).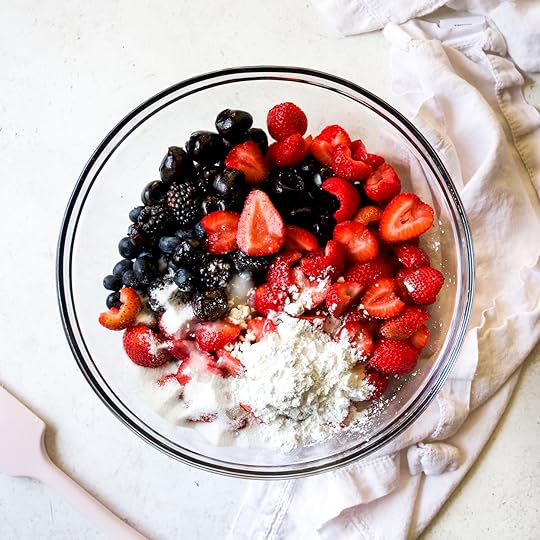 STEP 2: In a large mixing bowl, combine the berries, sugar and corn starch…
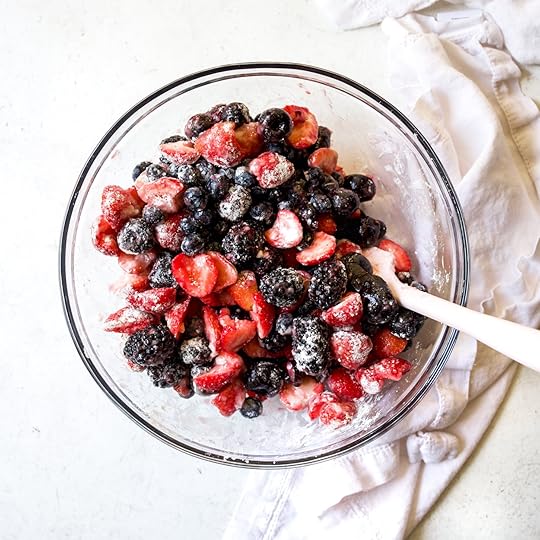 STEP 2: …tossing to coat.
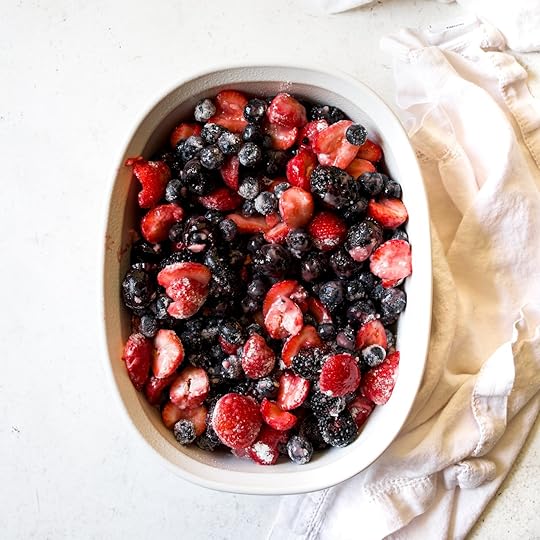 STEP 3: Scoop into the prepared baking dish.
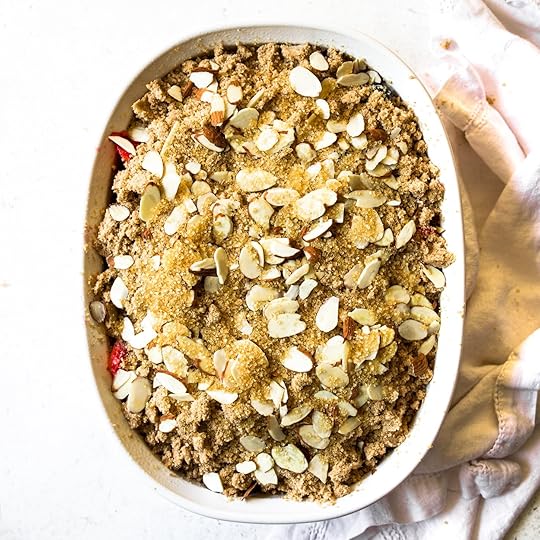 STEP 4: Cover evenly with the streusel. Then add the almonds and Demerara, if using. Bake in the center of the oven for 40 minutes.
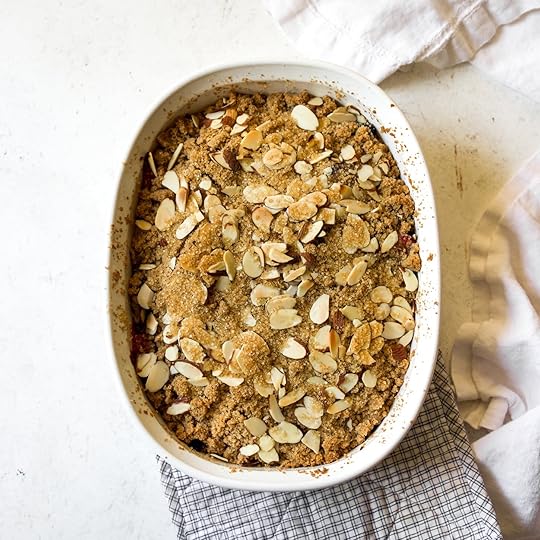 STEP 5: Let it cool for at least 40 minutes before serving. This will allow the juices to thicken a bit.
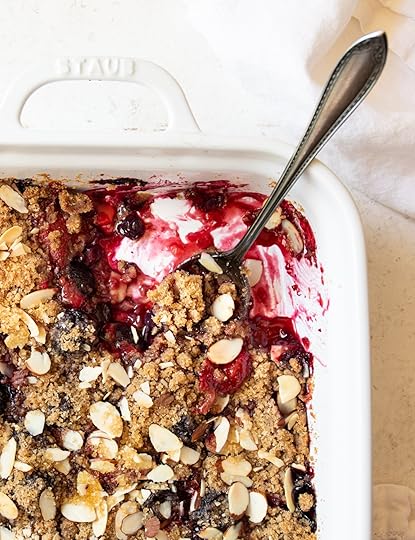
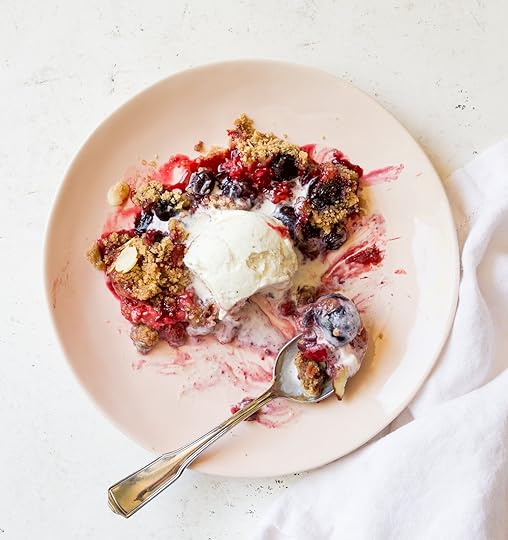
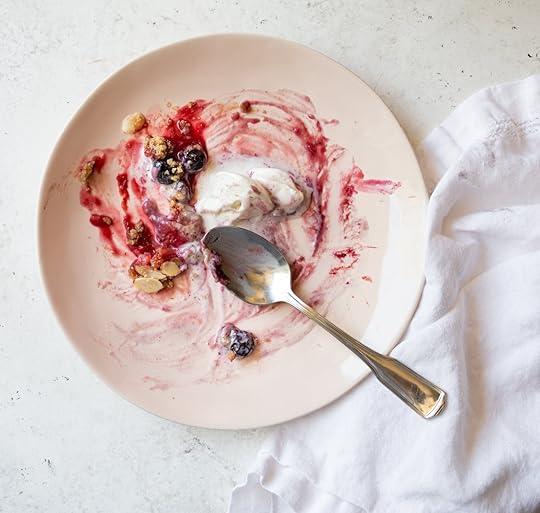 More Delicious Berry Recipes!
Give me all the berry recipes! Check out this easy Strawberry Jam recipe that will knock your socks off and these Lemon Blueberry Scones (they’re so fluffy!).
You can find all of the berry recipes here. Enjoy this delicious mixed berry crumble!!!
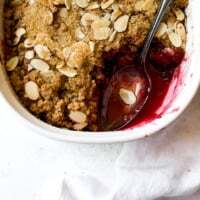 PrintDelicious Mixed Berry Crumble (Use Any Berries!)#wprm-recipe-user-rating-0 .wprm-rating-star.wprm-rating-star-full svg * { fill: #343434; }#wprm-recipe-user-rating-0 .wprm-rating-star.wprm-rating-star-33 svg * { fill: url(#wprm-recipe-user-rating-0-33); }#wprm-recipe-user-rating-0 .wprm-rating-star.wprm-rating-star-50 svg * { fill: url(#wprm-recipe-user-rating-0-50); }#wprm-recipe-user-rating-0 .wprm-rating-star.wprm-rating-star-66 svg * { fill: url(#wprm-recipe-user-rating-0-66); }linearGradient#wprm-recipe-user-rating-0-33 stop { stop-color: #343434; }linearGradient#wprm-recipe-user-rating-0-50 stop { stop-color: #343434; }linearGradient#wprm-recipe-user-rating-0-66 stop { stop-color: #343434; }#wprm-recipe-user-rating-0.wprm-user-rating-allowed.wprm-user-rating-not-voted:not(.wprm-user-rating-voting) svg * { fill-opacity: 0.3; }Juicy, thick berries covered in a crunchy, buttery streusel topping bake into the most DELICIOUS easy mixed berry crumble. Use any berries you'd like, but don't skip the vanilla ice cream! Course Dessert, SnackCuisine AmericanKeyword Berry, Crumble, Summer, Desserts, Baking, Recipe, Almond, Rebecca Firth, DisplacedHousewife Well-Tested RecipePrep Time 10 minutes minutesCook Time 40 minutes minutesTotal Time 50 minutes minutesServings 12 ServingsAuthor Rebecca FirthEquipmentBaking ScaleSpatulaStaub 9 x 13–inch (23 x 33–cm) Baking DishIngredientsFor the Streusel Topping1 batch 5-Minute Streusel ToppingFor the Berries6 to 7 cups (900 to 1100 grams) mixed fresh berries see Notes below recipe½ cup (100 g) sugar3 tablespoons (24 g) cornstarch 1 teaspoon almond extractTo Garnish (optional) 1/3 cup (38 g) sliced almonds 1 tablespoon (12 g) Demerara sugarInstructionsTo StartPreheat the oven to 375℉ (190℃) and grease a 9 x 13–inch (23 x 33–cm) baking dish (see more pan options in the
Notes
section below the recipe). Set aside.For the Streusel ToppingMake 1 batch
5-Minute Streusel Topping Recipe
. Set the unbaked streusel topping in the fridge until ready to use. If storing for longer than an hour, place in a covered container.For the BerriesIn a large bowl, toss the berries with sugar, corn starch and almond extract. Gently mix until all of the berries are evenly coated.Assemble & BakeScoop the berries into the prepared pan, using a spatula to scrape the sides and bottom of the bowl to get any remaining juicy bits into the pan as well. Cover the berries evenly with the chilled streusel. Then sprinkle with the sliced almonds and finally the Demerara sugar (if using) over the top. Try to sprinkle the Demerara on top of the almonds and not the streusel. This can be (and will be) imperfect. That's fine!Bake in the center of the preheated oven for 40 minutes or until the top is golden brown and the berry juices are thick and bubbly. Set on a wire rack to cool for at least 40 minutes before serving. I *highly* encourage a big scoop (or two) of vanilla ice cream to go with your mixed berry crumble!NotesThis easy summer dessert recipe is sooo flexible, see the notes below for all of the substitutions and options!Baking Dish Sizes I tested this recipe in a 9-inch square baking dish (23-cm) and a 9 x 13-inch baking dish (23 x 33-cm). Use the smaller pan for a juicer crumble with a thicker crumble crust. Likewise, use the larger size for a more concentrated, thicker berry bottom and a thinner crumble topping.If you don’t have either of the above pans, you’ll want a pan with a 10-cup (2.4 L) to 14-cup (3.3 L) capacity. If your baking dish seems especially full, place a baking sheet on the rack beneath to catch any overflow.*The oval dish in the photos is a Corningware 2.8L French White oval dish. I could only find it used online. I love the way it looks!Options If You Don’t Want Almonds (or almond extract!)Feel free to omit the almonds and almond extract. I tested this recipe with both vanilla extract (1 teaspoon) and fresh orange zest (from one orange), and both were delicious.Also, consider throwing in a 1/2 teaspoon Chinese five-spice powder, cinnamon or cardamom if you’re feeling it.Picking & Preparing Your BerriesI tested this with different combinations of blackberries, blueberries, strawberries, cherries and raspberries. Cherries are not berries, but they are outstanding in this and I highly recommend adding them to the mix!I tested this recipe with anywhere from 900 to 1200 grams of fruit (between 5 and 7 cups-ish). Since berries vary in terms of size and weight, cups aren’t super reliable. Ideally, use a scale if you have one. Otherwise, be generous when measuring out your cups.Any large berries (strawberries, blackberries…), halve and even quarter some of the larger ones. I liked a combination of large and small berry pieces in the crumble. You don’t want all small or all large pieces. It keeps things interesting.If you use frozen berries, there’s no need to defrost. Be sure to add an additional 1 tablespoon (8 g) of corn starch if using frozen fruit. You might also need to add an extra five minutes or so to the bake time. Note that frozen berries will yield a more liquid crumble base.Corn Starch Substitute If you don’t have any corn starch on hand, feel free to replace with all-purpose flour or arrowroot, 1:1. Crumble StorageStore the baked berry crumble covered on the counter. If it’s especially hot and humid, store it in the refrigerator in an airtight container. The crumble will last for 2 to 3 days at room temperature and up to 4 days in the fridge.The crumble topping may soften over time. You can pop it into a preheated 350℉ (177℃) for about 8 to 10 minutes to warm and crisp up the top.
PrintDelicious Mixed Berry Crumble (Use Any Berries!)#wprm-recipe-user-rating-0 .wprm-rating-star.wprm-rating-star-full svg * { fill: #343434; }#wprm-recipe-user-rating-0 .wprm-rating-star.wprm-rating-star-33 svg * { fill: url(#wprm-recipe-user-rating-0-33); }#wprm-recipe-user-rating-0 .wprm-rating-star.wprm-rating-star-50 svg * { fill: url(#wprm-recipe-user-rating-0-50); }#wprm-recipe-user-rating-0 .wprm-rating-star.wprm-rating-star-66 svg * { fill: url(#wprm-recipe-user-rating-0-66); }linearGradient#wprm-recipe-user-rating-0-33 stop { stop-color: #343434; }linearGradient#wprm-recipe-user-rating-0-50 stop { stop-color: #343434; }linearGradient#wprm-recipe-user-rating-0-66 stop { stop-color: #343434; }#wprm-recipe-user-rating-0.wprm-user-rating-allowed.wprm-user-rating-not-voted:not(.wprm-user-rating-voting) svg * { fill-opacity: 0.3; }Juicy, thick berries covered in a crunchy, buttery streusel topping bake into the most DELICIOUS easy mixed berry crumble. Use any berries you'd like, but don't skip the vanilla ice cream! Course Dessert, SnackCuisine AmericanKeyword Berry, Crumble, Summer, Desserts, Baking, Recipe, Almond, Rebecca Firth, DisplacedHousewife Well-Tested RecipePrep Time 10 minutes minutesCook Time 40 minutes minutesTotal Time 50 minutes minutesServings 12 ServingsAuthor Rebecca FirthEquipmentBaking ScaleSpatulaStaub 9 x 13–inch (23 x 33–cm) Baking DishIngredientsFor the Streusel Topping1 batch 5-Minute Streusel ToppingFor the Berries6 to 7 cups (900 to 1100 grams) mixed fresh berries see Notes below recipe½ cup (100 g) sugar3 tablespoons (24 g) cornstarch 1 teaspoon almond extractTo Garnish (optional) 1/3 cup (38 g) sliced almonds 1 tablespoon (12 g) Demerara sugarInstructionsTo StartPreheat the oven to 375℉ (190℃) and grease a 9 x 13–inch (23 x 33–cm) baking dish (see more pan options in the
Notes
section below the recipe). Set aside.For the Streusel ToppingMake 1 batch
5-Minute Streusel Topping Recipe
. Set the unbaked streusel topping in the fridge until ready to use. If storing for longer than an hour, place in a covered container.For the BerriesIn a large bowl, toss the berries with sugar, corn starch and almond extract. Gently mix until all of the berries are evenly coated.Assemble & BakeScoop the berries into the prepared pan, using a spatula to scrape the sides and bottom of the bowl to get any remaining juicy bits into the pan as well. Cover the berries evenly with the chilled streusel. Then sprinkle with the sliced almonds and finally the Demerara sugar (if using) over the top. Try to sprinkle the Demerara on top of the almonds and not the streusel. This can be (and will be) imperfect. That's fine!Bake in the center of the preheated oven for 40 minutes or until the top is golden brown and the berry juices are thick and bubbly. Set on a wire rack to cool for at least 40 minutes before serving. I *highly* encourage a big scoop (or two) of vanilla ice cream to go with your mixed berry crumble!NotesThis easy summer dessert recipe is sooo flexible, see the notes below for all of the substitutions and options!Baking Dish Sizes I tested this recipe in a 9-inch square baking dish (23-cm) and a 9 x 13-inch baking dish (23 x 33-cm). Use the smaller pan for a juicer crumble with a thicker crumble crust. Likewise, use the larger size for a more concentrated, thicker berry bottom and a thinner crumble topping.If you don’t have either of the above pans, you’ll want a pan with a 10-cup (2.4 L) to 14-cup (3.3 L) capacity. If your baking dish seems especially full, place a baking sheet on the rack beneath to catch any overflow.*The oval dish in the photos is a Corningware 2.8L French White oval dish. I could only find it used online. I love the way it looks!Options If You Don’t Want Almonds (or almond extract!)Feel free to omit the almonds and almond extract. I tested this recipe with both vanilla extract (1 teaspoon) and fresh orange zest (from one orange), and both were delicious.Also, consider throwing in a 1/2 teaspoon Chinese five-spice powder, cinnamon or cardamom if you’re feeling it.Picking & Preparing Your BerriesI tested this with different combinations of blackberries, blueberries, strawberries, cherries and raspberries. Cherries are not berries, but they are outstanding in this and I highly recommend adding them to the mix!I tested this recipe with anywhere from 900 to 1200 grams of fruit (between 5 and 7 cups-ish). Since berries vary in terms of size and weight, cups aren’t super reliable. Ideally, use a scale if you have one. Otherwise, be generous when measuring out your cups.Any large berries (strawberries, blackberries…), halve and even quarter some of the larger ones. I liked a combination of large and small berry pieces in the crumble. You don’t want all small or all large pieces. It keeps things interesting.If you use frozen berries, there’s no need to defrost. Be sure to add an additional 1 tablespoon (8 g) of corn starch if using frozen fruit. You might also need to add an extra five minutes or so to the bake time. Note that frozen berries will yield a more liquid crumble base.Corn Starch Substitute If you don’t have any corn starch on hand, feel free to replace with all-purpose flour or arrowroot, 1:1. Crumble StorageStore the baked berry crumble covered on the counter. If it’s especially hot and humid, store it in the refrigerator in an airtight container. The crumble will last for 2 to 3 days at room temperature and up to 4 days in the fridge.The crumble topping may soften over time. You can pop it into a preheated 350℉ (177℃) for about 8 to 10 minutes to warm and crisp up the top.The post Delicious Mixed Berry Crumble Recipe (Use Any Berries!) appeared first on DisplacedHousewife.
July 22, 2025
Mom’s Spiced Zucchini Relish Recipe
If you’ve never had Spiced Zucchini Relish, you’re in for a treat!
My mom has been making this crave-able summer condiment since we were little. This is akin to a ‘freezer jam’, so there’s no need for water baths or special canning equipment (but it will last in your freezer for up to a year!).
But let’s get to the taste of it all! Spiced zucchini relish is like pickle relish, but better (in my humble opinion). It’s loaded with flavor from onions, red peppers, celery seed, mustard seed and a light hand of cinnamon.
We love it with hot dogs, as you can see from the photos, but it’s great wherever you might use a regular pickle relish, such as making thousand island dressing, in deviled eggs, on a cheese board with creamy cheese and a robust salami.
It’s super simple to make as well. On Day 1, you’ll combine the finely chopped zucchini and onions with salt and water and let them hang out in the fridge overnight.
On Day 2, you’ll drain and rinse and then add to a large, heavy-bottomed Dutch oven (or large capacity saucepan). You’ll add in red peppers (or green bell peppers), sugar, vinegar, celery seed, mustard seed and some cinnamon and nutmeg. Bring to a boil, reduce to a simmer and an hour and a half (ish) later, you’re done!
I love to put it in these cute Weck jars in the photos and give it to friends or stash the rest in the freezer for winter hot dogs!
I hope you love this homemade zucchini relish recipe as much as my entire family does!
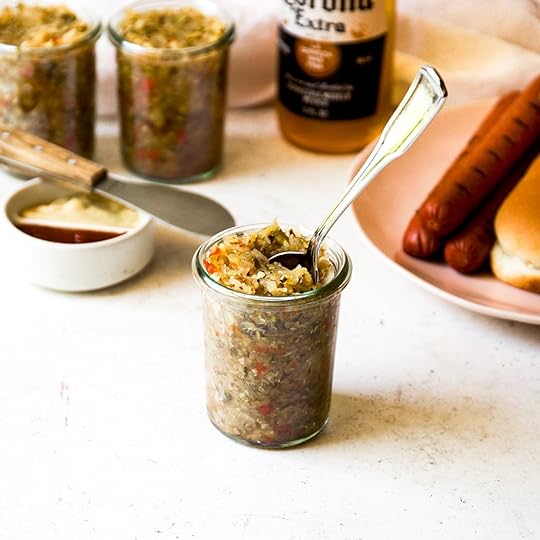
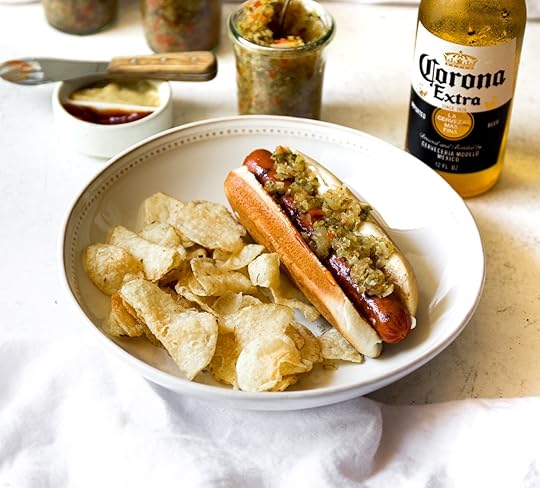 My Favorite Pro Tips for Making
 The Best Zucchini Relish Out There!
Finely chop up your ingredients.
Using a Cuisinart (or any food processor) makes fast work of chopping up the zucchini, onions and red pepper. If you have one available, use it. Otherwise, it doesn’t take too much to finely chop it all up.
You don’t want the pieces too big in the final relish.
Cook it down until most of the liquid is gone.
You will still see some liquid on the bottom of the pan, but most of it should have evaporated by the end of the cook time. If it’s still a bit soupy, then consider turning up the heat a touch, stirring and checking at 5-minute intervals. That should accelerate the reduction in liquid.
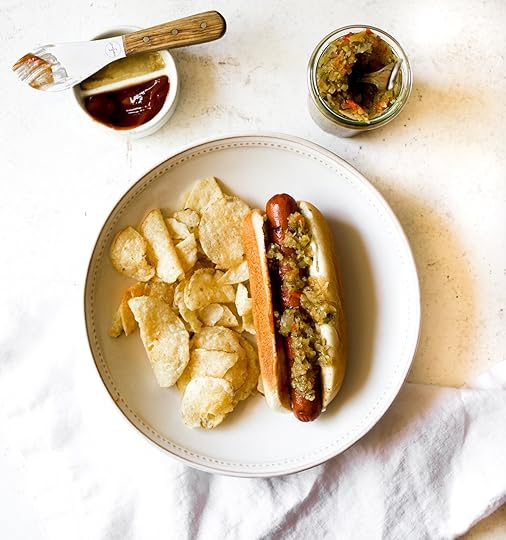
 Step-by-Step Instructions & Photos to Make
 The Best Homemade Relish Recipe!
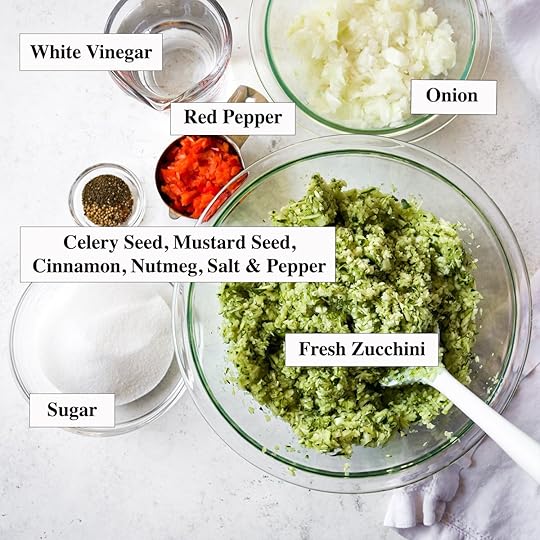 Step 1: Grab your ingredients: zucchini, onion, salt, vinegar, sugar, red bell pepper, mustard seeds, celery seed, cinnamon, nutmeg and pepper.
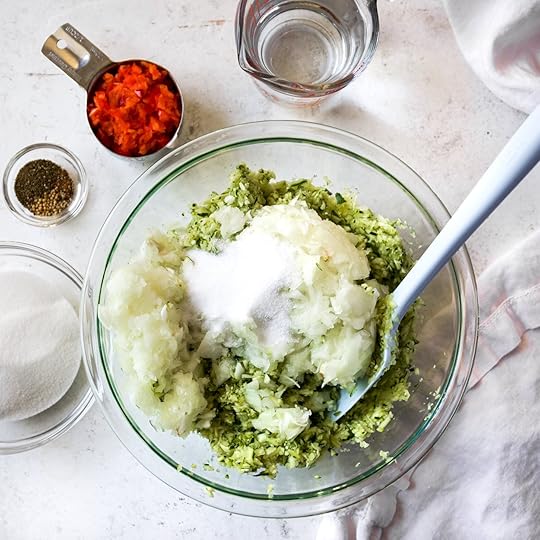 STEP 2: Combine zucchini, onion and salt in a large mixing bowl.
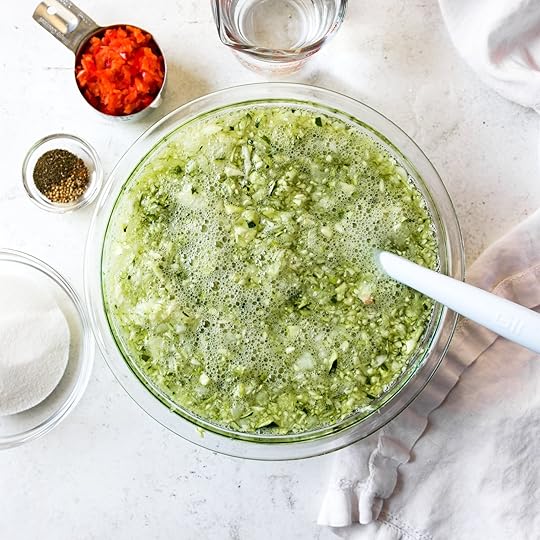 STEP 3: Cover with water and then cover the bowl and stash it in the fridge overnight.
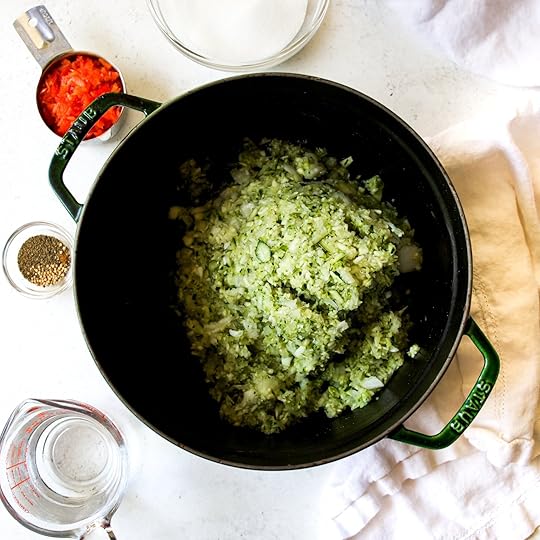 STEP 4: The next day, drain, rinse and drain again the zucchini and onions. Transfer to a large Dutch oven or large-capacity saucepan.
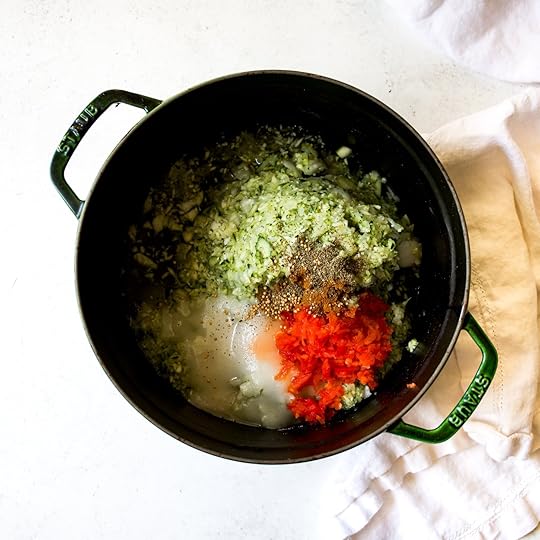 STEP 5: Add the vinegar, sugar, red pepper, mustard seed, celery seed, cinnamon, nutmeg and pepper, stirring to combine.
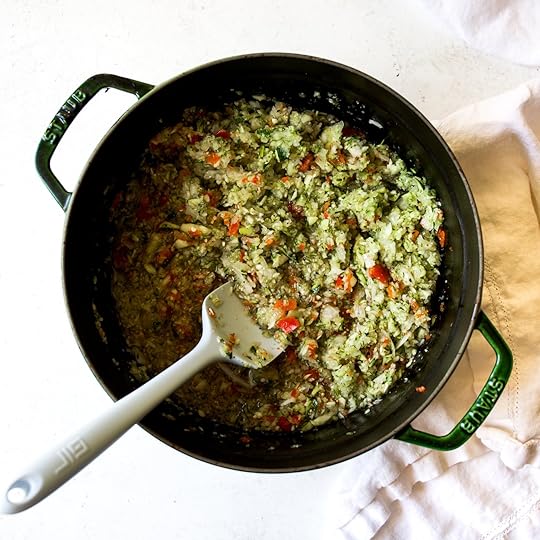 STEP 6: Bring to a boil and then reduce to a simmer, stirring periodically until the relish is thick and most of the liquid in the bottom of the pan is gone.
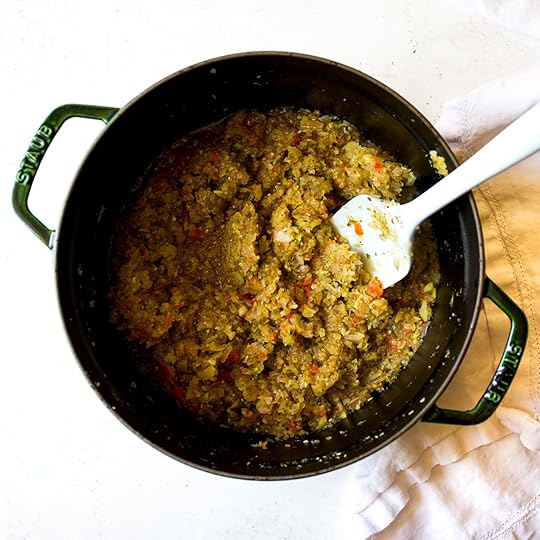 STEP 7: It will look like this when done!
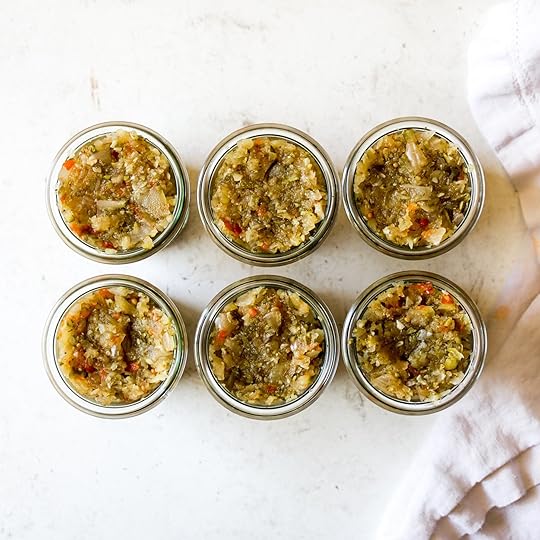 STEP 8: Transfer to clean jars, cover and let cool completely before storing in the fridge or freezer. Enjoy!
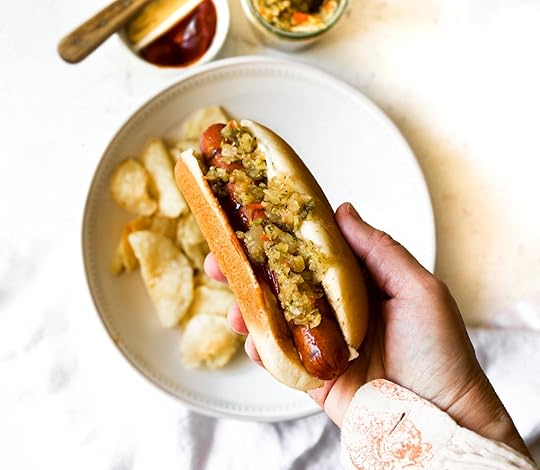
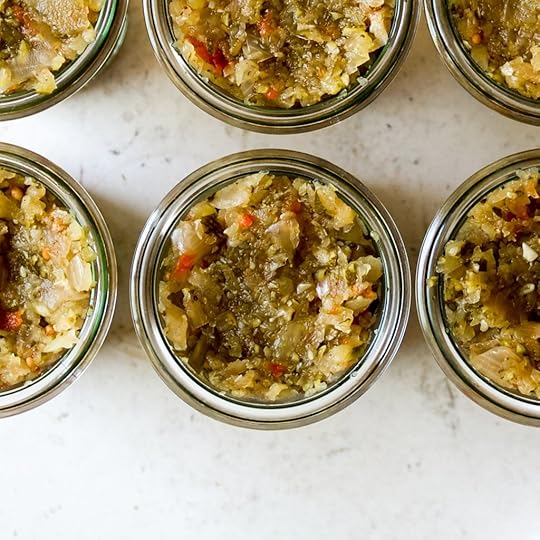 More Delicious Summer Recipes
While we’re bottling up summer produce to enjoy all year long, try out my favorite Strawberry Jam (this easy freezer jam is made with dried hibiscus!) and prep these Blueberry Scones completely (minus baking) and store in the freezer for scones on demand (they’re SO GOOD).
If you’re like a zucchini bender like I am, make this Brown Butter Zucchini Bread STAT!
You can find all of the summer recipes here!
Enjoy this crazy delicious zucchini relish recipe!
 PrintMom’s Spiced Zucchini Relish Recipe (You will love!)#wprm-recipe-user-rating-0 .wprm-rating-star.wprm-rating-star-full svg * { fill: #343434; }#wprm-recipe-user-rating-0 .wprm-rating-star.wprm-rating-star-33 svg * { fill: url(#wprm-recipe-user-rating-0-33); }#wprm-recipe-user-rating-0 .wprm-rating-star.wprm-rating-star-50 svg * { fill: url(#wprm-recipe-user-rating-0-50); }#wprm-recipe-user-rating-0 .wprm-rating-star.wprm-rating-star-66 svg * { fill: url(#wprm-recipe-user-rating-0-66); }linearGradient#wprm-recipe-user-rating-0-33 stop { stop-color: #343434; }linearGradient#wprm-recipe-user-rating-0-50 stop { stop-color: #343434; }linearGradient#wprm-recipe-user-rating-0-66 stop { stop-color: #343434; }#wprm-recipe-user-rating-0.wprm-user-rating-allowed.wprm-user-rating-not-voted:not(.wprm-user-rating-voting) svg * { fill-opacity: 0.3; }My mom's been making this perfectly spiced zucchini relish since we were kids. It's like pickle relish, but better! Loaded with spices, it's perfect for gifting or stashing in the freezer to enjoy all year long!Course Appetizer, Condiment, SnackCuisine AmericanKeyword Rebecca Firth, DisplacedHousewife Well-Tested Recipe, Zucchini, Relish, Summer, Recipes, FreezerPrep Time 25 minutes minutesCook Time 1 hour hour 45 minutes minutesOvernight Soak 12 hours hoursTotal Time 14 hours hours 10 minutes minutesServings 32 OuncesAuthor Rebecca at DisplacedHousewifeEquipmentBaking Scale5 qt Coquette (this is the one I have!)Mini Food ProcessorSpatulaWeck 5.4 oz Glass Jars (I use six for this recipe)IngredientsDay 1: Easy Overnight Soak3 medium (684 g) fresh zucchini finely chopped (about 1 1/2 lbs)2 medium (321 g) onions finely chopped2 ½ tablespoons (45 g) sea saltDay 2: Assemble & Cook1 cup + 2 tbsp (252 g) white vinegar½ cup + 2 tbsp (124 g) granulated sugar½ cup (110 g) red bell pepper seeded and finely chopped1 teaspoon celery seed1 teaspoon mustard seed½ teaspoon cinnamon¼ teaspoon nutmeg¼ teaspoon fresh ground pepperInstructionsDay 1: Easy Overnight SoakIn a large container, combine zucchini, onions and salt and cover with water. Cover and set in the fridge overnight.Day 2: Assemble & CookWhen ready to make the zucchini relish, drain the zucchini in a large colander. Rinse well with water and then drain again.In a large Dutch oven or large heavy-bottomed saucepan set over high heat, combine the rinsed zucchini, vinegar, sugar, chopped pepper, celery seed, mustard seed, cinnamon, nutmeg and pepper. Stir well to combine. The relish will be quite thick, that's ok.Bring to a boil and then reduce to a simmer, stirring periodically, for about 90 to 105 minutes. You'll know when the relish is done when the liquid has reduced and there is only a small bit at the bottom of the pan. If there is a lot of liquid or it's soupy, cook for longer.When done, pour the zucchini relish into sterilized jars (see
Note
below regarding sterilizing jars and jar sizes). Cover the jars and let them cool completely before stashing them in the fridge or freezer. The relish will last about 1 month in the fridge and up to a year in the freezer.NotesRecipe Yield + Notes on JarsThis relish recipe yields about 2 ½ pints/32 ounces/ 2 lbs/933 grams (roughly).I love to put it in the small Weck jars (linked just above the recipe), because it’s the perfect size to pull out and enjoy for a month, without any going to waste. Feel free to use whatever beautiful jars strike your fancy.A Note on Veggie WeightsWeight for 2 onions and 3 zucchinis will be a wee different for you than it is for me. If you have access to a scale, follow the weight measurements to make the recipe exactly as I do. If you don’t have access to a scale, then use the quantity of veggie provided.The red bell pepper would be about 1/3 of a pepper chopped. If you want to eyeball things. Sterilizing JarsIf I know I’ll be using the relish within a week or two, I just use clean jars.If I want it to sit in the fridge for a bit longer, I will sterilize the jars. You can either use the sterilize setting on your dishwasher, or you can submerge them in boiling water for at least 10 minutes and then let them air dry before using.Sterilizing your jars and freezing your relish for long-term storage will inhibit the growth of bacteria.Storing Zucchini RelishSince we aren’t using a canning process when making this relish, it is not shelf-stable. Meaning, you’ll need to store it in either the refrigerator or freezer. This spiced zucchini relish will last about four weeks in the fridge and up to a year in the freezer.
PrintMom’s Spiced Zucchini Relish Recipe (You will love!)#wprm-recipe-user-rating-0 .wprm-rating-star.wprm-rating-star-full svg * { fill: #343434; }#wprm-recipe-user-rating-0 .wprm-rating-star.wprm-rating-star-33 svg * { fill: url(#wprm-recipe-user-rating-0-33); }#wprm-recipe-user-rating-0 .wprm-rating-star.wprm-rating-star-50 svg * { fill: url(#wprm-recipe-user-rating-0-50); }#wprm-recipe-user-rating-0 .wprm-rating-star.wprm-rating-star-66 svg * { fill: url(#wprm-recipe-user-rating-0-66); }linearGradient#wprm-recipe-user-rating-0-33 stop { stop-color: #343434; }linearGradient#wprm-recipe-user-rating-0-50 stop { stop-color: #343434; }linearGradient#wprm-recipe-user-rating-0-66 stop { stop-color: #343434; }#wprm-recipe-user-rating-0.wprm-user-rating-allowed.wprm-user-rating-not-voted:not(.wprm-user-rating-voting) svg * { fill-opacity: 0.3; }My mom's been making this perfectly spiced zucchini relish since we were kids. It's like pickle relish, but better! Loaded with spices, it's perfect for gifting or stashing in the freezer to enjoy all year long!Course Appetizer, Condiment, SnackCuisine AmericanKeyword Rebecca Firth, DisplacedHousewife Well-Tested Recipe, Zucchini, Relish, Summer, Recipes, FreezerPrep Time 25 minutes minutesCook Time 1 hour hour 45 minutes minutesOvernight Soak 12 hours hoursTotal Time 14 hours hours 10 minutes minutesServings 32 OuncesAuthor Rebecca at DisplacedHousewifeEquipmentBaking Scale5 qt Coquette (this is the one I have!)Mini Food ProcessorSpatulaWeck 5.4 oz Glass Jars (I use six for this recipe)IngredientsDay 1: Easy Overnight Soak3 medium (684 g) fresh zucchini finely chopped (about 1 1/2 lbs)2 medium (321 g) onions finely chopped2 ½ tablespoons (45 g) sea saltDay 2: Assemble & Cook1 cup + 2 tbsp (252 g) white vinegar½ cup + 2 tbsp (124 g) granulated sugar½ cup (110 g) red bell pepper seeded and finely chopped1 teaspoon celery seed1 teaspoon mustard seed½ teaspoon cinnamon¼ teaspoon nutmeg¼ teaspoon fresh ground pepperInstructionsDay 1: Easy Overnight SoakIn a large container, combine zucchini, onions and salt and cover with water. Cover and set in the fridge overnight.Day 2: Assemble & CookWhen ready to make the zucchini relish, drain the zucchini in a large colander. Rinse well with water and then drain again.In a large Dutch oven or large heavy-bottomed saucepan set over high heat, combine the rinsed zucchini, vinegar, sugar, chopped pepper, celery seed, mustard seed, cinnamon, nutmeg and pepper. Stir well to combine. The relish will be quite thick, that's ok.Bring to a boil and then reduce to a simmer, stirring periodically, for about 90 to 105 minutes. You'll know when the relish is done when the liquid has reduced and there is only a small bit at the bottom of the pan. If there is a lot of liquid or it's soupy, cook for longer.When done, pour the zucchini relish into sterilized jars (see
Note
below regarding sterilizing jars and jar sizes). Cover the jars and let them cool completely before stashing them in the fridge or freezer. The relish will last about 1 month in the fridge and up to a year in the freezer.NotesRecipe Yield + Notes on JarsThis relish recipe yields about 2 ½ pints/32 ounces/ 2 lbs/933 grams (roughly).I love to put it in the small Weck jars (linked just above the recipe), because it’s the perfect size to pull out and enjoy for a month, without any going to waste. Feel free to use whatever beautiful jars strike your fancy.A Note on Veggie WeightsWeight for 2 onions and 3 zucchinis will be a wee different for you than it is for me. If you have access to a scale, follow the weight measurements to make the recipe exactly as I do. If you don’t have access to a scale, then use the quantity of veggie provided.The red bell pepper would be about 1/3 of a pepper chopped. If you want to eyeball things. Sterilizing JarsIf I know I’ll be using the relish within a week or two, I just use clean jars.If I want it to sit in the fridge for a bit longer, I will sterilize the jars. You can either use the sterilize setting on your dishwasher, or you can submerge them in boiling water for at least 10 minutes and then let them air dry before using.Sterilizing your jars and freezing your relish for long-term storage will inhibit the growth of bacteria.Storing Zucchini RelishSince we aren’t using a canning process when making this relish, it is not shelf-stable. Meaning, you’ll need to store it in either the refrigerator or freezer. This spiced zucchini relish will last about four weeks in the fridge and up to a year in the freezer. The post Mom’s Spiced Zucchini Relish Recipe appeared first on DisplacedHousewife.
July 18, 2025
THE BEST Ultra Moist Brown Butter Zucchini Bread Recipe
I love a delicious zucchini bread recipe about as much as the next person! When I was recipe testing this zucchini quick bread, I knew I wanted a couple of things: brown butter, dark brown sugar and full-bodied spices for mega flavor.
I also wanted this zucchini loaf to have lots of moist and bouncy texture. Lucky us, all of this adds up to the ultimate zucchini bread recipe!
When I finally nailed this recipe, we could not stop eating it straight from the pan!!
The brown butter is an extra step, but worth it. I also don’t want you to skip the Demerara sugar over the top!! It bakes up to the most beautiful crunchy top (see photos!) that contrasts perfectly with the soft, plush zucchini bread!
I hope you love this zucchini bread as much as we do!
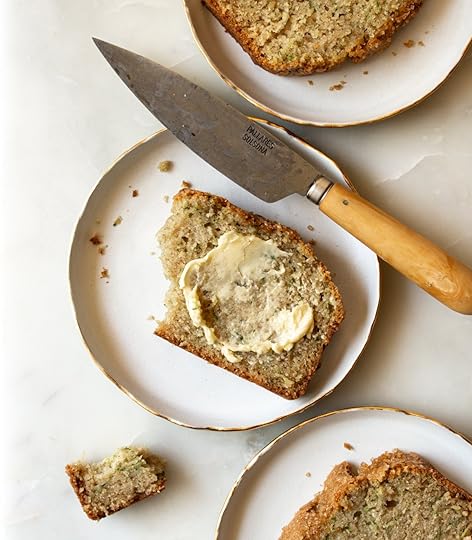 The Baker’s Guide to Measuring Flour
One of the biggest (and most common) mistakes in baking is how we measure flour. If you find yourself without a scale, see my top tips on how to properly measure flour for the perfect amount every time!
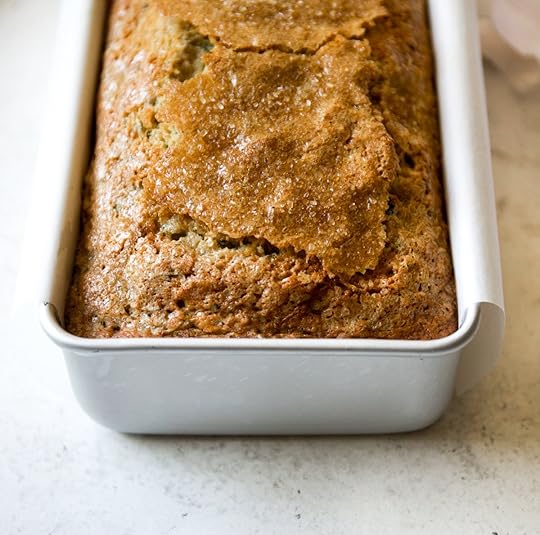 My Favorite Pro Baking Tips for Making Perfect Zucchini BreadLet your brown butter cool a bit before mixing it with the cake batter.
Set the butter in the freezer to cool off before moving forward with the recipe. Just a short 15 minutes will do the trick! You can grate the zucchini and get out your ingredients while it cools down.
Let the zucchini loaf cake batter sit for 15 minutes before popping it in the oven.This short rest allows the flour to relax a bit, some moisture to be absorbed by the flour and get a nice rise over the top of the cake when baked.
Don’t skip the Demerara topping!I mean, you can. But it’s sooo incredibly delicious over the top in terms of taste and texture, you don’t want to miss out!
PRO TIP: Don’t over mix the quick bread batter once you add the flour. Mix until barely combined and you still see streaks of flour! Then add the finely grated zucchini mixing again, until just combined. The final crumb of the zucchini bread will be tight, but light and bouncy.
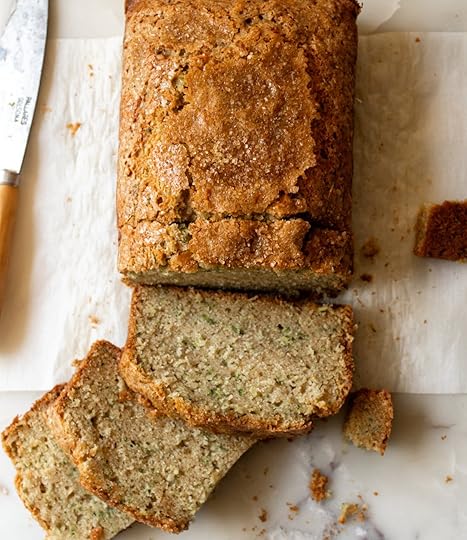 Step-by-Step Instructions With Photos for
 the Best Brown Butter Zucchini Bread Ever!
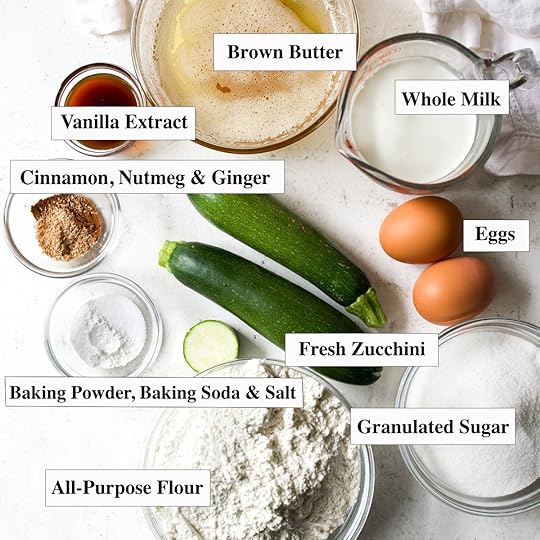 STEP 1: Gather your ingredients: butter, fresh zucchini, granulated sugar, dark brown sugar (not pictured; you can also use light brown sugar), oil (not pictured), vanilla, cinnamon, nutmeg, ginger, eggs, baking powder, baking soda, salt, all-purpose flour, whole milk and Demerara sugar (not pictured; optional).
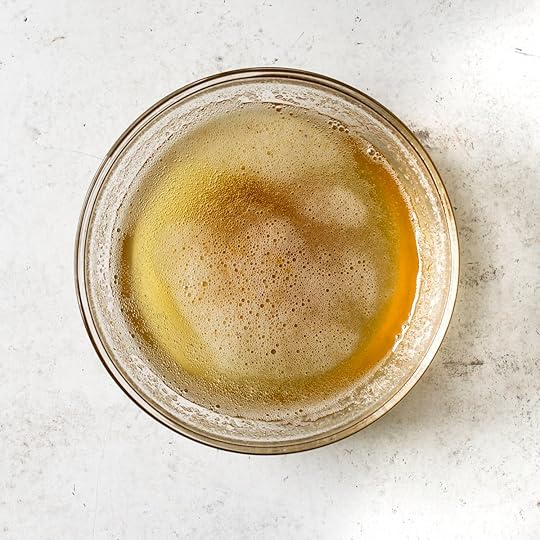 STEP 2: Brown your butter. Transfer to a heat-safe container and stash in the fridge or freezer to cool down a bit while you prep the zucchini.
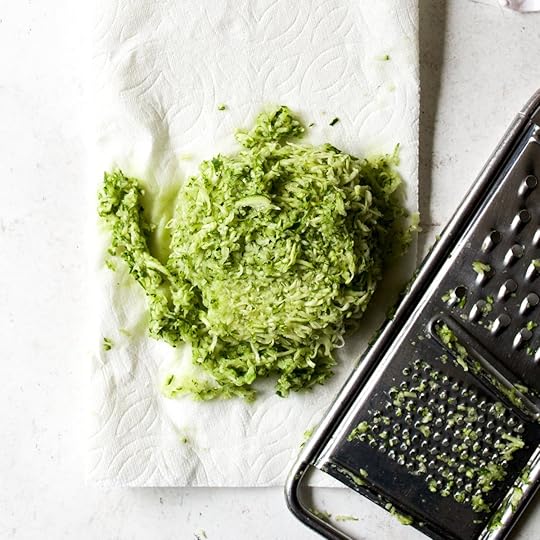 STEP 3: Finely grate the zucchini and set it on top of several layers of towels. You don’t need to squeeze out the moisture or anything; just let the towels absorb any moisture from the grated zucchini, just sitting there. Set aside.
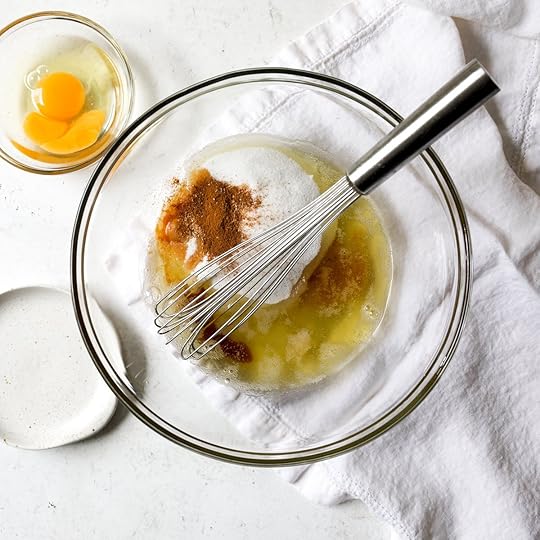 STEP 4: Whisk together the cooled brown butter, granulated sugar, brown sugar, oil, vanilla, cinnamon, nutmeg and ginger.
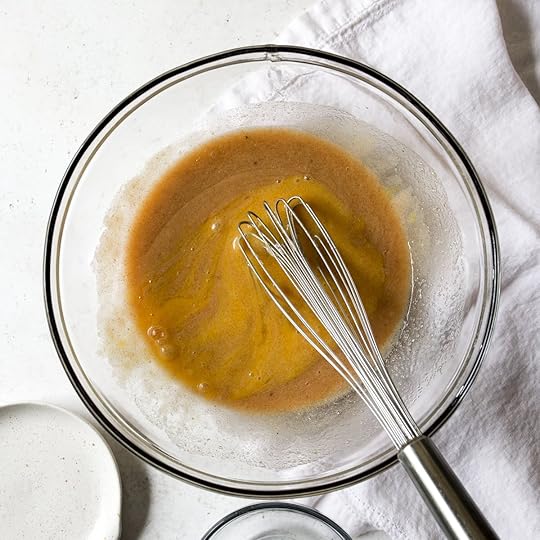 STEP 5: Whisk in the eggs, one at a time. Make sure the first is well blended before adding the second.
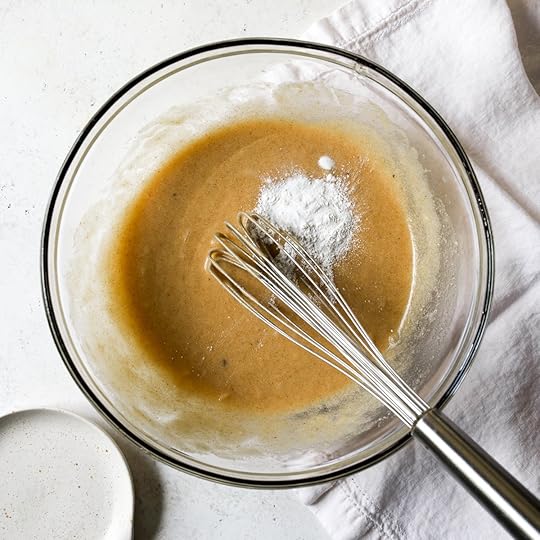 STEP 6: Whisk in the baking powder, baking soda and salt.
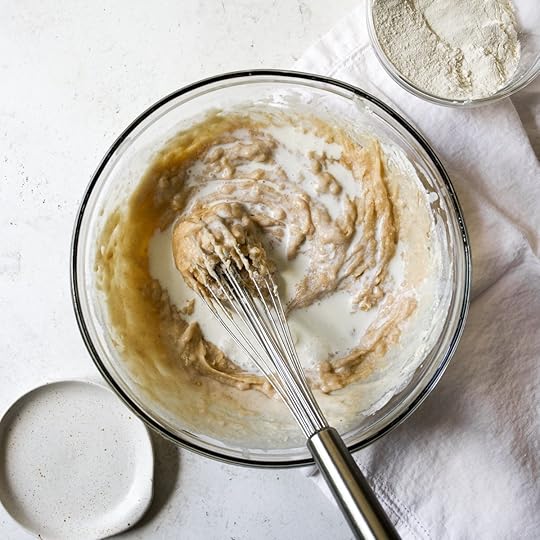 STEP 7: Alternate adding the milk…
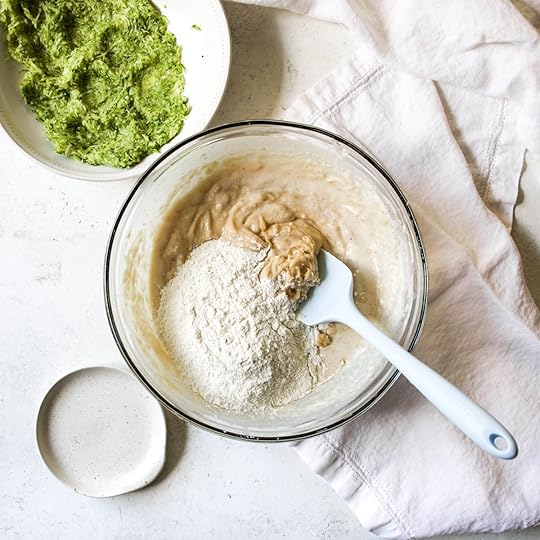 STEP 7: …and flour in two batches, mixing each until barely combined.
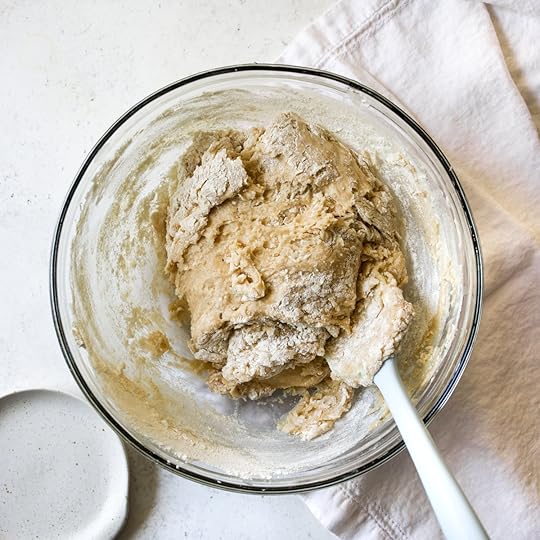 STEP 7: You should still see streaks of flour in your batter.
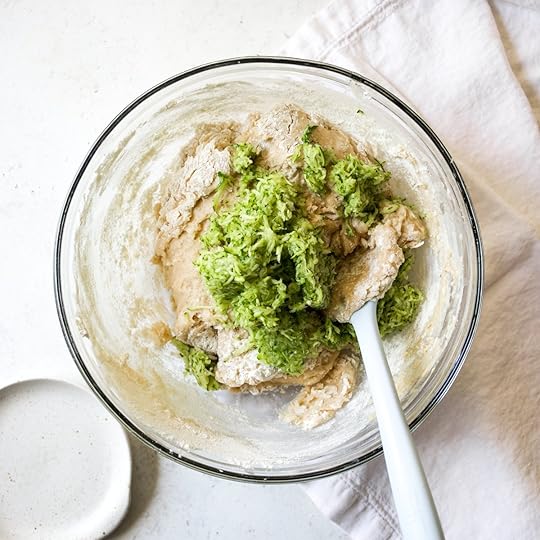 STEP 8: Mix in your zucchini until evenly distributed through the zucchini bread batter.
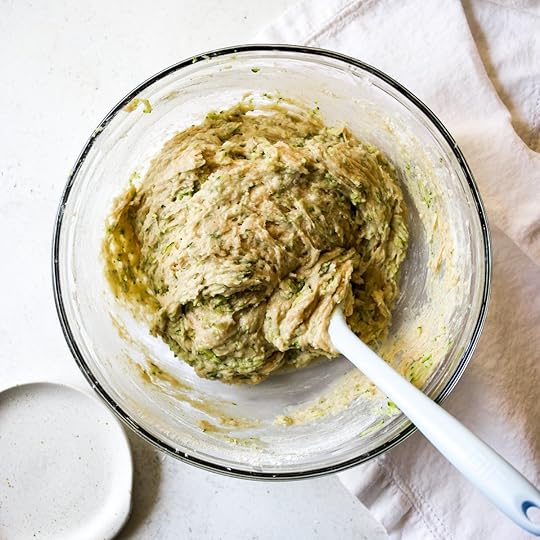 STEP 8: Your batter will look like this!
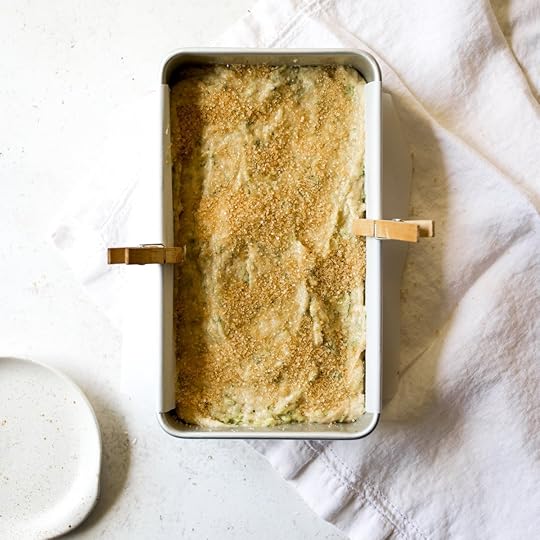 STEP 9: Scoop into he prepared pan, sprinkle with Demerara sugar and pop in the oven for about 60 minutes or until a toothpick inserted into the center of the cake comes out clean.
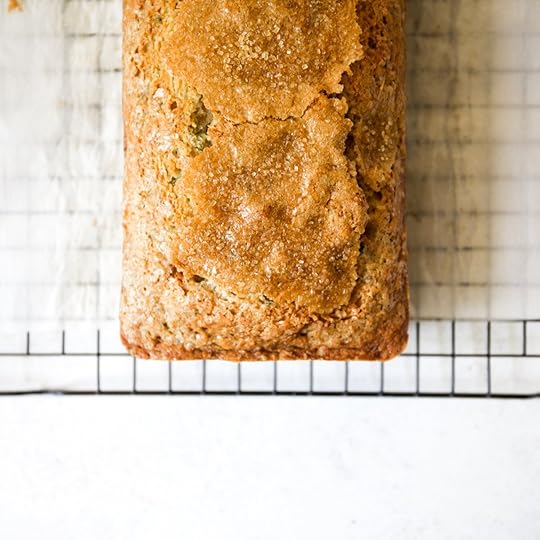 STEP 10: Cool on a wire rack for 30 minutes before using the parchment overhand to pull the bread out of the pan and setting it on the cooling rack until the cake is at room temperature. Serve and enjoy!
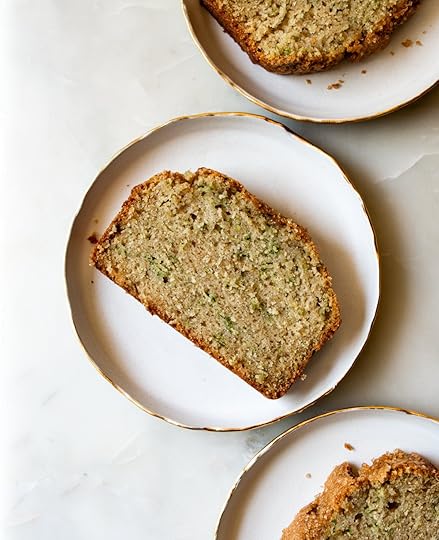
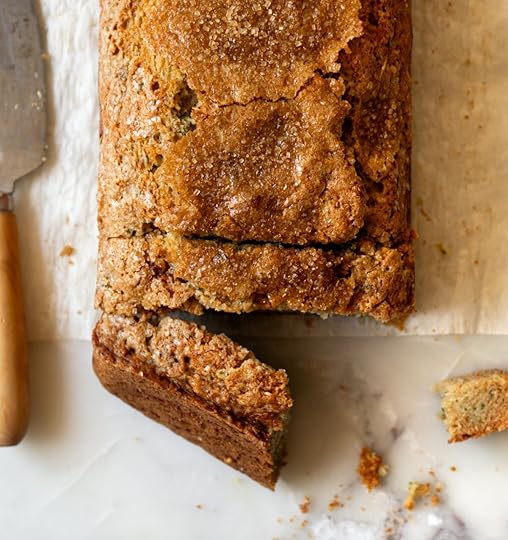
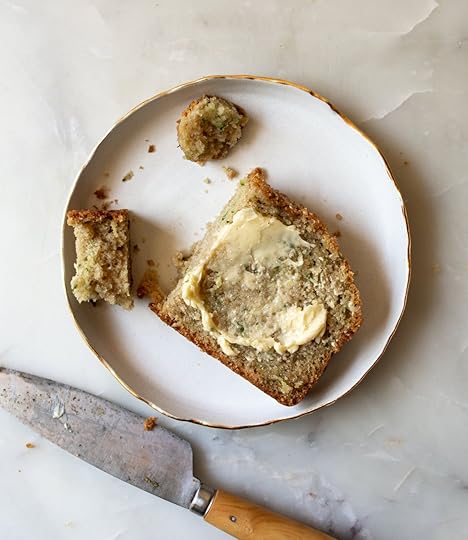 More Delicious Quick Bread Recipes!
If you like this, you’ll also love Double Chocolate Banana Bread (swoon) and this gorgeous Raspberry Lemon Loaf Cake! You can find all of the quick bread and loaf cake recipes here!
Enjoy this easy zucchini bread recipe!
 PrintTHE BEST Ultra Moist Brown Butter Zucchini Bread Recipe#wprm-recipe-user-rating-0 .wprm-rating-star.wprm-rating-star-full svg * { fill: #343434; }#wprm-recipe-user-rating-0 .wprm-rating-star.wprm-rating-star-33 svg * { fill: url(#wprm-recipe-user-rating-0-33); }#wprm-recipe-user-rating-0 .wprm-rating-star.wprm-rating-star-50 svg * { fill: url(#wprm-recipe-user-rating-0-50); }#wprm-recipe-user-rating-0 .wprm-rating-star.wprm-rating-star-66 svg * { fill: url(#wprm-recipe-user-rating-0-66); }linearGradient#wprm-recipe-user-rating-0-33 stop { stop-color: #343434; }linearGradient#wprm-recipe-user-rating-0-50 stop { stop-color: #343434; }linearGradient#wprm-recipe-user-rating-0-66 stop { stop-color: #343434; }#wprm-recipe-user-rating-0.wprm-user-rating-allowed.wprm-user-rating-not-voted:not(.wprm-user-rating-voting) svg * { fill-opacity: 0.3; }So excited for you to try this Ultra Moist Brown Butter Zucchini Bread Recipe! It's loaded with flavor from the brown butter, dark brown sugar and spices, with a soft, velvety and plush texture. Don't skip the Demerara sugar on top; it makes this zucchini bread next-level delicious!Course Breakfast Brunch, Dessert, SnackCuisine AmericanKeyword Rebecca Firth, DisplacedHousewife Well-Tested Recipe, Zucchini Bread, Brown Butter, Quick Bread, Loaf Cake, Spiced, DemeraraPrep Time 30 minutes minutesCook Time 1 hour hour 5 minutes minutesResting Time 15 minutes minutesTotal Time 1 hour hour 50 minutes minutesServings 1 Loaf CakeAuthor Rebecca at DisplacedHousewifeEquipmentBaking Scale9 x 5-inch (23 x 13-cm) Loaf PanMixing BowlsSpatulaBox GraterDemerara SugarIngredientsFor the Brown Butter10 tablespoons (140 g) unsalted butter yielding about (104 g) of brown butterFor the Brown Butter Zucchini Bread2 cups (240 g) fresh zucchini finely grated; 2 to 3 small zucchinis1 cup (200 g) granulated sugar¼ cup (55 g) dark brown sugar packed; you can use light brown sugar as well3 tablespoons (36 g) any delicious cooking oil sunflower, grape seed and olive oil all work great!1 tablespoon (13 g) vanilla paste or real vanilla extract1 tablespoon (6 g) cinnamon1 teaspoon nutmeg1 teaspoon ground ginger2 large eggs cold2 teaspoons baking powder1 teaspoon baking soda1 teaspoon sea salt¾ cup (168 g) whole milk room temperature2 1/3 cups (315 g) all-purpose flourTo Garnish3 tablespoons (36 g) Demerara sugar to sprinkle over the top of the zucchini bread pre-bakeInstructionsFor the Brown ButterPlace 10 tablespoons (140 g) of butter in a medium saucepan and melt over medium heat. Once melted, crank up the heat to medium-high. Stand by, continuously stirring and watching. Small golden bits will start to settle on the bottom of the pan. Once this happens, remove from the heat and pour into a heat-safe bowl to cool until closer to room temperature.
(For more details on browning butter, check out my How to Perfectly Brown Butter tutorial)
For the Zucchini BreadPlace finely grated zucchini on several layers of towels. You don't need to press out the excess moisture. Just let the towels soak up any moisture that drains off. Set aside.Preheat the oven to 350ºF (177ºC); grease a 9 x 5–inch (23 x 13–cm) loaf pan and line with parchment paper, letting the excess hang over the long sides of the pan. Set aside.In the bowl of an electric stand mixer fitted with the paddle attachment, add the cooled brown butter, sugar, brown sugar, oil, vanilla, cinnamon, nutmeg and ginger, and mix on medium until light and fluffy, 4 to 5 minutes. With the machine on low, add the eggs, one at a time, making sure the first is incorporated before adding the second. Add the baking powder, baking soda and salt and mix on low for 20 seconds. Scrape the sides and bottom of the bowl to make sure everything is combined. Add the flour mixture to the quick bread batter in two batches, alternating with the milk and mixing each addition until just barely combined and you still see streaks of flour. Finally, fold in the zucchini and mix until it's distributed evenly throughout the batter. Scrape the sides and bottom of the bowl to make sure everything is combined. Let the batter sit for 15 minutes. To Garnish & BakeScoop the batter into the prepared pan, tapping the pan several times on the counter to release any trapped air bubbles. Sprinkle the Demerara evenly over the top of the zucchini bread and bake in the center of the oven for 60 to 70 minutes* or until the cake is puffed up and lightly bronzed and a toothpick inserted into the center of the cake comes out with some moist crumbs, but no wet batter. Remember, it will continue to bake as it cools.*65 minutes is perfect in my oven.Let the zucchini quick bread cool in the pan on a rack for 30 minutes. Run a butter knife along the edge of the cake to release it from the pan; then use the parchment overhang to lift the cake out of the pan to finish cooling on the rack. This cake tastes delicious warm and even better at room temperature.NotesMixer vs Your ArmsYou can use an electric stand mixer with the paddle attachment (as referenced in the recipe instructions), a handheld mixer, or use a spatula and large mixing bowl as demonstrated in the step-by-step photos above the recipe. Your choice!Dark or Light Brown SugarFeel free to use light brown sugar if that’s what you have available. If you’re at the store, grab the dark brown sugar…it’s a delight in this!Cinnamon Yes, a full 1 tablespoon of cinnamon! I love the full cinnamon flavor in this!Why Cold Eggs?Since your brown butter will most likely still be a bit warm when you start mixing the zucchini bread together, the cold eggs will cool everything off. Demerara SugarDemerara Sugar gives this zucchini quick bread its signature crunchy top. It’s gorgeous visually and also adds to the taste and texture of the cake. Demerara has a delicious molasses flavor that adds to the taste experience of the finished cake. Seek it out!Add-Ins for Zucchini BreadFeel free to add 1/2 cup (85 g) of chocolate chips or 1/2 cup (57 g) nuts (toasted & chopped walnuts or pecans would be delicious).Make sure your pan isn’t filled more than 3/4s filled. If you’re worried, place a rimmed baking sheet on the rack beneath the loaf cake while it bakes to catch any overflow.One Of My Favorite Loaf Cake Tips!As tempting as it is to tear into a fresh-baked loaf of zucchini bread, I would love for you to wait until it has cooled completely and is at room temperature.The reason for this is that I think of loaf cakes and quick breads almost like steak. Weird, I know. But stay with me. When you first take a steak (or any meat) off of the heat, you want to let it sit so that the juices can relax and redistribute around the meat so that each bite is juicy. If you cut into it too soon, you loose a lot of the juice/moisture all over your plate.The same can be said for a loaf cake or quick bread. When you cut into it while it’s still warm and steam escapes, you’re letting a lot of moisture escape. Moisture I’d rather have in every slice of zucchini bread.I also swear, this tastes better once it’s cool. And even better the next day!Storing Zucchini BreadStore the zucchini bread in an airtight container at room temperature for up to three days. If it’s especially hot and. humid, consider storing it in the refrigerator. Zucchini Bread freezes like a dream! You can freeze the whole loaf or slices. Either way, make sure it’s wrapped tightly and stored in an airtight container to protect it from freezer burn.Defrost in whole frozen loaf in the fridge overnight and then set on the counter to come to room temperature before serving.If you froze slices of the brown butter zucchini bread, just set the slices on the counter and they’ll come to room temperature pretty quickly.
PrintTHE BEST Ultra Moist Brown Butter Zucchini Bread Recipe#wprm-recipe-user-rating-0 .wprm-rating-star.wprm-rating-star-full svg * { fill: #343434; }#wprm-recipe-user-rating-0 .wprm-rating-star.wprm-rating-star-33 svg * { fill: url(#wprm-recipe-user-rating-0-33); }#wprm-recipe-user-rating-0 .wprm-rating-star.wprm-rating-star-50 svg * { fill: url(#wprm-recipe-user-rating-0-50); }#wprm-recipe-user-rating-0 .wprm-rating-star.wprm-rating-star-66 svg * { fill: url(#wprm-recipe-user-rating-0-66); }linearGradient#wprm-recipe-user-rating-0-33 stop { stop-color: #343434; }linearGradient#wprm-recipe-user-rating-0-50 stop { stop-color: #343434; }linearGradient#wprm-recipe-user-rating-0-66 stop { stop-color: #343434; }#wprm-recipe-user-rating-0.wprm-user-rating-allowed.wprm-user-rating-not-voted:not(.wprm-user-rating-voting) svg * { fill-opacity: 0.3; }So excited for you to try this Ultra Moist Brown Butter Zucchini Bread Recipe! It's loaded with flavor from the brown butter, dark brown sugar and spices, with a soft, velvety and plush texture. Don't skip the Demerara sugar on top; it makes this zucchini bread next-level delicious!Course Breakfast Brunch, Dessert, SnackCuisine AmericanKeyword Rebecca Firth, DisplacedHousewife Well-Tested Recipe, Zucchini Bread, Brown Butter, Quick Bread, Loaf Cake, Spiced, DemeraraPrep Time 30 minutes minutesCook Time 1 hour hour 5 minutes minutesResting Time 15 minutes minutesTotal Time 1 hour hour 50 minutes minutesServings 1 Loaf CakeAuthor Rebecca at DisplacedHousewifeEquipmentBaking Scale9 x 5-inch (23 x 13-cm) Loaf PanMixing BowlsSpatulaBox GraterDemerara SugarIngredientsFor the Brown Butter10 tablespoons (140 g) unsalted butter yielding about (104 g) of brown butterFor the Brown Butter Zucchini Bread2 cups (240 g) fresh zucchini finely grated; 2 to 3 small zucchinis1 cup (200 g) granulated sugar¼ cup (55 g) dark brown sugar packed; you can use light brown sugar as well3 tablespoons (36 g) any delicious cooking oil sunflower, grape seed and olive oil all work great!1 tablespoon (13 g) vanilla paste or real vanilla extract1 tablespoon (6 g) cinnamon1 teaspoon nutmeg1 teaspoon ground ginger2 large eggs cold2 teaspoons baking powder1 teaspoon baking soda1 teaspoon sea salt¾ cup (168 g) whole milk room temperature2 1/3 cups (315 g) all-purpose flourTo Garnish3 tablespoons (36 g) Demerara sugar to sprinkle over the top of the zucchini bread pre-bakeInstructionsFor the Brown ButterPlace 10 tablespoons (140 g) of butter in a medium saucepan and melt over medium heat. Once melted, crank up the heat to medium-high. Stand by, continuously stirring and watching. Small golden bits will start to settle on the bottom of the pan. Once this happens, remove from the heat and pour into a heat-safe bowl to cool until closer to room temperature.
(For more details on browning butter, check out my How to Perfectly Brown Butter tutorial)
For the Zucchini BreadPlace finely grated zucchini on several layers of towels. You don't need to press out the excess moisture. Just let the towels soak up any moisture that drains off. Set aside.Preheat the oven to 350ºF (177ºC); grease a 9 x 5–inch (23 x 13–cm) loaf pan and line with parchment paper, letting the excess hang over the long sides of the pan. Set aside.In the bowl of an electric stand mixer fitted with the paddle attachment, add the cooled brown butter, sugar, brown sugar, oil, vanilla, cinnamon, nutmeg and ginger, and mix on medium until light and fluffy, 4 to 5 minutes. With the machine on low, add the eggs, one at a time, making sure the first is incorporated before adding the second. Add the baking powder, baking soda and salt and mix on low for 20 seconds. Scrape the sides and bottom of the bowl to make sure everything is combined. Add the flour mixture to the quick bread batter in two batches, alternating with the milk and mixing each addition until just barely combined and you still see streaks of flour. Finally, fold in the zucchini and mix until it's distributed evenly throughout the batter. Scrape the sides and bottom of the bowl to make sure everything is combined. Let the batter sit for 15 minutes. To Garnish & BakeScoop the batter into the prepared pan, tapping the pan several times on the counter to release any trapped air bubbles. Sprinkle the Demerara evenly over the top of the zucchini bread and bake in the center of the oven for 60 to 70 minutes* or until the cake is puffed up and lightly bronzed and a toothpick inserted into the center of the cake comes out with some moist crumbs, but no wet batter. Remember, it will continue to bake as it cools.*65 minutes is perfect in my oven.Let the zucchini quick bread cool in the pan on a rack for 30 minutes. Run a butter knife along the edge of the cake to release it from the pan; then use the parchment overhang to lift the cake out of the pan to finish cooling on the rack. This cake tastes delicious warm and even better at room temperature.NotesMixer vs Your ArmsYou can use an electric stand mixer with the paddle attachment (as referenced in the recipe instructions), a handheld mixer, or use a spatula and large mixing bowl as demonstrated in the step-by-step photos above the recipe. Your choice!Dark or Light Brown SugarFeel free to use light brown sugar if that’s what you have available. If you’re at the store, grab the dark brown sugar…it’s a delight in this!Cinnamon Yes, a full 1 tablespoon of cinnamon! I love the full cinnamon flavor in this!Why Cold Eggs?Since your brown butter will most likely still be a bit warm when you start mixing the zucchini bread together, the cold eggs will cool everything off. Demerara SugarDemerara Sugar gives this zucchini quick bread its signature crunchy top. It’s gorgeous visually and also adds to the taste and texture of the cake. Demerara has a delicious molasses flavor that adds to the taste experience of the finished cake. Seek it out!Add-Ins for Zucchini BreadFeel free to add 1/2 cup (85 g) of chocolate chips or 1/2 cup (57 g) nuts (toasted & chopped walnuts or pecans would be delicious).Make sure your pan isn’t filled more than 3/4s filled. If you’re worried, place a rimmed baking sheet on the rack beneath the loaf cake while it bakes to catch any overflow.One Of My Favorite Loaf Cake Tips!As tempting as it is to tear into a fresh-baked loaf of zucchini bread, I would love for you to wait until it has cooled completely and is at room temperature.The reason for this is that I think of loaf cakes and quick breads almost like steak. Weird, I know. But stay with me. When you first take a steak (or any meat) off of the heat, you want to let it sit so that the juices can relax and redistribute around the meat so that each bite is juicy. If you cut into it too soon, you loose a lot of the juice/moisture all over your plate.The same can be said for a loaf cake or quick bread. When you cut into it while it’s still warm and steam escapes, you’re letting a lot of moisture escape. Moisture I’d rather have in every slice of zucchini bread.I also swear, this tastes better once it’s cool. And even better the next day!Storing Zucchini BreadStore the zucchini bread in an airtight container at room temperature for up to three days. If it’s especially hot and. humid, consider storing it in the refrigerator. Zucchini Bread freezes like a dream! You can freeze the whole loaf or slices. Either way, make sure it’s wrapped tightly and stored in an airtight container to protect it from freezer burn.Defrost in whole frozen loaf in the fridge overnight and then set on the counter to come to room temperature before serving.If you froze slices of the brown butter zucchini bread, just set the slices on the counter and they’ll come to room temperature pretty quickly. The post THE BEST Ultra Moist Brown Butter Zucchini Bread Recipe appeared first on DisplacedHousewife.
July 16, 2025
Positively Delicious Homemade Pimento Cheese Recipe
Looking for the perfect pimento cheese recipe? My take on this Southern classic all started with late-night, rooftop drinks for Stella’s graduation, unexpectedly paired with the most PERFECT Negroni of my life.
While many pimento cheese recipes boast a list of ingredients—from pimentos (obviously!) to various cheeses, mayos, and a whole spice rack—I’ve streamlined mine to seven uber-flavorful ingredients (you might even already have them in your kitchen!).
I immediately came home from that trip to create my version of this classic recipe. You’ll find the perfect tang from cream cheese, a wonderful warmth and depth from a generous kick of cayenne, and the secret weapon: finely grated fresh yellow onion. This simple combination creates a rich, creamy, and undeniably addictive homemade pimento cheese that truly stands out (I love it so much!).
Best of all, it comes together in minutes and stays fresh in your fridge for a solid week!
I mostly use my pimento cheese as a dip, paired with pretzels (if you haven’t tried it, DO!). Or, use any old cracker (go Ritz!). It’s delicious smeared on toasted sourdough, paired with deviled eggs, scooped onto crispy celery, an added layer to your favorite sandwich…the possibilities are endless.
But again, I go back to where it really shines: AS A DIP. The needed addition to every cheese/charcuterie platter.
Enjoy this! Make it! Adapt it! And let me know how much you’re loving it!
Add your review » .user-review-a { border-radius: 0px; padding: 30px; background: #fdf3f6; margin: 30px 0; position: relative;}.user-review-a:before { content: "\“"; font-size: 110px; font-family: sans-serif; position: relative; position: absolute; top: 30px; left: 30px; color: #f78da7; line-height: 1;}.user-review-a blockquote { margin: 0; padding: 40px 30px 0 30px; border: 0;}.user-review-a blockquote p { font-style: italic; font-size: 18px; margin: 10px 0 20px; color: black;}.user-review-a blockquote cite { text-align: left; display: inline-block; width: 100%; font-size: 16px; text-transform: uppercase; letter-spacing: 1px; color: #444;}.user-review-a .link-container { text-align: right;}.user-review-a .link-container a { text-decoration: none; background: transparent; color: black; color: #fff; background-color: #f78da7; border: 1px solid #f78da7; padding: 7px 15px; font-size: 16px;}@media (max-width: 600px) { .user-review-a blockquote { padding: 25px; } .user-review-a:before { top: 12px; left: 12px; } .user-review-a { padding: 30px 20px; }}/* https://codepen.io/4m6/pen/wvqEzEr */[data-star] { font-size: 16px; font-family: sans-serif; letter-spacing: 2px; text-align:left; font-style:normal; display:inline-block; position: relative; unicode-bidi: bidi-override;}[data-star]::before { display:block; content: '★★★★★'; color: #eee;}[data-star]::after { white-space:nowrap; position:absolute; top:0; left:0; content: '★★★★★'; width: 0; color: #545454; overflow:hidden; height:100%;}[data-star^="3"]::after{width:60%}[data-star^="3.1"]::after{width:62%}[data-star^="3.2"]::after{width:64%}[data-star^="3.3"]::after{width:66%}[data-star^="3.4"]::after{width:68%}[data-star^="3.5"]::after{width:70%}[data-star^="3.6"]::after{width:72%}[data-star^="3.7"]::after{width:74%}[data-star^="3.8"]::after{width:76%}[data-star^="3.9"]::after{width:78%}[data-star^="4"]::after{width:80%}[data-star^="4.1"]::after{width:82%}[data-star^="4.2"]::after{width:84%}[data-star^="4.3"]::after{width:86%}[data-star^="4.4"]::after{width:88%}[data-star^="4.5"]::after{width:90%}[data-star^="4.6"]::after{width:92%}[data-star^="4.7"]::after{width:94%}[data-star^="4.8"]::after{width:96%}[data-star^="4.9"]::after{width:98%}[data-star^="5"]::after{width:100%}Everyone needs to try this. It is amazing!
—Sally
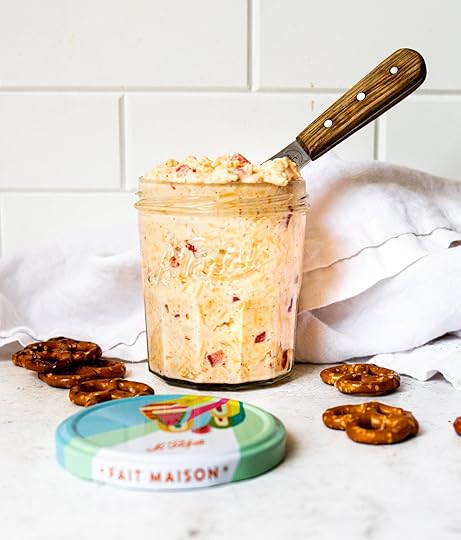
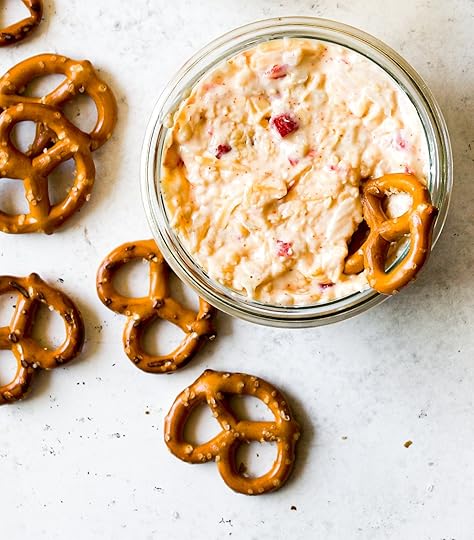 My Favorite Pro Tips for Making
 The Best Pimento Cheese Out There!Make sure the mayonnaise and cream cheese are at room temperature.
Your first step to making pimento cheese is to blend the mayo and cream cheese until smooth and creamy. This is easiest to do when the ingredients are at room temperature. Specifically, ensure the cream cheese is at room temperature (or use your electric stand mixer to beat it into submission).
Use the best-quality mayonnaise and cream cheese.Since they’re the base of this recipe, they need to taste good! I highly recommend Best Foods, Hellmann’s and Sir Kensington’s; all are great mayonnaise options. For cream cheese, there is no substitute for Philadelphia cream cheese, end of story!
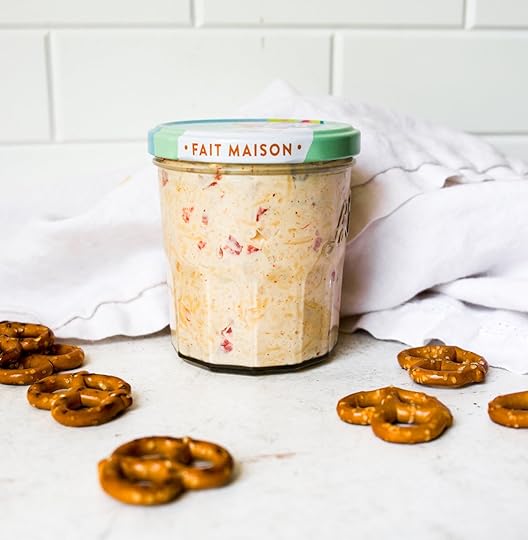 Step-by-Step Instructions & Photos to
 Make Perfect Pimento Cheese Every Time
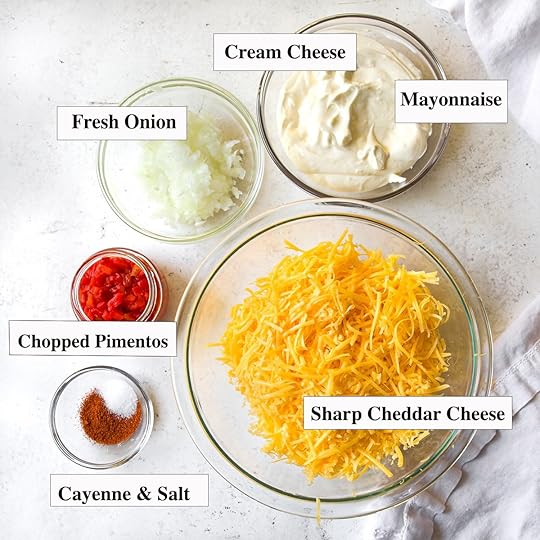 STEP ONE: Gather your ingredients: finely grated sharp cheddar cheese, mayonnaise, cream cheese (room temperature!), finely grated 1/2 small onion, chopped pimentos, cayenne pepper and salt.
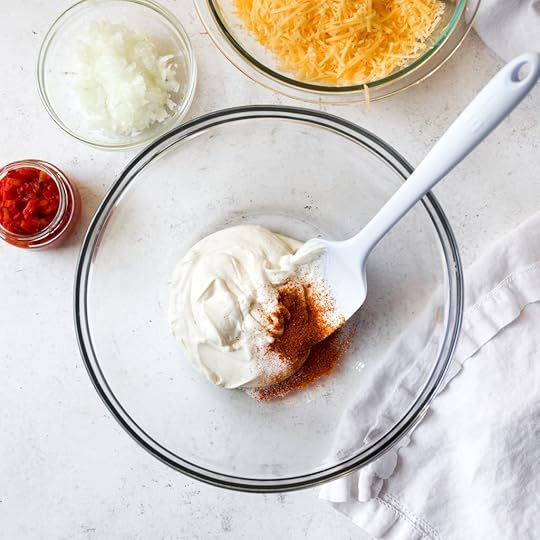 STEP TWO: Combine the mayo, cream cheese, cayenne and salt until smooth, creamy and no lumps of cream cheese remain.
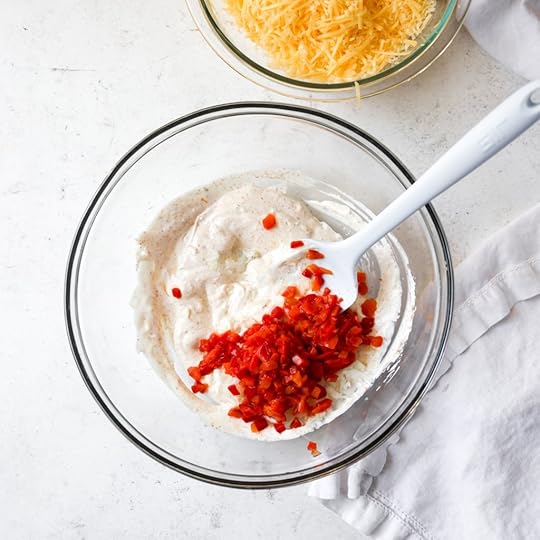 STEP THREE: Mix in the finely grated onion and chopped pimentos.
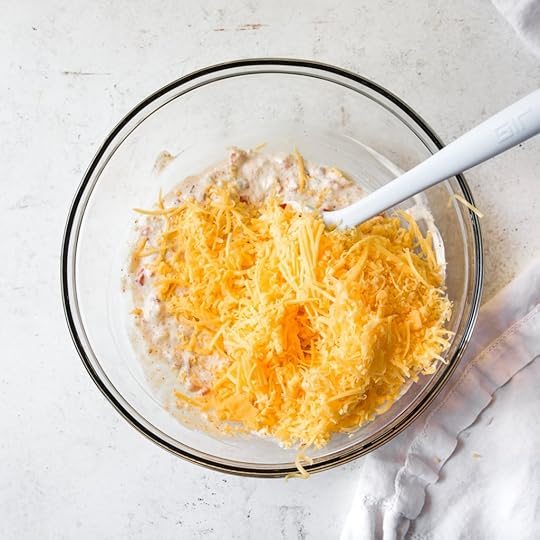 STEP FOUR: Stir in the cheddar cheese until well blended!
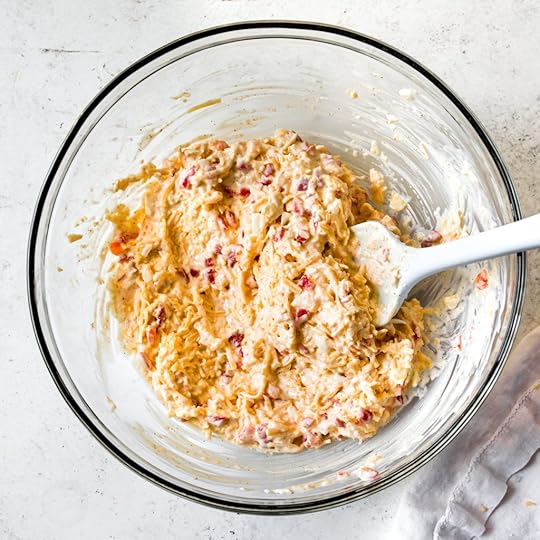 Here’s your beautiful pimento cheese, ready to eat!
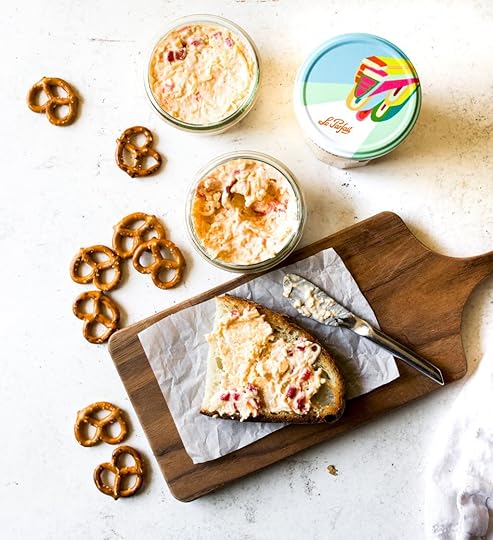
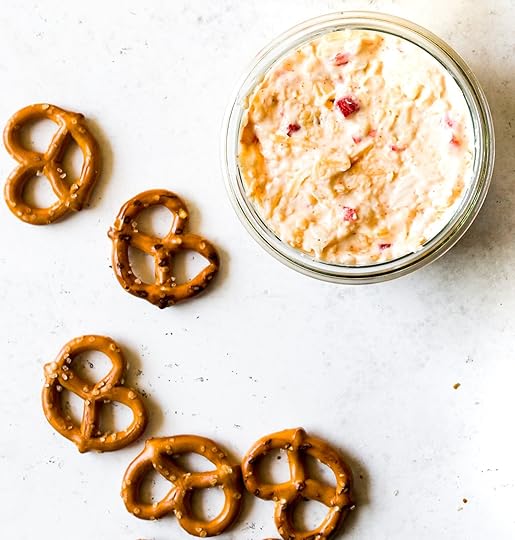 More Appetizer Recipes
If we were to sit down right now and share some snacks, it would probably include this Pimento Cheese Dip, as well as this incredibly delicious (and easy!) Strawberry Jam, some goat cheese, a creamy brie, prosciutto and perhaps some homemade focaccia! And you can find all of the appetizer recipes here!
Enjoy this easy pimento cheese recipe!
 PrintPositively Delicious Homemade Pimento Cheese Recipe (So Easy!)#wprm-recipe-user-rating-0 .wprm-rating-star.wprm-rating-star-full svg * { fill: #343434; }#wprm-recipe-user-rating-0 .wprm-rating-star.wprm-rating-star-33 svg * { fill: url(#wprm-recipe-user-rating-0-33); }#wprm-recipe-user-rating-0 .wprm-rating-star.wprm-rating-star-50 svg * { fill: url(#wprm-recipe-user-rating-0-50); }#wprm-recipe-user-rating-0 .wprm-rating-star.wprm-rating-star-66 svg * { fill: url(#wprm-recipe-user-rating-0-66); }linearGradient#wprm-recipe-user-rating-0-33 stop { stop-color: #343434; }linearGradient#wprm-recipe-user-rating-0-50 stop { stop-color: #343434; }linearGradient#wprm-recipe-user-rating-0-66 stop { stop-color: #343434; }#wprm-recipe-user-rating-0.wprm-user-rating-allowed.wprm-user-rating-not-voted:not(.wprm-user-rating-voting) svg * { fill-opacity: 0.3; }Delicious cheesy, spicy, creamy pimento cheese recipe with perfect mayo-to-cream-cheese ratio, spreadable consistency & heat. You'll love this easy dip & spread!Course Appetizer, SnackCuisine AmericanKeyword Pimento Cheese, Dip, Appetizer, Spread, Cream Cheese, Cheddar Cheese, Rebecca Firth, DisplacedHousewife Well-Tested RecipePrep Time 10 minutes minutesTotal Time 10 minutes minutesServings 2 CupsAuthor Rebecca at DisplacedHousewifeEquipmentBaking ScaleMixing BowlsSpatulaBox GraterLe Parfait Jars (perfect for storing your pimento cheese)Ingredients4 oz (121 g) mayonnaise good quality, such as Best Foods, Hellmann's or Sir Kensington's4 oz (114 g) cream cheese softened, I recommend Philadelphia if you can get it1 teaspoon cayenne pepper½ teaspoon sea salt1 jar (4 oz/113 g) pimentos drained and chopped1/2 (35 g) small onion finely grated; I love a yellow onion for this (don't use purple onion)8 oz (234 g) sharp cheddar cheese finely gratedInstructionsIn a large mixing bowl, mix together the mayonnaise, cream cheese, cayenne and salt until well blended and smooth. Take care that there aren't any chunks of cream cheese and that it's completely combined.Mix in the pimentos and onion until evenly distributed throughout the pimento cheese dip. Finally, mix in the cheese, making sure it is well combined. Break up any clumps of cheddar cheese, stirring until they're all gone and the pimento cheese is a well-blended mixture that's perfect for dipping.Stash the pimento cheese in airtight, lidded containers until ready to serve.NotesIf Using a Food ProcessorUsing a food processor makes this a breeze to make! First, finely grate the cheese and then transfer it to a large bowl.Next, pulse the pimentos, mayo, cream cheese, onion, and cayenne until everything is combined, but there are still chunks of pimentos.Finally, fold that creamy mixture in with the cheese, and voilà! You’re done!Adding OnionIf your onion is especially strong (you’ll know when you first start grating it!), add 1/2 of the recommended amount and then taste and adjust, adding more if desired.VariationsI really want to make it with small bits of crispy bacon and green onions. If you do this, please report back!Storing Pimento CheeseStore in an airtight container in the fridge for up to one week. You can freeze pimento cheese, but I don’t recommend it. The texture goes off and it can become a bit grainy.
 The post Positively Delicious Homemade Pimento Cheese Recipe appeared first on DisplacedHousewife.
July 11, 2025
Cool & Frosty Neapolitan Ice Cream Cake Recipe
If you’re looking for a warm weather dessert that looks dazzling and requires minimal effort, then this Cool & Frosty Neapolitan Ice Cream Cake Recipe is for you!
It starts with my favorite chocolate graham cracker crust. You’ll use regular graham crackers plus unsweetened cocoa powder, so there’s no need to hunt around for chocolate graham crackers or use Oreos.
Then you’ll add a layer each of store-bought vanilla and strawberry ice cream. If you feel frisky, you can add a chocolate layer; it’s your call. Then, melt up some chocolate and coconut oil to drizzle over the top for a quick chocolate magic shell that will add flavor, texture, and crunch.
Lastly, a pile of freshly-whipped cream and strawberries for the top!
Everything but the strawberries is stashed in the freezer until you’re ready for dessert, what could be better?!
I hope you enjoy this delicious ice cream cake!! I’m such a sucker for anything Neapolitan-flavored!
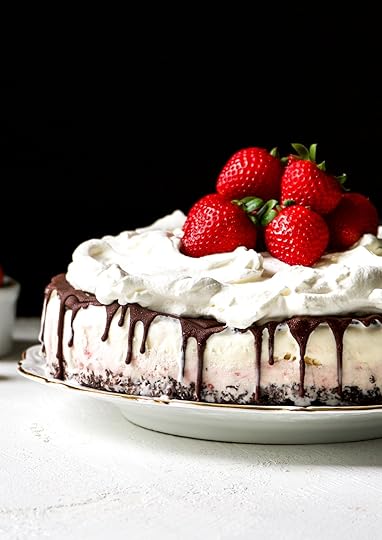
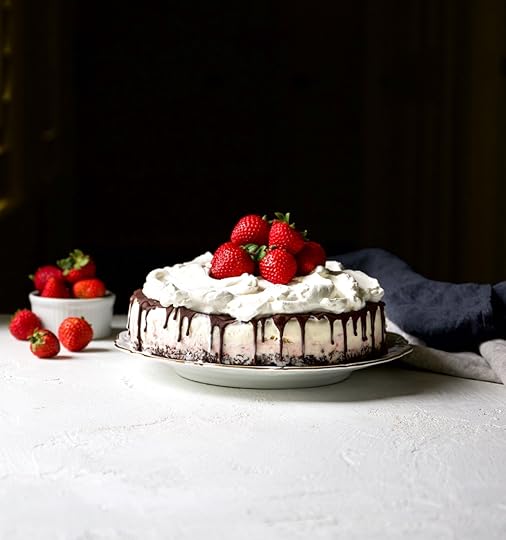 My Favorite Pro-Tips for Making
 the Perfect Neapolitan Ice Cream Cake Every Time!
My favorite tips are:
Bake and cool your crust completely. The chocolate graham cracker crust can be prepared up to three months in advance. So feel free to make it ahead and set it in the freezer until you’re ready to assemble the cake. It’s also great if the crust is cold when you put the ice cream in it, as it will help it set faster.Chill the cake in between adding the ice cream layers. To keep the layers of ice cream visually distinct, chill the cake in between adding each ice cream flavor.Stash the whole cake, with the whipped cream topping, in the freezer. Give the entire cake at least 2 hours to chill in the freezer before serving.After serving, immediately place leftovers in the freezer. See the photo below for what happens when you leave it out. It’s actually one of my favorite photos of this Neapolitan cake! More Frozen Dessert Recipes
I hope you’ll check out my favorite Brown Sugar Caramel Crunch Ice Cream, the It’s It knock-off recipe Chocolate-Dipped Oatmeal Ice Cream Sandwiches and you can find all of the frozen dessert recipes here!
Enjoy this easy Neapolitan ice cream cake!
 PrintCool & Frosty Neapolitan Ice Cream Cake Recipe#wprm-recipe-user-rating-0 .wprm-rating-star.wprm-rating-star-full svg * { fill: #343434; }#wprm-recipe-user-rating-0 .wprm-rating-star.wprm-rating-star-33 svg * { fill: url(#wprm-recipe-user-rating-0-33); }#wprm-recipe-user-rating-0 .wprm-rating-star.wprm-rating-star-50 svg * { fill: url(#wprm-recipe-user-rating-0-50); }#wprm-recipe-user-rating-0 .wprm-rating-star.wprm-rating-star-66 svg * { fill: url(#wprm-recipe-user-rating-0-66); }linearGradient#wprm-recipe-user-rating-0-33 stop { stop-color: #343434; }linearGradient#wprm-recipe-user-rating-0-50 stop { stop-color: #343434; }linearGradient#wprm-recipe-user-rating-0-66 stop { stop-color: #343434; }#wprm-recipe-user-rating-0.wprm-user-rating-allowed.wprm-user-rating-not-voted:not(.wprm-user-rating-voting) svg * { fill-opacity: 0.3; }Easy Creamy Neapolitan Ice Cream Cake has a chocolate graham cracker base, vanilla & strawberry ice cream, more chocolate, plus freshly whipped cream!Course Dessert, SnackCuisine AmericanKeyword Neapolitan, Ice Cream, Cake, Strawberry, Chocolate, Vanilla, Whipped Cream, Summer, Rebecca Firth, DisplacedHousewife Well-Tested RecipePrep Time 25 minutes minutesCook Time 10 minutes minutesFreezer Time 5 hours hoursServings 10 ServingsAuthor Rebecca at DisplacedHousewifeEquipment9-Inch (23-cm) Springform PanSmall Offset SpatulaMy Favorite Ice Cream ScoopIngredientsFor the Graham Cracker Crust16 (928 g or 7.5 ounces) whole graham crackers coarsely broken up3 tablespoons (42 g) light brown sugar packed2 tablespoons (10 g) unsweetened Dutch-processed cocoa powder½ teaspoon sea salt13 teaspoons (182 g) unsalted butter melted and cooledFor the Ice Cream Layers28 oz (794 g) strawberry ice cream28 oz (794 g) vanilla ice creamFor the Chocolate Magic Shell1 2/3 cups (283 g or 10 oz) semi-sweet chocolate finely chopped2 tablespoons (28 g) refined coconut oilFor the Fresh Whipped Cream1 batch Easy Homemade Whipped CreamTo Garnish12 fresh ripe strawberriesInstructionsFor the Chocolate Graham Cracker CrustPreheat your oven to 325°F (163℃) and grease a 10-cup, 9-inch (23-cm) springform pan. Line the bottom with parchment paper.In a high-speed blender or food processor fitted with the blade attachment* add your graham crackers, brown sugar, cocoa powder, and sea salt and run the machine until the mixture is fine (no large lumps) and well blended. *You can also place the graham crackers in a resealable plastic bag and smash them to bits with a rolling pin or the back of a measuring cup.Drizzle in the cooled, melted butter and pulse to combine. Press evenly into the bottom of the prepared springform pan. Use the bottom of a glass to make it compact and even. Bake for 10 minutes in the preheated oven. Remove from the oven and let cool completely. Even better, set in the freezer for 20 minutes before proceeding.For the Ice Cream LayersDrop scoops of strawberry ice cream over the top of the cooled crust. Use an offset spatula or the back of a spoon to smooth the top, taking care that the ice cream is flush against the side of the pan. Set in the freezer so that the ice cream can firm up for about 1 hour.Repeat with the vanilla ice cream and drop scoops of ice cream over the top of the frozen strawberry ice cream. Use an offset spatula or the back of a spoon to smooth the top. Again, take care that the ice cream is flush against the side of the pan. Set in the freezer so that this layer of ice cream can firm up for about 2 hours.For the Chocolate Magic ShellPut the chocolate and coconut oil in a heat-safe bowl over a medium saucepan of simmering water. Don’t let the water come to a boil or touch the bowl. Stir until smooth and melted and remove from the heat. Continue stirring until the chocolate comes to room temperature. Remove the sides of the springform pan and drizzle the cooled chocolate over the top of the ice cream cake, letting little drips go down the side in spots. Work fast because the chocolate will start to set immediately. Set back in the freezer until ready to serve. If storing for more than 2 hours, cover in plastic wrap to protect against freezer burn.To ServeWhen ready to serve, prepare 1 batch of
homemade whipping cream
according to the instructions. Scoop over the top of the ice cream cake and add pretty swoops and swirls. Finish by topping with the fresh strawberries.NotesAlternative PanYou can also make this Neapolitan cake in a 9-inch (23-cm) square or round cake pan. Straight sides are ideal (not slanted). Fully line the pan with parchment paper or plastic wrap to make it a bit easier to get the cake out of the pan.Full Whipped Cream CoveringYou can take the sides off of the springform pan and smear the whipped cream all along the sides, too, if you want it to have frosted cake vibes.Ice CreamUse your favorite ice cream flavors for this! I think adding a chocolate ice cream layer, in addition to the chocolate crust and the magic shell, would be delicious.You could also alternate four layers of ice cream, which would look so pretty. As long as your springform allows for that much height.Chocolate Magic ShellThis is a classic magic shell recipe. Feel free to use on any old bowl of ice cream!I specify ‘refined’ coconut oil because that type of coconut oil has little to no coconut flavor. Thus letting the chocolate be the star of the show! However, any coconut oil will work.Keep Your Cake Chilled!The core of the Neapolitan ice cream cake is, well, ice cream. And it’s wont to melt. Be sure to keep it in the freezer when you’re not actively assembling or serving it.Cutting Into SlicesRun a very sharp knife under warm water. Dry it thoroughly and then cut a slice, cleaning in between cuts. Storing an Ice Cream Cake Long TermYou can make this ice cream cake weeks ahead of time. You can freeze with both the magic shell and whipped cream on the cake. Be sure to freeze the fully assembled cake on a cake plate or parchment-lined baking sheet that fits in your freezer. Once completely frozen, cover with plastic wrap and then a layer of foil.
For best results
, and in a perfect world, I would wait to add the magic shell and the whipped cream on the day that you’re serving the cake. That way, you can keep the Neapolitan ice cream cake in the springform pan.All you’ll need to do is cover the top with plastic wrap and then a layer of foil. The sides and bottom of the pan will keep the cake protected from freezer burn and funky smells that might be hiding in your freezer.
PrintCool & Frosty Neapolitan Ice Cream Cake Recipe#wprm-recipe-user-rating-0 .wprm-rating-star.wprm-rating-star-full svg * { fill: #343434; }#wprm-recipe-user-rating-0 .wprm-rating-star.wprm-rating-star-33 svg * { fill: url(#wprm-recipe-user-rating-0-33); }#wprm-recipe-user-rating-0 .wprm-rating-star.wprm-rating-star-50 svg * { fill: url(#wprm-recipe-user-rating-0-50); }#wprm-recipe-user-rating-0 .wprm-rating-star.wprm-rating-star-66 svg * { fill: url(#wprm-recipe-user-rating-0-66); }linearGradient#wprm-recipe-user-rating-0-33 stop { stop-color: #343434; }linearGradient#wprm-recipe-user-rating-0-50 stop { stop-color: #343434; }linearGradient#wprm-recipe-user-rating-0-66 stop { stop-color: #343434; }#wprm-recipe-user-rating-0.wprm-user-rating-allowed.wprm-user-rating-not-voted:not(.wprm-user-rating-voting) svg * { fill-opacity: 0.3; }Easy Creamy Neapolitan Ice Cream Cake has a chocolate graham cracker base, vanilla & strawberry ice cream, more chocolate, plus freshly whipped cream!Course Dessert, SnackCuisine AmericanKeyword Neapolitan, Ice Cream, Cake, Strawberry, Chocolate, Vanilla, Whipped Cream, Summer, Rebecca Firth, DisplacedHousewife Well-Tested RecipePrep Time 25 minutes minutesCook Time 10 minutes minutesFreezer Time 5 hours hoursServings 10 ServingsAuthor Rebecca at DisplacedHousewifeEquipment9-Inch (23-cm) Springform PanSmall Offset SpatulaMy Favorite Ice Cream ScoopIngredientsFor the Graham Cracker Crust16 (928 g or 7.5 ounces) whole graham crackers coarsely broken up3 tablespoons (42 g) light brown sugar packed2 tablespoons (10 g) unsweetened Dutch-processed cocoa powder½ teaspoon sea salt13 teaspoons (182 g) unsalted butter melted and cooledFor the Ice Cream Layers28 oz (794 g) strawberry ice cream28 oz (794 g) vanilla ice creamFor the Chocolate Magic Shell1 2/3 cups (283 g or 10 oz) semi-sweet chocolate finely chopped2 tablespoons (28 g) refined coconut oilFor the Fresh Whipped Cream1 batch Easy Homemade Whipped CreamTo Garnish12 fresh ripe strawberriesInstructionsFor the Chocolate Graham Cracker CrustPreheat your oven to 325°F (163℃) and grease a 10-cup, 9-inch (23-cm) springform pan. Line the bottom with parchment paper.In a high-speed blender or food processor fitted with the blade attachment* add your graham crackers, brown sugar, cocoa powder, and sea salt and run the machine until the mixture is fine (no large lumps) and well blended. *You can also place the graham crackers in a resealable plastic bag and smash them to bits with a rolling pin or the back of a measuring cup.Drizzle in the cooled, melted butter and pulse to combine. Press evenly into the bottom of the prepared springform pan. Use the bottom of a glass to make it compact and even. Bake for 10 minutes in the preheated oven. Remove from the oven and let cool completely. Even better, set in the freezer for 20 minutes before proceeding.For the Ice Cream LayersDrop scoops of strawberry ice cream over the top of the cooled crust. Use an offset spatula or the back of a spoon to smooth the top, taking care that the ice cream is flush against the side of the pan. Set in the freezer so that the ice cream can firm up for about 1 hour.Repeat with the vanilla ice cream and drop scoops of ice cream over the top of the frozen strawberry ice cream. Use an offset spatula or the back of a spoon to smooth the top. Again, take care that the ice cream is flush against the side of the pan. Set in the freezer so that this layer of ice cream can firm up for about 2 hours.For the Chocolate Magic ShellPut the chocolate and coconut oil in a heat-safe bowl over a medium saucepan of simmering water. Don’t let the water come to a boil or touch the bowl. Stir until smooth and melted and remove from the heat. Continue stirring until the chocolate comes to room temperature. Remove the sides of the springform pan and drizzle the cooled chocolate over the top of the ice cream cake, letting little drips go down the side in spots. Work fast because the chocolate will start to set immediately. Set back in the freezer until ready to serve. If storing for more than 2 hours, cover in plastic wrap to protect against freezer burn.To ServeWhen ready to serve, prepare 1 batch of
homemade whipping cream
according to the instructions. Scoop over the top of the ice cream cake and add pretty swoops and swirls. Finish by topping with the fresh strawberries.NotesAlternative PanYou can also make this Neapolitan cake in a 9-inch (23-cm) square or round cake pan. Straight sides are ideal (not slanted). Fully line the pan with parchment paper or plastic wrap to make it a bit easier to get the cake out of the pan.Full Whipped Cream CoveringYou can take the sides off of the springform pan and smear the whipped cream all along the sides, too, if you want it to have frosted cake vibes.Ice CreamUse your favorite ice cream flavors for this! I think adding a chocolate ice cream layer, in addition to the chocolate crust and the magic shell, would be delicious.You could also alternate four layers of ice cream, which would look so pretty. As long as your springform allows for that much height.Chocolate Magic ShellThis is a classic magic shell recipe. Feel free to use on any old bowl of ice cream!I specify ‘refined’ coconut oil because that type of coconut oil has little to no coconut flavor. Thus letting the chocolate be the star of the show! However, any coconut oil will work.Keep Your Cake Chilled!The core of the Neapolitan ice cream cake is, well, ice cream. And it’s wont to melt. Be sure to keep it in the freezer when you’re not actively assembling or serving it.Cutting Into SlicesRun a very sharp knife under warm water. Dry it thoroughly and then cut a slice, cleaning in between cuts. Storing an Ice Cream Cake Long TermYou can make this ice cream cake weeks ahead of time. You can freeze with both the magic shell and whipped cream on the cake. Be sure to freeze the fully assembled cake on a cake plate or parchment-lined baking sheet that fits in your freezer. Once completely frozen, cover with plastic wrap and then a layer of foil.
For best results
, and in a perfect world, I would wait to add the magic shell and the whipped cream on the day that you’re serving the cake. That way, you can keep the Neapolitan ice cream cake in the springform pan.All you’ll need to do is cover the top with plastic wrap and then a layer of foil. The sides and bottom of the pan will keep the cake protected from freezer burn and funky smells that might be hiding in your freezer.The post Cool & Frosty Neapolitan Ice Cream Cake Recipe appeared first on DisplacedHousewife.