Sharon Wray's Blog, page 46
June 28, 2022
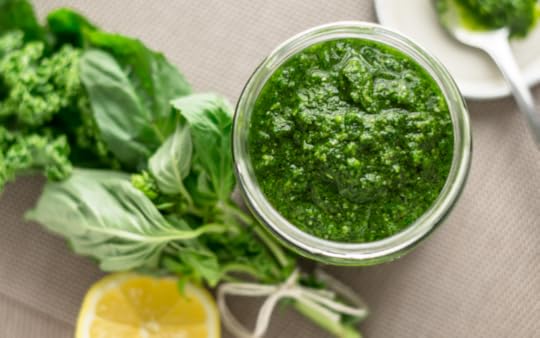
Sarah Munro’s Basil Pesto
Although Basil Pesto is a food recipe, I’m adding it to Sarah Munro’s collection because originally pesto was a way to preserve extra basil that came out of gardens. Once it’s cut, it can be dried but doesn’t last long in its fresh state. So for centuries, people have been coming up with ways to save it in the freshest way possible. Below is one of the original recipes that dates back to colonial days, which is why Sarah Munro, (my PhD historian and heroine in book 2 of the Deadly Force series, ONE DARK WISH), has added it to her collection of DIY herbal recipes.
But, if you’re adventurous you can modify it any way you prefer. You can switch out the pine nuts for walnuts or pecans. Mix in some spinach leaves with the basil leaves. Add different types of salt. Substitute lime juice for lemon juice. The possibilities are endless! Pesto is great with pasta, chicken, fish, and grilled veggies. It’s a perfect summer complement to most foods cooked on the grill, and it’s a way to preserve the freshest flavors of basil for the darkest days of winter.
Sarah Munro’s Basil PestoIngredients2 cups fresh basil leaves1/2 cup freshly-grated Parmesan or Romano cheese1/2 cup Extra Virgin Olive Oil1/3 cup pine nuts3 cloves garlic, minceddash of fresh lemon juice1/4 teaspoon Sea Salt1/8 teaspoon freshly-ground pepperDirections:In the bowl of a food processor, pulse the basil leaves and pine nuts 4-5 times.
Add the garlic and cheese and and lemon juice and pulse about 6-8 times, scraping down the sides with a rubber spatula between pulses.
Turn on the processor and slowly (very slowly!) drip in the olive oil. (if you don’t pour it in slowly, it won’t emulsify) Pause frequently to scrape down the sides. Process until all of the oil is mixed with the basil/cheese mixture and there’s no oil floating on top.
Add the salt and pepper and pulse a few more times to make sure everything is well mixed. Serve immediately.
If you want to store the pesto, place in a glass jar with a tight-fitting lid and keep in the refrigerator. Or you could freeze the pest in an ice cube tray so you have individual cubes of pesto to use during the winter. Once the pesto is frozen, pop out the pesto cubes and put them into a freezer bag and return to the freezer. If frozen, the pesto will last six months. If not frozen, it will last 3 months in the refrigerator.
IMPORTANT DISCLAIMER ABOUT WILD PLANTS, FORAGING , AND MAKING HERBAL REMEDIES:I am not a medical professional and nothing written on this blog is medical advice. None of my statements have been evaluated by the FDA (I am legally required to give you this disclaimer).
It is important to do your due diligence before foraging, harvesting, and/or consuming any type of medicinal plant.
If you are taking any medications, talk to your doctor about any potential drug interactions.If you are allergic to anything, make sure whatever you are foraging is not in the same family. Example: While dandelions are typically considered safe, those who are allergic to ragweed, latex, daisies, or any other plants in the same or similar families, may not be able to consume dandelion.Always research potential side effects, dosage recommendations, and how to properly prepare and consume each medicinal plant.
Always make sure you are foraging what you believe to be. Fully prepare and study the anatomy before harvesting wild plants.
Always make sure your kitchen/work area is clean and that all materials are sterilized.
Do not forage plants from areas that have been sprayed within the past 2 years at the very least.
I am not legally or morally responsible for the health of any of my readers. Please do your own research!
 Subscribe
 Enter your email address to subscribe to this blog and receive notifications of new posts by email.
Email Address
Subscribe
The post Sarah Munro’s Basil Pesto appeared first on Sharon Wray.


June 27, 2022
War Paint, Fall Out Boy, and Winston Churchill: The Three Things All Writers Need to Win
“Wait for me!” my niece yells as she runs after the older kids. But her six-year old legs can’t keep up with the other four in the nine-to-thirteen set.
“You’re slow,” the nine-year old yells back and waves her off. “Just wait for us here and we’ll tell you what happens.”
“No!!! I want to be there with you. I want to do it too!” She huffs and puffs and runs. “Wait for me.”
“You’re not good enough, yet,” said the ten-year old. “Stay with Aunt Sharon.”
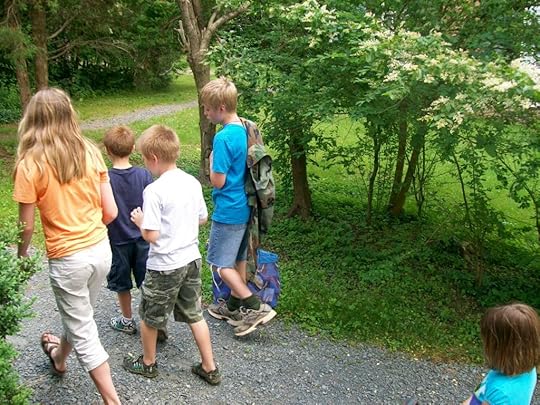
I follow behind, in my natural position as watcher, bearer of snacks, and on-the-ready first aider and sports agent. Which means I’m carrying the picnic basket, camera, and everything else I thought we might need for an all-day adventure in the canvas bag weighing down my shoulder.
“It’s okay,” I say to the girl who wishes she was bigger. “I’m here with you. I promise we won’t miss anything.”
“But we will,” she whines. “They’ll give out the best baseball positions before I get there.”
Although tempted to point out that five children do not make a baseball team, I sigh and hand her the bat that sticks out of my bag at an odd angle and keeps hitting me in the head as I walk. “They can’t do anything without the bat. So before you give it to them, use it to bargain for a better position.”
“Okay.” Seemingly appeased with her new source of power, she smiles and takes off. But it doesn’t take long for her to turn around and come back for me.
“They’re gone. And they took the bat.”
“I’m sorry.”
“They just don’t understand.”
“Understand what?”
Her shoulders slump forward in an exaggerated way and she sticks out her tongue. “How much it hurts to be left behind.” She kicks the ground. “I don’t like it. I want to be grown so I can be part of the group. And I want it now.”
My shoulders ache and I count the number of steps until we get to our favorite picnic table. I honestly don’t know what to say so I start to unload everything. She might be small, but she’s smart. And she’ll roll her eyes at any pity or insincere comments. She’s a six-year old who demands honest answers from her adults. In other words, she knows bullsh*t when she hears it. It’s one of the things I admire most about her. I hand her the only Coke in the bag. (It’s mine which means my options for lunch have been reduced to a warm juice box or the park’s water fountain)
She opens it with a practiced pop-fizz. “How come it’s so hard?”
“How come what’s so hard? Being small? Or being left behind?”
She looks up at me with those too-old eyes. “To be so close to what you want–so close you can almost touch it–and not be part of it. To watch everyone else doing what I want to do but can’t. It’s like holding an ice cream cone and not being able to lick it.”
My heart catches in my throat and the words from a friend of mine rush through my mind. Like all authors, she’s had her share of rejections. And despite being multi-published, the most recent rejection had been particularly painful. “I can see my goal in everyone around me who is moving forward,” she said, “but when I reach out to touch my dream, it vanishes. And I’m left behind. I really hate this time of year.”
I’d asked why, wondering if there was a particular time of year when the rejections were more difficult than others.
All she’d said was, “Conference season.”

And those two words had sent a cold wash through my body. I knew exactly what she was talking about. The hard moments include book signings you’re not a part of. The publisher parties. The awards programs. If there was ever a time during the year when an author at any level of her career felt left behind, alone and unwelcome, it was during conference season. But I also knew the other truth. The loneliness that comes from comparison doesn’t end once you reach your next goal. From what I could see, those feelings of inadequacy, the sense of being unseen, become amplified.
That snapping, barking fear, which hounds all people chasing a dream, never goes away. But when you finally have something to lose, the fear magnifies. Even though I’ve had my own moments of being left behind, I’d had no advice to offer my friend then or my niece now. Hallmark encouragements look nice when printed artistically on pieces of driftwood, but they wouldn’t give the six-year old the weapons to slay her insecurities. And the truth was, in order to beat those feelings, we needed a weapon. A particularly sharp and scary one. Because, like my niece and my friend, I too was afraid I’d be left behind. Afraid of remaining unseen. Afraid that all the baseball field positions would be taken. Afraid that there’d be nothing left by the time I arrived.
But I had to give my niece something. I knelt in front of her. “Do you know who Winston Churchill was?”
“You mean the dog from the movie Oliver & Company?”
“No. He was the Prime Minister of Great Britain. And he had an important job to do. He had to stop the spread of evil throughout Europe and the rest of the world.”
“Wow.”
“He was terribly afraid they would lose the war, but he had a saying for those who had to face the enemy face-to-face. Never, never, never give up.”
She burped from too much Coke.
I stood. For many reasons, that quote is my absolute favorite. That quote never fails to keep me going. That quote was my last arrow. Except it hadn’t worked on the six-year old. She needed something tangible, something concrete, something she could do, like when my daughter would get excited or upset about something and dance around the room singing High School Musical songs. As I pull out the butterfly nets and lay them on the table, my niece’s direct stare demands an honest answer to a tough question. Not some seventy year old quote from a man she’s never heard of.
She comes over to help and finds the battery powered iPod speaker. “I wish I could fly,” she says suddenly. “Then I could fly over my brothers and poop on them.”

I laugh out loud. “You don’t want to poop on them. You want to rise above them.” Then I smile, remembering something. “You know, I’m a member of a writing group call the Firebirds. We’re named after the Phoenix.”
“Cool,” says the thirteen year old girl who’d just arrived from the baseball field. “A mythological bird that rises from the ashes.”
“What do you do when you feel left behind?” the six-year old asks the teenager.
“I make a playlist,” says the teenage girl. “I have one for every situation. Reading a book, taking a bath, doing homework. But when I’m really upset, I make a playlist of Victory songs.”
“What’s a victory song?” my niece asks.
The teenager picks up her cousin and twirls her around and around until they both fall onto the ground in a pile of tickles and laughs and twisted limbs. “It’s a song you play before you do something hard, like take a test, or when you’re sad or your feelings are hurt. It’s a song that reminds you that you’ve already won. There’s even a Victory song called the Phoenix. It’s by Fall Out Boy.”
My niece jumps up and down. “I want to be a Phoenix. Then I won’t be scared anymore.”
“It’s not about not being scared,” says the teenager. “It’s about knowing what you want, in spite of the fear, then telling yourself you’re going to win anyway. The Victory song is just there to remind you that you’re exactly where God wants you to be and that it’s okay to be there.”
She pulls out phone and pops it on the speaker. Then she picks up some dirt, mixes it with the dregs of the Coke can, and makes a paste. “Get ready,” she says, spreading the mud on her cousin’s face. “We’re going to dance the Phoenix Victory Song.”
“What’s this?” she asks. “Face painting?”
“No, silly.” The teenager stands and smiles. “War paint. A true warrior never goes into battle without it.” Then she hits play.
As I dance with the two girls, disregarding the frowns from other picnickers, I realize that my daughter has just given me, and my writer friends, a weapon with which to slay our “left behind demons”. With our very own Victory song, there’s nothing we can’t accomplish.
Subscribe Enter your email address to subscribe to this blog and receive notifications of new posts by email.
Email Address
Subscribe
The post War Paint, Fall Out Boy, and Winston Churchill: The Three Things All Writers Need to Win appeared first on Sharon Wray.
June 24, 2022
The Hungry {Romance} Writer: Peanut Butter Cookies
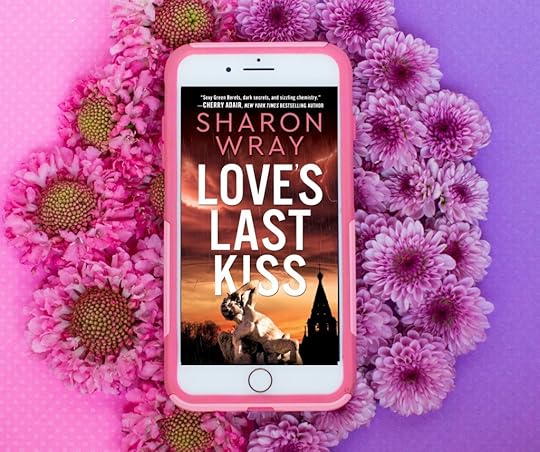
Today I’m celebrating the success of Love’s Last Kiss, the next book in the Deadly Force series, by making one of Rose Gurthrie’s (the heroine of Love’s Last Kiss) favorite peanut butter recipe. As a young woman who is caring for her sick brother, and trying to save her hero, Kade Dolan (an Army Ranger and ex-con), she often feels helpless and alone. To help keep those she loves happy, she bakes and her favorite recipe is Peanut Butter Cookies.
This recipe can be underbaked for super-soft cookies or baked for an extra minute to make then crunchy enough to dip into a glass of milk. You can use creamy or crunchy peanut butter, but don’t use natural peanut butter because the extra oil makes the cookies… oily. I hope you enjoy the cookies… and Love’s Last Kiss… as much as I love baking and writing both of them!
Sharon Wray
Yields 26 cookies
The Hungry {Romance} Writer: Peanut Butter CookiesThis is one of my favorite Peanut Butter Cookie recipes because they are really soft and stay soft for days after baking them. Make sure the chill the dough--that is a critical part of to the success of this recipe. It's better to chill the dough longer than to take it out early.
30 minPrep Time
10 minCook Time
40 minTotal Time
 Save Recipe Print Recipe var print_b = document.getElementById('mpp_print_button'); var save_b = document.getElementById('mpp_saverecipe_button'); print_b.onclick = function(){ zlrPrint( "mpprecipe-container-229", "https://sharonwray.com/wp-content/plu...", "mpprecipe-design22", "1", "#" ) }; save_b.onclick = function(){ window.open('https://sharonwray.mealplannerpro.com...' + window.location.href); return false; };
 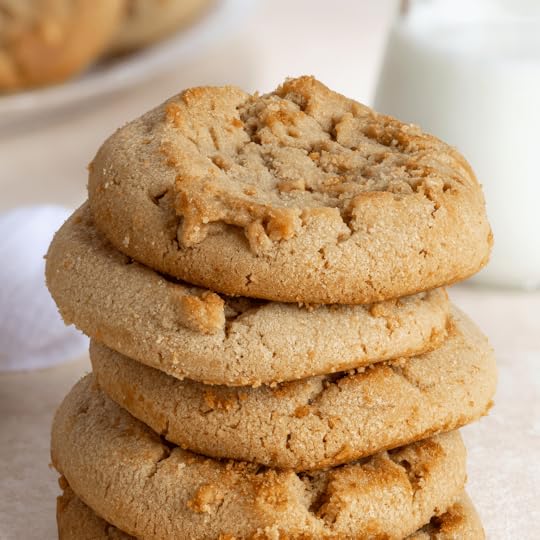 My Recipes My Lists My Calendar
 Ingredients
1/2 cup butter, softened1/2 cup granulated sugar1/2 cup brown sugar, packed1 cup + 2 tablespoons (creamy or chunky) peanut butter (Don't use natural peanut butter)1 large egg1 1/2 teaspoons pure vanilla extract1 1/3 cups flour, spooned and leveled1/2 teaspoon baking soda1/2 teaspoon baking powder1/4 teaspoon kosher salt1/2 cup granulated sugar, for rolling doughInstructions
Place the butter into a large bowl and beat until smooth. Scrape the bowl and make sure the mixture is creamy.Beat in the sugar, brown sugar and beat well. Scrape the sides of the bowl and make sure the the mixture is both creamy, smooth, and fluffy.Beat in the peanut butter (1 cup plus 2 Tablespoons) until it is mixed in with the butter and sugar.Beat in the egg and the pure vanilla extract just until combined. (don't overbeat the eggs)In a small bowl combine the flour, baking soda, baking powder, and Kosher salt.Pour the flour into the bowl, on top of the peanut butter mixture. With a wooden spoon, stir in the flour until it begins to combine. Then use a mixer to beat the ingredients together until just combined. Do not over beat.You will still see some flour--but once the dough comes together, scrape the bowl. Mix some more just until all the flour is blended in.Cover the bowl and chill in the refrigerator for at least 20 minutes or more (up to 2 days).Preheat the oven to 350 degrees F. Line baking sheets with parchment paper.Pour the 1/2 cup sugar to a small bowl and get a clean fork.Take the dough out of the refrigerator and make small balls out of the dough, about the size of a large walnut.Roll each ball into the sugar and place on the baking sheet.Dip the fork into the sugar and them press the fork into the center of each ball. Press and do it again on the perpendicular so there are two criss-crossing fork marks. WIth the fork, press the balls into 1/2" thick cookies. Keep dipping the fork into the sugar as you press down all of the dough balls.Bake in the oven for 10-12 minutes, less if you like underbaked cookies. Or a minute more if you prefer crunchier cookies. They are done when the edges appear dry and the center are no longer shiny.Take them out of the oven and place the trays on a baking rack. Sprinkle the leftover sugar over the top of the hot cookies.Let the cookie sit on the pan for 5 minutes and then remove them to another baking rack.Eat as soon as they're cool enough!7.8.1.2229https://sharonwray.com/deadly-force-recipe-series/the-hungry-romance-writer-peanut-butter-cookies/ { "@context": "http://schema.org/", "url": [ "https:\/\/sharonwray.com\/deadly-force-recipe-series\/the-hungry-romance-writer-peanut-butter-cookies\/" ],"name" : "The Hungry {Romance} Writer: Peanut Butter Cookies","description" : "This is one of my favorite Peanut Butter Cookie recipes because they are really soft and stay soft for days after baking them. Make sure the chill the dough--that is a critical part of to the success of this recipe. It's better to chill the dough longer than to take it out early.","prepTime" : "PT30M","cookTime" : "PT10M","recipeYield" : "26 cookies","datePublished" : "2022-04-25 12:34:57","recipeInstructions":[ { "@type": "HowToStep", "text": "Place the butter into a large bowl and beat until smooth. Scrape the bowl and make sure the mixture is creamy." }, { "@type": "HowToStep", "text": "Beat in the sugar, brown sugar and beat well. Scrape the sides of the bowl and make sure the the mixture is both creamy, smooth, and fluffy." }, { "@type": "HowToStep", "text": "Beat in the peanut butter (1 cup plus 2 Tablespoons) until it is mixed in with the butter and sugar." }, { "@type": "HowToStep", "text": "Beat in the egg and the pure vanilla extract just until combined. (don't overbeat the eggs)" }, { "@type": "HowToStep", "text": "In a small bowl combine the flour, baking soda, baking powder, and Kosher salt." }, { "@type": "HowToStep", "text": "Pour the flour into the bowl, on top of the peanut butter mixture. With a wooden spoon, stir in the flour until it begins to combine. Then use a mixer to beat the ingredients together until just combined. Do not over beat." }, { "@type": "HowToStep", "text": "You will still see some flour--but once the dough comes together, scrape the bowl. Mix some more just until all the flour is blended in. " }, { "@type": "HowToStep", "text": "Cover the bowl and chill in the refrigerator for at least 20 minutes or more (up to 2 days)." }, { "@type": "HowToStep", "text": "Preheat the oven to 350 degrees F. Line baking sheets with parchment paper. " }, { "@type": "HowToStep", "text": "Pour the 1\/2 cup sugar to a small bowl and get a clean fork. " }, { "@type": "HowToStep", "text": "Take the dough out of the refrigerator and make small balls out of the dough, about the size of a large walnut. " }, { "@type": "HowToStep", "text": "Roll each ball into the sugar and place on the baking sheet. " }, { "@type": "HowToStep", "text": "Dip the fork into the sugar and them press the fork into the center of each ball. Press and do it again on the perpendicular so there are two criss-crossing fork marks. WIth the fork, press the balls into 1\/2\" thick cookies. Keep dipping the fork into the sugar as you press down all of the dough balls." }, { "@type": "HowToStep", "text": "Bake in the oven for 10-12 minutes, less if you like underbaked cookies. Or a minute more if you prefer crunchier cookies. They are done when the edges appear dry and the center are no longer shiny." }, { "@type": "HowToStep", "text": "Take them out of the oven and place the trays on a baking rack. Sprinkle the leftover sugar over the top of the hot cookies." }, { "@type": "HowToStep", "text": "Let the cookie sit on the pan for 5 minutes and then remove them to another baking rack." }, { "@type": "HowToStep", "text": "Eat as soon as they're cool enough! " }],"keywords" : "The Hungry {Romance} Writer: Peanut Butter Cookies","recipeIngredient" : ["1\/2 cup butter, softened","1\/2 cup granulated sugar","1\/2 cup brown sugar, packed","1 cup + 2 tablespoons (creamy or chunky) peanut butter (Don't use natural peanut butter)","1 large egg","1 1\/2 teaspoons pure vanilla extract","1 1\/3 cups flour, spooned and leveled","1\/2 teaspoon baking soda","1\/2 teaspoon baking powder","1\/4 teaspoon kosher salt","1\/2 cup granulated sugar, for rolling dough"], "image": { "@type": "ImageObject", "url": "https:\/\/sharonwray.com\/wp-content\/uploads\/2022\/04\/30.png" }, "author": { "@type": "Person", "name": "Sharon Wray" }, "nutrition": { "@type": "NutritionInformation", "servingsize": "1 serving"},"@type": "Recipe"}Subscribe Enter your email address to subscribe to this blog and receive notifications of new posts by email.
Email Address
Subscribe
The post The Hungry {Romance} Writer: Peanut Butter Cookies appeared first on Sharon Wray.
June 23, 2022
Prep & Plan: Week Thirty-Two
It’s officially Summer and that means it’s time for some road trips! But just like when I travel by car in the winter, I always prepare the car before I hit the road for Summer travel. A few months ago it snowed in Virginia and a terrible accident closed Interstate 95 in Northern Virginia (below Washington, DC). The road was shut down for over 20 hours. While the news mentioned that people were stuck in their cars for hours, and that many ran out of gas, they didn’t really delve into the disaster–and almost tragedy–that was occurring during those hours when the temperature dropped to 11 degrees F.

Why am I discussing winter storms? Because the same rules apply when traveling during the summer. A blizzard could just as easily be a hurricane or a series of fast-moving tornadoes. You just never know when an accident or the weather will shut down a highway and leave you stranded for hours. I ended up in a terrible winter situation once where I was stranding in a blizzard on a highway overnight. After that event, I promised myself I would never be left without food and water ever again. But weather and accidents aren’t the only things that can go wrong. A sick child or a broken-down vehicle can land you in a dangerous situation. So below I’ve made two lists. The first are maintenance items you may want to consider. The second is a Summer Emergency Car Kit that will give you the tools, should you need them, to get yourself out of trouble or at least off the road to safety.
Summer Car MaintenanceCheck tire pressureCheck the brakesCheck the AC and top off refrigerant if necessaryTest the batteryTop of oil, windshield wiper cleaner, and other fluidsCheck and replace wipers, if necessaryCheck belts and hosesCheck and replace filters, if necessaryPlan ahead if you need to service your car since many car repair shops need a few weeks to order parts and get the work done, especially with all of the supply chain and labor shortages.Clean the car, inside and out, since it’s so much nicer to travel in a clean car.Summer Emergency Car KitCash. I always take a ton of cash with me. During this recent emergency, by the time people got off the highway the closest gas stations were limiting gas and only accepting cash. Caffeine pills ~ These are available in any drug store, but if you’re alone in an emergency they help you stay awake. Depending on how cold it is, and if you have to turn off your car to save gas, you could freeze to death if you fall asleep and don’t keep moving.)A case of bottled water Granola bars/protein bars/other non-sugary snacks. Also cheese sticks, pudding cups, and mandarin oranges work well.Ibuprofen and acetaminophen HeadlampsFlashlight Swiss Army knife or something similarLifestraw to filter water you are unsure about drinkingUV purifying water bottle and/or water purifying pills High quality First Aid Kit along with a pair of scissors (if not included)Paper maps for your location in case you lose cell service or run out of battery powerCell phone battery block with multiple USB slots and a small LED light, as well as the cords to hook up small electronics. This way you don’t need to run the car engine to charge you phone. Fully charge the block before you hit the road.Make a connection bag that holds the different types of cords you need for your electronics. Emergency weather radio with AM stations. Or a CB radio, if you preferA package of tissues to use as toilet paperConsider compact urinals (males and female) in case you need to use the bathroom but can’t leave the car. (I really wish I’d had one of these during my emergency. You can order them from Amazon, Walmart, or any camping supply store and they come in different sizes and models.)Extra medications ~ Bring extra if there’s a med you need to take daily. Especially things like insulin, etc. Identity documents in a plastic, waterproof bag. While I also have these on a thumb drive, you won’t be able to access them in an emergency from your car. (We will discuss this in the next two weeks of this series). These documents include Driver’s licenses, car registration and insurance information, medical cards for emergencies as well as anything else you might need quickly like prescription refill forms, etc. Don’t forget any licenses for weapons you have in the car.Sun protection ~ Sunscreen and a hat in case you have to walk off the highway.Solar kit ~ I travel with a 25W solar panel with two USB outlets.Fire making kit ~ A small torch light and a regular lighter. Storm proof matches are nice if you know how to use them. Add a few small candles.Extra glasses ~ If you can’t see without glasses (for reading or driving), bring an extra pair. Same thing if you wear contacts. Duct tape and paracord ~ My husband was in the army and we always have these two things in the car. And we’ve used both of them in emergencies. Work gloves ~ to change tires, collect wood, etc. Lightweight blanket in case you have to sleep in your car.Lightweight raincoat or poncho and an umbrella.Small took kit with pliers, scissors, screwdrivers, adjustable wrenches, hose clamps, zip ties, and anything else you can think of.Tire sealant and gaugeJumper CablesBug SprayPlastic trash bagsWalking shoes in case you need to walk for miles to get off a closed highway.Visibility equipment like flares or glow-in-the dark roadsigns to mark your disabled vehicle.A few other things to consider:Gas. It’s dangerous to drive around with gas cans in your car. But if you end up in a traffic jam for hours, like the winter Virginia I95 debacle, you’ll need to turn off your car to conserve gas. One thing that helps is never letting your gas tank go below half full. But that also means you’ll need to stop more frequently to get gas, which can be a pain when you’re on a long haul trip. It’s just something to keep in mind. One of the biggest issues when a road reopens is that the lanes are littered with cars that have no gas which makes getting out a more difficult and dangerous proposition.
Personal Protection: This can be a controversial subject. But if you carry a licensed weapon with you, make sure you know the legal requirements in each state you pass through. Some states/cities/localities ban tasers, pepper spray, knives as well as guns. So whatever you have with you, make sure you know the rules for every state you pass through. And, if you have a license for your weapon, keep it with you.
Long, long, long haul car trips: The list above is for a trip that may normally take up to 12 hours. But if you are traveling cross country, you may want to consider packing camping gear, a small fire stove, extra food/MREs, etc. Here is a great article about planning long haul driving trips across different terrain.
Balance: When you are traveling long distances, with many people, and maybe staying someplace for many days, weight and space become a concern. So you’ll have to balance what you need at your destination versus what you need on your trip (or might need). That’s a personal decision you’ll have to figure out on your own after considering your situation such as distance, age of car, number and ages of passengers, etc. But if the goal is to get someplace safely, you may want to consider the above lists. Even just having a First Aid kit and some water will mean the difference between life and death. I am not being hyperbolic, just realistic.
Finally, information is your friend. When you plan out your trip, check the weather as well as the routes. Depending on where you’re driving, you may want to double check the crime rates of areas you’re driving through. Also, you could make a list of high-quality hotels along the route, as well as the locations of hospitals, ERs, police stations, etc. And write down any other critical information you may need if you don’t have access to the internet, due to a national or weather emergency.
Although this is a long list of things to consider, the goal of traveling (hopefully) is to have fun. The great thing about a Summer Emergency Car Kit is that once you build it, you don’t have to do much to maintain it. And switching things out for different seasons (like taking out bug spray and adding mittens) is easy.
I hope you find this list helpful and not stressful. The point it to get prepared and then forget about it because you’ll know that no matter what craziness happens, you and your family will survive. And maybe you’ll be in a position to help others as well.
Subscribe Enter your email address to subscribe to this blog and receive notifications of new posts by email.
Email Address
Subscribe
The post Prep & Plan: Week Thirty-Two appeared first on Sharon Wray.
June 22, 2022
A Summer of Travel Journals
It’s summer and I’ve just completed almost eight weeks of travel for work, family, and vacation. I’ve traveled throughout Virginia and Paris, and in a few weeks I’m heading back to Charleston, SC and Chicago. It’s been fun and exhausting, but I’m so glad to be home for now. After I do the laundry, put away the suitcases, and take a nap, one of my favorite things to do is review my travel journal.

Whether or not I spend one night or ten nights in a place, I always record everything in my travel journal: names of hotels, restaurants, interesting sights, people I’ve talked to, random details and even doodles. While it can feel like work, when I get home I’m always so happy that I’ve kept a record of where I’ve been and how I felt and even what I ate.
Here are a few reasons why I love keeping a travel journal:1. I take a ton of photos and store them on a Google drive when I get home to eventually share on Social Media (I never post while I’m traveling. I’m too paranoid). But when I get home, I print out my favorites and stick them into my journal. After each day, I always keep a few pages blank specifically for my photos. Sometimes I also add things like pressed flowers from a New Orleans courtyard, a napkin from an Irish tea shop, or a ticket to see the D-Day Memorial in Virginia. I even have a cocktail napkin from the highest bar in NYC!
2. I always record my day, including where I’ve stayed and eaten. I describe places I’ve seen and the people I’ve met. I try to include obscure details like strange smells and unusual foods—things I know I’ll forget once I’m home.
3. I love to sketch, even though I’m horrible at it, and it’s a fun way to keep my memories. Once I’m done with my doodles, I ask my kids to identify what I’ve drawn and write down in the journal what they think they see. They’re never right, but it’s always fun to be mocked by the young.
4. The other thing I love about having a journal is that I never mind eating alone. Once I’m served, I sit and observe and write the world around me.
5. Although I record my day, I also keep notes on the people I’ve met. Most people don’t carry business cards so I track names, numbers, and people with whom I’d like to stay in touch.
6. Keeping a journal gives me a complete, detailed itinerary of our trip I can share with others who are planning their own trip. I’ve also used my diaries when I’ve revisited cities years later to remind me of things I liked and didn’t like.
7. I always leave space for to-do lists for things I need to remember while I’m traveling such as buy day-of theater tickets or next-day museum tickets or make dinner reservations in the next city. It’s amazing what you can forget while traveling.
8. Since I’m always talking to people when I travel, I keep a separate section of the journal for must-dos. Things that aren’t on my itinerary or in my guide book that I learn about from others and decide to see. I even track things that will inspire me to take a future trip to a new place.
9. I write down all of my financial transactions. Although I keep my receipts, I still keep a running tab of every expense and ATM withdrawal, as well as the daily exchange rates. That way there are no surprises when I get home and open my credit card bill! I also keep track of things I buy that I may have to list for U.S. Customs (depending on the country I’m in).
10. Most important, don’t write in your journal as if others are going to read it. Be as irreverent, funny, whiny as you want. Years later, you will appreciate your own candor!

Wherever you go this summer, even if you stay home, I wish you a safe and happy time! Bon Voyage!
Subscribe Enter your email address to subscribe to this blog and receive notifications of new posts by email.
Email Address
Subscribe
The post A Summer of Travel Journals appeared first on Sharon Wray.
June 21, 2022
Sarah Munro’s Herbal Room Scents
Simmer pots are not just for winter. When you use fresh herbs from the summer garden, simmer pots are a great way to freshen your home when you’re keeping the windows closed with the AC on. People have been scenting their homes with herbs for centuries and even used to sprinkle dried herbs on clean floors to keep their homes smelling fresh and clean. This is why Sarah Munro–my PhD historian and heroine in book 2 of the Deadly Force series, ONE DARK WISH–has a list for summer-scented simmer pots in her collection of DIY herbal recipes.
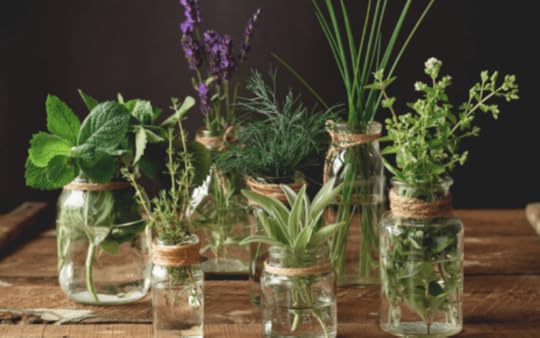
The recipe below uses fresh lemons, rosemary, and vanilla extract. But I have also used a few other combinations like:
6-10 pine or cedar twigs, 4 bay leaves, and 1 teaspoon grated nutmeg. 1 orange (sliced), 1 teaspoon grated fresh ginger, and 1/4 teaspoon almond extract. 1 fresh lime (sliced), 4 thyme sprigs, ten mint leaves, and 1/4 teaspoon pure vanilla extract. 1 orange (sliced), 2 cinnamon sticks, and six cloves.1 lemon (sliced) and 20 mint leaves,When you put all of the ingredients in a glass jar to sit, these herbal room scents also make lovely gifts for friends and family.
Ingredients1 pint (2-cup) glass jar with a tight-fitting lid1 lemon, washed and sliced6 sprigs of fresh rosemary1/4 teaspoon pure vanilla extractfiltered waterDirections:Fill the jar with the lemon slices, fresh rosemary, and a 1/4 teaspoon of pure vanilla extract. Fill the jar with filtered water.
Cover the jar with a lid and let sit for 12-24 hours—or give as a gift to a friend.
When ready to use, pour the jar’s contents into a small pot on the stove. Bring to a boil and then lower to a simmer. This simmer pot should last about an hour and will spread the scent throughout the first floor of a house or apartment.
Watch the water carefully and turn off the pot just before all the water boils away. (You don’t want to burn the pot!)
You can double or triple this recipe if you want a larger, longer-burning simmer pot.
IMPORTANT DISCLAIMER ABOUT WILD PLANTS, FORAGING , AND MAKING HERBAL REMEDIES:I am not a medical professional and nothing written on this blog is medical advice. None of my statements have been evaluated by the FDA (I am legally required to give you this disclaimer).
It is important to do your due diligence before foraging, harvesting, and/or consuming any type of medicinal plant.
If you are taking any medications, talk to your doctor about any potential drug interactions.If you are allergic to anything, make sure whatever you are foraging is not in the same family. Example: While dandelions are typically considered safe, those who are allergic to ragweed, latex, daisies, or any other plants in the same or similar families, may not be able to consume dandelion.Always research potential side effects, dosage recommendations, and how to properly prepare and consume each medicinal plant.
Always make sure you are foraging what you believe to be. Fully prepare and study the anatomy before harvesting wild plants.
Always make sure your kitchen/work area is clean and that all materials are sterilized.
Do not forage plants from areas that have been sprayed within the past 2 years at the very least.
I am not legally or morally responsible for the health of any of my readers. Please do your own research!
Subscribe Enter your email address to subscribe to this blog and receive notifications of new posts by email.
Email Address
Subscribe
The post Sarah Munro’s Herbal Room Scents appeared first on Sharon Wray.
Sarah Munro’s Basil Salt
Before we had preservatives and anti-caking additives and more modern ways to preserve food, people had unique ways to both preserve and flavor their favorite ingredients. One popular way to add flavor to food, and to use up extra herbs, was to flavor salt. The recipe below (one of my favorites) is a combination of coarse salt and fresh basil from the garden. After making as much pesto as I can, I use my leftover basil to make Basil Salt. Because flavored salt has been around for centuries, Sarah Munro, (my PhD historian and heroine in book 2 of the Deadly Force series, ONE DARK WISH), has added her recipe for Basil Salt to her collection of DIY herbal recipes.
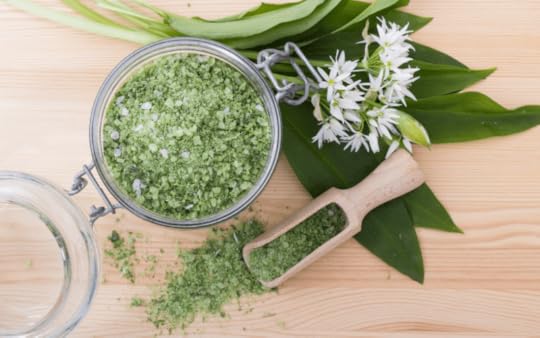
But basil isn’t the only way to flavor salt. A few other combinations I’ve made include rosemary and orange rind salt, lemon rind and thyme salt, and lavender salt. Basil Salt can be used to flavor pasta, fish, and poultry. I’ve also added it to homemade tomato soup and grilled summer veggies. Bon appetite!
Sarah Munro’s Basil SaltIngredients:1 cup Coarse Sea Salt (any type you prefer like Celtic, Kosher, or Pink Himalayan)1/3 cup washed & dried fresh basil1 glass jar with a tight-fitting lidDirections:Coarsely chop the basil (leaves and stems) and put into a blender.
Add the salt to the blender and pulse until all the basil is completely mixed up with the salt and you don’t see any small pieces. This may take a few minutes but stop after every 30 seconds to use a rubber spatula to push down the salt on the sides of the blender as well as to make sure nothing gets stuck on the bottom beneath the blades. When the salt and basil are thoroughly combined, the salt will be a finer texture than when you started and it will be green.
Drying Basil Salt by air: Line a rimmed baking sheet with parchment paper and spread the basil salt on top. Use a wooden spoon to break up any clumps. Put the baking sheet in a cool, dark place and allow it to sit for at least 24 hours. Every few hours (or whenever you remember) stir the salt on the tray. Once it’s completely dry (it will be a lighter green color and that’s okay!) store in an airtight glass container.
Drying Basil Salt by oven: Preheat the oven to 220 degrees F. Line a rimmed baking sheet with parchment paper and spread the basil salt on top. Put the baking sheet in the oven and bake for 30 minutes or until completely dry. 15 minutes into the baking, use a spoon to stir the salt. Bake a bit longer if it’s still not dry. When you take out the tray, the salt will be a lighter green color–that’s okay! Use the spoon to break up any clumps and let sit on the counter for another hour. Once it’s completely dry, store in an airtight glass container.
Basil Salt lasts for 3 months if stored in a cool, dry pantry or cabinet.
IMPORTANT DISCLAIMER ABOUT WILD PLANTS, FORAGING , AND MAKING HERBAL REMEDIES:I am not a medical professional and nothing written on this blog is medical advice. None of my statements have been evaluated by the FDA (I am legally required to give you this disclaimer).
It is important to do your due diligence before foraging, harvesting, and/or consuming any type of medicinal plant.
If you are taking any medications, talk to your doctor about any potential drug interactions.If you are allergic to anything, make sure whatever you are foraging is not in the same family. Example: While dandelions are typically considered safe, those who are allergic to ragweed, latex, daisies, or any other plants in the same or similar families, may not be able to consume dandelion.Always research potential side effects, dosage recommendations, and how to properly prepare and consume each medicinal plant.
Always make sure you are foraging what you believe to be. Fully prepare and study the anatomy before harvesting wild plants.
Always make sure your kitchen/work area is clean and that all materials are sterilized.
Do not forage plants from areas that have been sprayed within the past 2 years at the very least.
I am not legally or morally responsible for the health of any of my readers. Please do your own research!
Subscribe Enter your email address to subscribe to this blog and receive notifications of new posts by email.
Email Address
Subscribe
The post Sarah Munro’s Basil Salt appeared first on Sharon Wray.
June 20, 2022
Riptides: Battered, Bruised, and Still Standing
A few weeks ago my family and I went to the Outer Banks for a wedding. The first day, I took my twins and my niece to the beach. But before I let the three of them near the water, I gave them my lecture on riptides. How they were dangerous (blah, blah) and how they could pull you out to sea (blah, blah). Since it was high tide by the time we got to the beach, I made them stand in the surf. In spite of their moans and complaints about how mean and unreasonable I was being, they ended up spending hours beating back higher-than-normal waves even though they never went deeper than than their knees.

While I sat on the beach huddled beneath the umbrella covered with SP 70+ sunscreen, they faced the wild waves with screams and laughs. Every time they landed on their butts, they ran back to me on the beach squealing for help. When I declined to leave the safety of my shade (I was, after all, the meanest mom on the planet) they ran right back into the water. This went on for over an hour while I followed their fun with my camera.
Then I noticed something. As the kids got more and more tired, they began to reach for each other. Until, finally, they only faced the waves hand-in-hand. They’d finally discovered that they were stronger when they held onto each other. Not only did they have a better chance of not being smacked down, their recovery after being knocked over by the waves was much faster and much more fun.
As I watched them, I took the enormous step of leaving my shade. It had taken them only an hour to discover what most writers I know (myself included) take years to realize. We are all stronger when we stand together–when we celebrate each others’ successes and encourage each other during periods of despair. As the kids ran and kicked and played–all while holding hands–they reminded me that while perseverance helps you make it through, friendship keeps you upright and fighting. When wave after wave of rejections, bad reviews, and disappointments hit, we may fall. But those of us lucky enough to have friends will always find a reached-out hand to help us up.
At the end of the day, exhausted, beat up, and dealing with sand in places where sand should not be, all the kids talked about was doing it again tomorrow. In spite of choking on salty water, toes cut on shells, and the occasional face-plants, they focused on how they would change their strategy to face the largest waves and remain standing. Then they said the most amazing thing. “We hope there’s a riptide tomorrow!”
Subscribe Enter your email address to subscribe to this blog and receive notifications of new posts by email.
Email Address
Subscribe
The post Riptides: Battered, Bruised, and Still Standing appeared first on Sharon Wray.
June 17, 2022
The Hungry {Romance} Writer: Grilled Ham & Cheese
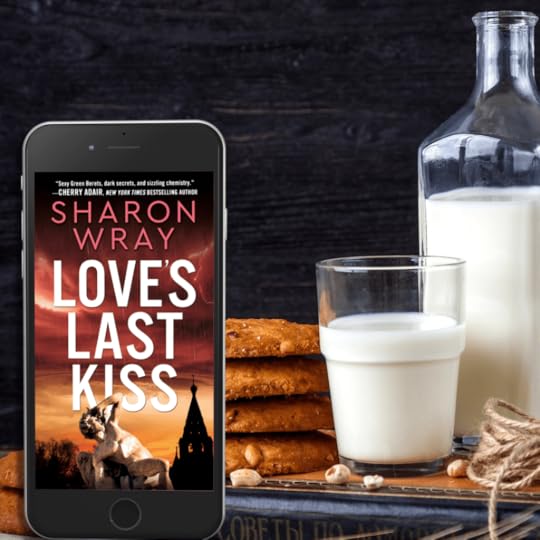
I can’t believe that June is half over and that Love’s Last Kiss has been out for a month. I want to offer a huge thank you to all of my readers who’ve made this newest book in the Deadly Force series such a huge success! This week I’m sharing another one of Rose Guthrie’s recipes (Rose is the heroine of Love’s Last Kiss) that she makes for the hero Kade Dolan after a very difficult night where he had to fight for his life in Doom, Savannah’s illegal fight club.
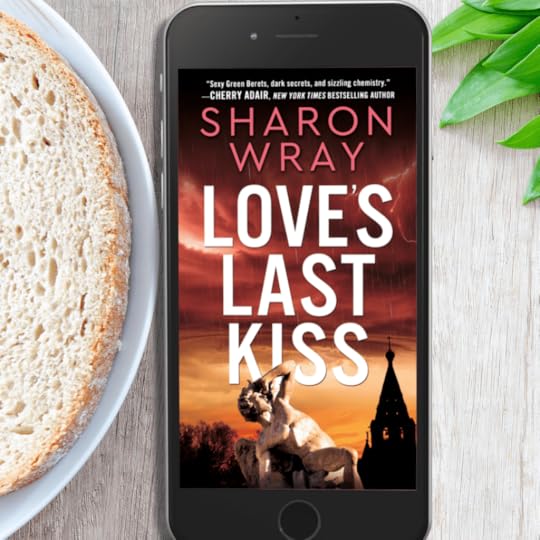
Although it’s late at night and they’re both exhausted, Rose makes her famous Grilled Ham and Cheese for the man who’s literally put his life in danger to protect hers. It’s warm and delicious and gives them all the cozy, comforting feels that they’ve been missing in their lives. It might even lead to a declaration of… love.
Sharon Wray
Yields 2 sandwiches
Serves 2
0The Hungry {Romance Writer: Grilled Ham & CheeseGrilled Cheese is a staple in my household. While I prefer to use sourdough bread, any bread will due. And butter (not margarine) turns the bread a nice golden brown.
5 minPrep Time
8 minCook Time
13 minTotal Time
Save Recipe Print Recipe var print_b = document.getElementById('mpp_print_button'); var save_b = document.getElementById('mpp_saverecipe_button'); print_b.onclick = function(){ zlrPrint( "mpprecipe-container-230", "https://sharonwray.com/wp-content/plu...", "mpprecipe-design22", "1", "#" ) }; save_b.onclick = function(){ window.open('https://sharonwray.mealplannerpro.com...' + window.location.href); return false; };  My Recipes My Lists My Calendar
 Ingredients
Four slices of Sourdough BreadFour slices of hamFour slices of a good Swiss cheese4 Tablespoons of Dijon mustard8 Tablespoons of butter, softenedInstructions
Butter one side of each slice of bread, using 2 Tablespoons of butter for each slice.Lay two slices of bread in a cold cast iron frying pan. Spread 1 Tablespoon of Dijon mustard on the bread.Using two slices of cheese and ham per sandwich, layer the ham and cheese on top the Dijon mustard.Use the rest of the Dijon mustard on the other two slices of bread (not the buttered side) and place those slices on top of the ham and cheese, Dijon side down.Turn on the stove to a medium-low heat and place the frying pan on the heat. Cook the grilled cheese sandwiches for about 4 minutes on either side, making sure the bread doesn't burn but the cheese melts. They are done when the bread turns a golden brown and the cheese is melted.Serve immediately.7.8.1.2230https://sharonwray.com/deadly-force-recipe-series/the-hungry-romance-writer-grilled-ham-cheese/ { "@context": "http://schema.org/", "url": [ "https:\/\/sharonwray.com\/deadly-force-recipe-series\/the-hungry-romance-writer-grilled-ham-cheese\/" ],"name" : "The Hungry {Romance Writer: Grilled Ham & Cheese","description" : "Grilled Cheese is a staple in my household. While I prefer to use sourdough bread, any bread will due. And butter (not margarine) turns the bread a nice golden brown.","prepTime" : "PT5M","cookTime" : "PT8M","recipeYield" : "2 sandwiches","datePublished" : "2022-04-25 12:36:37","recipeInstructions":[ { "@type": "HowToStep", "text": "Butter one side of each slice of bread, using 2 Tablespoons of butter for each slice." }, { "@type": "HowToStep", "text": "Lay two slices of bread in a cold cast iron frying pan. Spread 1 Tablespoon of Dijon mustard on the bread." }, { "@type": "HowToStep", "text": "Using two slices of cheese and ham per sandwich, layer the ham and cheese on top the Dijon mustard." }, { "@type": "HowToStep", "text": "Use the rest of the Dijon mustard on the other two slices of bread (not the buttered side) and place those slices on top of the ham and cheese, Dijon side down." }, { "@type": "HowToStep", "text": "Turn on the stove to a medium-low heat and place the frying pan on the heat. Cook the grilled cheese sandwiches for about 4 minutes on either side, making sure the bread doesn't burn but the cheese melts. They are done when the bread turns a golden brown and the cheese is melted. " }, { "@type": "HowToStep", "text": "Serve immediately." }],"keywords" : "The Hungry {Romance Writer: Grilled Ham & Cheese","recipeIngredient" : ["Four slices of Sourdough Bread","Four slices of ham ","Four slices of a good Swiss cheese","4 Tablespoons of Dijon mustard","8 Tablespoons of butter, softened"], "image": { "@type": "ImageObject", "url": "https:\/\/sharonwray.com\/wp-content\/uploads\/2022\/04\/29-e1651151484993.png" }, "author": { "@type": "Person", "name": "Sharon Wray " }, "nutrition": { "@type": "NutritionInformation", "servingsize": "2 serving"},"@type": "Recipe"}Subscribe Enter your email address to subscribe to this blog and receive notifications of new posts by email.
Email Address
Subscribe
The post The Hungry {Romance} Writer: Grilled Ham & Cheese appeared first on Sharon Wray.
June 16, 2022
Prep & Plan: Week Thirty-Two
I have been very blessed that I’ve been able to travel to so many countries. It’s a long story as to why, but all of that traveling has taught me a lot about HOW to travel for business and for fun, and how to stay safe all at the same time. Since things are changing constantly in regards to health and political situations around the world, especially this summer (May 2022), it’s so important to keep up to date with all the changes. Changes that include everything from Covid regulations to wartime reports.

Because I am going to Europe this summer, this post will focus on my favorite planning resources for European travel. This list includes blogs, podcasts, and even a website for the U.S. State department so you can stay current with all of the travel advisories. This list of blogs is for all travelers from students backpacking across Europe to higher-end travelers. Many of the resources also include information for those traveling alone as well as up-to-date information on things like accessibility and wheelchair access.
My FavoriteEuropean Travel Tips, Blogs, & PodcastsRick Steve’s EuropePeter Greenberg Worldwide (blog & podcast)Our Escape ClauseWanderlust CrewOrdinary TravelerThe Blonde AbroadAsher Fergusson Travel & Family JournalismAuto EuropeRoad AffairU.S. State Department Travel AdvisoriesWherever you go this Summer, I wish you loads of fun and safe travels!
Subscribe Enter your email address to subscribe to this blog and receive notifications of new posts by email.
Email Address
Subscribe
The post Prep & Plan: Week Thirty-Two appeared first on Sharon Wray.