
Anna Geiger's Blog, page 33
April 12, 2020
How to support math learning at home
TRT Podcast#11: How to support math learning at home
How do you help your kids with their math homework when it’s different from the way you learned it?
What math games (that you may already have in your house) build math skills?
What are simple ways to build math skills in everyday life?
And what’s a fun, free online tool that you and your kids will fall in love with?
Listen and find out!
Full episode transcript
You are listening to episode 11, Simple ways to support math learning at home. Welcome back to Triple R Teaching. Most weeks I share tips and resources for classroom teachers and full-time homeschoolers. But for the last few weeks I've made a little bit of a pivot, and I've created episodes aimed at you, the instant homeschooler. It's true, we're not typical homeschoolers. For most of us, our children's teachers are providing work, whether that's via Google Classroom or email, Zoom calls or printable packs. So we're not completely alone. And yet as we're alone in our homes, self isolating, it can feel like we're alone. So today I want to come to you and support you and give you some practical things that you can do to support your child's math learning. These are things you can do right now while we're suffering through this global pandemic and in the future when it has passed us, okay?
The number one thing you can do is, try to let go of the stress surrounding your child's math homework. And if you hear that and say, I don't have any stress around my child's math homework, he or she is in first or second grade, it's easy, then don't worry about this tip. However, for many of us, even if our children are in early elementary school, some of their math work can feel confusing or frustrating. That's because many of our children's teachers are approaching it in a different way than our teachers taught us. And when that happens, we tend to get frustrated. We might think, why are they making this so hard? There's a very simple way to do this, just cross out the number, carry the one, why are they making this so complicated? I just want to say, I don't think the idea behind it is as complicated as we might think that it is.
Let me explain what's going on here. Back when we learned math, or at least when I did and probably many of you, it was very procedural. So you learned the steps to solve all the problems. I knew that when I was subtracting, if the number below the first number was bigger, then I had to move next door, cross out that number, make it one smaller, add a one to the number I was working with and then subtract. And I was very good at it and I did very well in math for many years. I did not, however, understand exactly why I was doing those steps - both in that example and many other examples of math where I learned the steps to solve the problem. The challenge came as I got older and math got more complicated; now it really was important for me to understand what was going on behind those numbers.
But I didn't really understand because I didn't understand way back in second grade. So eventually I was very happy to be done with my math learning. Staying after school every day to get help from my math teachers so I could pull out another A had gotten old, and I had no interest in a career in math or any kind of advanced math. I just went as far as I needed to go. This is not true for everyone. My husband, for example, is good at many, many things, basically good at everything, and he learned math the same way I did (he's older than I am). But he had a math mind and understood what was going on with those numbers even though he was learning it in a very procedural way. That's true for some people. But I would say for many, if not most people, we really need that direct instruction to help us think more conceptually about numbers.
I did not get that. Maybe you did not get that. Many of our children are getting that, and that's a good thing.
But as a parent, it can be a little frustrating if we don't understand where their child's teacher is coming from. It's also true that teaching this way is new to a lot of today's teachers and it's possible they may not be approaching it in the best way because they are learning too. So patience is required from all of us. If you are working with your child and you don't understand what they're doing with these 10 frames or number lines or anything that seems different than the way you learned math, try to take the role of a student. I'm going to give you some tips now from Christina Tonevold. I am part of her Build Math Minds membership for teachers and she, like me, is a parent and a former classroom teacher who used to be extremely traditional in the way she taught math.
She calls herself The Recovering Traditionalist because now she understands that teaching math needs to be more conceptual, more discussion-based, more big picture and not just little rules that we don't understand. So she certainly teaches those rules, but she also teaches it within this bigger context of understanding the math. And this is what she had to say in one of her recent podcast episodes. She said, "If you're doing math work with your child and they're learning something different than the way you learned it and you're confused... Instead of saying, 'What on earth, this isn't the way they taught me math! Why did they make it so hard?' you could say something like this. 'Tell me why you did that. Explain to me what this 10 frame is for. Show me how you use this number line.' So instead of trying to explain it yourself, see what they know. They just might teach you something."
Here's a quote from Kate Snow who was doing a podcast episode with Christina. This is what she had to say. "I just encourage parents to be kind of an explorer of math, you don't have to be the expert, you can just be exploring math with your child, making sense of it with your child if it doesn't make sense to you right now."
I get it. It can feel a little uncomfortable if you're not supposed to understand everything all at once. But that's the exciting thing about math. We keep learning new things every day.
Now that may not feel very practical in the moment ... such as if you are doing a math worksheet or activity with your child, they're confused and you're confused because it's not the way you learned it. You're going to need to get some help, right? So I recommend emailing the child's teacher in a calm way.
I know for me personally, when I don't understand something, I can get very frustrated very quickly. I might be tempted to fire off an email that says, "Mrs. Smith, I don't understand the math we're doing. This is not the way I learned it. Why does this have to be so complicated? What exactly are we doing on page 422?" Instead, take a deep breath, wait until you're calm, and send an email that starts with something positive. Like, "Hi Mrs. Smith. Thank you so much for all you're doing to help our kids during this distance learning. I know this is a huge learning curve for you and you're doing a great job. I just have a question about math on page 455. It looks like we're doing some kind of subtraction with regrouping, but they're doing it differently than the way that I learned it. Could you explain to me exactly how you're teaching it so I can help my child do this better? Thank you so much."
So be positive. Remember, your child's teacher is going through a lot right now. Teaching from a distance is not easy. Just come to this from a perspective of learning just as your child is learning. Hopefully you can figure this out with your child's help. If you can't, don't worry. Send a friendly patient email to your child's teacher and you'll get this figured out. If you're still confused, go ahead and go to my website, and drop me an email. I can probably send you a link that will help you understand the new approach to this type of math. That's tip number one.
Tip number two, play math games. This is easy. Just pull out some games you have at home that support math learning. If you don't have any and you're willing to go ahead and order a few on Amazon to get you through these many weeks, perhaps months of being stuck at home, I want to tell you some of our favorites. There are so many out there, but I want to share the ones I have personal experience with.
The first one is Mancala; this is a game using little glass gems, although honestly you could make it yourself and use pennies. If you look it up online, you could probably figure it out. But it's a great game for kids of all ages. So my kindergartner loves it, but you can certainly play it with your eighth grader or even another adult because it kind of grows with you. You can use different strategies depending on your age, so that's a really great game. Check out Mancala.
Also, I recommend Double Shutter. This is a great game for addition and this is one also that my kindergartner likes to use now, but my older kids also can certainly use it.
You can try Monopoly. We all know Monopoly -- but oh, that eternal monopoly kind of drives me crazy. I have a little boy who's in second grade who loves monopoly. Thankfully, he has a lot of siblings who will play it with him. So I don't usually have to be the one, but there is so much math that goes on during Monopoly. So if your child enjoys that game and there's someone to play it with him or her, maybe not always you, that's a great option.
Yahtzee, that's a really good one. There are a lot of apps for playing Yahtzee that are free.
Another game that my kids are really enjoying is called Qwixx. Qwixx is one that my kids are obsessed with right now, so most nights my seventh grader, fifth grader and second grader are playing it together, and they're all loving it. And the cool thing is even though they're all different ages, last night they played and all three of them got the same score. So that's one of those games that grows with you as well. It's a really fun one. In the notes for this episode which come at themeasuredmom.com/episode11, I'm going to provide links to Amazon for all of these games. So if you're curious about where to get them or you can't remember them, head to the show notes, themeasuredmom.com/ episode 11.
Tip number three is to integrate math into everyday life. And all this means is to just look for those opportunities and take them, if you have the time and patience. I would say during the school year when we are constantly running around picking up kids, driving to practices, etc. it's hard for me to slow down and take these math moments. But things are different right now. We are stuck at home, and like it or not, we have more time. At least I do. If you are working from home frantically trying to get your work done while also monitoring your children's homework, I totally understand. That may be a different story.
But if there are moments when you're having a slower pace at your home, consider integrating math learning. And this is so simple; this is not something you have to plan for in advance. It just means being alert and ready to take advantage of those opportunities. So for example, we have this snack mix my kids like and it comes in a small box and is rather expensive. I only want them to have a small bit of it. So I tell them, you only get half a cup of the snack mix once a day. Well, my kindergartner says, "Mom, can you help me get the right amount of snack mix?" I can open the drawer of measuring cups and say, "Let's find the cup that is half a cup. How does this compare to this whole cup? How many half cups do you think would go in this whole cup?"
That took like 30 seconds, right? And it's still teaching her something about math. If you put something on the table and you're eating frozen chicken nuggets, you could say, "Hey kids, we've got 20 chicken nuggets here and six people in our family. How many chicken nuggets could each person get and how many will be leftover?" And then here's the golden question. After you ask your child to do some kind of math ask, "How did you figure that out?" Or "how do you know?" This is really important; it helps them think about the math that they're doing and explain it to you. And the cool thing is if you have more than one child, they very likely may solve it in different ways. So hearing each other share their solutions also builds math understanding.
One more example. Your child says, "Mom, can I use the iPad?" And you might say, "You may use it for just 15 minutes and then I want you to go outside." And then you could look at an analog clock and say, "Look at that clock, and tell me what time will it be when you're done with your 15 minutes of iPad time?" If they can't figure it out, you help them. If they figure it out, you say, "Okay, how did you figure that out?" So as you can see, integrating math into everyday life is not hard; you just have to watch for the opportunities and you'll get better and better at this with time. Don't feel pressure to do this every day. If you do this several times a week, that's a win.
Tip number four, try something new. In today's show notes, I'm going to send you to Steve Wyborney's website. He's got some very simple fun PowerPoint presentations that are free. All you have to do is download them, open them up on your computer, and they are these really cool mental math type activities that challenge your children to think about math in different ways. And you're going to first go to it and you're going to think to yourself, really, is this what she was sending me to? There are so many great math apps out there with lots of colors and sounds, why would I use this? Because it looks extremely basic and simple, but you will be surprised at how fun and challenging these activities can be. There are different things they do. One of them is called Splat, where your child sees dots on a screen and splats covering other dots. They have to figure out how many dots are under the splats to give the total number that's on the screen.
These are great ways to promote math learning at home and to promote math discussion. So do one of these a day, have all your kids look at them and then work together to solve them. I'll bet that you're going to like them a lot and your kids are going to want to do more than one. So there are a lot of different things that he offers, but like I said, these are free and I will link to them in the show notes.
So I hope that I delivered with some simple ways to support math learning at home. Let's quickly review what they were. Number one was try to let go of the stress surrounding your child's math work, even if it's different from what you learned. Be more of a learner and explorer of math. And if you're still puzzled, send a friendly email to your child's teacher. Tip number two was to play math games. I gave you some suggestions for those, and those will be linked in the show notes. Number three, integrate math into everyday life, and that just means look for opportunities to challenge your child to think about math. Remember to always ask that question, "How did you figure that out?" And then tip number four, try something new. I'm recommending Steve Wyborney's PowerPoint presentations. They are free and they're fun ways to explore math concepts with your child. So go ahead and find the show notes themeasuredmom.com/episode11. Thank you so much for listening, and I will talk to you again soon.
+ Click to view entire transcript
- Click to collapse
Our family’s favorite games that promote math learning
Mancala
Double Shutter
Monopoly
Yahtzee
Qwixx
Links & Resources mentioned in this episode
Build Math Minds podcast with Christina Tonevold and guest Kate Snow
Steve Wyborney’s free math strategies and downloads
Subscribe & review in iTunes
Are you subscribed to my podcast? If you���re not, I want to encourage you to do that today. I don���t want you to miss an episode!�� Click here to subscribe in iTunes!
Now if you have an extra minute, I would be really grateful if you left me a review over on iTunes , too. Those reviews help other people find my podcast, and they���re also fun for me to go in and read. Just click here to review. You’ll need to click to “Listen on Apple Podcasts” and “write a review.”�� Let me know what you appreciate about the podcast. Thank you!
There are many ways to listen …
Subscribe in iTunes
Subscribe in Spotify��
Subscribe in Stitcher
Looking for the entire podcast library?
Click here to see all episodes.
© 2020, Anna G. All rights reserved.
The post How to support math learning at home appeared first on The Measured Mom.


April 11, 2020
New digital activities for distance learning!
Now, in addition to printable activities, I offer digital resources that you can use in Google Slides!
If you have the Internet and a free Google account, you can use these digital��no-print activities.
They’re perfect for use in Google Classroom, but you can also use the Google Slides activities on a desktop computer, Chromebook, or iPad.
And guess what?
Members of The Measured Mom Plus may access all these activities for free.��
Not a member yet? Learn more about membership here.
If membership isn’t for you, no problem!
Each of these products may be purchased separately in my shop.
Check out each new product below.

This engaging activity will give your learners hands-on practice building CVC words.
Students will name the picture and build the CVC word on 20 different slides.
Purchase the CVC-Word Building activity HERE
This Google Slides activity will give your learners practice with l-blends.
Students will name the picture and identify the missing l-blend on 20 different slides.
Purchase the l-blend activity HERE
This Google Slides activity will give your learners practice with r-blends.
Students will name the picture and identify the missing r-blend on 20 different slides.
Purchase the r-blend activity HERE
This Google Slides activity will give your learners practice with s-blends.
Students will name the picture and identify the missing l-blend on 20 different slides.
Purchase the s-blend activity HERE
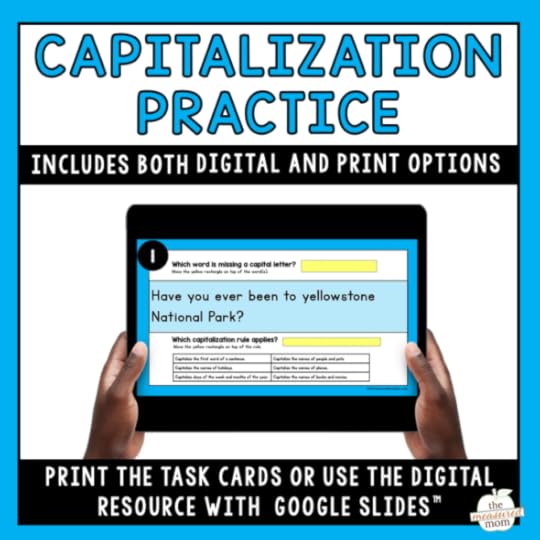
This activity will give learners practice with basic capitalization rules.
Capitalize the first word of a sentence.
Capitalize the names of holidays.
Capitalize days of the week and months of the year.
Capitalize the names of people and pets.
Capitalize the names of places.
Capitalize the names of books and movies.
On 20 different slides, students will identify the word that needs a capital letter and identify the capitalization rule that applies.
Purchase the captalization activity HERE
© 2020, Anna G. All rights reserved.
The post New digital activities for distance learning! appeared first on The Measured Mom.
April 5, 2020
How to support reading at home
TRT Podcast#10: How to support reading at home
How do you help your child grow as a reader when school is cancelled?
Can you really do this when you don’t have a degree in education?
Absolutely! And I’ll show you how in just four simple steps.
You’ve got this.
Episode freebie

Full episode transcript
You are listening to Episode 10: How To Support Reading At Home. This episode is brought to you by The Measured Mom Plus, my affordable online membership for teaching learners in pre-K through grade three. To check it out, please visit themeasuredmomplus.com. S
o I'm recording this episode in April of 2020, when millions of parents all around the world find our children at home with us all day instead of at school. Schools are canceled due to the coronavirus, and while we're not homeschooling in the traditional sense, we find ourselves in a very unique situation. We're not 100% responsible for our children's education because many of their teachers are teaching remotely to some extent, but it's up to us as the parents to make sure that this work gets done. I know that many of you listening to this podcast are not trained teachers, which is why I've received many emails from parents asking, "How can I support my child's reading at home?"
Teaching reading is a huge topic, which I'm sure you know. This would explain why I have dozens and dozens of posts about how to teach reading on my blog, themeasuredmom.com, as well as hundreds if not thousands of free printables for supporting readers. I even have a whole eight week course about teaching reading; it's called Teaching Every Reader. So the point of this episode is not to try to cover all of those things. It's not going to be to break down how to teach reading step-by-step. Instead, I'm going to keep this really simple and doable. I'll be sharing four steps to supporting your child's reading at home.
Step number one, make sure your child reads every day.
This is extremely obvious, and yet it's easily overlooked. If your child has to practice a musical instrument, you know how easy it is to skip something that's supposed to be happening every day. I can certainly speak from experience here. My husband teaches our kids piano lessons. I'm also a pianist so I can help them during the week and check up with them. Sometimes at the end of the week he'll say, "So are we ready for piano lessons?" And I'll think, "Well, I had good intentions this week of making sure that all of them practiced every day, but now that I think about it, I don't think they did."
Same story here. We have good intentions, but if we don't have a consistent routine for making sure it happens, it may not. Now, my oldest two kids breathe reading, so I never have to tell them to read ever, probably in their whole lives. They just choose to read. But for my next two kids, who are two boys in second and fourth grade, reading is not the thing they go to automatically. So if they have some extra time and it's at least 40 degrees outside, they will go outside and play football or basketball or soccer in our yard or driveway. It's up to me to make sure they read every day.
And when that is not included on a list of things from the teacher, I have to make sure it happens. When my fourth grader was in about second or third grade, I really had to tackle this. He could read fine orally, but his comprehension was very poor. So every day after school when he wanted to go outside and play, I had him sit and read to me for 20 minutes. We had simple chapter books that we worked with and we stopped after every few pages to talk about them. It took some time, but now he's a wonderful reader and picks up books on his own. If you find it's hard to keep track to make sure your child is actually reading every day, I recommend some kind of visual system. You could try a family calendar and a set of stickers; have your child put a little sticker in the corner of each date after he or she has read. Then maybe after they've reached a certain streak, maybe 10 days in a row of reading for 20 minutes, you give them some kind of reward.
Now, I totally understand that in this unique situation we're in, getting your child to read every day is only part of the challenge. You also have to find something for your child to read. This is not as easy as it normally would be. Typically, I would tell you to find books at your child's library and I would give you suggestions depending on your child's reading level. Well, most of our libraries are closed indefinitely, and this makes it hard. You probably don't want to invest in a whole lot of books brought to you by a delivery person. You want to find something online. So in addition to working from the books that you have in your house, there are some different online resources that you can use to get reading material for your child. And by far my top recommendation is readinga-z.com.
Now, I personally have a paid membership to this even though during a regular school year my kids are not homeschooled; they go to school. I still have it because as a mom who's excited about supplementing what my kids learn at school, I like to print books from there to use with my kindergartner and sometimes even my older kids. A year's subscription costs currently about $110, but I'm pretty sure that while the schools are closed, Reading A-Z has an extended free trial. So while you're on that free trial, you can download any of the books from the website that you want. They have phonetic books to build phonics skills, and they have leveled readers. Most likely what you're going to be using a lot of is the leveled readers, and you can ask your child's teacher what level your child is at. So I'm talking about the guided reading levels that go from A to Z.
A very, very, very beginning reader is going to be at level A or B. Someone who's starting to read books like Frog and Toad, if you're familiar with that one, they would be at about level J. And then if they're reading books like the Magic Tree House Books, that's level M. So you want to talk to your child's teacher through email and find out what level approximately your child is reading and then print some books from readinga-z.com. If you don't have a printer or you don't to print things because you're running out of ink, no problem. The books usually come in a projectable form so that in a classroom a teacher could just project it page by page on a screen. You can use that at home. Just open up the book and have your child use an arrow to move to the next page, and they can read it on the screen. So I highly, highly, highly recommend readinga-z.com for reading material.
You can also use Epic, which is free for teachers, not for home, but it's free for teachers and my understanding is that the teacher just has to do some kind of technical thing to make sure that your child can access that account at home for free. The great thing about Epic is it has a variety of high quality children's literature to read. It also has Read To Me, which my kindergartner loves to use. She likes to listen to it read books to her, like audio books with the pictures, and it also has a lot of great educational videos that are safe for kids to watch without ads or anything like that. The tricky part about Epic though is that it can be hard to find books at your child's reading level. So my top recommendation is readinga-z.com. If you have a child who's more fluent as a reader and it's not such a big issue to find books at their level, then Epic is also a great choice.
I do want to also say that if your child is a very, very, very beginning reader, so just getting started, I have a lot of free sight word books and phonics books on my website that you can download for free. So I will provide links to those in the show notes, which you can financial at themeasuredmom.com/episode10. And one last thing about finding reading material, if you're a member of The Measured Mom Plus you have access to additional reading material for your kids. So each month I add new literacy resources that are not on the free site, including reading passages and partner plays. The partner plays are great because you can read a part, your child can read a part and then you can switch. And so they're fun for rereading and building fluency. So that was step number one to make sure your child reads every day.
Step number two is to listen to your child read and coach as needed. It's very easy when listening to a beginning reader or even to one who's more advanced to jump in and correct every word that's wrong. You don't want to do that. You want your kids to solve those words themselves. Just to be clear, if your child is reading at a reading level that's appropriate for him or her, they're not going to be stopping at words constantly. They should be able to read pretty fluently and only be getting tripped up once in a while. So if your child is reading to you and they're constantly getting tripped up by words, you need to back up and read a simpler book. With that said, when your child is stuck on a word, here are some things that you can say. "What sound does this letter make? Let me hear you make that sound. Okay. How about this letter? Now let's put the sounds together."
Something else you could try is often they have all the sounds correct except for the vowel. So you might say, "You almost have it. Make the vowel say its other sound or make the A say its other sound." Sometimes the trouble comes with longer words. So you can cover up the ending and ask, "What does this first chunk say? Now, what does this chunk say? Put those together to say the word." Sometimes when kids are very young readers, they need the pictures as clues to help them read. So you could say, "Look at the letters in this word and now look at the picture. Does the picture help you figure out the word?" Something else you could talk to them about is have them think about what's going on in the story and then say, "Look at the word. Look at the picture. Think about what's happening in this story. What could this word be?" If a word is really tough, so it might be beyond your child's phonetic ability, you know your child will not be able to sound it out currently, and that's fine.
You can tell them to skip the word until they get to the end of the sentence then come back and try again, and often thinking about what would make sense as well as using the phonic skills they do have, that can help them solve the tricky word. If your child reads a word incorrectly, try not to jump in right away. Wait until they get to the end of the sentence, because often your child will make the correction all on his or her own. So she'll read the sentence and she'll realize, oh, that didn't make sense, and she'll go back and fix it. So that's awesome, but if you notice your child is not doing that and is just moving right on, then you would want to stop them and ask them questions. Things like this. "Did that make sense? Did you read all the words in that sentence correctly? Look at the letters closely. Try this word again." Or, "That didn't sound right to me. Could you go back to the beginning of the sentence and try that sentence again?"
So there you have it. That was step number two, listen to your child read and coach as needed. Step number three is to ask the right questions. And in this step we're really focusing on comprehension because if your child is reading all the words correctly but doesn't understand what was read, the child is not really reading. Your child is just word calling. And so we want to make sure that your child understands what he or she is reading. This can get tricky if your child is reading chapter books that you've never read because you may not know what questions to ask. So I'm going to help you through that with this step. If you're listening to your child reading, you're sitting right next to him or her, then asking the right questions is easy. You're going to pause every so often to monitor comprehension and you're going to try to keep your questions as open ended as possible. This is really hard to do, but think conversation not quiz. So you're trying to get your child to talk with you about the book and not just answer question after question that you're firing at them.
So these questions should happen before the reading, during and after. So before reading you could ask things like, "What clues does this title give you about the book? Do you think this will be a fiction book or a nonfiction?" Or if your child doesn't know those words, "Do you think this book will be imaginary or real? What do you already know about this topic? What types of things do you think the author is going to teach us in this book?" And that would be for a nonfiction book. As they're reading, you can stop every couple of pages and ask questions like this. "Why do you think the character did that? What do you think is going to happen next? What do you think this word means? Have you ever felt like this character or has something like this ever happened to you?" And then when your child is done reading, you can ask summary type questions like, "Tell me about the beginning, middle, and end of this book." Or, "What was the problem in this story? How did the character solve it?"
So as you can see, there's a variety of things you can ask and it's not too hard to think of those questions if you're listening to your child read. The hard part comes when you have a reader who is reading independently and you don't have time or the interest in reading the whole book to make sure you know what questions to ask and if the child is even answering them correctly. So first I recommend scanning the book yourself. You can learn a lot just by paging through it, looking at chapter titles, and especially reading that summary on the back. So give yourself a general idea of what the book is about, and then notice your child's demeanor when you ask the questions. If your child is getting defensive or looks nervous or uncomfortable when you're asking questions about the book, that's a good sign that comprehension isn't all that great.
So if you find that it's becoming a battle to get anything out from your child, like you say, "Tell me about this book," and they say, "I can't remember," I've been in your shoes, I had a child who did that, and so if that happens, you are going to want to do some intervention. You'll want to sit and have your child actually read to you. And then after every few pages you stop, put a hand in it, close it and say, "Okay, let's talk about what we've read so far." I'm going to repeat something I mentioned earlier, and that is try not to make this a quiz. Think mini book club, just you and your kid, and not a test. This is really hard to do and I fail at this half the time, but it's just something to think about. You want this to be an enjoyable time and not a testing time, so try to ask open ended questions that could have different answers.
Try not to wait until your child is completely done with a chapter book before asking about it because if there were comprehension issues early on, it's going to be really hard to remedy those. It's best to have your child read a chapter and then talk to you about it. Then you can talk about the book as a whole when your child has finished. So some things you can ask after a chapter would be, "What's the most important thing that happened in this chapter?" Or, "If you had to tell me about this chapter in just a couple of sentences, what would you tell me? What problem is the main character having in this chapter?" Or if your child is reading nonfiction, you could say, "What do you think is the most important thing you learned in this chapter?" Or, "What's the most important thing the author wants you to know?"
If you have more than one child at home reading or you're also working from home while your child is doing "homeschool", then you are going to need to have your child be a little more independent. And so this is where sticky notes can become your new best friend. You could have a sticky note where you write a prompt on it and you put those at different pages in the story. You might have your child record answers on a piece of paper or you could have them talk to themselves out loud to answer the question and then answer those questions later with you when you have some time. So, for example, you might put a sticky note after three pages at the beginning of a book and it might say, "Stop and think about what the book is about so far." Or, "Stop and write one sentence about the book so far."
You might have a sticky note at the end of a chapter reminding your child to get a piece of paper and write, "This chapter was about ...." or, "I think _______ will happen next," or with nonfiction, " The most important thing I learned in this chapter was ..." You could even have a prompt that says, "A question I still have is ..." So these are things to help your child think more deeply about the text. It really helps to have them at stopping points so that they're not overwhelmed with understanding the whole book at once when they're finished. You want to make sure they're monitoring comprehension, so they're checking in with themselves to make sure they understand what they're reading as they go through the book. I have a blog post all about helping kids remember what they read. It shows you what to do when your child isn't remembering what they read and you'll find a link to that in the show notes.
We're on our last step, number four, supplement with additional activities. As you listen to your child read and ask questions about the reading, you'll likely discover what your child needs to work on. If your child struggles with sounding out words, then you need to practice phonics skills. I have dozens and dozens of free reading games on my website, which you can find on the free printables page of themeasuredmom.com/free. If you would like to focus on a very specific phonics skill such as short vowel words or words with silent e at the end, you can make a game where you just type in the words you want your child to practice. And just for you, I have a very special episode freebie for this episode. It includes samples of items that members of The Measured Mom Plus get to enjoy every month. A freebieI'm going to share with you for this episode is an editable reading game. So you can type in the words you want your child to practice, and you can change those words every time you play the game. Just type them in on the computer and print.
You'll find that in the episode show notes at themeasuredmom.com/episode10.
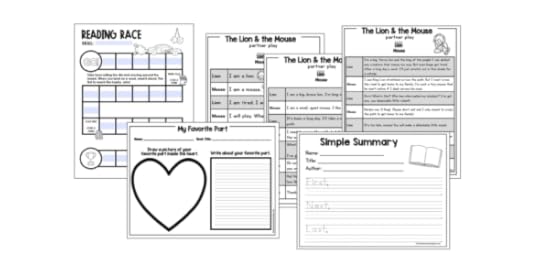
Something else I have for you in that episode freebie is something that will help your child with fluency. So if your child is reading very slow or they're getting tripped up over words, even though you know they know them, they just can't seem to read fluently or they're reading without any expression at all, a great thing you can do is Reader's Theater or partner play. That's why I like to add a new set of partner plays almost every month in The Measured Mom Plus, and I'm going to give one of those sets of partner plays to you as part of this episode freebie. The great thing about my partner plays is they come in three levels, so you can choose the level that fits best for your child.The earliest level is for about kindergarten or first grade and the highest level is about second or third grade. So go ahead and find a fun set of partner plays in the episode freebie. You can print that and enjoy reading that with your child.
As for comprehension, I also have two sample reading response pages. Again, these are from the membership, but I'm giving them to you for free to get a free sample; these are included in the show notes as well.
So there you go. We've got four steps for supporting reading at home. Make sure your child reads every day, listen to your child read and coach as needed, ask the right questions to support comprehension, and then finally, supplement with additional activities. I look forward to seeing you next week with more tips for supporting your child's learning. Thanks so much for listening, and I'll talk to you again soon.
+ Click to view entire transcript
- Click to collapse
Sponsored by
The Measured Mom Plus, my online membership for PreK-grade 3 educators.
Resources mentioned in this episode
Reading a-z. com
Epic
Free sight word books
Free phonics books
What to do when kids don’t remember what they read
Resources for members of The Measured Mom Plus
Reading passages
Partner plays
Subscribe & review in iTunes
Are you subscribed to my podcast? If you���re not, I want to encourage you to do that today. I don���t want you to miss an episode!�� Click here to subscribe in iTunes!
Now if you have an extra minute, I would be really grateful if you left me a review over on iTunes , too. Those reviews help other people find my podcast, and they���re also fun for me to go in and read. Just click here to review. You’ll need to click to “Listen on Apple Podcasts” and “write a review.”�� Let me know what you appreciate about the podcast. Thank you!
There are many ways to listen …
Subscribe in iTunes
Subscribe in Spotify��
Subscribe in Stitcher
Looking for the entire podcast library?
Click here to see all episodes.
© 2020, Anna G. All rights reserved.
The post How to support reading at home appeared first on The Measured Mom.
March 29, 2020
How to work from home while homeschooling
TRT Podcast#9: How to Work from Home While Homeschooling
Is your child’s school closed due to the pandemic?
Do you suddenly find yourself working from home while also unexpectedly homeschooling?
I’ve been working from home for seven years. And while I’ve never officially homeschooled (until now), I’ve always had at least one child at home during the day.
I’ve learned a few things about what works and what doesn’t.
Learn my best tips for accomplishing work from home while also caring for your children.
It IS possible, and you can do it.
Listen to the full episode
Full episode transcript
You are listening to episode nine, how to work from home while homeschooling. Anna here. I spoke to you last week with tips for instant homeschoolers. Many of you like me do not typically homeschool, but with schools all over the world closing due to the Coronavirus pandemic, many of us find ourselves with our children all day every day, which means we have become their teachers. And many of us are also working from home. So this is the question I've been asked a lot, how do I work from home and homeschool my kids and/or also care for my toddler or preschooler? Today's episode is all about productivity and management skills, two things you're going to become very good at. So let's get started.
The first thing you need to do is create a dedicated workspace. Even in a small house, it's important that you have a place where you can keep your computer and the things you need to do your work. I don't recommend carrying them around the house and doing them wherever it feels comfortable. Instead, have a special place so that you can take the things that you need and put them away at the end of the day. Hopefully it's also a place that your family respects and that people know not to put their things or take things from.
During the first few years of our marriage, my husband, who is a professor, also had a home office where he would work when he was not over at school. And he had his computer there and his shelves of books and everything else he needed and a door that shuts, which sounds pretty amazing to me because I've never had a door in my home office. It's always been somewhere in the middle of the house. And no, this is not ideal, but yes, it can work because I've been doing it for seven years. So let me tell you a little bit about how I make that work.
Currently, my home office is in the kitchen. I have a big roll top desk that we squeeze next to the kitchen table. It is crowded and you have to squeeze a little bit to get into the back chair, but it does work. What I like about it is that I can hear everything that's going on in the house when I need to. So sometimes when my kids are just playing happily, I can sit down and squeeze in some work that doesn't require a lot of deep thinking, I can hear if they're fighting and I need to intervene, I can hear if my preschooler needs help in the bathroom, I can hear if someone's at the door. I'm in the hub of the house and I can take care of those things.
I also really like that if everyone else is busy, like maybe somewhere playing outside with my husband and I'm in the kitchen making supper, I can stop to sit down at my computer to do a few things. So if I'm boiling water for something, I can sit down and answer some emails while I'm waiting for that to finish. This has allowed me to get a lot of those little tiny tasks done because I have a place that I can easily sit down and tackle them.
Of course, the challenge to having a home office in the middle of the house without a door is that it's hard to do deep work. The big thinking work, but I'm going to get to that in a little bit. So my first tip for you again, is just to find a place where you can store your things and work. And if you need to have two workspaces during the day, that's totally fine. Maybe during the daytime, you have a space in your kitchen, but then when you need to do your deep work, you have a card table in your bedroom. Whatever you do, make sure that you can accomplish both those little things that just have to be done and the hard thinking work that requires you to be by yourself.
The next tip is to be open with your boss. I feel really bad when I hear from people who say they have a 9:00 to 5:00 job and they're expected to do everything they do at work while homeschooling their kids. That's just not possible. You can't do everything you would do in a 9:00 to 5:00 job while managing your homeschool or caring for toddlers who are normally in daycare. That's just completely unrealistic.
And I hope that if you think this is what your boss expects of you, that you can have a candid, open conversation about what you can and cannot do during this time. You simply cannot shut yourself into a room while your big kids teach themselves all day long, or your toddler or preschooler babysits themselves all day. You know that, but your boss needs to know that too. Your boss needs to know the things that you're responsible for at home. There needs to be a discussion about what your boss's expectations are for you each day and to know where there's flexibility. What are the things that absolutely must get done every day and what are the things that can be pushed off if needed?
Once you know what your boss expects you to do, I recommend making a list of tasks that you can do depending on how present your children are. Here's what I mean. You could write down a list of things that you could easily do if your children are in the room with you. So let's say they're eating breakfast. They're all set up, what can you do at your computer at that moment? For me, it's answering most emails. Another thing would be to set up a list of things that you can do if your children are happy and busy. So let's say your preschooler is playing in the playroom and your older kids are working on their homework and don't need any help. Is there something you can do that requires a medium level of concentration but you could easily be distracted? For me, that's usually creating printables for preschool or kindergarten.
And then you're going to need to think about what type of stuff you need to do that is deep work. So something that you need to do without distraction. For me, that would be creating more complicated printables like reading passages and partner plays. I have to think a lot more when I create stuff like that. So those are some of my deep work things as well as creating trainings for The Measured Mom Plus, writing podcast episodes and recording episodes like I'm doing right now. I've got to have special focus time by myself to do those things.
Work off that list during the day. When your kids are close to you in the same room, are there little things you can do? When your kids are happy and busy, what are the things you can do? And then save that deep work time for another spot. And that's of course my second tip, you've got to have a dedicated time for deep work. I know this is hard to come by, especially if you have little ones, but here are some tips for what I've been able to do to make this work.
Number one, I do get up early. Sorry if you're not an early riser, but if you are, totally make use of that time. I actually talked about this last week, but our kids are not allowed to get out of their rooms until 6:40 even if they wake up early. So if you have had a habit in your house of kids getting up and making breakfast while you're still sleeping, you might want to have some kind of expectation that they have to stay in bed until a certain time, or if they wake up early, maybe they can read in their beds, but it's really essential that you have this time that you're not going to be interrupted. So if you like getting up early, set your alarm and maybe get a good hour's worth of that hard work done in the early morning if your job has that kind of flexibility.
My other time for deep work is the afternoon. I would prefer, of course, that this were in the middle of the morning when I'm the freshest, but of course, if you're homeschooling right now or you've got a toddler or a preschooler, they're probably awake and busy in the morning. So a good time might be the early afternoon after lunch. So if you have a toddler or even some preschoolers, they'll take a nap for you and you can use that time to focus on the deep work. Your older kids can have the understanding that hopefully, they've finished their schoolwork by now and this might be a time for them to watch a movie or to watch some TV or do some other thing that is going to keep them occupied while you tackle your work.
You can borrow a trick from teachers in the classroom. This is something that a lot of teachers do when they're teaching small groups and they want their students to know they cannot interrupt the teacher. They wear something like a scarf or something like that that gives an instant signal. No, you may not talk to me right now unless it's an emergency. You can certainly implement that as a parent with your older kids. Now, it's not going to work real well with kids under five probably, but older kids who are pretty self-sufficient, they can learn that that signal means Mom or Dad is not to be interrupted unless we have a real serious problem. Be sure to communicate with your family when that dedicated deep work time is, that's with your spouse and with your children so that everyone honors it. It may take some training for a while, but if you are consistent with your expectations, you will get that time that you can count on.
My next tip is to front load time with your young children. So I know that when my kids get up and it's time for breakfast, it's certainly very tempting to just keep working because I am on a roll after getting up early, but it's really important that you give your young children time at the beginning of the day so that they don't quickly become whiny and irritable. So you may be able to get a little bit of work done right after breakfast, but then after your older kids are starting with homeschool, you may need to spend some time reading or playing Candy Land with one of your younger children, and then you could set a timer. You could say, "Okay, Mommy, just read to you, Mommy played a game with you, now I need 30 minutes to do some work at my computer. And here's this timer. You can take it. When it beeps, I'll stop and we'll do something together."
Notice I'm not giving you a picture of a day that involves you working for eight hours uninterrupted because that's just not the world you're living in right now, but you can still accomplish quite a few things. The best way to accomplish those things is to use productivity hacks. That's my next tip for you because I know it's very easy when you finally do have time to work to waste that time. And that's frustrating, isn't it? You finally have two hours to sit at your computer and do some work and all you want to do is look at Facebook or watch YouTube videos. I've totally been there. And these are things I have to work at every day to keep myself focused because my work time is very limited. We have six kids. There's just a lot going on. And so these are some things that I have used to help me stay focused on my work.
One of the things I use is called Freedom. So I'll leave a link to all these things in the show notes, which you can find at themeasuredmom.com/episode9. So Freedom is something that you pay a one-time fee for. I think it was under $100 and it's just on my computer now, and I can block certain websites at different times. And you can set it up so that you could go in and cancel it if you decide you want to go back to those or you can set it up so that you can't cancel it and you're stuck. And that's usually the one that I choose.
So for example, I might say, "Okay, I have two hours. I have absolutely got to write these trainings for The Measured Mom Plus. I cannot watch YouTube videos right now." And so I set it up so I cannot access YouTube during those two hours. And if I try to, I'll go there and it will have this beautiful green screen with a butterfly that will say, "You are free!" And that means you're free to go do the things you need to do and not waste time on this website. It has been really helpful for me. I don't use it very often, but it does the job when I need it.
Something else I really like is called Focus@Will. This is a yearly fee, but it's not too much money, and it provides music that you can listen to in the background while you're working for periods of time. And there's all different kinds of music you can choose. I always choose the classical quiet piano music because I'm distracted by anything else, but there's anything for everybody. And so I set it for about 30 minutes and I know while that quiet music is playing, I absolutely have to be doing research for this particular topic and I cannot stop to do other things. That is really helpful for me. Once you make yourself get started, the time starts to fly and you actually make progress. It's just pushing past that initial resistance that you may feel.
I also have some Chrome extensions that I love. I have Facebook Feed Eradicator, and what that means is when I go into Facebook, I cannot see posts from my friends. I could go into their actual Facebook page and see what's new with them, which I do sometimes, but there's no feed. And I cannot tell you how much time this saves me. When I first joined Facebook, which I confess I dragged my feet for a long time to do, I would easily get sucked in and spend 45 minutes to an hour just visiting my friends' pages and reacting with their posts. Quickly, I realized that this was going to be really bad for my business until I figured out how to manage this.
So the Facebook Feed Eradicator means instead of seeing people's feeds, all I see is a nice time management quote. And I can still go into all the groups that I'm part of and that I manage, which is what I need to do, and not be sucked into all these feeds from my friends. I also got something like that for YouTube. It's called Distraction Free for YouTube. It's another Chrome extension and that means when I watch a YouTube video, it does not give me suggested videos on the side. That was another major time suck and I was really happy to discover that one. So I can still see a lot of suggested videos on my homepage in YouTube, but on the side of the video, it's this beautiful white space and not an endless list of other videos that I should watch.
Something else I want to mention quickly here is the Pomodoro Technique. I don't know if you've heard of that, but it's this idea that you set a timer for 25 minutes and you work nonstop during that time and then at the end of it, you give yourself a five minute break. Like stepping away from your computer, maybe walking around your house. I don't use this consistently, but sometimes, that idea of setting a timer for working for that period of time really helps. And this you can use with Focus@Will, which I told you about, where you can play music for a certain period of time.
My last tip for you is to prepare for your next day with a helpful evening ritual. One thing I tell my kids a lot lately is to do something for your future self. So what can you do that will make your morning self happier? What can you do that will make tomorrow better for your future self? We have to do things like this with our children, right? We might have them pack their lunch the night before or put their backpack by the door, but what about when you're working from home?
The biggest thing I can tell you, the biggest game changer for me when I do it is to write down the biggest three things I need to accomplish the next day for that day to be successful. And at first, you might feel yourself say, "What? Three things? I have a hundred things I need to do." Just try it. The cool thing about it is when you do those three things, you just feel like you got stuff done instead of feeling stressed out that you have so many things that are not crossed off. So what I do the day before is I write my big three things at the top of my planner and then beneath it, I write the other things I'd like to get done. So my top priority has to be getting those three things done. And when they're done, I can tackle the other things. I don't do this perfectly. It is something I am working at, but when I do it, my day goes so much better.
Something else I recommend is putting away all your work and clearing your workspace so you have a nice place to begin working the following day. In our house, for years, we've always spent the evening after supper tidying the house so we don't have to wake up to piles everywhere. The dishes are done. Now that my kids are older, they help. We have the playroom tidy. This almost always gets done. Unless we're somewhere in the evening, which isn't happening these days, the house is picked up. So when I come down the stairs in the morning to a blissfully quiet house, it's tidy and it allows me to get right into my work without feeling distracted by piles and clutter.
So those are my tips for you for working from home while homeschooling. Let's review those really quickly. Create a dedicated workspace. Be open with your boss about what you can do from home and ask for flexibility as to when you complete certain tasks. Have a dedicated time for deep work that your spouse and your children learn to respect. A time that you are not to be interrupted except in emergencies. Front load time with your youngest kids. So make sure that at the beginning of the day, you are playing games with them, reading to them, and then setting timers so that they know for a certain period of time, you are working. Use productivity hacks, which I will list in the show notes. And finally, prepare for the next day with a helpful evening ritual. For me, that's writing down the big tasks I need to complete the next day and working with everyone to tidy our house.
Thank you so much for listening and I hope you'll check out the show notes at themeasuredmom.com/episode9. In those show notes, I'll share a link to some posts I created recently with tips for homeschooling your preschooler, kindergartner, first, second or third grader. I've got loads of helpful free resources included in each of those posts. So be sure to check it out. I'll talk to you again soon.
+ Click to view entire transcript
- Click to collapse
Resources mentioned in this episode
Freedom
Focus@Will
Chrome extension: News Feed Eradicator for Facebook
Chrome extension: Distraction Free for YouTube
Subscribe & review in iTunes
Are you subscribed to my podcast? If you���re not, I want to encourage you to do that today. I don���t want you to miss an episode!�� Click here to subscribe in iTunes!
Now if you have an extra minute, I would be really grateful if you left me a review over on iTunes , too. Those reviews help other people find my podcast, and they���re also fun for me to go in and read. Just click here to review. You’ll need to click to “Listen on Apple Podcasts” and “write a review.”�� Let me know what you appreciate about the podcast. Thank you!
There are many ways to listen …
Subscribe in iTunes
Subscribe in Spotify��
Subscribe in Stitcher
Looking for the entire podcast library?
Click here to see all episodes.
© 2020, Anna G. All rights reserved.
The post How to work from home while homeschooling appeared first on The Measured Mom.
March 28, 2020
Simple meals the kids will actually eat
Looking for simple meals that you can feed your kids while you try to keep sane during this challenging time of unexpected working-from-home and homeschooling?
Try these!
I know you have a lot on your plate right now.
You may find yourself working from home��while homeschooling your kids whose schools have been closed … indefinitely.
Since everything is shut down, you don’t really have an escape. No coffee shop, no library … it’s even hard to find take-out.
Many of us are probably finding ourselves doing more cooking than we’re used to.
As a mom of six (ages 4-12) who’s worked from home since 2013, I know what it’s like to spend a lot of time in the kitchen.
I put together this list of our favorite simple recipes – that the kids will actually eat without too much complaining.
As I meal plan, I try to mix things up, but these are the recipes I find myself returning to over and over.
So this is a reference for me as well as for you.
I hope it’s helpful!

Chicken recipes
Cook a big batch of chicken breasts in your slow cooker. Just put the breasts in the cooker, sprinkle with spices (I use salt, garlic powder, and onion powder), and pour some water (about halfway up the chicken) in the bottom. Cook on low or high until the chicken shreds easily with a fork. Super soft, and perfect to use in the following recipes:
Chicken wild rice soup is a family favorite. I’ve been making this recipe for years. Make a big batch so you can have it for leftovers. We like to serve it with this homemade banana bread.
Grape chicken salad. I just mix the cooked chicken with chopped apples, sliced grapes, and chopped celery (if I have it). I sprinkle it with salt, garlic powder, and onion powder, and mix it with plain yogurt until everything is lightly covered. We eat it with crackers. (Serve with chopped nuts on the salad if you want.)
Mexican chicken pinwheels. Mix about a pound of shredded chicken with a few ounces of shredded cheese. Add some salsa and 8 ounces of cream cheese. (This is not a perfect science; just add the amounts that look right to you.) Then spread it on tortillas, roll up, and eat. You can follow this recipe if you prefer more specific directions.
Chicken burrito bowls. Full disclosure – this is not my kids’ favorite, but I have no idea why. I mix some of the shredded chicken with taco seasoning. Each kid gets a bowl of rice with chicken on top. They add toppings like cheese, black beans, corn, pico de gallo, sour cream, etc. Yum!
Other chicken recipes
Chicken fingers.��This one takes a bit longer, but without that commute a lot of us have a little more time. Just cut up chicken breasts into thin slices, dip in a beaten egg (mixed with salt and spices if you prefer), and dip in another bowl with crushed corn flakes, bread crumbs, or cracker crumbs.�� Bake at 400 about 20-30 minutes, flipping halfway. Serve with cooked potatoes and veggies.
White chicken chili is a favorite of my kids. I love it because you dump everything in the slow cooker and let it cook. Start with 3-4 chicken breasts. Add a can of corn, 8 oz cream cheese, 2 cans of white beans, a chopped onion, and some spices. I use about 2 teaspoons of chili powder, some garlic, a teaspoon of cumin, and a teaspoon of oregano. Finally, add 32 ounces of chicken broth and cook on low for 6-8 hours. We eat it with sour cream and tortilla chips.
Ground beef recipes

Cook up a big batch of ground beef. ��You can use it in these recipes. Freeze what you don’t plan to use this week.
Tacos. Mix ground beef with homemade taco seasoning (I keep a big batch of this recipe ) and serve in taco shells or flour tortillas.
Taco salad. Top lettuce with the taco meat, chopped peppers and/or tomatoes, cheese, black beans, and/or corn. Serve with chips and sour cream.
Spaghetti.�� Make a big batch so you have leftovers.
Cheeseburger wraps. Mix at least a pound of cooked hamburger with some shredded cheese and ketchup. Put inside tortillas, roll up, and secure with toothpicks. Cook on a griddle until crispy. Not the most nutritious meal, but a family favorite (especially when served with frozen french fries).
Chili. Find your favorite recipe and make a big batch. Serve it with corn muffins. This is our family muffin recipe.
Beef fried rice. Not a favorite of everyone in the family, but so easy this mom doesn’t care. It’s best if you cook the rice in advance. Warm the rice in a little oil. Then add the cooked ground beef and a couple of scrambled eggs. Finish with low sodium soy sauce and you’ve got a meal.

Meatless recipes
Bean and cheese quesadillas. I just put refried beans and shredded cheese between two tortillas and warm on the griddle. I slice them up into triangles, and we eat with salsa and sour cream.
Grilled cheese. ‘Nuff said.
Macaroni and cheese. From the box. For days when you just.can’t.even.
Pancakes. This is not my favorite thing to make, but my almost 13-year-old daughter loves to do it all from start to finish. A good project for an older tween or a teenager.
Easy breakfast casserole. Cook about a pound of ground breakfast sausage. Mix with 10 whisked eggs, a cup of milk, and about 2 cups of shredded cheese. Pour all into a square greased baking dish and bake at 375 for about 40 minutes. So easy and good.
I hope this helps you as you manage life during this challenging season!
If you’re suddenly homeschooling,
check out these posts too …
© 2020, Anna G. All rights reserved.
The post Simple meals the kids will actually eat appeared first on The Measured Mom.
March 24, 2020
10 Tips for instant homeschoolers

TRT Podcast#8: 10 Tips for Instant Homeschoolers
Is your child’s school closed due to the pandemic?
Do you suddenly find yourself homeschooling your kids?
I have good news. You don’t need to spend all day teaching our child. Just 2-3 hours each day (maybe even less) will do it!
In this episode you will learn:
Tips for establishing a homeschool routine
Suggestions for structuring your day
How to get help when things get tough
You can do this, and I’m here to help!
Listen to the full episode
Full episode transcript
You are listening to Episode Eight, 10 Tips For Instant Homeschoolers. Anna here, how are you doing? As I record this episode in March of 2020, the world is experiencing something like we've never experienced before. Here in the US, many states have closed schools for at least two weeks, some longer, some even till the end of the semester. And that's because, as you know, an extremely contagious virus is making its way around the world and our country. And to hopefully prevent many people from catching it and to give the hospitals time to welcome what may be a large influx of patients, we're staying home. So we're not only suddenly homeschooling our kids, but we may find that the things we typically rely on are no longer available, such as getting together with friends, trips to the library, attending church, or visiting the zoo or museum. In my state, it's against the law to gather in groups of 10 in most settings.
We're stuck. We are facing a true challenge in that many people who are not trained to be teachers are expected now to teach their children. And people like me who happen to be trained teachers, but choose not to homeschool for good reasons, are now unexpectedly homeschooling. For years on my blog, The Measured Mom, I've been sharing resources and free printables for teachers and parents and homeschoolers, and when I launched this podcast just last month, my plan was that the episodes would only be for educators, primarily teachers and people who choose to homeschool. But things are different now. Our country's population of teachers has instantly exploded, as many of you are now instant homeschoolers. So I'm going to switch tracks for a bit. For at least the next few weeks I seek to support you, the sudden and unexpected homeschooler.
I know that everyone's situation is different. You might be an at home parent who's used to having the kids at school and now during the day you're managing a house full of kids all day and trying to keep up with schoolwork and housework and so on. Or you may have material from your children's teachers and you're just trying to make sure that everything gets done. On the other hand, your children may be facing a school cancellation, but the school has forbidden teachers to actually send work home so your kids are having an extended spring break while you go a little crazy and worry that they're getting behind. Maybe you're trying to homeschool while also working from home. I know many people are in that situation. Or you're trying to homeschool, but you also have a one year old or a three year old and they're making it very difficult for you to teach your older kids.
I have six kids, ages four through 12. Before I had children, I was a teacher for eight years and I've been working from home for the past seven years. Now I'm an entrepreneur, which means that my time is flexible and I can choose what projects to work on. But I have had two babies in the last seven years of working from home, so I've learned a few things about making the most of the time and energy that I have. I hope that my perspective and tips are helpful to you. So with that, let's move into 10 tips that will help you navigate this challenging season. I'm going to give you tips for scheduling your homeschool, managing screen time, keeping your sanity, and a few more things. So let's dive in.
Tip number one, remember that school at home takes much less time than school in a classroom. I know that some parents are concerned, they're thinking, "My child is at school for eight hours a day. How can I possibly do that at home?" Well, you don't have to. Any seasoned homeschooler will tell you that your child can get their work done in much less time than they do at school, especially if your child is young. As a former teacher, I can certainly tell you that much of the school day is spent in transitions, things like lining up or going to lunch or having recess. Those things added up take a few hours. So once you shave off a few hours for all of that, you can shave off even more for each subject. For example, teaching a whole class of first graders reading can take 90 minutes. If you're doing this at home, it may take just 30 minutes. If your family schedule allows it and you're able to start school early, you can be done by lunchtime in most situations.
Tip number two, and this is an important one, ask yourself what needs to be in place for you to stay well? And I mean emotionally, physically, mentally, and spiritually. Your health is so important. Not only because you are important, but also because you will not be able to help your family if you are not well. Ask yourself, what do I need to keep myself healthy? Having had six kids in eight years, that was a huge blessing, but it was not easy. And so I've spent a lot of time over the last dozen years pondering what it means to keep myself healthy.
For me, I need time by myself when the day starts. If I would get up after the kids, then there would be fighting, there would already be messes, there would be chaos and that would totally get me off on the wrong foot. So I personally have to get up an hour and a half before everyone else. That makes me happy. A quiet house makes me happy. And so I use that early morning time to do work or to exercise.
You might be wondering, well how do you do that if your kids are early risers? Well, I actually do have early risers. My oldest kids definitely are chomping at the bit to get out of their beds at 6:40, which is when we allow them to come out of their rooms and come downstairs for breakfast. But actually way back, early on, even when they were toddlers, we taught them that we would not bring them out of their cribs until mommy was ready. Back then it was 7:00. Now it's 6:40 because that's how early we need to get up for everyone to get out the door at 7:30. If we had fussy toddlers, we would go in their room, give them a hug and say, "Mommy will come get you when it's 7:00." And that just worked for us.
They all had to learn it, but they all learned it. And that one thing has really helped me stay sane over all these years. In the past, I've used some of that early morning time to exercise, but now that all my kids are home all day, I really need that early time to get blog work done. For example, right now I'm recording this podcast in a closet while everybody is still upstairs in their beds.
So what do I do about exercise? I spent the first few days of instant homeschooling not exercising at all and I felt very sluggish and gross. So I decided that at 6:45 when everyone's downstairs for breakfast, I'm going to go down to the basement. And my oldest kids, ages 8, 9, 11 and 12 who are used to getting their own breakfast can also get breakfast for my two youngest kids, who are 4 and 6. And no one is to come down to the basement and interrupt my exercise except in an emergency. And so this is a way that I'm figuring out a way to keep myself physically together during this interesting time.
Another thing that's really essential for keeping me sane, whether or not I'm doing this instant homeschool thing, is dividing housework. So there is no way that I could care for my family, manage this business and keep the house clean all by myself. It's just not possible. Back in the day when I started the blog and my oldest was only five, the house just didn't get that clean. Laundry piled up a lot. I basically never dusted and that was hard. It was a sacrifice I made because we did want a big family and we were blessed with that, but now that we have more flexibility with older kids, we're able to have them pitch in quite a bit.
So every morning, school day or not school day, one of my big kids is assigned to empty the dishwasher so that when people are done eating breakfast, it's very easy for me to slide things in there. One of my big kids is responsible for starting a load of laundry and later in the day putting it in the dryer. Also, every Friday we all pitch in to clean the house. The kids are scrubbing toilets, washing bathroom counters. The little kids are tidying up. Some of the kids are dusting. Meanwhile I'm mopping floors, we're all working together to get the house clean. Do they like doing this? No. Does it keep me sane and teach them some useful life skills in the process? Yes.
Something else that's important and necessary for me is maintaining my relationship with my Savior. And I've found that I need to have a routine to make this happen consistently. So after I finish my breakfast, I pull out my write the word journal, which is from a shop called Cultivate, and I'll link to that in the show notes, and I copy a few Bible verses in the journal and that helps me focus on what's important for the day and get started on the right foot.
Something else I need, is dedicated work time. Remember I've been working from home for seven years and that didn't happen by telling myself that when I have a few seconds I'll sit down at the computer. I've got to have time that I can count on every day. And for me, this is right after lunch. It used to be because I had toddlers who were sleeping during that time. Now nobody naps. But right after lunch the kids know they have about 45 minutes to an hour that they're expected to entertain themselves. And then at that time, all of them are allowed to move into the basement and watch a DVD for about an hour and a half or so. And this gives me some dedicated work time. Is it quiet? No. Is it super productive? I wish. But unfortunately I'm really tired in the afternoon. That's when I tend to get sleepy and I'm not super productive, but this is the season we're in and I make the most of the time that I have.
I know this step is getting long, so bear with me here but I do need to do a lot of things to keep myself well. And another one of those is managing my eating. I definitely am a person that likes to eat for emotion's sake. So I may be eating because I'm happy or eating because I'm sad or eating because I'm bored and if I don't give myself any structure, I will quickly gain 20 pounds and I speak from experience here. So one thing I'm really working on right now is recording everything I eat in the Lose It app. And that's something free you can find online and put on your phone. And that just helps me stay in touch with myself and what I'm eating and keep myself accountable.
Finally, after a whole day with the kids, I really need some time to myself to clear my head. I am very much an introvert. I really do best when I have a lot of time on my own. Well, that kind of time is hard to come by these days. So when my husband comes home from work around 4:15 I go outside and I take a walk for 30 minutes to an hour all by myself. And I've bought lots of things to keep me warm so I can go out even on the coldest winter days. On those walks, I listen to a podcast or I listen to a book on Audible. So as you can see, I do need quite a few things in place to keep myself together. Maybe you don't need quite as many things, but you need to ask yourself, what do I need to have in place to keep myself together mentally, physically, spiritually, emotionally, so that things move forward in a positive manner?
Tip number three, keep as many of your regular routines as you can. It's important that we not treat instant homeschooling as a vacation. Have your kids get up at the normal time or close to it, the time they'd normally get up for school. And have them go to bed at their normal time, the time they would go to bed on a school night. If they have instruments that they practice, like piano or violin, keep that up. If you already have daily jobs for them, have them keep doing them.
Tip number four is to keep your homeschool materials organized because they will quickly take over your house. If you are doing a lot of the teaching yourself, then I would suggest that the night before you print whatever you need and put it in folders for each child. If you are doing what we are, which is working off of the material the school sends, here's how I handle it. Most of my children's teachers send an email every morning, so I print those right away when they come in so that I can read them and, if necessary, my children can read them. And then I have a manila folder for each of my children that's working with printed work, and those are my three youngest kids. So they have a folder with their name on it that says 'work done' and then they have one with their name on it that says 'work not done'. And that way when they finish a worksheet they can put it right in that done folder and I'm ready to return it to school or do whatever I need to do with it. We do all of our schoolwork in the dining room and the kitchen and this way I can just walk between the rooms and help as needed. I don't want to be going up to bedrooms to help kids. I need everything to be in one place. So far that's working for us. So in the dining room are my three oldest kids who have their Chromebooks and are able to do a lot of the work on their own and in the kitchen are my younger kids who need a lot more support from me.
At the end of our school morning, because we're usually done in the morning, everyone has to take all of their materials and put them in a pile in their designated space in the dining room. So the three little kids are using a bench, the two oldest kids are using a small table by the window and this way the next day they know exactly where to get their materials and we don't have a big mess of papers for the rest of the day.
If you're wondering how we get done in the morning, usually by 11:00, that's tip number five, which is to start your homeschool day as soon as possible. Now I realize that everyone's schedule is different, but if it is possible for you, go ahead and start as soon as you can. I'm done showering and eating by about 8:15 and that's when I begin homeschooling my youngest kids. My older kids usually start on their own by 7:30 because they're doing most of their work online, so they just log into Google Classroom and they find out all the things that their teachers have assigned for the day. They like online learning, and they're self starters. I don't have to do a lot to get them going. Not the case with my younger two learners who are working from home. They need me to tell them exactly what to do next and to give them breaks as needed.
Tip number six, don't try to follow a strict schedule. So here's a quote from a homeschooler who follows my newsletter and she wrote me this. This is from Jessica. She's experienced at homeschooling and she had this to say, "If you are a naturally scheduled person, know you're going to have to learn to be more flexible. And if you're a naturally go with the flow person, not focused on a clock ever, know that you're probably going to have to learn to be more scheduled and routined for your kids. Homeschooling stretches you in ways you never expected, just like the classroom."
So like me, Jessica is a former teacher and so she knows that you don't always know how things are going to go. There were many, many days as a classroom teacher that I was planning on something and I had to decide not to do it because one subject took too long or I knew it required a special amount of patience that I did not have that day. The same thing with homeschooling. Here's a quote from Emily, another homeschooling reader, "You'll make yourself crazy if you create one schedule and expect everyone to follow it. Meaning 9:00 to 10:00 AM writing, 10:00 to 11:00 AM math, 11:00 to 12:00 lunch and recess and so on. Imagine three kids, different ages, different levels, needing your attention for writing, all in the same hour or for math problems. That would be whack-a-mole for sure."
So if you're not supposed to have a rigid schedule, what do you do instead? My advice is to have a set time and expectation, a routine for when everyone starts their schoolwork and then stagger those difficult subjects. So let me explain what I mean by that. Here's how it looks at our house. My older two kids, like I said, they are a fifth and seventh grader. They're very good students. They like to do online learning. They're very independent, so they need very little help from me. What I have to do is manage my next three kids. My fourth grader is a good student, but does struggle to comprehend some things so he needs extra time from me, as most students do. At the beginning of the day, I find it's the best time for us to tackle his science. It is his least favorite subject and frankly mine as well. And so I need my brain to be fresh and my patience to be high as we figure out that content together.
So that is usually the first thing that he and I do while I give my second grader and kindergartner some easy activities to do. My second grader may be doing a phonics worksheet or a spelling workbook. Those are easy for him. My kindergartner may be doing something coloring related, something she doesn't need me for. And then when I'm done with that harder science activity with my fourth grader, he switches to something that's easy for him, like English, and I go do something more challenging with my second grader. Yesterday that was filling out a reading response sheet based on a chapter book he's reading. Or I do something with my kindergartner that requires my attention. Since my children attend a Christian school, we have Word of God to do and that requires me to sit down with them and have a devotion or read the Bible story. So as you can see, I structure things based on who needs my help the most.
Tip number seven is to insert breaks as needed. And these breaks may be because your child needs them or because you need them. After doing a few worksheets, I often send my second grader off to play because he's starting to get tired and that may be about 20 minutes of work and he needs a break. You know what? That's totally fine because that gives me five minutes to make sure my fourth grader's on track and has any questions answered for anything he's working on. My kindergartner also enjoys frequent breaks to go off and play and she's ready to go back to work when I call her.
I do not, repeat, do not, try to do two hours, frankly not even 45 minutes usually, of nonstop work with my younger kids. Their taking that break is good for them and it's also good for their little brother because we have a four year old at home who's not getting as much of Mommy's attention. He's used to having just me with him in the mornings when my kindergartner goes to half day kindergarten, and now he's sharing that time with everyone. I don't really think he's suffering though because he has so many more kids to play with him. So often my second grader will take a break and go play Candy Land or UNO Attack or some other game my four year old loves and that's awesome because it gives them more time together and it also breaks up their school day.
As I said earlier, my older kids are self starters. They really like doing online learning so I actually have to insist on breaks for them. So everyone has to stop working around 9:30 to have a snack and then right before lunch, even if they have a little bit of work left, everyone has to go outside for 30 minutes to get some fresh air and to give me a little bit of a quiet house. When you're thinking about breaks, I would encourage you to make them be screen free if possible. The exception would be if it's a day where it's too cold or nasty to go outside and your kids just need some exercise. There's a really fun website called gonoodle.com. They have a lot of brain break things, like silly songs you can dance to. My kids are often singing the songs from GoNoodle because their teachers use it with them at school. So check that out if you're looking for fun brain break ideas for your kids.
Let's go on to tip number eight. Remember that you are not alone in this. And I'm especially talking about when your child is struggling with something. You do not have to figure everything out. My seventh grader, for example, came to me recently with a hard math problem. The last time I did seventh grade math was about 30 years ago when I was in seventh grade. Frankly, I didn't remember how to do it. Now because I have a husband who is very gifted at those things, he just comes home from work and helps her. But if you don't have that situation and you don't have a spouse who can help with something that's extra hard for you, there are places you can go.
First of all, go to your child's teacher. Trust me, they do not like the school closings any more than you do and they want to help. So hopefully you have an email address for your child's teacher. Some teachers even encourage you to call or text, so do that. They are not going on vacation during these school closings. They are at home just like you and they are ready and probably waiting for you to get in touch with them. So reach out and get some help.
There are also some really great online videos that are designed for children to teach them concepts that you may not be able to teach them or simply to supplement what you're teaching. So I'm going to give you two websites, which I'll link to in the show notes. One of them is called BrainPOP. And the cool thing about BrainPOP is they're offering free access for as long as the schools are closed. So go to brainpop.com and way up on the top you should see something that says click here to request free access. Go to that. That site is extremely well organized so that you can quickly find a video that will help teach a particular concept. Another website you can go to is free all the time I believe and that's called Kahn Academy. I think it's K-A-H-N. I'll link to that in the show notes as well. And Kahn Academy also has a lot of videos for teaching concepts. It's quite full and harder to find things, but it is another resource for you.
Tip number nine, use screens wisely. If there was ever a time that we could appreciate technology and the intrusion that it's made into our lives, it's now, right? I'm really thankful that my kids' teachers can email me. I'm glad my big kids can sit and log into Google Classroom and find the things they need and do their work without a lot of help from me. But it isn't healthy for our kids to spend all day on screens, even if they're learning. I don't know about you, but my kids get irritable when they're getting too much screen time. And whenever they have a fit, because I tell them screen time is done that's a big clue they're spending too much time on screens. So set guidelines around them.
At our house, the big kids really are using their Chromebooks pretty much all morning long, but the rule is the Chromebook is only for schoolwork. So in the afternoon, if they want to go on Amazon to look up something to spend their birthday money on, or they want to do their 15 minutes of screen time where they're allowed to watch parent approved YouTube videos, they may not do it on their Chromebook. The Chromebook is just for school. I have not added screen time to my children's lives, as in their bonus screen time. During the regular school year, they each get 15 minutes from Monday to Thursday total. All right. So one of those days they can spend 15 minutes watching YouTube or something. And then on the weekend they're each given 20 minutes. That's it.
Now keep in mind they have a lot of siblings and they watch each other's times, so it's really a lot more than 15 or 20 minutes, but I'm not adding to that during this special time because we're still having school. Right? This is not a vacation. And also it's not good for them or me frankly to have all that screen time, extra screen time, going on. All that said though, our kids are getting more screen time than normal because of our unique situation. And hopefully on Monday my husband and I are going to get a couple of Kindles in the mail, the kind that kids can use that don't have all the distractions of games and internet access so that we can let them read. My oldest especially, a 12 year old, is very much a bookworm and she is suffering because the libraries are closed and she's out of books. And even though typically I'd rather they read paper books, we're in a unique time and I do want them to be able to read books that they enjoy.
Let's go on to our last tip for today. Thanks for sticking with me. Tip number 10, look for the positive. And I want to be clear here, that is not something I do naturally. I admit I am typically a glass half empty kind of person. It's been that way my whole life. Some of my kids have inherited that from me. I've had to work at seeing the positive and I am not always good at it. And I know that for many, many people, possibly you, even if no one in your family is sick, this is a very bleak situation. You may be out of work. You may struggle with your mental health when you're in the house all the time with your kids. You may be parenting young children and desperately want to get out of the house, but have nowhere to go.
So please know, I don't want to minimize the very real challenges you may be facing. However, I have noticed a few positive things in the last week. I have to admit it actually felt really good to go to our family calendar and use a pen and draw line after line to mark things out for the rest of this month. Like you, our family is very busy and even though I try not to over schedule our kids, the fact that we have six of them means there are a lot of things going on. It's good for all of us, especially here in America where we tend to keep ourselves very busy, to take a few weeks or more to slow down and focus on the people right in our homes.
I also have to say that I appreciate the hour that I get back for not driving my children to and from school. So I drive them to school, come back, go pick up my kindergartner in the middle of the day, come back, pick up all the kids at the end of the day and come back. I appreciate that hour. It actually gives me more time to play games with my little kids and my big kids. It gives me more time to give focused attention to my big kids because I'm not rushing out the door to take a walk half an hour after they get home from school. During this time of forced togetherness, we get to spend more time together. That means more family meals, more family game and movie nights, more conversation.
So yes, things are hard, but I hope that these 10 tips will help you create a positive experience for your family as we face an uncertain future. I'd like to give you one more resource. If you're a Christian family, as mine is, I recommend checking out Discipleship Parenting, a weekly podcast for Christian parents who are raising the next generation to know their Savior. The hosts, a husband and wife team will help you stay focused on what matters most, especially during this challenging time.
Next week, I'll be back with more tips for the instant homeschooler because I know you have a lot more questions. Many of you emailed me saying, "What do I do when I'm working full time and I have little kids at home? How do I teach my students long distance while homeschooling my kids?" And so on. So I'll be here next week with more tips for you. For now, go ahead and head to the show notes to get all the links I mentioned in this episode. To go there, go to themeasuredmom.com/episode8. I'll talk to you soon.
+ Click to view entire transcript
- Click to collapse
Resources mentioned in this episode
Lose It! app
Write the Word journals from Cultivate
Brainpop
Kahn Academy
Discipleship Parenting podcast
Subscribe & review in iTunes
Are you subscribed to my podcast? If you���re not, I want to encourage you to do that today. I don���t want you to miss an episode!�� Click here to subscribe in iTunes!
Now if you have an extra minute, I would be really grateful if you left me a review over on iTunes , too. Those reviews help other people find my podcast, and they���re also fun for me to go in and read. Just click here to review. You’ll need to click to “Listen on Apple Podcasts” and “write a review.”�� Let me know what you appreciate about the podcast. Thank you!
There are many ways to listen …
Subscribe in iTunes
Subscribe in Spotify��
Subscribe in Stitcher
Looking for the entire podcast library?
Click here to see all episodes.
© 2020, Anna G. All rights reserved.
The post 10 Tips for instant homeschoolers appeared first on The Measured Mom.
March 22, 2020
What to do with your third grader when school is cancelled
Are you trying to figure out how to homeschool your third grader when you’re stuck at home due to school cancellations?
I’m here to help!

Do you suddenly find your third grader at home due to school cancellations?
Currently my five oldest kids are home due to (indefinite) school closings.
I’m a former teacher myself, but I never planned to homeschool.
Yet … here we are!
Here are some tips for teaching your third grader at home.
*Heads up: Most of my resources for third graders are inside my affordable online membership site, but I’ll only include free resources in this post.
How to teach your third grader
If you have assigned work from the teacher …
If you already know what your child needs to do – and you just need to��do it – here are some tips:
Keep your regular waking up/going to bed routine.
After your child has breakfast, move into “school time” as soon as possible.
Start with the work that requires the most patience from you and your child. Get that out of the way while you’re both fresh.
Recognize that homeschooling your third grader may take just 3-4 hours a day (probably less), and that’s perfectly fine. You are not failing your child if your school day is fast. Remember that much of a third grade teacher’s day involves managing a large group (I speak from experience here).
If you don’t have a lot of guidance from the school (or want to supplement) …
Reading
Review phonics skills as needed.
By this time, most children are fluent with multi-syllable words. However, here are some basic resources for one-syllable words if your child needs extra practice.
Here’s a giant post with over 50 free printables for teaching silent e words.
Here are some freebies for words with vowel teams.
It’s important that your child can decode longer words with ease.
Check out these strategies for reading longer words from This Reading Mama.
This Reading Mama has these great activities for working on prefixes and suffixes .
Teach your child about the six syllable types. This Reading Mama has a post for that, too.
Practice sight words if necessary.
Most third graders don’t need a lot of sight word practice, but if your child struggles be sure to ask his/her teacher for a list. Then use my free editable sight word games to type in the words you want to practice. Remember to practice just a few at a time, and always mix in words your child already knows.
Schedule time for your child to read on his/her own.
Make sure your child sits and reads for at least 20 minutes a day.
Unfortunately, it may be difficult to get your hands on books right now since libraries are closed. But a great��(usually for a cost, but currently FREE) resource for books to read online is Epic.
Focus on reading comprehension.
After your child reads a book, ask about it. Use the words��who, what, when, where, why,��and��how.
Does your child struggle to remember what s/he reads? Check out these tips.
If you’re looking at no school for more than two weeks, teach your child reading comprehension strategies. This Reading Mama and I put together a series about these, and it’s mostly written for parents. You can do it! You don’t have to teach all of them; just pick a few to focus on. Learn more here.
Grammar
Grammar concepts are becoming a big focus now, and you don’t want your child to forget what s/he has learned.
While most of my grammar printables are in the membership site, here are some freebies from mine and other sites.
Print and refer to these parts of speech posters from This Reading Mama.
Try these parts of speech word sorts from This Reading Mama. I love that they focus on nouns, verbs, adjectives, and adverbs.
Don’t forget to teach about pronouns�� (my only printables for pronouns are inside the membership ).
Third graders should know when to use capital letters, but they often don’t! This game teaches capitalization rules.
Writing
Creative writing is important, but I’ll be honest … teaching writing isn’t easy (even for experienced teachers). This is because writing isn’t easy. Teaching it isn’t supposed to be either.
Don’t give up, though!
If you’re looking at an extended homeschool situation (more than two weeks), I recommend writing with your child a few times a week; schedule 20-30 minutes each time.
Make sure there’s an audience for the writing. Don’t have your child write just because you say so. Here are some ideas for audience:
grandparents (share it on FaceTime or over the phone)
another parent
a sibling
a friend or neighbor (email it)
someone in a nursing home (mail it)
Consider different genres of writing.
a personal narrative (writing about his/her own life)
writing a nonfiction piece about something he/she knows about, like a particular animal
a how-to piece (how to make a sandwich, etc.)
a letter
a free-verse poem
MODEL first. If you ask your child to write a letter, have him/her watch you do that first. Yes, even third graders need this. It will also help you remember that writing isn’t easy and will give you empathy when your child is stuck (which will happen, I promise).
Writing to a prompt is okay once in a while, but it’s best to have your child come up with his or her own topics. This post will help.
As your child writes, sit down and do your own writing. It can help your child stay on task and reminds him/her that you’re in this together.
Don’t insist that the work is perfect. After your child completes a piece (or complains that this is too hard wants your help), compliment your child on one positive thing in the writing. (Yes, this may be hard, but you can do it!) Then pick just one thing to focus on improving.
��It’s helpful to keep track of spellings using a personal spelling dictionary. Download a free spelling dictionary here.
Share it! Read it to a parent or grandparent (use FaceTime or the phone if needed). Email it or snail mail it.
Math
I could spend a whole post sharing just third grade math topics, but I’m highlighting the biggest concepts below.
Review addition and subtraction with numbers up to 1000.
Here are some sites with worksheets.
Math-Aids
Math Goodies
Super Teacher Worksheets requires a fee, but it does have free printables mixed in.
Help your child memorize multiplication and division facts.
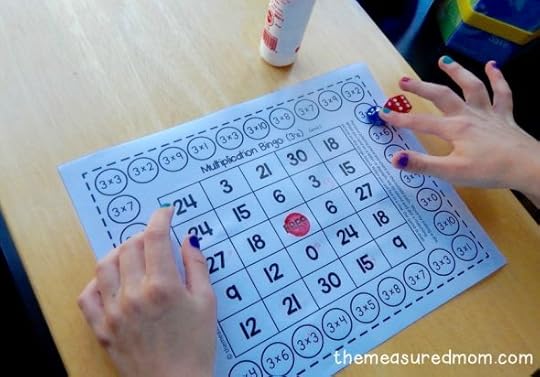
Free printable games for multiplication and division
Also practice multiplying one-digit numbers by multiples of 10. Use the worksheet sites I linked above.
Teach problem solving.
I have a growing collection of problem solving activities in the membership, but nothing on the free site. I recommend checking out Math Geek Mama and asking her which freebies on her site would be good for third grade.
Work on fractions.
Teaching the concept of fractions can be tough, but there are resources out there to help you. BrainPop usually charges a fee, but is currently free during the school closures. Request free access, and then check out the fractions videos here.
Teach kids how to see and name fractions on a number line with this freebie from Math Geek Mama .
Teach equivalent fractions with Math Geek Mama’s freebies.
BUMP! games
Matching games
Board game
Teach about measurement and data.
It’s hard to find free resources for interpreting data (I have a big set of graph worksheets inside the membership, but not the free site). Try searching on Pinterest.
Focus on area and perimeter.
Try these free task cards from The Curriculum Corner.
Here’s a set of challenging area task cards from Top Nop Teaching on TPT.
You can’t go wrong with Laura Candler’s resources. She has a free area and perimeter game on TPT.
Social Studies and Science
These concepts are important, but your child is not going to be forever behind in school if don’t teach them for a few weeks (or even months) in third grade.
Watch a few YouTube videos and have conversations with your child about the world. It’s okay if you don’t spend much time on these.
I promise.
How should you fill the rest of the day?
Those are the academic skills I recommend working on, but you have a whole day ahead of you. What else should you do?
Read, read, read to your child. Do this as often as possible – for as long as both you and your child are enjoying it. Yes, even kids who can read on their own should be read to. Here are some book ideas for family read alouds.��
Need books to read but you can’t get to the library?
Get a free one month trial of the app Skybrary (with LeVar Burton from Reading Rainbow) – we used this in the past and loved it.
Get a free one month trial of Epic! , a great digital library for ages 12 and under. We use it and love it.
Get moving. If possible, send your child outside.��As often as possible.��
Pull out things that will keep your child busy.��
Do simple art projects. My favorite site for easy, fun crafts to do at home is I Heart Crafty Things . Have fun browsing her site! I also recommend creating small cards/crafts that you can mail to family and friends.
If you can, FaceTime grandparents and other relatives.
Cook together. Here are a bunch of fun ideas.
Do simple science projects, like these.
Encourage your child to play with building toys –�� Legos , Magna Tiles , etc.
Play board games. Good games for third graders include Sorry , Quixx , Monopoly, Phase 10 , Chinese Checkers , UNO , Mancala , Qwirkle , and Penny Drop .
Find some free drawing tutorials on YouTube. We absolutely love Art for Kids Hub and use it��all the time.�� Check out the channel here.
Give them screen time. Yes, I said it. I recommend planning this for specific times in the day – as late in the day as possible so you save it for when you really need it. Here’s a list of free education sites for kids.

I hope this helps as you plan for several weeks at home. Please feel free to reach out to me through my email: anna(at)themeasuredmom(dot)com.
My inbox is bursting these days, but I do my best to answer every message.
Hugs to you!
Anna
Check out the full series here
© 2020, Anna G. All rights reserved.
The post What to do with your third grader when school is cancelled appeared first on The Measured Mom.
What to do with your third grade when school is cancelled
Are you trying to figure out how to homeschool your third grader when you’re stuck at home due to school cancellations?
I’m here to help!
Do you suddenly find your third grader at home due to school cancellations?
Currently my five oldest kids are home due to (indefinite) school closings because of COVID-19.
I’m a former teacher myself, but I never planned to homeschool.
Yet … here we are!
Here are some tips for teaching your third grader at home.
*Heads up: Most of my resources for third graders are inside my affordable online membership site, but I’ll only include free resources in this post.
How to teach your third grader
If you have assigned work from the teacher …
If you already know what your child needs to do – and you just need to��do it – here are some tips:
Keep your regular waking up/going to bed routine.
After your child has breakfast, move into “school time” as soon as possible.
Start with the work that requires the most patience from you and your child. Get that out of the way while you’re both fresh.
Recognize that homeschooling your third grader may take just 3-4 hours a day (probably less), and that’s perfectly fine. You are not failing your child if your school day is fast. Remember that much of a third grade teacher’s day involves managing a large group (I speak from experience here).
If you don’t have a lot of guidance from the school (or want to supplement) …
Reading
Review phonics skills as needed.
By this time, most children are fluent with multi-syllable words. However, here are some basic resources for one-syllable words if your child needs extra practice.
Here’s a giant post with over 50 free printables for teaching silent e words.
Here are some freebies for words with vowel teams.
It’s important that your child can decode longer words with ease.
Check out these strategies for reading longer words from This Reading Mama.
This Reading Mama has these great activities for working on prefixes and suffixes .
Teach your child about the six syllable types. This Reading Mama has a post for that, too.
Practice sight words if necessary.
Most third graders don’t need a lot of sight word practice, but if your child struggles be sure to ask his/her teacher for a list. Then use my free editable sight word games to type in the words you want to practice. Remember to practice just a few at a time, and always mix in words your child already knows.
Schedule time for your child to read on his/her own.
Make sure your child sits and reads for at least 20 minutes a day.
Unfortunately, it may be difficult to get your hands on books right now since libraries are closed. But a great��(usually for a cost, but currently FREE) resource for books to read online is Epic.
Focus on reading comprehension.
After your child reads a book, ask about it. Use the words��who, what, when, where, why,��and��how.
Does your child struggle to remember what s/he reads? Check out these tips.
If you’re looking at no school for more than two weeks, teach your child reading comprehension strategies. This Reading Mama and I put together a series about these, and it’s mostly written for parents. You can do it! You don’t have to teach all of them; just pick a few to focus on. Learn more here.
Grammar
Grammar concepts are becoming a big focus now, and you don’t want your child to forget what s/he has learned.
While most of my grammar printables are in the membership site, here are some freebies from mine and other sites.
Print and refer to these parts of speech posters from This Reading Mama.
Try these parts of speech word sorts from This Reading Mama. I love that they focus on nouns, verbs, adjectives, and adverbs.
Don’t forget to teach about pronouns�� (my only printables for pronouns are inside the membership ).
Third graders should know when to use capital letters, but they often don’t! This game teaches capitalization rules.
Writing
Creative writing is important, but I’ll be honest … teaching writing isn’t easy (even for experienced teachers). This is because writing isn’t easy. Teaching it isn’t supposed to be either.
Don’t give up, though!
If you’re looking at an extended homeschool situation (more than two weeks), I recommend writing with your child a few times a week; schedule 20-30 minutes each time.
Make sure there’s an audience for the writing. Don’t have your child write just because you say so. Here are some ideas for audience:
grandparents (share it on FaceTime or over the phone)
another parent
a sibling
a friend or neighbor (email it)
someone in a nursing home (mail it)
Consider different genres of writing.
a personal narrative (writing about his/her own life)
writing a nonfiction piece about something he/she knows about, like a particular animal
a how-to piece (how to make a sandwich, etc.)
a letter
a free-verse poem
MODEL first. If you ask your child to write a letter, have him/her watch you do that first. Yes, even third graders need this. It will also help you remember that writing isn’t easy and will give you empathy when your child is stuck (which will happen, I promise).
Writing to a prompt is okay once in a while, but it’s best to have your child come up with his or her own topics. This post will help.
As your child writes, sit down and do your own writing. It can help your child stay on task and reminds him/her that you’re in this together.
Don’t insist that the work is perfect. After your child completes a piece (or complains that this is too hard wants your help), compliment your child on one positive thing in the writing. (Yes, this may be hard, but you can do it!) Then pick just one thing to focus on improving.
��It’s helpful to keep track of spellings using a personal spelling dictionary. Download a free spelling dictionary here.
Share it! Read it to a parent or grandparent (use FaceTime or the phone if needed). Email it or snail mail it.
Math
I could spend a whole post sharing just third grade math topics, but I’m highlighting the biggest concepts below.
Review addition and subtraction with numbers up to 1000.
Here are some sites with worksheets.
Math-Aids
Math Goodies
Super Teacher Worksheets requires a fee, but it does have free printables mixed in.
Help your child memorize multiplication and division facts.
Free printable games for multiplication and division
Also practice multiplying one-digit numbers by multiples of 10. Use the worksheet sites I linked above.
Teach problem solving.
I have a growing collection of problem solving activities in the membership, but nothing on the free site. I recommend checking out Math Geek Mama and asking her which freebies on her site would be good for third grade.
Work on fractions.
Teaching the concept of fractions can be tough, but there are resources out there to help you. BrainPop usually charges a fee, but is currently free during the school closures. Request free access, and then check out the fractions videos here.
Teach kids how to see and name fractions on a number line with this freebie from Math Geek Mama .
Teach equivalent fractions with Math Geek Mama’s freebies.
BUMP! games
Matching games
Board game
Teach about measurement and data.
It’s hard to find free resources for interpreting data (I have a big set of graph worksheets inside the membership, but not the free site). Try searching on Pinterest.
Focus on area and perimeter.
Try these free task cards from The Curriculum Corner.
Here’s a set of challenging area task cards from Top Nop Teaching on TPT.
You can’t go wrong with Laura Candler’s resources. She has a free area and perimeter game on TPT.
Social Studies and Science
These concepts are important, but your child is not going to be forever behind in school if don’t teach them for a few weeks (or even months) in third grade.
Watch a few YouTube videos and have conversations with your child about the world. It’s okay if you don’t spend much time on these.
I promise.
How should you fill the rest of the day?
Those are the academic skills I recommend working on, but you have a whole day ahead of you. What else should you do?
Read, read, read to your child. Do this as often as possible – for as long as both you and your child are enjoying it. Yes, even kids who can read on their own should be read to. Here are some book ideas for family read alouds.��
Need books to read but you can’t get to the library?
Get a free one month trial of the app Skybrary (with LeVar Burton from Reading Rainbow) – we used this in the past and loved it.
Get a free one month trial of Epic! , a great digital library for ages 12 and under. We use it and love it.
Get moving. If possible, send your child outside.��As often as possible.��
Pull out things that will keep your child busy.��
Do simple art projects. My favorite site for easy, fun crafts to do at home is I Heart Crafty Things . Have fun browsing her site! I also recommend creating small cards/crafts that you can mail to family and friends.
If you can, FaceTime grandparents and other relatives.
Cook together. Here are a bunch of fun ideas.
Do simple science projects, like these.
Encourage your child to play with building toys –�� Legos , Magna Tiles , etc.
Play board games. Good games for third graders include Sorry , Quixx , Monopoly, Phase 10 , Chinese Checkers , UNO , Mancala , Qwirkle , and Penny Drop .
Find some free drawing tutorials on YouTube. We absolutely love Art for Kids Hub and use it��all the time.�� Check out the channel here.
Give them screen time. Yes, I said it. I recommend planning this for specific times in the day – as late in the day as possible so you save it for when you really need it. Here’s a list of free education sites for kids.
I hope this helps as you plan for several weeks at home. Please feel free to reach out to me through my email: anna(at)themeasuredmom(dot)com.
My inbox is bursting these days, but I do my best to answer every message.
Hugs to you!
Anna
Check out the full series here
© 2020, Anna G. All rights reserved.
The post What to do with your third grade when school is cancelled appeared first on The Measured Mom.
What to do with your second grader when school is cancelled
Are you trying to figure out how to homeschool your second grader when you’re stuck at home due to school cancellations?
I’m here to help!
Do you find yourself suddenly homeschooling?
Even though I’m a former teacher and now have a houseful of kids age 4-12, I never planned on homeschooling.
But here we are … homeschooling for at least two weeks, and probably longer.
As we seek to stop the spread of COVID-19, many of us find ourselves home with our kids without anywhere to go.
Here are some tips for teaching your second grader at home.
*Only free resources are included in this post, but you are always welcome to check out my shop and online membership.
How to teach your second grader
If you have assigned work from the teacher …
If you already know what your child needs to do – and you just need to��do it – here are some tips:
Keep your regular waking up/going to bed routine.
After your child has breakfast, move into “school time” as soon as possible.
Start with the work that requires the most patience from you and your child. Get that out of the way while you’re both fresh.
Recognize that homeschooling your second grader may take just 2-3 hours (max) a day, and that’s perfectly fine. You are not failing your child if your school day is fast. Remember that much of a second grade teacher’s day involves managing a large group (I speak from experience here).
If you don’t have a lot of guidance from the school (or want to supplement) …
Reading
Second graders are all over the map when it comes to reading ability, so you’ll want to ask your child’s teacher what s/he needs to work on. Let’s start with some phonics skills.
Review silent e words.
Start with these games that help children hear long vowel sounds in words.
Here are some fold and read cards.��
Try a silent e four in a row game.
Need more? Here’s a giant post with over 50 free printables for teaching silent e words.
Move on to vowel teams.
Vowel teams include long vowel digraphs – such as ee and oa,��as well as diphthongs��oi, oy, aw, au.
Most of what I have for these are in the membership, but here are the freebies from the main site.
Practice reading multi-syllable words.
I have quite a few of these on the membership site but not much here on the free site. You might want to check out This Reading Mama .
Practice sight words.
I would ask your child’s teacher for�� a list of sight words to practice. Then use my free editable sight word games to type in the words you want to practice. Remember to practice just a few at a time, and always mix in words your child already knows.
Schedule time for your child to read on his/her own.
All these phonics skills don’t do much good if we don’t give our learners chances to apply them as they read real books.
Of course the best place to get books for your child is the library – but your library may be closed indefinitely (as ours is).
If you are able to print books for your child to read, I HIGHLY recommend Reading A to Z. I have a subscription to this website so I can print books for my youngest readers (even though I don’t homeschool – or at least I don’t usually homeschool).
Great news! Reading A to Z is offering an extended FREE trial. Seriously. Get on over there and print some books for your child, or find some your child can read right on the computer. Not sure which books are for your child? Email me (anna(at)themeasuredmom(dot)com, and I’ll try to point you in the right direction.
Another great (usually for a cost, but currently FREE) resource for books to read online is Epic.
Focus on reading comprehension.
After your child reads a book, ask about it. Use the words��who, what, when, where, why,��and��how.
Does your child struggle to remember what s/he reads? Check out these tips.
Grammar
This isn’t a huge focus in second grade, but it will become a big one in third grade. It’s important to learn some basic concepts now.
While most of my grammar printables are in the membership site, here are some freebies from the main site.
Learn about nouns. Here’s a free game.
Identify verbs. Here’s a game .
Recognize when to use capital letters. This game teaches capitalization rules.
Handwriting
This is something that can quickly fall apart without regular practice. It’s a good idea to have your child fill out a short handwriting page once or twice a week.
Free level 4 handwriting pages
Writing
Creative writing is important, but I’ll be honest … teaching writing isn’t easy (even for experienced teachers). This is because writing isn’t easy. Teaching it isn’t supposed to be either.
Don’t give up, though!
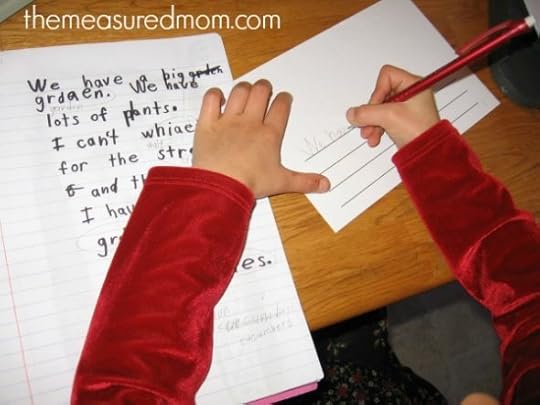
If you’re looking at an extended homeschool situation (more than two weeks), I recommend writing with your child a few times a week; schedule 20-30 minutes each time.
Make sure there’s an audience for the writing. Don’t have your child write just because you say so. Here are some ideas for audience:
grandparents (share it on FaceTime or over the phone)
another parent
a sibling
a friend or neighbor (email it)
someone in a nursing home (mail it)
Consider different genres of writing.
a personal narrative (writing about his/her own life)
writing a nonfiction piece about something he/she knows about, like a particular animal
a how-to piece (how to make a sandwich, etc.)
a letter
a free-verse poem
MODEL first. If you ask your child to write a letter, have him/her watch you do that first.
Writing to a prompt is okay once in a while, but it’s best to have your child come up with his or her own topics. This post will help.
As your child writes, sit down and do your own writing. Helps him realize you’re in this together, and reminds you that writing is challenging – gives you more empathy.
Don’t insist that the work is perfect. Your child needs to spell his/her best. “Invented spelling (also called “developmental” spelling) is necessary for this age. Follow these tips for using it well.
It’s also true that second graders are ready to spell quite a few words correctly, and we want them to spell the words they know without mistakes. It’s helpful to keep track of spellings using a personal spelling dictionary. Download a free spelling dictionary here.
Share it! Read it to a parent or grandparent (use FaceTime or the phone if needed). Email it or snail mail it.
Math
Help your child memorize addition and subtraction facts within 20.
Free addition games
Free subtraction games
Pull out some flash cards, and play 15 in a Row. It works for both addition and subtraction.
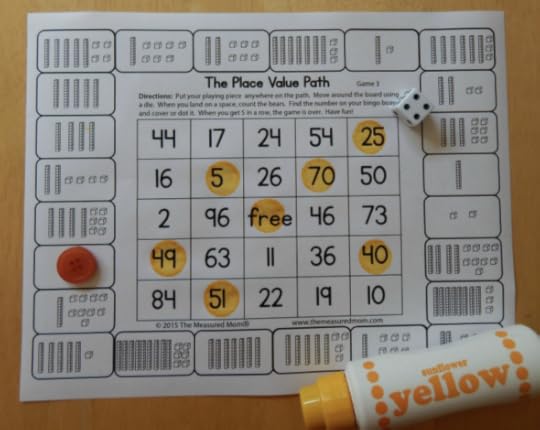
Teach place value (hundreds, tens and ones) with 2 and 3-digit numbers.
Free place value games
Along with this, teach your child to mentally add and subtract 10 or 100 from a number.
Show your child how to add two-digit numbers (with and without regrouping).
I have free resources for this inside the membership, but not on the free site.
Practice telling time to the nearest 5 minutes.
Free telling time games
Practice counting money with quarters, dimes, nickels and pennies.
Free counting money games
Teach basic fractions.
I have nothing on the free site, but Life Over C’s has this free fraction pack.
Measure things around your house.
I recommend doing this with nonstandard units at first. How many pennies long is your pencil? How many dominoes long is this piece of paper?
It’s a good idea to estimate first. “How many pennies long do you��think your shoe will be? Let’s check it and see if you were right!”)
When your child is ready,�� pull out a ruler and measure in inches or centimeters.
Review the concept of 3-D shapes.
Go on a hunt around your house. Can you find examples of the common 3-D shapes? (cylinder, cone, cube, triangular prism, rectangular prism, and sphere)
Try these simple one-player games.
Play these 2-player 3-D shape games.
Social Studies and Science
I don’t want to say these aren’t important, but for a second grader they are at the bottom of the list. Your child can learn social studies and science concepts through real life. Don’t stress about these.
Watch a few YouTube videos and have conversations with your child about the world. Seriously, your child will not get behind if you don’t focus on these in second grade.
How should you fill the rest of the day?
Those are the academic skills I recommend working on, but you have a whole day ahead of you. What else should you do?
Read, read, read to your child. Do this as often as possible – for as long as both you and your child are enjoying it. Yes, even kids who can read on their own should be read to. Here are some book ideas for family read alouds.��
Need books to read but you can’t get to the library?
Get a free one month trial of the app Skybrary (with LeVar Burton from Reading Rainbow) – we used this in the past and loved it.
Get a free one month trial of Epic! , a great digital library for ages 12 and under. We use it and love it.
Get moving. If possible, send your child outside.��As often as possible.��
Pull out things that will keep your child busy.��
Make homemade play dough , or buy it online.
Do simple art projects. My favorite site for easy, fun crafts to do at home is I Heart Crafty Things . Have fun browsing her site! I also recommend creating small cards/crafts that you can mail to family and friends.
If you can, FaceTime grandparents and other relatives.
Cook together. Here are a bunch of fun ideas.
Do simple science projects, like these.
Encourage your child to play with building toys –�� Legos , Magna Tiles , etc.
Play board games. Good games for second graders include Sorry , Phase 10 , Chinese Checkers , UNO , Mancala , Qwirkle , and Penny Drop . My second graders is crazy about Monopoly .
Find some free drawing tutorials on YouTube. We absolutely love Art for Kids Hub and use it��all the time.�� Here’s a playlist of the easier drawing projects.
Give them screen time. Yes, I said it. I recommend planning this for specific times in the day – as late in the day as possible so you save it for when you really need it. Here’s a list of free education sites for kids.
I hope this helps as you plan for several weeks at home. Please feel free to reach out to me through my email: anna(at)themeasuredmom(dot)com.
My inbox is bursting these days, but I do my best to answer every message.
Hugs to you!
Anna
Check out the full series here
© 2020, Anna G. All rights reserved.
The post What to do with your second grader when school is cancelled appeared first on The Measured Mom.
What to do with your first grader when school is cancelled
Are you trying to figure out how to homeschool your first grader when you’re stuck at home due to school cancellations?
I’m here to help!
Our family is slowly adjusting to our new “normal” … Homeschooling.
Even though I’m a former teacher and now have a houseful of kids age 4-12, I never planned on homeschooling.
But here we are.
As we seek to stop the spread of COVID-19, many of us find ourselves home with our kids without anywhere to go.
Here are some tips for teaching your first grader at home.
*Only free resources are included in this post, but you are always welcome to check out my shop and online membership.
How to teach your first grader
If you have assigned work from the teacher …
If you already know what your child needs to do – and you just need to��do it – here are some tips:
Keep your regular waking up/going to bed routine.
After your child has breakfast, move into “school time” as soon as possible.
Start with the work that requires the most patience from you and your child. Get that out of the way while you’re both fresh.
Recognize that homeschooling your first grader may take just two hours (max) a day, and that’s perfectly fine. You are not failing your child if your school day is fast. Remember that much of a first grade teacher’s day involves managing a large group (I speak from experience here).
If you don’t have a lot of guidance from the school (or want to supplement) …
Reading
First graders are all over the map when it comes to reading ability, so you’ll want to ask your child’s teacher what s/he needs to work on. Let’s start with some phonics skills.
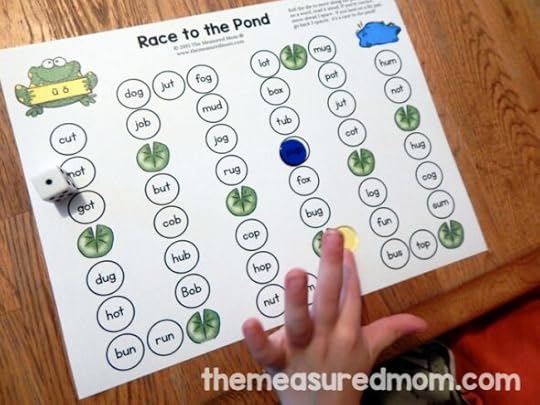
Make sure your child is fluent with CVC words.
CVC stands for consonant-vowel-consonant. These are the first words we teach kids to sound out (words like��cat and��bug), and I have loads of freebies on my site. Check them out below:
Try this word building mat with cards.
Print and use these CVC word board games.
Check out all my printables for short vowel words … including simple games and worksheets. Start here and scroll to see them all.
Practice words with beginning digraphs and blends.
If your child is fluent with CVC words, it’s time to move on to the next step.
A digraph is two letters that make one sound (sh, ch, th, wh, kn, wr). A blend is two letters that appear together but make their own sounds (fl, st, etc.).
Here are some single player digraph games.
Here are some 2-player games for digraphs and blends .
More advanced learners can play my fast and fluent games for words with beginning blends.
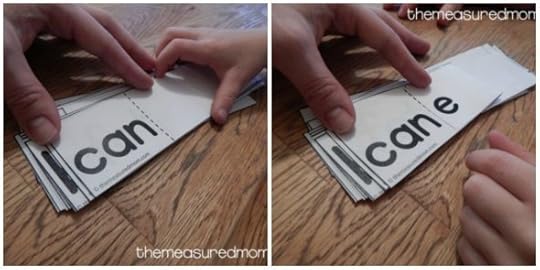
Next come silent e words.
Start with these games that help children hear long vowel sounds in words.
Here are some fold and read cards.��
Try a silent e four in a row game.
Need more? Here’s a giant post with over 50 free printables for teaching silent e words.
Move on to vowel teams.
Vowel teams include long vowel digraphs – such as ee and oa,��as well as diphthongs��oi, oy, aw, au.
Most of what I have for these are in the membership, but here are the freebies from the main site.
Is your child ready to read multi-syllable words?
I have quite a few of these on the membership site but not much here on the free site. You might want to check out This Reading Mama .
Practice sight words.
I would ask your child’s teacher for�� a list of sight words to practice. Then use my free editable sight word games to type in the words you want to practice. Remember to practice just a few at a time, and always mix in words your child already knows.
Schedule time for your child to read on his/her own.
All these phonics skills don’t do much good if we don’t give our learners chances to apply them as they read real books.
This may be difficult if your library is closed (as ours is). If it’s not, however, or you’re not opposed to spending some money, check out this post with a list of books for different levels.
If you are able to print books for your child to read, I HIGHLY recommend Reading A to Z. I have a subscription to this website so I can print books for my youngest readers (even though I don’t homeschool – or at least I don’t usually homeschool).
Great news! Reading A to Z is offering an extended FREE trial. Seriously. Get on over there and print some books for your child. Not sure which books are for your child? Email me (anna(at)themeasuredmom(dot)com, and I’ll try to point you in the right direction.
Handwriting
This is something that can quickly fall apart without daily practice. It’s a good idea to have your child fill out a short handwriting page several times a week.
Free level 4 handwriting pages
Writing
Creative writing is important, but I’ll be honest … teaching writing isn’t easy (even for experienced teachers). This is because writing isn’t easy. Teaching it isn’t supposed to be either.
Don’t give up, though!
If you’re looking at an extended homeschool situation (more than two weeks), I recommend writing with your child a few times a week; schedule 20-30 minutes each time.
Make sure there’s an audience for the writing. Don’t have your child write just because you say so. Here are some ideas for audience:
grandparents (share it on FaceTime or over the phone)
another parent
a sibling
a friend or neighbor (email it)
someone in a nursing home (mail it)
Consider different genres of writing.
a personal narrative (writing about his/her own life)
writing a nonfiction piece about something he/she knows about, like a particular animal
a how-to piece (how to make a sandwich, etc.)
a letter
a free-verse poem
MODEL first. If you ask your child to write a letter, have him/her watch you do that first.
Writing to a prompt is okay once in a while, but it’s best to have your child come up with his or her own topics. This post will help.
As your child writes, sit down and do your own writing. Helps him realize you’re in this together, and reminds you that writing is challenging – gives you more empathy.
Don’t insist that the work is perfect. Your child needs to spell his/her best. “Invented spelling (also called “developmental” spelling) is necessary for this age. Follow these tips for using it well.
Share it! Read it to a parent or grandparent (use FaceTime or the phone if needed). Email it or snail mail it.
Math
Teach your child to add and subtract within 20.
Free addition games
Free subtraction games
Help your child add 10 and subtract 10.
A simple way to do this is print a free hundreds chart. Play I Spy… (“Can you find the 25?”) Then have your child add or subtract 10 from that number. (“What is 25 plus 10?”)
Teach place value (tens and ones) with 2-digit numbers.
Free place value games
Show your child how to add two-digit numbers (without regrouping).
I have free resources for this inside the membership, but not on the free site.
Practice telling time to hour and half hour.
Free telling time games
Teach basic fractions.
I have nothing on the free site, but Life Over C’s has this free fraction pack.
Measure things around your house.
I recommend doing this with nonstandard units at first. How many pennies long is your pencil? How many dominoes long is this piece of paper?
It’s a good idea to estimate first. “How many pennies long do you��think your shoe will be? Let’s check it and see if you were right!”)
If your child is ready, you can pull out a ruler and measure in inches or centimeters.
Practice identifying 3-D shapes.
Go on a hunt around your house. Can you find examples of the common 3-D shapes? (cylinder, cone, cube, triangular prism, rectangular prism, and sphere)

Try these simple one-player games.
Play these 2-player 3-D shape games.
Social Studies and Science
I don’t want to say these aren’t important, but for a first grader they are at the bottom of the list. Your child can learn social studies and science concepts through real life. Don’t stress about these.
Watch a few YouTube videos and have conversations with your child about the world. Seriously, your child will not get behind if you don’t focus on these in first grade.
How should you fill the rest of the day?
Those are the academic skills I recommend working on, but you have a whole day ahead of you. What else should you do?
Read, read, read to your child. Do this as often as possible – for as long as both you and your child are enjoying it. Normally I’d tell you to choose to check out my book lists and head to your library. I realize that may not be an option now. Do the best with what you have.�� Be sure to talk about books as you read. Here are my tips for doing that.
Need books to read but you can’t get to the library?
Get a free one month trial of the app Skybrary (with LeVar Burton from Reading Rainbow) – we used this in the past and loved it.
Get a free one month trial of Epic! , a great digital library for ages 12 and under. We use it and love it.
Get moving. If possible, send your child outside.��As often as possible.��
Pull out things that will keep your child busy.��
Make homemade play dough , or buy it online.
Order kinetic sand . This stuff keeps my kids busy for 30 minutes at a time – or more! Plus, it’s easy to clean up. Pull out cups and bowls, and your child can cook and make sand castles right at the kitchen table.
Do simple art projects. My favorite site for easy, fun crafts to do at home is I Heart Crafty Things . Have fun browsing her site! I also recommend creating small cards/crafts that you can mail to family and friends.
If you can, FaceTime grandparents and other relatives.
Cook together. Here are a bunch of fun ideas.
Do simple science projects, like these.
Encourage your child to play with building toys –�� Legos , Magna Tiles , etc.
Play board games. Good games for first graders include UNO , Mancala , Qwirkle , and Penny Drop .
Find some free drawing tutorials on YouTube. We absolutely love Art for Kids Hub and use it��all the time.�� Here’s a playlist of the easier drawing projects.
Give them screen time. Yes, I said it. I recommend planning this for specific times in the day – as late in the day as possible so you save it for when you really need it. Here’s a list of free education sites for kids.
I hope this helps as you plan for several weeks at home. Please feel free to reach out to me through my email: anna(at)themeasuredmom(dot)com.
My inbox is bursting these days, but I do my best to answer every message.
Hugs to you!
Anna
Check out the full series here
© 2020, Anna G. All rights reserved.
The post What to do with your first grader when school is cancelled appeared first on The Measured Mom.
Anna Geiger's Blog

- Anna Geiger's profile
- 1 follower

