Rachel R. Smith's Blog, page 15
December 10, 2015
I Have S’mores on my Feet! (And I’m loving every minute of it)

Hubby just gave me an early Christmas present–heated s’mores slippers. The happy expressions on their graham cracker faces are a perfect representation of how my feet feel right now. Ten toasty warm little toes. The best part is that they are USB powered. Now when I write, all I have to do is slip them on and plug them in to my laptop. Happy feet, indeed.


December 9, 2015
Beware of the Spirit that Guards the Book in the Cave
The time has finally come! This week, I’m writing the part of my story that I’ve been looking forward to the most. This particular section of the plot was one of the very first scenes to come to me, which means it has been swirling around in my mind for well over ten years now. And it’s all inspired by that phrase up there (points up to title of post).
By now, you may have guessed that one of the settings in this part of the story is a cave. I love caves. I suppose that affection naturally goes hand in hand with my love of gems and minerals. Hubby and I even went to Chattanooga, TN for our honeymoon to tour the various caves in that area (why, yes, we did “See Rock City!”). Most people go to the beach, we went underground. ^_^
Earlier this year, I visited Ohio Caverns, both for fun and as a form of field research. I made a post about it when I first started this blog (before I knew how tags worked), so I thought now would be a good opportunity to revive it and re-share.
So without further ado: Originally posted June 2, 2015.
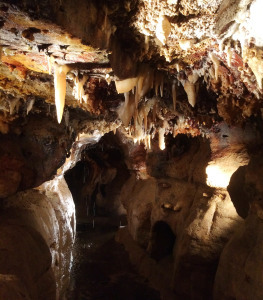
Today I visited Ohio Caverns, partially because I love visiting caves and partially as field research to gather information for part of Book 3 (hint, hint!). Ohio Caverns are limestone caves known for both the variety of stone formations present and the particularly brilliant colors of the mineral deposits. The formations within the cave are primarily composed of calcite, but there are iron oxide and manganese dioxide-based features as well. We went on both the Historic tour and the Natural Wonders tour. Each tour highlighted different features of the cave.
The Historic tour went through the first part of the cave to be discovered and opened for exploration in 1897. Unfortunately, many of the crystal formations were taken as souvenirs by the early visitors, but the tour was still enlightening. The lighting system used in this section of the cave is a replica of those used there in the 1920s. It was very dim, lacking the staged spotlights used in many other caves. Admittedly, it wasn’t so great for photography so I don’t have any good pictures from that part of the cave. But, I thought that it presented a great impression of how it must feel to actually explore a new cave. Our guide, Allison, had a great sense of humor which made the tour even more interesting! If you ever visit Ohio Caverns, try to get her as your guide and be sure to laugh at her jokes! ;)
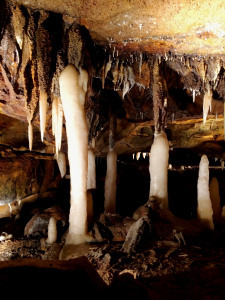
 The Crystal King
The second tour we took was the Natural Wonders tour. There was ample lighting present which served to highlight the variety of colors within the formations. The calcite stalactites and stalagmites were the brightest white that I’ve seen in any of the caves I’ve visited so far. One, named the Crystal King (see rig, was particularly impressive. The Crystal King is bright white and is said to be one of the largest and most perfectly formed stalactites to be discovered. Ohio Caverns are also the only ones in North America to contain “dual formations”. Dual formations occur when one mineral formation grows on another formation that has a different chemical composition. Those in Ohio Caverns are iron oxide formations that calcite has grown on.
Ultimately, the visit was enjoyable and gave me plenty of good material to draw from!
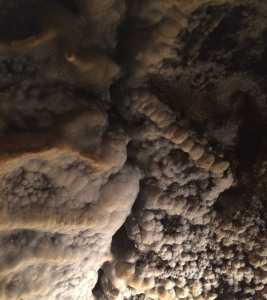 Calcite formation on ceiling
 Dual formation columns of iron oxide (top, red-brown color) and calcite (bottom, white)
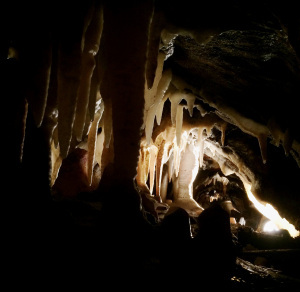
 Water-filled passage
 Calcite formations
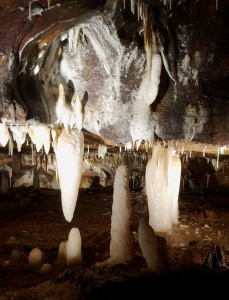 Calcite formations
 Calcite stalagtites on ceiling
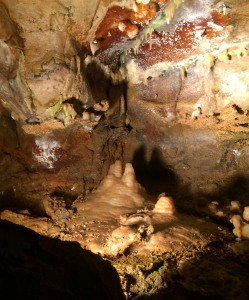 Calcite stalagmite and example of colored deposits on ceiling


December 6, 2015
Nail Polish Sunday #2–This time with crystals!

It’s time for the biweekly nail polish Sunday once again! Since it’s a festive season, it’s a perfect time for nails decorated with crystals. Because everything is better with Swarovski crystals. (Except food, that would be too crunchy.)
A manicure with crystals looks fancy and certainly seems like it would be expensive, but if you can do it yourself it’s significantly cheaper. Once you have the supplies, they last for years worth of manicures.
Here are the supplies needed:
Tweezers
Nail polish for basic manicure
Swarovski crystals in 7ss and 5ss size. The best price I found was from this seller on Amazon–I got them in a variety of colors in sizes 7ss and 5ss in 2010 and still haven’t run out. A quick note on size: the lower the number the smaller the diameter. Sizes 7ss and 5ss seem to work best for nail art.
Crystal flipping tray (on Amazon) This isn’t strictly necessary, but it helps a lot by making it easy to turn the crystals face up. All you have to do is pour the crystals in and gently shake the tray side to side. When the crystals hit the walls, they flip right-side up like magic.
Silver micro beads. You can buy them specifically packaged for nail art, or you can find them for just a couple of dollars at your local art supply store. They can usually be found in the same aisle as the bottles of glitter.
Flatback faux pearls. I got mine from Sephora. They also last virtually forever. Ciate mini paint pot with pearls
How to:
Step 1: Apply nail color of choice as you normally would, but stop before applying top coat. In this case, I’m using a pale sky blue from Zoya called Blu.
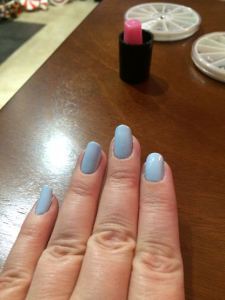
Step 2: Apply each crystal, one by one.
 Start by putting a small drop of top coat onto the nail in the location you want to put the first crystal.
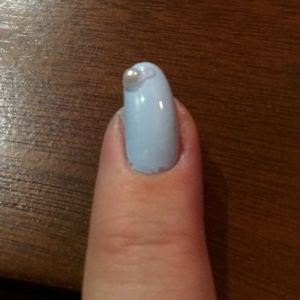
Use the tweezers to grab one crystal (or pearl in this case) and place it over top of the drop of top coat. Place the next drop and apply the next crystal and so on.
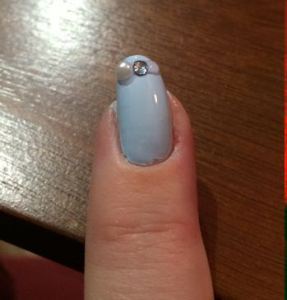
When applying a cluster of crystals, I prefer not to decorate all of my nails since it can look overwhelming. So I tend to do just the index and ring finger and apply the crystals as an arch either at the top or bottom of the nail.
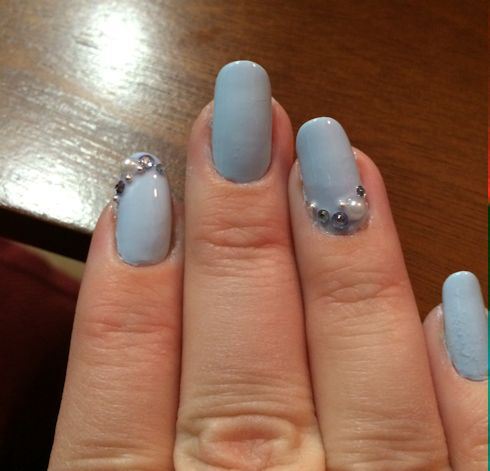
Step 3: Once all the crystals are in place, brush over the whole nail–crystals and all–with top coat. Be careful to apply the coat evenly, as it tends to pool around the crystals. If this happens, you can redistribute the polish easily while its still wet by gently pulling the excess away with the brush.
And that’s it–with just a little patience and not a lot of money and your nails can be sparkling and bright for the holidays!
PS- As a side note, if you aren’t up for applying each crystal individually, you can always buy pre-made stickers in the nail polish supply section of most beauty stores. The upside is that they are super easy to apply–just peel and stick. The downside is that they are one-time use and relatively costly, and the sticker is visible and peels up after a day or two. But they are a quick and easy alternative for a special night!
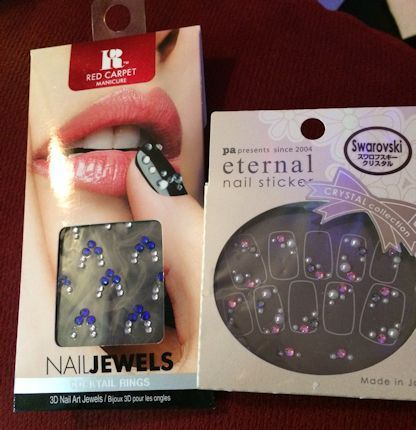 The ones one the left are from Ulta and I got the ones on the right during my last trip to Japan.


December 5, 2015
Science Explains Fantasy: Weaknesses

Jonathan MacGregor has a great series on Science Explains Fantasy on his blog MacGregor’s Pen. I love the concept of fantasy elements having a basis in real science so this series is one of my favorites to keep up with. Check out his latest post on weaknesses, and be sure to explore his previous posts in the series too!
 Originally posted on MacGregor's Pen:
Even the mightiest of us have our weaknesses. Superman, the embodiment of physical superiority, is reduced to a position of humility in the presence of kryptonite.

Many characters in fiction have their own personal kryptonite: werewolves and silver, vampires and sunlight… the list goes on. Below is a picture from Serkworks that highlights the weaknesses of several famous movie monsters and villains. Hoodies and t-shirts featuring this design are available here.

Kryptonite may not be real, but it has become synonymous with weakness. But can we have our own personal kryptonite? The concept of having a personal weakness is far more commonplace than you might think.
Allergies
Allergies are so common that this segment hardly needs any introduction. It is estimated that 15 million Americans suffer from food-related allergies alone, which marks a 50% increase from those estimated in 1997. Although it remains unclear why allergies are on the rise…
View original 1,348 more words


December 3, 2015
Warning: Author Geeking Out (Also, Sumo reveals his reading preferences)
Today, I got my first look at the new paperback copies of both Reflection: The Stranger in the Mirror and Reflection: Harbinger of the Phoenix. It’s one thing to see the full image on my computer monitor and another to actually hold a physical copy of the book in my hand. It’s a good thing I was home alone, because I squealed with delight as soon as I opened the box, and I’m pretty sure hubby would have teased me for my reaction. The new covers look even better in real life than they do on screen–thank you once again, West Coast Design!
So the only rational reaction was to take a picture to share here with all of you! They look so pretty sitting on my shelf with the rest of my books.
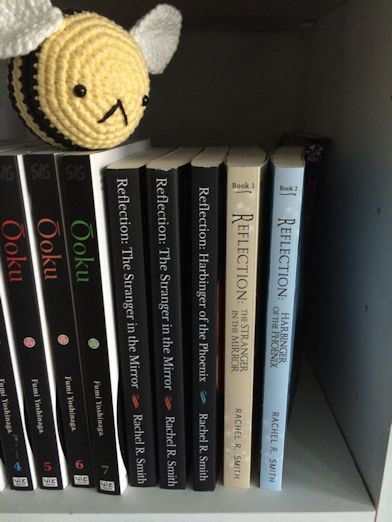
When I laid them out on the bed to take a picture of the fronts, Sumo decided to jump into the photo. Apparently, no photo can be taken in this house without him in it. He hopped onto the bed, wandered right into the picture, and plopped down.
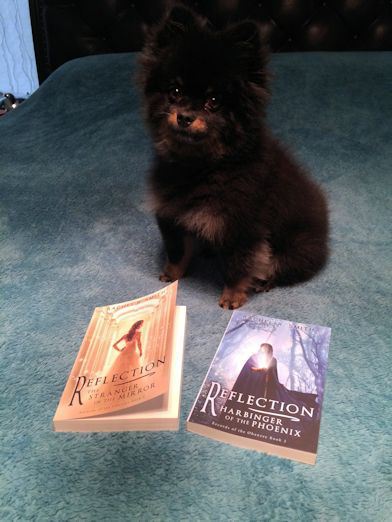 I’m here, you may start taking pictures now.-Sumo
After graciously allowing me to snap a few pictures (and telling me that halogen lights make colors look odd in photos), he took a distinct interest in book 2. There was a great deal of sniffling, “snorteling,” and snuffling. I snatched the book before the licking could commence. Because licking always comes next.
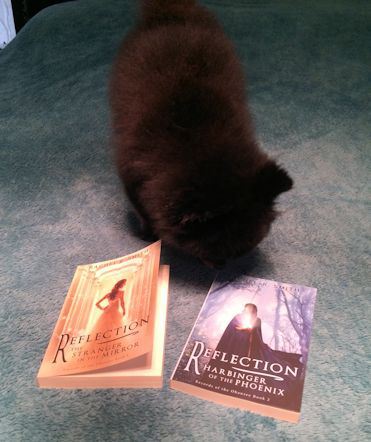 Books do not like being licked, Sumo!
It would seem that Sumo likes book 2 even better than he likes book 1. At least, it must smell better. ^_-


December 1, 2015
Bookish Scenarios Tag

Thanks to Shannon at ForeverShannon for tagging me! I love reading when other bloggers post these book-themed tags. It gives a lot of insight into the reasons behind each person’s tastes and preferences, so I’m excited to answer one for myself now. ^_^
1. You have to get rid of all your books and you can only keep one from each of these genres – contemporary, fantasy, non-fiction and one other genre of your choosing. What books do you keep?
Contemporary– This one is tough because I don’t really like to read books with contemporary settings. So I’m going to cheat a little bit and choose The Seven Dials Mystery by Agatha Christie. It’s set in the early part of the 20th century, so by now it’s kind of a historical fiction, but it was contemporary at the time it was published! I’m reading her works in the order they were written and The Seven Dials Mystery is my favorite so far.
Fantasy– Ok, taking away my fantasy books would be like removing a limb. I love so many of them that it’s hard to pick just one to “save.” I could say I’d save my own book. But since I wrote it, I don’t really need to have a copy to read, do I? I’d pick The Wheel of Time series, since I always discover something new when I re-read, but that’s 14 books not 1. So I’m going to pick The Ghost Bride by Yangsze Choo. It’s a lovely story laced with Asian mythology, mystery, and a bit of romance. Highly recommend!
Non-fiction– This one is easy! The Chicago Manual of Style. Without it, editing and proofreading would be an impossible task.
Science-fiction– 14 by Peter Clines. A mix of mystery and sci-fi that kept me guessing (incorrectly!) the entire time.
2. You’re at the bookstore and you hear a teenager telling their mom they don’t like to read, but their mom insists they pick something. You walk over and recommend a book you think is great for people who aren’t big on reading – what book is it?
I would suggest picking up a manga to read, probably Skip Beat! or Full Metal Alchemist. The plots are just as intricate as a novel, but the mixed media of images and text should keep the interest of people who don’t like to “read.”
3. You’re not feeling yourself and need a pick me up. Which book do you read to put yourself in a great mood?
My go-to series for a pick me up is the manga series Skip Beat! It’s lighthearted, cute, and funny. The main character, Kyoko, faces so many challenges as she works toward her dreams, but she does it with unrelenting determination and humor. I always feel lighter after I finish reading a volume.
4. You go back in time for a day to your childhood years. What book would you most likely have caught yourself reading?
Depends on how far back you consider your childhood years. When I was 11/12, I went through a long Stephen King phase so one of his novels would be a good bet. Before that, I was really into The Baby-Sitter’s Club books (that was back when they were first coming out too). Prior to that, I don’t remember many specific books or series that I read–but I read anything and everything I could get my hands on. My parents took me and my brother to the library frequently and we even had a bookmobile stop in front of our house. I do remember loving the Dorrie books by Patricia Combs though!
5. Your friend surprises you with a 4 day trip and you have 1 hour to pack. Which book do you bring to read on the way?
I’d just grab my ipad. It’s already loaded with books on my TBR list so I could choose from The Winner’s Crime, Hidden Huntress, Winter, The Heir, or Air Awakens.
6. Your house has been robbed! Don’t worry – everyone is safe, but your bookshelf has been raided. What’s the book you really hope is safe?
Haha, if they tried to raid my book shelves then they would still be in my house packing. But…I would be most worried about my first edition hardback copy of Memoirs of a Geisha. It’s not particularly valuable, but it would be hard to replace!
7. Your friend borrows a book and returns it in awful condition. Do you a) Just pretend you haven’t noticed, b) Ask them to repurchase it, or c) Secretly do the same to something of theirs?
I wouldn’t say anything to them, but I would glare menacingly behind their back and never loan them another book. Ever. That’s purely hypothetical though, since no real friend would ever do such a thing.
Ah…I’m terrible when it comes to tagging others. So once again, I’ll leave the invitation open to anyone who would like to tag themselves! ^_^


November 29, 2015
On the Care and Feeding of Writers
I came across this post on The Agarthan Guide’s Tumblr page on the Care and Feeding of Writers and I just had to share it for my fellow authors and writers over here (or more specifically, for those who live with us and participate in the care and feeding thereof ;) ). For the life of me, I couldn’t figure out how to reblog/share it directly from Tumblr, so please click on over to their page to see the full series of images. You won’t be sorry. :) While you’re there, be sure to check out her amazingly gorgeous artwork too!


November 24, 2015
Can’t Post, Talking with my Imaginary Friends

Today’s post is going to be short and sweet because my imaginary friends are chattering away impatiently while waiting for me to get back to transcribing their adventures over in MS Word. Some days the words just won’t come, so when they do decide to talk, I listen! The image above summarizes my sentiments pretty well. It’s actually from a t-shirt that I have on my Christmas list–you can get one too here: Etsy.
Happy reading/writing everybody–it’s back to work for me!


November 22, 2015
Nail Polish Sunday #1 (Glitter gradient version 1)
As promised a couple of weeks ago, this is the first of the biweekly nail polish-oriented posts I’ll be making. I thought I would start with one of my favorite looks, the glitter gradient. I actually have two different techniques for doing the glitter gradient: the first uses two different colors of nail polish, the second uses loose micro glitter. Today I’ll show the technique using two colors of polish, and I’ll do one another day with the loose glitter. Let me ask in advance that you ignore my very short thumbnail. An unfortunate incident involving a tumbling tower of Tupperware led to an unrepairable break. Perfect timing. :P
Without further ado, here’s how I do a glitter gradient:
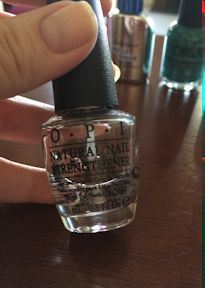 Base Coat: OPI Natural Nail Strengthener
I always start with base coat. This is really important because it not only helps the polish better adhere to the nail, but it also provides a barrier to prevent the color from staining your nail. Instead of using regular base coat, I like to get an extra strengthening benefit by using OPI Natural Nail Strengthener.
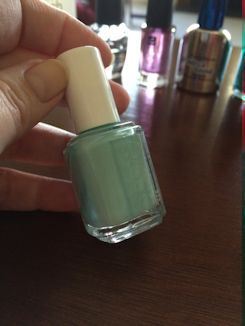 Color: Essie Blossom Dandy
For the color, I’m using Essie Blossom Dandy. It’s hard to photograph, but the shade is a pastel aqua/mint green creme. It covered my nails completely in two coats. The consistency of this one is pretty thin and it has a tendency to run off the edge of my nails no matter how carefully I apply it. But that’s ok, because I have a secret weapon.
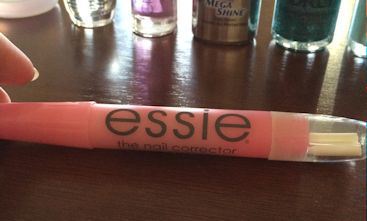 Nail Corrector Pen
What’s my secret weapon? The Essie nail corrector pen. Pretty much every brand makes a nail corrector pen. In my experience there is very little difference regardless of which one you buy. Now, some of you may be saying to yourself, “I’ve used one of those before and it doesn’t work well.” If you’re using it the way it’s designed to be used, I totally agree with you. For those that aren’t familiar, the pens have a reservoir of acetone inside and an absorbent tip. In theory, there would be sufficient acetone absorbed in the tip to wipe away any polish that gets on the skin around the nail. But I’ve always found the tips to be too dry to work well.
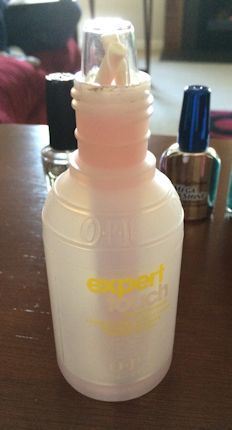 So I improvised and found a method that works really well. I had a small, empty bottle of nail polish remover that just happens to be the right height for the corrector pen. I poured in enough remover to cover the bottom about 1/4″ deep. This is just enough to cover the tip of the nail corrector pen.
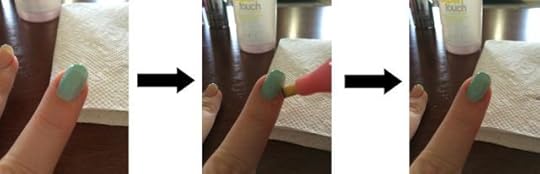 Messy nail –> During clean up –> Polish removed in one pass
When I need to use it, I pull out the pen, tap off the excess acetone onto a paper towel, then trace the tip over the rogue polish. I recommend checking after each nail. Since wet polish dissolves more readily than dry, doing it after each nail makes for a quicker and easier process. I clean the tip by wiping it across the paper towel and then drop it back into the bottle until I need it again.
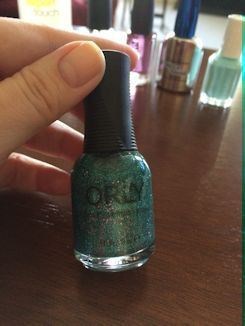 Glitter: Orly Steal the Spolight
After applying two coats of the base color to each nail, it was time for the glitter. Here, I used Orly Steal the Spotlight. It’s a green micro glitter with sparse flecks of pink glitter mixed in. It is just a few shades darker than the Essie Blossom Dandy, so it makes for a nice contrast while staying in the same color family.
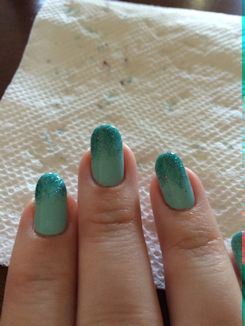
 After the first glitter coat
The trick for glitter gradients is to create the gradient using multiple, thin coats. For each coat, you want to have barely any polish on the brush. Too much and the coat will be too dark. Too little and you’ll drag lines into the base color. It takes a bit of practice to get a feel for how much is the right amount to have on the brush. One rule of thumb is that if there is enough polish to form a bead at the bottom of the brush, then you probably have too much.
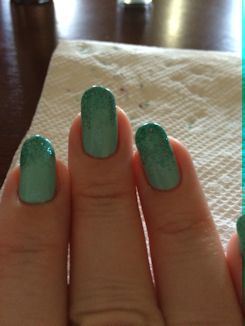
 Final gradient
Start applying the glitter coat by lightly dabbing the brush on the top part of the nail. There’s two reasons why I do this: first, if there is any excess on the brush, it will come off here where the glitter is meant to be heaviest anyway and second, I can use this spot to lightly re-wet the brush as I work. I like the gradient to come about halfway down the nail, so I apply the polish by touching the brush about midway down my nail and gently dragging it toward the tip. The first coat should look pretty thin. Use the same technique for the next coat, but instead of starting with the brush midway down the nail, start with it slightly closer to the tip. As each subsequent layer of glitter is applied, you move your starting point closer and closer to the tip of the nail. In the end, the top of the nail will have more layers of glitter, which will naturally result in a gradually increasing opacity.
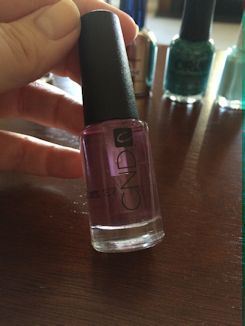 Top coat 1: CND Super Shiney
I finish my nails using two layers of top coat. For the first top coat layer, I use CND Super Shiney (that’s not a typo, that’s how they spell shiny on the bottle). I like it because it is quick drying and rapidly seals the polish beneath. With this top coat, my nails will be smudge-proof within about 10 minutes. They’ll still smear or scratch if they come in contact with something rigid (for about an hour), but I can do light tasks like use the computer, play video games, or read a book without worrying.
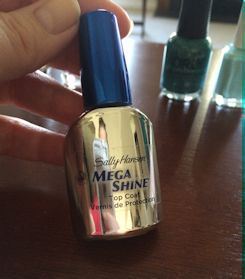 Top coat 2: Sally Hansen Mega Shine
For the second layer of top coat, I use Sally Hansen Mega Shine. I’ve used this on my nails since I was in high school and I love it. Love it. This is the glossiest, shiniest top coat I have ever tried, plus it dries quickly too. The combination of this with the CND Super Shiney makes my manicure last 1.5-2 weeks without chipping. I should note that I don’t claim this combo to be a silver bullet for chip resistance. It works like a charm for me. I’ve tried it on my mom and aunt and it has a tendency to make the polish peel off of their nails as one solid layer (which makes removal super easy, though the timing is unpredictable XD). I think it may work best on those who keep their nails painted consistently and therefore don’t have a lot of natural oils built up on the nail itself. I also keep my nails buffed, but I only do a dull buff rather than smoothing a gloss. Perhaps the added surface roughness gives an extra oomph of mechanical adhesion for my nails. Regardless, I would recommend either one of these top coats on their own too.
In two weeks: a holiday manicure with crystal accents!
As a final note: there are still a few hours left to get a free Ebook copy of Reflection: The Stranger in the Mirror on Amazon! Here’s the link: http://www.amazon.com/dp/B00XGYO2C4


November 20, 2015
Why wait until Black Friday? (When you can get it free now!)

According to the internet and multitudes of TV commercials, Black Friday sales have come early this year. So I decided to jump on the bandwagon too. Am I going shopping today? Hahaha…no. (I wish.) Nope, this one is for everybody else!
Today and tomorrow, Reflection: The Stranger in the Mirror will be available for free on Amazon. Yup, free. No strings attached. Unless you feel compelled to leave a review too, which is always appreciated. If you’ve been considering trying out my book(s), now is, quite literally, the best opportunity to do it. Plus, every download makes my heart swell with joy. So it’s a win-win all the way around. ^_-
Here’s the link: http://www.amazon.com/dp/B00XGYO2C4