
Pam Anderson's Blog, page 76
January 17, 2011
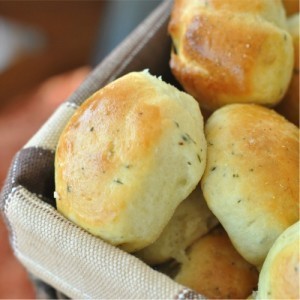
Bolete's House-Made Thyme and Sea Salt Rolls
 Makes 2 dozen
If you like, sprinkle the tops of the rolls, as they do at Bolete, with a pinch of sea salt.
1 packet (2 1/4 teaspoons) active dry yeast
1/3 cup warm water
1/3 cup milk
1 cup heavy cream
1 large egg, beaten, plus an extra egg for egg wash
2 tablespoons butter, melted
4 cups bread flour
2 teaspoons salt
3 tablespoons sugar
2 tablespoons picked fresh thyme leaves
Dissolve yeast in warm water in a 2-cup liquid measuring cup until foamy, about 5 minutes. Add milk, cream, egg, and butter; set aside.
Meanwhile, pulse flour salt, sugar, and thyme in a food processor. Add wet ingredients and process, adding a tablespoon or so of flour if mixture is excessively wet and sticky or a tablespoon or so of water if dough feels hard and dry. Continue to process until dough is smooth and elastic, about 30 seconds longer.
Turn dough onto a lightly floured work surface, knead into a smooth satiny ball, and place into a large bowl coated with vegetable oil spray Place in a warm place until dough doubles, 1 1/2 to 3 hours, depending on room temperature .
Without punching dough down turn onto a flour-coated work surface, dividing it into 2 dozen equal pieces. Working one at a time, roll each piece of dough into a smooth round. Place on a large (12- by 18-inch) cornmeal-coated rimmed baking sheet. Repeat with remaining balls of dough.
Cover shapes with a barely damp, lightweight kitchen towel and let rise until almost doubled in size, 45 minutes to 1 1/2 hours, depending on room temperature.
Fifteen minutes before baking rolls, adjust oven rack to lower-middle position and heat oven to 400 degrees. Brush rolls with remaining beaten egg. Bake until rolls are golden brown, 25 to 30 minutes. Transfer rolls to a wire rack and serve warm. (Can be wrapped in plastic wrap, placed in a zipper-lock bag and frozen up to 1 month. Warm in 300-degree oven for 5 to 10 minutes.)


Bolete's Cream Dinner Rolls with Fresh Thyme
Makes 2 dozen
If you like, sprinkle the tops of the rolls, as they do at Bolete, with a pinch of sea salt.
1 packet (2 1/4 teaspoons) active dry yeast
1/3 cup warm water
1/3 cup milk
1 cup heavy cream
1 large egg, beaten, plus an extra egg for egg wash
2 tablespoons butter, melted
4 cups bread flour
2 teaspoons salt
3 tablespoons sugar
2 tablespoons picked fresh thyme leaves
Dissolve yeast in warm water in a 2-cup liquid measuring cup until foamy, about 5 minutes. Add milk, cream, egg, and butter; set aside.
Meanwhile, pulse flour salt, sugar, and thyme in a food processor. Add wet ingredients and process, adding a tablespoon or so of flour if mixture is excessively wet and sticky or a tablespoon or so of water if dough feels hard and dry. Continue to process until dough is smooth and elastic, about 30 seconds longer.
Turn dough onto a lightly floured work surface, knead into a smooth satiny ball, and place into a large bowl coated with vegetable oil spray Place in a warm place until dough doubles, 1 1/2 to 3 hours, depending on room temperature .
Without punching dough down turn onto a flour-coated work surface, dividing it into 2 dozen equal pieces. Working one at a time, roll each piece of dough into a smooth round. Place on a large (12- by 18-inch) cornmeal-coated rimmed baking sheet. Repeat with remaining balls of dough.
Cover shapes with a barely damp, lightweight kitchen towel and let rise until almost doubled in size, 45 minutes to 1 1/2 hours, depending on room temperature.
Fifteen minutes before baking rolls, adjust oven rack to lower-middle position and heat oven to 400 degrees. Brush rolls with remaining beaten egg. Bake until rolls are golden brown, 25 to 30 minutes. Transfer rolls to a wire rack and serve warm. (Can be wrapped in plastic wrap, placed in a zipper-lock bag and frozen up to 1 month. Warm in 300-degree oven for 5 to 10 minutes.)
January 14, 2011
Double Cinnamon Bread
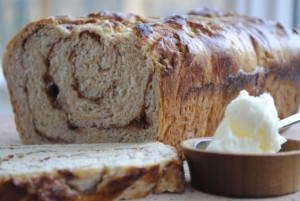 Makes 1 big, beautiful glistening loaf
You get a double cinnamon hit—in the bread as well as in the swirl. After sprinkling on the cinnamon sugar, feel free to add some raisins to the mix.
By tepid, we mean the milk should be the temperature of a baby's bath—just barely warm.
2 ½ teaspoons active dry yeast
1 1/2 cups whole milk, warmed to tepid
1 stick (8 tablespoons) melted but not hot
4 cups all-purpose flour, plus 2 teaspoons for the swirl
2 tsp salt
1/4 cup granulated sugar, plus 1/4 cup for the swirl
2 teaspoons ground cinnamon, plus 2 teaspoons for the swirl
1 egg, beaten
Sprinkle yeast over warm milk; let stand until yeast dissolves and starts to expand, about 5 minutes; whisk in butter.
Meanwhile, pulse 4 cups of flour, salt, 1/4 cup of the sugar, and 2 teaspoon of the cinnamon in the work bowl of a food processor. Add milk mixture; process until it forms a soft, rough mass, about 30 seconds. (Dough will firm up as butter solidifies.)
Turn dough onto a lightly floured surface to form a smooth ball; place into a vegetable cooking spray-coated large bowl and then cover with plastic wrap. Place in a warm place until dough doubles, 1 1/2 to 3 hours, depending on room temperature. Mix remaining 1/4 cup of sugar with remaining 2 teaspoons of cinnamon and flour.
Turn dough onto a lightly floured work surface, stretching it into a 20-by 9-inch rectangle; brush with egg and sprinkle with cinnamon sugar. With the 9-inch side facing you, roll dough into a tight cylinder and place it in a vegetable cooking spray-coated 9-inch loaf pan.
Cover pan with a damp towel; let rise until almost doubled in size, 1 hour to 1 1/2 hours, depending on room temperature.
Ten to 15 minutes before baking, heat oven to 350 degrees. Brush dough with remaining egg wash and bake until crust is brown and interior registers 190 degrees, about 45 minutes. Turn loaf onto a wire rack to cool. (Cooled loaf can be wrapped in plastic wrap and stored at room temperature a day or two or wrapped loaf can be placed in a zipper-lock bag and frozen up to 1 month.) Slice, toast, serve!

Fear of Flouring
It's been nearly a year since I wrote about my fear of making bread. I resolved last New Year's to confront my fear and start making bread. Did I do it? Technically speaking, yes. I made a few quick breads – like cranberry and pumpkin – and Jamie's Beer Bread and my mom's Irish Soda bread, both quick and delicious. But did I venture into the realm of yeast bread? No.
The Anderson family gathered for the holidays at my parent's house in Pennsylvania. Sharon and Tony, who had said they would be in charge New Year's Eve dinner, came with a carload of food, beverage, utensils, kitchen gadgets…and their sourdough starter (doesn't everyone travel with a sourdough starter?). They made fresh bread for us every day. Atkins Diet followers and lovers what you are about to read may disturb you so perhaps just skip to the next paragraph: between six of us we'd eat a loaf for breakfast – sliced, toasted and topped with eggs, jam or just plain butter. At dinner we would eat an entire loaf, using chunks of bread to clean our salad plates and to scoop up the last remaining bites of pasta sauce. There is something simply irresistible about fresh baked bread.
As Sharon made bread each morning, I sat on the periphery, half watching. Honestly, I was jealous that my little sister was turning out fresh bread faster than hotcakes and making it look so easy. But the more I watched, it looked like a pretty straightforward process.
I finally plucked up the courage and said I'd like to try. We had enough 'regular' bread in the house and it was a lazy Friday morning so I aimed high and decided to make swirly cinnamon bread. We did a little Googling to learn about making cinnamon swirl bread. Mom and Sharon were in the kitchen with me, overseeing, but I did it on my own. Dare I say it was easy?
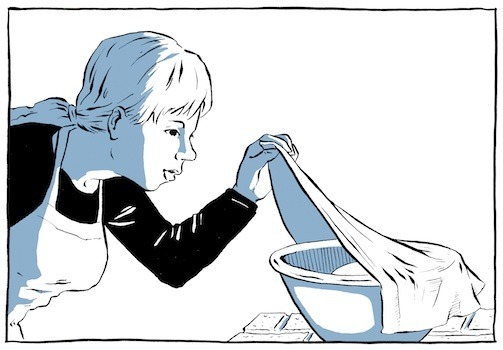
The hardest part for someone like me is the waiting. I am not a patient person. But impatience, coupled with excitement, meant that I checked on my dough every fifteen minutes for four hours. I kept my bowl of rising dough by the warmth of the fire so that it would rise a bit faster (though Sharon tells me that the faster the dough rises, the less flavor it develops). I kept peeking under the towel to see that smooth, round ball growing and to smell that sweet, yeasty dough, with a hint of cinnamon.
By the time we finished dinner on Friday night, my two loaves were coming out of the oven. Though we had just polished off a loaf of Sharon and Tony's sourdough bread with dinner, we couldn't resist cutting into the loaf and trying it. We all agreed it was perfect, a delicious balance of savory and sweet. The next morning we toasted thick slices of my cinnamon raisin bread and spread them with butter. The family loved it and I felt proud.
On our way back to the city Andy and I stopped at the grocery store. I picked up a big jar of yeast, a sack of bread flour and made another batch of dough. This time, I made rolls to go with the soup we had for dinner. I'm grateful to Sharon and Tony for the sourdough starter and for showing me that making bread is easy and so worth it.

January 12, 2011
A New Year, A New Favorite

The older I get, the more I dislike crowds. When I was in college, the idea of a packed club, a crowded party, and a mobbed dance floor was exhilarating. Now, it sort of makes me wince—hot and sweaty with bad beer and no clear path to the bathroom? No thanks. These days, I prefer my dance parties in the living room after a great meal or in the kitchen while doing the dishes.
Needless to say, our New Year's Eve plans this year did not involve going out. Tony and I decided that we could probably cook just about anything we could find in a restaurant and at half the price. We combed through Indian cookbooks, searched the internet and assembled a hearty Indian menu. The night would start with homemade potato samosas and papadums which we would dip in three sauces: a spicy cilantro sauce, a sweet and tangy tamarind sauce, and a cool herbed yogurt sauce. Next we'd move to a rich, long-simmered lamb curry and a creamy chicken korma, which we would pile on top of perfumey basmati rice and scoop it all up with soft, homemade naan.
We knew we needed a few more hands to actually pull this meal off, so we invited Mom and Dad and Maggy and Andy to join the fun. Andy requested we start the meal with a spicy cucumber, cilantro, and gin cocktail, and Mom volunteered to make toasted coconut ice cream for dessert. And so the meal plan got bigger and more exciting.
Tony and I spent the better part of two days trying to find all the ingredients we needed. Most of the spices weren't hard to come by, but we trekked all over Southeastern Pennsylvania in search of whole cardamom pods, tamarind concentrate, and a strange spice called asafetida (which we never did find).
When December 31st arrived, we rose early and cooked all day. The curries turned out wonderfully—rich and deeply spiced with fall-apart-tender chunks of meat; the naan was pillowy soft and hot out of the oven; the cocktails were cool, zippy, and refreshing; and the ice cream was lush and creamy. Tony and I were extremely proud of the whole meal—how it tasted and how hard we'd worked to pull it off. But most of all, we were proud of the samosas. We'd made naan, curries, and homemade ice cream before. We've tried plenty of new cocktails and toiled over interesting sauces. But we had never attempted samosas. These flaky little pastries filled with spiced potatoes and peas are a must-have appetizer at Indian restaurants, but they seemed so complicated to make. Most cookbooks call for puff pastry as a shortcut. But this meal was not about shortcuts.
There is no two ways about it, these little guys were time consuming, but they weren't difficult to make. We started by making the filling, then we made the dough (which, in the food processor, is a cinch). When we were ready to make the samosas, we called for back up. The whole family got involved as we divided and rolled out the dough, made and filled the samosas, and finally fried them quickly and served them piping hot with our sauce line-up. Our samosas were amazing…possibly better than any I've had at a restaurant. They were perfectly crispy and flaky on the outside and warm and spicy on the inside. And they couldn't come out of the oil fast enough!
These are definitely a new 3MC favorite…should we be embarrassed that we made them again the next night to eat with our leftovers? Sure, samosas are not weeknight fare, but they are a fun cooking project for a group. It really speeds up the process having three or four sets of hands. Grab a beer and make a night of it. Trust me, it's so worth it.

Spicy Potato Samosas
 Makes 32 savory pastries
This recipe comes from Julie Sahni's Classic Indian Cooking. The potato filling can be made up to 2 days ahead and refrigerated until you are ready to make the samosas. We fried these little pastries in a roasting pan set over two burners, just watch out for the handles…they get hot! Serve samosas with your favorite Indian dipping sauce, like this cilantro sauce.
Pastry Dough:
1 1/2 cups all-purpose flour; more for dusting
1 tsp. kosher salt
4 Tbs. vegetable shortening
6-7 Tbs. cold water
Spicy Potato Filling:
4 Tbs. vegetable oil
2 tsp. coriander seeds
1/2 cup finely chopped onion
1 1/2 tsp. finely chopped fresh ginger root
1-3/4 lb. potatoes boiled until soft and cut into very small dice
1/2 cup frozen green peas
2 small green chiles, seeded and minced (or 1/4 tsp cayenne)
1 1/4 tsp garam masala
1 Tbs. lemon juice
2 tsp. kosher salt
Peanut oil or corn oil, enough to fill a large skillet to a depth of 3 inches
Make the dough:
Put the flour and salt into the container of a food processor, with the steel cutting blade attached. Process for a few seconds to mix them. Add shortening and process, pulsing until the fat is well distributed through the flour. Add the water through the feed tube, with the motor running, until a ball of dough forms, about 15 seconds. Take the dough out of the food processor and gather it into a smooth ball. Coat the ball with a little oil and place it in a bowl. Cover with a moist towel or plastic wrap, and let rest for 1/2 hour.
Make the filling:
Heat the 4 Tbs. of vegetable oil in a large skillet over medium-high heat. Add the coriander seeds and cook until they turn dark brown (about 15 seconds). Add the onions and ginger, and continue cooking until soft, about 4 minutes. Add the diced potatoes and peas, stir rapidly, and fry until potatoes begin to become dry and looked fried, about 8-10 minutes. Turn off the heat, add the chile (or cayenne), garam masala, lemon juice, and salt. Mix well and set aside to cool.
Assemble the samosas:
Knead the dough again for a minute and divide into 2 equal parts. Using your hands, roll each portion into a 1/2-inch thick rope, and cut each rope into 8 pieces. Roll the small pieces into smooth balls.
Working one at a time, place one ball of dough on your work surface, dust it lightly with flour, and roll it into a 6-inch circle. Cut the rolled circle in half. Now you have two semicircles. Each semi-circle will make a samosa.
Place a small bowl of water next to your work surface. In order to form a cone, moisten half of the semi-circle's straight edge with water and bring the other half of the straight edge over it, so that the dry side overlaps the moistened portion by about 1/4 inch. Press the overlapping edges securely together to seal. Be sure to pinch closed the point of the cone as well; a good seam will keep the stuffing in during frying. (You can see pictures of this process here.)
Fill the cone with one heaping tablespoons of the potato filling. (We found we could fit more filling in each samosa if we mashed the potato mixture up a little with a fork.) Moisten the open side of the cone with water and pinch the opening closed. Continue with the rest of the dough and filling in the same way.
Fry the samosas:
When ready to fry the samosas, heat about 4 inches of vegetable oil in a large pan to about 350° F. Add the samosas in batches of 8-10, being careful not to crowd the pan. Cook the samosas, turning often, until they're golden brown, about five minutes. Using a slotted spoon or tongs, transfer samosas to a paper towel-lined plate to drain. Serve immediately.

January 10, 2011
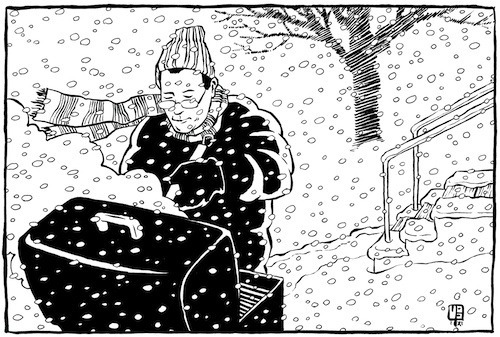
Winter Grilling
Hi! I'm Mike Vrobel from DadCooksDinner.com. I'm thrilled to be guest posting on ThreeManyCooks. Pam's How to Cook Without a Book taught me the difference between following recipes and knowing how to cook, and was a major step on the journey to my own food writing. And so, without further ado…
I'm a grill fanatic. I will not let minor inconveniences (like a foot of snow and single digit temperatures) stop me from grilling. Here's how I deal with the icy issues of winter grilling.
Cold: This is the most obvious—and also the easiest to deal with. I use my grill all the time on cold, calm winter days, where the temperature is below freezing. Sometimes well below freezing. I remember one low and slow barbecue where the sun was out, but the temperature never got above single digits. Like I said, I'm a fanatic.
Any good grill can hold its heat in cold weather. The key is to keep the lid closed unless absolutely necessary. It takes longer for the grill to recover its full temperature in the cold, because it has to reheat the cold air trapped under the lid. The fewer times the lid is opened, the better.
Cold is probably more of an inconvenience for the cook than for the cooking. To keep warm, I stay inside as much as possible. (This also helps with keeping the lid closed). When I do go out, I just shrug my coat on, put on some welding gloves to keep my fingers warm and protect them from the flames, and trust the heat of the grill to take care of the rest.
Wind: Windchill isn't just for people; it also happens to grills. A grill heats the surrounding air; in the winter, the cold air takes longer to heat up, but eventually the grill creates a protective coating of warm air around itself. If wind is blowing that heated air away, the grill has to heat the new air, and will constantly lose heat to the wind.
In other words: "Wind is the enemy…it sucks the heat out of the cooker." Chris Allingham, VirtualWeberBullet.com
If possible, put the grill where it is screened from the wind. My gas grill is on the deck, where the house blocks our westerly winter wind. My charcoal grill is on the patio, somewhat screened by the deck, but is more exposed to the wind. If it is really, really windy, I resign myself to using the gas grill. Or (shudder) cooking indoors.
When using a gas grill on a windy day, the flame can blow out. If this happens, because the burners are still turned on, gas can build up in the grill. When the lid is opened, if the gas happens to connect with a lit burner, the result is a fireball. This happened to someone I know. She wasn't seriously hurt, but her hairstylist did have to come up with an interesting "flip" style until the hair grew back on one side of her head.
Snow: Snow doesn't affect your cooking; I'd much rather grill in the snow than in the rain. Snow only makes it hard to get to the grill. My gas grill is on my deck, near the house, and I keep a shovel right next to the door. My charcoal grill, which lives on a patio next to the deck, is much farther away. If we have a lot of snow I have to be really enthusiastic about charcoal grilling to dig out a path to that grill.
Darkness: This is another problem: it gets dark early. You need some way of lighting the grill while you work. My gas grill has good LED lights built into the handle, and is close enough to my porch light that I don't need anything else when I'm using it. Unfortunately, using my kettle grill usually involves juggling my tongs, instant-read thermometer, and a flashlight. I want to get one of those camping or miner's headlights, so I can have hands-free light wherever I want it. Yes, I'll look silly. I already look silly running in and out of the house to grill in the middle of the winter, so how much worse could it be?
Notes:
*Never, and I mean NEVER, use a grill in a garage or other enclosed area! Why? I'm breaking out the bullet points for this one:
Using a grill under something that can catch fire is a Bad Idea. One good grease fire, and the whole garage (or carport, or whatever is above you) can go up in flames. And, if that something going up in flames is attached to your house…
Charcoal grills: Never, ever, burn charcoal in an enclosed space, or indoors. Burning charcoal produces carbon monoxide, and it can build up to poisonous levels in an enclosed space.
Gas grills can also produce carbon monoxide due to incomplete combustion if they are not adjusted properly. On top of that, gas grills have the additional danger of propane buildup. If your grill doesn't light right away, or there is a leak in the propane tank or the grill, an enclosed area can trap enough propane for an explosion. This is why the propane association recommends that propane tanks not be kept in enclosed areas like garages or sheds.
Safe grilling resources:
CPSC Advises Consumers to Avoid Deadly Grilling Dangers
Carbon Monoxide (CO) and Propane
Propane Grill Do's and Dont's
*Winter grilling is why I own a gas grill. The gas grill convenience of "light it and forget it" lets me get back in the house where it is warm, and keeps the heat going no matter how cold it is. Because of how easy it is, I grill once a week, on average, throughout the winter. I do use my charcoal grill during the winter, but only a handful of times after Christmas. As I said, I really have to be in the grip of grilling mania to do the extra shoveling to get to my charcoal grill.
*Grilling always has more variables than cooking indoors; winter grilling adds extra variables (wind, cold, darkness) to the mix. Sometimes it can take an extra hour for that roast to finish grilling. Don't trust cooking times published in recipes; use them as a rough guideline, and check to make sure the food is done cooking. I use some combination of taste testing, poke testing and an instant-read thermometer. If your family gets cranky when dinner is late, like mine does, make sure to leave a cushion when answering the question: "When's Dinner?"
*I have a backup plan in case the weather gets really nasty. Winter grilling is a challenge, but it should be a fun challenge. I won't try to grill in a driving snowstorm, with the wind blowing ice in my face and the deck covering with snow faster than I can shovel. Sometimes, discretion is the better part of valor, and it's time to roast the chicken in the oven.
*Finally, when I go through the extra effort of grilling in the winter, I make sure to grill as much of the meal as possible. I don't just grill the meat, I grill the vegetables, maybe the starch, and occasionally the bread. (Grilled flat bread is wonderful.) If I have extra space, I'll throw peppers and onions on the grill; they make a great addition to salads later in the week.
What do you think? Questions? Other ideas? Leave them in the comments section below.
*Enjoyed this post? Stop by and visit me at DadCooksDinner.com Thank you!

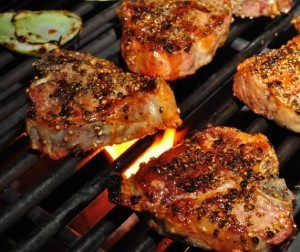
Spice Rub-Grilled Lamb Chops with Grilled Fennel
 Recipe by Mike Vrobel from DadCooksDinner
Lamb loin chops (aka Lamb T-Bones) are a slightly more economical cut than rack of lamb. Loin chops don't give you the wonderful "lamb popsicles" that you get from a rack of lamb. But you will get more lamb for your dollar, and lamb loin is every bit as tender and flavorful as rack of lamb.
Ingredients:
8 lamb loin chops
2 tsp kosher salt (about 1/2 tsp per two chops)
Spice rub
1 tbsp whole coriander seed
1 tbsp lemon zest (the zest of 1/2 a lemon)
1 tbsp fennel fronds, minced
2 tsp minced fresh rosemary
2 tsp whole peppercorns
Fennel
2 bulbs fennel
2 tsp kosher salt
1/2 tsp fresh ground pepper
olive oil
Juice of 1 lemon (use the lemon from the zest above)
Directions:
1. Dry brine the chops: 2 hours before cooking, trim any excess fat from the lamb, then sprinkle evenly with the salt. Grind all the spice rub ingredients until they are coarsely ground. Sprinkle the rub over the lamb chops, and press it into the chops to help it stick. Let the lamb rest at room temperature until it is time to cook.
*You can season the chops up to 24 hours ahead of time. If you do, refrigerate them, then remove from the refrigerator two hours before cooking. The two hours at room temperature gives them enough time to take the chill off before grilling.
**You can season as little as one hour before cooking and still get the dry brine effect from the early salting. If you can't season one hour before cooking, do it just before putting the chops on the grill.
2. Prepare the fennel: Trim the fronds from the fennel, then trim the root end down to the base of the bulb. Stand the bulb on the trimmed root end, and cut into 1/2 inch thick slices. Sprinkle evenly with the salt and pepper, then cover with a thin coat of olive oil.
3. Prepare the grill: Prepare your grill for cooking in two zones, one on medium-high heat and the other on medium heat. For my gas grill, I preheat with all the burners on high for 15 minutes. Then I clean the grill grate with my grill brush, and oil the grates with a paper towel dipped in vegetable oil. Finally, I turn half the burners down to medium-high, and the other half to medium.
4. Grill it!: Put the lamb chops on the medium-high part of the grill, and the fennel on the medium part of the grill. Cook for 6 minutes; if you want to get fancy, rotate them 90 degrees after 3 minutes to give crosshatched grill marks. Flip the chops and fennel, and cook for another 4-6 minutes, until well browned on the second side. The chops are done when their internal temperature is 120*F in their thickest part. (That's for medium-rare. Cook to 115*F for rare, 130*F for medium). The fennel is done when it is tender and well browned. Remove from the grill, toss the fennel with the lemon juice, then let the lamb rest for 10 minutes before serving.
Notes:
*Lamb chops are small – I serve 2 per person, or 3-4 per person for big eaters.
*Grinding the rub: Don't have a mortar and pestle, or a coffee grinder dedicated to being a spice grinder? Improvise a mortar and pestle using a coffee cup and a spice jar.
What do you think? Questions? Other ideas? Leave them in the comments section below.
*Enjoyed this post? Come visit me at DadCooksDinner. Thank you!

January 7, 2011
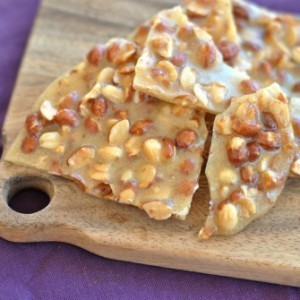
The Easiest Peanut Brittle Ever!
 1 cup raw peanuts
1 cup granulated sugar
1/2 cup light corn syrup
1/8 teaspoon salt
1 teaspoon each: butter and vanilla extract
1 teaspoon baking soda
Spray a 12-inch round pizza pan or other similar size baking sheets with vegetable cooking spray; set side.
Mix peanuts, sugar, corn syrup, and salt in a 2-quart Pyrex measuring cup. Microwave on high power, until nuts are fragrant and syrup is bubbly, stirring after 4 minutes, 7 to 8 minutes depending your microwave's wattage. Stir in butter and vanilla; continue to microwave on high power until nuts are golden brown, 1 minute longer. Stir in baking soda and then immediately pour onto on prepared pan. Working quickly, spread to desired thickness. Let stand until completely cool, about 30 minutes. Break into pieces. (Can be stored in a tin a couple of weeks—if you can make it last that long.)

Microwave Magic…
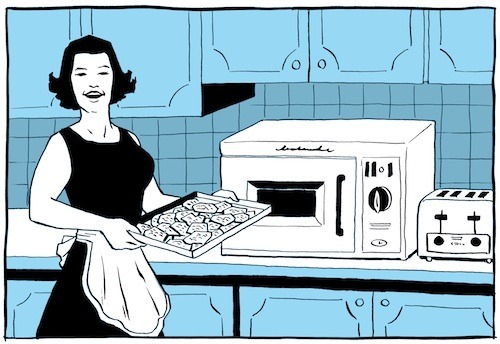
"Microwave Magic" was the title of the wood-grain folder where I found Mom and Dad's peanut brittle recipe–in a collection of recipes by the home economist for West Florida Gas (why the gas company created an electric microwave cookbook is probably a reminder of what a phenom the microwave oven was in the 70s).
I found the hole-punched folder buried under a plastic bag jammed full of loose recipes in their kitchen drawer. I was instinctively skeptical of the peanut brittle recipe. The whole collection was loose leaf, sketchier than a bad church cookbook, and we're all accustomed to slick books with alluring photos. I must have momentarily forgotten that some of the best recipes in the world are on smudged, hand-written 3-by-5 card and in community cookbooks. Besides, I've been eating and loving Mom and Dad's peanut brittle for years. I just never knew they nuked it.
As it turns out, it's about the easiest, no mess, f00lproof peanut brittle I've ever made. The equipment is straightforward—a 2-quart Pyrex measuring cup, some measuring spoons, a couple of measuring cups, a rubber spatuala, and a pizza pan. And the technique was utterly simple. Microwave peanuts, sugar, corn syrup and salt on high power for 7 to 8 minutes, stirring once at 4 minutes. Stir in another a little butter and vanilla; microwave another minute. Stir in baking soda, pour onto pizza pan, spread, cool, break up.
Why is peanut brittle so addictive? It could be because they're like chips—you can endlessly pick at all the little shards, and eat a half bag without ever eating a whole chip. It could be that shatter-glass crunch and its simple clean favor. Or the fact that it's both sweet and savory. In any case, when there's peanut brittle in the cookie jar, I'm a hopeless picker.
Mom asked me if I wanted to take some peanut brittle home with me. There was a time I would have said yes. Instead I asked for a couple cups of raw peanuts. Why take home a few pieces of brittle when in about 20 minutes, I can have two pizza pans filled with the stuff?

Pam Anderson's Blog

- Pam Anderson's profile
- 13 followers

