
Ann Christy's Blog, page 7
May 4, 2015
Between Life and Death – The Cover
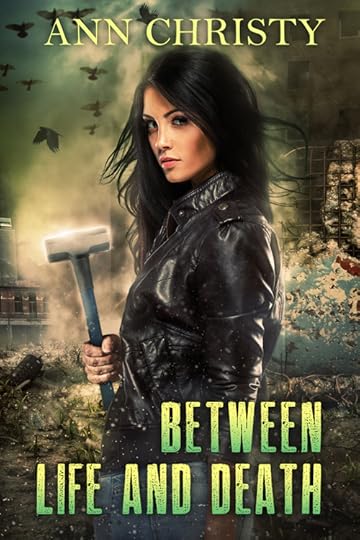 Yes, that’s right! Here it is!
Feast your eyes upon this beauty, the final cover for Between Life and Death. I think the cover artist really outdid himself on this one and my love is strong for it.
In less than a month, the third book in the trilogy will be published and I will once again be permitted to leave my house, keep a schedule that doesn’t include sixteen hours a day in front of the computer, and walk my dogs without tapping on a tablet while I walk.
Or will I?
While I wish the books had taken off, (every writers dream, you know), I’m actually really happy with the series’ performance. People who read them (no matter how many there are) seem to really like them. Emily and Veronica have been in my head so consistently for all these months that they are almost real, and that readers are feeling it as well is enormously gratifying.
That makes it very hard to leave them behind when the third book is sent out into the world.
To that end, there are three (awesome) announcements regarding this series that will be forthcoming.
The first I’ll announce in the Afterword of Between Life and Death. The second will come soon, once I’ve made my final selection and signed all appropriate legalese.
The third I will give you right now. Vindica is coming! That’s right, we’re finished with the final edits on Vindica, a new short tale that takes place in the Between Life and Death (#BLAD) world and it will be appearing in The Z Chronicles very soon.
If you haven’t heard of The Chronicles series so far (what? really?), then jump on over to Amazon and begin the feast. I was honored (and lucky enough) to be included in the very first of them, The Robot Chronicles, and they have become a machine. Liberally sprinkled with big names and huge talent (regardless of how well known) they have been rocking the charts. I don’t imagine that the Z Chron will be any different.
Vindica is the genesis tale for Violet. You briefly met her in Forever Between, will see more of her in Between Life and Death, but you’ll get to see the real Violet inside Vindica. As a note, her story is not YA. There is some darkness in there. And, caveat, even though I got it under the limit of 10K words, it barely squeaked in under that, so it’s a long short tale…if that makes sense.
And what about Advanced Review Copies of Between Life and Death, you ask? Oh yes, please get me your name if you want on the list. Because so many people are now asking for the book, a review copy, but not ever leaving a review, the only people who qualify for ARCs are those that have left reviews before. So please, either send me the link of your review on Amazon or your name on Amazon so I can find it (link is much easier for me). Release date is the 29th of May, so ARCs will be going out on the 14th. My email is ann.christyauthor@gmail.com.
If you’ve read this far, then here’s one more thing, but it’s not an announcement. It’s a plea, a call to action! Getting reviews is tough and without them, I can’t buy advertising or do many (or any truly effective) promotions so that more people will see my work. While I love writing, eventually it has to pay for it’s own covers, editors, formatters…etc. So if you liked the BLAD series (or any of my books), please go to Amazon (or any other venue!) and write a review. They don’t have to be long. Some places you don’t even have to write, just assign stars. I’ll be putting up a page with links to my books everywhere so you can do it with one click, but for now here is my link to Amazon and to Barnes and Noble. My books are listed there (B&N still shows the old covers, which is so weird.)
Gah, so glad that’s over. I absolutely hate asking for reviews. Makes me feel weird, like maybe I shouldn’t ask because it’s embarrassing or undeserved or something like that. So, enough of that. If you do it, I’ll be grateful.
I’ll try to get back on track with my Read and Loved posts, but it will have to wait until I get this book put to bed. The editing process is very time-consuming since everything has to be tossed about and tested.


April 11, 2015
The In-Betweener is free on April 11th and 12th

Yep, you read that title right. I’ve put The In-Betweener free for a couple of days! Aside from my perma-free (Silo 49: Going Dark), I almost never do free days. I think the last time was well over a year ago, but I decided to just go for it. If you want to read this series but haven’t yet, or are on the fence about it, well, there’s no more reason to delay. Go ahead and grab it up!
March 28, 2015
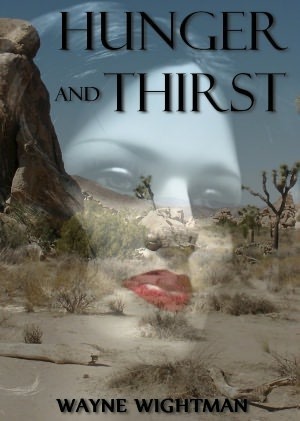
Read and Loved: Hunger and Thirst by Wayne Wightman
I know I’ve been remiss on getting my Read and Loved posts out there. I fully intended to do them weekly, but when I’ve got a book about to be released, something has to give. Now that Forever Between is out, I have a few days before I go back into my shell for book three! So, here is a goodie I read in 2011 that deserves a shout out.
First, please overlook the cover. Back in the wild days of 2011, independent authors didn’t have to have covers like we do nowadays. Flip past that and dive into the story.
Here is my review as written right after I read the book:
Hunger and Thirst is one of the best novella length works I’ve read in a very long time…maybe ever. (Okay, I’ve read even more since this, but this still holds as one of the most intriguing!) Part horror, part love story, part post-apocalyptic tale and part character study, it is superior in all it’s parts and makes a very compelling whole.
I read it all at one go. I came home from work, opened it up, and spent the remainder of the evening completely oblivious to anything around me. It was one of those stories that you get so deeply pulled into that the real world just fuzzes out. I couldn’t hear the phone, hunger pains or complaints about a lack of dinner. It was that good. And it was utterly unique as well.
With novella length works, one must walk a fine line in giving a synopsis. Too much and it is ruined for future readers, too little and no one knows exactly what the reviewer loved about it. I’ll try to walk that line because I would really hate to ruin your pleasure with this story.
Jack and Natalie are the main characters. They meet in the dry and dusty desert of a post-apocalyptic world where the rules of civilization don’t really exist but they are not so far gone that people don’t remember and appreciate that they were once there. That knowledge is really key to the story. When asked to behave but no one requires you to, do you? Is morality something deeper than arbitrary rules meant for civilized people who must get on in a crowd?
Of course, Jack and Natalie fall in love. That is the love story of the piece but it isn’t your standard love or romance as written today. It’s much more. And it is combined with horror, morality and how people deal with new (and very old) situations.
And yes, like only Mr. Wightman can do, there is a very cool cat in the story. It’s not the same level as the dog in Selection Event, but it couldn’t be really since Event is a full length novel.
As the other reviewer mentioned, there is something very special about the way Mr. Wightman creates characters. Aside from Jack, Natalie and the kitty, there are actually a very large number of characters who make short appearances in the story. Yet, despite their brief appearances, each is fully fleshed and it is done, somehow, in just the briefest of phrases. Someone really needs to study what he’s doing and figure out how he is doing it. He is, quite frankly, the best character artist I’ve ever read.
This is an inexpensive way to get a full evening of entertainment that you won’t regret. The other work of his that I’ve read, Selection Event, is even more fulfilling, so I can heartily recommend both of them. Just don’t start them if you have pressing business to attend to. You won’t get it done.
Caveat: As always, I only include books in the Read and Loved posts that are written by authors I don’t know. This is my opinion simply as a reader.
March 26, 2015
New Covers for the Between Life and Death Series
 While I love the old covers for The In-Betweener and Forever Between, they don’t really speak to people browsing on Amazon for a new book. After all, I know the story, so I can see the way the covers tie in. Someone who hasn’t read it only sees a dark cover and has no idea why it’s that way. So, with a mixture of excitement and sadness, I went searching for a new artist who could create a cover that worked better.
And I had no idea how wonderful the new ones would be. Feast your eyes! I think he captured Emily wonderfully. What do you think?
On a side note, I went ahead and ordered some copies of both The In-Betweener and Forever Between with the old covers. Why? Because very few people had a chance to get the paperbacks with the old covers, so they’re as rare as hen’s teeth! It might be fun to give those away during giveaways. You never know, they might become collector’s items.
If you’re going to Amazon, then you may or may not see the new covers for a few days. It takes time for new covers to propagate through all their servers. I saw the new one on The In-Betweener this morning and squealed with delight.
The pre-order for book three, Between Life and Death, still has the old cover image up, but never fear, the new one will come soon. The cover artist is super busy (and now possibly even more since so many authors asked me who did the new covers) but I’ll be up to the front of the line again within a couple of weeks.

March 22, 2015
Book on Sale Alert! Alien Chronicles
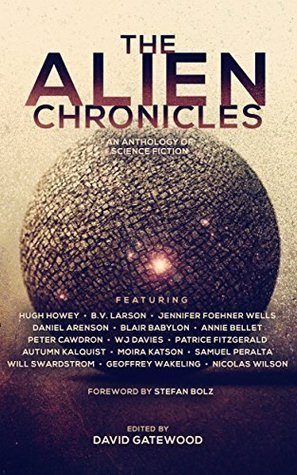
Since I know I’m not the only one reading this amazing series of anthologies, I thought I’d share that it’s on sale for just $0.99 for the moment. I don’t have a story in this one, but I’ve read it and it’s fantastic. It even has a story by one of my favorite authors of all time, Hugh Howey. Enjoy!
March 20, 2015
Crafty Author – Book Charm Bookmarks
 If you made your pile of gorgeous, little book charms using my previous instructions, then you probably want some ideas about what to do with them. Or maybe not, but I’ll give you a few anyway.
  The first one is the easiest to do: Bookmarks!
Average time to assemble two dozen bookmarks is about an hour once you’re proficient at it. The first time I put these together, it took about 2 hours simply because I had to work it out as I went along. Once you’re really good at it, it might be super fast.
Super Short Instructions:
- Get some bookmark blanks, eyepins or headpins, beads or charms and your book charms
- Assemble
- Admire!
Now for the longer instructions with some pictures!
Supplies:
- Bookmark blanks – Here is where I diverge from my normal Amazon route. You can find them there, but they tend to be more expensive for some reason. Also, the decorative ones that seem like a good deal are often made of a more brittle material and can’t be bent at all. They actually break. I did buy a couple of orders of some that looked really beautiful. Out of two dozen marks, 9 were bent and 6 were broken at the link where the charms get hung. And when I tried to straighten a bent one, it broke. So, I’d stay away from those. The best pricing I’ve found, as well as quality, is at Fire Mountain Gems for the silver-plated steel ones. They are really nice!
- Findings such as eyepins and headpins, depending on how you’ll put them together, plus possibly jumprings and crimp tubes.
- Tools for creating the loops. You can get these from Amazon and I use these and these. I love them! You’ll also need a crimping tool if you’re using crimps. There are loads of different ones, but just search on Fire Mountain Gems and you’ll find some very reasonably priced ones that are super useful. I have two from there.
- Beads, stones or charms, depending on how you want to decorate them.
- Your bookcharms

Work surface, ready to make book charm bookmarks. Note the coffee cup peeking out at the top right. Yeah, I needed that.

Decisions, Decisions! This is a small collection of some of the charms I use on the various swags, including bookmarks. Upper left is a dish of jumprings, which are essential to putting together the swag. You’ll need open jumprings rather than closed/soldered ones.
Instructions:
- Since you baked your bookcharms with either a headpin or an eyepin already inside, you should already have an idea of what you can do or want to do. If you have an eyepin, (with the eye at the bottom of the book), then you can hang a charm from that using a jumpring to connect them (examples of that are to the right of the row of bookmarks in the top picture). If you have a headpin, then you can loop the top of your headpin around the hole in the bookmark and then crimp it using a crimping tube and be done with it. If you want more embellishments, you have options. For headpin bookcharms, I usually add another headpin to a jumpring inserted into the bookmark hole and put meaningful beads and/or charms onto it (you can see an example of that toward the left of my top picture, the one with the alabaster bead). That way, you’ll have two pins dangling from the bookmark.
- First, learn to open and close a jumpring properly. Here’s a good youtube video.
- You can learn the basics of wrapping wire, crimping, and other very simple procedures in a minute or two right here. If I could learn it in a minute, you know it’s simple.
- Assembly line. The way I do it is to lay out all the parts for each one and then I don’t have to put everything down and fiddle with stuff. It does make it go faster. First, attach anything you want to the bookcharm (if you have eyepin opening), then make any additional pins (like with beads and such), and finally, only after you’re done with all of that, make the loops in the top of the pins and crimp them. Then, open your jumpring and attach the looped pins to the opening in the bookmark.
- That’s it. Admire it.

Putting a bookcharm with an eyepin together.

This one is the simplest example of a bookmark. A single eyepin with a charm at the bottom attached via a jumpring. At the top the bookcharm is attached to the bookmark via another jumpring. A crimp tube was used to secure the loop I made in the top of the eyepin.
Notes on choosing embellishments. I try to choose things that match something significant in the book. For Strikers, that includes charms like two hearts, a sailboat wheel, a sailboat, leaves, etc. For the book, The In-Betweener, I chose things like padlocks, keys, birds, hearts, infinity signs, and so on. For the sequel to that, Forever Between, I chose bicycles, hearts, infinity, birds, arrows, crossbows, etc. Each book has it’s moments and themes, and there are a bagillion charms out there to choose from.
For beads, I like to use semi-precious stones if I can find the right ones, but glass (particularly some of the elaborate designs) are good as well when the color matters more than the substance. So, alabaster, jade, malachite, lapis lazuli, fresh water pearls, obsidian, and even gray marble have their places on the book charms. Most everything I get from Fire Mountain Gems, but some things I can only find by dedicating searching. A few things, like infinity charms and crossbows, I had to go through Amazon. That tends to cost more.

I like to make a variety, so that the charms will speak to whatever spoke to the reader. If a reader tells me their favorite part was what happened with Emily’s mom at the end in The In-Betweener, then I might choose a lock and key for them.

Some of the materials used for these bookmarks included aventurine, jade, alabaster, or gray marble.
As always, if you have troubles or questions, don’t hesitate to email me or comment! This is a fun project that is great for giveaways or simply to send to your most avid readers.
YA Spring Fling is On!
The second of the two big spring book events I promised to share with readers is on. The YA Spring Fling has a load of books you can enter to win, including three of mine: Strikers, The In-Betweener, the just released, Forever Between. Here is the site. The image below shows just some of the books. I want them all!

NOTE: For some reason, The In-Betweener and Forever Between are listed under YA Horror, probably because they have quasi-zombies in them. I’m trying to get it into Science Fiction where it belongs, but please be assured neither book is horror in the classic sense.
March 13, 2015
Read and Loved: Temporary Duty by Ric Locke
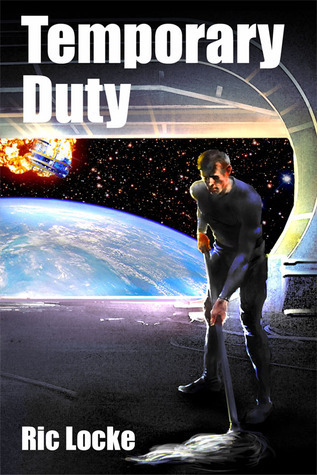
This is a quirky book that I enjoyed quite a bit. Also, I liked the previous cover much better than this one, so don’t let the cover fool you.
As a career naval officer, of course this one piqued my interest. I mean, sailors going directly from ships on good old Earth to ships with aliens? Come on, that’s like bait. Plus, these aliens just sort of showed up so there’s no build up of Earth tech or anything. It’s totally new.
Is the book perfect? Nope. But it sure is a fun romp. The story follows two sailors, low rankers who are young and already cynical, as they get assigned to the first alien ship to visit our planet. They have very little idea what their duties will be, but they assume it will involve mops and toilet cleaning.
Even their names are common, John and Kevin. I believe that was on purpose, as a way to illustrate in yet another way how everyday-sailor they are.
There is much adventure, derring-do, hilarity, bureaucracy (bureaucrazy in my lexicon), and romance. It’s a long book, and I had a great deal of fun reading it. Perhaps my enjoyment was partially because I’ve been the sailor at the bottom of the rank pile (I came in enlisted originally). Either way, it’s a fun read. Very space opera, but in a fun way instead of a laser beam everything you meet way.
Caveat: As always, the only books featured on Read and Loved are books written by authors I don’t know. This is my opinion purely as a reader. And yes, I like to feature books that I haven’t seen a huge buzz about.
March 12, 2015
Alternate History Short Story Finished – Unnatural
This is far…faaaar…outside my normal lanes, but it’s one that sort of spoke to me. It’s called Unnatural and if it passes the censors (uh, editors and opinion-makers) then it will be appearing in an anthology. The subject matter is a bit touchy and I foresee many people hating it only for that reason. We’ll see. One very trusted beta reader has it already, (by the way, I can take two more but they must have a gmail account for security reasons), so we’ll see what gets said. I like it though. Love the ending.
March 11, 2015
Crafty Author – Shrinky Dinks!
 This might bring back some memories for some of you. Back when the world was young and I was in primary school, there was this awesome craft we did using Shrinky Dinks. All the kids drew something, then traced our hands or what-not, on this special paper and then our teacher went to the lounge and shrunk them in the oven! I remember just loving doing that.
Well, despite the fact that the world has entered an entirely new age since then, Shrinky Dinks persist. And for the Crafty Author, they offer an excellent way to create easy, attractive and fast swag that is very swagalicious.
Up at the top of the post you can see some finished versions. I put tiny ones on tiny keychains links, the sort you might put your spare keys on or just hang off your regular keychain. I put the larger ones on a standard sized keychain. Ain’t they cute?
These also make an excellent alternative to the Killer Book Charms if you find that project too daunting. These are far easier.
BONUS: Because my instructions are often looooong and very complete, I’ve added the Super Short Tutorial at the beginning for those who don’t want the full instructions. I find them useless, but some people are more crafty than I and only need the quickie instructions.
Super Short Instructions:
- Print your images on Shrinky Dink for Inkjets
- Cut them out and punch a hole in them
- Shrink them in the oven
- Sprinkle embossing powder on them and bake them again
- Brush DuraClear Gloss onto the back side of the Shrinks
Now for the long instructions…..
What You’ll Need:
- Shrinky Dink for Inkjet Printers – This is important! Don’t get regular Shrinky Dink. Yes, I know regular ones are less than half the cost of inkjet ones, but they won’t work and can mess up your printer by smearing ink everywhere. I don’t get it on Amazon. The price difference isn’t significant from Michael’s, but the Michael’s coupons make me feel like I’ve scored a huge victory, so I buy them that way. Otherwise, it is between 12 and 13 bucks for 6 sheets of the stuff.
- Your photo-manipulation software, printer and printer ink
- Image of your front book cover
- DuraClear Gloss Varnish. Yep, you’re using that stuff again. It’s usually way cheaper at Michael’s, assuming your local one carries it.
- Small flat edged paintbrush, no wider than a half inch.
- Embossing powder - I’ve linked to one that is about a gazillion times cheaper than buying at Michael’s. Okay, not a gazillion, but so much that it makes me want to spit. And it turns out that it’s fan-freaking-tastic. I’m fighting the urge to buy a crate of it before someone realizes it’s awesome and jacks up the price. Get the glossy ultra-high clear. Don’t be tempted by holographic or anything. You’ll see why in another picture, because yeah, #LFMF. I’m easily distracted and click-happy. I’m sure I’ll figure out what to do with all that other embossing powder.
- Toothpicks
- Hole punch - This is more important than it sounds. Don’t use that cheap-o one that creates rough holes because those will become exaggerated after you shrink them. I went ahead and bought a good one and am very glad I did. Major difference in the final product, plus I use it for all sorts of Crafty Author projects. You need a 1/4 inch one. But I think I might try for one at 3/8ths of an inch as well soon.
- Whatever findings you’ll need to attach them. For keyrings on Amazon, you can easily wind up with crap. These are the ones I buy and I’ve been super happy with them, but I’m not entirely sure they come from the same supplier every time. They are much more expensive at Michael’s! For the 12 mm rings, I have to get them from Michael’s. I just close my eyes and it hurts less to be gouged like that. They’re also fun to attach to a ribbon as bookmarks and all sorts of stuff. (Let me know what creative usage you come up with.)
Create Your Images:
- Just like in the tutorial for Killer Book Charms, you’ll be using photo-manipulation software but this should be easy. Open up 2 new images, being sure to leave the pixels per inch at something like 300 and the size at 8.5″ x 11″ and a transparent background.
- Open up your high resolution image of your book cover. The one you uploaded to Kindle should be just fine.
- Resize your cover (but don’t save it like that!) to three inches tall. A three inch book cover makes about a 1.5 inch tall charm including the borders and white space above it. That’s just right for key-chains.
- Copy that and paste it as a new layer onto one of your newly created blank images.
- Do your brightness and contrast adjustments now. Lighten by 50 and increase contrast by 10 for best results. That won’t work exactly with every book cover though, so keep track of what you do so you can adjust the next round if you need to.
- Slide that down to the left corner of your image once you’re happy. Then copy and paste that image, the one already adjusted, and fit four across the paper in three lines, leaving a half inch of white space above each row so you have space for your holes to be punched.
- Now you’ve got about two inches of space at the top that is bugging you, right? Go ahead and copy/paste another book cover and rotate that bad boy to slide into the top sideways. You should be able to fit two of them. (I tried some smaller ones, but they are really very tiny when they’re done. Like, earring small.)
- Once you’ve got that down pat, be sure to save it both as the native file format and and as a .jpg. Now, open the .jpg version and copy the entire thing and paste it to your other new and blank image. Then “mirror” the image so that you are looking at the page backwards. Also lower the opacity so you can just barely see the images. That’s so that you can format whatever you’re going to create for the back side and the papers will line up in the printer correctly.
- Create your back side. I just used a simple web address. Remember to lighten the first one and then copy from there.
- Delete the layer that held your backwards front side from the second image or else it will print that way.
- Test print on card stock. Admire it.

Once again, I used an old version of Paint Shop Pro to prove this can be done without having the latest PhotoShop (though that’s what I use). You have to lighten the image by at least 50 points and increase contrast by 10 or else the Shrinky Dinks will come out unusably dark.

These are two tester images so you can see the lightening. On the left is one lightened by 35 points (which is not enough). On the right is without lightening. It will look odd to have it so light, but you can see how dark my finished products were at 35. The ones at 50 turned out much better.

Print a test page using good card stock because that will give a better representation of what it will look like on the dink paper. Also, be sure to check and see that your back images overlay your front images the way you want them to.
Print, Cut and Bake:
- Once you’re happy with your layout and have successfully printed a test page, go ahead and print on the precious Shrinky Dink paper. I like to be sure the rougher feeling side is facing toward the ink.
- Don’t touch it! Just leave it in the printer for about fifteen minutes before snatching it up and seeing what your two bucks for a single sheet got you. Preheat your oven to 275 degrees F while you wait.
- Cut out your shrinks and then punch holes in them.
- Be sure to put parchment paper on your cookie sheet. TIP: Put a folded double layer of parchment on the cookie sheet such that the shrinks will sort of be lifted off the sheet. I got less deformation that way. Not sure if that will work for everyone.
- Only put a few on each time, with plenty of room between them. You’ll need to watch them like a hawk so put the oven light on. Put the cookie sheet in, then watch in horror as they curl up and get all weird, then breath again when they start to straighten out. Wait thirty seconds after they uncurl before taking them out so they get that last shrinkage in. If yours did it faster than a minute, then your oven might be too hot. They can get brown if they overcook and also brittle.
- As soon as you take them out of the oven, press down on them with a towel to flatten them the rest of the way. If yours are deformed or skewed, they might not be fully done. Slip them back in for another minute and see if that helps. Not all shrinkies will turn out perfectly though, some will be deformed.
- Set them aside to cool on a flat surface while you do the rest.

I started cutting them all precise-like with my craft knife, but then I didn’t like the sharp edges. I switched to a really good pair of craft scissors. Only do that if you can cut a long straight line with scissors well. It will show up if it’s wavy at all.

Be sure to leave about a half inch of space above your book logo so that you can punch your holes with plenty of room around it.

This is the size before shrinking (left) and after (right). It’s amazing! And it’s very thick and quite stiff when shrunk.

Do you see the Fail Box contents there? Yes, they are there. Some of them are crooked because I put too many on the cookie sheet at once and I put different sizes on the cookie sheet. I re-baked a bit during embossing and most of them fixed themselves.

This shows you a Fail Box. The nearest one has holographic embossing powder on it, which sounds great but looks like crap. The other two have the embossing powder I linked to. It’s far superior to any other in my arsenal.
Shine ‘em up:
- You’re going to bake your shinks again, this time sprinkled with embossing powder. That will give it a hard, shiny finish. While the shine is pretty, it’s also needed. One of the downsides of Shrinky Dinks is that the ink from printers will eventually rub right off, so a finish of some kind is needed to protect it from the rubbing of keys or what have you. The caveat to this is that you can only use embossing powder on one side of your shrinks, the other will just get some quick brush coats of DuraClear, so pick the side with the images for your embossing powdering.
- This can be messy and annoying. The easiest way to do it is to have your parchment covered cookie sheet on top of your stove (since it will be hot between batches) and a piece of wax paper on the counter close to it. Put a crease into the wax paper at the center and then flatten it again (you’ll see why later). Put your open jar of embossing powder on the center of the wax paper with the upturned lid closest to you. Hold the shrink over the open jar and sprinkle tiny pinches across the surface of the shrink. You’ll have enough when you can barely see the colors of the image through the powder.
- Using your jar lid as a spill tray, put the shrink onto the cookie sheet. Sprinkles of embossing powder have likely escaped onto the parchment. Use a paint brush to slide those to a corner of the parchment. Embossing powder will re-liquefy every time it’s heated, so it will glue future shrinks to your parchment (#LFMF moment).
- Only put a few on the sheet at a time. Your shinks will re-soften as well so you need to be able to handle the number you have in a few seconds. Pop it back in the oven and the very moment you see the last bit of embossing powder melt, take them out and use a toothpick to poke down or flatten any edges that have tried to curl up.
- Let them cool for a moment, then set them onto something flat and cool to finish drying. You will have a lovely, raised shell of hard, shiny clear finish when done.
- Put a couple of thin coats of DuraClear gloss on the reverse side of your shrink to protect what you’ve got there.
- Insert key rings and voila…insta-swag!
NOTE: The crease in the wax paper is so that you can easily pour all the embossing powder you spilled back into the jar.


