Wendi Dunlap's Blog, page 2
January 23, 2016
DIY an inexpensive way to hang posters and prints
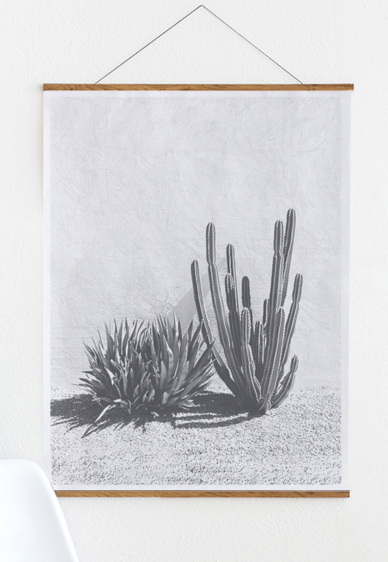
If you’ve tried to buy a frame for a large poster-sized print lately, you know how frustrating it is. Nice frames that size are ridiculously expensive. Other frames are less ridiculously expensive, but look cheap. Just tacking or taping the posters to the wall gets old once you’ve graduated from college dorm walls. I have a ton of large movie posters I want to hang in my home, but they aren’t hanging yet because framing them is a big investment.
Then, for Christmas this year, I received a gift card to Parabo Press (thanks, Dave!) where they will print poster-size “engineer prints” from your photos. I ordered one from an Instagram photo, and was pretty happy with the print itself:
A photo posted by @litlnemo on Jan 20, 2016 at 2:46pm PST
But… as you can see, it’s just taped to the wall there with washi tape, and that was not going to be my long term solution. I had to find something else.


June 14, 2015
The notebook obsession: Pt. 2
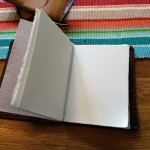
I was craving one of the larger Traveler’s Notebooks at this point. One that would give me more room to draw and plan. And I liked the slightly thinner cover the originals have in comparison to the Renaissance Art journal. (Don’t get me wrong, I love it to pieces. But I wanted something different and more like the real Midoris for the larger notebook.)
I kept looking at the prices and thinking “No, I can’t justify buying one.” But I didn’t want to get one of the “fauxdoris”, either. The thing about Midoris is that they are a bit like Apple products in that they are not just nice products, but they are beautifully designed and packaged and they feel a bit like a treasure to open. Fake Midoris often do not have that quality, though of course some do, and many of them just looked… cheap. The ones that didn’t were expensive, like real Midoris. And even the ones that looked good usually didn’t have that quality of “vintage notebook that Indiana Jones would probably carry around” that I was looking for.
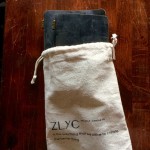
So then, I received an unexpected Amazon gift card. Surprise! I thought about what I would spend it on. A Midori? But I just couldn’t bring myself to do it. And then I found this. A set of two notebooks and a pen holder from ZLYC. I was skeptical — surely they had to be cheap crap. I looked in the reviews and was surprised to see that they were almost universally positive, and didn’t appear to all be shills, either. On top of it all, the notebooks are the same size as Midoris (and almost an exact look-alike). I thought about it for a while, then took the plunge, ordering a set in Dark Coffee. Here’s what I got:
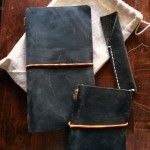


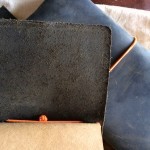
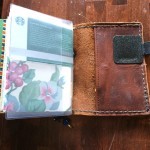
Let’s just say I was impressed. The leather was perfect — thin and flexible and yet with some good heft to it. It is nice to hold on to. It smelled good, not of chemicals or mildew. They were put together nicely, and each book came with three random inserts (plus an extra plastic pocket insert in the large book).
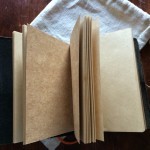
The large book had a two graph inserts, a free calendar, and the pocket insert; the small book had all kraft paper inserts. I was thrilled, and immediately started customizing the large book. I may use the small one as a gift since I already have the other from Renaissance Arts.
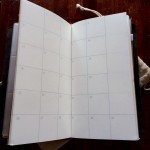
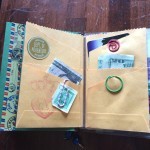
And now, a few days later, here’s what I have!


The notebook obsession: Pt. 1
Uh-oh. I’ve got another obsession.
A few months ago, there was a post on Metafilter about something called the Midori Traveler’s Notebook. I had never heard of this. The notebooks, apparently, have a devoted cult of users who buy all kinds of accessories, customize and decorate their notebooks, and generally spend a lot of time using them as planners, sketchbooks, and more. I looked at some links about the Midori notebooks, and thought they looked nice, but not anything I would use much. Though I’ve always loved stationery and journals, I’ve never used them enough. Usually I get one, write in it a few times, then never again.
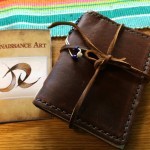
And then an online friend pointed me to a free journal offer from Renaissance Art. This one. She said “Anyone interested in those Midori notebooks should try this offer. You only have to pay for shipping.” Why not? I thought. I do love journals and notebooks. And $9.99 for a pretty leather journal? What’s not to like? It’s not a Midori-brand notebook, but it is the same size as a Midori Passport-size Traveler’s Notebook, the smaller size, so Midori refills would fit.
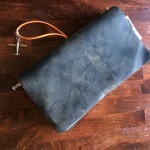
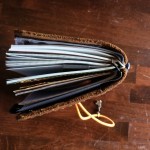
I ordered the notebook, and was impressed when, only a few days later, this arrived from Renaissance-Art. (Incidentally — I have no connection with Renaissance Art. I just like the notebook they sent me.)

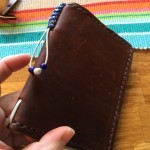
The notebook was made of beautiful, buttery leather. It smelled good, like a new baseball glove. I went online to see how people use and customize their Midoris and “fauxdoris” like this one, and immediately fell head over heels into the rabbit hole. For example, see this Flickr group. People use the books as sketchbooks, art journals, travel journals, planners, and more.
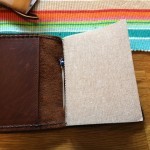
What is special about them is the refillable system. Refills are held in with elastics, and you can add more elastics to hold more refills. There are a ton of different refills — graph, lined, blank, kraft paper, calendars, zip pouches, etc. It’s not difficult to make your own, either. So if you want to use yours as a personal planner, you might include a calendar, a Chronodex insert, and lined paper. But if you want to use yours as an art journal, your inserts might include drawing paper and a pouch to carry supplies. When you fill up one of the paper inserts, you can take it out and replace it with a new one, even if the rest of your inserts aren’t used up yet. It’s endlessly customizable and flexible.
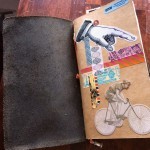
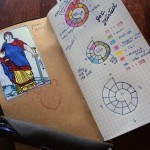
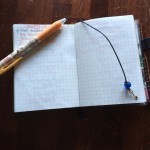
Of course, I got all excited about this and started customizing mine. Of course.


I love the book and have been using it a lot. But. It wasn’t enough. It’s a bit small for writing, and might work better for me as a sort of wallet, so I wanted the larger size — maybe a real Midori?
And with that cliffhanger of sorts, I’ll stop for now. Watch for Part 2.
April 29, 2015
New article: Four Times
Recently there have been some shootings in my neighborhood. I felt the need to write about it a bit. So I did. You can read the article on Medium.
February 28, 2015
Just wrote an article on Medium. It’s about nostalgia, an...
Just wrote an article on Medium. It’s about nostalgia, and development, and the city, and the feelings caused by change. Please read and share, if you like.
January 6, 2015
Bartell’s Soda Fountain, 1922
Something for those, like me, who are interested in Seattle history:
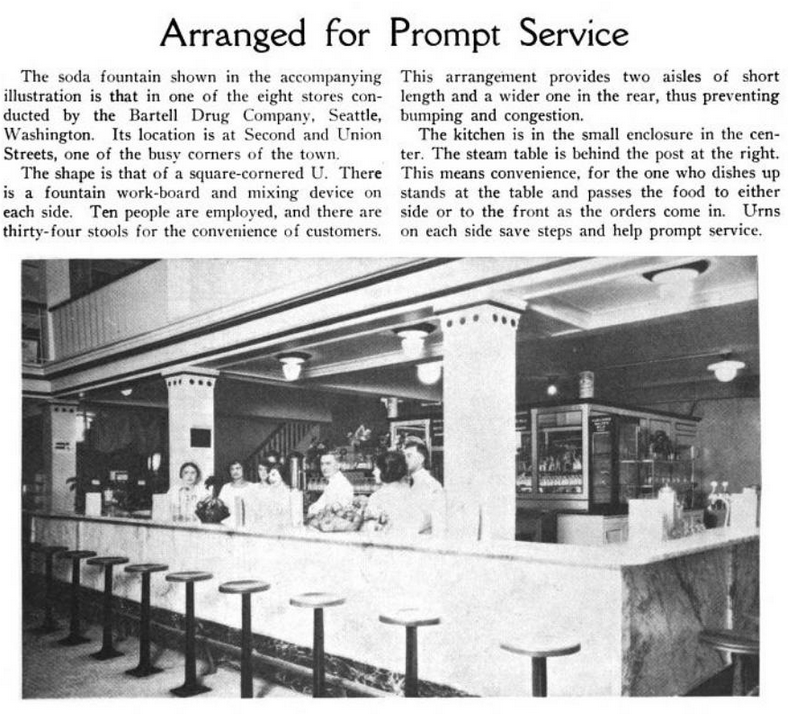
From The Bulletin of Pharmacy, 1922.
Bartell Drugs is still in business, but, sadly, there are no soda fountains remaining at their stores. There is no longer a store at Second and Union, but there is one a block away on Third.
(This post is mirrored on my soda fountain blog, Phosphates, Fizzes and Frappes.)
December 26, 2014
Project: Orange coconut oil sugar scrub
 This year my budget for Christmas was lower than it has been in previous years. So I made some presents: orange coconut oil sugar scrubs. They came out perfectly — they smell great and do an excellent job of exfoliating and moisturizing the skin. I love this stuff. As it turned out, the folks I gave it to loved it as well. I may have to do it again.
 It was a fairly easy and inexpensive project. Here’s what you need:
Coconut oil
Sugar
Essential oil
Anything else you want to include in the scrub
Jars
Labels
Anything else you want to decorate the jars with, such as ribbon
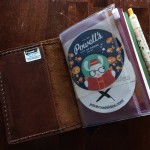
The sugar and coconut oil are roughly a 1:1 mixture, but you can adjust it depending on what you want your scrub to be like. I used orange essential oil, just a bit, and dried orange peel from Penzey’s. The jars were from IKEA ($3.99 for a package of 4). I made the labels myself in Photoshop.
I was inspired by this project, which has been pinned on Pinterest more than 19,000 times! Sometimes Pinterest-inspired stuff can fail pretty badly, but I’ve had relatively good luck with them, and this one was an unqualified success.
December 15, 2014
Project: Chalkboard stairs
I have a stairway that goes up to the attic level of my house (that’s where my bedroom is, though originally the attic was unfinished.) The stairway was last painted some decades ago with boring gray floor paint. The walls are dingy “landlord white.” I’ve meant to do something with the stairway for 18 years, but was never sure exactly what. Bright colored steps? Dark? Wood-finish? And what to do with the walls?
I spent a lot of time looking for ideas and inspiration. I made a Pinterest board that currently contains 244 pins of interesting staircases. But the solution to the stairway eluded me.
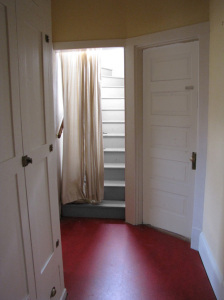
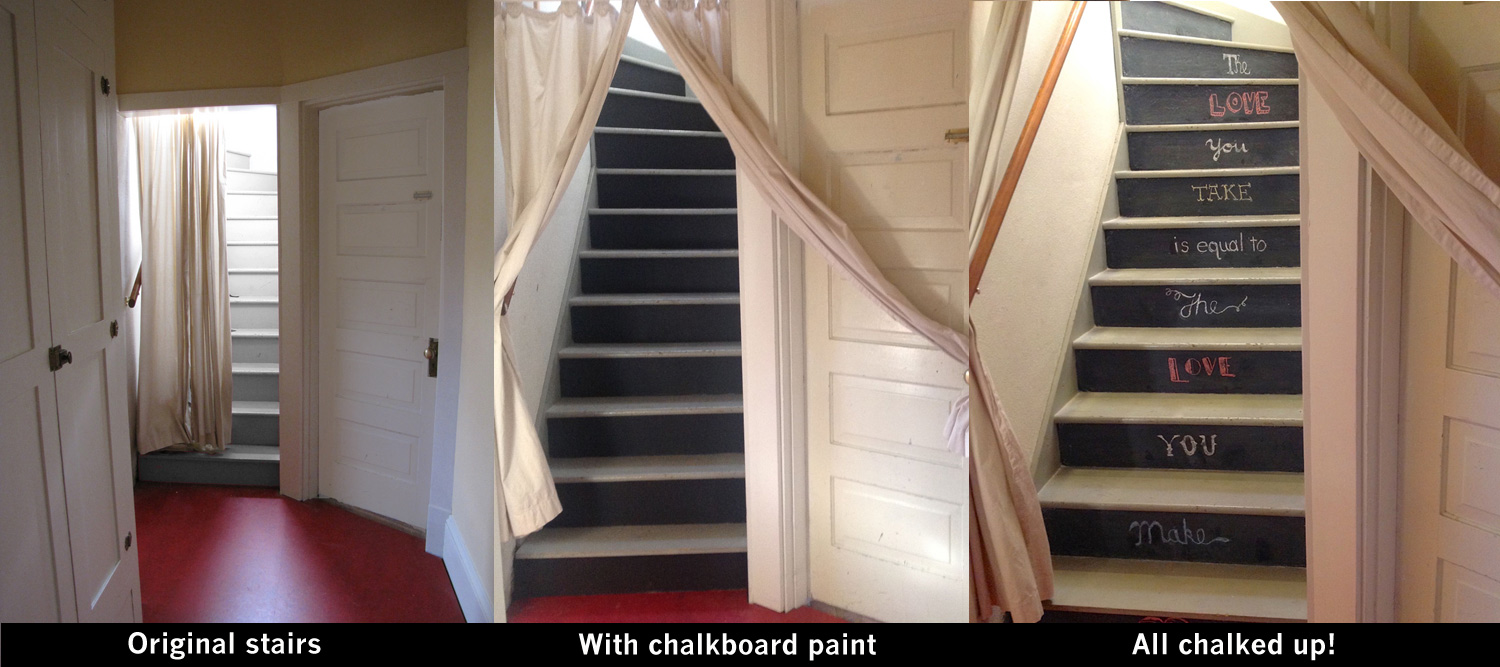
This is about the best the stairs ever looked before now. Because you are far enough away not to see the flaws.
You can see in the photo what my stairs looked like. Plain gray, with a curtain to hide them (and keep the heat downstairs when necessary). They look better in the picture than they did in reality. In reality, they are so dull, old, and dirty-looking. No amount of cleaning makes them look nice.
Redoing them is an annoying task — finding the right floor paint, and the right color, and setting up a gate to keep the cat off the stairs, and keeping off the stairs myself while the paint dries. I just haven’t had time to think about it much. But I realized that I could just decorate the risers — the front part of each step — without much fuss. I could draw on them, paper them, paint something, whatever. Eventually when I redo the whole stairway — which I still need and intend to do — I can remove or paint over whatever I do now.
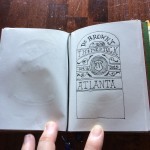
I thought about lettering something interesting on each riser. A quote of some kind. And then, I remembered chalkboard paint. Ah, chalkboard paint. So fun. And, at the moment, so trendy. One thing led to another, and a few days later, this was my stairway:
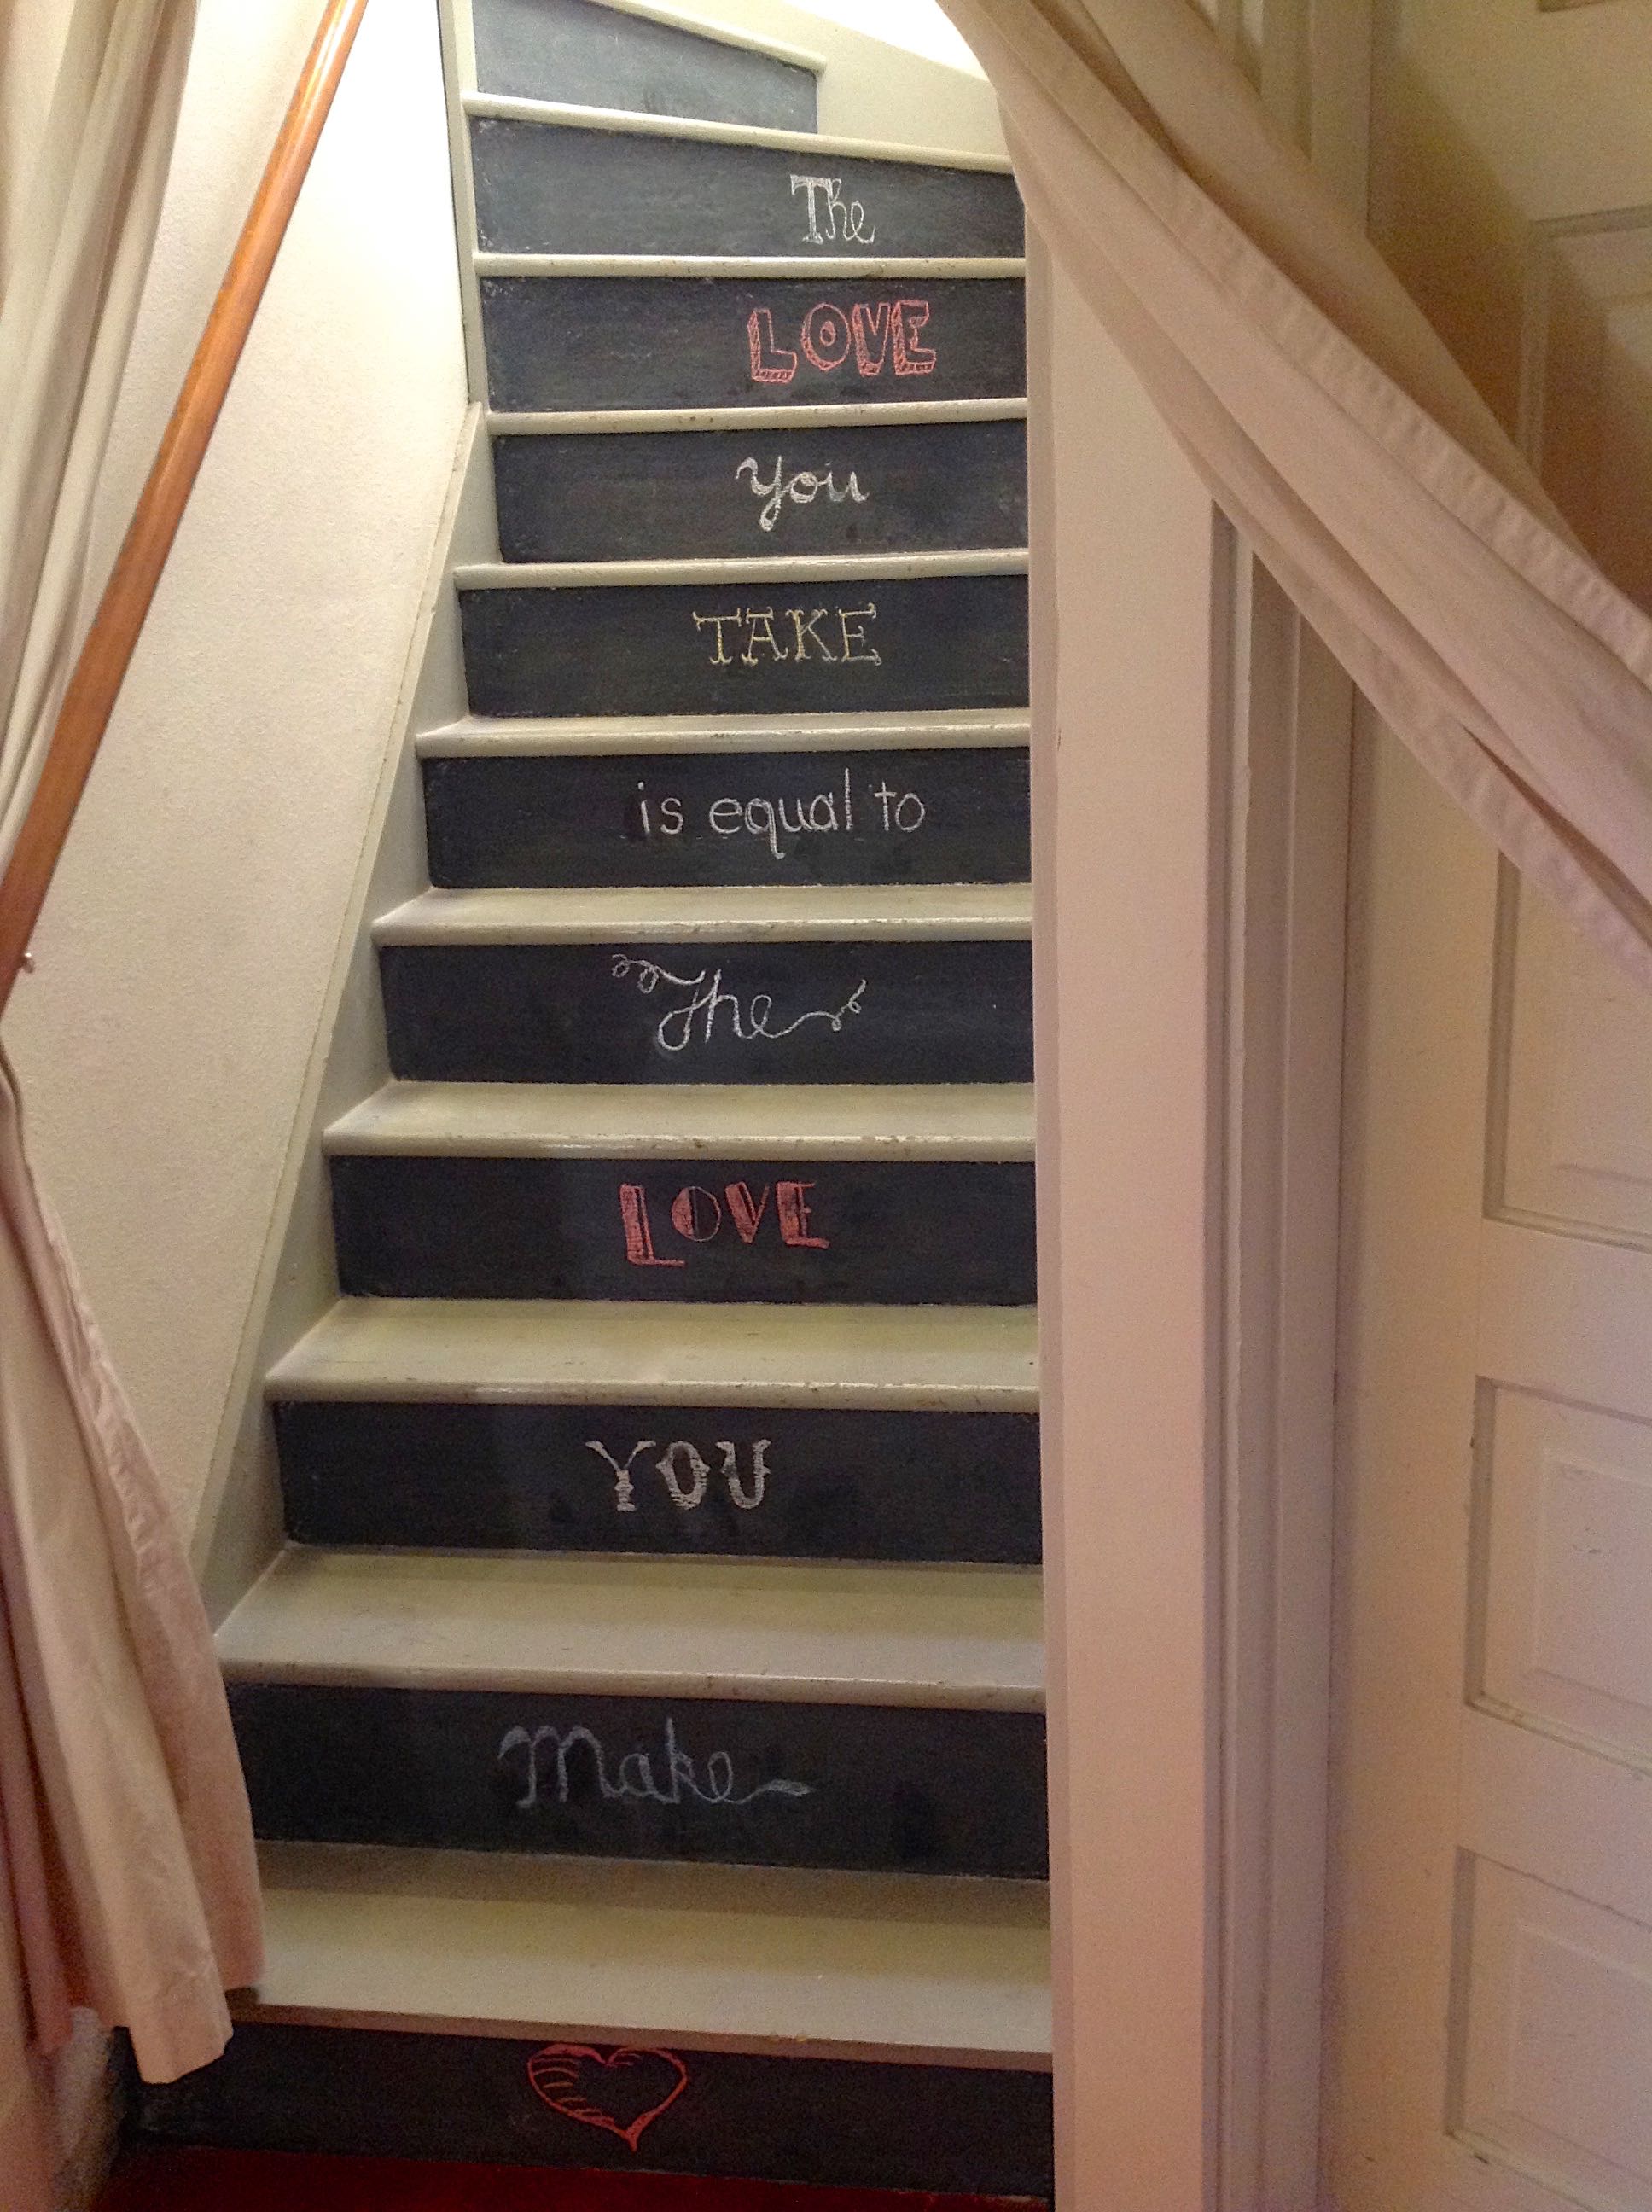
Yes, I’m a Beatles fan. How did you know?
The risers are now chalkboards, and I can change the lettering any time I like. Or I can just draw things on them. I could even write reminders on them like “Don’t forget to pick up the laundry while you’re up there!” if I wanted to.
The top of each step is still the ugly old gray paint. But even with the dingy grey steps and white walls, the stairs look 100% better than they did before, and the whimsy of my chalkboard steps makes me smile whenever I see them.
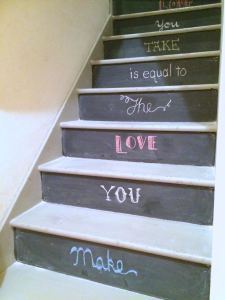 It’s also a fun place to practice some chalkboard lettering styles. Chalk is pretty forgiving! Some of these words were easy to write, and others involved some erasing before I was happy with them.
“Chalkboarding” your staircase is easy. I used Rustoleum’s chalkboard paint in a quart can (not the spray paint). The paint goes a very long way. This is the second project I’ve used it on, and I am maybe 1/4 way through the can. Ideally you are supposed to use a foam brush or roller to get the smoothest finish, but I just used a normal brush. (Living dangerously, I didn’t bother taping around the steps, either. It worked out fine, but unless you like to live as dangerously as I do, you might want to tape some paper or plastic down.)
Clean the surface you are going to paint. If it’s rough, sand it or your writing surface won’t work well. (I didn’t need to do this — the surface is a bit rough here and there, but it seems to be OK.) Paint a coat of chalkboard paint. At this point, you’ll probably ooh and ahh at the deep, rich black finish. That is, if you use black paint. Chalkboard paint really does look nice when it hasn’t been chalked on yet!
Wait four hours before the next coat. Then give it at least one more coat. Two, if you can. (I used one.)
Now comes the hard part. If you’re like me, you want to start writing on your new chalkboard steps! But you can’t. You have to wait three days for the paint to cure. Three days! If you don’t do this, I’m told that the words you write on the board might be permanent. And you don’t want your steps to be that unforgiving, do you? So be patient, and wait.
In three days, break out the chalk. But, wait! Don’t write yet. First, you have to condition the chalkboards. (You may need a lot of chalk for this step.) Take some chalk on its side and cover each step completely with chalk. Then wipe the chalk off with a dry cloth, leaving a fine film of chalkdust on the surface. (At this point you lose that beautiful deep rich black color, but instead, the surface gets that slightly cloudy chalkboard look. Don’t stress out about it. That’s what it’s supposed to look like!)
Now you can write on it! Be a bit gentle with it at first while the paint continues to cure a bit more. What will you write on yours? I started with a Beatles lyric. But I have other ideas — poems, famous quotes, Burma Shave ads…
Eventually, I’ll paint the walls and the steps and brighten this area up a bit. I may or may not keep the chalkboard risers at that time. But in the meantime, I have something I can enjoy, in a part of my home that always depressed me before.
November 28, 2014
My bedroom makeover is featured today in a post on Apartm...
My bedroom makeover is featured today in a post on Apartment Therapy! Cool, huh?
November 19, 2014
Pinterest and the bedroom project
It probably goes without saying, but Pinterest was an immeasurable help in getting the bedroom project designed and completed. Back in the old days (by which I mean 2009), when I planned my new kitchen, I did it semi-old school by creating a digital inspiration board:
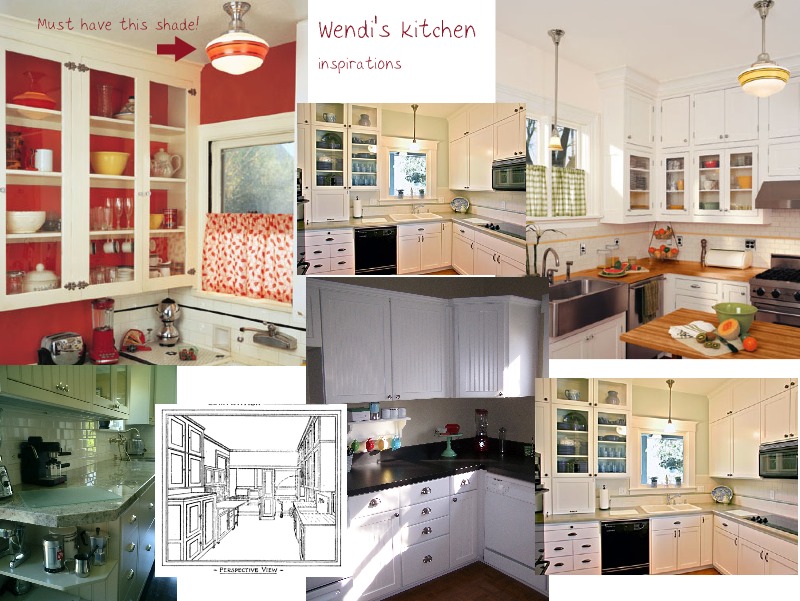
and a digital materials board:
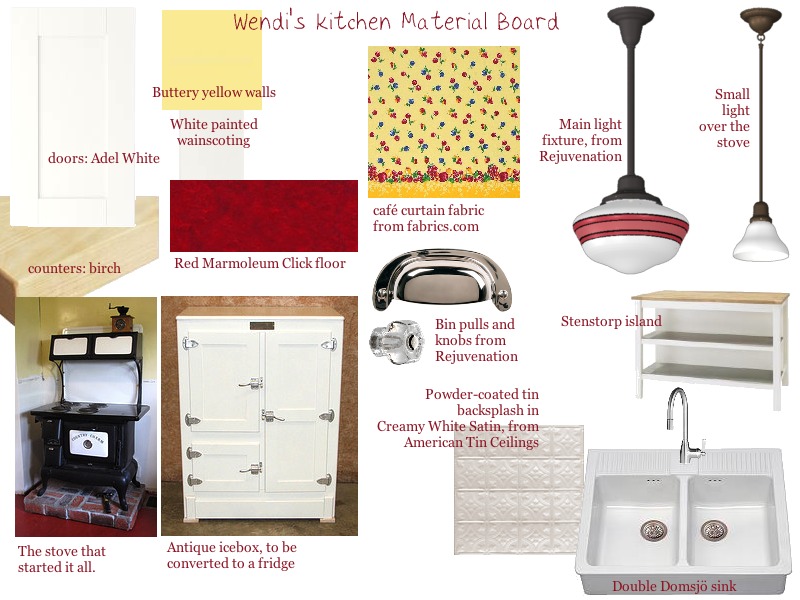
Both of these were helpful, but they were a bit tedious to put together. I had to find the images I wanted, copy or scan them, and paste them into Photoshop, where I would try to make them fit into the page.
Pinterest has made that process completely simple, as long as the images you want to use are in digital form somewhere. Click a button, edit some text, boom! You’ve got an inspiration board. Or a materials board. Or a brag board. Or some combination of the three.
I used one to compile ideas for this project for a long time: possibly a couple of years. And now it also contains images of the finished room.
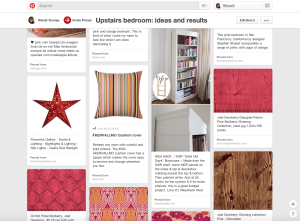 Certain patterns became obvious almost from the beginning: painted white floors; pink, red, and orange; rich fabrics; attic doors; built-in bookcases. And so the design developed almost organically from the collection of things I loved.
Some pins very specifically inspired me, however, and I’d like to credit them here. Click on the photos to see the pins on Pinterest (from which you can usually click through to the original source material).
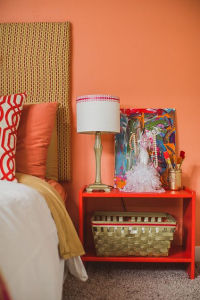

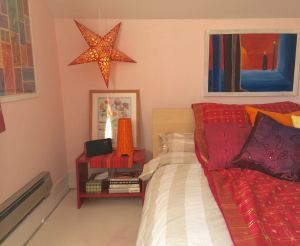
When I saw this pin, with the coral-red painted RAST nightstand, it was a revelation. I already had two of those nightstands, still unfinished pine, that I’d owned for more than a decade. I hadn’t decided yet whether to keep them. This pin (unfortunately, I do not know its source, but I will credit it if I find out!) showed me that a painted RAST would be well worth keeping. A can or two of Rustoleum later, and I had glossy red nightstands that look great against the pale pink wall and white floor.
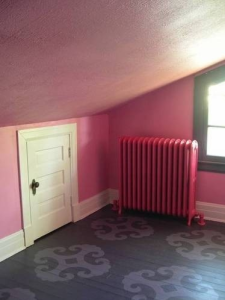
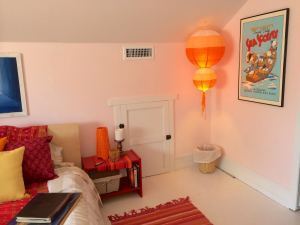
The adorable tiny attic eaves door in this pin (and the painted floor!) helped me figure out what to do with the access opening to my own attic eaves. The hole had been blocked with a loose piece of plywood for at least the last 18 years!
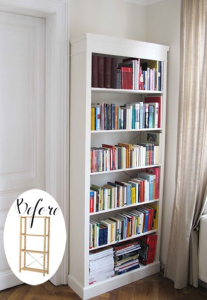
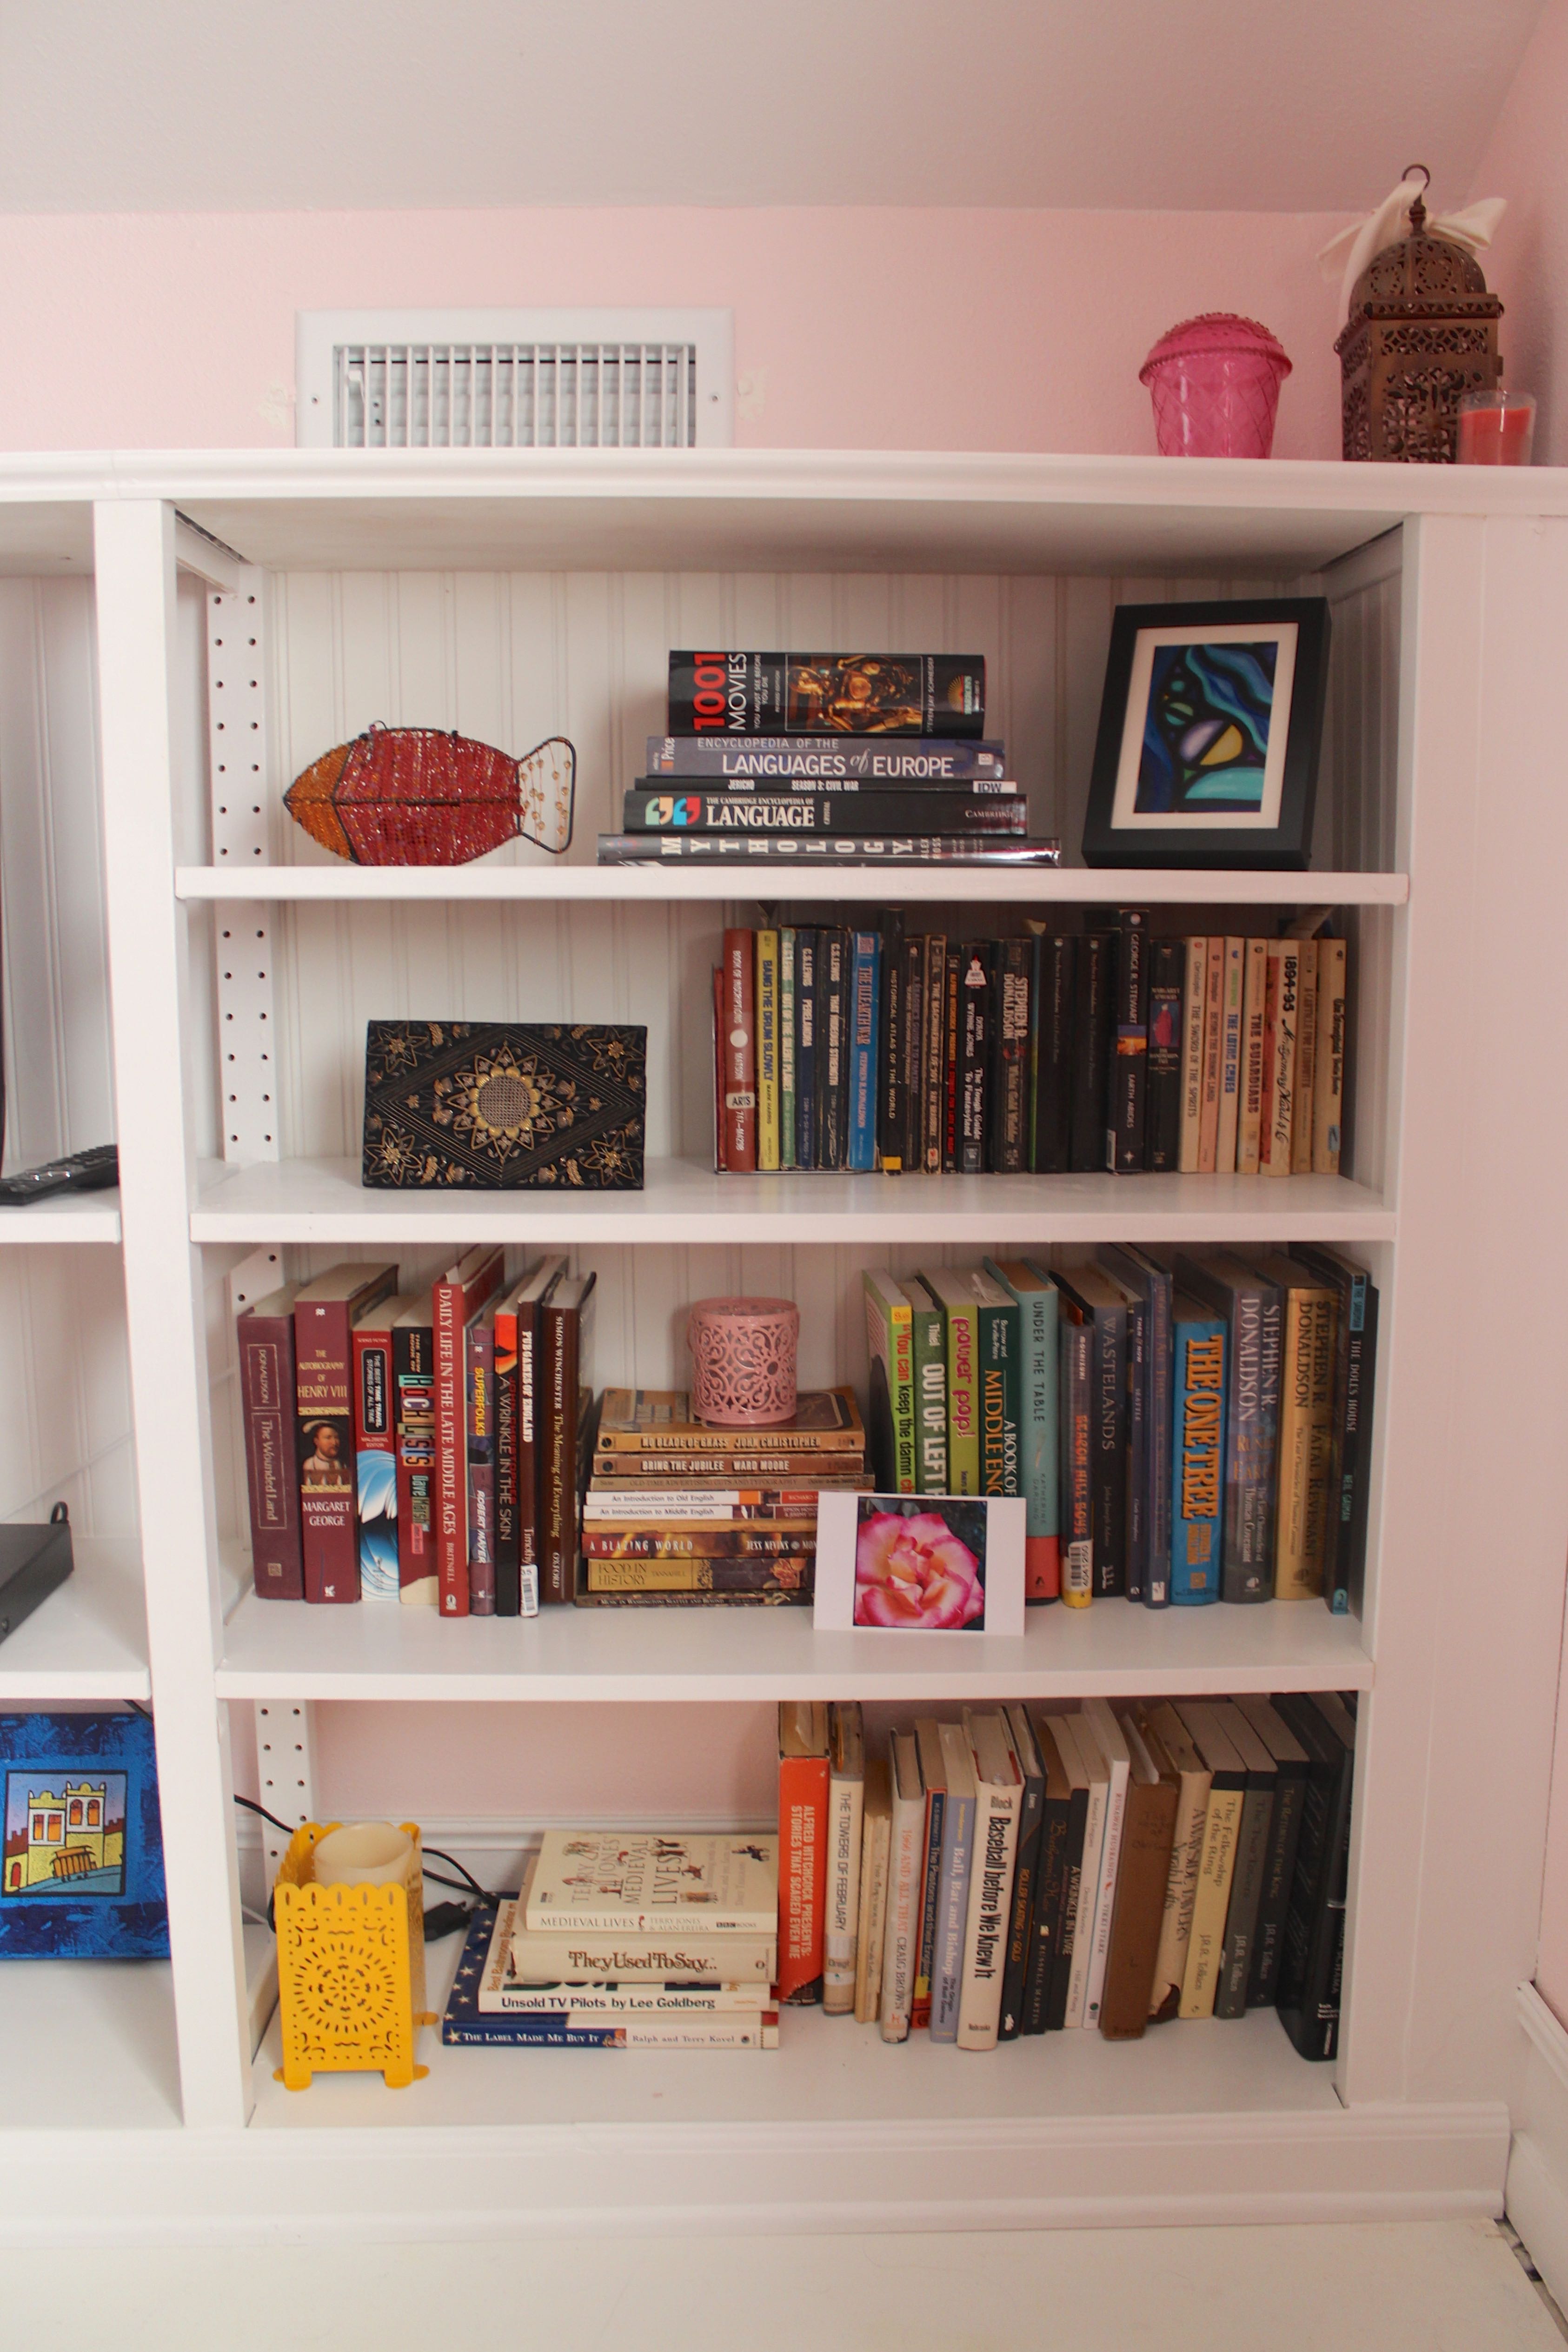
This is another example of a pin that made me think of something I already owned in a different way. I already had a huge IVAR shelving unit from IKEA. I was thinking about painting it. So why not hack it a bit to make it look like a built-in? Paint, beadboard, trim, and spackle did the trick.
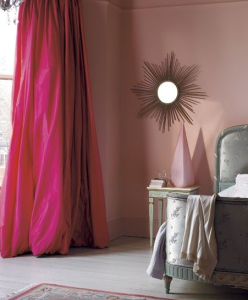
 This image was the one that first got me thinking seriously about whether I could live with pink walls. As it turns out, I love them!
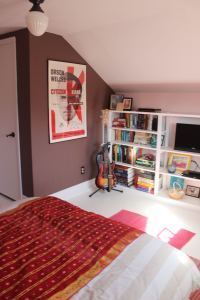
And, last but not least, the genesis of the chocolate-brown wall.