Amy C. Fitzjohn's Blog, page 3
June 12, 2023
Project Bean TeePee
There is so much to do when you take on a new allotment. It can be overwhelming. I’m breaking things down into baby steps; projects I can do in a day, or work on at home and take to Hen’s Tooth.
May is the time to start off climbing beans, to plant out in June.
I picked up some seed packets at Wilko and from DT Brown (it’s worth joining their newsletter to get the free P&P offers) and started them in small pots in May. I also acquired runner bean plants from my mother in law, who had some spare.
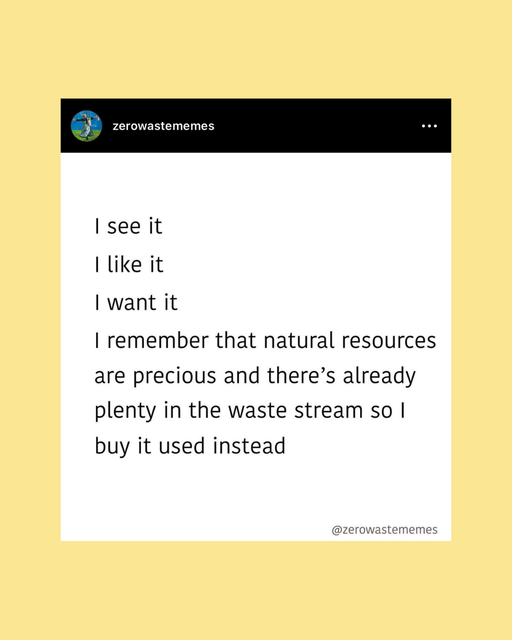
Part of the fun and the challenge of having an allotment is to be as sustainable as possible. To reuse and re-purpose things. I have as shed at home full of random bits and bobs for just such projects. I also like wombling for things and cruising around charity shops and junk shops grabbing random bargains.
The Bean TeePee
I had some old decorative fishing nets from a previous interior design project. That sounds very grand, they used to be hanging in my seaside themed summerhouse.
I’ve seen pictures on Pinterest of teepees made out of climbing beans. Ever since I was a kid, I’ve always loved a den, and thought it would be fun to create my own little green den at Hen’s Tooth.
How To Build Your Own Bean TeePeeThe Teepee starts with a solid structure for the beans to climb up.
Step 1: Start by choosing where to put the teepee. A flat (ish) piece of ground. Somewhere with enough sunshine for the beans to thrive and somewhere you would be happy to hang out. No one wants to sit in a teepee that overlooks a wall, or some smelly bins!
Step 2: Prep the ground – cut down or pull out any weeds. Because my allotment it no dig, I trimmed back the weeds to ground level then laid some cardboard over the ground. I then coved this with wood chip. I cleared space around where the teepee would sit ready to plant up.
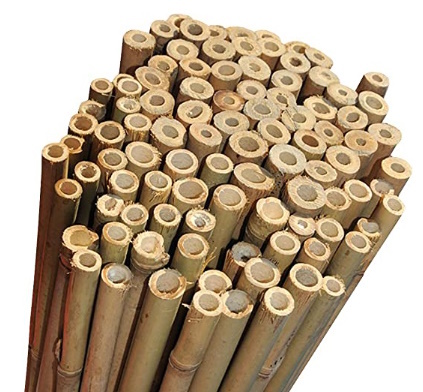
Step 3: Get 4 to 6 really long bamboo canes or other branches – at least 2m long.
Step 4: Push the sticks into the ground at even intervals, leaving a gap between 2 of the canes wide enough to get through. Push them in good and hard and angle them inward.
Step 5: Use wire or twine to string the tops of the canes together to form a pyramid shape. Make sure this is tied tightly to hold everything firmly in place. I prefer not to have unnecessary plastics in the garden, so avoid cable ties or plastic twine. Instead, choose a natural jut twine. It will biodegrade over time. It will be good for at least a year, and you can easily remake the teepee next season if you want to.

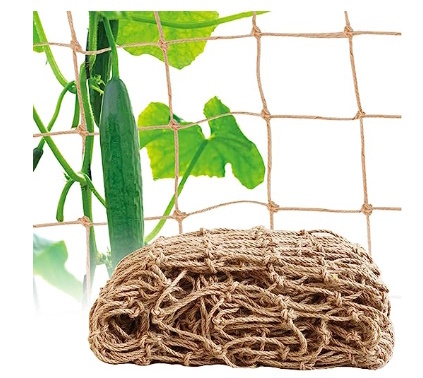
Step 6: Your beans need something to climb up. You can make a netting grid with the twine or get some netting. Lay the netting over the teepee shape, making sure it goes right to the ground and up to the top. Tie it in place with small pieces of twine.
Step 7: The plants.
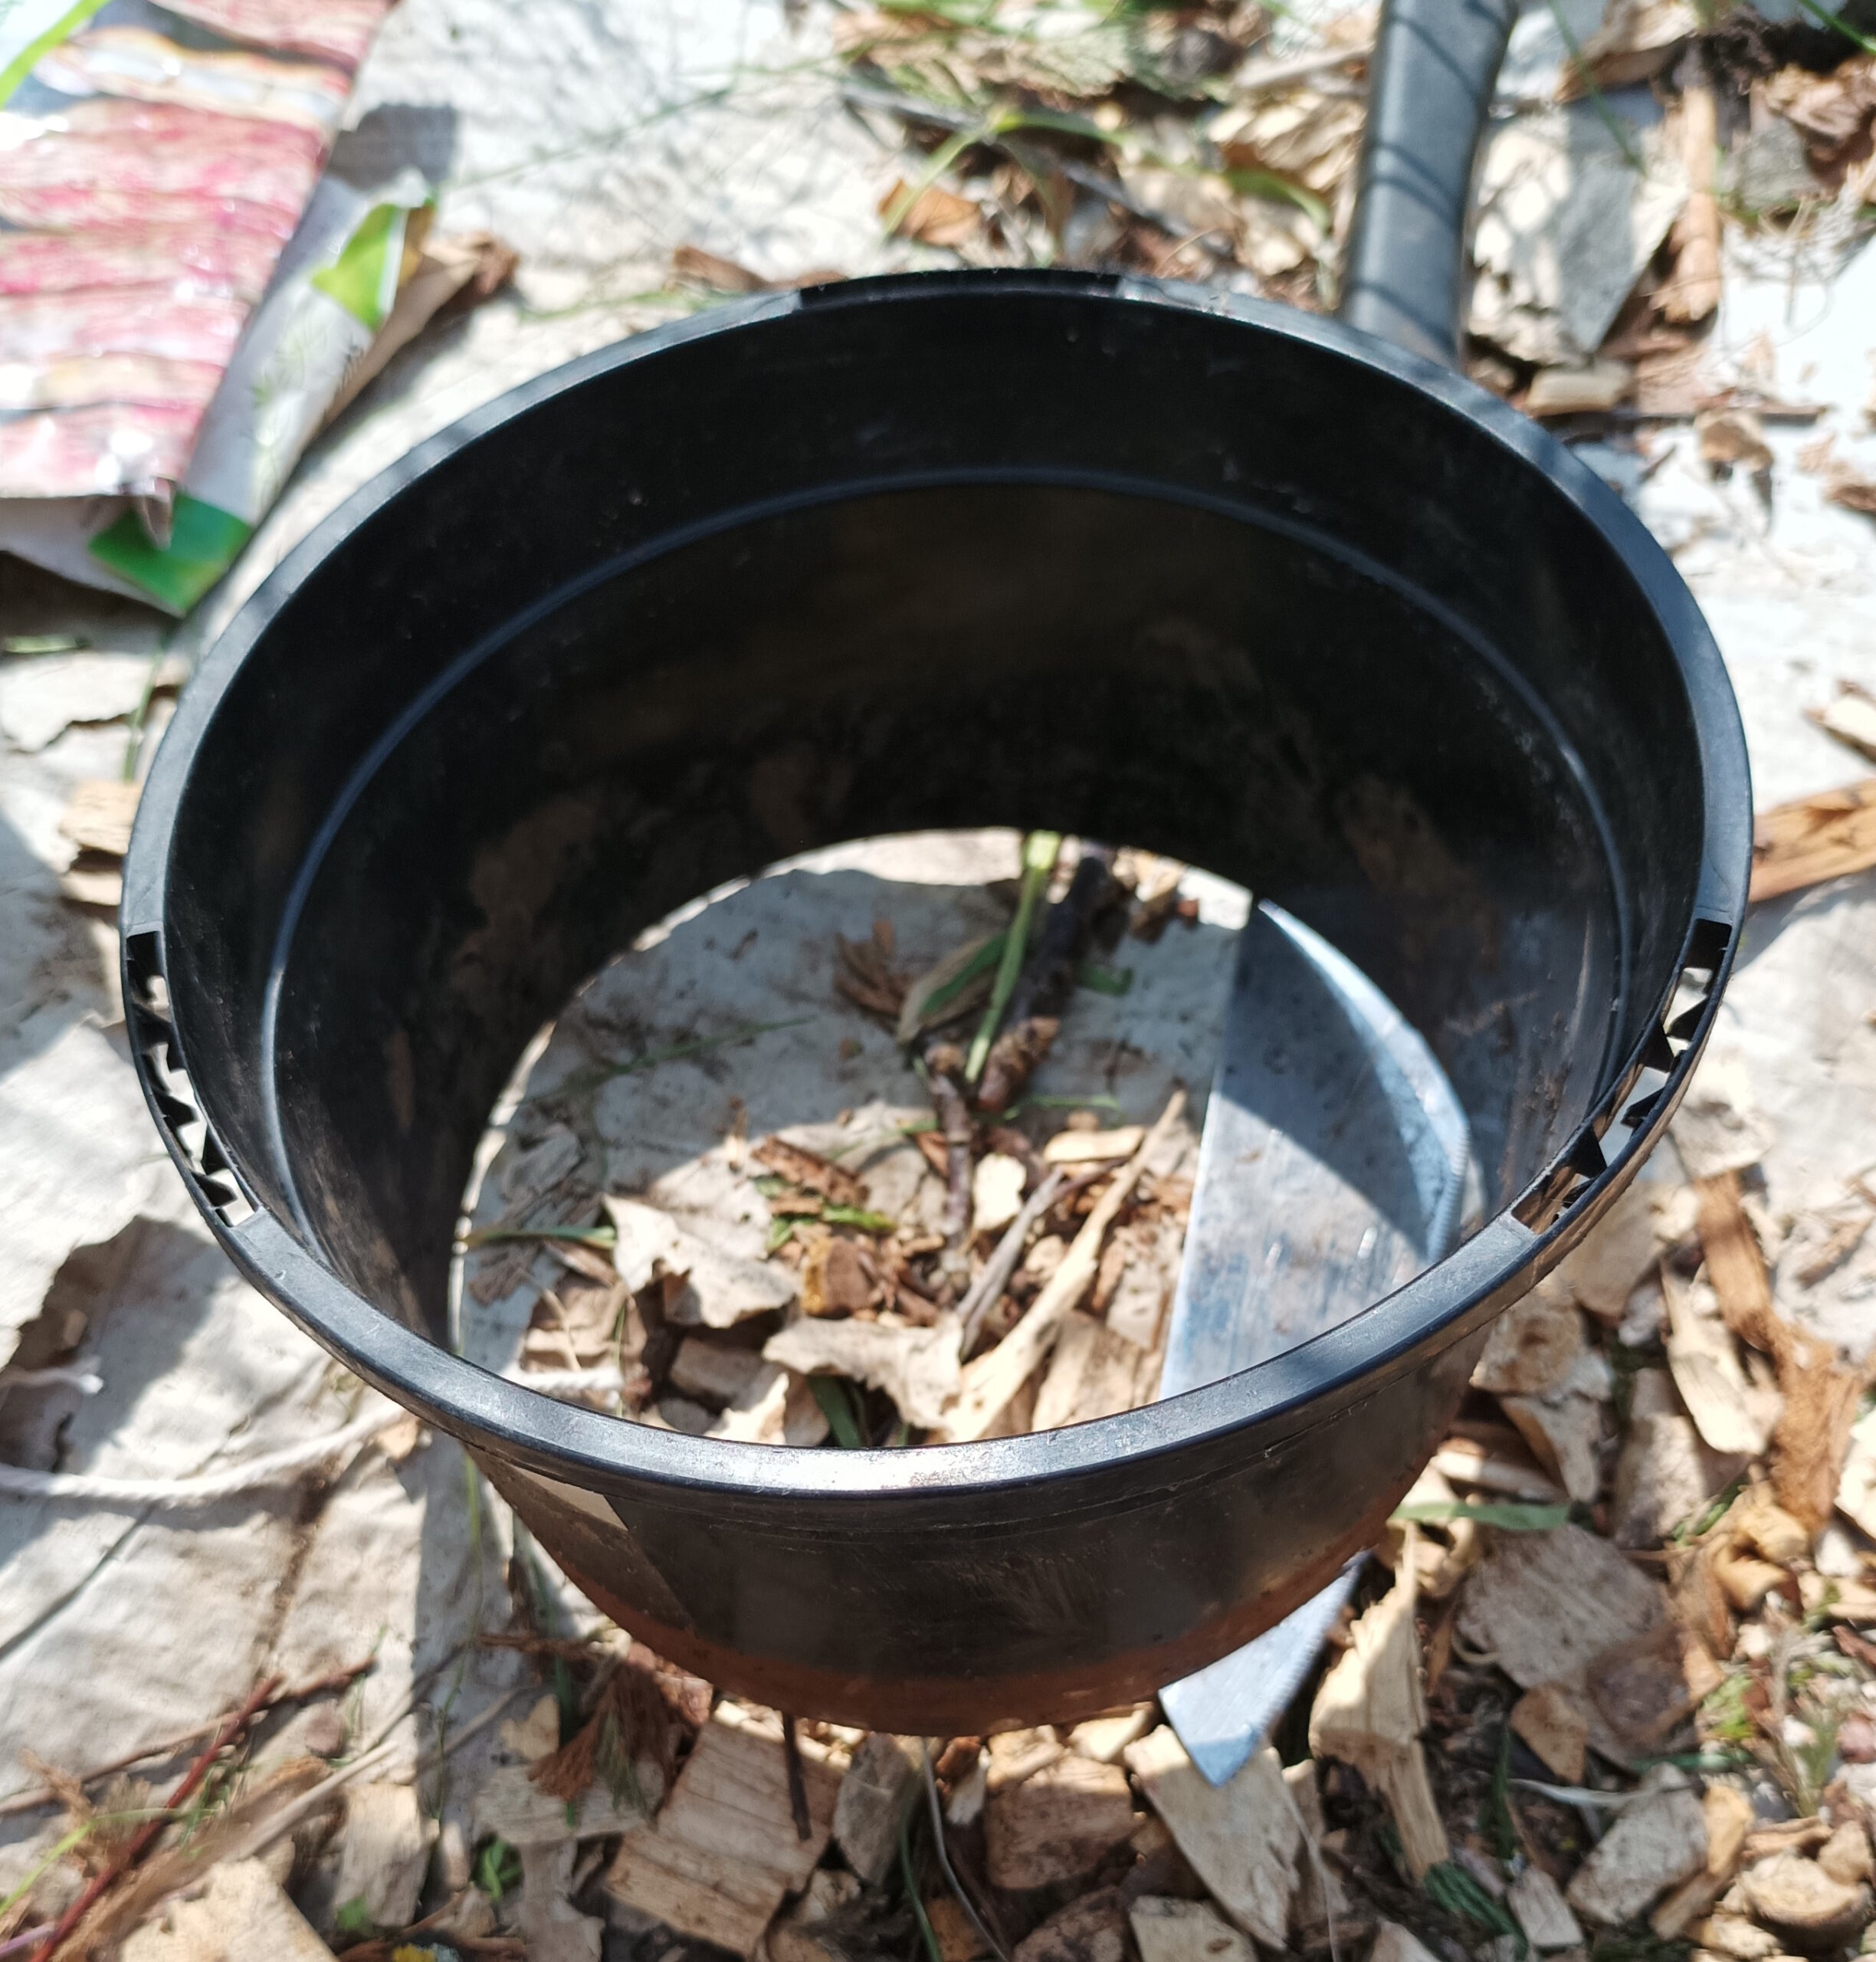
Because my allotment is no dig, I didn’t want to dig in trenches for the beans. Instead, I reused old plastic plant pots, roughly 15 – 20cm and cut the bottom out of them. I then dug small holes big enough for the pot and pushed them in, before topping them up with peat free compost. This way I effectively created ‘mini’ raised beds and minimized the soil disturbance.
In May/June you can water the compost then put the bean seed directly into the final growing position. Two beans for this size of pot is enough. Or, if you have already started the beans in pots and have seedlings, or have some bean plants, plant these directly into the watered compost, then give them a good water in.
Cutting the bottom from the pot gives the beans the chance to root deep into the subsoil to reach food and water. Beans are deep rooting plants and if I buried the whole put, their growth would be limited by eventually getting root bound in the pots. I want my beans to grow tall and strong so they cover the teepee.
Step 8: Water and wait. May and June have been unusually dry and hot in the UK this year, so I have been going to the allotment every couple of days to give everything a good water.
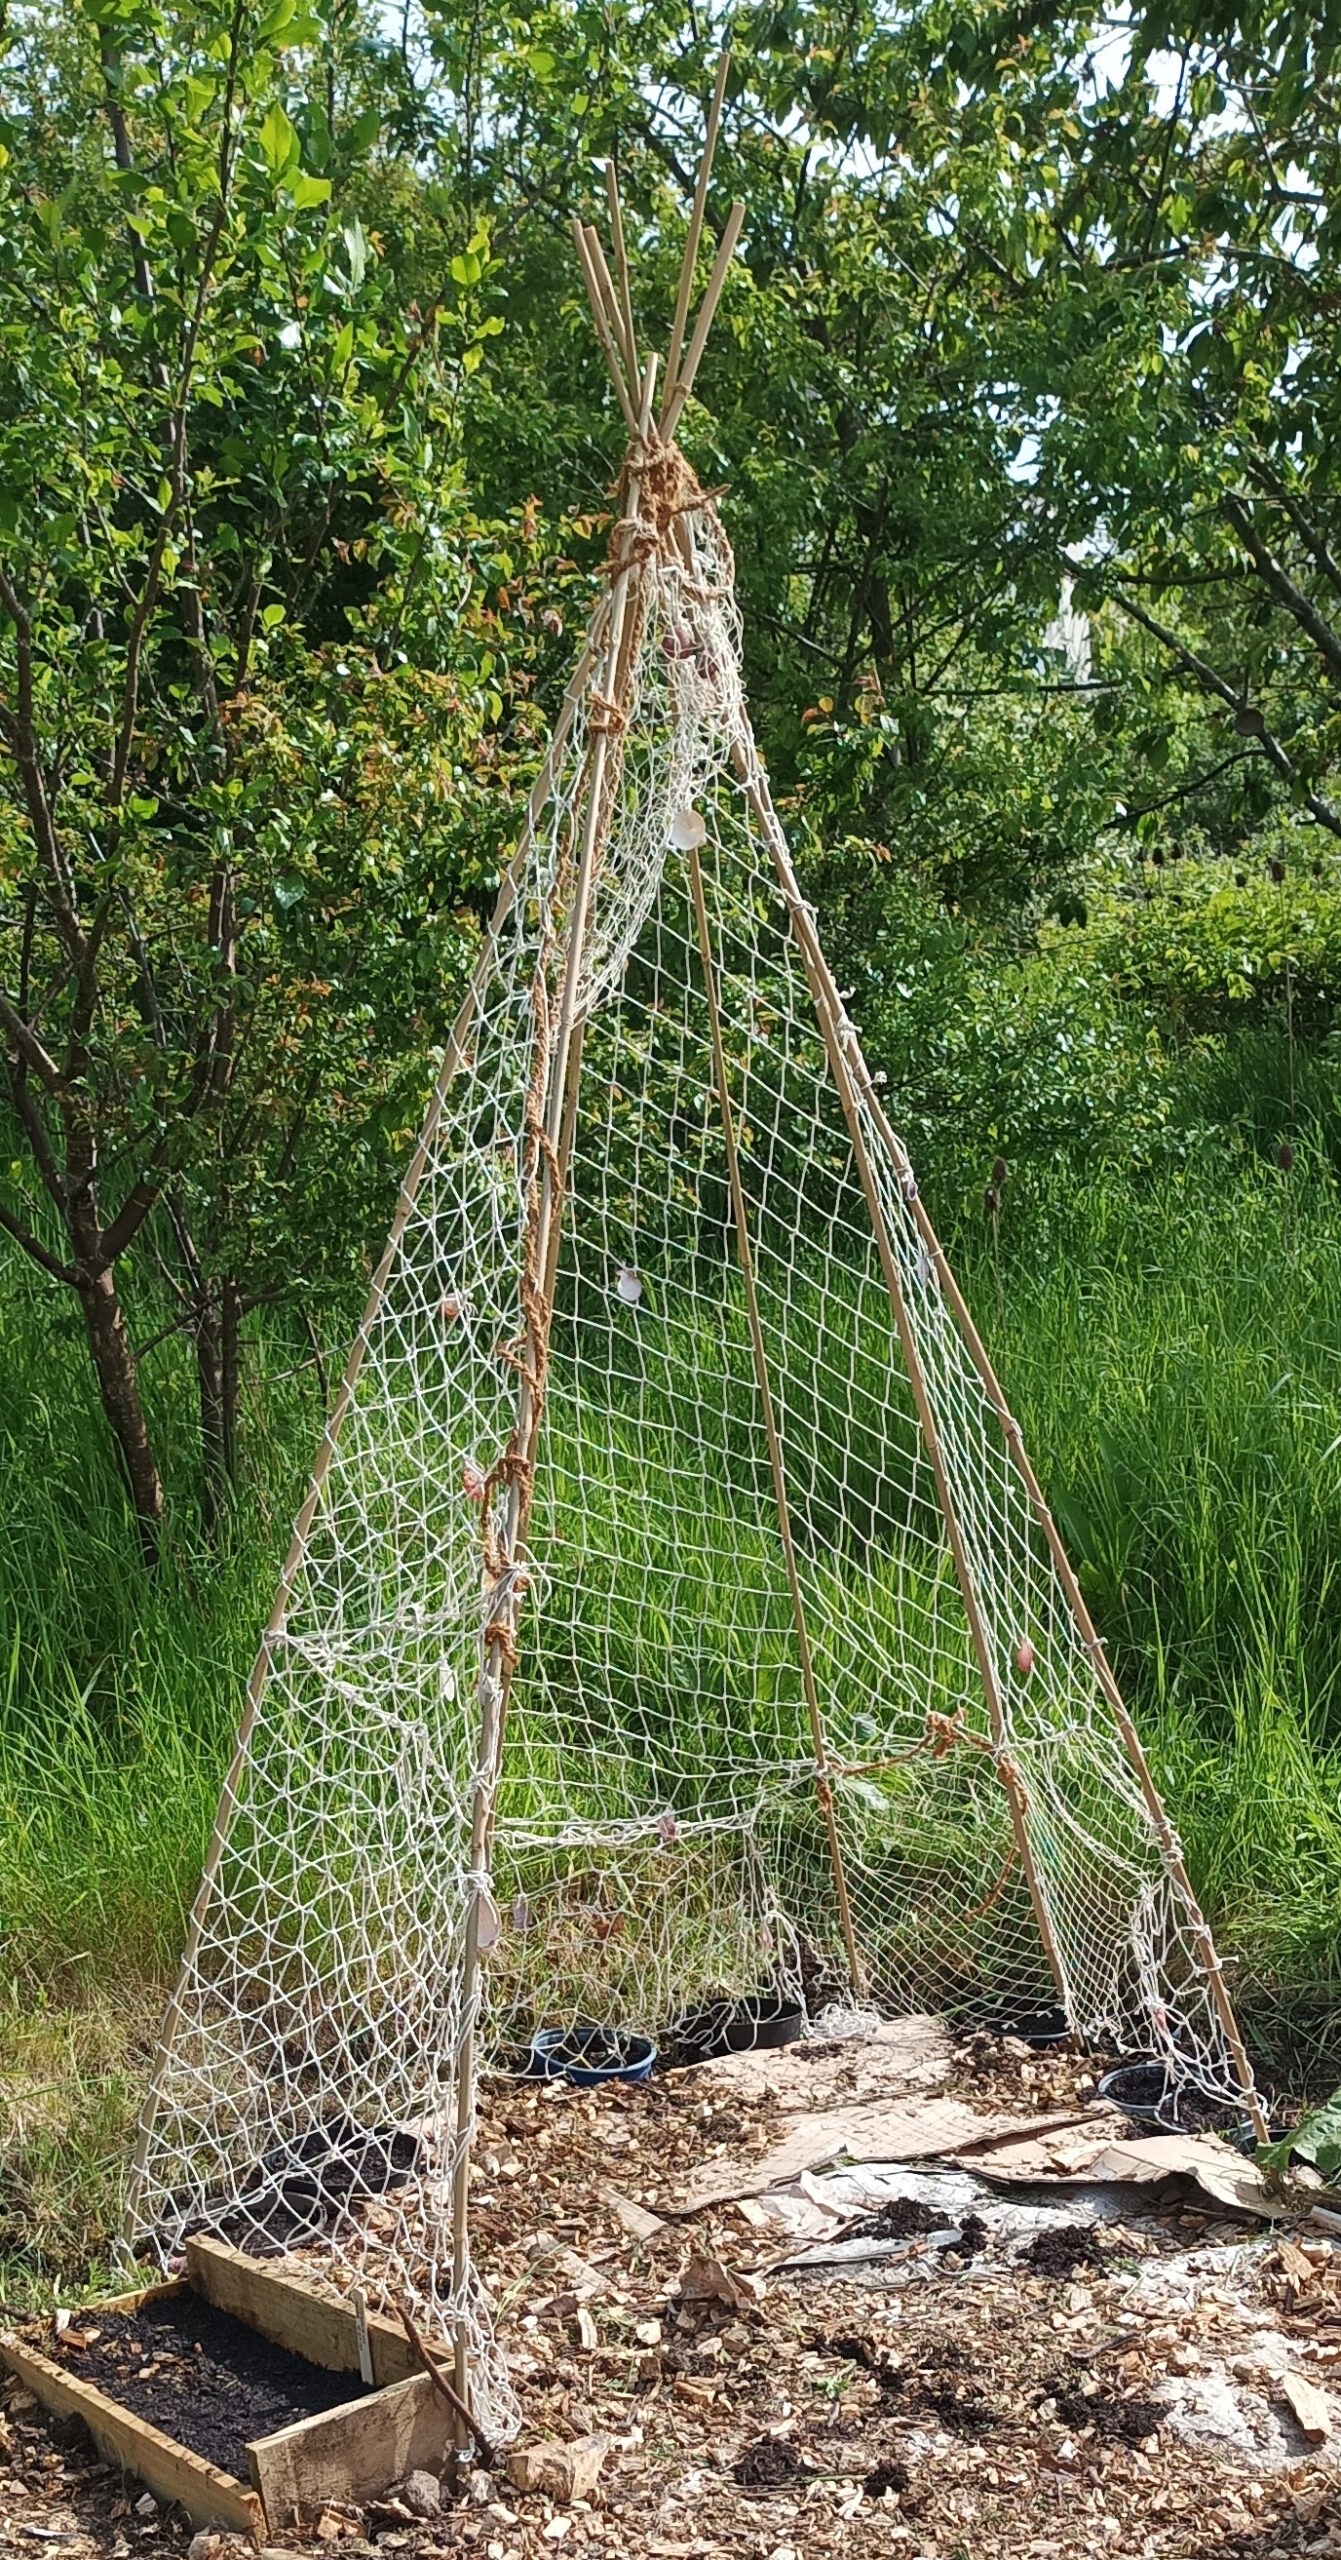
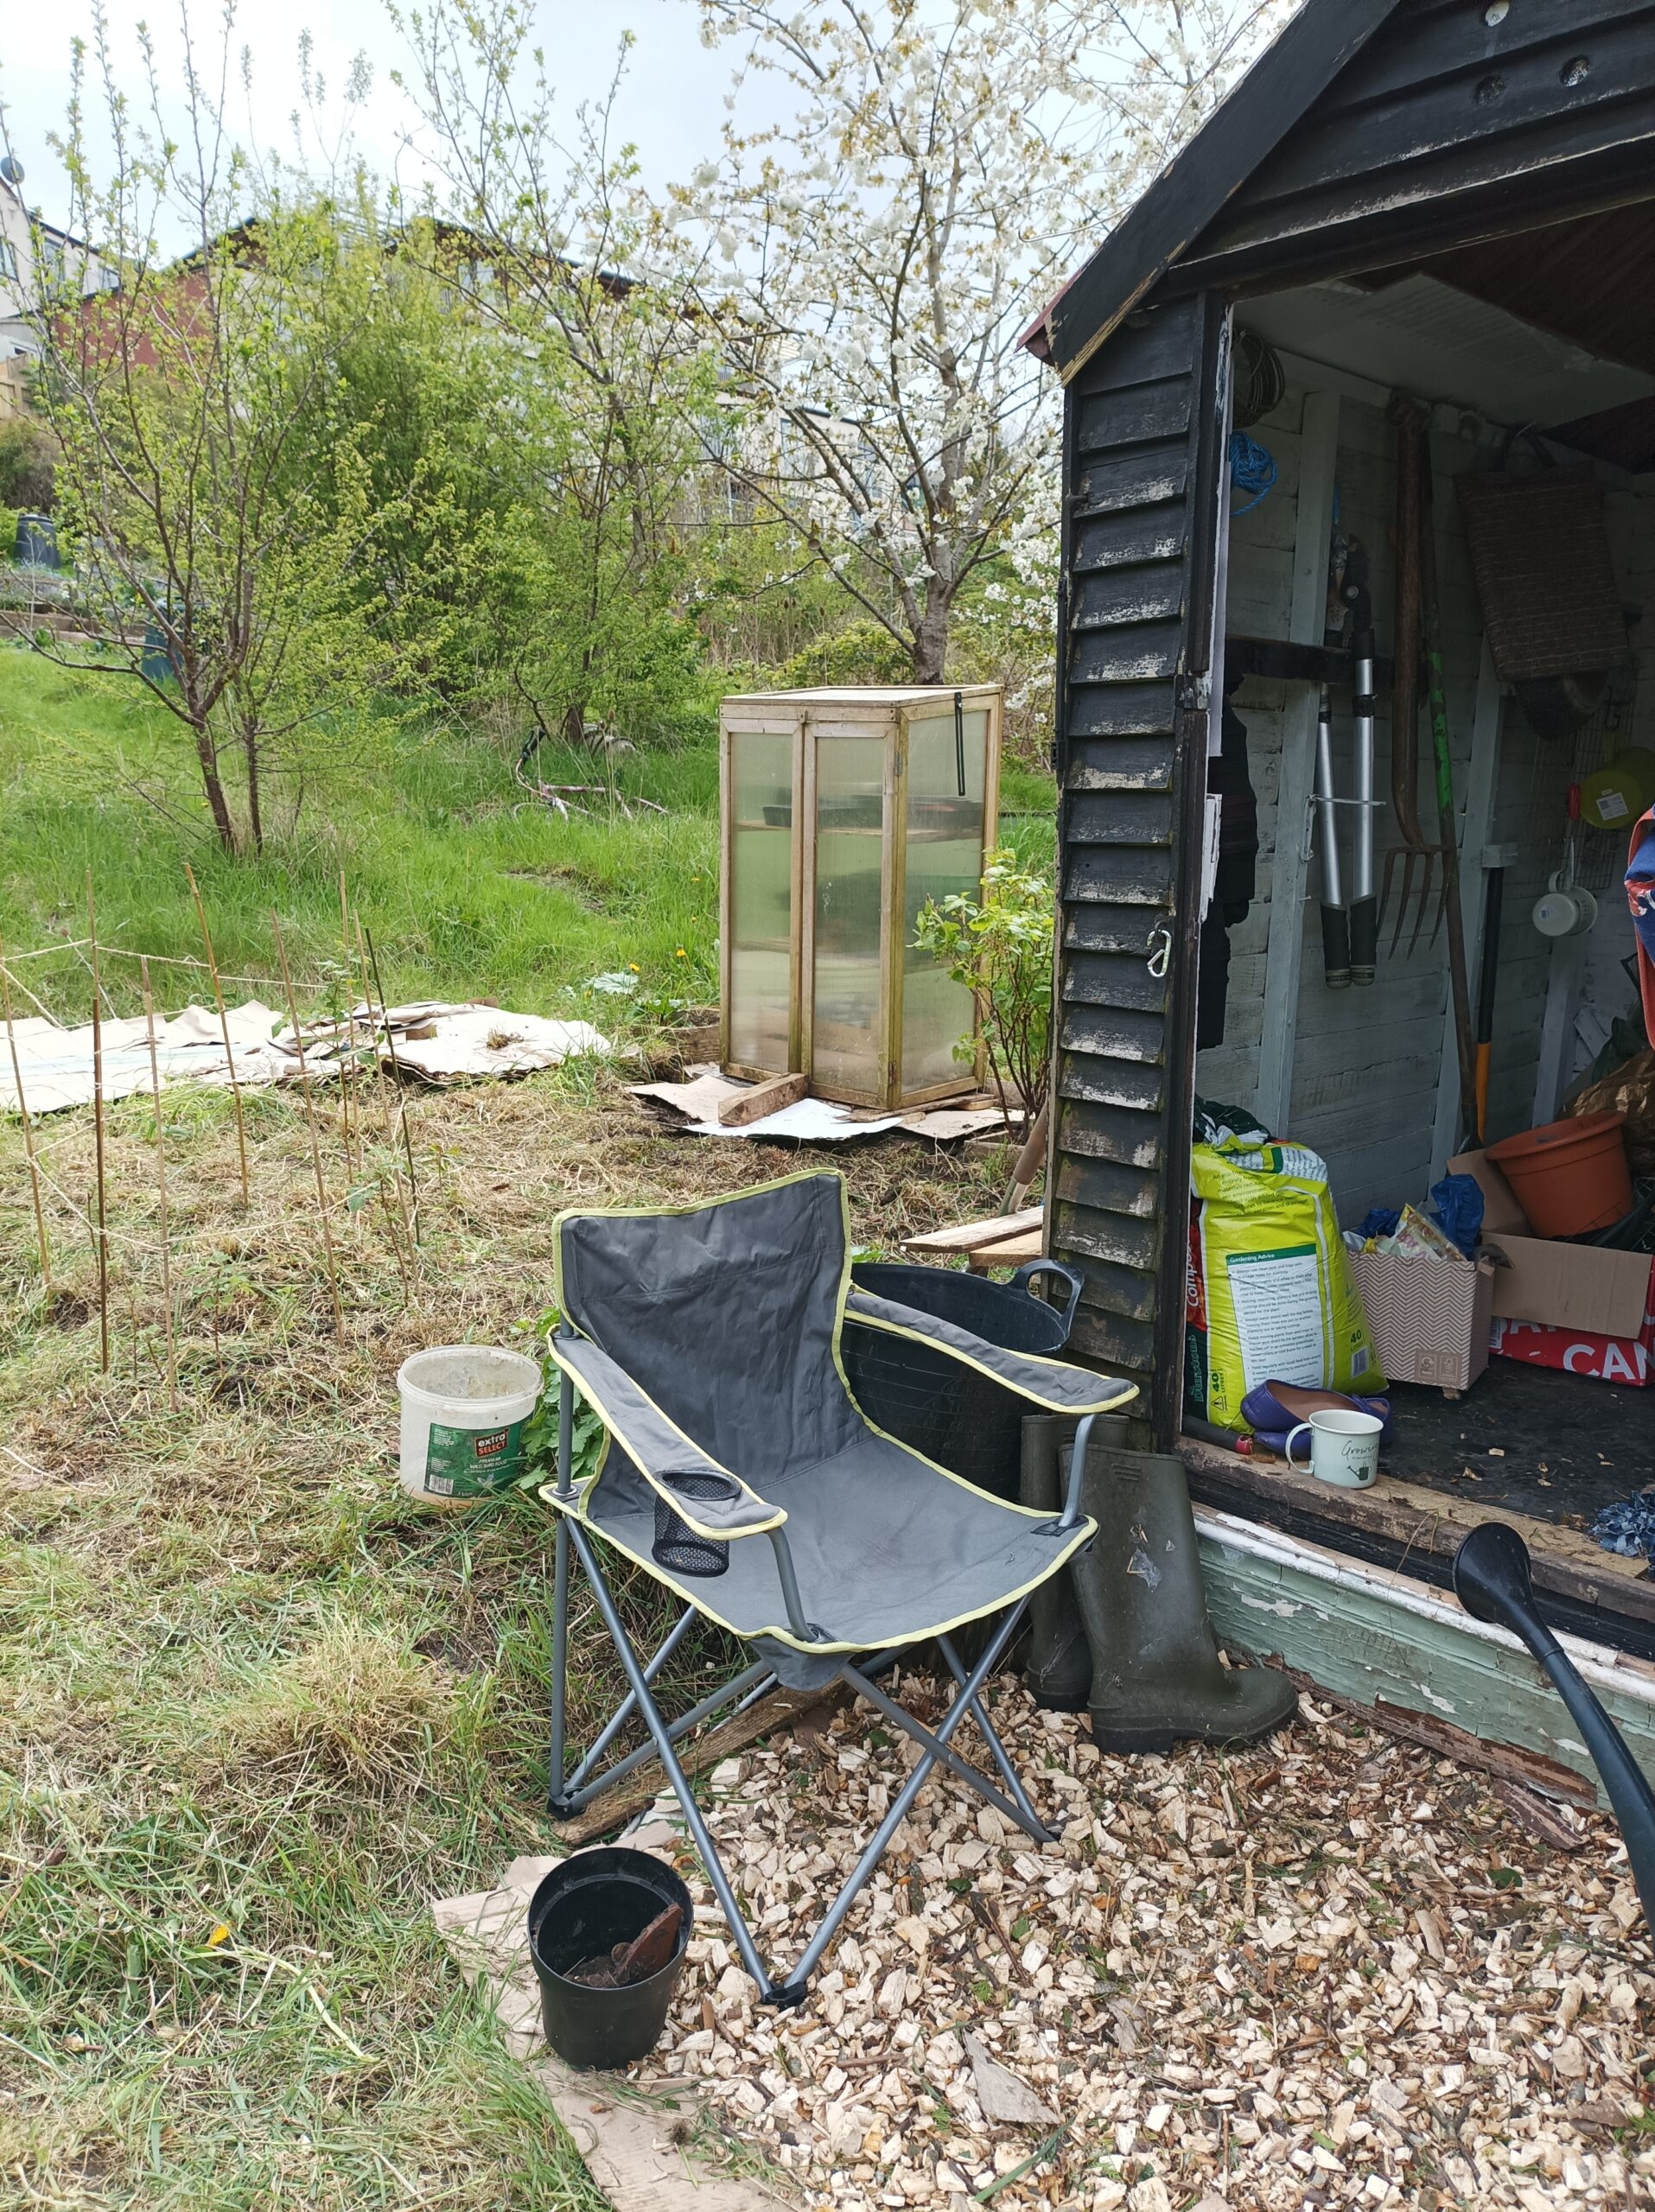
This is what it looks like now. Later in the year I’ll share the results!
Hopefully it’ll be something like this:

*As an Amazon Associate I earn from qualifying purchases. This post may contain affiliate links.
The post Project Bean TeePee appeared first on Amy Morse.


June 7, 2023
Project Hobo Stove
Hen’s Tooth allotment has given me a great opportunity to experiment with some off-grid projects.
I’m breaking things down into baby steps; projects I can do in a day, or work on at home and take to Hen’s Tooth.
Part of the fun and the challenge of having an allotment is to be as sustainable as possible. To reuse and re-purpose things. It’s surprising what you can do with some candles, scrap paper and old food cans.
The Hobo Stove
I’d like to be able to make myself a cup of coffee while I’m working. I needed a way to create a small stove, without resorting to buying a gas stove or something else that relies on fossil fuels. Longer term I’ll make some kind of barbecue area, but in the interim I decided to try something small and simple.
I took to Pinterest and found Hobo Stoves.
What Is A Hobo Stove?A hobo stove is a simple, portable cooking device. It is made from discarded or improvised materials to provide a means of cooking food and boiling water outdoors.
There are a a couple of approaches to making a stove.
The Basic DesignsThe Open Can and Twigs Hobo StoveThe basic design of a hobo stove consists of a metal container or can, such as a large coffee can or old food can, ventilation holes and combustible material.
One approach it to use an old food can, punch several ventilation holes or cut around the sides near the bottom. The top of the can is open, creating a cooking surface. Some designs may also include a wire or metal grate to hold the cookware above the flames.
To use a hobo stove, gather combustible materials such as twigs, small pieces of wood, or other organic matter and place them inside the stove through the open top. The ventilation holes allow air to flow into the stove, supplying oxygen to the fire. You then light the fire, and the heat produced can be used for cooking or boiling water.
I’ve not tried this method yet as I’ve only had small cans to use. Instead, I’ve used another approach.
The Small Can-Candle Hobo StoveThe idea is to take a small can – I’ve used an old cat food can – coil strips of cardboard or paper, slot them in, then melt wax over the paper and let the wax drip in between the layers. The paper acts as a wick and the wax acts as a fuel. It will burn much longer and hotter than a candle.
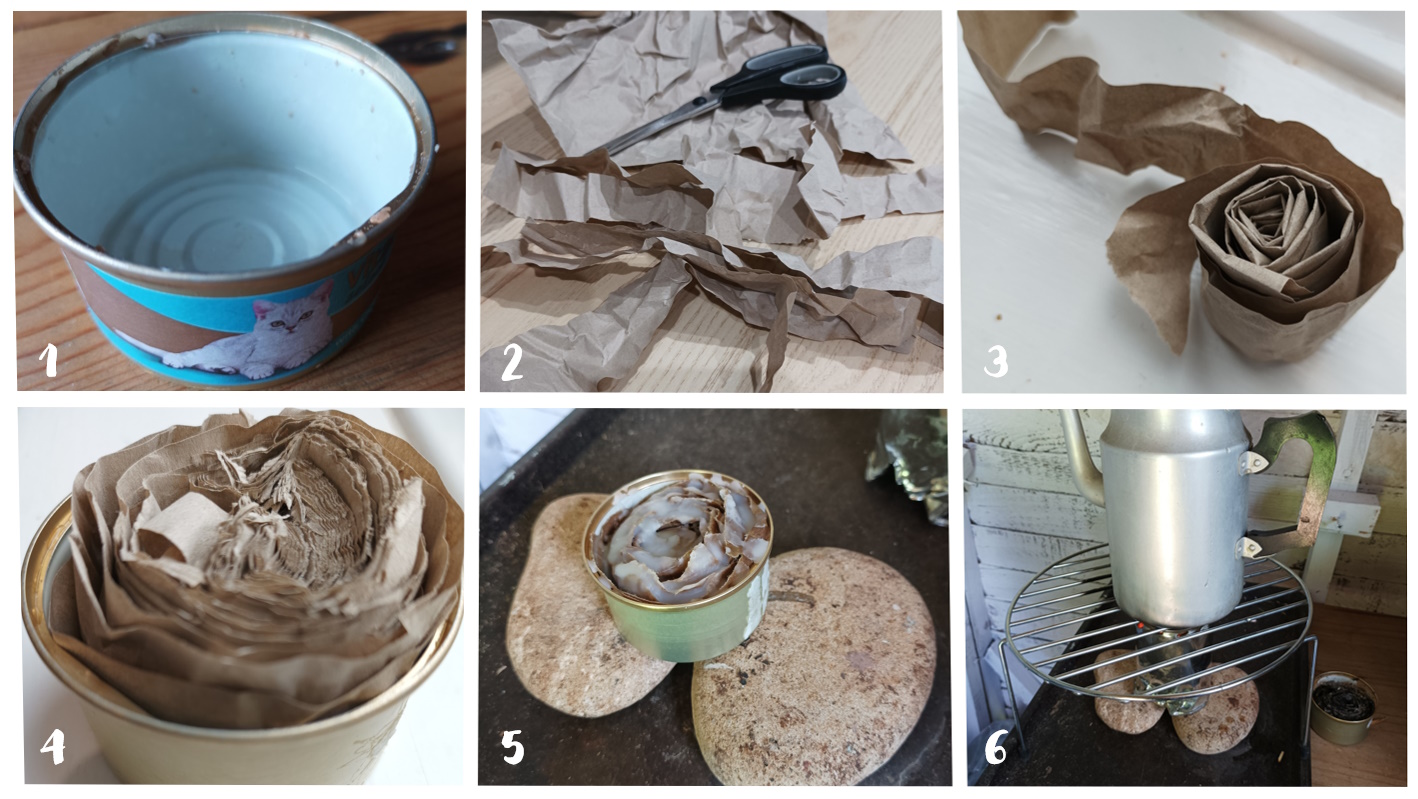 How To…
Step 1: Start with a clean, small can. A cat food can is ideal.
Step 2: Cut strips of scrap paper, the depth of the can. I’ve used packaging – but newspaper, or thin card, craft offcuts etc. work too, whatever scraps you have.
Step 3: Wind your strips into a spiral.
Step 4: Keep adding strips and winding until you have enough to loosely fill the can.
Step 5: Either melt some wax (beeswax pellets, soya wax flakes, or old candle scraps) in the microwave for a few seconds, or light a candle and direct the drips into the can. Cover the paper and let the wax drip between the layers.
Step 6: Set up a stand above your stove. You could use a metal stand as I have (I picked this up in a junk shop for £2) or get a larger can, open both ends, make some ventilation holes in it and stand it over the stove to put your pot on.
I picked up this vintage coffee pot in the same junk shop for £5. It’s ideal – as one hobo candle stove burns out it’s just enough to heat the pot. It’s not quite enough to boil the water, so it’s not ideal for making tea, but it’s hot enough to be the perfect temperature for making coffee, and filling up a Pot Noddle!
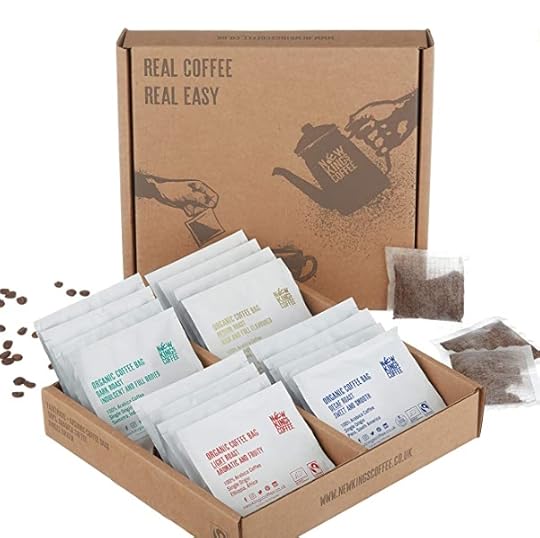
I tried a Mokka to make coffee, but there’s not enough heat produced to boil the water. Instead, I’ve bought coffee bags:
New Kings Coffee are fab coffee bags, from a start up I met on a enterprise accelerator scheme in Bristol.
I love their selection pack and it’s ideal for my ‘kitchen’ at Hen’s Tooth.
 https://amzn.to/43tgSUiWhy A Hobo Stove?
Hobo stoves are lightweight, compact, and can be made from readily available materials. They provide a convenient way to cook meals or heat water where traditional cooking equipment may not be available.
I’ve set it up inside my shed because it needs to be out of the wind to work. The can also gets really hot, so it’s important to take necessary safety measures. I’ve placed an old baking tray on the table top and a couple of flat stones to put the stove on. The stones stop the heat conducting through to the tray and burning the table, but the tray is there to stop the stove falling onto a flammable surface. I never leave the stove unattended and it is slow to get going, so I time it to sit and have a rest in the shed!
Hobo stoves should be used with caution, and safety measures should be taken to prevent the spread of fire and avoid accidents. Always make sure to use them in appropriate outdoor settings and follow any regulations or guidelines related to open fires and cooking.
Stay safe and enjoy your coffee!
*As an Amazon Associate I earn from qualifying purchases. This post may contain affiliate links.
The post Project Hobo Stove appeared first on Amy Morse.
June 2, 2023
Project No Dig
When I took on Hen’s Tooth, I was keen to use sustainable practices when working the land. Healthy crops start with healthy soil.
The Importance of SoilSoil health is an important aspect of agriculture and environmental sustainability. It plays a critical role in supporting the overall well-being of ecosystems. Soil degradation is a significant global issue that affects approximately one-third of the Earth’s land area. It impacts food production, biodiversity, water quality, and climate regulation. The topsoil layer is the most fertile part of the soil. This loss reduces the soil’s ability to support plant growth and agriculture.
Healthy soils have good water infiltration and retention capacities, allowing them to absorb and store water. Soil health supports diverse ecosystems by providing habitats for a wide range of organisms, including bacteria, fungi, insects, and earthworms. These soil organisms contribute to nutrient cycling, decomposition, and pest control. Preserving soil health helps protect biodiversity and ensures the sustainability of ecosystems.
We still have so much to understand about what goes on in the soil beneath our feet. Science is just scratching the surface (pun intended) of the complex relationships between microorganisms, fungus and a plants.
Mycorrhizal NetworksFungal networks supporting plant life are often referred to as mycorrhizal networks. Mycorrhizal networks are found in various ecosystems, including forests, grasslands, and agricultural systems. They have been shown to enhance plant growth, improve nutrient efficiency, and contribute to ecosystem resilience. The fungal hyphae, which are thin, thread-like structures, extend far beyond the reach of plant roots, enabling them to explore a larger soil volume. The hyphae can access nutrients such as phosphorus, nitrogen, and micronutrients, which may be otherwise inaccessible to the plant. In return, the fungi receive sugars and other organic compounds from the plants, sustaining their own growth and reproduction.
Healthy soils act as a carbon sink, sequestering carbon dioxide from the atmosphere. By storing carbon in the soil, it helps mitigate climate change by reducing greenhouse gas emissions.
Soil health is critical for sustaining plant growth and productivity, as well as for maintaining the long-term health of agricultural and natural ecosystems.
Good soil management practices – such as ‘no dig’ gardening or ‘no till’ agriculture – increase biodiversity and improve soil health.
What is ‘No Dig’?No-dig gardening is a method of gardening that involves growing plants without disturbing the soil by digging, plowing or tilling.
Promoting soil health, building nutrient layers into the soil – ‘feeding’ the soil, not the plant – and leaving those clever little mycorrhizal networks undisturbed.
Instead of digging or turning over the soil, a layer of organic matter is added on top of the soil surface, which decomposes and creates a nutrient-rich layer for the plants to grow in. This layer of organic matter can include materials like compost, leaves, straw, or grass clippings.
The idea behind no-dig gardening is to work with nature rather than against it, by preserving the soil structure and promoting the growth of beneficial microorganisms.
This method of gardening can help to improve soil health, reduce weed growth, conserve water, and save time and energy. No-dig gardening is a sustainable and environmentally-friendly approach to gardening that can lead to healthier plants and better yields.
The History of No DigThe concept of no-dig gardening has been around for centuries, and has been used by various cultures around the world.
However, the modern form of no dig gardening that we know today was popularised by Charles Dowding, an organic gardener in my part of the UK, the Westcountry.
In the 1980s, Dowding began experimenting with a no dig approach to gardening and found that it improved soil health, reduced weed growth, and led to higher yields. He went on to write several books on the subject, including “Organic Gardening: The No-Dig Way“.
Today, no dig gardening is widely recognised as a sustainable and effective approach to gardening that can lead to healthier plants and improved soil health.
Why No Dig?“Discover the joy and ease of no dig – Grow plentiful, healthy food while helping the soil & the planet”
Charles Dowding – no dig: HOME – Charles Dowding
When I mentioned to fellow allotmenteers that I’m trying to do no dig, I have been regarded with suspicion, even contempt.
The conventional method is to dig nutrients into the soil, which can work to improve yields in the short term, but is also labour intensive. By constantly disturbing the soil, it doesn’t have time to recover and settle leading to nutrient and moisture loss and the escalating spiral of frequent reapplication of ferlitisers.
Ultimately this leads to soil degradation, erosion, loss of biodiversity and releasing carbon into the atmosphere. An expensive, labour intensive, and destructive approach in the long term. Who am I to judge other allotmenteers’ approach? But I want to use my little patch of land more sustainably.
No Dig BenefitsHere are some benefits of no-dig gardening:
Improved Soil Health: No-dig gardening helps to improve soil health by preserving the soil structure and promoting the growth of beneficial microorganisms. It also reduces soil erosion and compaction.Increased Yield: Plants grown in a no dig garden tend to have a higher yield because the soil is rich in nutrients and has a better structure, allowing the plants to grow more roots and absorb more nutrients.Reduced Weeds: By adding a layer of organic matter on top of the soil, helping to suppress weed growth. It also reduces the need for environmentally damaging herbicides.Water Conservation: Helping to conserve water by improving the soil’s ability to retain moisture. Useful when the weather is dry and I can’t get out to the allotment for a few days. The organic matter on top of the soil helps to prevent evaporation and reduces the need for frequent watering.Saves Time and Energy: Less labour intensive than traditional gardening methods, as it eliminates the need for tilling, digging, and weeding. This means less time and energy spent maintaining the garden.My ReasonsThere are three big reasons for me to use the no dig method at Hen’s Tooth:
FirstlyI’m quite lazy. I don’t want to create unnecessary and back-breaking work for myself by having to double dig and turn over heavy clods of claggy soil.
SecondlyI want to eliminate toxic waste, like chemicals and single use plastic. I’ll be using any organic scraps I can to feed my beds. I won’t be suppressing weeds with layers of plastic and I won’t be buying noxious, poisonous, plastic packed chemicals to fight nature on my plot. I can reuse compost bags, plastic pots etc. but it’s better not to have the waste all. Our world is literally choking with unnecessary plastic. Every decision I make that leads to less plastic being produced in the first place is the best I can do. Growing my own food and flowers, and reusing waste are solid places to start.
ThirdlyI don’t have loads of money to throw at my allotment. For me, the point (and the joy) of an allotment is to make do, to reuse, recycle and repurpose. I want to be creative, sustainable and experimental. The weird little projects and experiments that my limited space at home doesn’t allow for, I can do at Hen’s Tooth. Playing with off grid concepts and makes. Using the bits and scraps, left over paint, resources, and waste from DIY projects at home.
No Dig and HügelkulturThe problem with the no dig method is the regular reapplication of layers of material on your soil to ‘feed it’. Avoiding plastic waste and saving money means I won’t be buying loads of bags of compost. I’ll need to get some in the first couple of growing seasons, to allow time for my own compost heap to develop, but the less of it I buy the better.
As the site is sloped, there are terraces and raised beds along it. I need to top up those beds, suppress weeds and retain moisture so I am using the Hügelkultur method to supplement my no dig approach.
I’ve started by cutting back tall weeds and grasses then layering cardboard over the beds.
This was the first thing I did when I took on the plot. The weeds will die down until I’m ready to prepare the beds.
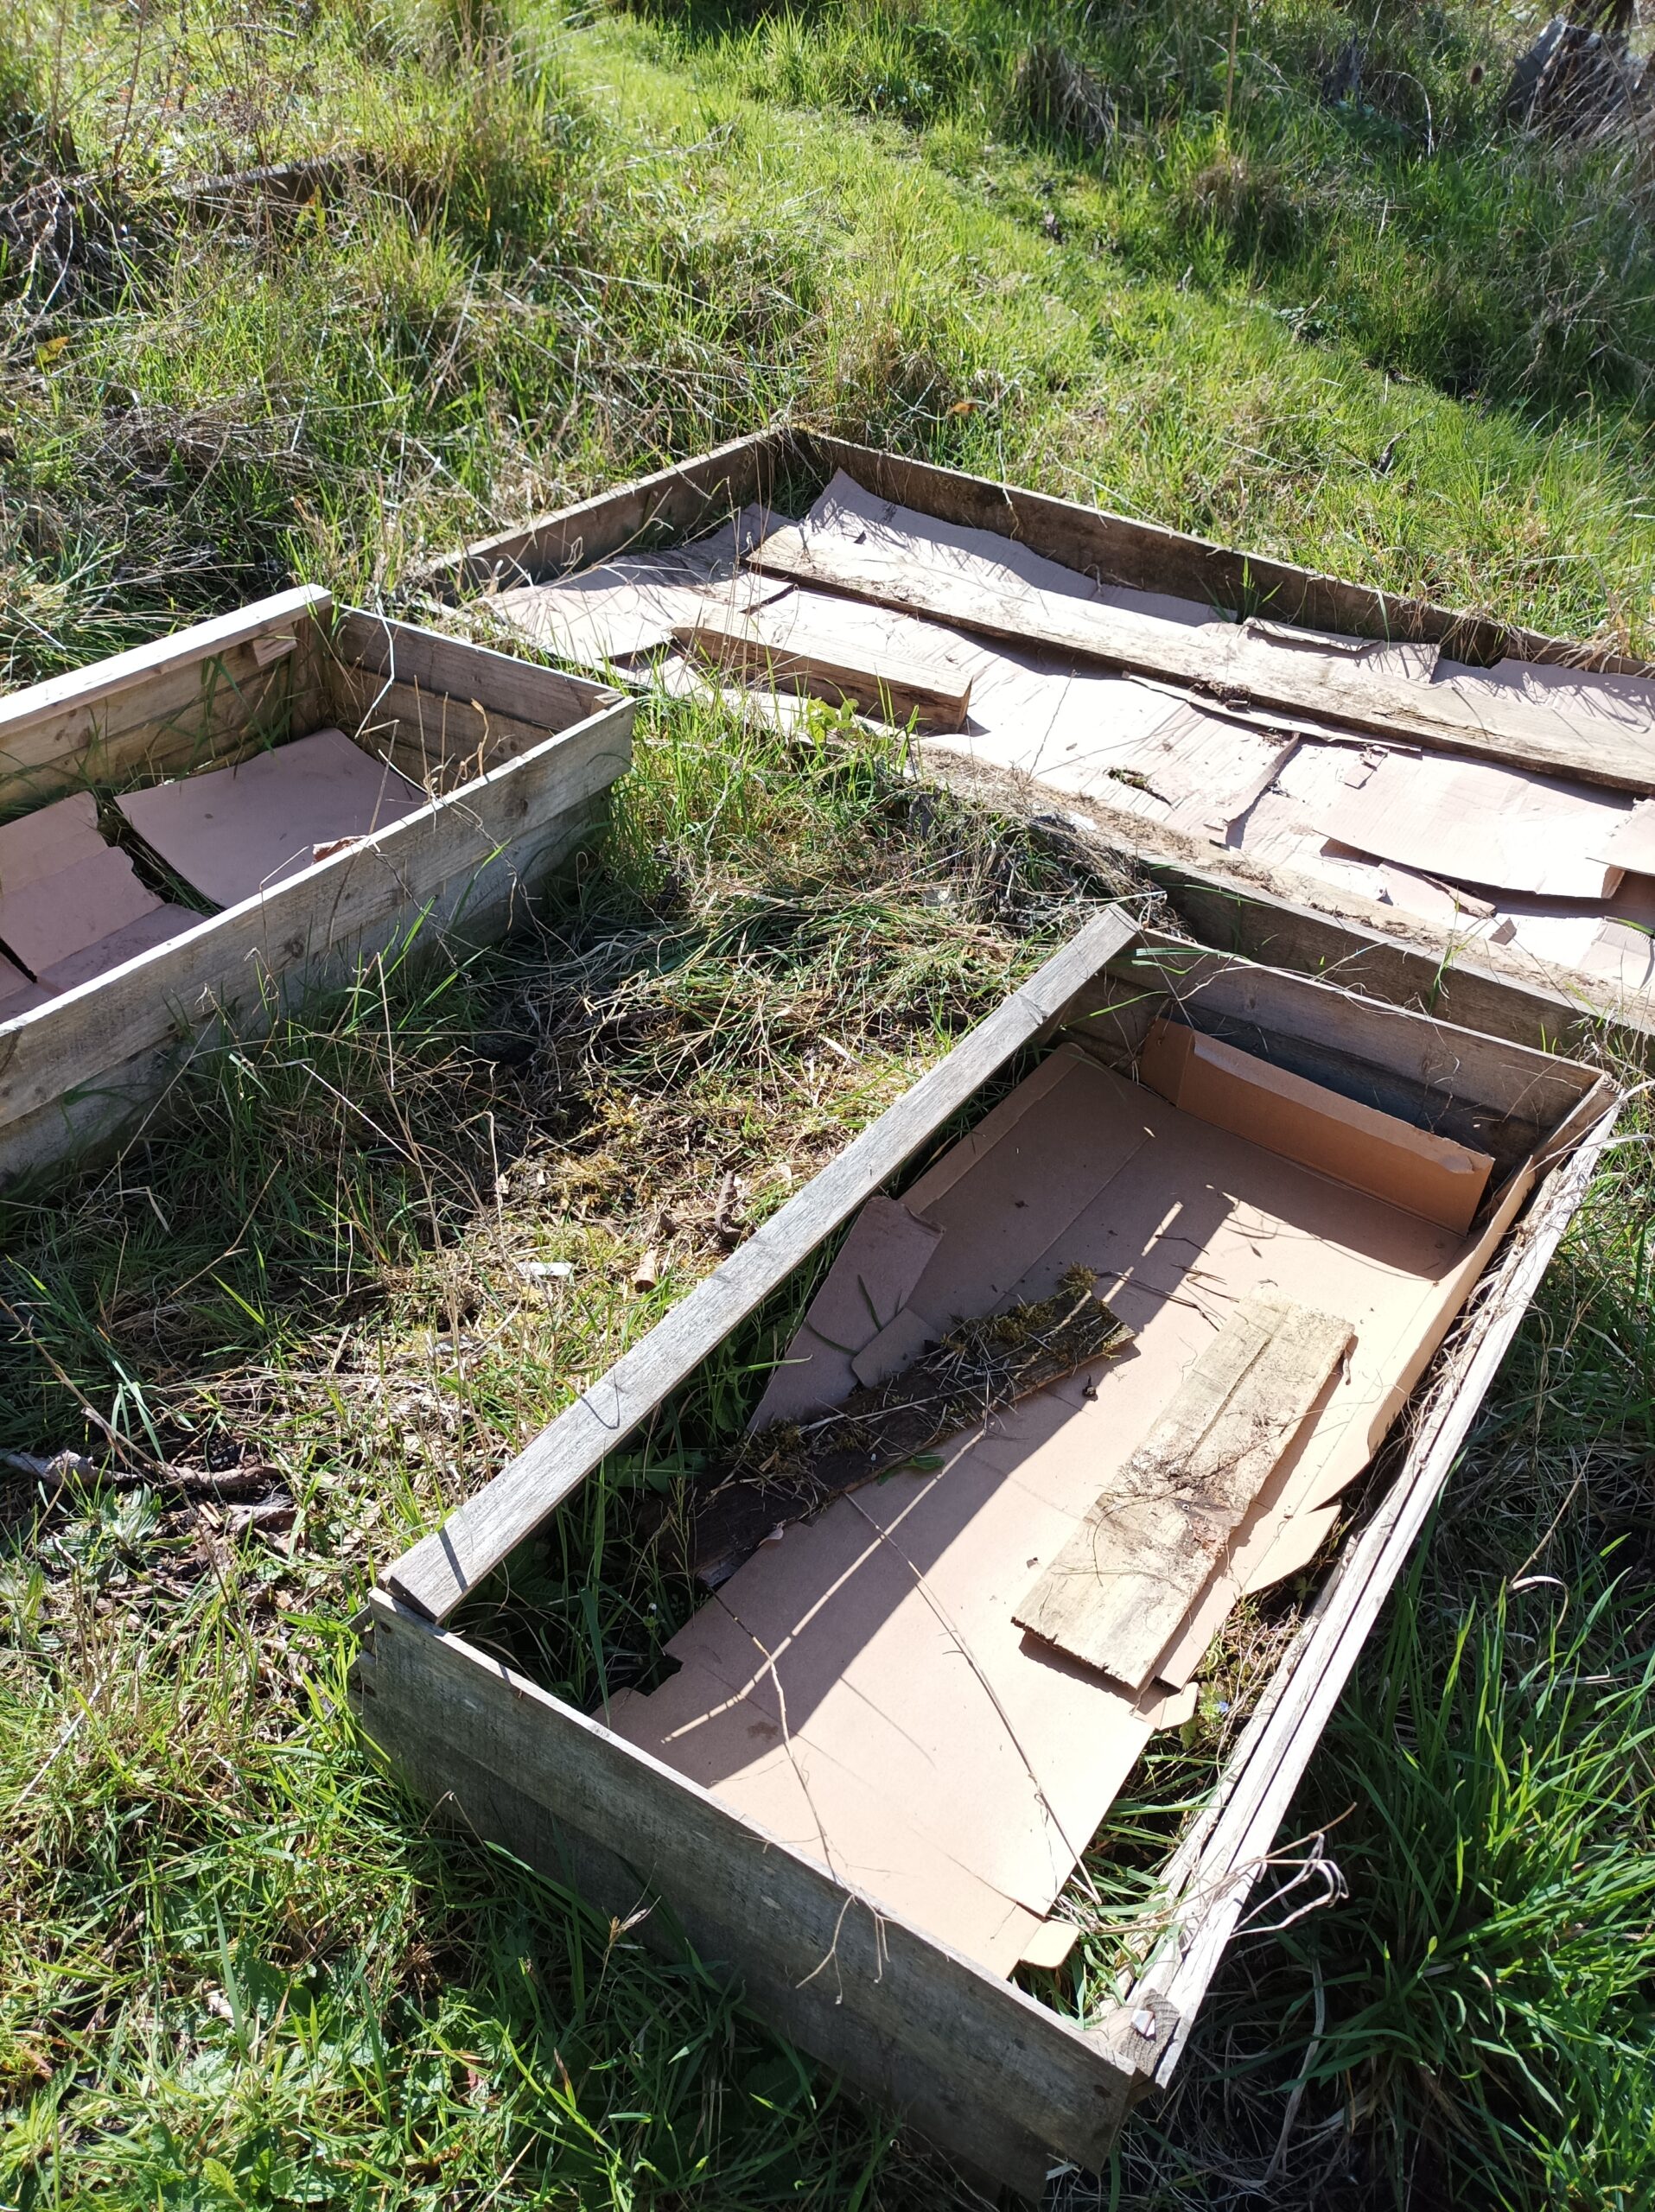 The cut flower and tomato beds when I first took on the site
Hügelkultur involves layering compostable matter like a lasagna. Start with larger scraps, like wood, at the bottom, then shredded up paper and cardboard, fruit and veg scraps and peelings, and then a top dressing layer of compost. The idea being that the layers will gradually break down and improve the soil.
Effectively, I’m growing directly on top of a compost heap and not wasting lots of money on buying soil and compost.
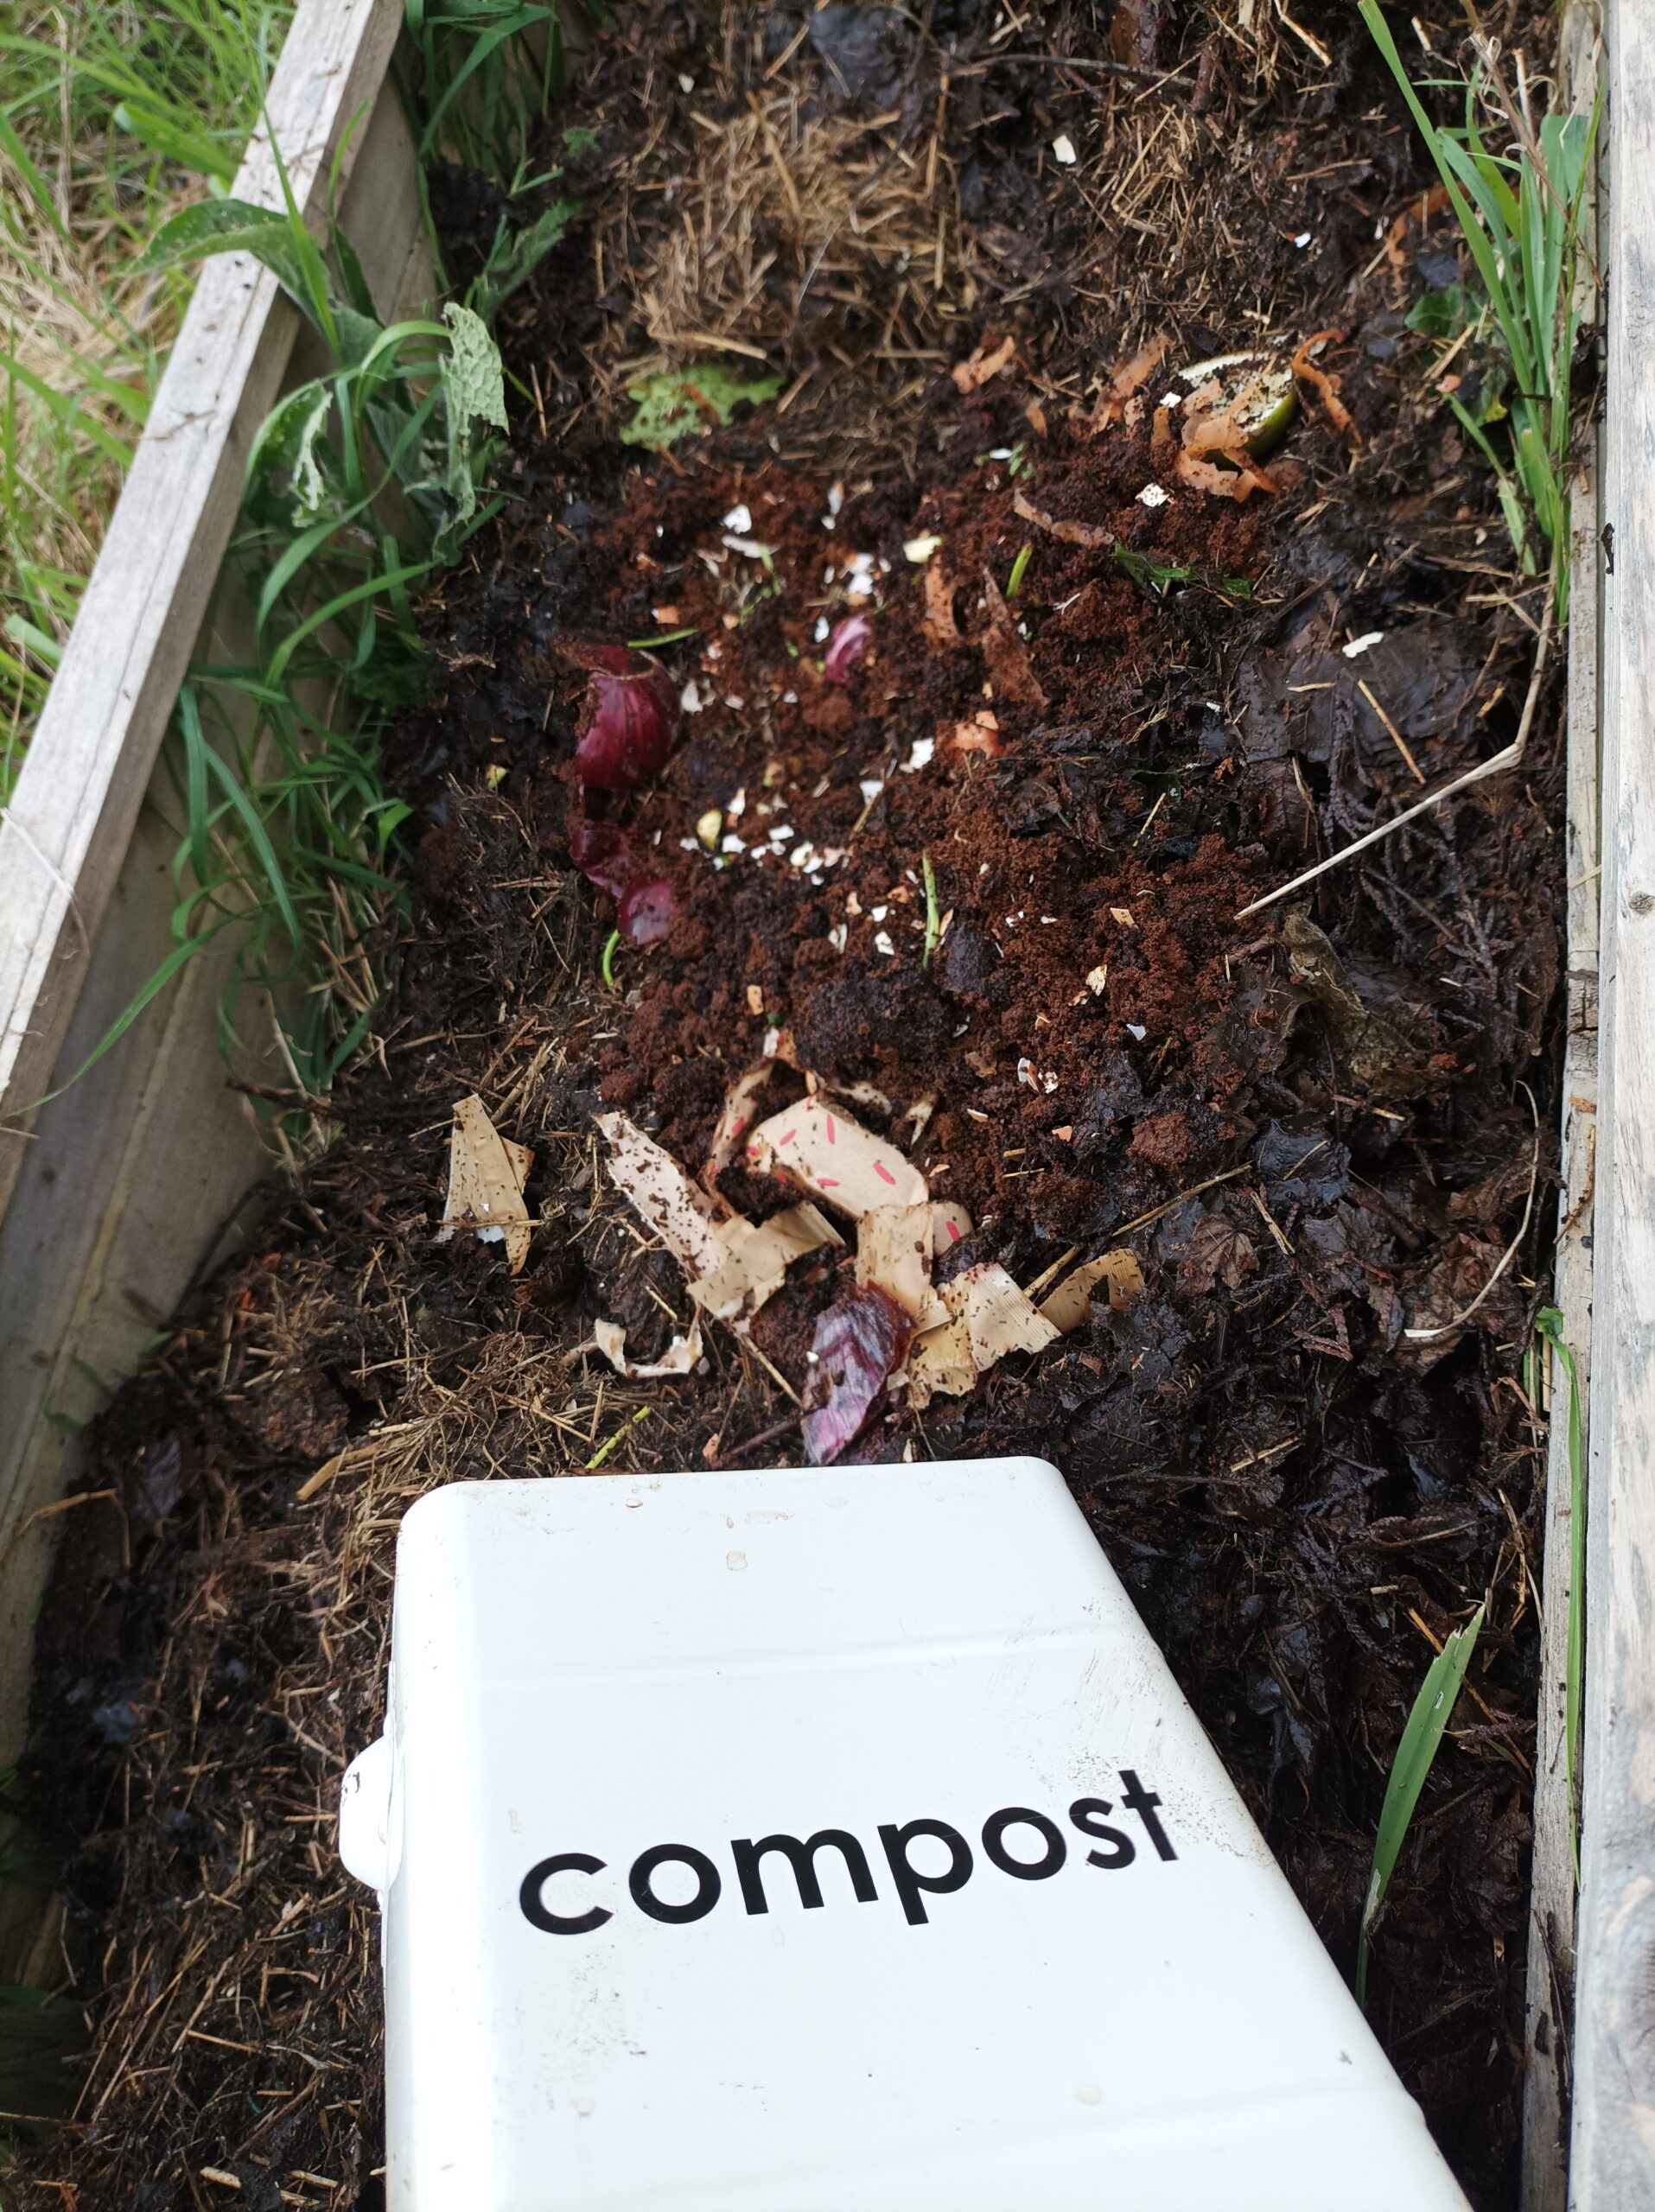 Adding kitchen and garden waste to a raised bed
The term “Hügelkultur” originates from the German words “hügel” meaning mound or hill, and “kultur” meaning culture or cultivation. It has been used for centuries in German and Eastern European agriculture. The method has gained popularity in permaculture and sustainable gardening practices worldwide.
Here’s how Hügelkultur works:Building the Mound: Hügelkultur starts by creating a mound with logs or branches as the base layer. This base layer provides several benefits, including improved drainage, aeration, and moisture retention. Or in my case, filling my raised beds.Layering Organic Material: On the base layer, add organic materials like leaves, grass clippings, straw, kitchen waste, and compost. These materials can be collected from the surrounding area or sourced externally. The layers gradually break down, creating a nutrient-rich and moisture-absorbent environment.Planting and Mulching: Once the layers are in place, the Hügelkultur bed is ready for planting. Seeds or transplants can be placed directly into the mound. A layer of mulch, such as straw, on top retains moisture and suppress weed growth.Sourcing Organic MatterBecause I’m a bit of a Womble*, I keep, and forage, things that could be useful.
*The Wombles: For the benefit of non-UK readers or people under the age of about 30. The Wombles was a children’s TV show about creatures living on Wimbledon Common, recycling and repurposing human rubbish… “Things that the everyday folk leave behind…”Six TipsHere are my tips for sourcing organic matter to fill your no dig beds:
Who do you know? My neighbour has a wholesale plant business – The Bloom Room. I randomly acquire plants that are too sorry and sick to be sold, spent compost and whatever is going to waste. Who do you know with access to resources that would otherwise go to waste?What can you save at home? If you don’t already, start saving all your kitchen and garden scraps. Any uncooked food, veg and fruit peelings, pruning’s, grass clippings, tealeaves and coffee grounds, eggs shells etc.What can you rescue? When you see skips outside people’s houses, ask first, but is there any soil etc. you can make use of? Most coffee shops have bags of spent coffee grounds to get rid of. Ask and they will happily give it to you (they pay to have the waste removed otherwise).What can you scavenge? ask your friends and neighbours to give you their kitchen and garden waste.What can you get for free (or low cost)? Keep an eye on online platforms like Facebook Marketplace, local Facebook groups, Gumtree, Freecycle etc. Start a compost heap – There is already a heap at my allotment, but I’ve not dared look into it yet. It’s currently covered in nettles and brambles! At some stage I need to cut back the spiky stuff and see what I have to work with! I’ll be rebuilding or starting a new heap, using pallets. This is a long term project, however, I won’t have any compost from it this season. But I’ll be adding to it as I go along. Next year I should have some lovely loamy compost from the heap.This is also a great book filled with loads of tips. I recommend it. Before I had my allotment I read it. I will be rereading it and using it as a reference over the season.
*As an Amazon Associate I earn from qualifying purchases. This post may contain affiliate links.
The post Project No Dig appeared first on Amy Morse.
May 30, 2023
Project Shed(s) Revamp
Being the custodian of an allotment is a marathon, not a sprint.
There is so much potential at Hen’s Tooth. I’m pacing myself with different projects and sharing my progress here, to inspire others to make the most of the resources they have and have a go at some practical projects.
I have two sheds on the plot;
1) A Wendy house2) A potting shedThe small, child’s Wendy house, is at the top of the plot, with an amazing view over the city.
The standard 2ft x 6ft potting shed is at the bottom of the plot.
When I took on the allotment, inside the potting shed were a few raggedy old tools and bags of junk. The Wendy house was empty, with a broken door.
Spring started later in the UK this year, with an especially cold and wet April. It limited the amount of bed prepping and planting I could do, so I prioritised the indoor spaces. I wanted somewhere to escape the weather and to store tools and pots etc.
Potting ShedI started with the potting shed. That way, I had an indoor place to work and store equipment. This would be my main work area, the office on the plot, and my little kitchen.
Step 1 – ClearingWhen you take on any decorating and reorganizing project, the first thing to do is to clear the space and look at what you already have. I needed a day that was at least dry so I could empty everything out without it getting soggy.
I cleared out the old junk, sorted out anything worth keeping, and then gave the place a good dust and a sweep – evicting the resident spiders and woodlice.
Step 2 – PreparationWith everything out of the way I could asses any damage to the structure. There were some old planks left by the previous owners, so I cut some to size and screwed them onto the inside of the roof to cover the gaps. The exterior of the roof is in good condition, but the interior was broken with daylight coming through under the eaves, I needed to make it more watertight first.
Step 3 – PlanningOnce the space is empty and watertight, you can then measure up and plan how to configure the space.
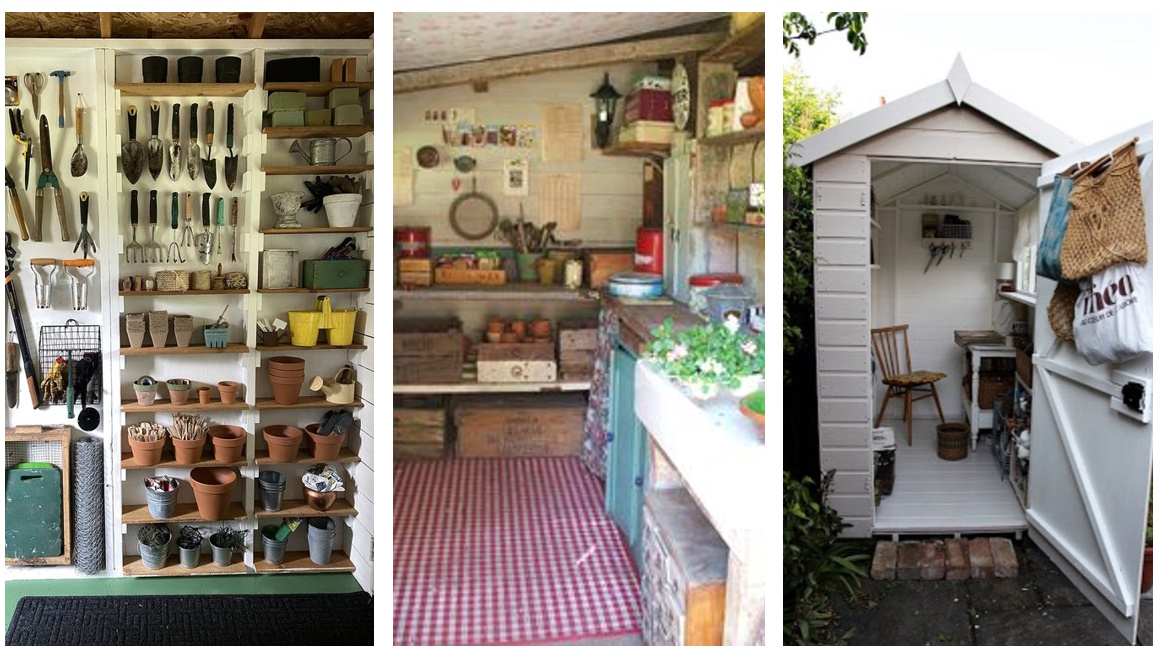
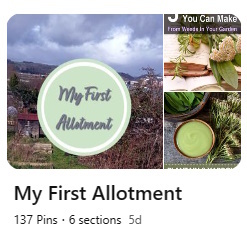
I started collecting ideas and inspiration on a Pinterest mood board.
I had a vision for a well organised, lovely, bright shed. It needed to be functional but also a pleasurable environment to be in, Hen’s Tooth is my little retreat after all, and I knew I would be spending a lot of time there. I wanted it to be comfortable as well as practical.
Taking inspiration from images of other shed projects:
 Step 4 – Decorating
I had some paint leftover from home. I used this to paint the inside walls of the shed to brighten it up. I had some old broken laminate floor from our house when we did our kitchen last year. I’m such a womble I always keep things in our shed at home that I think might be useful for future projects. I’ve laid the old laminate on the floor.
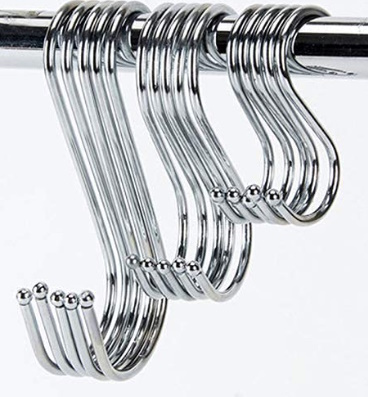
I’d added hooks and nails to hang things from to the walls. I have an old wire grid from a broken greenhouse that I’ve hung on the wall and used S hooks to hang things from.
 Step 5 – Dressing the space
Once the walls were painted and hooks and grid attached to the walls I could then start dressing the space.
There was an old chair at home that has been stored behind the shed, so bought this to Hen’s Tooth.
I got a bit crafty and made some projects with jeans – I’ll write another blog sharing my Jeans makes.
I picked up an old, wooden TV bench from a charity shop for 20 quid.
From our kitchen refurb, I already had a camping water box with a tap. I have set up a sink area with the water box and an old mixing bowl underneath as my sink.
I have also set up an area with a hobo stove, so I can boil water for drinks and snacks. I’ll share the hobo stove project on another blog.
The Potting Shed, Before and After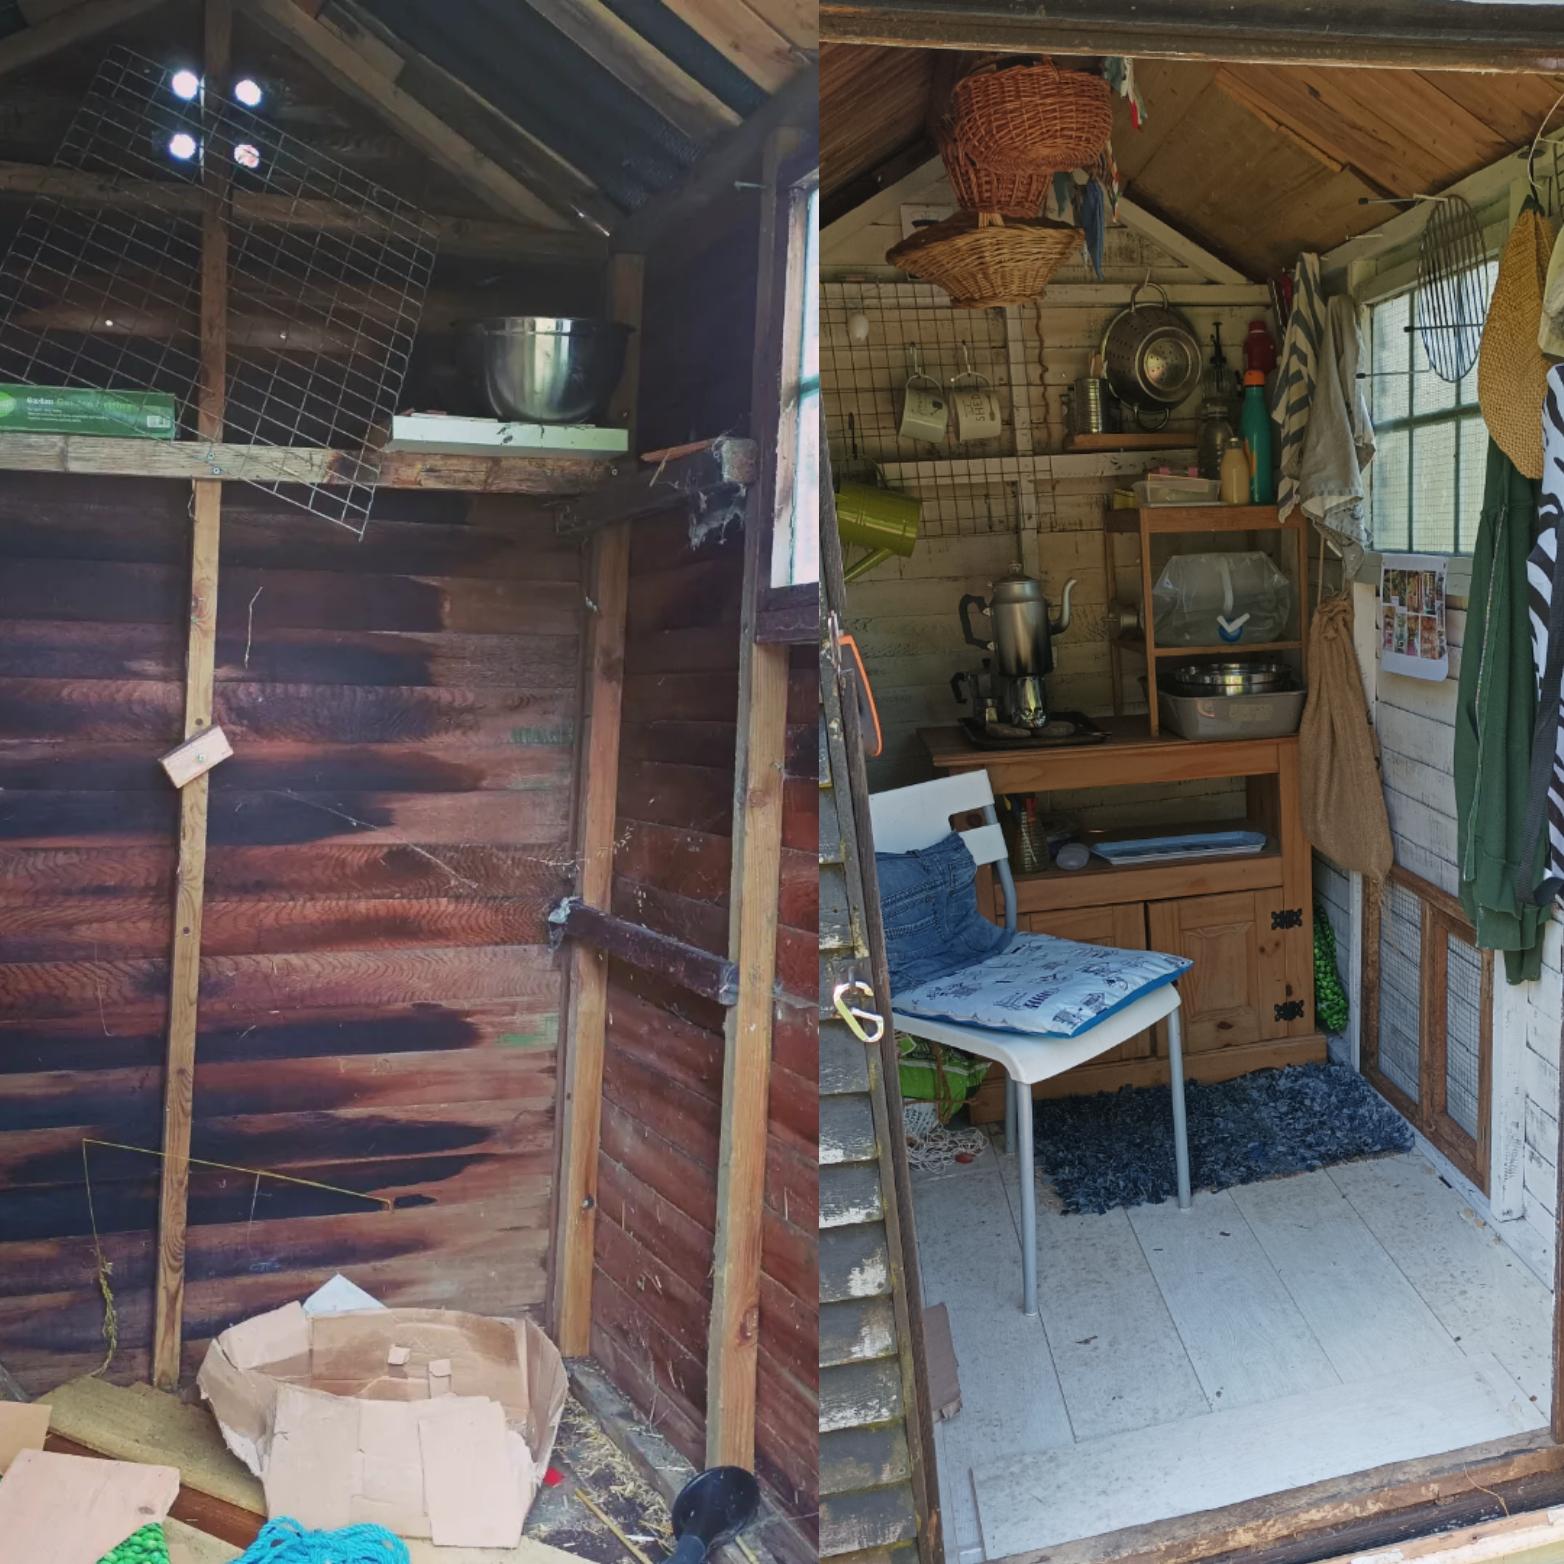
Eventually, I’ll build an extension on the side of the shed and use it as a summer kitchen and potting area, but for now, I’m pleased with my cosy little shed.
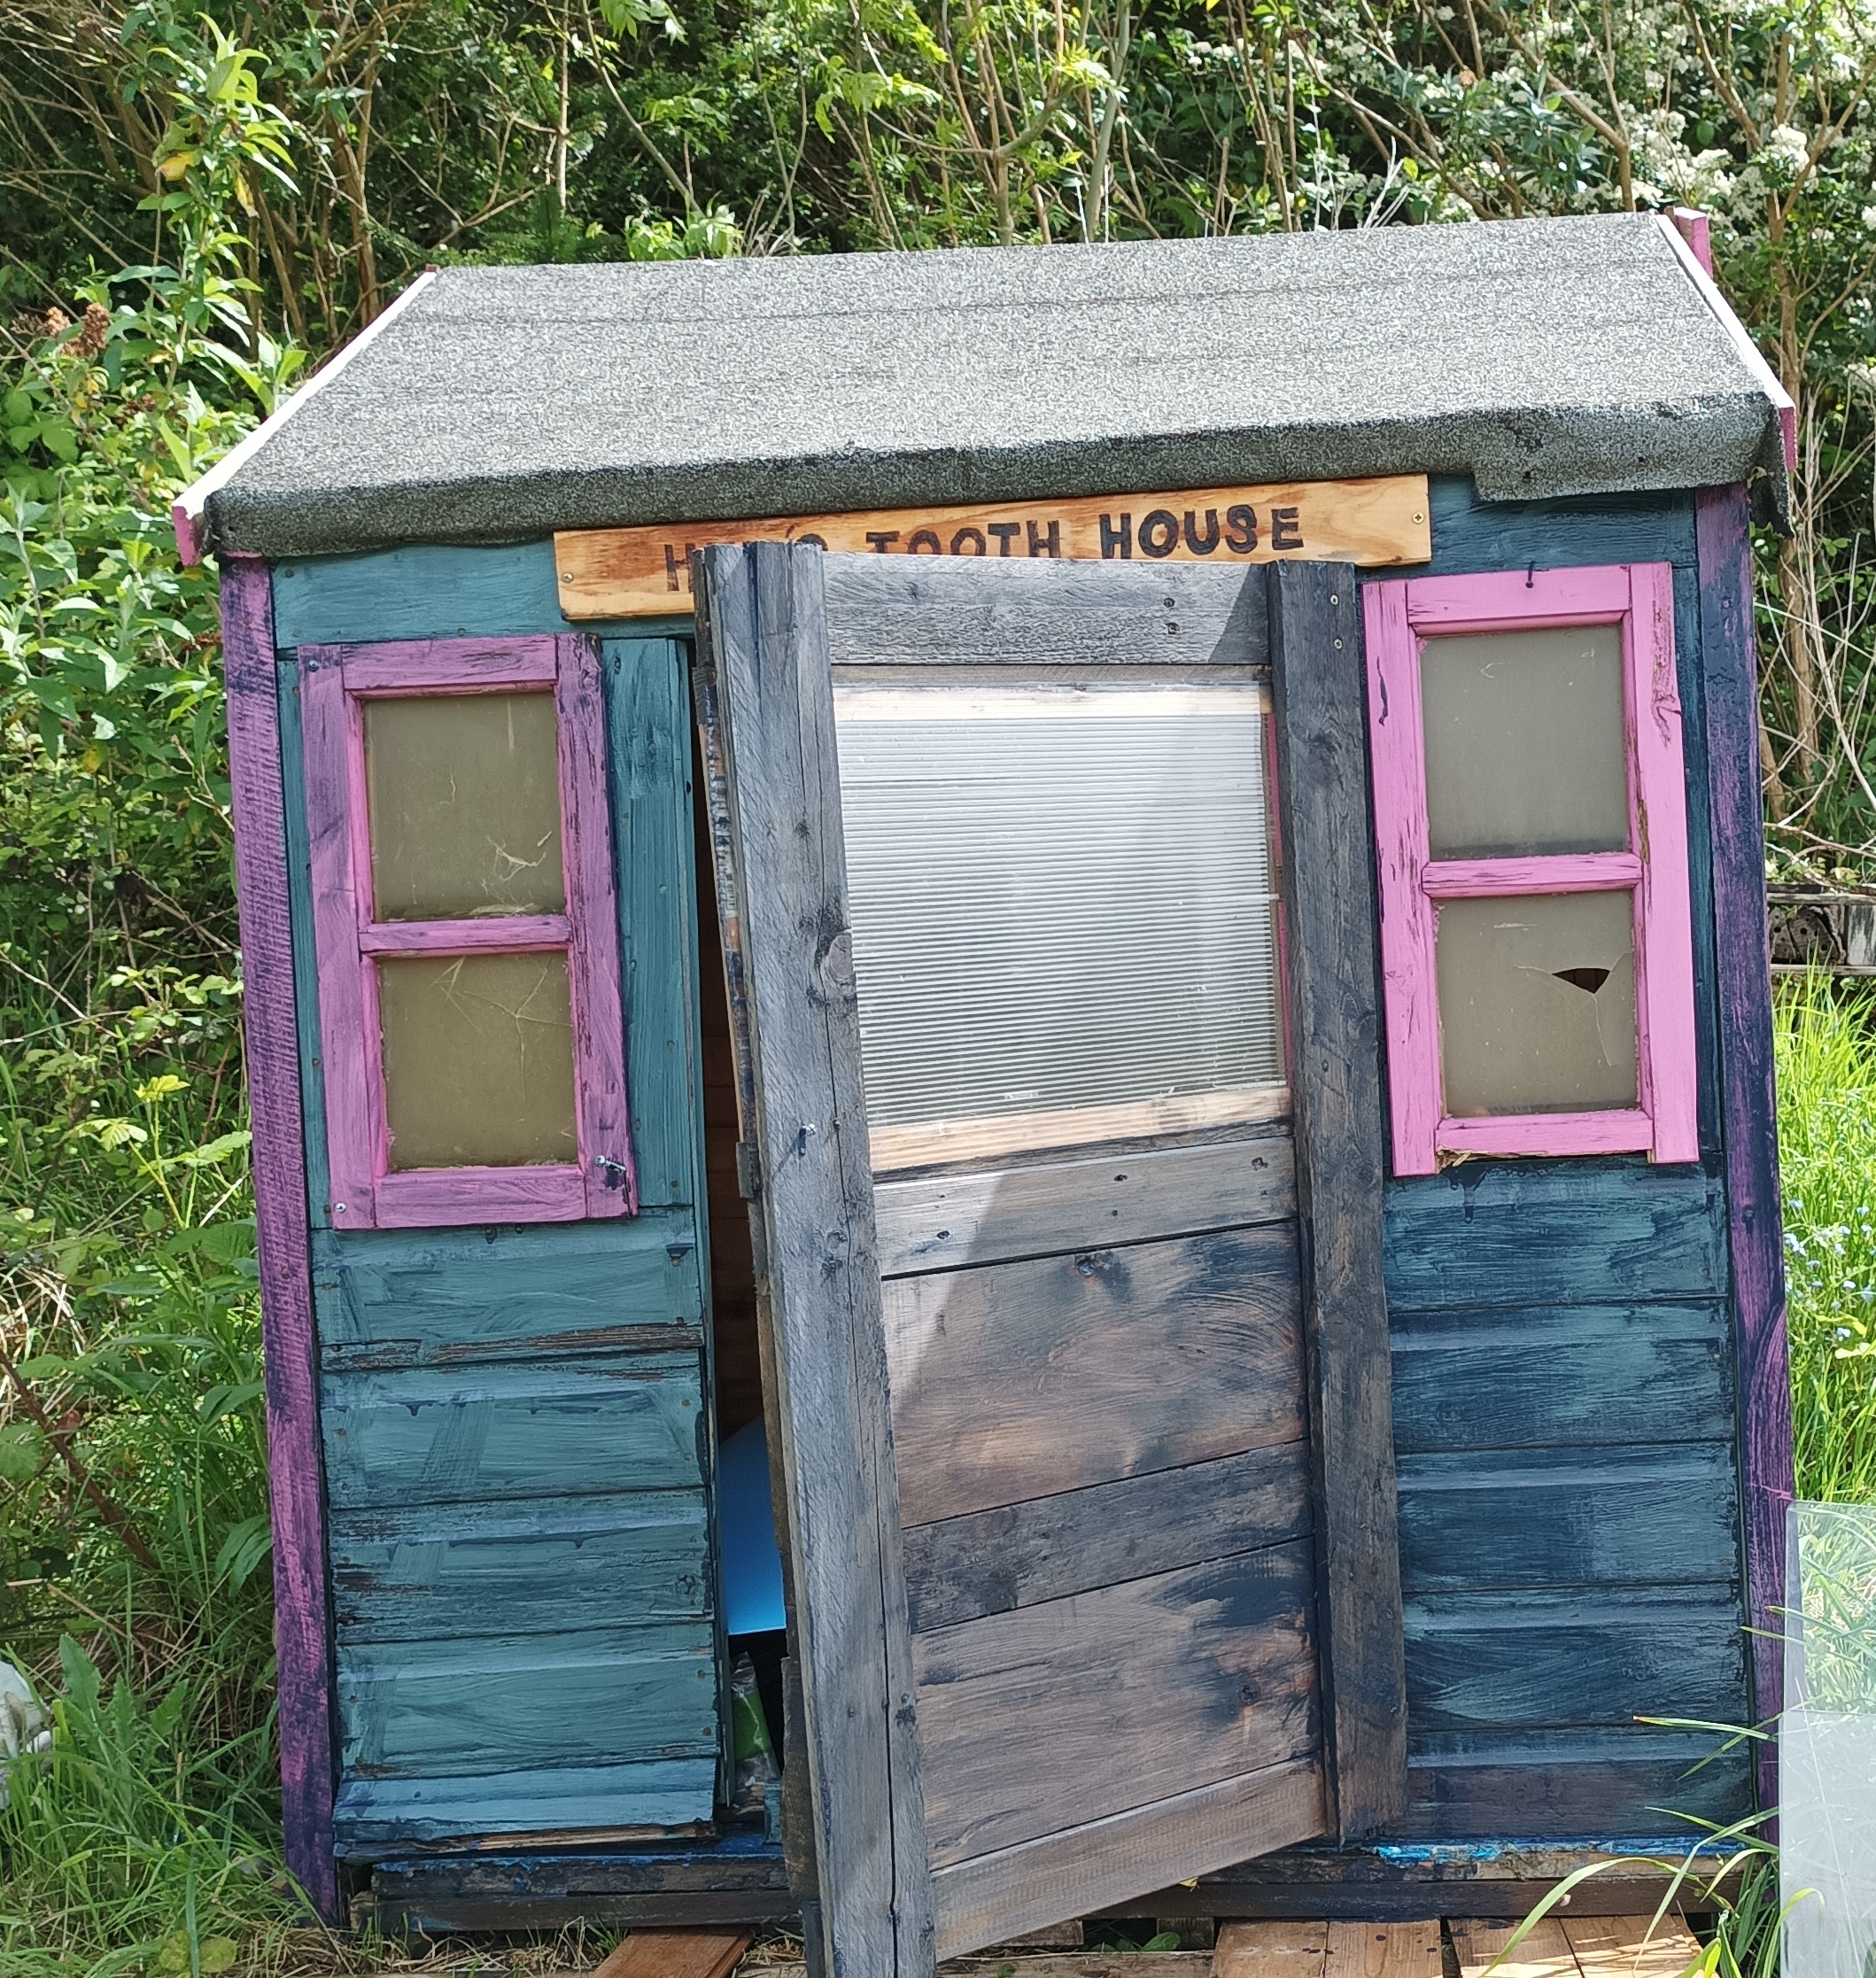
The Wendy House
The Wendy house has been converted into a little chillout zone.
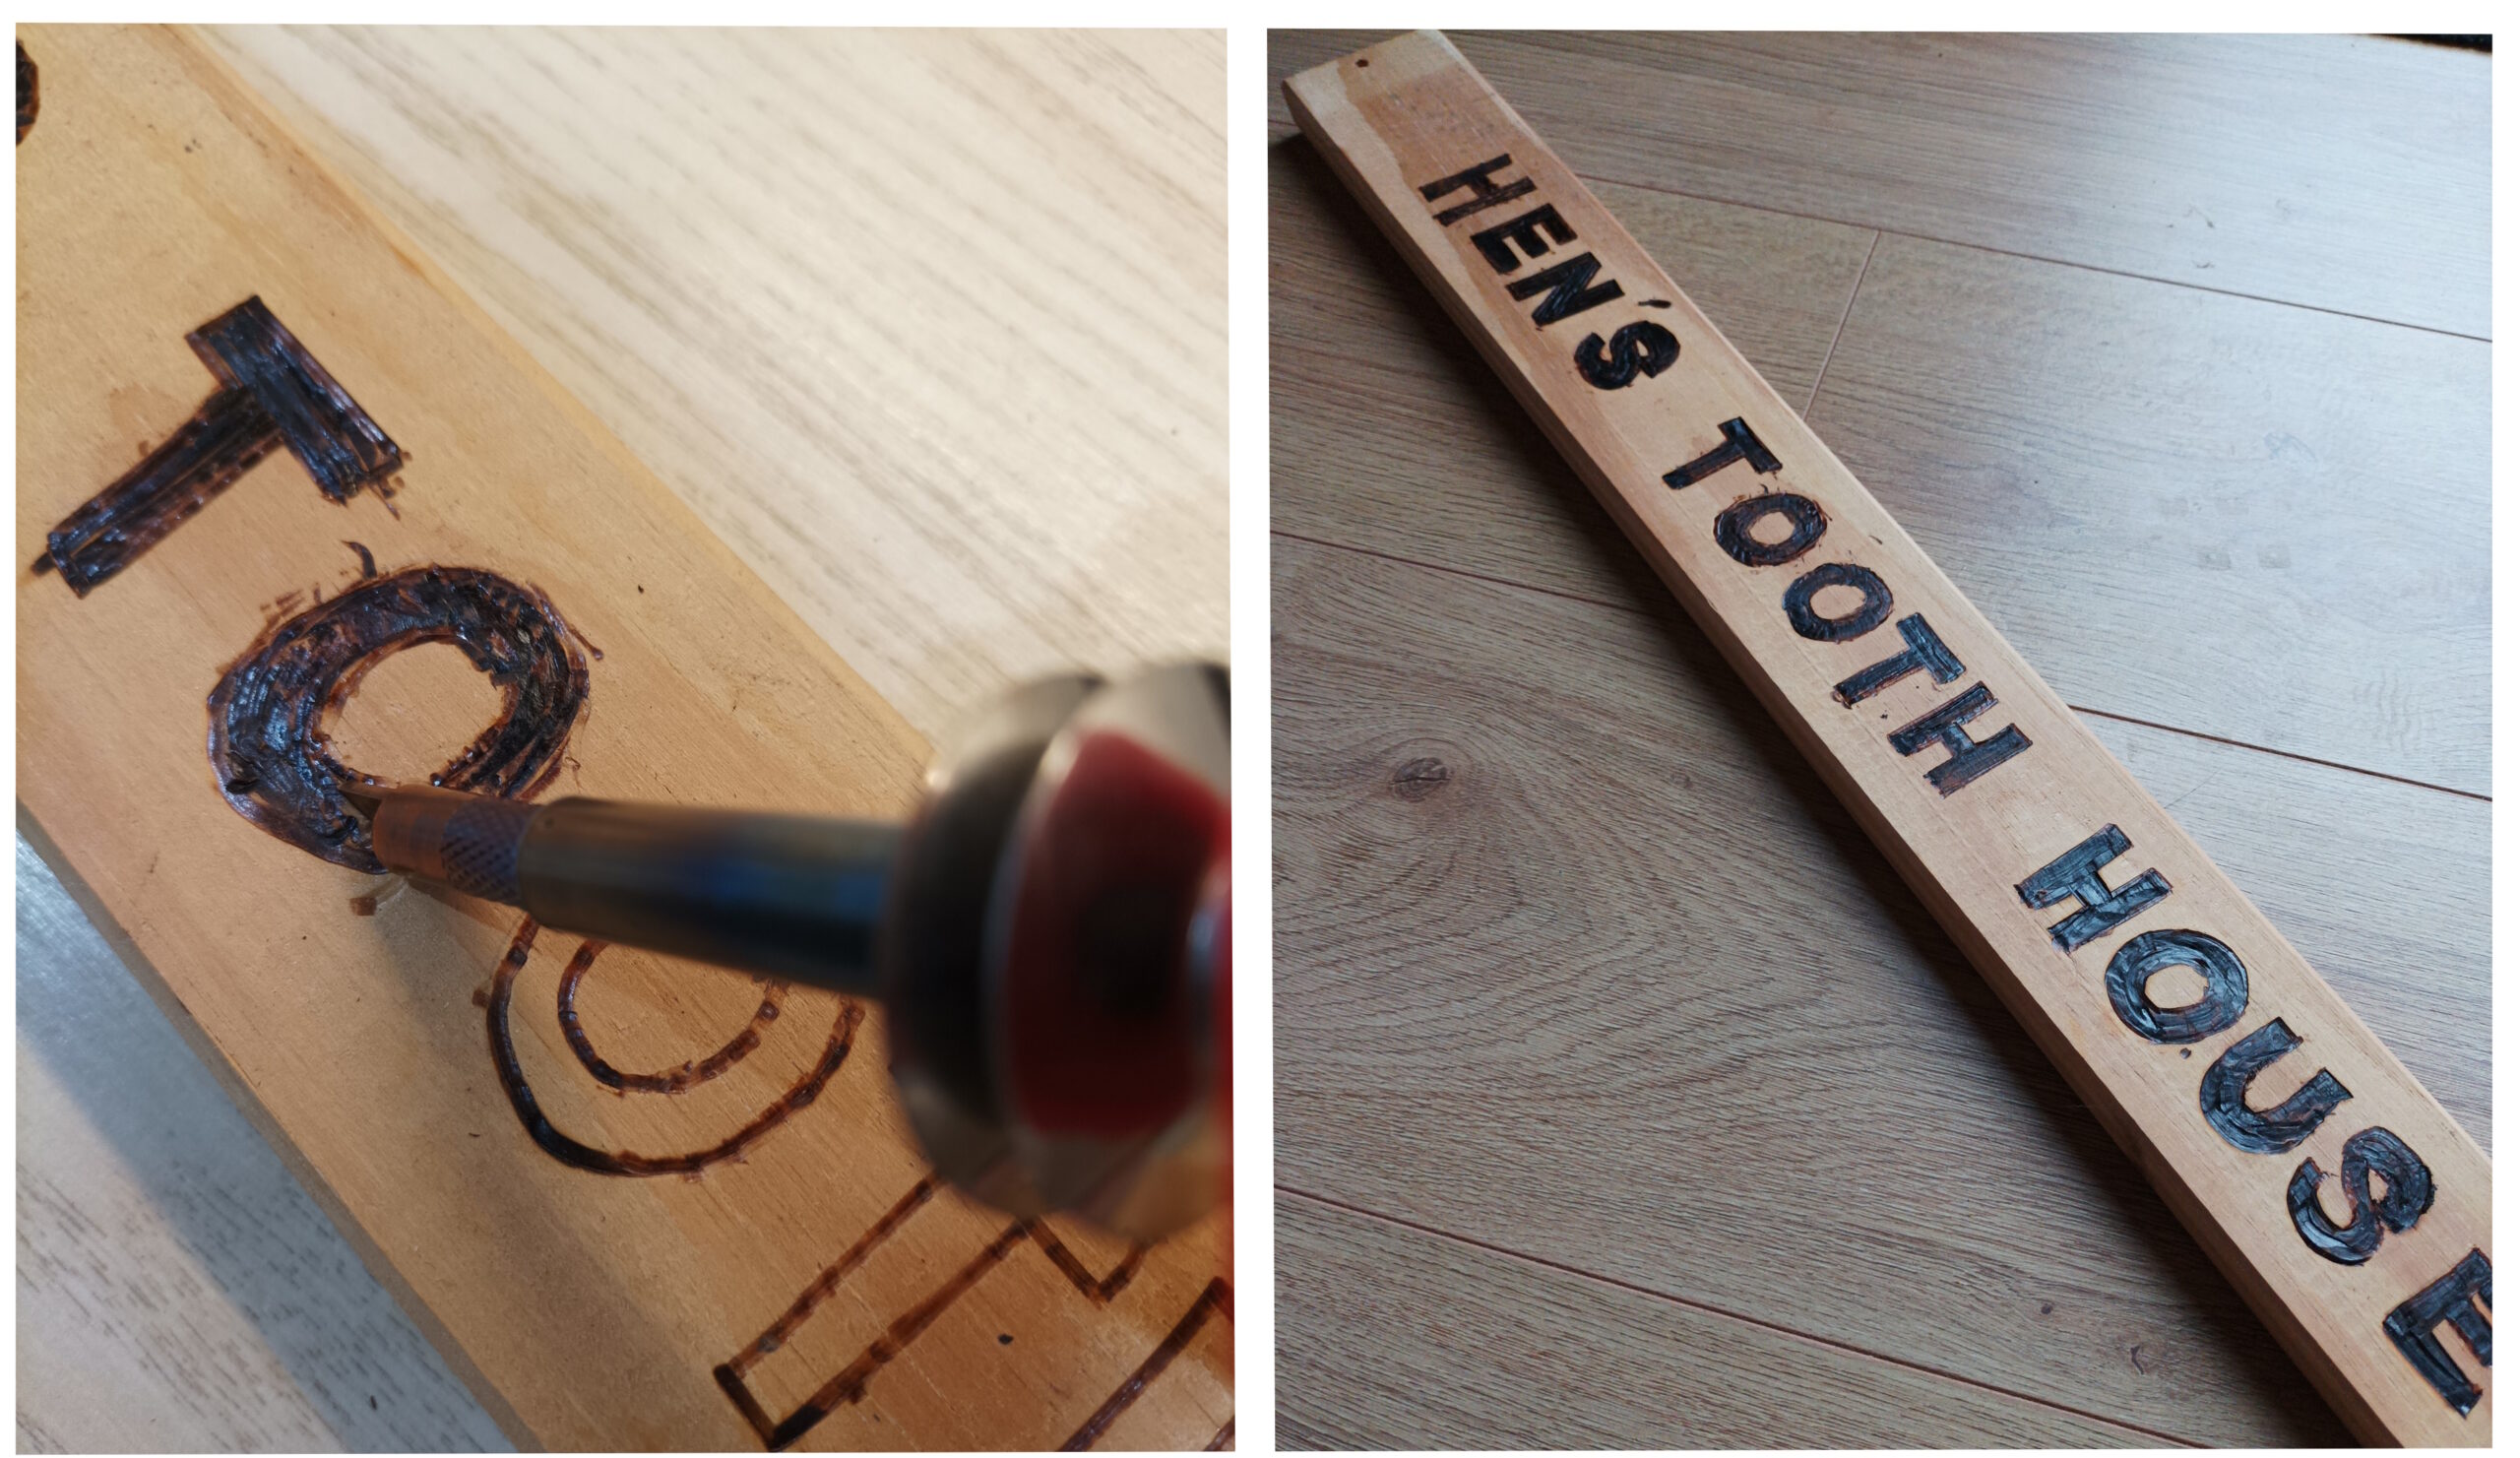
It even has a sign above the door, made with a pyrography tool and an old plank.
It was an open shell when I took it on.
I constructed a new door out of all pallets and a scrap of polycarbonate that I had in the back of my shed.
I swept out all the cobwebs and dirt.
I’ve laid some heavy duty floor underlay, that was left over from our kitchen refurb, so there’s a waterproof membrane on the floor that will also suppress the dust.
I had a big piece of sponge left over from an old mattress that I’ve cut up to make a room-sized floor cushion.
I had an old bed sheet, which I’ve made into a cover for the floor cushion.
While I had my sewing machine out I also made cushion covers and bunting.
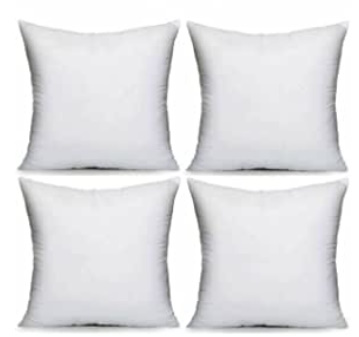
Making CushionsStep 1 – Start with the cushion padStart with your cushion pad. I had old cushions in my sewing stash, left over from other home decorating projects. You can also cut up an old pillow into a square and reuse this, or buy cushion pads from plenty of budget retailers.
 Step 2 – Select your fabric
I found some chicken themed fabric at my local fabric shop – Calico, to go with the Hen’s Tooth theme.
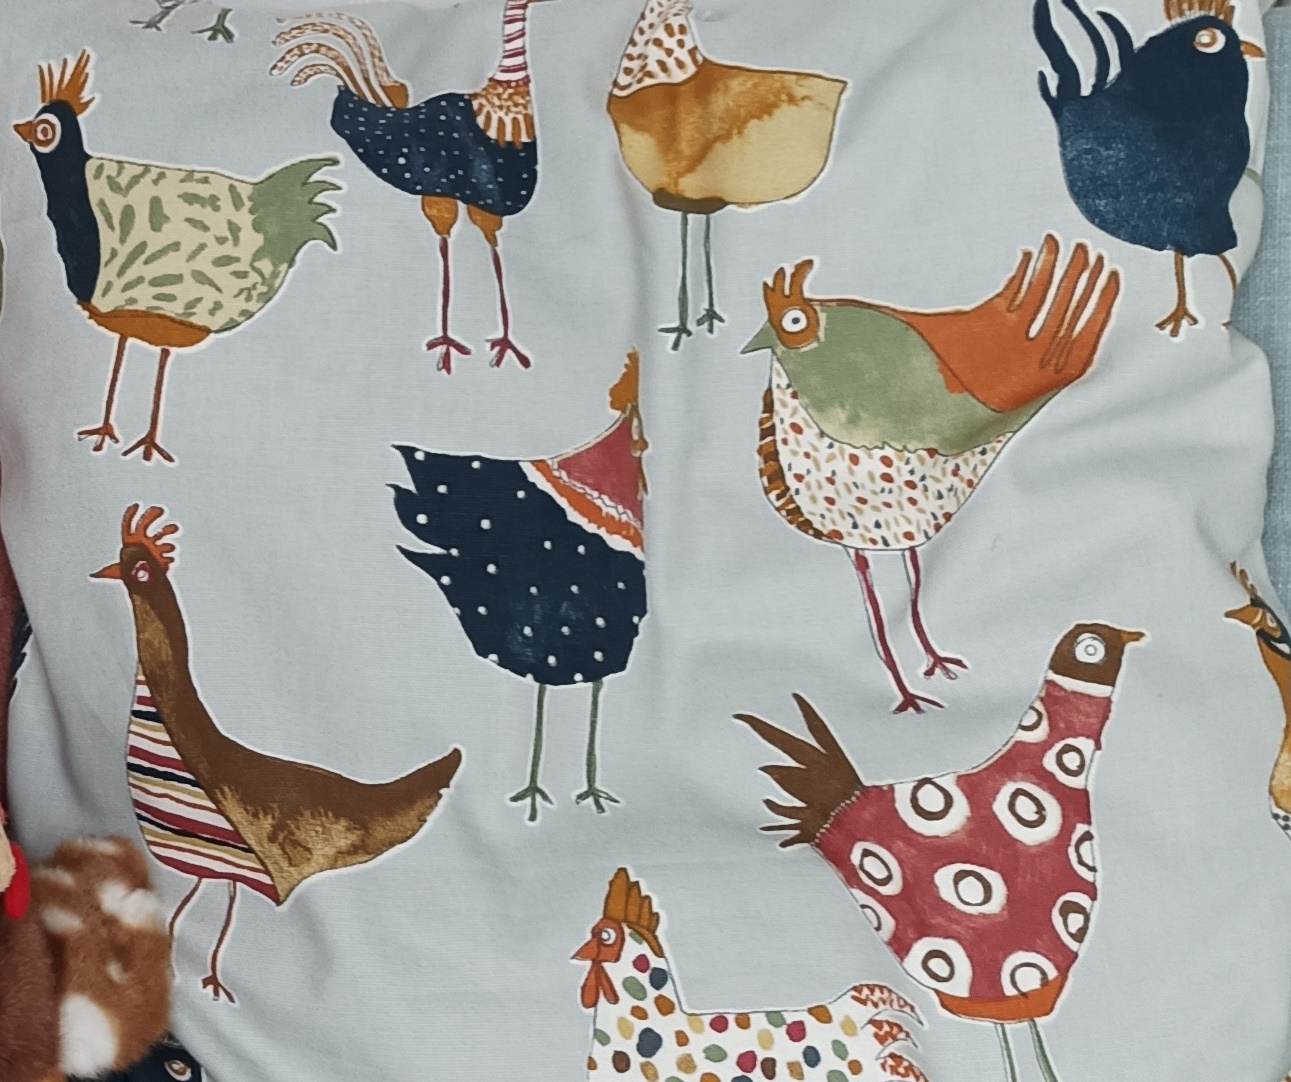
It’s better to use a thicker, upholstery, fabric for more robust cushions, but you can also use printed cotton fabric, old curtains, jeans – whatever fabric you have.
Step 3 – Cut to size“Measure twice, cut once” – this is always good advice!
How you cut the fabric will depend on how you configure your cushion, the pattern, style, etc.
I’ve gone for a really simple style – I’m not a very skilled seamstress. I know one setting on my sewing machine and can sew a competent straight line, that’s about it. But, for a basic cushion this is all you need.
If you want to remove and wash your cushion cover, you need to think about fastenings.
You can:
Sew in a zipFold and tuck (like a pillowcase)ButtonsPoppersRibbonsVelcrowYou can pick up multipacks of zips relatively cheaply. Standard cushions are 30 or 50 cm square, so a 20cm zip should suite most cushion covers.
Sewing in a zip is a little trickier and more fiddly. The trick is to sew the zip side first, then open the zip before sewing the other 3 sides so you can reverse the cover easily.
Here is a tutorial on sewing a zipped cushion cover:

I’ve used a combination of the fold and tuck method and zipped covers.
The Fold and tuck methodMeasure 3 x the size of your cushion. Because I have a design on my fabric that goes one way up, I’ve had to cut down the length of the fabric, which can potentially be more wasteful, so I made sure I had a good length of it.
Working on the reverse side of the fabric, cut the long strip, 3x the pad size.Sew hems on the two short endsFold the fabric into 3Sew the two open sidesTurn the cover the right way aroundYou can then tuck the cushions pad in like a pillowcaseBuntingI used the same scraps of material to make some bunting to hang around the inside of the Wendy house.
Bunting also involves sewing straight lines, so if you can make a cushion, you can make bunting.
Make bunting in 19 steps:Cut a triangle template from a piece of cardboard. Cut it about 1cm around larger than the finished triangle, this is to account for your hem. Use this as a template to keep your individual triangles of bunting the same size. For each triangle, cut two pieces of fabric. Working on the reverse, sew two sides of the triangleTurn the triangle the right way aroundUsing a pencil or tips of scissors to push the point outSet aside and work on the next triangle Repeat for as many triangles as you thing you’ll needFlatten out the triangles – iron the whole batchApply the ribbon. Use ribbon or bias tape binding in an appropriate colour. Choose a wide ribbon as you will be folding it in half lengthways (2cm wide, min.)Allow a good few centimetres loose both ends to hang the bunting up (15cm)Place the unsewn edge of the first triangle on the ribbon and fold the ribbon overPin in place, then sewOnce the tape length is on the machine, use something to space the triangles (either measure a gap or use something to space. I used the width of the machine base as a guide) you want to make sure your triangles are evenly spaced along the ribbonIf you have more than one fabric design, arrange the triangles in an alternating patternRepeat until you have sewn in all the triangles, or the bunting is long enoughAllow a tail the same length at the endUsing the tape hems on the rough edge of the bunting gives you a nice strong, neat strip of bunting that can be hung either way round.
Here’s a blog with visual instructions, if you need them:
 Decorating Hen’s Tooth House Shed
Once I’d made my cushions and bunting at home, I took them to the allotment to decorate the Wendy house.
Similar to the shed, I started by clearing the space, giving it a sweep out and clean, then painted the walls and ceiling with some left over paint.
I put the big floor cushion in first, then scattered the cushions around. I hung up the bunting using a staple gun.
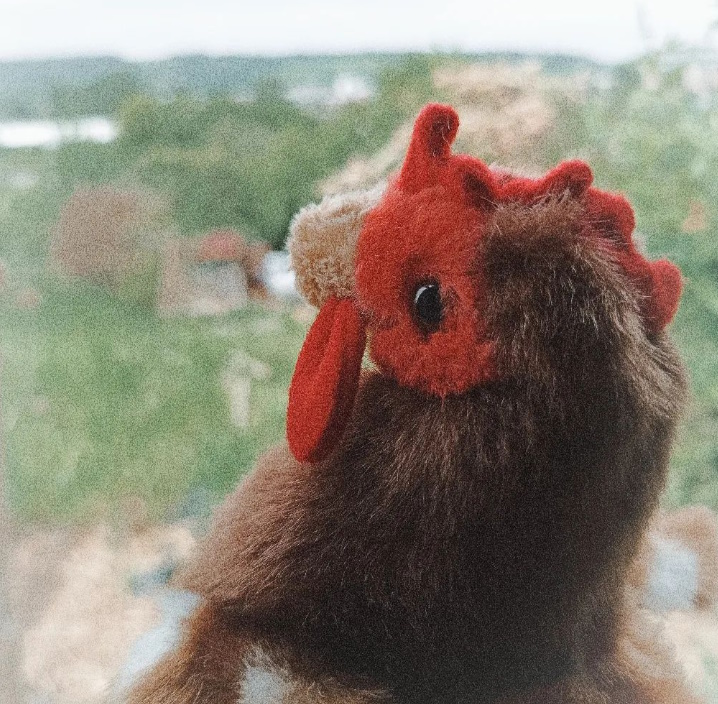
Fortunately, I took on my allotment at Easter time, so after the weekend, shops were selling off their Easter tat. I found egg and chicken themed knick-knacks – I bought some mini egg string lights and some little mini pom-pom chicks to stick with the chicken theme. During a day trip to Cheddar – which, by the way, is the place to go for weird soft toys – I picked up a little cuddly chicken who was become the mascot for Hen’s Tooth.
I’m calling her Henrietta, after one of my pet chickens that died last year.
She keeps me company in my cool little chill out space, where I can sit and eat lunch or drink a coffee and watch the city below.
Hen’s Tooth House – Before and After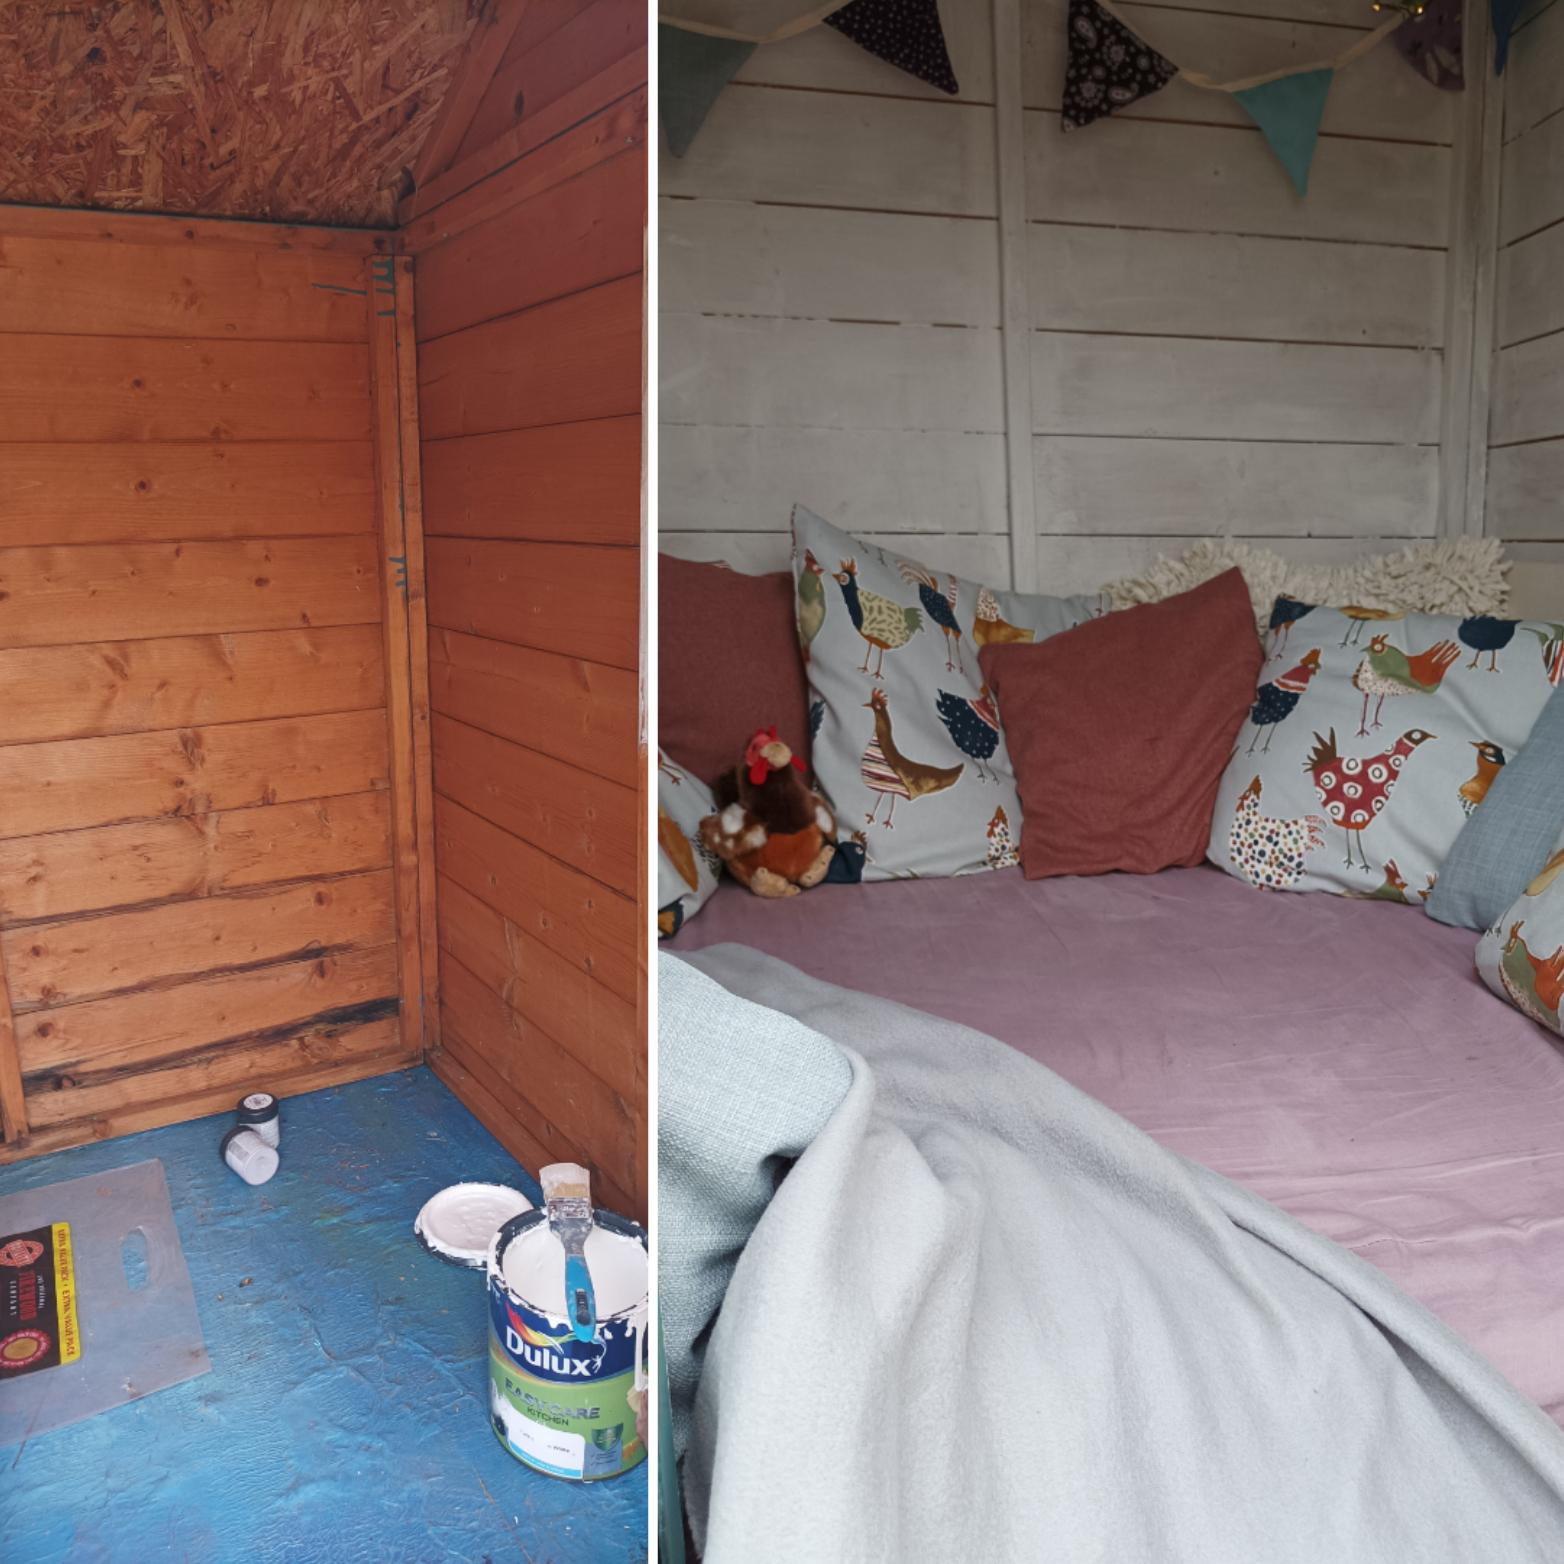
*As an Amazon Associate I earn from qualifying purchases. This post may contain affiliate links.
The post Project Shed(s) Revamp appeared first on Amy Morse.
May 22, 2023
The First Month at Hen’s Tooth Plot
It’s been about a month since I took on my Bristol allotment – Hen’s Tooth.
What to do first?I’ve still not gotten over the excitement of taking on my allotment plot, but there is so much to do.
It’s important to do it step by step and not to try to do it all in the first year. Having an allotment is a marathon, not a sprint.
Happily, it’s the start of the season in the UK and having finished a work contract at the end of March, the timing is impeccable!
It’s been a wet few weeks, with a just the odd day of sunshine, or at least, not rain!
The spring season seems to be late in the UK this year. We still had frost well into April so there wasn’t much I could plant out until May.
For anyone else about to take on their first allotment, or a new garden, here are some things to think about:
Observe your plot:Before you start doing anything, take a good look at your allotment plot. Notice where the sun hits, where there might be shade, where the soil looks the healthiest or the driest, where the weeds are growing, etc. This will give you an idea of what will grow best where and how you can best utilise your plot.
My plot is covered in grass so there is a lot of clearing to do!
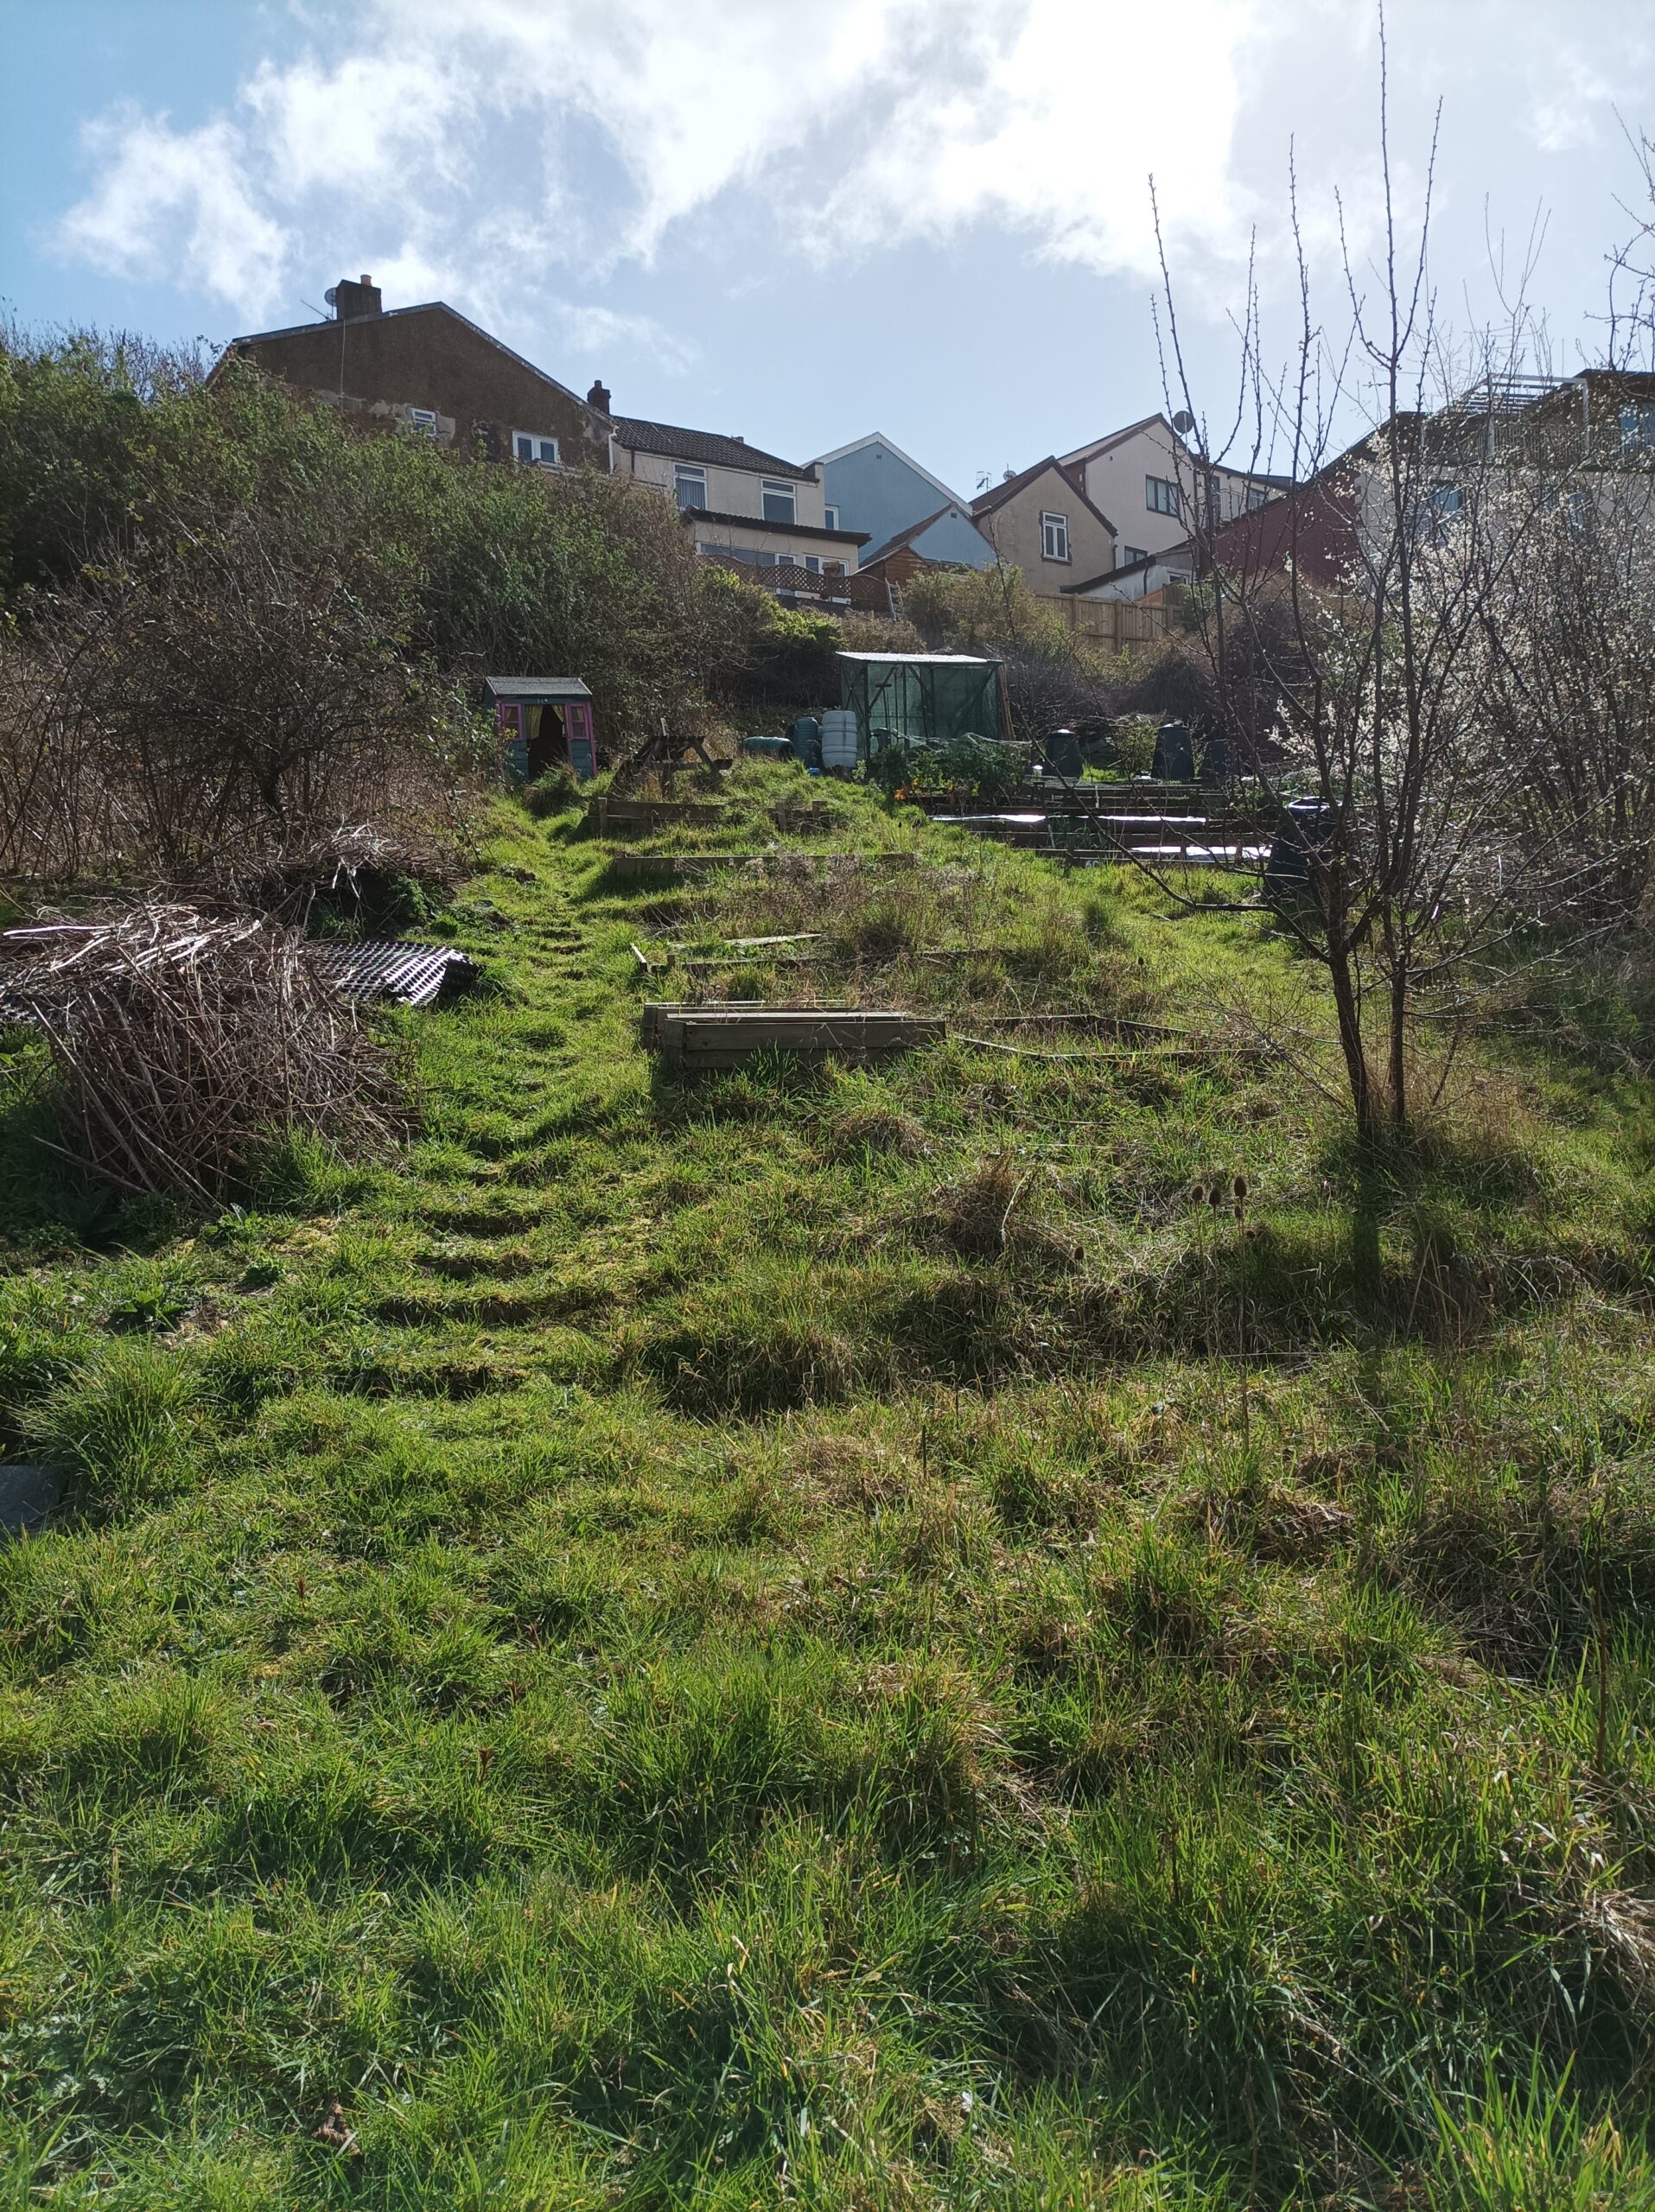
It slopes down South East to North West. There are houses on the southern summit of the plot and the sun comes around and over the houses. This means at this time of year the top of the slope is in shade until lunchtime, the bottom of the plot is the sunniest and the worst of the weather comes in from the west.
This means the side of the shed is a bit of a sun trap – perfect spot to place a bench. Also a good area for greenhouses.
There are ten beds laid out in all, but over time, I can increase this.
Clean up your plotMost likely, your plot has been left alone for some time and will need some cleaning up. Remove any weeds, rocks, and debris that may be on the plot. This will help you see what you are working with and prepare the plot for planting.
I’ve been collecting cardboard for a few weeks and have laid this on the beds, weighted down with wood and rocks from around the plot.
This was the first thing I did. It will suppress weeds until I’m ready to prepare the beds, and when I come to prep the beds I can just layer compost on top of the cardboard and it will rot down naturally into the soil.

As I gradually clear areas of the plot, I’m laying out more card. I’m also laying out card to cover in woodchip for the working areas and spaces between beds.
I learned this technique while volunteering at Hartcliffe City Farm last year. A couple of local tree surgeons have an arrangement with the Council to dump woodchip at the site, so there is usually a pile free for the use of allotmenteers. The cardboard will rot into the soil over time, enriching it.
It is far better to use cardboard. Using plastic sheeting or plastic based rolls of weed suppressing membrane may seen convenient, but it leaches microplastics into the environment.
I keep finding these membranes under layers of weeds and roots and grasses, when I do they are a nightmare to remove and shed little bits of toxic waste (because that’s ultimately what plastic is – toxic waste).
You can renew the cardboard and woodchip over time and it means that if you ever change the use of an area, you’ve already nourished the soil.
 Prepare the soil
Soil is the most important part of your allotment. You’ll want to make sure your soil is healthy and fertile before you start planting. Test your soil to see what nutrients it might need and amend it accordingly. You can also add compost, manure, or other organic matter to enrich the soil.
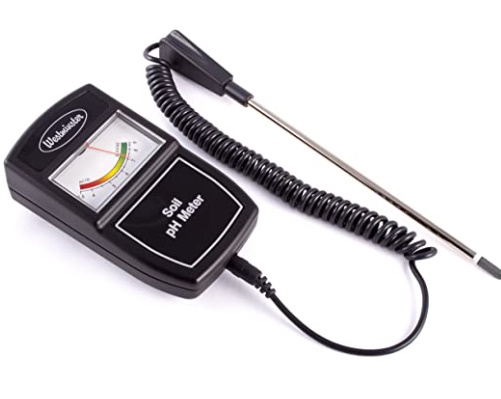
I’ve not tested my soil. Kits are available online.
I’ll be adding compost and nutrients over time, so I’ve not got that technical!
Bristol is on the Avon Gorge; a limestone massif on the edge of the Mendip hills. Our water is heavily mineralled with lime (it’s the place kettles go to die), so I can assume that the Ph is more alkaline that acidic. That means I can happily add tealeaves and coffee grounds (acidic) without upsetting the nutrient balance.
Coffee shops often have bags of spent grounds to take away, so whenever I see some, I grab it to add to the beds.
You can gets testing kits and testing meters online.
The soil is quite heavy clay so retains moisture but is also tough to work. I’ll be using the ‘no dig’ method so this isn’t necessarily a problem.
I’m doing a bed at a time, trying to dig as little as possible. Some of the deep rooted weeds make this challenging. I’ve had to dig over 2 big beds as my potatoes needed to go in, but so far as possible I’m trying to stick to no dig principles.
Plan your plotOnce you’ve observed your plot and cleaned it up, it’s time to plan what you want to grow. Think about what vegetables, fruits, flowers and herbs you want to grow and where you want to plant them. Consider crop rotation and companion planting as well.
I want fruit, veg, herbs and flowers from my plot. I will then have lots of resources and produce to experiment with, and have a well balanced plot with something for all the pollinators, birds and beasties I share it with.
Produce that doesn’t need as much sun and doesn’t need as much attention would be better in the top beds up the slope. They won’t mind the shade and I don’t need to be walking up and down a hill all the time. I can get them in and leave them to it. My potatoes have gone into 2 of these beds.
Once I started cutting back the overgrown grass I discovered there is a rhubarb, some raspberry canes and a fruit bush, that I think is blackcurrant. These are all in one area at the bottom of the plot so I will have this area as my fruit beds.
The next beds up the slope are in a prime sunny spot so will be ideal for cut flowers. I’ll also leave the grassy banks between the different areas up the slope, as wildflower meadow strips for pollinators, cuttings and colour.
Get the tools you needYou’ll need some basic tools to get started, such as a spade, fork, hoe, watering can, and gloves. You may also need some additional tools, depending on what you want to grow and how you want to maintain your plot.
I already had a spare trowel and hand fork. I also raided my in-laws shed, asking if they had anything they could spare. There were some tools in the shed already, left by the previous occupants – I’m somehow now the proud owner of 3 rakes!
You can pick tools up in charity shops, junk shops, car boot sales and it’s always worth looking out for offers. Wilko were selling off surplus garden stock at the start of the year and I’m glad I got carried away buying random bits and bobs, now – like watering cans and gloves.
Start plantingWith your plot prepared and your plan in place, it’s time to start planting! Make sure to follow the instructions for planting each type of seed or seedling and water them regularly. As you grow your crops, you’ll need to care for them by weeding, watering, and fertilizing as needed.
I was already starting off seeds at home in my small greenhouse, and now I have the allotment, I’ve had to up my game and start more.
Having the space, now also means I can grow things I’ve not grown at home before as they take up too much room in my small back garden.
I’ll be growing brassicas (cauliflower, broccoli) at Hen’s Tooth.
I can also grow more potatoes and have a larger crop of sweetcorn.
I’m planning what to grow at home and what to grow at the plot.
At home it makes sense to stick to things I use regularly and that grow quickly, like herbs and lettuce.
At the plot, things that take up more room or take longer to grow.
I’m sure I’ll add things over time. I like to grow a small amount of a lot of things. This provides a variety of ingredients and resources for makes, but also minimizes the risk of failures, as even if some things don’t work, at least I’ll still get some produce.
At home:Herbs, cut and come again leaves, spring onions, tomatoes, peas and beans, cucumber, gherkin, courgette, spinach
At Hen’s ToothFlowers for cutting, sweetcorn, potatoes, cauliflower, broccoli, onions, tomatoes
No Dig and HügelkulturI want to do the no dig method, but currently don’t have enough compost, so I’m doing what I can with the resources and the soil that’s on the site.
I have planted up my potatoes and I’ve had to dig them in. I’m hoping that they will help to break up the soil over time and I can mulch over them to continue to improve the soil next season. I don’t want to buy lots of plastic packed bags of compost, creating unnecessary plastic waste.
I’m using the Hügelkultur method. This involves layering compostable things like a lasagna. Start with larger things like wood at the bottom, then shredded up paper and cardboard, fruit and veg scraps and peelings, and then finally a thin layer of compost. The idea being that the layers will gradually break down and improve the soil.
Effectively, I’m growing directly on top of a compost heap and not wasting lots of money on buying soil and compost.
 What else?
I have some big plans and grand ideas. I’ve started a Pinterest board, where I can gather ideas, inspiration and things to try at the plot.
 She Sheds
I have 2 sheds: a small child’s Wendy house at the top and a standard, small potting shed at the bottom.
I’ll be refurbishing these and adding to them.
Off GridI want to try off grid experiments, like a stove to make hot drinks and a compost toilet.
Pallet ProjectsI have so many ideas for pallet projects, I’ve added a special section to the Pinterest board.
So much to do – and at some point I need to actually get some plants growing!
The post The First Month at Hen’s Tooth Plot appeared first on Amy Morse.
May 2, 2023
The Joy of My First Allotment
Once you get the growing bug, you can never have enough space!
I’ve been growing my own produce for as long as I’ve had little garden’s to do it in; with mixed success.
Never enough spaceI’ve only ever had small garden spaces, with one exception when we lived in Bulgaria for a short while. We had 1/4 acre of land, but we were only there for one growing season.
When we moved to our current suburban terraced house in Bristol, UK, the first thing I did was dig up the pointless strip of scraggy lawn and plant a veg bed.
It’s a north west facing garden, shaded by trees and houses. With limited growing space and limited sunshine, my results have been limited.
I love my little garden, but it’s not enough to satisfy my inner farmer!
The wait for landI joined the local authority allotment list soon after moving to this house. I think I was on the list for 6 or 7 years, until finally, in 2023, I got the gate code to my first allotment.
I signed the lease and got the keycode at the start of April – perfect timing for the UK growing season

View up the slope of my allotment
Why an allotment?An allotment is a piece of land, usually leased from a local authority or private owner, to grow crops, flowers, or other plants.
As rare as Hen’s TeethAllotments are like hen’s teeth in Bristol. With thousands of people on the waiting lists, one part time member of staff employed by the council to manage things, and very few plots and sites available.
Our current council administration seems intent on selling off any available land to property developers. Local people growing fruit and veg doesn’t make them any money!
Because allotment plots are as a rare as hen’s teeth in Bristol, I’ve named my little slice of off grid earth, ‘Hen’s Tooth’.
I’ve even changed my Instagram to share my allotment adventures!
The Benefits of an AllotmentHere are just a few of the many benefits of having an allotment.
Fresh, healthy produceOne of the obvious benefits of having an allotment is the opportunity to grow your own fresh, healthy produce. You can choose to grow a wide variety of fruits and vegetables, depending on your taste and preferences. By growing your own food, you have complete control over the growing process, including the use of pesticides and fertilizers. Be sure the food you eat is free from harmful chemicals and fresh.
I’ll be growing organically on my parcel of land and using the No Dig method.
Physical activityGardening is a great form of exercise. Having an allotment gives you the opportunity to spend more time outdoors and get some physical activity. Gardening involves a range of activities, from digging and planting to weeding and harvesting, all of which can help to keep you active and healthy.
My plot is a sloping site, I’ll certainly stay fit working up and down the site.
Mental health benefitsIn addition to the physical benefits, gardening has been shown to have a positive impact on mental health. Studies have shown that spending time in nature can reduce stress and anxiety and improve mood and self-esteem. Gardening can also provide a sense of purpose and accomplishment, which can be particularly beneficial for those who are struggling with mental health issues.
One of the things I love about gardening is the sense of hope and anticipation. The very act of propagating and nurturing a plant is an act of hope; of looking forwards to a time in the future. The anticipation of feeling great satisfaction, of harvesting that ripe produce and taking a juicy bite for the first time.
The allotment CommunityAllotments are often located in communal areas, and this provides a great opportunity to meet other gardeners and form friendships. Gardening is a social activity, and many allotment holders enjoy sharing tips and advice with each other. Some allotment sites also organize social events and competitions.
I’m yet to meet my neighbours at the allotment. I look forward to making new friends and feeling part of a community of fellow growers and plant nerds.
Environmental benefitsGrowing your own food has a number of environmental benefits. Firstly, it reduces your carbon footprint as it eliminates the need for transportation of produce from farms to markets. Additionally, growing your own food reduces the amount of packaging and plastic waste that is generated from buying pre-packaged produce. Finally, by growing your own produce, you can reduce your reliance on supermarkets, which often source food from environmentally damaging practices.
It’s one more way to disconnect myself from the tethers of our broken food system; to reduce my plastic use and waste, to take a step closer to more self sufficient and sustainable life.
Culinary adventuresI’m, looking forward to gluts of produce and making delicious meals, preserves and ferments from it. I’ll share my adventures and discoveries of both growing and using my produce.
The post The Joy of My First Allotment appeared first on Amy Morse.
April 26, 2023
DIY Dry Shampoo
In my ongoing bid to remove as much pointless plastic from my life as possible, and reduce my chemical load, I’m experimenting with different homemade beauty products.
I still use my homemade deodorant daily, and would never go back to aerosols.
You can find that recipe HERE. Honestly, it really works.
I’ve had mixed success with homemade soaps. I find the melt and pour bases ‘waxy’, so instead I get liquid refills and solid shampoo from zero waste shops.
Dry shampoo is another unnecessarily chemical laden product, when you can make your own at home, instead of a petrochemical fueled spray.
 Why Dry Shampoo?
Homemade dry shampoo is a great alternative to commercial dry shampoos that can contain harsh chemicals and additives. It’s easy to make and can be customised to suit your hair type and preferences.
Here’s a simple recipe for making your own dry shampoo at home:
RecipeIngredients:
1/4 cup cornstarch or arrowroot powder1/4 cup baking soda (optional)5-10 drops of essential oil (optional)Spoonfuls of Cocoa Powder (until the desired colour is reached)Instructions:
In a small bowl, mix together the cornstarch or arrowroot powder and baking soda. Stir in teaspoons of cocoa powder until your reach the desired colour.Add 5-10 drops of your favorite essential oil to the mixture and stir well. (This step is optional but can help to add a nice scent to your dry shampoo. Mint is a fresh one that goes well with cocoa, Rosemary is good for hair growth or Tea tree is anti bacterial but doesn’t smell as good!)Store the mixture in an airtight container, such as an old jam jar.To use, simply apply the dry shampoo to your roots using a makeup brush or your fingertips. Massage it into your scalp and hair, focusing on the areas that tend to get oily.Let the dry shampoo sit for a few minutes to absorb any excess oil, then brush or shake it out of your hair.I’ve made this without the baking soda and it also doubles as talc for those sweaty Betty moments on a hot day!
My 2 ingredient recipe: arrowroot powder or corn-starch, cocoa powder.This recipe is more comprehensive: https://www.treehugger.com/how-to-make-a-diy-dry-shampoo-5188508
Plus, when you add cocoa powder, it smells deliciously chocolaty!
The post DIY Dry Shampoo appeared first on Amy Morse.
April 23, 2023
Understanding The Culture Of Your Industry
Knowing your industry is essential to stand out from the crowd, identify trends and opportunities and to collaborate with others in your industry. Knowing the culture of your industry will help you to attract the right team and the right customers.
This contributor explores the concept of ‘business culture’ in more detail.
What’s changing in your Industry?[image error]
It’s easy to think of businesses and the markets they serve as fairly consistent entities, curating a two-part relationship that feeds into and helps sustain one another. However, that’s not always the case. Often, the actual culture around experiencing, enjoying and researching into the market you serve is an important element of your business, and understanding that could be vital.
For example, any restaurant that hopes to remain relevant (or even achieve a coveted Michelin star), will need to know what’s going on in the world of gastronomy, what top restaurants in its field are doing, and how food critics are thinking about and discussing culinary arts. We can copy and paste this kind of cultural assessment onto many other industries too, from the video game market to the world of farming and so on.
So, as a brand hoping to contribute something new and important, it’s essential to understand the real culture of your industry. But what does that involve, and how can you actualize that into your brand? In this post, we’ll discuss all of that and more:
Heading To EventsIt’s healthy to head to trade and industry events for your particular niche. This not only helps you get a clear eye on what local businesses are doing to compete, but you’ll be able to talk to the general audience interested in that field too. This can yield some interesting insights, particularly if you try and plan a few surveys and can network with other companies. On top of that, you’re seen to be part of the culture, as engaging is the best thing you can do to learn.
Reading Appropriate JournalsThere’s nothing better than reading highly qualified, experienced, learned material that helps expand your knowledge about a particular topic. For instance, learning about Californian Wines, its history as well as the current market can be tremendously inspiring, helping to feed that fire of passion that caused you to launch a business in this field to begin with. Fostering a real culture of learning and interest within your firm can only be healthy, by encouraging your staff to move forward and engage with the topic at hand. In the long run, this can make a huge difference.
Engaging In A Wider ConversationThe culture of your industry is not complete without your contribution. It can be worth sharing your thoughts, showcasing what your firm does, and being an advocate for everything you bring to the table, and the wider table itself. For instance, you might be active on Twitter sharing insights into the new of your industry, or even discuss challenges your business has had in the past, and how you overcame them. You might just share your excitement about upcoming events or products, and celebrate other brands too in order to network and add positivity. Being part of the conversation weaves you into the fabric, and makes you relevant.
With this advice, you’re sure to understand and be part of the culture of your industry. Over time, this can not only keep you relevant, but interested, and contributive.
The post Understanding The Culture Of Your Industry appeared first on Amy Morse.
February 17, 2023
SEO Tips for Small Businesses – How to Get Found Online
So, you’ve got this lovely website, how do you make sure it can be found? Use these SEO (Search Engine Optimization) tips from a contributor to give your website a Google boost.
Be Found OnlineIt makes no doubt that SEO (Search Engine Optimization) can benefit businesses of all sizes, including small businesses. Indeed, optimising your website for search engines can transform small businesses’ digital presence. Contrary to common belief, SEO strategies can be accessible and affordable, even for SMEs and solo entrepreneurs. While you may not be able to have your own SEO expert in-house, you can still see significant results from proven strategies.
What can small businesses expect from their SEO journey? The answer depends on your objectives and business type:
They can rank on the first SERP page for their local audienceThey can generate more local leadsThey can establish their reputation as a local expertAre you a small business looking for SEO tips to help you get found online? Competing with larger companies in search engine optimisation (SEO) can be challenging, but there are many strategies you can employ to give your small business a local edge. In this blog post, we’ll share some of our top SEO tips for small businesses so you can increase your visibility and reach more customers.
 Be Consistent With Your Content
High-quality content is one of the major factors that search engines use to rank your website. As a small business, creating and consistently publishing high-quality content can be difficult to manage.
It can help to set up a regular blog schedule, posting fresh content at least once a week. This will help keep your website up-to-date, increasing your chances of ranking higher in search engine results. Additionally, your content can help build trust and engage with your target audience by providing helpful information to potential customers and followers.
When writing content for SEO purposes, make sure that you’re using targeted keywords throughout your posts. You should also ensure that your articles are well-researched and easy to read. Be sure to keep paragraphs short and sentences concise. Also, include images, videos, and other visuals to enhance your content.
Invest in a Quality WebsiteWhen it comes to SEO, having a quality website is essential for small businesses. Professional web design can make all the difference when it comes to technical SEO requirements and helping your business be found online. A professionally designed website will have an improved look and feel that is more user-friendly and engaging to visitors. It will also meet the technical SEO requirements necessary for a successful website.
These technical SEO factors include optimised URL structure, clean code and navigation, fast loading speeds, an SSL certificate (which helps with security and trustworthiness), schema markups, and image optimisation. Besides, a website built by a professional web designer will incorporate all the latest trends and technologies, such as mobile-friendliness, responsiveness, custom content management systems, and more.
Place Yourself on Google MapsFor small businesses, appearing on Google Maps can be a great way to be found and improve your visibility and local SERP results. Google My Business (GMB) is the platform used to list businesses on Google Maps. It’s free to set up an account, and you don’t need to be a tech expert. All you need to do is provide basic information about your business. You can also add photos, videos, and special offers to attract customers and make your listing stand out.
Are you ready to bring your digital presence to the next level with these simple SEO tricks?
The post SEO Tips for Small Businesses – How to Get Found Online appeared first on Amy Morse.
January 15, 2023
Review Of The Year Without Supermarkets
I did it (sort of)! In 2022 I pledged to go a year without shopping in supermarkets.
I had already started avoiding supermarkets at the end of 2021 anyway, so technically it was more than a year.
However, just because I love to self sabotage, out of sheer bloody-mindedness, I went into Lidl on New Year’s Eve to buy meat for a New Year’s day roast dinner, having not been organized enough to get to the local butchers in time.
Fulfilling a PledgeSo yes, I went a year without shopping in a supermarket, but I broke the pledge before the end of 2022.
What now?
I had thought I’d write a book about the experience but, honestly, there’s not enough to say to fill a book. I was actually really easy to do this ‘challenge’ – I quickly changed my shopping habits, established new routines, and my life was richer (as were local businesses in my community) as a result.
Will I go back to my old habits?
In short, No.
Why would I?
Returning to a supermarket for the first time in a year, nothing has improved. In fact, it’s worse. Prices have gone up and there are more empty shelves.
For the stock that is still there, far too much of it is covered in unnecessary single use plastic.
Fresh produce is still too cheap – and it’s not the supermarkets absorbing the cost of loss-leaders, it’s farmers and producers.
None of the issues that led to me make the decision to shop elsewhere have been resolved, if anything, there is more overpackaged and over processed food.
Broken System, Fractured Supply ChainsWhile the lengthy and complex supply chains of supermarkets have been fractured due to a combination of staff shortages and trade barriers (thanks Brexit), and war in Ukraine, local producers supplying local businesses have had few of these issues.
For example – Anecdotally, a few weeks ago, I was in my local fruit and veg shop with a friend and she commented that they have eggs, and they are free range and cheaper than the supermarket. She shops in Asda, and they have had supply chain shortages for weeks. While she was scouring supermarkets for free range eggs that didn’t cost a small fortune, I hadn’t even realized there was an egg shortage because there are always plenty in the local shops from a local free-range farm.
No. I would still rather spend my money with local shops and producers, where more wealth is kept in my community and I’m helping to support a family instead of shareholders. However, I will occasionally return to the supermarkets, but in a more strategic way.
What do I pledge for 2023?
I will…Use supermarkets only as a last resort. Go to more ethical supermarkets (i.e.: Co-op) where I can. Avoid single use plastic where possible – although that is a challenge as my local supermarket is Lidl and on balance, they are the worst of the big supermarkets for covering everything in plastic. Actively look for the food that would otherwise be binned (my local Co-op is especially good for yellow labels!)Make use of apps like Too Good To Go and look at Olio, too. Save money and combat food waste, win-win.
What have I learned?
‘Convenience’ really isn’t that convenient.
We’re sold this idea of abundance and convenience, but it’s often not the case. Especially now that global political shifts have exposed the weaknesses in our broken food system.
Our lust for convenience and stuff is also quite literally costing the Earth.
Climate change, biodiversity loss, plastic filled oceans, mountains of waste, are especially inconvenient!

I Prefer to Shop Slow
The whole experience of supermarket shopping is unpleasant.
Get in your car, drive to an identikit shop that could be anywhere in the country.
Get inside and be prepared for, go-go-go, get out of my way, rush-rush-rush.
Supermarkets feel so impersonal.
Starkly lit, hostile environments, with a mind boggling and vulgar array of ‘stuff’ that will probably go to waste.
Plus, there is always a long queue!
When I’m in a supermarket, I can see and feel why humanity is in such deep trouble!
Sometimes, Supermarkets Are The Best Or Only Option
That said, every now and then, convenience is so damn convenient – like not getting to the butchers in time on New Year’s Eve.
In our busy lives, we can’t always be well organized and forward thinking.
On balance, once in a while the supermarket is the sensible option – but it is definitely not the only or even best option every time.
Think Before You Shop
Take a beat, instead of getting in your car and driving to a supermarket when you’re in a rush – ask yourself, is there a better way?
Do you really need to drive up the road to get an extra pint of milk, then while you’re at it get a basketful of other random stuff that was on offer or wasn’t on your list?
Could you just walk to the corner shop instead?
Will the supermarket really have the thing you want and will it really be better value from there?
Is there a local or more ethical alternative?
Vote With Your Wallet
If we all stopped to think and voted with our wallets, we can strengthen our local communities, keep our local high streets buzzing and help small businesses to thrive.
Instead of our hard earned cash disappearing into some offshore account somewhere; squirreled away by people and corporations that already have more money than they could possibly spend in a lifetime.
They don’t even put any of it back into communities by paying tax on it!
If you care about such things, know that you can have an impact.
‘But it’s just one plastic bag’ – said 5 billion people!
If we all made even a few small changes in our buying decisions, they add up.
Demand less plastic, demand less waste, demand more money for the farmers and producers, demand fairer pay and better treatment for workers.
Demand these things by showing them where you’d rather spend your money.

We have the power to change the world, little by little, step by step, if we all do even one small thing to be better humans.
The post Review Of The Year Without Supermarkets appeared first on Amy Morse.