
Jude Blereau's Blog, page 3
June 17, 2014
Gingerbread and Pear Pudding Cake for the Cooler Weather
 Dairy Free, Low Gluten Gingerbread and Pear Pudding Cake with a Lemon Custard Cream
It must be the cooler winter weather, but I’ve been doing a fair bit of baking lately – something wholesome and nourishing for a little treat each day. There’s the very quick to throw together Gingerbread and Pear Pudding Cake above (freezes brilliantly), the Lemon Meringue Pie below for my daughters birthday a couple of weeks ago (which lasts brilliantly because that Italian Meringue is so stable) and a couple of weeks before that, this hearty Pumpkin Bread. Both the LMP and Pumpkin bread recipes are in Wholefood Baking.

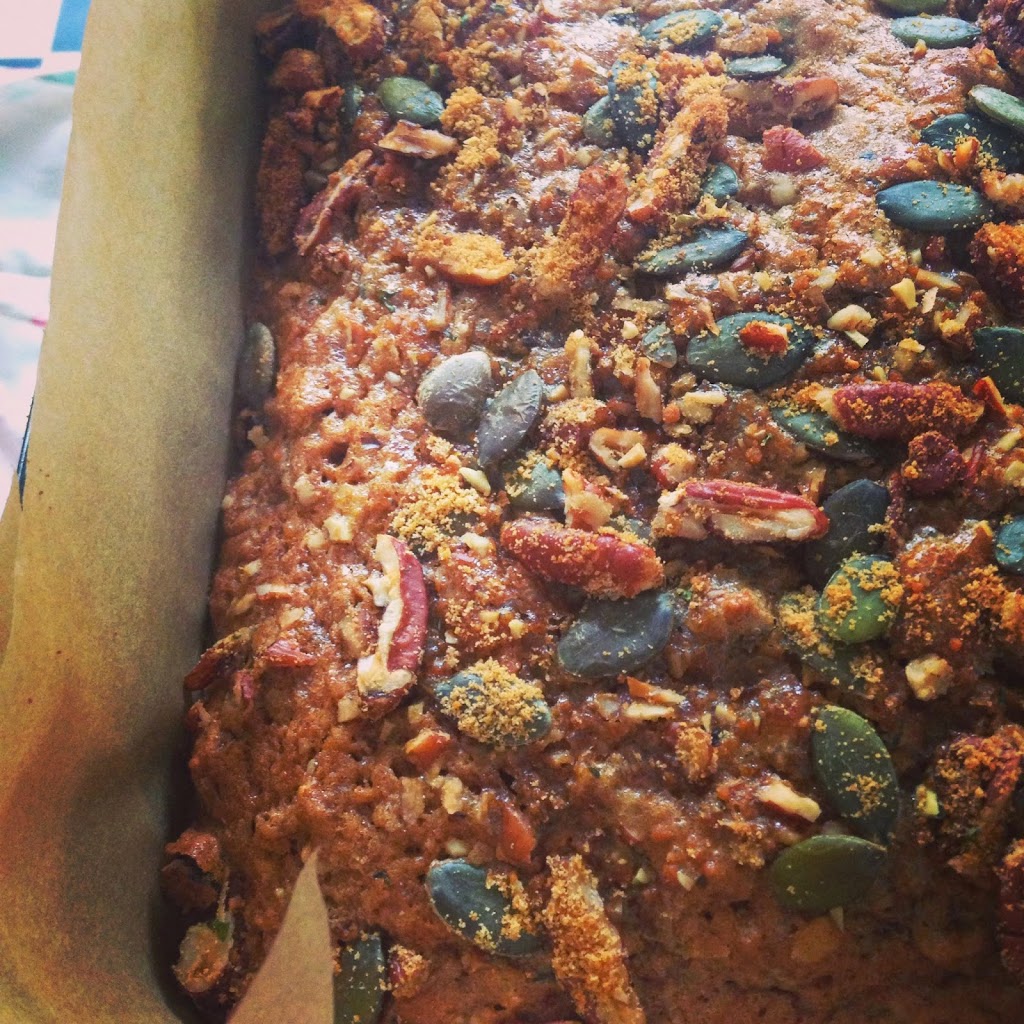
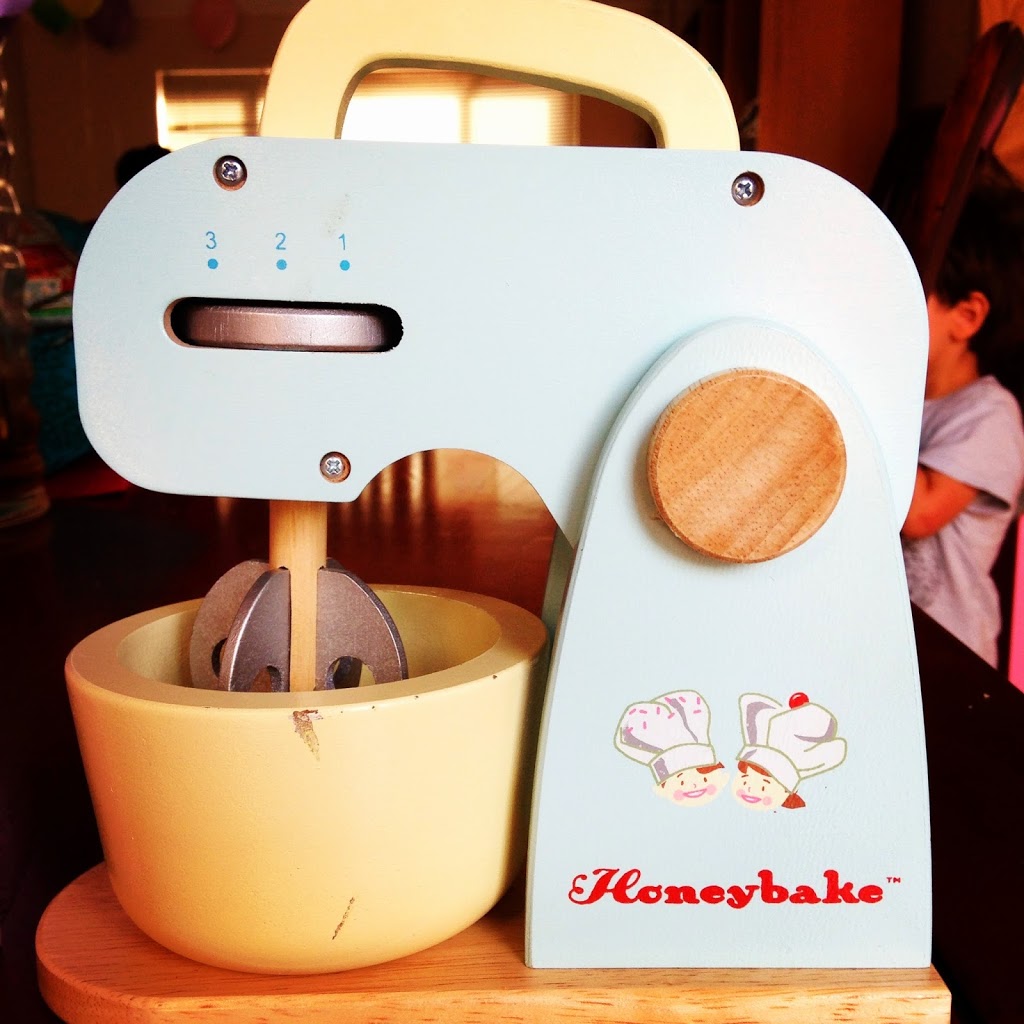
I’m usually having that little something sweet as I sit at my desk mid morning – I’m head down, rugged up as I work on a new book (will be some time off before it gets to the shelves) and it’s a delicious and warming part of my day. This isn’t going to be a long post, just a hello and would you like the recipe for that delicious Gingerbread and Pear Pudding Cake ? It would be perfect for the solstice this coming weekend. Serve it warm from the oven, or if left over, warm it up a bit before eating. And the Lemon Custard Cream – a little dairy free number, but if you’d prefer to make a dairy lemon custard, go for it. Just make sure you get something lemony with it… lemon and gingerbread is a gorgeous combination. And the stand mixer below ? It is a toy that belongs to my nieces children. LOVE IT. A little bit of whimsy, but I love the colour and that it is wooden (and not plastic) and basically gorgeous.
I love winter, love the solstice and love the wild and windy winter weather that accompanies it. I find it a time to turn inward, reflect and hopefully become a little more balanced – a never ending journey I know, but one that I find deeply meaningful. With such short days, and the cold and wind outside, I find a little piece of this cake all warm and puddingy, to be deeply delicious to both body and soul.
GINGERBREAD AND PEAR PUDDING CAKE
Dairy Free, Nut Free and Low Gluten
This delicious cake is based on a recipe by one of my favourite wholefood chefs Myra Kornfeld. I’ve loved and admired her work over many years, especially this recipe and made a quite a few changes to it along the way. With regard to the Oatmeal, in Australia I use the Four Leaf brand, in the US Bob’s Red Mill calls this Oat Flour. Basically you want some bran and germ. At a pinch you can buy rolled oats (stabilised/steamed) and grind them to a rough meal. Make sure the brand of rolled oat is not too dry. I am considering marinating raisins in some Pedro Ximenez and using them in the cake as well/or instead of the pears. Please remember I use 20ml tablespoons.
1 cup / 135gm oatmeal
1 cup / 130gm unbleached white spelt flour
1/2 teaspoon bicarbonate (baking) soda
3/4 tablespoon ground ginger
1/4 teaspoon ground cloves
1/4 teaspoon ground cinnamon
1 generous tablespoon (or more) glace ginger, roughly chopped
1/2 cup /125ml melted coconut oil (full flavour)
1/2 cup/ 125ml maple syrup
1/2 cup molasses
3 tablespoons brown rice syrup/ 60ml (I prefer the Spiral brand)
2/3 cup / 160ml coconut milk (full fat)
2 eggs
3/4 tablespoon apple cider vinegar
2 teaspoons natural vanilla extract (I use Heilala)
2 – 3 medium pears, peeled and cut into thick slices
Pre heat oven to 180c or 165c if fan forced. Line a 20cm square cake tin.
Add the oatmeal, spelt, baking soda, ginger, cloves, cinnamon and glace ginger into a mixing bowl and whisk through to distribute the ingredients. In another bowl, whisk together the coconut oil, maple syrup, molasses rice syrup, coconut milk, eggs, vinegar and vanilla. Before you add this to the dry ingredients, peel and slice the pears. Add the wet to the dry ingredients, and stir through until combined – it will be a wet mix. Pour into the baking tin and press the pears into the mix.
Bake for 40 – 50 minutes or until a skewer inserted into the middle comes out clean. Remove from the oven and serve as desired.
A DAIRY FREE LEMON CUSTARD CREAM
2 cups (500ml) rice milk (or 1 of coconut and 1 of rice, or include almond milk as desired)
1/3 teaspoon agar powder
1 1/2 – 2 tablespoons (30 – 40 ml) maple syrup
1 tablespoon kudzu (or cornstarch)
finely grated zest of one lemon
30 – 60 ml lemon juice
1 teaspoon natural vanilla extract
Add the milk, 30ml maple syrup to a small pot and whisk in the agar well. Bring to a gentle boil and simmer for 8 minutes (from the boil) on a very gentle heat. Stir often as the agar will sink to the bottom and stick.
Meanwhile, mix the kudzu and 1/4 cup (60ml) water to a smooth paste. When the agar is ready take it off the heat and whisk in the kudzu slurry – it will thicken immediately. Return to the stove and stir constantly until it comes to the boil. Remove from the heat and add lemon zest, 30ml lemon juice and vanilla. Stir through and taste, adding more lemon juice as needed. Pour into a bowl and cover, place in fridge and cool. Add what will be fairy thick and set mix to a food processor and blend until silky smooth – this will take at least 5 minutes.
The post Gingerbread and Pear Pudding Cake for the Cooler Weather appeared on Wholefood Cooking.


May 29, 2014
Forget The Green Smoothie
 EVOlive Oil Mayonnaise and Yoghurt Dressing with Seasonal Herbs
Once upon a time, when by all accounts and my life experiences, people were healthier and happier than they are now, food and life was a lot simpler. I’m talking about my parents generation – those in their 90’s, many still living independently – though now needing help – and vibrant lives, those that lived simpler and less complicated lives. We hear often, that the young generation today is the first generation in a very long time considered to have a shorter life span than current generations, and that we are sicker and unhappier than ever. Somehow my mum, and those of her generation managed it all without the green smoothie or green smoothies with chia seeds. Now those of you that are familiar with my work, know that I tend to be interested in fundamentals – you can read more about those here (you will also find a fabulous rustic tart of greens recipe there, perfect for this time of the year). You will know that after 25 odd years in the ‘healthy’ food industry – which I prefer to call the ‘whole and natural foods’ industry – I am alarmed by the rapid escalation of fractionalisation that seems to be happening in the past few years. The green smoothie is a case in point. Honestly, I didn’t take much notice of it when it first appeared a few years ago, it just seemed silly and made no sense what so ever. But somehow, it’s become the poster child for ‘healthy’ eating, or ‘real, natural or whole food’. I’ve decided I’d like to weigh in on the discussion.
As always, I like to find the original source from whence things come – where did this belief that throwing lots of greens into a blender is a leading edge healthful thing to do? As it happens, from a book called Green For Life by Victoria Butenko. Now before I go on, I would like to point out that I believe we all have a path to follow and none of us have the right to question another’s path. I understand and respect this, but given this book is a treatise on the green smoothie, I think it’s worth noting a few things. The gist of it is this: the author and her family came to the US from Russia, where food was scarce and limited to mostly grains, dairy and some fruit. On settling in the United States, they were amazed at the variety and availability of food, they especially loved the convenience food and used a microwave often. Within 3 years, all of them were extremely unwell, doctors told them there were no cures for their diabetes, asthma, allergies, heart issues etcetera. So they looked elsewhere, and turned to raw food. Now I’m not going to go to deeply into this issue, but you cannot discuss the green smoothie without discussing raw food, but it would seem obvious to me that they could also have simply stopped eating highly processed food / junk food / and frequenting the microwave. However, a vegan, raw food (most likely because it was at least real) diet turned things around but after several years, they began to have problems such as a heavy feeling in the stomach, grey hair and simply no longer desiring some of the allowed foods. So, the author searched for what was missing (I’m assuming in the vegetable world only) and discovered that greens was the food group that offered everything humans needed, and they weren’t having enough. But how much did a human need to eat? For this answer, she looked for an animal that was close genetically to a human – with an approx.99.4% genetic match, enter the chimpanzee.
The author observed that humans had lost their natural way of eating – but rather than recognising the blindingly obvious problems with refined, processed and junk foods – instead considered that “it is logical to hypothesise that our diets are supposed to be 99.4% similar” (to the chimpanzee) and that understanding the chimpanzee eating habits may help us to better understand the human dietary needs? Seriously? The only thing that I can keep thinking is that we might share a lot of genetic material with a chimpanzee, yet in that difference we are most definitely not a chimpanzee. Given that the main argument here is that this is the ‘natural’ way to eat, we absolutely have to consider another blindingly obvious point – the fact that man climbed down from the trees, stood erect on two legs and developed a bigger brain. Biological anthropologist Richard Wrangham (Catching Fire) (this is the guy that Michael Pollan talks about in his new book Cooked) holds the belief it was the discovery of fire, whereby cooked food enabled more and easier access to nutrient density, thus facilitating the evolution from a large to smaller gut and from a smaller to bigger brain. Others share the belief it was access to nutrient dense animal foods – notably the softer and nutrient dense bone marrow and brain that did the trick. Neither considered that it was an abundance of uncooked greens. Whilst we might share that large amount of DNA with the chimpanzee, we are yet, quite obviously not the same, and to say it is logical to hypothesise our diets should be 99.4% the same beggars belief.
At the very least, chimp and orangs have a larger colon to gut ratio, strong jaws and large teeth –perfect to chew and digest the large amount of fibrous fruits and tough high cellulose leaves (with stems) which along with fermentation in the colon, provides enough calories to support the animal. Humans have the opposite – a smaller colon to gut ratio, with a weaker jaw and smaller teeth – perfect for cooked foods, which require less energy to digest and softens the strong cellulose fiber. It was because of this absolute fact, that the greens had to be blended, otherwise they simply could not be broken down (and then because they were having so many green smoothies and not chewing – which is essential for our bone and jaw health, the author devised a rubber chewing device which you can buy from their website). Whilst certainly heat (fermentation, cooking) does destroy enzymes, denature protein and can destroy vitamin C and some heat sensitive minerals such as thiamine, it remains that cooking food provides incredible nutrient density and energy that is easily accessible – lightly cooked meat for example, makes it more easily digestible – it starts breaking down the protein molecules. Eating cooked foods has also been quite obviously, simply spectacularly successful – we did climb down from the trees and are now the leading animal (I know, we’re not looking that good right now, neither are the cultures that we’ve built, but that is another discussion). But cooking can also make some big differences to vegetables – it can soften and break down that fibrous cellulose, it helps to improve the digestibility of complex carbohydrate (especially the starch – cooked potato or sweet potato is more digestible cooked than raw) and it can break down some problematic aspects of raw foods – oxalic acid and goitrogens for example. Whilst I believe there is some hysteria around the internet in regards to oxalic acid, it does remain that it is problematic, especially if you have a less than optimal gut ecology.
I’d like to talk a bit more about that gut ecology. If you have a ‘delicate’ or troublesome digestive system (bloating, intolerance to gluten and dairy etcetera) you will most likely have a less than healthy gut ecology. This means you don’t have enough beneficial bacteria to do the many, many jobs they actually do – including most importantly, their intimate involvement in digesting food – in particular the full and proper digestion of gluten and dairy proteins, and oxalic acid. But, what those good bacteria can’t do however, no matter how much you will it (or blend it) is to be able to fully and appropriately digest some of those more complex carbohydrates (more than 1 or 2 sugars) that include cellulose, fibre and those known as FODMAPS. This is why, even when blended some of those carbohydrates are still tricky to digest. Unless a kale leaf is very, very young it is going to be difficult to digest, even when blended – it is far easier to digest when cooked, which is how the cultures that have most experience with it (such as the Italians) generally use it.
In the end, this seems to me a discussion on eating a balanced diet. All healthy human groups include raw food (where appropriate to the food) and understand the value of that life force. However, no healthy human groups solely eat raw food – this is the findings of many, including that same Richard Wrangham who postulated the theory that cooked food is responsible for our evolution from the apes, and as a biological anthropologist found no human group eats all their food raw, as did Weston Price many years before. Nowhere is this issue of balance more evident than in a discussion on cooked versus raw. I have always (as my parents generation before me) consumed raw foods – including the goitrogenic cabbage in my mum’s favourite coleslaw and we called it a salad – indeed we had a salad generally around 3 times a week, more in summer. We consumed raw, fresh seasonal fruits and called it an apple or pear, not a ‘raw food’, but we also ate all of those same foods we ate as salads and fresh fruit, cooked. We also consumed raw animal products meats (steak tartare), raw milk and raw eggs in raw milk (mum’s egg flip) but we also had them cooked. But perhaps of most importance, is that what and how we ate was all in the context of those fundamentals I spoke of earlier, that you can find here.
There is also much more to the issue of the green smoothie – promoted by the author as a time saving way to include these greens in your diet, and their nutritional value. I’d simply like to say that in regards to the issue of nutritional value, as much as you would like to think that you are getting all those minerals in that kale or dark leafy green, if you don’t have some fat soluble vitamins with it, you won’t and those minerals can’t do what you want them to do. Those fat soluble vitamins are A, D, K and E. And, if you think that the kale or dark leafy greens (or the chia seeds) are giving you Omega 3 EFA’s, well yes they are but in the form of Alpha Linolenic Acid, which has to go through many conversions to become the derivatives that really are essential – Eicosapentaenoic Acid (EPA) and especially Docosahexaenoic Acid (DHA). There are some foods that just happen to be especially rich in both ALL the fat soluble vitamins and those longer chain essential fatty acid derivatives EPA and DHA – they are ALL animal foods and are : all animal fats eg butter (ghee), egg yolks, offal (especially liver) and fish (including their eggs). This is why we consistently see raw vegetable and green salads traditionally paired with dressings such as mayonnaise based, or topped with soft cooked eggs, presented with lovely crunchy fatty bacon bits or strips of barely cooked liver. You might immediately recognise these pairings as classic, traditional and delicious French, Italian or European pairings. Yes, some land sources such as extra virgin olive oil do have vitamin E, but they don’t have the others.
When choosing vegetables to eat raw, it pays to bear in mind that nature tends to provide season appropriate foods – lighter, less carbohydrate dense and higher water content vegetables and fruits in summer. These all require less cooking – they are easy to eat and digest raw – and blended if that’s how you would like them. Yet, it gives us the almost opposite in the cooler months – these denser and more complex carbohydrate root vegetables, thicker and more cellulose dense leaves (cabbage, kale and collards) and fruits (apples, quince, pears ) provide us with more fuel to keep us warm, but will need cooking to make that goodness fully available. Yes you could blend those leaves up and break down the cellulose, but that is often not enough for some and I would also ask why? I simply don’t agree, because this is what I have seen, that is offers more (better) nutrition than when cooked. And, in regards to healing, there are many paths to the one door and I’ve seen a cooked food diet do the same thing – but this is a deeply complex area, with many other co factors and one for another day.
I think it is an incredibly admirable thing to be advocating eating greens, but extreme and unbalanced to believe the best way to do so is to blend them, raw, into a smoothie (mostly with lots of fruit). They have been eaten by all healthy cultures for generations, and they called it a salad. They knew which greens needed cooking to make them optimally digestible, and what to serve with them to make all their greeny goodness and mineral bounty more bio available. The tragedy of our time is that this traditional knowledge, which served it’s people well, has been undervalued and lost. There are some beautiful greens around right now and so many delicious ways to include them in your day – uncooked as salads, and cooked (that tart I suggested earlier is delicious). This was my morning tea yesterday…..
 Quick and Simple Salad – no need for a blender
Autumn is a great time for the easily digested family of lettuce – here I’ve used one of my favourites, Buttercrunch. I’ve added microgreens from the garden, celery heart, pink lady apples and toasted walnuts for a bit more density. Can I say, microgreens are ridiculously easy to grow, nutrient rich with little carbohydrate development at such a young stage – kale is great in this format. To make the dressing I used equal amounts of mayonnaise and yoghurt (thus supplying some beneficial bacteria), lemon or lime juice to taste, a touch of honey to taste and a touch of a nice curry powder, with lots of fresh (and easily digestible) herbs – coriander which is now in season. This dressing will keep in the fridge for at least a week, and gives me the ability to put a salad together quickly. It would be delicious with lentils tossed through it also.
 As you can see, I used the thinner skinned Myer lemons, because that is what I had
The post Forget The Green Smoothie appeared on Wholefood Cooking.
April 14, 2014
Fish Pie for Easter
FISH PIE AND THE ROAD TRAVELLED
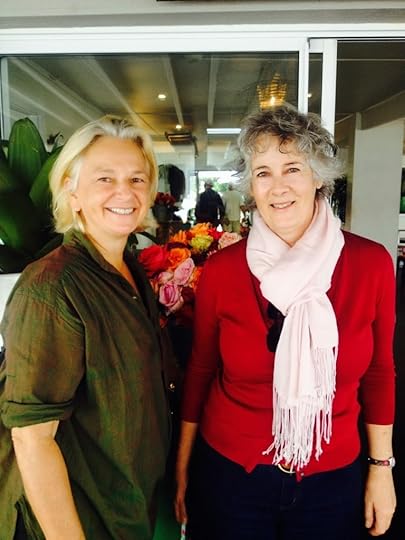
Finally the weather is cooling and with it the food we cook. It’s been a busy time since my last post, with classes here in Perth and then travelling to country NSW to do seminars and classes. I love to travel and most often, it’s with my dear friend Jeanie – we realise that we have both done more road trips together than with anyone else (family, children etc), and we’ve done them all around the world it seems! We road tripped from Jean’s home out of Murwillumbah to Coonabarabran in Central New South Wales – abut 10 hours, for the Warrumbungle Food Festival, where I gave 2 seminars and we both did classes. Organised by the very inspirational naturopath Jen Berthet, from the Warrumbungles Holistic Health Care Centre, it was a wonderful opportunity to meet new people share information.
But, my goodness, it’s lovely to be home – and very exciting to come back to two book parcels – April it seems is the time for new book releases – My Darling Lemon Thyme by Emma Galloway, and Tasty Express by Sneh Roy (the very aptly titled Cook Republic). Incredibly exciting, I love, love receiving books and they are both beautiful. Can’t wait to take them down south with me after easter for our holiday, I am going to pour through them and start cooking! I’ve also been tempted by two from overseas – Whole Grain Mornings by Megan Gordon, and the new one by a favourite of mine, Bryant Terry – Afro Vegan (sorry, I couldn’t connect you to his website, I think it has been hacked !)
There’s not going to be a lot of talk here today, just some photo’s of what and where, and fish pie. It’s the easiest thing to make, and deeply nourishing – perfect for the cooler Autumn weather. We are having it for dinner tonight, but it would be perfect for the Easter Weekend coming up. It’s easy to digest and a great option for young children, or anyone with a dodgy digestive system or simply anyone looking for a delicious and deeply nourishing meal. If you’re looking for a cake, why not try this Apple Shortbread (oh, it would be delicious with Rhubarb and Quince too) or this delicious Walnut and Yoghurt Cake
Have a lovely Easter weekend and I’ll see you after…
x Jude
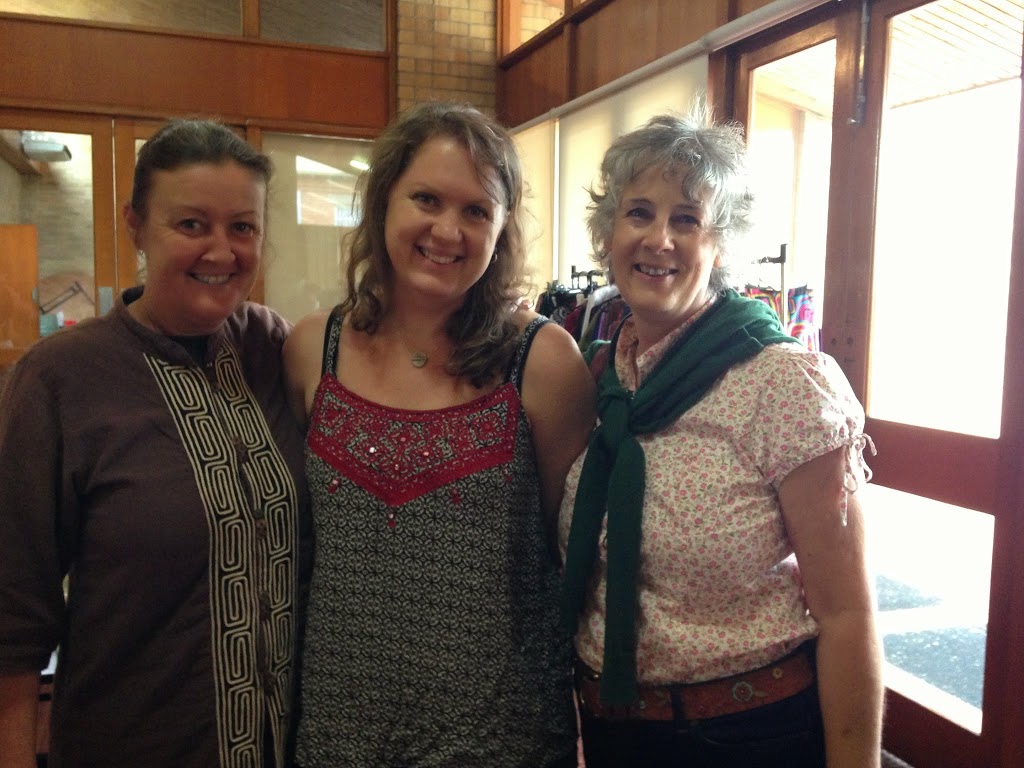
With the beautiful Jen Berthet and Jeanie
In Sydney with my dearest friend, Holly Davis. We had just had breakkie at the Boat House in Pittwater
 Back home to launch Emma’s beautiful, beautiful book My Darling Lemon Thyme, here with Emma and SamFISH PIE
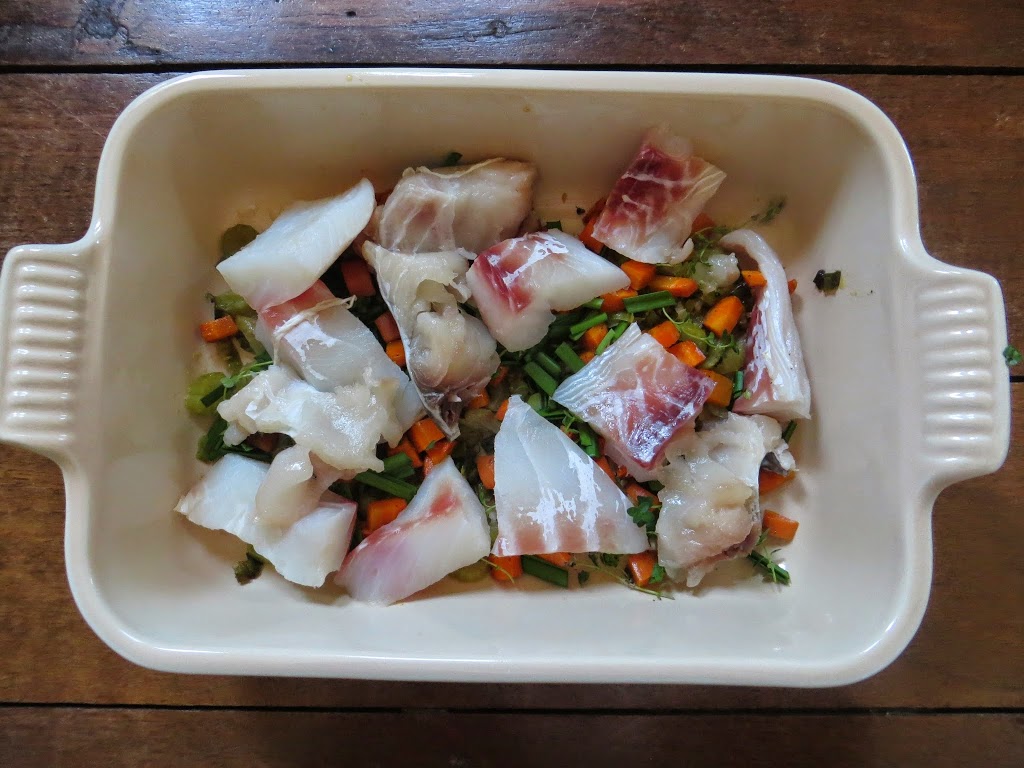
Use a fish that is sustainable where you live – this will vary from place to place. I like to choose a some strong tasting oilier fish such as sea mullet, bonito or mackeral and something a little lighter – black bream, flathead or one of the snapper family is great also. If you can, buy the fish as a whole and ask the fishmonger to fillet it for you. Keep the skin on or off, it’s up to you – it will just be a textural thing in the mouth. In the picture I’ve used Spanish Mackeral (skin on) and Goldband Snapper (skin off). Please, no salmon. Unless it’s being flown in from the northern hemisphere, in Australia, this is all farmed – this is not the place to go looking for your very desirable long chain fatty acids, when we have plenty of high omega fish that are wild caught and not farmed. If you live in the northern hemisphere, and they are in season, go for it.
The recipe is incredibly loose and forgiving – basically, if vegetables have less water in them (onion or leek instead of spring onions), or more carbohydrate or cellulose such as carrot and celery, cook them first. Today, I lightly cooked some leek from the garden, finely sliced celery, fine diced carrot in good dollop of ghee and a sprinkle of sea salt. Added that to the baking dish, then sprinkled roughly chopped garlic chives and lemon thyme. And, honestly? I don’t even bother weighing the fish, I just decide how much I’d like in the dish.
2 – 3 medium potatoes, well scrubbed and cut into 2 – 3 cm dice
100 or so gm broccoli – roughly cut
sea salt to taste
1 generous tablespoon butter or ghee
1 – 2 extra tablespoons butter or ghee
2 stems spring onions, roughly chopped or 1 small onion finely diced (I used leek today)
2 tablespoons fresh herbs – lemon thyme, parsley or basil
grated zest of 1 small lemon and generous juice
Vegetables – you can read above what I used, with corn in season, that would make a lovely addition too. English Spinach and Silverbeet (Chard) can be added straight to the dish, but some of the kales might need a little cook with the root vegetables to help break down their strong cellulose structure.
4 – 6 tablespoons cultured or sour cream (be generous)
1 teaspoon seed mustard
pinch sea salt and freshly ground black pepper
300 gm fish, checked over for bones and roughly cut into 3 cm chunks
Pre heat oven 190c
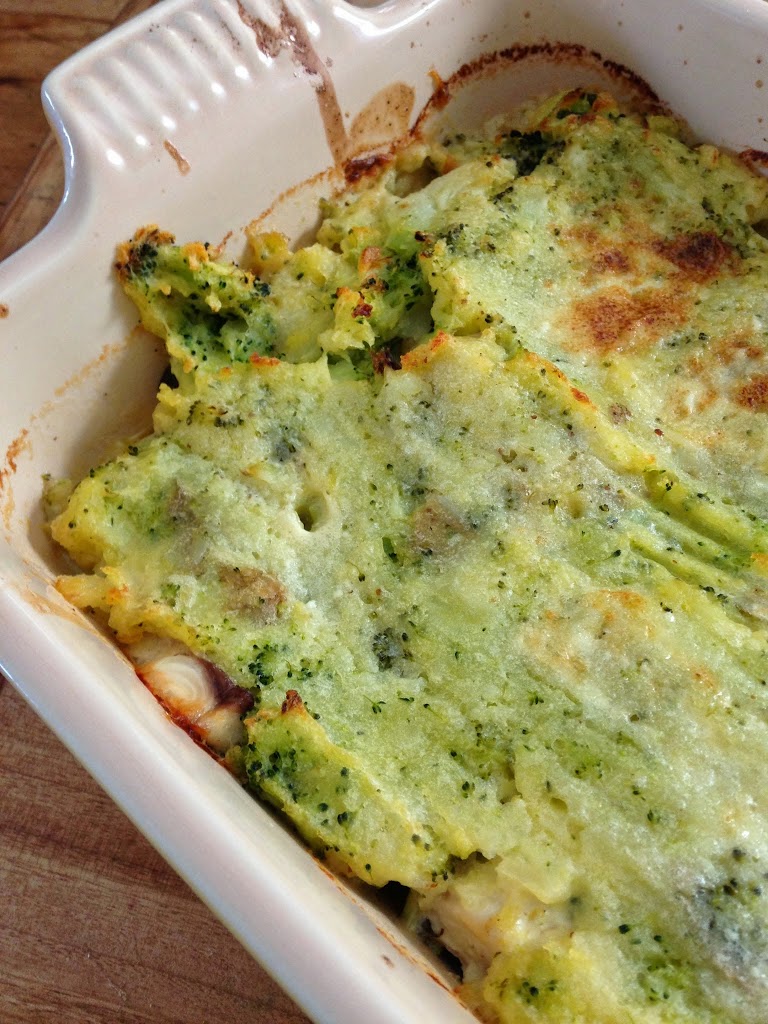
Steam the potatoes and when nearly ready, add the broccoli and cook until the broccoli is just soft. Take care not to overcook and dull the colour of the broccoli. Add 1 generous tablespoon butter, salt to taste or ghee and roughly mash. Set aside.
Choose a shallow, ovenproof dish.
Melt the remaining butter or ghee in a small saucepan and if using onion or leek, add this and cook over a gentle heat until soft. If using spring onion, just throw it in let it soften for a minute or so. Add any root vegetables to cook for a few minutes until soft, and if using kale, give that a little go in the frying pan also.
Add your vegetables of choice to the baking dish and if using English Spinach, add that now too. Top with the chunks of fish. Sprinkle with a little sea salt and freshly ground black pepper.
Add the lemon zest, juice, cream and mustard t0 the warm frying pan. Stir through gently – the cream will ‘melt’ and relax. Spoon the mix over the fish and vegetables (and if you have more sour cream, go ahead and use it – make sure the fish is well covered) and top with the mashed potato.
Place in the oven and cook for approx 20 mins or until the top is lightly golden and the juices are bubbling. I like to serve this with greens – I’m serving this with green beans from the garden tonight.
The post Fish Pie for Easter appeared on Wholefood Cooking.
February 18, 2014
Preserving the Harvest
Preserving is one of the things I love to do most, chutney is by far the easiest and a perfect place to use ripe, bruised or seconds fruit and vegetables and any home pot will do – except copper. Whilst I love copper for jam making, chutney with it’s use of vinegar is too acidic.
In chutney, the preserving agent is sugar and vinegar. I like to use Apple Cider Vinegar with Rapadura sugar as the sweetener as my general rule but could be tempted to another vinegar depending on the fruit (sherry, raspberry spring to mind). Sometimes I like the fruity tone and complexity that an apple juice concentrate provides, and given that chutney’s are used in small amounts, I’m okay with that use of fructose. BUT, and there is a but. Chutney made with a juice concentrate or Rapadura (a low sucrose content) will require a BOILING WATER BATH (we will talk more about that later) to ensure preservation. Made with brown sugar (even the beautiful semi refined Billingtons Muscovado’s) and thus with a higher sucrose content, they will be fine simply packed very, very hot into a clean, dry, sterile and warm jars.
But let’s talk actually making the chutney yes? Dead easy. I like my chutneys to have a bright fruity flavour but with depth and fullness of flavour. I rarely follow a recipe and would like to guide you along that same path. You will get a better result as every bit of fruit you use will be different – all cooking is in essence responding the the raw ingredients nature has grown for you. Fundamentally the fruit forms the base of the chutney (or vegetable), the liquid is that which comes from the fruit and the preserving agents sugar and vinegar. Sweetness and further depth of flavour is ensured with some dried fruit. This is then tempered with a bit of onion for flavour and depth (I’m a bit iffy on garlic) and most definitely ginger. Lots of ginger. Then nuanced with spices – I consider allspice an essential for chutney. This is a spice in it’s own right, and not similar to mixed spice. Then depending on what I’m making, I will choose the spices to suit. That’s it. oh, and chilli (but please be careful – I think people overdo chilli in a chutney and it overwhelms).
I’m going to give you a guide line to make chutney, but if you’d like an actual recipe, you can find Pear Chutney here.
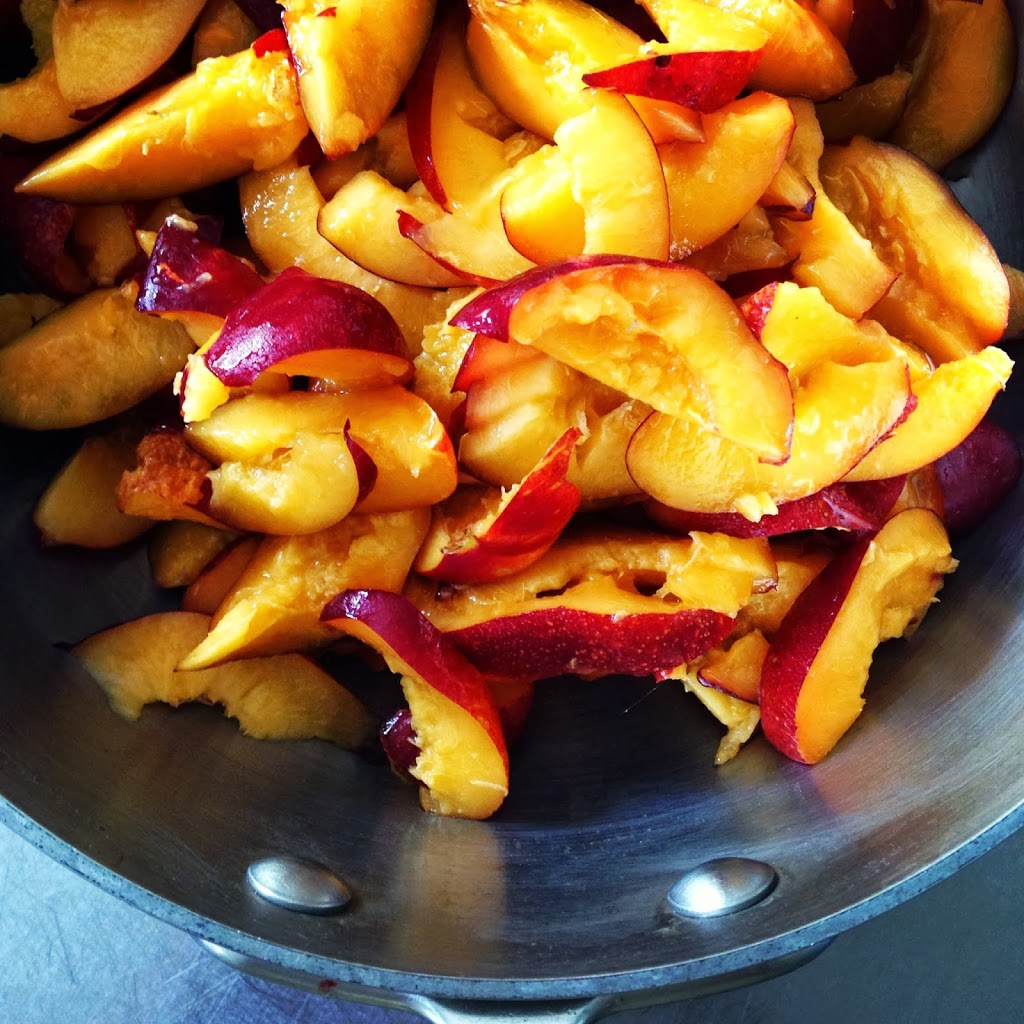
I start by choosing a pot that will fit the amount of fruit I have – I am looking for the fruit to be approximately 2/3 up the side of the pot. Preferably one that is not to wide as this allows too much evaporation. Wash your fruit and chop – a size to suit you, but ensure that any bruised or damaged bits are discarded. But the wetter the fruit (berries, stone fruit etcetera) the bigger the pieces can be.
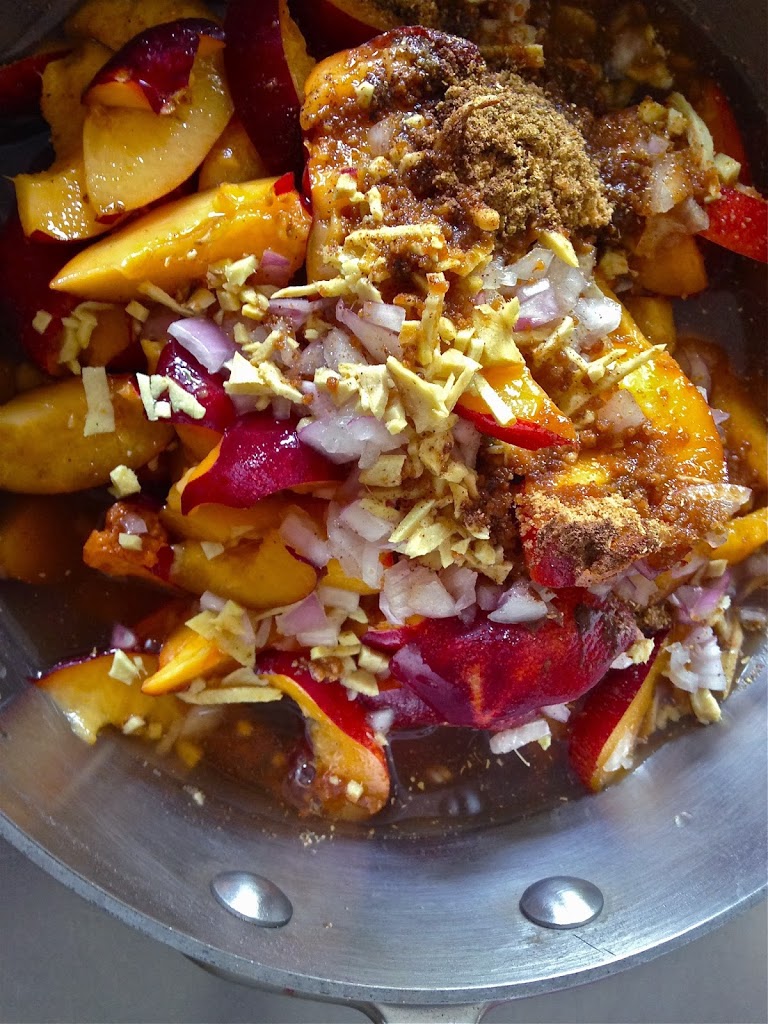
Add a small amount of onion – I do like purple onion for fruits, I think it gives depth with sweetness.You can see in the picture above it’s not overwhelmed with onion. Then chop up a whole lot of fresh ginger – I like nice biggish bits as you can see.
Add 1/2 – 1 cup of dried fruit – I like a raisin, as I think it has a deeper and more complex flavour, especially the muscats. But depending on the fruit, others might give a better end result – for example dates with oranges. Nope, you don’t have to chop them up.
Add your spices. Definitely allspice – the berries, or the ground – I would start with 1/2 teaspoon for 1 kg of fruit and go from there. Cinnamon quills are brilliant, start with one. For this nectarine chutney I chose to use Garam Masala as I love it’s play of peppery and spicy complexity, and added extra ground coriander just because I think ground coriander is beautiful with stone fruits.
Then add a good amount of apple cider vinegar – enough to give the dish enough liquid to start, with equal amount of sugar – whichever you are using, or apple juice concentrate (you can see the amount of liquid I start with above).
Then cover it with a lid and cook over a gentle heat until the juices have sweat out from the fruit – not too long, approx 15 – 20 minutes. Then assess if it needs more liquid – you need enough just about cover the fruit and saturate their cells. Go carefully adding more vinegar, and add in increments – you can always add more, but hard to take away. As you add vinegar, add sweetness to match. Then assess if it needs more sweetness, balancing the acidity or vice versa. Leave the lid off and continue to cook at a gentle simmer – blip, blip – too much boil and you will evaporate that liquid. After about 20 minutes, taste it to see again where the acid/sweetness flavour and liquid ratio is at. Adjust as needed, and also taste for spices and add as desired.
How to know that it’s cooked? You are looking to see that the fruit is saturated – it looks markedly different from fruit that is not cooked, or not saturated enough with the preserving mediums of vinegar and sugar. When it’s at that stage, you can then reduce it down to the consistency that you are after. A small chutney batch of approx 1 kg will take about 40 – 60 minutes.
I check, taste and adjust frequently when making chutney – for amount of liquid, acid/sweetness balance and spice.
Now you have your chutney. If you have made it with a generic brown sugar (NOT recommended as it is highly refined – thus not good for you – and won’t add depth of flavour) or the semi refined Billingtons Muscovado (I like the Light Muscovado) you can simply funnel the very hot chutney into clean, dry, sterile and warm jars (make sure they are on wood/towels or thick paper so they don’t crack) and lid them. Leave to sit for at least 8 hours -you should hear them audibly ‘pop’ as the lid is pulled down during the vacuum formation, show a visible concave centre and then store them. The heat will give you enough of a vacuum. But, if you’ve used a fruit juice concentrate or rapadura, that won’t stop the decay process. They will be fine in the fridge for some weeks but not in the pantry. So, you have to use a boiling water bath.
The boiling water bath is the tool (rather than the ingredient) that you use to preserve the chutney.
This is one of the most interesting techniques – we know it here in Australia as the Vacola system. In essence, what we are doing when we bottle, is to use heat and an enclosed system to destroy micro-organisms that cause food to spoil and create a vacuum in which remaining bacteria cannot grow. Food is packed into a bottle, a seal (originally rubber) is placed around the rim, then a lid is placed, using a clamping system to keep it closed. The Vacola system uses rubber rings with clamps placed on, the French have the rubber seals on the lids with the clamp attached to the lid. As the closed jar goes into water and is heated to a specific temperature (or in this case, boiling) air is forced out through the rubber, bacteria (and such) are killed, and when removed a vacuum seal occurs as the jar cools. When it’s fully cooled the clamps are removed – it is the vacuum seal that keeps air and bacteria out. Newer systems (mostly used in Europe and the U.S, but used now extensively here in Australia) have the lid and rubber formed into one – using a sealing compound around the edges. This is the creamy “paint” that you see on lids and specifically the fine, more darkly coloured ring closer to the edge. Many of the U.S systems (Ball etc) separate that lid into two: a top and screw section. Glass (only tempered) jars can be re used (if in pristine condition), but lids and rings must be new for each bottling. A special note must be made here that preserving, and especially bottling and the hot or boiling water bath, is all about understanding acidity. Clostridium botulinum (extremely toxic) grows in the absence of air (a vacuum), low acidity and a moist environment. Fruits are generally high in acidity, vegetables and especially meats, low acidity. Here with chutney’s you’ve got plenty of acidity, but the process I am recommending is only relevant here for your chutney.
In regards to the pot the Fowlers Vacola is a commercial example of a hot or boiling water bath (just in case you are confused about the terms hot /or boiling water bath. In a hot water bath– the water comes 2/3rd up the sides of the jar, and takes a much longer time for preservation.In a boiling water bath – water is below, around and above the jar, and preservation is achieved in a much shorter time). The Fowlers Vacola preserving pot/system is not absolutely necessary – you can use any big (large) pot, AS LONG AS IT IS DEEP ENOUGH FOR THE WATER TO COVER THE TOPS OF THE JARS AND HAVE SPACE TO BOIL FREELY. ALLOW APPROX 12 CM ABOVE THE JAR TOPS FOR BRISK BOILING. Basically, the Fowlers Vacola system is a large pot – for a hot water bath it has a well-positioned thermometer, and for a boiling water bath, it has enough room.
With a stockpot, a few precautions must be taken to protect the jars from cracking. A wire rack must be placed on the bottom of the pot to keep the jars from direct contact with the heat, and to ensure the movement of boiling water around the bottom of the jar. Some people wrap the jars in paper or cloth to prevent rattling, but I have never done this. The American system is different and brilliant – it has a basket that holds the jars and is so easy to use – it’s available on – line in Australia, coming as a kit (which is worth getting) and you can find it here. Once you get there, you will need to click onto Preserving Kits from the side index. I couldn’t get it to link straight up for you.
Now you are set with understanding the role of the boiling water bath, and your chutney is done, this is what you do next. Bring your pot of water nearly to the boil.
Remove the clean, dry jars and lids from the oven (they should be warm), keeping them on their trays, and ladle the hot chutney into the jars, using a funnel. Place the lids on the jars, then screw on. Make sure the water isn’t boiling as you lower the chutney into it. As a note:it’s important that you put warm chutney into warm jars, otherwise if the filled jar is too cold it will crack when it hits the nearly boiling water.
Using special tongs, lower the jars into the not far off boiling water (or if you have the American basket system, place in the basket). Boil for 12 minutes, starting that timing from when the water comes back to the boil. When done, using the same tongs, remove and place the jars on a towel or wooden surface. Let them sit until totally cool – at least 8 hours.
If you are using a screw top lid system, they should pop audibly as they cool – this is the sound of the lid being sucked down as the vacuum forms. If you are using a screw top lid system or the Vacola system there should be a concave dent in the middle of the lid (for Vacola this is visible when the clamps are taken off). If this has not occurred, store in the fridge and use soonish.
The post Preserving the Harvest appeared on Wholefood Cooking.
January 25, 2014
Quinoa, Teff and Corn Cornbread (and a catch-up)
 I know, I look brown – please don’t judge me – when you cut me, I have golden corn, green basil, red capsicum – I’m delicious and need to be served with other things… you can see inside me down below…
Where to start ? A thank you to you all for emailing me and saying how much you enjoy the blog when I have posted so rarely in 2013? A thank you for continuing to send me photo’s of your children smeared with food – giggling and laughing with their favourite recipe from Wholefood for Children? A thank you for the friendship and privilege that comes from knowing you trust me and have me in your homes? A thank you for welcoming the new book WHOLEFOOD BAKING with open arms? How about we just start with it all and go from there. I start each year with the best intentions of keeping a regular blog, and I didn’t do too badly until the WHOLE AND NATURAL FOODS CHEF TRAINING PROGRAM which started in August- lots of things went by the wayside! When it stopped, I stopped and have had very little desire to take any responsibility for my life whatsoever since then!! I couldn’t have made a decision if my life depended upon it !! But a little bit of going very slowly after Christmas and up to right now, has done wonders. Lets catch up shall we? And I’ve also got a really simple, delicious gluten free cornbread for you later on.
2014 was a full and wonderful year – my fourth book Wholefood Baking was released and I’m incredibly excited to share that it has just been announced as one of the Australian winners of the GOURMAND BOOK AWARDS. Oh my goodness, that hasn’t quite sunk in yet. The best part of this book though was travelling Australia with afternoon tea launches, meeting so many wonderful people (including you) and seeing the community of people returning to real food that is being built. It was wonderful also travelling Australia for Wholefood Cooking classes with THERMOMIX, a good collaboration I think :)
In August we began the 3rd intake of the Whole and Natural Foods Chef Training Program, and this was quite the special group. Amazing, gutsy people in this group that I know are going to go on and make a difference. It’s not an easy course – it’s intense and pushes you to your limits – but, it’s there at the limits that we often discover who we really are or get to eyeball the things (most often our minds) that stop us from being all we can be. There are some photo’s I’d like to share with you from the course:
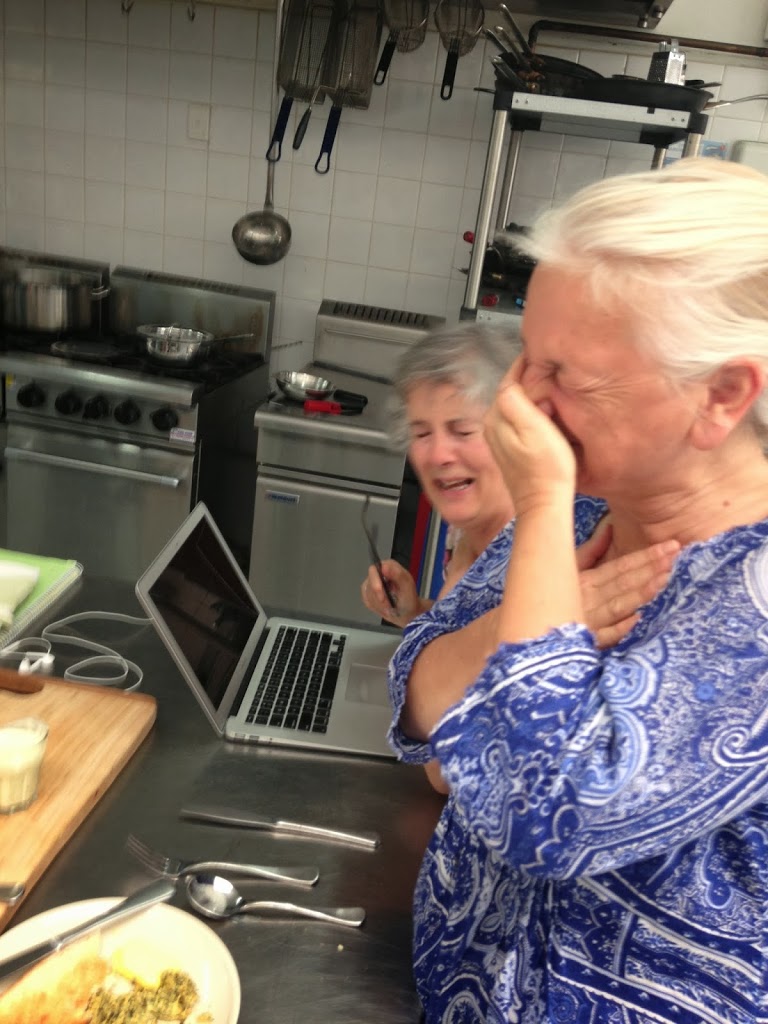
The course does not happen with the legend and wise woman that is Holly Davis. I chose this picture as I think it expresses us best – me, exhausted and unable to keep it together, Holly who as soon as I loose it is not far behind. I also have to include this photo below – seriously not the best photo of either myself or Holly (she will probably kill me for putting it up – seriously we look old and haggard). This is us completely loosing it during taste testing of final practical exams – something tasted unbelievably terrible, and Holly and I were profoundly unprofessional and just couldn’t stop laughing – every time I look at it I just crack up again.
I’ve made many speeches this year and turned 60 in November and one thing stands out for me – we are never an island, and when we become who we want to be, it is always because we are loved and supported. Interestingly I was listening to a interview with Catriona Rowntree yesterday, and she was saying that to be unconditionally loved is the most empowering thing in life (for her, it was her Nanna). I have long wanted to be the person I am now (no not the achievements, but how I feel each day – empowered, trusting, joyful, aware of this gift that is life, alive and on purpose) and for me, those that have enabled that are varied – the most important thing and person in my life (my daughter, Nessie) would at the head of the line, but family, my cousin Fran, best friend Nene, and Holly is not far behind. I think my higher self has pushed me to my limits and it’s there I found who I really am – I love most that I’ve got to this place with compromising my principles – I it’s a deeply organic sense of self worth.
Over summer I’ve had had some wonderful people to breakfast in my kitchen – for once
the eastern states are coming west – here I am with Jo Whitton
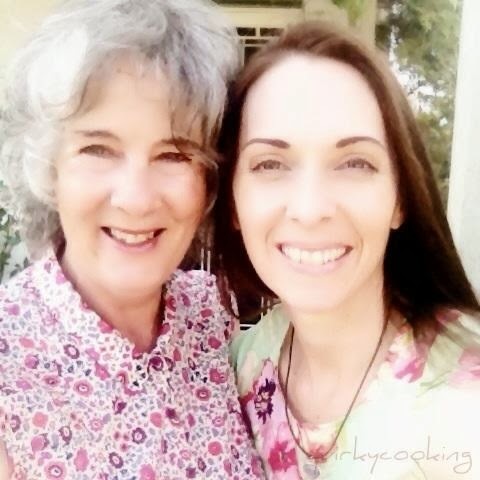 Jo Whitton, Quirky Cooking
And here with Jane Grover
 Jane Grover
And, for the life of me – with my technological skills (poor) I can’t get the photo of Alexx Stuart and her son Benjamin on here.. but you can see that wonderful woman on my Instagram feed. It was such a treat to have time with these inspiring women and hear their stories.
Which brings me to Instagram – I’ve used it more than Facebook towards the end of the year because it was so easy – hence the lack of lots of photo’s on FB !!
So for this year, it’s a whole new website (should be up about March) and there will be lots of goodies for you there. I’m working on a new book, so it will be head down, not too much travel and very few CLASSES. I do have a NOURISHING WISDOM INTENSIVE happening for Perth (this one comes with a pantry pack of grains, legumes, sea vegetables and other treats). It’s a 4 day rather than a 3 day, as this is it – we have extra time to do some of the things you would like to do. You can find information for that here.
As a final note, in case you are looking for some reading? Whilst I actually didn’t end up reading a lot last year (which is a tragedy as I love reading, but was too busy most of the time) my favourites were:
Deep Nutrition: Why your Genes Need Traditional Foods Catherine Shanahan MD and Luke Shanahan
Cooked by Michael Pollan
The books I’ve just bought / am really looking forward to buying or being published this year:
The Lost Lake by Sarah Addison Allen (love her stories)
Whole -Grain Mornings – New Breakfast Recipes to Span the Seasons Megan Gordon
Emma’s book – www.mydarlinglemonthyme.com
Michelles book – www.hugoandelsa.com
I wish you the most joyous and wonderful 2014 – may you be unconditionally loved, nourished, inspired and delighted often. I look forward to sharing more with you over the coming year – and if that is with a cup of tea and we happen to find ourselves having breakfast, morning or afternoon tea, all the better.
x Jude

The post Quinoa, Teff and Corn Cornbread (and a catch-up) appeared on Wholefood Cooking.
December 19, 2013
The Gingerbread Home | Wholesome, Healthy and Whimsy

I know, we have Christmas in summer here in Australia, this year they promise a cool 30c rather than the general 40+. I don’t know if it’s because I am a child of tradition, or my age but I love to think of snow. Perhaps it’s because I love cold weather – the food, the clothes, the snuggling, the games, the reading etcetera. Whatever the reason and because of both I wanted to do a gingerbread home this year – just for whimsy. Whimsy is an important thing -you better not pout (with reason or logic) it’s your heart calling, and when your heart calls you better listen. When Nessie was growing up, her beautiful older cousins Kim and Lisa took charge of the GBH. They provided all the lollydom that she missed out on at home, and I’m incredibly grateful. Not for the lollies in all their chemical and fake glory, but the experience, the daringness of it all and the connection (even now her cousin Fran sends her a text the other day with a picture of the kids making a GBH with the caption ” look Ness, real lollies”). I’m pretty much of the belief that it’s actually not about the lollies, but the experience and if you provide your makers with enough fun, they will be very very happy indeed. Can I say a word about ‘wholesome’? I don’t belive that means no sugar – I believe it means close to it’s natural state as possible, moderation, connection, fun and deliciousness.
So let’s get to it.
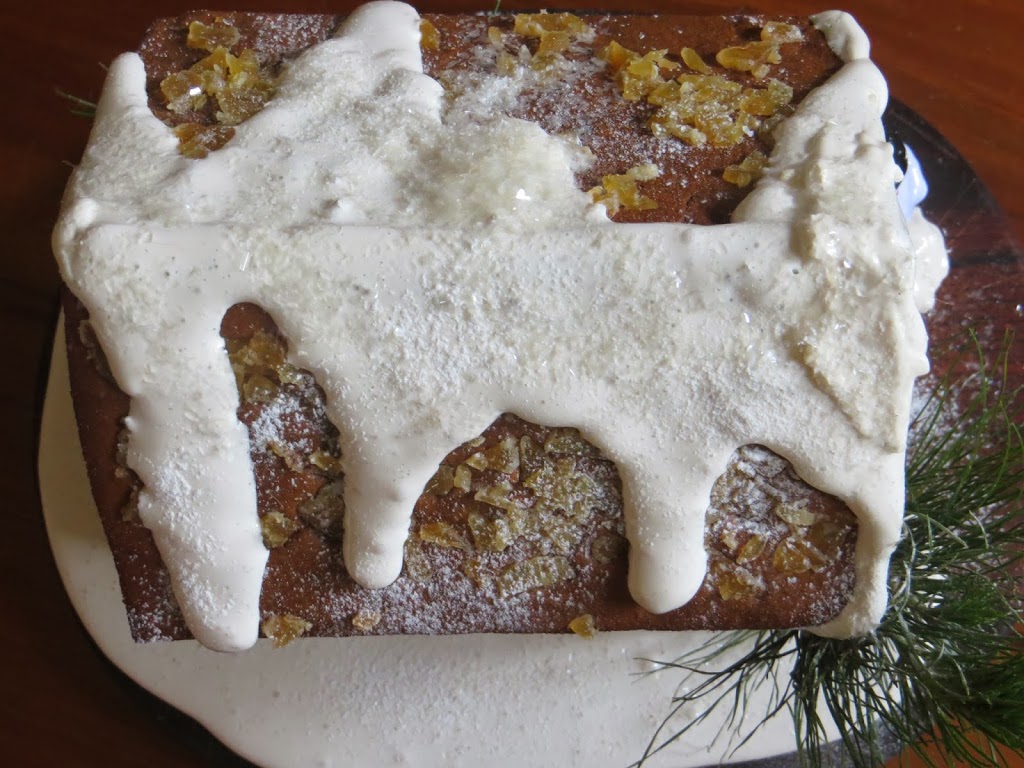
I’ve chosen to use whole ingredients with a minimum of whole and semi refined sweeteners (namely rapadura, golden icing sugar and brown rice syrup). The home is built on a wholemeal spelt base with rapadura sugar – if I was in the U.S I would have chosen maple sugar as it would give an amazing flavour. I’ve made the royal icing glue using the Billingtons Golden Icing Sugar – a semi refined sugar which I love (in Australia it’s available in many supermarkets, even Woolworths). Because it’s semi refined, it will come up brownish when made and you can see that beige tone in the glue along the side of the walls. Because of this, I’ve not used this icing for ‘snow’ on the roof, or indeed even sprinkled it to resemble snow – as soon as it absorbs a touch of moisture it will be brown. SO, I thought I’d try marshmallow and very happy with the final result. I chose to press crystallised ginger (I bought some without sugar around the edges) onto the roof panels, and love the end result – and the more ginger for me the better. Children might not like to eat that, what about some roughly chopped pecan or walnut? Something just gives it a wonderful textural, roofy effect. I sprinkled cornstarch over the entire house for snow, and found some shiny cake sprinkly things in my pantry and gave it a touch of that also. You can see I was lazy and didn’t make windows – that’s easy to do if you would like, but with children involved, I would recommend you keep it simple.
Before we get started, I want to say to you how much I’ve enjoyed meeting you this year as I travelled with my new book Wholefood Baking, and through facebook and instagram. I spoke to a woman called Lisa from Sydney the other day who had rung, to ask which book she thought I should buy her friend for her birthday. In talking she said that her very, very fussy mothers at playgroup don’t blink when she brings and says ” this is a Jude cake / dish”. Please know I understand that trust given, and thank you for having me in your kitchen and home, and know I consider it a deeply meaningful honour and privilege. Blessings to you and your loved ones for a beautiful Christmas season and blessed 2014.
x Jude
PUTTING THE HOUSE TOGETHER:
It is best to make the royal icing and glue the house together first, THEN start on making the marshmallow. The Gingerbread pieces must be absolutely cool before using. Decide also what you are going to put it on – I have simply used a chopping board.
You can find the Gingerbread recipe below, the Royal Icing /Glue recipe below, the Marshmallow recipe here with a few extra notes about it below, and you will also need 1 tablespoon cornstarch for the snow.
Place 2/3 royal icing into a large piping bag fitted with a 5 – 7mm nozzle.
Start by piping a good amount of cement along the sides of the front and along the sides of the side panel. Join together on the board – you will find you only have to hold them for a few seconds or so, and leave to ‘set’ for a couple of minutes before continuing on with the back and other side panel. Make sure it is nice and sturdy/set before doing the roof. Be generous with your cement, and nothing says you can’t go along with the piping back and add more to the gaps if needed. For the roof panel, you will need to pipe cement along the top of the house sides, front and back tops and along the top of the roof panel. Place them on one at a time, and then pipe more as needed. Using a finer piping tip, use the remaining icing to decorate as needed (window’s, etc).
NEXT STEP IS TO MAKE THE MARSHMALLOW. I made the recipe in a vanilla version without the strawberries, and did a couple of different things. Firstly, replace the strawberries with water. When adding the gelatine to the water make sure you sprinkle it in and mix it until smooth – no lumps. Secondly, reduce the amount of sugar – there is no acidity from the strawberries to buffer the sweetness, reduce it to 280 – 300 – no less, or you won’t have what you need. Thirdly, I used 3 kinds of vanilla – all my favourite Heilala brand – I scraped out vanilla seed from 1 pod and added the seeds to the sugar, water, brown rice syrup mixture + the paste and extract as per the recipe. The trick with using the marshmallow to decorate was beating it for ages – easily about 15 – 20 minutes which helped it to cool and set up a bit. You can see how I used mine, but even at this stage it would still run – I couldn’t make snow banks against the house, as it just ran down so I would say practice before you commit yourself. You will have left over marshmallow (terrible I know). I’ve set mine up to use in a rocky road – you can read how to set it in the recipe.
When you’ve snowed it with marshmallow, add twigs, trees etc as desired and stick them with the glue.
The post The Gingerbread Home | Wholesome, Healthy and Whimsy appeared on Wholefood Cooking.
Jude Blereau's Blog

- Jude Blereau's profile
- 3 followers

