A.C. Flory's Blog, page 90
May 18, 2018
How to make Word 16 embed all your fonts
Before I begin, if you don’t want to self-publish your own paperback, or if you don’t use a PDF file to do it, look away now.
Right, this is the task:
convert your manuscript from a Word 16 [13 and possibly 10] document to a PDF file, in order to print with
Lulu.com, CreateSpace.com or KDP [possible IngramSpark as well]
The problem:
after converting to PDF, you find that there are fonts in your PDF that are not ’embedded’,
yet after scouring your original Word file, you can find no trace of these non-embedded fonts.
How can you fix something that doesn’t seem to be there?
Before launching into the how-to, let me go back and explain the problem in a little more detail. It all starts with the Word fonts. While Word documents look great on screen and print without problems, sharing them with others can be tricky as they may not have the same fonts on their version of Word.
This is where PDFs come in. They take a picture of your Word file so that it can be shared by just about anyone. However…for PDFs to work properly, all those pesky Word fonts have to be embedded in the PDF. With me so far?
Okay, so how do you know whether the fonts have been embedded in your PDF file or not?
Easy. Download a free copy of Adobe Acrobat Reader. Install it onto your computer and use it to open the PDF file of your manuscript. Once the manuscript is open:
click File, and
select Properties from the menu
[image error]
With the Properties dialog box open, select the Font tab:
[image error]
On the Font tab you will find a list of all the fonts used in your manuscript. Next to each one you should see ‘(Embedded Subset)’. I’ve underlined it in green above. If you see a font name without ‘Embedded Subset’ next to it [circled in red above], that means the font is loose and may be replaced with some other font when the reader opens the document [or tries to read your print book].
Now, you could take a chance and shrug the problem off, but printers tend to take a dim view of non-embedded fonts. CreateSpace tags them as errors but allows you to continue anyway. I suspect Lulu will be a bit less forgiving, that’s why I went looking for a solution.
Unfortunately, the solutions offered on the lulu.com website are not particularly useful unless you have an app called Adobe Distiller which is needed to make another app, called Lulu Job Options, work. Guess who doesn’t have Adobe Distiller?
My first brilliant idea was to go back into my Word file and get rid of the unembedded font[s]. Fail. I tried doing an Advanced search for the TimesNewRomanPSMT font, but the search came back with no returns. Given that I never choose TimesNewRoman, I can only think that it’s lurking somewhere in one of Words many defaults.
So then I spent about three, increasingly frustrated hours online, trying to hit on the right combination of search words to find an answer to my problem. I won’t bore you with the failures because the answer, when I finally found it, was right there in Word’s damn defaults. You’ll find it in the File/Options dialog box:
With your Word manuscript document open, click the File Tab.
From the File navigation pane, select ‘Options’:
[image error]
‘Options’ is where the default options that govern much of the behind-the-scenes stuff lives in Word.
Once you click ‘Options’, the Word Options dialog box opens up. This is the motherlode:
[image error]
Click Save on the navigation pane as shown [circled in red].
This will open up the Save options, one of which includes the option to ‘Embed fonts in the file’ [circled in red].
Click Embed fonts in the file.
Last but by no means least, uncheck both ‘Embed only the characters used in the document’ and ‘Do not embed common system fonts’. TimesNewRomanPSMT is one of those ‘common system fonts’. -rolls eyes and pulls hair-
Finally, click OK, save your Word file and then convert it to a new PDF file, again.
This time, when you open the new PDF with Acrobat Reader and check its properties, you should see something like this:
[image error]
And there it is [circled in red], the TimesNewRomanPSMT font…embedded at last!
Happy publishing,
Meeks
The making of an Iron Age torc
In an earlier post I wrote about the Snettisham Great Torc, and how it had been created by artisans 2000 years ago. Well today I have something even more exciting to share – a video about how these amazingly beautiful objects were made using the simplest tools imaginable. And here it is:
Roughly half way through, the presenter talks about how she experimented with the technique by casting her own ingot of bronze and then patiently hammering it out into a thin piece of wire. The Iron Age artisan who made the torc must have been a master craftsman with a whole bunch of lesser journeymen and apprentices to help with the backbreaking work, but still, can you imagine how long it would have taken? And how many failures there would have been along the way? The skill, dedication and commitment of these craftmen is beyond my comprehension.
Once again, my thanks to Dawn of Dawn Gill Designs for finding this incredible video and sending me the link to it. If you haven’t yet guessed, Dawn is the blogger I call Silversmith because she makes beautiful pieces of jewellery. She’s also my go-to-person when I need information on crafting techniques. -waves at Dawn-
Okay, back to work. Today I upload Vokhtah and its new cover to Lulu! Vokhtah was my first book and the only one I have never been able to physically hold in my hands. Finally getting a print copy will signify the end of a learning curve that began in 2004. So excited. 
May 16, 2018
Vokhtah – cover reveal and an excerpt
First and foremost, the cover!
[image error]
The blurb on the back cover hasn’t scaled properly, but that’s okay as the image used for the actual print cover will be the right size. The width of the spine will be adjusted as well, once I’ve got the trim size/page count finalised. Other than those small changes, the cover is done. 
May 15, 2018
Intergenerational care – the way of the future, I hope
At 65, I have no intention of shuffling off to an aged-care facility any time soon, but the mere threat of ending my days in one makes me shiver. You see, I’ve visited a few, and even the best are waiting rooms for the last train.
Here in Australia, in-home care is becoming a buzz word, but even if the idea gets the funding it needs and actually takes off, it won’t solve the problem of loneliness. And it won’t solve the problem of the frail, not-so-very-old who need the kind of care that only a nursing home can provide.
I was chatting with online friend, Sue Vincent, about the prospect of robots being used in aged care when Sue pointed me to this link:
The article opened my eyes to research that’s being done into how best to combine care for the bookend generations – i.e. the very young and the very old.
This is the bit that did it for me:
‘After we filmed our documentary, one lady who attended the care facility told me that you don’t think about your age when you are in the company of young children. The little ones brought a new sense of vibrancy and fun to the centre, and the focus was no longer on watching time pass but on living in the moment.’ [emphasis is mine].
Not every older person is going to want to have direct contact with young children – all mothers know how tiring toddlers can be – but there are so many other things an older person could do behind the scenes to make together-time fun.
I know because I do some of this behind the scenes stuff at one of the community houses at which I volunteer. They have a small day care centre run by dedicated staff who never have enough hours in the day to prepare all the little things needed for the childrens’ activities. I’ve made countless lumps of playdoh, cut out pictures, squeezed easter eggs into tiny knitted ‘chickens’ [created by yet more volunteers], wrapped Christmas presents, helped with fund-raising raffles…the list goes on and on.
My point is that helping behind the scenes, at one’s own pace, can be just as satisfying as doing one-on-one with the kids themselves. Why? Because it gives older people a sense of purpose, a reason to ‘get up in the morning’.
In my humble opinion, having a sense of purpose is what we all need to ‘live in the moment’.
-hugs-
Meeks
May 14, 2018
Online Privacy, Security and Newsletters
I’ve just come from Indies Unlimited, one of my favourite websites because of all the free information they provide to Indie authors. The article that prompted this post concerns the new EU regulations and how they relate to newsletters. One of the key facts in the article is that people who use newsletter companies, such as Mailchimp, will have to ask their European subscribers to formally ‘opt in’.
I strongly recommend that everyone who uses a newsletter to communicate with subscribers take a close look at this article:
After reading the article, I was curious to see what Mailchimp had to say about the new EU regulations. What I found was not really a surprise, but it did concern me enough to write the following comment:
Great post, RJ and something all Indies have to look at very seriously, because very few know exactly what the Newsletter companies are doing with their own data and the data of their /subscribers/. This ignorance, and the responsibility that goes with it, will not disappear with a simple opt-in form.
I don’t use a newsletter service but I decided to check out your link to Mailchimp, as it’s a very popular one. The following quotes are taken straight from their various pages:
INFO COLLECTED
‘That information may include your IP address….and other information about how you interacted with our Websites or other websites.’
[the important bit is ‘or OTHER websites]
TRACKING DEVICES & PERSONAL INFO
‘In some cases we may use cookies and other tracking technologies described in this Cookie Statement to collect Personal Information, or to collect information that becomes Personal Information if we combine it with other information.’
[the important bit is ‘that becomes Personal Information if we combine it with other information’]
THIRD PARTIES
‘The third parties that set these third party cookies can /recognise/ your computer both when it visits the website or service in question and also when it visits /certain other websites or services/.’
[the important bit is that Third Parties can include every tech company on the internet including Facebook, Google, Amazon and countless others. Seriously].
TRACKING SUBSCRIBERS
We also enable our users [that’s people who use Mailchimp for newsletters] to employ cookies and similar tracking technologies in connection with their use of our Services in order to allow us and our users to track their subscribers.
[the important bit is ‘to track their subscribers’].
“Do Not Track” or “DNT” signals. Since uniform standards for “DNT” signals have not been adopted, our Websites do not currently process or respond to “DNT” signals. MailChimp takes privacy and meaningful choice seriously and will make efforts to continue to monitor developments around DNT browser technology and the implementation of a standard.
[the important bit is that Mailchimp IGNORES do not track requests. In other words, until they’re forced to obey, your choices don’t matter doodly squat to them].
Now that the EU is bringing in such strong regulations [and other countries may follow], we all have to make choices about how we treat other people’s privacy and security [because data gathered by ad companies can be hacked and used by anybody with the technical skills].
I don’t use any of the newsletter companies, but I know that in the past I’ve signed up for newsletters from online friends and colleagues. Now I’m quietly seething because I am very concerned about my privacy and online security. That’s why I deleted my Facebook account AND deleted everything to do with Google. To learn that I’ve been spied on like this is…not pleasant.
I know that most of you don’t see the privacy/security issue the same way that I do, but I’m asking you to please consider those who get caught up in it without any idea that it’s happening to them.
Not happy,
Meeks
May 9, 2018
#KDP Cover Creator – in words and pictures
After reviewing the Amazon KDP print-on-demand process, and finding it wanting, I thought I’d better provide a guide to the Cover Creator do’s and don’ts.
To begin…
If you have already published an ebook with KDP:
Log in to KDP
Go to your Bookshelf
Find the ebook for which you want to create a paperback version and click ‘+ Create Paperback’
If you have not published with KDP before but have an ordinary Amazon account, go to the website:
And sign in with your Amazon ID and Password. If you don’t have an Amazon account, click the big, yellow ‘Sign Up’ button and follow the registration instructions.
Once you’ve logged in to KDP, click the ‘+ Paperback’ button as shown below:
[image error]
To work…
You should now be looking at the first page of the paperback setup screen. New authors will need to fill in the required details before they click ‘Save and Continue’ at the bottom of the screen. Existing authors will find the details already filled in using the details from the ebook.
Page 2 of the setup contains more questions, and down near the bottom half of the page you’ll find the Cover Creator option:
[image error]
Click the yellow, ‘Launch Cover Creator’ button if you want to use the app to create a cover for your book.
[Note: if you already have a cover, you can upload it by clicking the ‘Upload a cover you already have…’ radio button instead. Covers must be in PDF format and they must be the appropriate size for whichever trim size you have chosen – i.e. for the physical dimensions of your book, including the spine]
You should now be looking at the ‘How to Use Cover Creator’ window:
[image error]
This is essentially just an overview of the process. Click the ‘Continue’ button.
Next, you will be asked to choose a background picture for your cover. You have three options – use a free, KDP image, use your own image or skip this step:
[image error]
Point at the options to see a description of that option. If you want to use your own image, click ‘From My Computer’ and select the appropriate file to use in the templates. If you’re not ready to select an image yet, click ‘Skip This Step’. You will be prompted later to select an image for the cover. For the purposes of this guide, we’ll be using the free images from the KDP gallery.
From Image Gallery…
The images in the KDP gallery are organised in categories. When you select one of the main categories listed on the left hand side of the window, the sub-categories will display on the right hand side. In the example shown below, the main category selected is ‘Backgrounds’:
[image error]
Clicking one of the sub-categories will take you to the actual images. In the example shown below, I clicked on one of the images from the ‘Abstract’ sub-category:
[image error]
Alternatively, I could have typed a keyword into the search box to narrow down my search.
Once you find the image you want, click the orange ‘Use this Image’ button.
Cover Creator inserts the chosen image into all of the available templates and displays them for you to choose the one you like the best:
[image error]
Click the left and right direction arrows to see all the available templates [11]. When you find one you like, click it.
You should now be looking at the ‘Quick Tutorial’:
[image error]
This is just a simple overlay that explains the purpose of the buttons, icons and guidelines. Click the ‘Dismiss’ button to get rid of the overlay.
While the overlay is helpful, it completely ignores the most basic elements of the screen – i.e. how to enter your own blurb on the back cover!
When you dismiss the tutorial overlay, this is what you will see:
[image error]
The triangular orange alerts are there to tell you how to replace the nonsense text with real text. Point to an alert to see a description of what it’s about. Generally, to replace the nonsense text, simply click in the relevant paragraph. This will clear all text and allow you to type, or copy/paste, the correct text onto the cover.
Easy, right? Not quite. For reasons I can’t fathom, the default font size for the paragraphs is not the same as the text shown. For example, the font for the author bio is huge, so before you type in the blurb, you have to set the font style and size via the editing bar as shown below:
[image error]
Click the small down arrow to display the list of available fonts. Click a font to select it.
Next, click the small down arrow next to ‘Auto Fit’ and select a font size because…auto fit doesn’t work and the font is still huge. As far as I could tell, selecting the size of the font is a case of trial and error. The alignment options seem to work, as do the font colour and drop shadow options, but no matter what I tried, the Bold and Italic options remained greyed out.
Once you have all the back cover text entered properly, click on the ‘Author Photo’ icon. You will see two options – ‘From My Computer’ and ‘Skip This Step’:
[image error]
Down the very bottom, in tiny blue letters, you should also see a link to the ‘KDP image guidelines’. -grinds teeth- Clearly this screen has been re-used without adjusting for context. Clicking this link does provide some very important information about cover images – i.e. if you choose to use your own image – but it provides absolutely nothing about the Author Photo. Luckily, Cover Creator resizes the Author Photo to fit automatically.
But… All photos are not equal. First I tried a photo of 527 x 532 pixels, and it worked perfectly. Then I tried a much smaller one – 157 x 202 pixels. Cover Creator inserted it into the available space but came back with a problem. It thought the photo was less than 300 DPI. Actually, both photos were 300 DPI so the size had clearly triggered some glitch.
For your information, the following photo size seems to work well:
500 x 500 pixels or
1.667 x 1.667 inches or
42.33 x 42.33 millimeters
With the blurb and Author Photo taken care of, it’s time to edit the rest of the template. First up are the template colours. Click the paintbrush tab beneath your cover:
[image error]
This will display an editing bar:
[image error]
The options on the left allow you to select each colour individually from a pallet of colours. The options on the right are colour sets that work well together. If you are choosing your colours individually, be very careful that the background and font colour are a good contrast to each other. If they are too similar, the text will be very hard to read.
The next tab is the layout tab:
[image error]
Clicking this tab displays a selection of preset layouts:
[image error]
And finally, there’s the font tab:
[image error]
This option is for Title, Sub-title [if you want one] and Author Name. It provides a series of font ‘sets’:
[image error]
Click the left and right arrows to see all the sets, and try them out. Click one to select it.
[Note: I’m not sure if the fonts were all very similar or I’m just going blind, but they all looked the same the me. Of course, this might be a display glitch…]
If you want to insert a sub-title, you have to click around the cover until the sub-title text box suddenly appears. Kind of lame. Type in your sub-title.
Although finding the sub-title is not intuitive at all, one nice feature is that you can select any piece of text – e.g. Title, Sub-title, Blurb, Spine etc – and change its colour using the Text Colour option on the editing bar:
[image error]
You can also change the font and font size, which makes me wonder why you’d bother with a Text tab in the first place. -shrug-
When you’ve finished tweaking the cover, click the ‘Preview’ button and sit back while the system puts the finished preview together. Depending on how big the cover files are, this can take a while.
If you’re satisfied with the appearance of the cover, click the ‘Save and Submit’ button at the bottom of the preview screen:
[image error]
The cover file will be saved automatically, and you can continue with the rest of the setup for your print book.
I hope this helps,
Meeks
May 8, 2018
How to print a paperback – #KDP vs #CreateSpace
So far, I’ve only used CreateSpace for my print-on-demand needs, but today I thought I’d check out the new, Amazon KDP print option as well.
To access the KDP print option, you have to be registered with KDP. If you’ve already published your ebook[s] with them, simply log in and click on your Bookshelf. Click the book you want to print and you will see an option to create a paperback for that book:
[image error]
The next bit is pretty slick. If your book is already available as an ebook, most of the setup information will be inserted automatically [taken from the ebook setup]. The bits that aren’t are fairly self-explanatory. But what if you’re a brand new author thinking of printing a book for the very first time?
First Impressions
Not knowing where to start, I decided to watch some videos provided by KDP. I can only assume the makers of the videos assumed new authors would already know about trim sizes etc., because they skipped a whole heap of stuff to do with the pre-print part of the process.
Next, I decided to check out the two templates offered by KDP. One template only had the formatting instructions, the other had dummy text to make it easier to see what went where. As with the CreateSpace templates, everything is manual with lots of copy-pasting. Meh. A bigger problem I found was with section breaks etc. There are only about 10 example chapters in the template. So what do you do if you’ve got more than 10 chapters in your own book? You can keep adding chapters, of course, but if you accidentally delete the section break [which is not visible] the whole thing falls apart.
Finally, I had a look at the written instructions for the Basics. It’s pretty bare bones and assumes that authors will be familiar with Word processes and formatting, but otherwise they were okay until the section on page numbers. The following is copied straight from the website:
Go to the first page of your first chapter.
Depending on whether you want your page numbers in the header or footer, double-click on the header or footer. This will open the Design tab.
In the “Navigation section,” click Link to Previous. This will prevent page numbers from showing up on your title, copyright, and table of contents pages.
In the “Header & Footer” section, click Page Number and choose where you want the page numbers to be.
For Steps 3 and 4 to work, the manuscript must already contain a section break separating the chapters from the front matter [Title, Copyright, Table of Contents etc]. I checked back over all the previous instructions to make sure I hadn’t missed something, but no, none of them even mentioned a section break much less instructions on how, and why, to add one.
This is a glaring and costly mistake because, if there is no section break:
the ‘Link to Previous’ option will be greyed out, i.e. unavailable,
a page number applied at any point in the manuscript will cause page numbers to be displayed on each and every page…including the front matter.
any Headers – e.g. Author Name, Book Title etc – will also appear on each and every page…including the front matter.
If you are going to provide instructions for something, those instructions have to be as clear as possible and accurate. My guess is that the instructions conflated the section breaks in the templates with the instructions on doing everything from scratch. Unfortunately, this kind of slip can lead to massive frustration on the part of authors, and a failed project.
A little further down, the instruction for creating a PDF of the Word file suggested authors use the File/Save As option. This is one of the ways of creating a PDF, but it assumes the author will know about file types and how and where to change them. In Word 2016, it’s a lot easier to use the File/Export option which takes you straight there.
Next, I thought I’d check out the cover creator option on KDP. First I watched the video walkthrough. From what I could see, the Cover Creator app. is very similar to the one used by CreateSpace. The video tutorial, however, is more of an overview than a real guide, so I decided to give it a try myself.
The layout and some of the functions are definitely slicker than the Cover Creator app provided by CreateSpace. But. It soon became obvious that KDP’s version is still a beta. The following are the problems I found after just a few minutes of play:
there are only 11 templates to choose from [CreateSpace provides 30],
if you choose one of the free, KDP images as the first step in the process, you can ‘start over’ and choose another template, but you can’t go back and choose another picture,
if you do want to choose another picture, using the Back button on the browser will take you back to the KDP bookshelf, and yes, you have to go through the first page of the setup all over again,
if you exit via the Cover Creator ‘Close’ button, you exit all the way out of KDP and have to log back in,
if you decide to use your own image, there is no template that allows for a ‘free’ cover [in the CreateSpace version there are 2]. This is what I mean:
[image error]
As you can see, my cover image includes interesting fonts and colour choices. When I brought it into Cover Creator, however, I ended up with the default template version plastered over the top. And there was no way I could get rid of it. Horrible. If you are going to use your own cover image, make sure it’s the correct size for the trim size and contains NO WRITING.
Overall? I think the KDP print-on-demand process needs more work. I’ll give it a skip, at least for now.
Meeks
May 7, 2018
Max Zorn Creates Incredible Pictures Using Only Packing Tape
Another artist making beautiful images with the most unlikely of materials…packing tape. I am in awe of his talent.
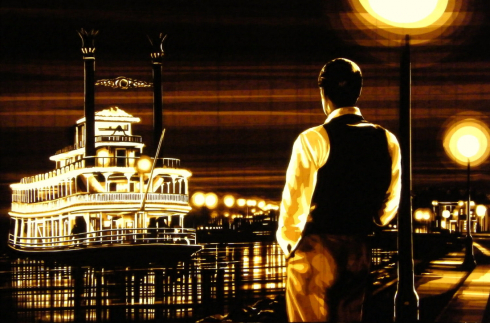


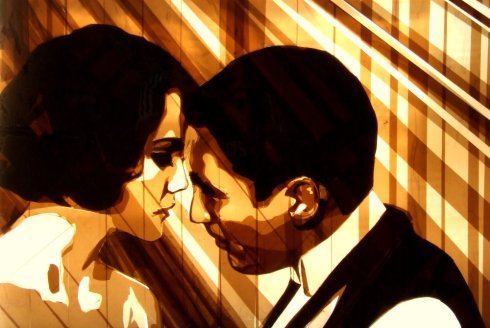


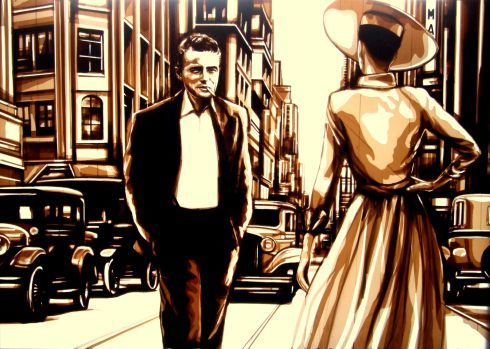

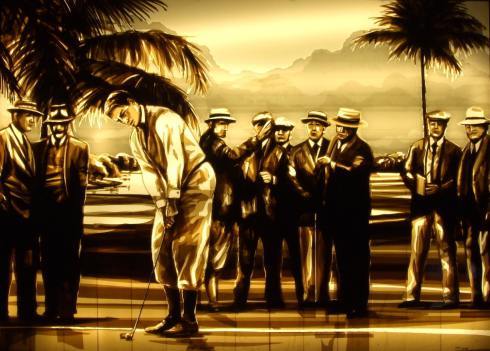

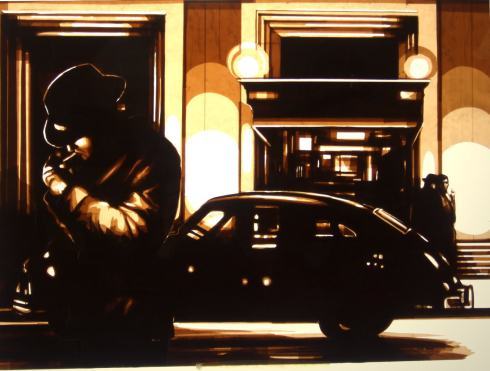

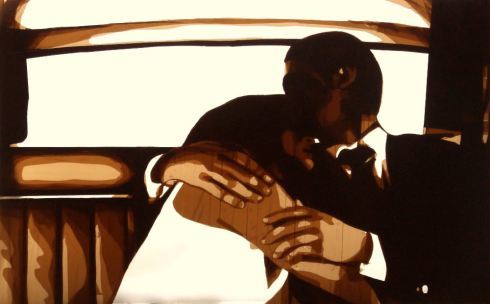
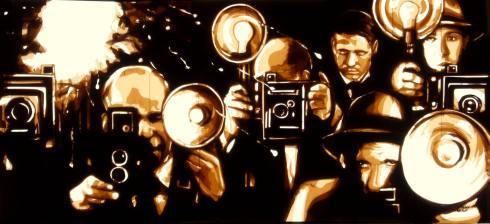


Max Zorn Creates Incredible Pictures Using Only Packing Tape
Amsterdam street artist Max Zorn has a unique talent for making incredible art using mainly brown packaging tape.
The very idea of using tape instead of paint came from Max Zorn’s friend who was working in a car design. “These guys often use slim tapes to outline their ideas on large boards. I was surprise to see how fast they could create stunning sketches with it”, says Max Zorn. And ever since then, he started showing his talents making this packaging tape art by decorating old street lamps which you can find almost everywhere in Amsterdam. “It’s the perfect medium to experiment, because of its golden glow“, he adds.
Max Zorn’s rise began after publishing the two-minute self-made video on YouTube “Street Art by Max Zorn Making of Tape Art” back in 2011, showing how he hangs his translucent tape art on street lamps…
View original post 221 more words
May 5, 2018
How to vector a bitmap with Corel Draw X8
I know there are easier ways to get rid of the background in a bitmap, but I’ve never been able to achieve the crisp results I wanted, so instead I apply nodes to the bitmap, effectively turning it into a vector of a bitmap.
What do I mean? I’ll explain with a real life example. This is the image I downloaded from freeimages.com:
[image error]
The reason I downloaded it was because I wanted those two gears, and only those two gears. This is what I ended up with after 3 days of boring, painstaking work:
[image error]
As you can see, the gears now appear in splendid isolation, crisp and clear, as if I’d photographed them against that dark charcoal background. This is how I did it.
Step 1 – Use the File/Import command [Ctrl I] to bring the bitmap file into Corel Draw X8.
Step 2 – Select the bitmap and click the Shape Tool as shown:
[image error]
Step 3 – The bitmap should now have nodes displayed at each corner.
[image error]
Right click anywhere on the ‘lines’ between the nodes to place a new node and open the right click menu:
[image error]
Step 4 – From the right click menu select the ‘Add’ option. This will give you a new node to work with.
Step 5 – Use the Shape Tool to move the new node to the edge of the shape you want to bring out. At this point the lines between nodes will all be ‘straight’:
[image error]
Step 6 – [optional] As this point I usually create a dark coloured, vector rectangle and place it behind the bitmap so I can see the shape, and its background, more easily. Use the Object/To Back of Page command to locate the rectangle behind the bitmap.
Step 7 – To mold the lines around the bitmap shape, you have to make them capable of bending into a curve. To do this, right click the node you want to change to a curve. The context sensitive menu is displayed again. This time, select the ‘To curve’ option.
Step 8 – The line between nodes should now display two directional arrows:
[image error]
Click-hold-and-drag the directional arrows to create the required curve.
For the teeth of the gears, I had to use about 5 nodes for each tooth:
[image error]
As you create the vector shape around the bitmap shape, the coloured background will be revealed, proving that the emerging shape no longer has a background. And of course that means you can place it on top of other images like so:
[image error]
Ta dah! Not completely finished but it’ll do for now. Oh and I finally worked out how to stop the CMYK black from displaying as grey when converting to an RGB image. Soooo simple.
With the Corel Draw X8 screen displayed, select:
Tools/Color Management/Default Settings
This is will cause a popup window to be displayed. Find the Color Conversion Settings and change the Color Engine to ‘None’:
[image error]
Now the blacks will stay black instead of displaying as a kacky grey. 
May 3, 2018
Twitter users! Change your password, now
[image error]I subscribe to an Australian government website called ‘Stay Smart Online’. The site sends me notifications of current security alerts, and this is the latest:
‘As a precaution, Twitter is urging more than 330 million users to change their password after a glitch left log-in details exposed in the company’s internal computer system.
When you set a password for your account, Twitter uses technology that masks it, so no one can see your password.
The company recently identified a bug that stored unmasked passwords in an internal log. Twitter found this error itself, removed the passwords and is now looking at how it can prevent this from happening again.
Twitter has advised it has fixed the bug, and has no reason to believe the passwords left Twitter’s systems or were misused by anyone.’
Despite these assurances, however, you really should change your Twitter password now. More importantly, you should also change your password on any other sites where you used the same password.
I know you’re not supposed to ‘re-use’ passwords, but I’m just as guilty as everyone else because my memory is simply incapable of storing hundreds of passwords. I have special passwords for my banking accounts, or accounts that deal with money, that don’t get shared, but for the main social media accounts that I log in and out of multiple times a day, well….:(
Anyway, I’ve just gone through and changed mine, so I’m a good girl now. 


