
Sam Dogra's Blog, page 6
June 8, 2019
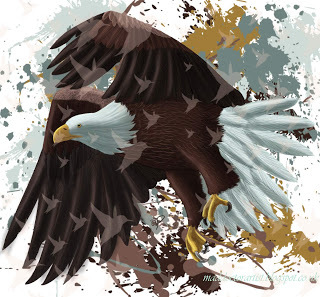
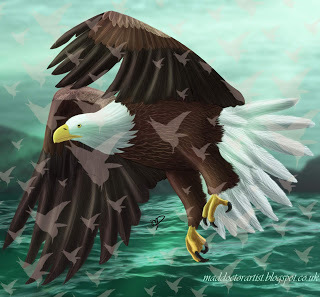
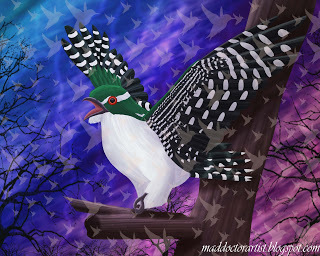
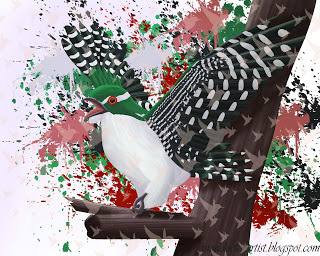
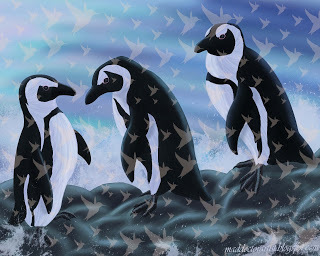
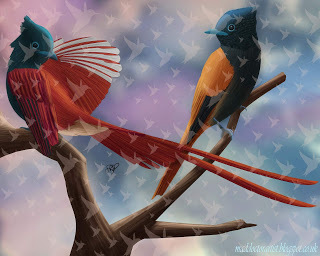
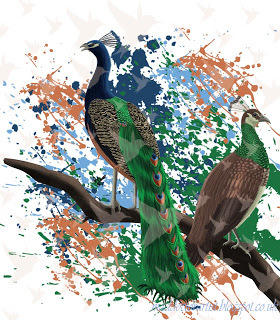
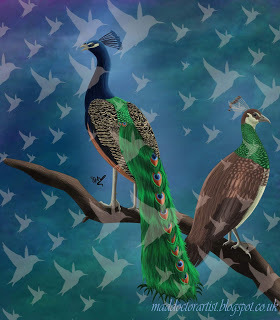
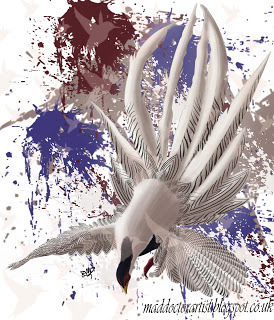
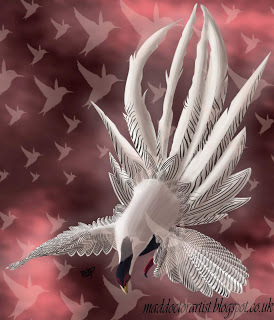
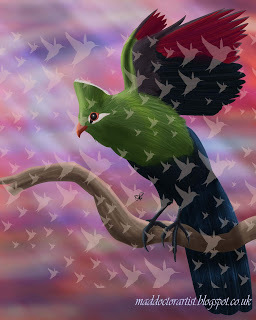
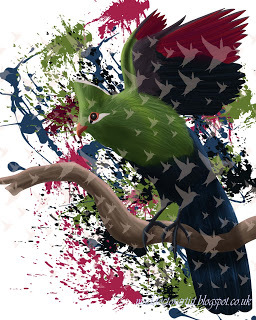
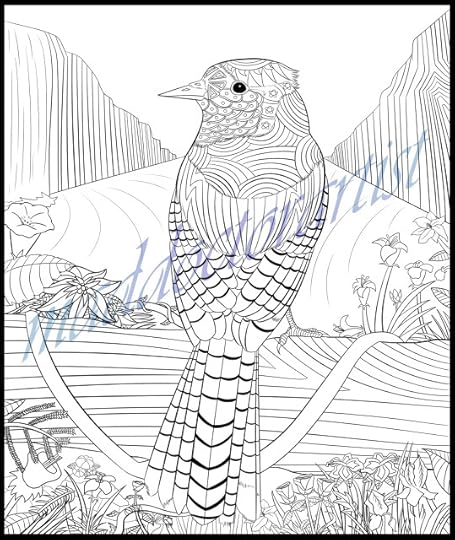
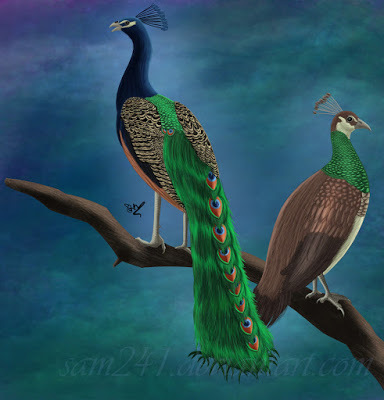
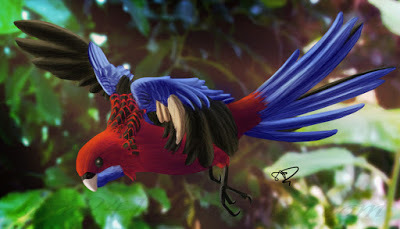
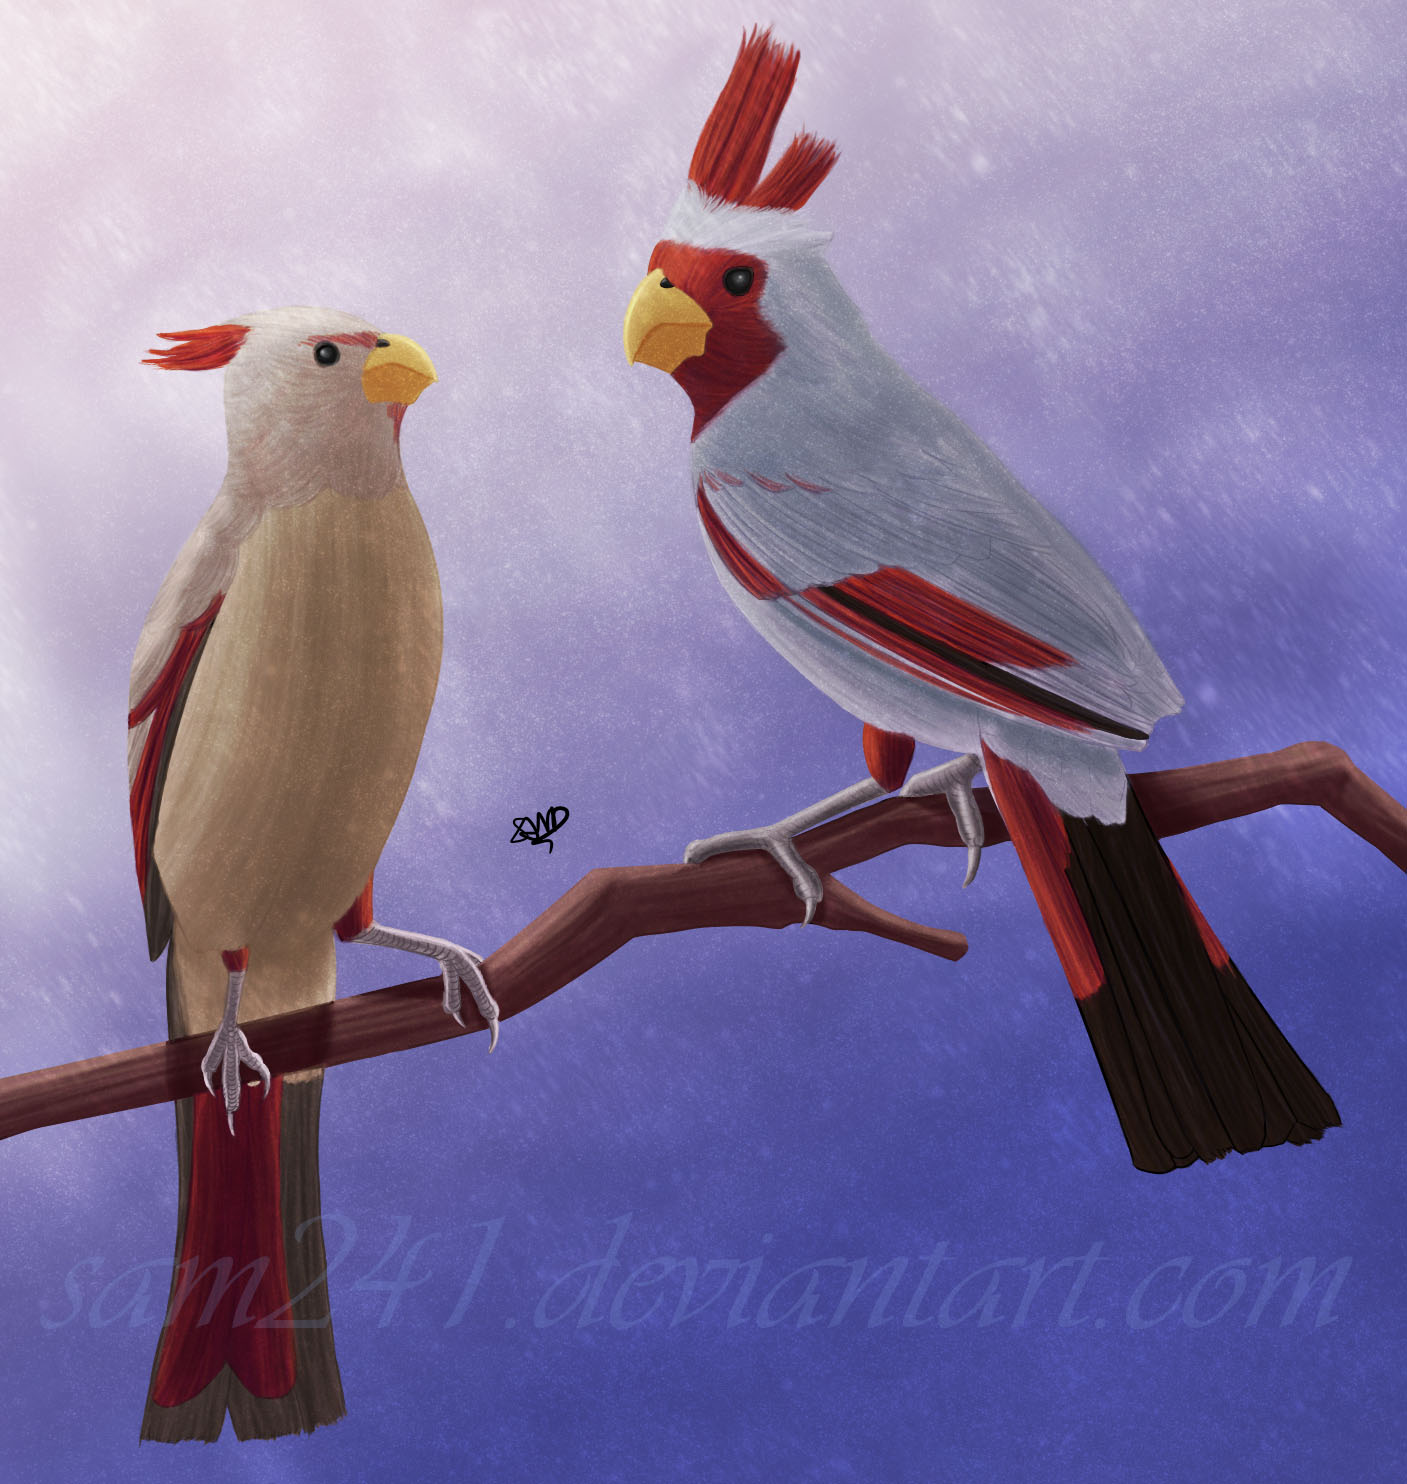
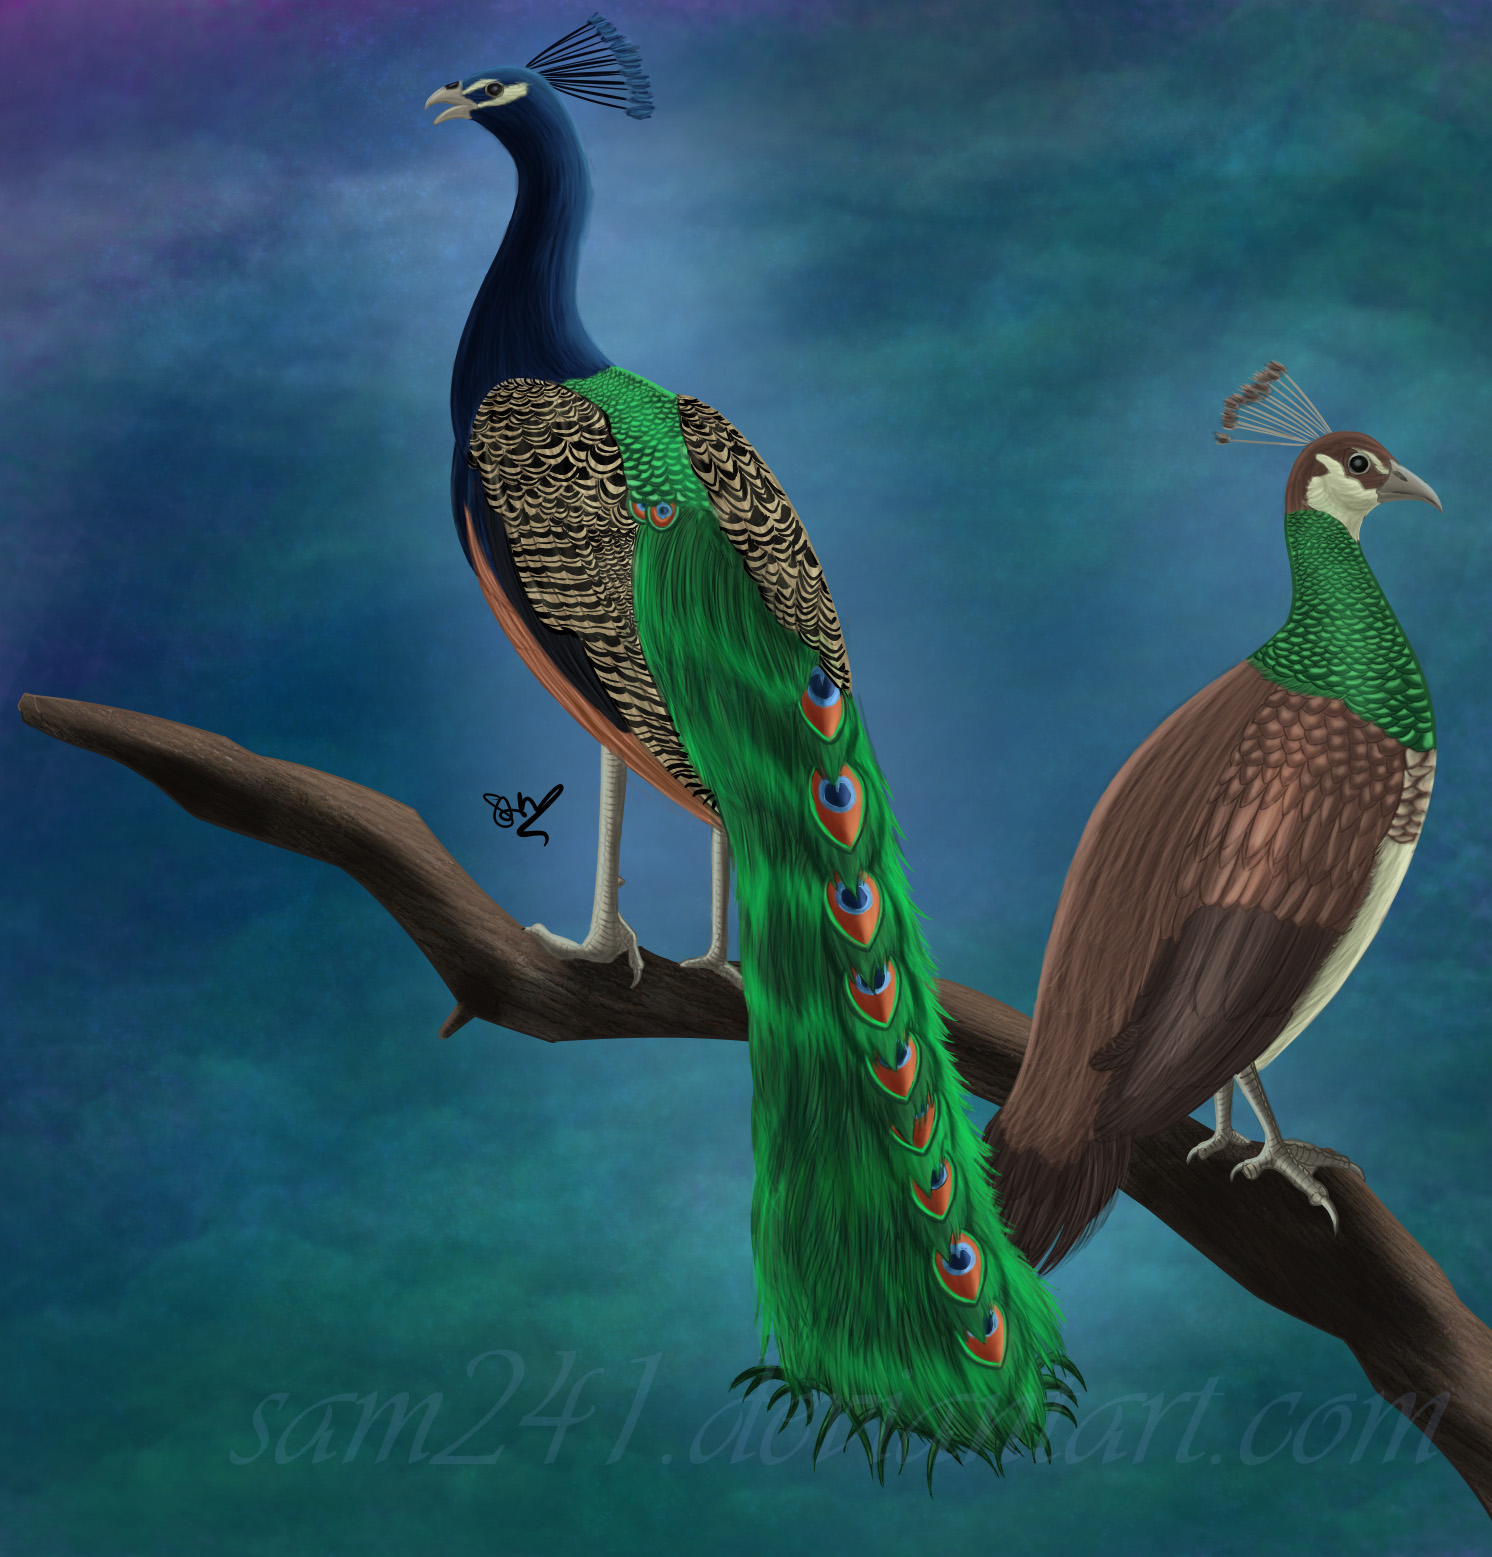
New Redbubble bird designs!
Hello everyone, I've been updating my RedBubble page with some new birds, so head on over there if you want one of my beautiful feathered friends on various items such as T-shirts, mugs, notepads and more!
Here is the link to the store!
Here are the new designs:
Here is the link to the store!
Here are the new designs:


June 1, 2019
How to Draw a Bird Art Tutorial
Hello all, I'm back again, this time with an art tutorial! As may already be quite obvious, I love drawing birds, and with an infinite number of species to choose from, you could spend a lifetime drawing and never draw them all!
Nonetheless, they can be tricky to capture on paper (or Fire Alpaca in my case), so I thought I'd do a little tutorial that may help. Note that I'll be focusing on the drawing aspect, not the colouring, though if you'd also like a tutorial on my colouring process I'd be happy to do one!
I am by no means an expert on drawing, I'm just a hobbyist sharing my work process, so if you don't feel this style suits you, then don't worry! There are many other art resources out there- you can click on my 'art resources page' to get started.
So, without further ago, here are my tips for how to draw a bird...
STEP ONE- FINDING A GOOD REFERENCE
This is the most important step, as it will act as main guide. In the example I'll be using, I wanted to draw a goaway bird, so I found a some photos with a pose I liked:
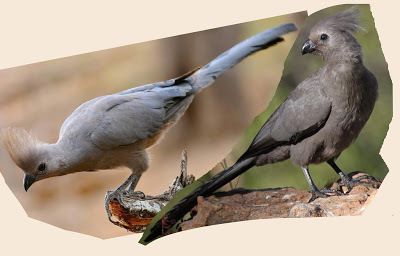 [source one; source two]
You can tweak them as you need until you find a composition you're happy with.
STEP TWO- BREAKING IT DOWN
This is a useful tip for drawing anything. In order to understand the form, you need to break it down. You can initially break it down into 2D shapes, like circles, but then try to make them more 3D (I admit this latter step I still struggle with!). This helps you know the main shapes to capture, and stops you getting bogged down in detail.
 The head, body, tail and legs can be simplified into shapes
You may also want to measure- some artists do this with a ruler, but something less technical and a bit more flexible is to use an aspect of the reference photo as a measurement. I typically use the bird's head, and measure the body/ tail/ legs in 'heads'. This gives you a good estimate of the position of the features, and ensures you don't elongate or shorten things that make the proportions look off.
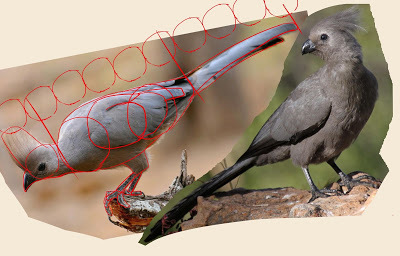 The body is roughly 4 heads long, the tail about the same length as the body...
For digital drawing, open up a new image (the examples below are from Photoshop Elements as I had already done the linework, but I use Fire Alpaca for the actual drawing of the lines). Put in your reference images [you can copy and paste from the original image], then make a new layer on top [by clicking the 'New Layer' icon at the bottom right, or via Layers-> New Layer in the top menu]. You may also want to make a new layer below and fill with a colour [using the gradient tool- try to avoid pure white as this can be hard on the eyes, so i tend to use cream or grey].
On a clean new layer, you can start building the form of the birds. For digital art, I tend to use an outlandish colour for this (red/ blue) so that it's clear which is the sketch and which is the layer for the proper lines.
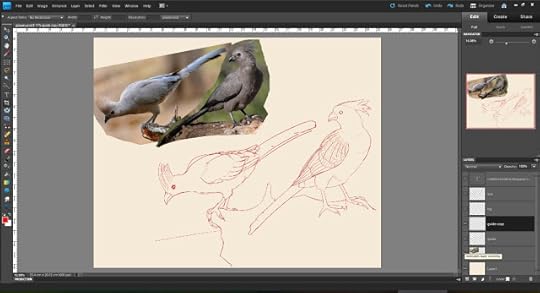 Once the base shapes are in place, you can join it up and add smaller details, and make corrections as needed.
You can keep checking back to the reference until you're happy with the base sketch.
If you're using traditional media like pencil and paper, keep the lines light so they can be easily erased later.
STEP THREE- LINES
Now it's time to make the lines! I make a new layer above the sketch layer, and use single, crisp strokes for the lines.
 See how I've gone over the red lines and made some corrections...
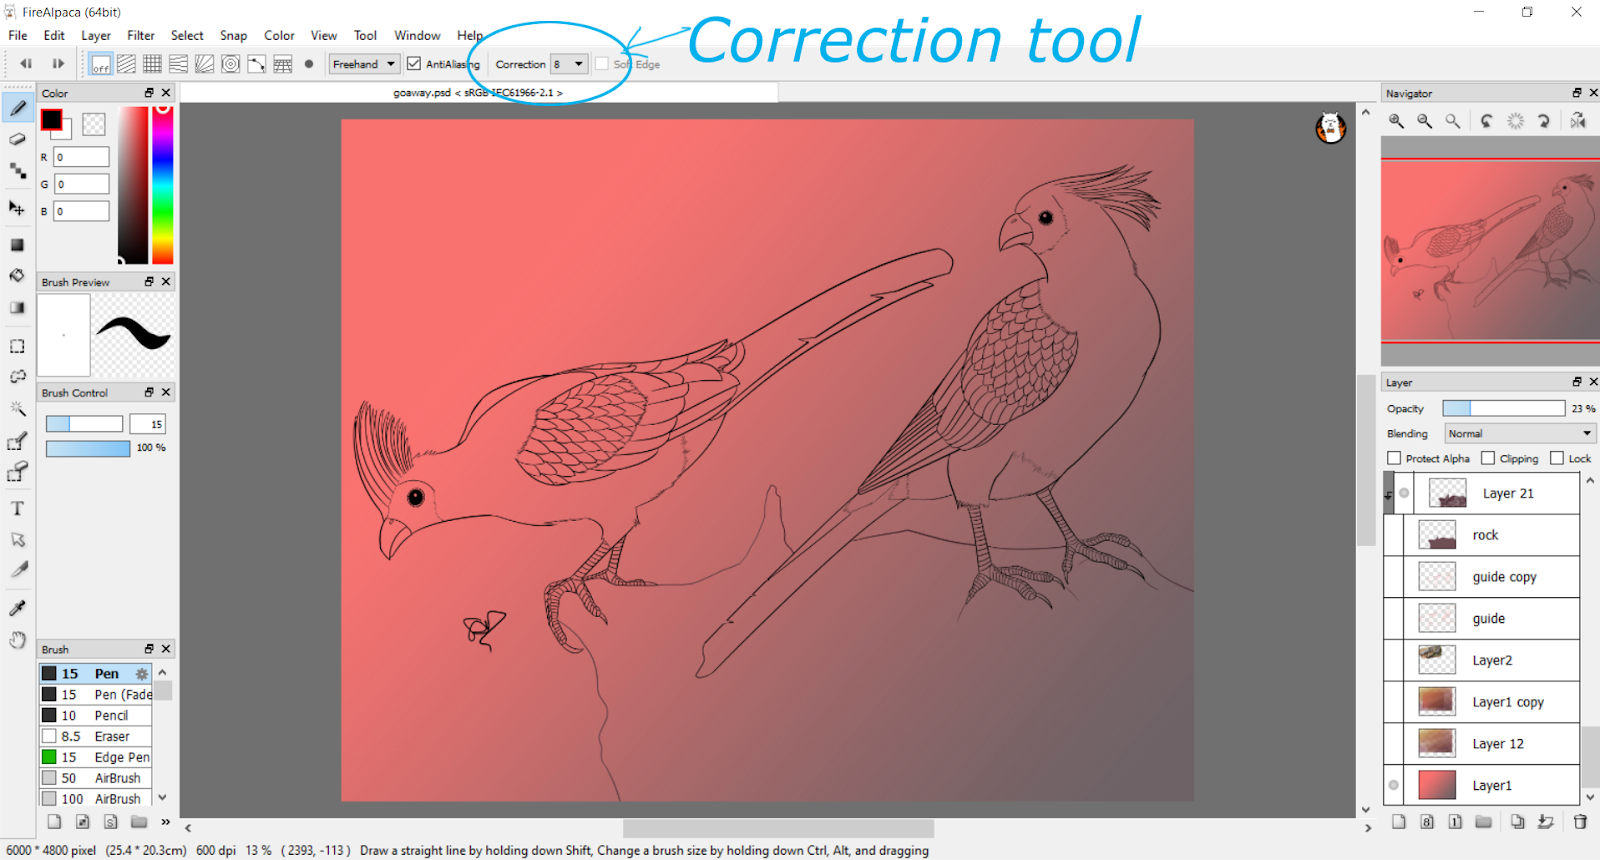
Now Firealpaca has a lovely feature called a stabilizer- this helps your lines be less jittery, and you can adjust it to how much you want it to 'correct'. But even if you draw traditionally, this same tip applies- try to draw with confident, single strokes, and not multiple stuttered lines. This is fine for the sketch, but for lines to be crisp, they should be fluid. If you're painting digitially, you can try and undo multiple strokes if need be, and using the layers option, you can 'overshoot' lines and erase later. You can also rotate the canvas- curves are easier to draw in different planes so find out which angles are most comfortable for you.
 Fire Alpaca has the correction tool as highlighted, and you can also rotate the canvas freely using the arrow keys or the navigator in the top right corner
It's also useful to decrease the opacity of the sketch layer, as if you accidentally draw on the wrong layer you can tell right away. Photoshop in particular has an annoying habit where if you undo a move, it puts you back on the other layer (if you had another layer selected) and it's the most frustrating thing to be half-way done only to find it's all on the wrong layer!
STEP FOUR- DETAILS
Now with the main lines set, you can add the details- such as the webbing on the legs, smaller feathers, etc. You can also add in background elements too. Once you're all happy, delete the sketch layer (or hide it if you prefer) and voila!
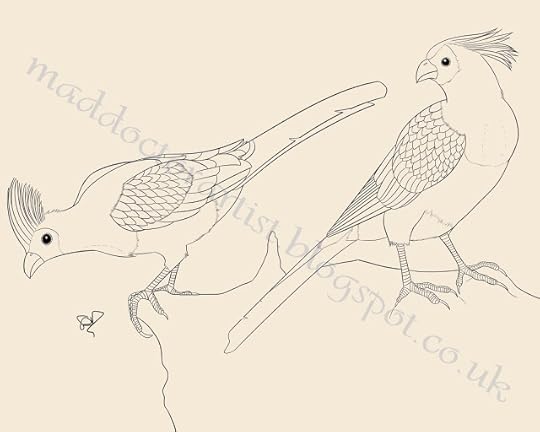 And you're done!
And with that, there's the pair of goaway birds lineart finished! They look pretty neat, huh?
I hope you found this run down helpful! And as I've mentioned, there are many ways to draw and paint birds, this is just my method.
Got any tips to share? I'd love to hear!
Nonetheless, they can be tricky to capture on paper (or Fire Alpaca in my case), so I thought I'd do a little tutorial that may help. Note that I'll be focusing on the drawing aspect, not the colouring, though if you'd also like a tutorial on my colouring process I'd be happy to do one!
I am by no means an expert on drawing, I'm just a hobbyist sharing my work process, so if you don't feel this style suits you, then don't worry! There are many other art resources out there- you can click on my 'art resources page' to get started.
So, without further ago, here are my tips for how to draw a bird...
STEP ONE- FINDING A GOOD REFERENCE
This is the most important step, as it will act as main guide. In the example I'll be using, I wanted to draw a goaway bird, so I found a some photos with a pose I liked:
 [source one; source two]
You can tweak them as you need until you find a composition you're happy with.
STEP TWO- BREAKING IT DOWN
This is a useful tip for drawing anything. In order to understand the form, you need to break it down. You can initially break it down into 2D shapes, like circles, but then try to make them more 3D (I admit this latter step I still struggle with!). This helps you know the main shapes to capture, and stops you getting bogged down in detail.
 The head, body, tail and legs can be simplified into shapes
You may also want to measure- some artists do this with a ruler, but something less technical and a bit more flexible is to use an aspect of the reference photo as a measurement. I typically use the bird's head, and measure the body/ tail/ legs in 'heads'. This gives you a good estimate of the position of the features, and ensures you don't elongate or shorten things that make the proportions look off.
 The body is roughly 4 heads long, the tail about the same length as the body...
For digital drawing, open up a new image (the examples below are from Photoshop Elements as I had already done the linework, but I use Fire Alpaca for the actual drawing of the lines). Put in your reference images [you can copy and paste from the original image], then make a new layer on top [by clicking the 'New Layer' icon at the bottom right, or via Layers-> New Layer in the top menu]. You may also want to make a new layer below and fill with a colour [using the gradient tool- try to avoid pure white as this can be hard on the eyes, so i tend to use cream or grey].
On a clean new layer, you can start building the form of the birds. For digital art, I tend to use an outlandish colour for this (red/ blue) so that it's clear which is the sketch and which is the layer for the proper lines.
 Once the base shapes are in place, you can join it up and add smaller details, and make corrections as needed.
You can keep checking back to the reference until you're happy with the base sketch.
If you're using traditional media like pencil and paper, keep the lines light so they can be easily erased later.
STEP THREE- LINES
Now it's time to make the lines! I make a new layer above the sketch layer, and use single, crisp strokes for the lines.
 See how I've gone over the red lines and made some corrections...
Now Firealpaca has a lovely feature called a stabilizer- this helps your lines be less jittery, and you can adjust it to how much you want it to 'correct'. But even if you draw traditionally, this same tip applies- try to draw with confident, single strokes, and not multiple stuttered lines. This is fine for the sketch, but for lines to be crisp, they should be fluid. If you're painting digitially, you can try and undo multiple strokes if need be, and using the layers option, you can 'overshoot' lines and erase later. You can also rotate the canvas- curves are easier to draw in different planes so find out which angles are most comfortable for you.
 Fire Alpaca has the correction tool as highlighted, and you can also rotate the canvas freely using the arrow keys or the navigator in the top right corner
It's also useful to decrease the opacity of the sketch layer, as if you accidentally draw on the wrong layer you can tell right away. Photoshop in particular has an annoying habit where if you undo a move, it puts you back on the other layer (if you had another layer selected) and it's the most frustrating thing to be half-way done only to find it's all on the wrong layer!
STEP FOUR- DETAILS
Now with the main lines set, you can add the details- such as the webbing on the legs, smaller feathers, etc. You can also add in background elements too. Once you're all happy, delete the sketch layer (or hide it if you prefer) and voila!
 And you're done!
And with that, there's the pair of goaway birds lineart finished! They look pretty neat, huh?
I hope you found this run down helpful! And as I've mentioned, there are many ways to draw and paint birds, this is just my method.
Got any tips to share? I'd love to hear!
How to Draw a Bird Tutorial
Hello all, I'm back again, this time with a tutorial! As may already be quite obvious, I love drawing birds, and with an infinite number of species to choose from, you could spend a lifetime drawing and never draw them all!
Nonetheless, they can be tricky to capture on paper (or Fire Alpaca in my case), so I thought I'd do a little tutorial that may help. Note that I'll be focusing on the drawing aspect, not the colouring, though if you'd also like a tutorial on my colouring process I'd be happy to do one!
I am by no means an expert on drawing, I'm just a hobbyist sharing my work process, so if you don't feel this style suits you, then don't worry! There are many other art resources out there- you can click on my 'art resources page' to get started.
STEP ONE- FINDING A GOOD REFERENCE
This is the most important step, as it will act as main guide. In the example I'll be using, I wanted to draw a goaway bird, so I found a some photos with a pose I liked:
[source one; source two]
You can tweak them as you need until you find a composition you're happy with.
STEP TWO- BREAKING IT DOWN
This is a useful tip for drawing anything. In order to understand the form, you need to break it down. You can initially break it down into 2D shapes, like circles, but then try to make them more 3D (I admit this latter step I still struggle with!). This helps you know the main shapes to capture, and stops you getting bogged down in detail.
The head, body, tail and legs can be simplified into shapes
You may also want to measure- some artists do this with a ruler, but something less technical and a bit more flexible is to use an aspect of the reference photo as a measurement. I typically use the bird's head, and measure the body/ tail/ legs in 'heads'. This gives you a good estimate of the position of the features, and ensures you don't elongate or shorten things that make the proportions look off.
The body is roughly 4 heads long, the tail about the same length as the body...
For digital drawing, open up a new image (the examples below are from Photoshop Elements as I had already done the linework, but I use Fire Alpaca for the actual drawing of the lines). Put in your reference images [you can copy and paste from the original image], then make a new layer on top [by clicking the 'New Layer' icon at the bottom right, or via Layers-> New Layer in the top menu]. You may also want to make a new layer below and fill with a colour [using the gradient tool- try to avoid pure white as this can be hard on the eyes, so i tend to use cream or grey].
On a clean new layer, you can start building the form of the birds. For digital art, I tend to use an outlandish colour for this (red/ blue) so that it's clear which is the sketch and which is the layer for the proper lines.
Once the base shapes are in place, you can join it up and add smaller details, and make corrections as needed.
You can keep checking back to the reference until you're happy with the base sketch.
If you're using traditional media like pencil and paper, keep the lines light so they can be easily erased later.
STEP THREE- LINES
Now it's time to make the lines! I make a new layer above the sketch layer, and use single, crisp strokes for the lines.
See how I've gone over the red lines and made some corrections...
Now Firealpaca has a lovely feature called a stabilizer- this helps your lines be less jittery, and you can adjust it to how much you want it to 'correct'. But even if you draw traditionally, this same tip applies- try to draw with confident, single strokes, and not multiple stuttered lines. This is fine for the sketch, but for lines to be crisp, they should be fluid. If you're painting digitially, you can try and undo multiple strokes if need be, and using the layers option, you can 'overshoot' lines and erase later. You can also rotate the canvas- curves are easier to draw in different planes so find out which angles are most comfortable for you.
Fire Alpaca has the correction tool as highlighted, and you can also rotate the canvas freely using the arrow keys or the navigator in the top right corner
It's also useful to decrease the opacity of the sketch layer, as if you accidentally draw on the wrong layer you can tell right away. Photoshop in particular has an annoying habit where if you undo a move, it puts you back on the other layer (if you had another layer selected) and it's the most frustrating thing to be half-way done only to find it's all on the wrong layer!
STEP FOUR- DETAILS
Now with the main lines set, you can add the details- such as the webbing on the legs, smaller feathers, etc. You can also add in background elements too. Once you're all happy, delete the sketch layer (or hide it if you prefer) and voila!
And you're done!
And with that, there's the pair of goaway birds lineart finished! They look pretty neat, huh?
I hope you found this run down helpful! And as I've mentioned, there are many ways to draw and paint birds, this is just my method.
Got any tips to share? I'd love to hear!
Nonetheless, they can be tricky to capture on paper (or Fire Alpaca in my case), so I thought I'd do a little tutorial that may help. Note that I'll be focusing on the drawing aspect, not the colouring, though if you'd also like a tutorial on my colouring process I'd be happy to do one!
I am by no means an expert on drawing, I'm just a hobbyist sharing my work process, so if you don't feel this style suits you, then don't worry! There are many other art resources out there- you can click on my 'art resources page' to get started.
STEP ONE- FINDING A GOOD REFERENCE
This is the most important step, as it will act as main guide. In the example I'll be using, I wanted to draw a goaway bird, so I found a some photos with a pose I liked:
[source one; source two]You can tweak them as you need until you find a composition you're happy with.
STEP TWO- BREAKING IT DOWN
This is a useful tip for drawing anything. In order to understand the form, you need to break it down. You can initially break it down into 2D shapes, like circles, but then try to make them more 3D (I admit this latter step I still struggle with!). This helps you know the main shapes to capture, and stops you getting bogged down in detail.
The head, body, tail and legs can be simplified into shapesYou may also want to measure- some artists do this with a ruler, but something less technical and a bit more flexible is to use an aspect of the reference photo as a measurement. I typically use the bird's head, and measure the body/ tail/ legs in 'heads'. This gives you a good estimate of the position of the features, and ensures you don't elongate or shorten things that make the proportions look off.
The body is roughly 4 heads long, the tail about the same length as the body...For digital drawing, open up a new image (the examples below are from Photoshop Elements as I had already done the linework, but I use Fire Alpaca for the actual drawing of the lines). Put in your reference images [you can copy and paste from the original image], then make a new layer on top [by clicking the 'New Layer' icon at the bottom right, or via Layers-> New Layer in the top menu]. You may also want to make a new layer below and fill with a colour [using the gradient tool- try to avoid pure white as this can be hard on the eyes, so i tend to use cream or grey].
On a clean new layer, you can start building the form of the birds. For digital art, I tend to use an outlandish colour for this (red/ blue) so that it's clear which is the sketch and which is the layer for the proper lines.
Once the base shapes are in place, you can join it up and add smaller details, and make corrections as needed.You can keep checking back to the reference until you're happy with the base sketch.
If you're using traditional media like pencil and paper, keep the lines light so they can be easily erased later.
STEP THREE- LINES
Now it's time to make the lines! I make a new layer above the sketch layer, and use single, crisp strokes for the lines.
See how I've gone over the red lines and made some corrections...Now Firealpaca has a lovely feature called a stabilizer- this helps your lines be less jittery, and you can adjust it to how much you want it to 'correct'. But even if you draw traditionally, this same tip applies- try to draw with confident, single strokes, and not multiple stuttered lines. This is fine for the sketch, but for lines to be crisp, they should be fluid. If you're painting digitially, you can try and undo multiple strokes if need be, and using the layers option, you can 'overshoot' lines and erase later. You can also rotate the canvas- curves are easier to draw in different planes so find out which angles are most comfortable for you.
Fire Alpaca has the correction tool as highlighted, and you can also rotate the canvas freely using the arrow keys or the navigator in the top right cornerIt's also useful to decrease the opacity of the sketch layer, as if you accidentally draw on the wrong layer you can tell right away. Photoshop in particular has an annoying habit where if you undo a move, it puts you back on the other layer (if you had another layer selected) and it's the most frustrating thing to be half-way done only to find it's all on the wrong layer!
STEP FOUR- DETAILS
Now with the main lines set, you can add the details- such as the webbing on the legs, smaller feathers, etc. You can also add in background elements too. Once you're all happy, delete the sketch layer (or hide it if you prefer) and voila!
And you're done!And with that, there's the pair of goaway birds lineart finished! They look pretty neat, huh?
I hope you found this run down helpful! And as I've mentioned, there are many ways to draw and paint birds, this is just my method.
Got any tips to share? I'd love to hear!
May 15, 2019
Dr Sam's Birds of the World: A Colouring Book for Adults now LIVE!

Hey everyone, good news! After a lot of back and forth with the Amazon KDP powers that be, my colouring book is at last published and ready to go!
You can find the links as follows:
Amazon.com:
https://www.amazon.com/dp/1095029495
Amazon.co.uk:
https://www.amazon.co.uk/dp/1095029495
I hope you enjoy the content and you can look forward to several more volumes if you develop a taste to colour more birds of the world!
May 9, 2019
Delay of Dr Sam's Birds of the World: A Colouring Book for Adults

Hey everyone, I have a bit of disappointing news. Due to technical issues with Amazon, my colouring book will not be available today as planned. I am hoping they will fix their issue within the next couple of days, so once the book is available I will let you know as soon as possible.
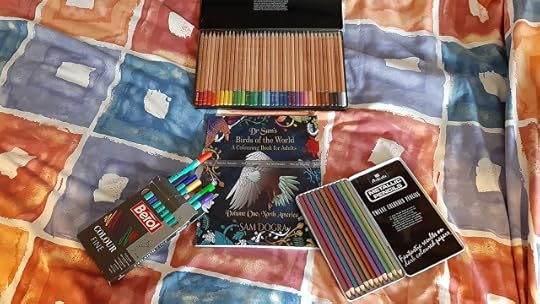
In the meantime, however, I am putting up a PDF of one of the birds that you can download and print to use for a taster! This is the blue jay, click on the picture or the link below to download the high resolution PDF:
 Click here to download the PDF
Hopefully the full book will be available soon!
April 27, 2019
New project announcement: Dr Sam's Birds of the World!
So, over the last few months I have been working on a brand new project! Inspired by the positive reception of my bird artwork, I decided to put them in a form that means even more people can enjoy my beautiful feathered friends!
And so... *drum roll*
I am delighted to announce the first of my new colouring book series, Dr Sam's Birds of the World!
This volume contains 20 of my bird illustrations, now in beautiful black and white with impressively detailed hand-drawn backgrounds, for you to colour however you see fit...
 The majestic bald eagle!
These 20 bird species are all native to North America, and future volumes will cover the other continents...
 A pair of painted buntings!
This volume will be released on 9th May 2019 , available from Amazon worldwide. Watch this space as I will update with links to purchase the book directly once it's published, as well as a full downloadable preview of one of the birds.
 A blue jay
I'm really excited about this, and I hope you'll also be looking forward to some birds to colour very soon!
And so... *drum roll*
I am delighted to announce the first of my new colouring book series, Dr Sam's Birds of the World!

This volume contains 20 of my bird illustrations, now in beautiful black and white with impressively detailed hand-drawn backgrounds, for you to colour however you see fit...
 The majestic bald eagle!
These 20 bird species are all native to North America, and future volumes will cover the other continents...
 A pair of painted buntings!
This volume will be released on 9th May 2019 , available from Amazon worldwide. Watch this space as I will update with links to purchase the book directly once it's published, as well as a full downloadable preview of one of the birds.
 A blue jay
I'm really excited about this, and I hope you'll also be looking forward to some birds to colour very soon!
April 12, 2019
My Art Journey (Part 2)
Welcome to Part Two of my Art Journey! I strongly recommend reading Part one first, so you can see how I got here!
Last time I was enjoying myself in fanart and dabbling in digital media, but then my life was about to change...
Phase 4: Trying my own- Zodiac Hunters!
So, as I alluded in my last post, there was a game I played that inspired me so thoroughly I decided to make my own original character. That game was Eternal Darkness for the Gamecube, and I was so impressed with its immaculate writing, worldwide spanning plot and scope that it was enough to make me go 'right, I can have a go at an original idea too!'.
I decided to draw my original character first, before I had any idea about name, or who they were, or anything. So I did.
 Tada!
Tada!
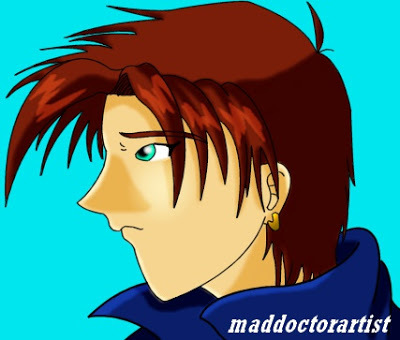
Once I knew what he looked like, I went in for the other details. I named him Nick, and he was a sorceror (I was quite into the anime Sorcerorous Stabber Orphen at the time- I told you that tidbit would come into play again!).
I drew him a few more times, then gave him a companion named Seth, a treasure hunter, and then another called Midnight, who was a thief.
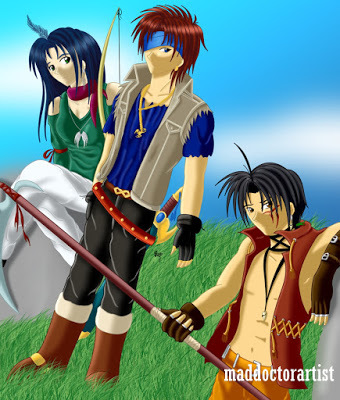 My first drawing of the three of them together!
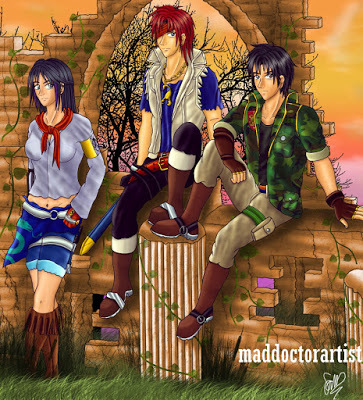 ...and a much improved version later as I refined my designs!
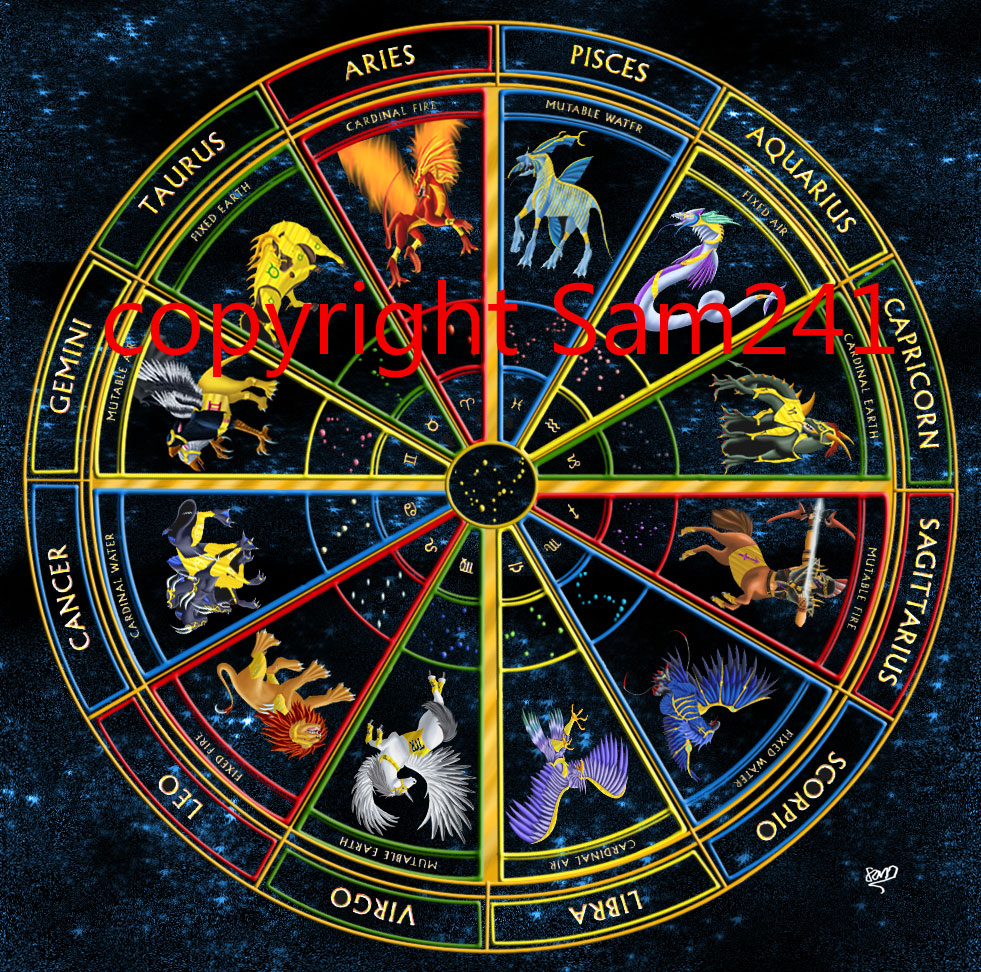
A few more refinements and changes and these became the main characters of my first original story idea, the Zodiac Hunters. I also designed my majestic 'Zodiac Beasts' who were an integral part of that story.
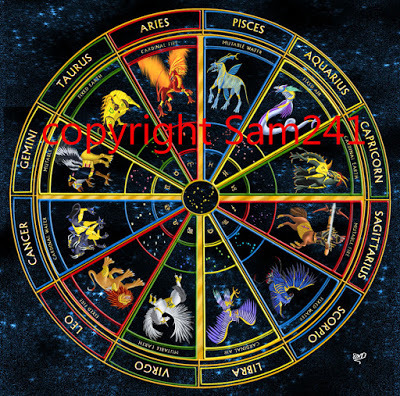 My Zodiac Beasts! Unfortunately this image has been repeatedly stolen, hence the rather obtuse watermark.
In between this, though, I continued with various fanart, drifting away from anime and sticking more to games such as Final Fantasy VIII, Skies of Arcadia, Prince of Persia and Tales of the Abyss. This continued well after I started university and medical school, and it was there that the game Fire Emblem's beautiful art style caught my eye. I loved the semi-realistic faces and intricate fantasy costumes (that weren't overblown to surrealism like in Final Fantasy), and I delved into that. Being in medical school also helped my anatomy and proportions, as I was learning it at the same time.
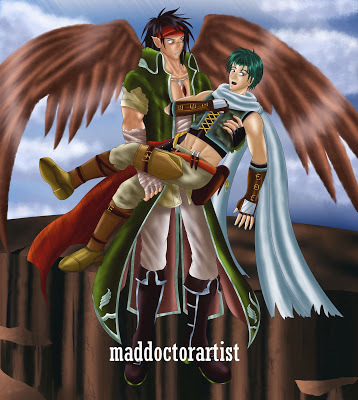 Some Fire Emblem: Radiant Dawn fanart, featuring my favourite character Sothe (with the white scarf) and Tibarn (the guy with the eagle wings!)
And it was from here that I jumped right into my next phase...
Phase 5: A New Era of Azaria
Unfortunately, try as I might, Zodiac Hunters never got much off the ground. It was far too ambitious, complex and beyond my current skill-level as a writer, as I discovered once I joined a writer's group called Authonomy.
I became good friends with Lisa Wiedmeier, author of the Timeless series, and for fun drew a lot of her characters as it was a chance to get away from the manga-style and try something more realistic. This proved extremely challenging however (and it still is!). My early attempts were quite horrifying, smack in the middle of the uncanny valley! Luckily Lisa was very patient and not too brutal, and in fact helped me decide to give up on Zodiac and try a new story.
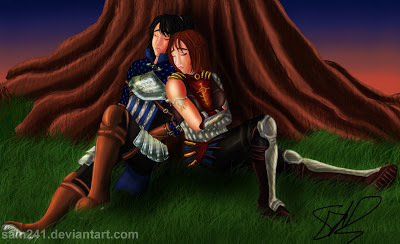
 Callon, one of Lisa's characters from her Timeless series, drawn with permission of the author
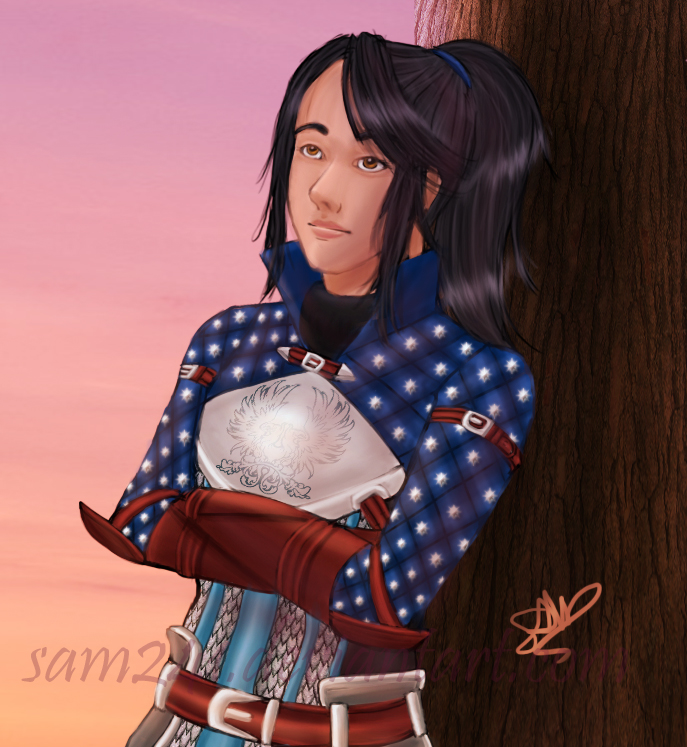
I thence came up with the concept for The Binding, and accordingly designed my characters too. This time I knew my characters' names and roles beforehand, and soon enough I had a visual idea of what they would look like, too:
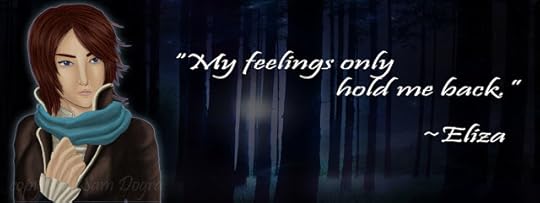 Eliza Bryant, heroine of my novel 'The Binding'
Initially I stuck to my usual anime style, until I discovered a wonderful deviantart tutorial called 'Manga to Realistic'...
Phase 6: From Manga to Realistic
This tutorial was life-changing, as it finally gave me a basis to transition to a more realistic art style. Sadly the author appears to have deleted it, so I won't repost the original as I don't have their permission, but you can view it here. This was a series of tutorials that went over the differences between manga-style art and realism, and set out how to draw facial features separately.
I had been looking for a tutorial like this for ages, and I was delighted to get practising ASAP. My Azaria characters were the beneficiaries, and in months I made good progress. I even dabbled in some fanart as well, marvelling at the difference in quality. I had always been stuck at this transition for so very long, and it was amazing to see that I finally had the tools to knock down the wall I'd been starting at for years!
 I re-did a drawing of Squall, the main protagonist of Final Fantasy VIII. The difference is quite staggering!
 And a redraw of my Azaria characters, Eliza and Ryan
At last I was heading in the direction I wanted to. My art was becoming more realistic, my own characters were coming out closer to how I saw them in my head...
And then...
Phase 7: Year of the Dragon Age
On the recommendation of a close friend I picked up the game Dragon Age: Origins, as she felt the themes and setting were up my alley. Admittedly I was reluctant, but when I saw the game for £2.50 for my Playstation 3 I thought 'why not'. It turned out to be a great investment, as I fell in love with the franchise and its characters!
I was very late to this particular party (the game came out in 2009 and I played it for the first time in 2016) but I didn't mind. The characters and setting were intriguing, the setup unusual (this was the first Western RPG I'd ever played), and of course it inspired my art. It had been a long time since I'd drawn fanart, having focused on my Azaria characters for the most part, but this brought me back.
And so I had to draw my Grey Warden, which is a self-made player character with a specific background:
 My Grey Warden, Elissa Hannah Cousland
It wasn't long until I picked up the other two sequels and this became my new obsession. Given that Dragon Age was a much more realistic-in-design game (compared to the JRPGs before it), it helped me further progress.
 My Grey Warden and Leliana, a companion character
That same friend also started getting massively into Overwatch, and while I personally am not interested in multiplayer only games, I did and still do admire the character designs. Once again this helped push me towards a more realistic style, as did the discovery of some Youtube critique channels and looking at more tutorials that I'd not thought to search for.
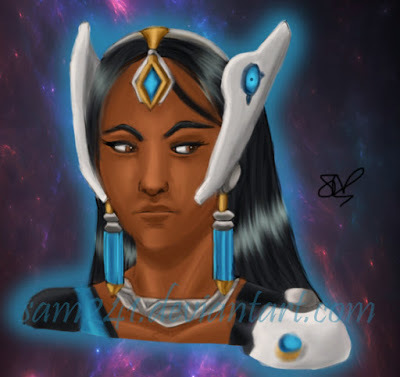 This is my reality...Symmetra from Overwatch!
Alas, despite the heaps of progress I'd made, I hit another wall. That final step to complete realism just seemed to elude me, no matter how much I practised or referenced or looked at various tutorials. This became extremely frustrating, especially when I'd improved so much in a short space of time. My love affair with Dragon Age also seemed to dry up overnight, as I lost the passion for it I once had, and my inspiration started to wane.
Seeing as I was getting no-where, I thought to myself, perhaps a break was due. After finishing my RCGP exam (final GP training exam) in 2016, I now had the time to draw more than ever, but I was perhaps overdoing it.
So I looked back to when I started, to the nature art that had captivated me as a child. And I realised, for some time I had been harbouring a desire to draw birds. Every time I saw majestic photographs, or saw them on holiday, it had stirred a desire to draw, one that I hadn't even realised.
Thus this was the ideal time to take a break from my fanart and characters, and try something new...
Phase 9: Era of the Bird
This was one of the best decisions I made. It took a whole new part of my brain to draw birds rather than people, and suddenly the inspiration was back. It has got to the point where if I see a species I have not seen before and it captivates me with its beauty, I will drop whatever I am doing to draw it. I have never had this feeling with art before, and I absolutely adore this new drive to create!

With a near-infinite species list to choose from, I could draw any bird of any colour, size, shape and more, and learn to improve my skills at drawing from reference. It has also helped me draw much faster and more regularly, which are only beneficial. It has helped me with colour and values, with lighting and shading, how to create softer feather textures, and much more.
And so this is where I am today! I am still practising at people in the background, slowly but surely, but for the moment I thoroughly enjoy my birds and they will continue to be my mainstay for the time being.
I also have an exclusive bird-art only instagram account, so if you'd like to follow please find me @maddoctorartist
Whew, what a journey! From my humble school art, to anime, then games and now back to the natural beauty of birds! Who knows what the next 22 years will hold for my art journey? I'm excited to find out!
What was your art journey like, if you too are an artist? I'd love to know!
Last time I was enjoying myself in fanart and dabbling in digital media, but then my life was about to change...
Phase 4: Trying my own- Zodiac Hunters!
So, as I alluded in my last post, there was a game I played that inspired me so thoroughly I decided to make my own original character. That game was Eternal Darkness for the Gamecube, and I was so impressed with its immaculate writing, worldwide spanning plot and scope that it was enough to make me go 'right, I can have a go at an original idea too!'.
I decided to draw my original character first, before I had any idea about name, or who they were, or anything. So I did.
 Tada!
Tada!Once I knew what he looked like, I went in for the other details. I named him Nick, and he was a sorceror (I was quite into the anime Sorcerorous Stabber Orphen at the time- I told you that tidbit would come into play again!).
I drew him a few more times, then gave him a companion named Seth, a treasure hunter, and then another called Midnight, who was a thief.
 My first drawing of the three of them together!
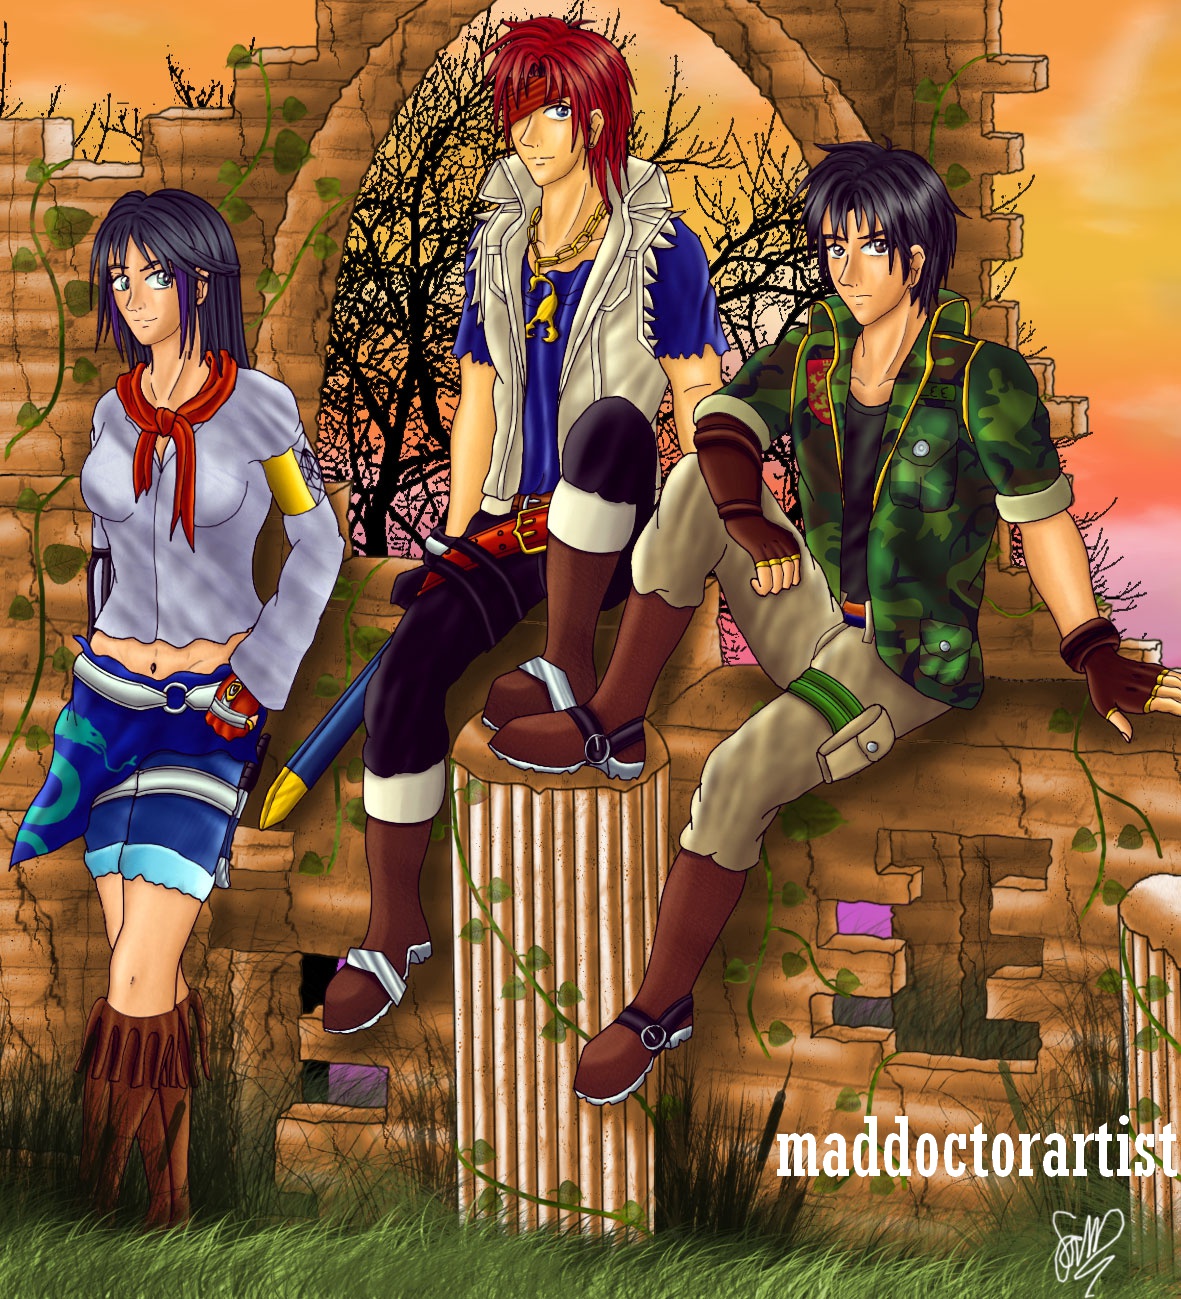 ...and a much improved version later as I refined my designs!
A few more refinements and changes and these became the main characters of my first original story idea, the Zodiac Hunters. I also designed my majestic 'Zodiac Beasts' who were an integral part of that story.
 My Zodiac Beasts! Unfortunately this image has been repeatedly stolen, hence the rather obtuse watermark.
In between this, though, I continued with various fanart, drifting away from anime and sticking more to games such as Final Fantasy VIII, Skies of Arcadia, Prince of Persia and Tales of the Abyss. This continued well after I started university and medical school, and it was there that the game Fire Emblem's beautiful art style caught my eye. I loved the semi-realistic faces and intricate fantasy costumes (that weren't overblown to surrealism like in Final Fantasy), and I delved into that. Being in medical school also helped my anatomy and proportions, as I was learning it at the same time.
 Some Fire Emblem: Radiant Dawn fanart, featuring my favourite character Sothe (with the white scarf) and Tibarn (the guy with the eagle wings!)
And it was from here that I jumped right into my next phase...
Phase 5: A New Era of Azaria
Unfortunately, try as I might, Zodiac Hunters never got much off the ground. It was far too ambitious, complex and beyond my current skill-level as a writer, as I discovered once I joined a writer's group called Authonomy.
I became good friends with Lisa Wiedmeier, author of the Timeless series, and for fun drew a lot of her characters as it was a chance to get away from the manga-style and try something more realistic. This proved extremely challenging however (and it still is!). My early attempts were quite horrifying, smack in the middle of the uncanny valley! Luckily Lisa was very patient and not too brutal, and in fact helped me decide to give up on Zodiac and try a new story.
 Callon, one of Lisa's characters from her Timeless series, drawn with permission of the author
I thence came up with the concept for The Binding, and accordingly designed my characters too. This time I knew my characters' names and roles beforehand, and soon enough I had a visual idea of what they would look like, too:
 Eliza Bryant, heroine of my novel 'The Binding'
Initially I stuck to my usual anime style, until I discovered a wonderful deviantart tutorial called 'Manga to Realistic'...
Phase 6: From Manga to Realistic
This tutorial was life-changing, as it finally gave me a basis to transition to a more realistic art style. Sadly the author appears to have deleted it, so I won't repost the original as I don't have their permission, but you can view it here. This was a series of tutorials that went over the differences between manga-style art and realism, and set out how to draw facial features separately.
I had been looking for a tutorial like this for ages, and I was delighted to get practising ASAP. My Azaria characters were the beneficiaries, and in months I made good progress. I even dabbled in some fanart as well, marvelling at the difference in quality. I had always been stuck at this transition for so very long, and it was amazing to see that I finally had the tools to knock down the wall I'd been starting at for years!
 I re-did a drawing of Squall, the main protagonist of Final Fantasy VIII. The difference is quite staggering!
 And a redraw of my Azaria characters, Eliza and Ryan
At last I was heading in the direction I wanted to. My art was becoming more realistic, my own characters were coming out closer to how I saw them in my head...
And then...
Phase 7: Year of the Dragon Age
On the recommendation of a close friend I picked up the game Dragon Age: Origins, as she felt the themes and setting were up my alley. Admittedly I was reluctant, but when I saw the game for £2.50 for my Playstation 3 I thought 'why not'. It turned out to be a great investment, as I fell in love with the franchise and its characters!
I was very late to this particular party (the game came out in 2009 and I played it for the first time in 2016) but I didn't mind. The characters and setting were intriguing, the setup unusual (this was the first Western RPG I'd ever played), and of course it inspired my art. It had been a long time since I'd drawn fanart, having focused on my Azaria characters for the most part, but this brought me back.
And so I had to draw my Grey Warden, which is a self-made player character with a specific background:
 My Grey Warden, Elissa Hannah Cousland
It wasn't long until I picked up the other two sequels and this became my new obsession. Given that Dragon Age was a much more realistic-in-design game (compared to the JRPGs before it), it helped me further progress.
 My Grey Warden and Leliana, a companion character
That same friend also started getting massively into Overwatch, and while I personally am not interested in multiplayer only games, I did and still do admire the character designs. Once again this helped push me towards a more realistic style, as did the discovery of some Youtube critique channels and looking at more tutorials that I'd not thought to search for.
 This is my reality...Symmetra from Overwatch!
Alas, despite the heaps of progress I'd made, I hit another wall. That final step to complete realism just seemed to elude me, no matter how much I practised or referenced or looked at various tutorials. This became extremely frustrating, especially when I'd improved so much in a short space of time. My love affair with Dragon Age also seemed to dry up overnight, as I lost the passion for it I once had, and my inspiration started to wane.
Seeing as I was getting no-where, I thought to myself, perhaps a break was due. After finishing my RCGP exam (final GP training exam) in 2016, I now had the time to draw more than ever, but I was perhaps overdoing it.
So I looked back to when I started, to the nature art that had captivated me as a child. And I realised, for some time I had been harbouring a desire to draw birds. Every time I saw majestic photographs, or saw them on holiday, it had stirred a desire to draw, one that I hadn't even realised.
Thus this was the ideal time to take a break from my fanart and characters, and try something new...
Phase 9: Era of the Bird
This was one of the best decisions I made. It took a whole new part of my brain to draw birds rather than people, and suddenly the inspiration was back. It has got to the point where if I see a species I have not seen before and it captivates me with its beauty, I will drop whatever I am doing to draw it. I have never had this feeling with art before, and I absolutely adore this new drive to create!

With a near-infinite species list to choose from, I could draw any bird of any colour, size, shape and more, and learn to improve my skills at drawing from reference. It has also helped me draw much faster and more regularly, which are only beneficial. It has helped me with colour and values, with lighting and shading, how to create softer feather textures, and much more.
And so this is where I am today! I am still practising at people in the background, slowly but surely, but for the moment I thoroughly enjoy my birds and they will continue to be my mainstay for the time being.
I also have an exclusive bird-art only instagram account, so if you'd like to follow please find me @maddoctorartist
Whew, what a journey! From my humble school art, to anime, then games and now back to the natural beauty of birds! Who knows what the next 22 years will hold for my art journey? I'm excited to find out!
What was your art journey like, if you too are an artist? I'd love to know!
April 6, 2019
My Art Journey (Part 1)
I've been drawing for a fair amount of time, around 22+ years, and it's something I continue to enjoy immensely to this day. I actually gave up Art as a formal subject at age 14 (mostly because I had to study sciences for my future career in medicine, but also because if I had to draw another goddamn still-life I was going to break my pencils in half!), but that didn't stop me pursuing it in my own time.
My drawings have come a long way since I first started, and it's interesting to see the various phases I've had. So, given that I'm in a very different place where I began, I've decided to look back on my art journey and see how I've arrived here.
Phase 1: Where it Began
The very first drawings I ever did were...Sonic the Hedgehog! I got a SEGA Mega Drive age 5 with Sonic 1 bundled in, and while I used to burst into tears when I couldn't get past Marble Zone (the second level), something about the plucky blue hedgehog drew me to him. Literally haha!
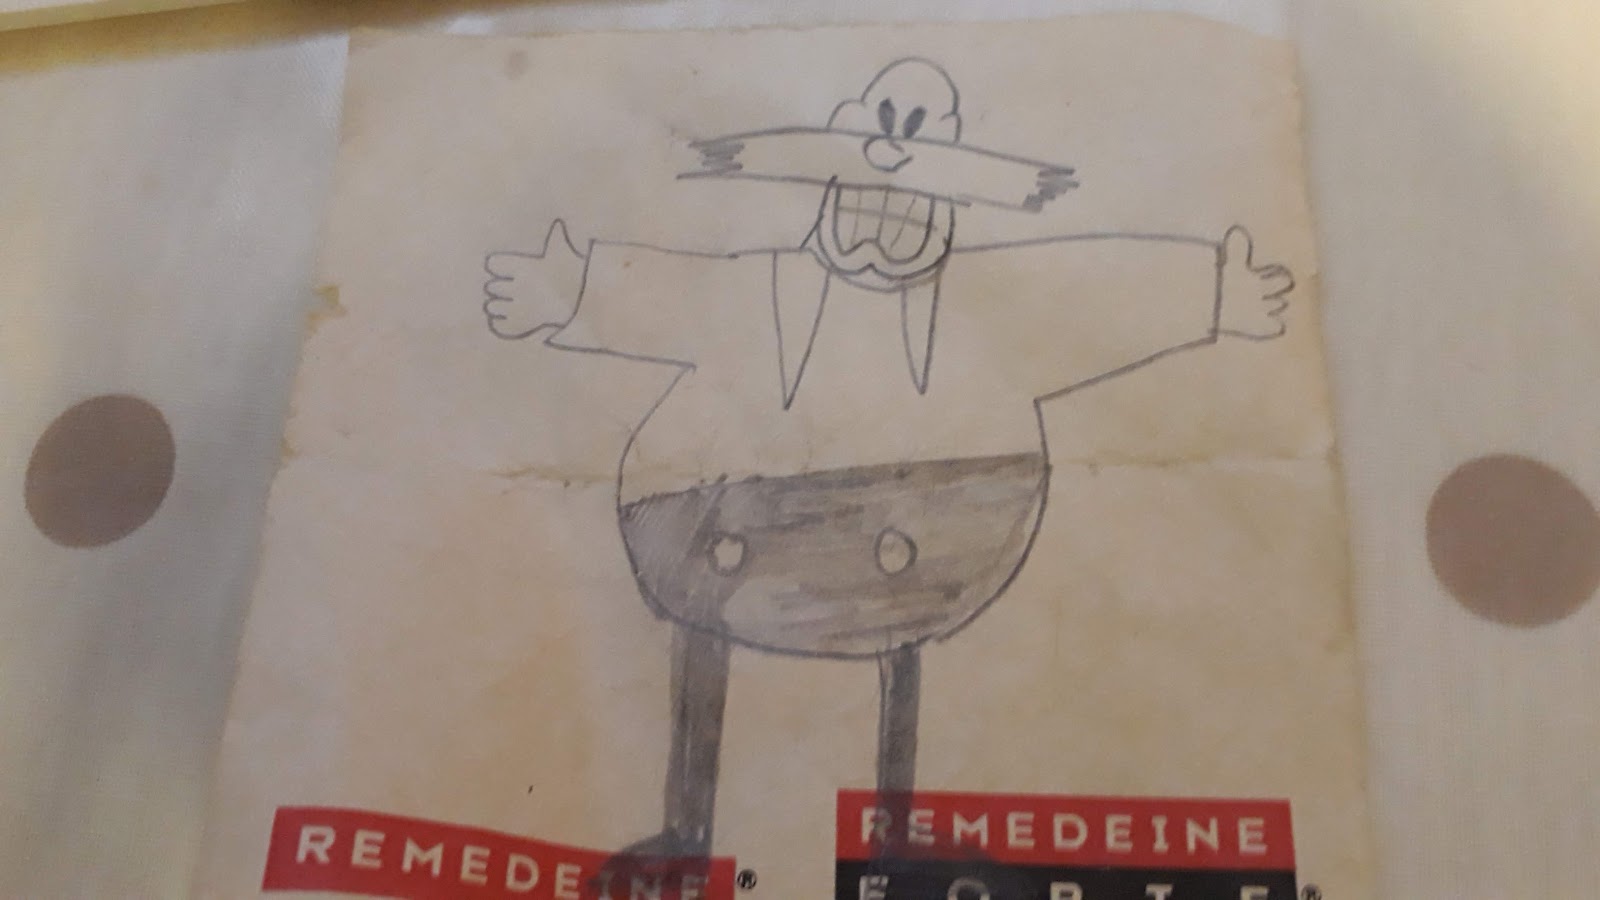
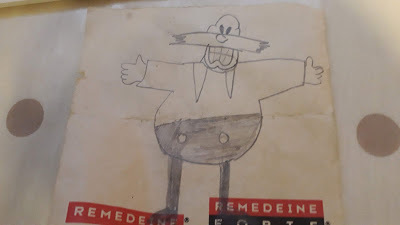 A very early drawing of Dr Robotnik (I was probably between 6-8 years old)
I even made a Sonic board game, drawing the individual panels, which I'm still rather impressed with.
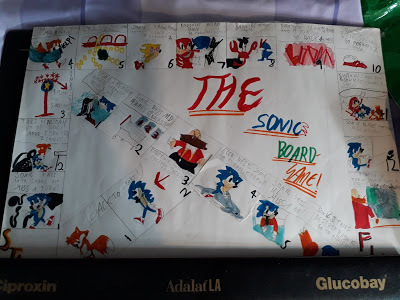 Behold the days when doctors could accept useful office stationary from the pharmaceutical companies!
As I grew older and art became a more formal subject at school, I started to enjoy it even more. I was especially interested in nature art, such as flowers and animals. It also helped that I had an extremely talented art teacher who was very encouraging of my ability. I can still remember when, not long after I had started my new school year, she caught me in the corridor and casually told me I was in the school's art club- which was quite prestigious as only kids with promising potential were allowed to join it! It made me feel very proud, and I enjoyed attending every Monday morning before lessons.
Sadly she passed away from tetanus about two years after I was in the art club, which was devastating. Her replacement wasn't nearly as enthusiastic, but I continued on, remaining a part of the school art club and making interesting fun projects such as ink paintings:
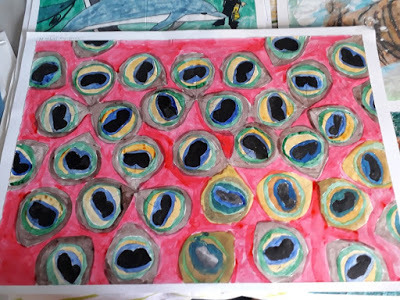 An ink pattern based on a peacock feather
However, nature wasn't always a possible drawing subject, and I got very, very tired of constantly being told to draw still-lifes (which was eventually what made me drop Art quicker than a boiling metal pan handle). Plus, since I wasn't actually being taught useful things like how to identify a light source, measuring from a reference, shading etc (which I all had to teach myself years later, and am still learning!), I didn't find these types of drawing exercise useful.
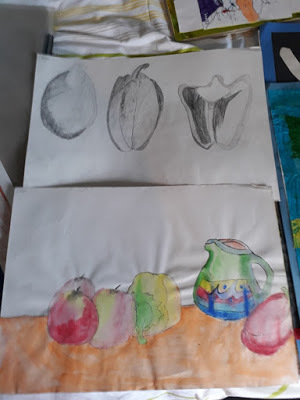 The joys of...fruit and veg...yaaaay...
On the days we were allowed more artistic freedom, however, I dove straight for animals. These were much more interesting and dynamic than plain old fruit and kettles, and I loved sketching them. Elephants and tigers were my most favoured, as well as dolphins and foxes.
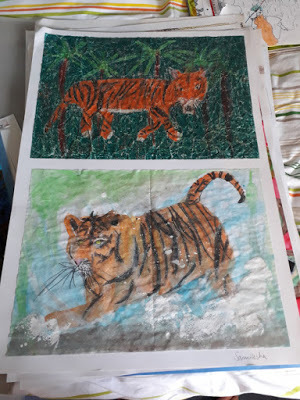 Hear me roar!
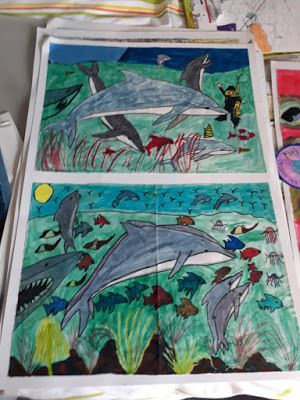 Dolphins were my favourite animal at the time and this showed!
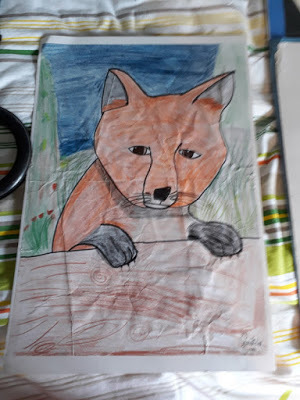 It's supposed to be a fox, I promise you!
And so, as I left to start secondary school age 14, I left my humble beginnings for the next phase of my art journey...
Phase 2: 'It's Anime not Pokemon!'
During the ages of 12-14 I drifted away from drawing in my leisure time, sticking to only drawing in school for projects rather than my own amusement. It was only when I moved to secondary school that I got back into it, as at that time I also started to get into Japanese animation, or 'anime' as it's more commonly known.
The anime Tekkaman Blade (or as I knew it, Teknoman) aired on Fox Kids in the UK, and I got really into it. Thus my thirst for drawing came back, and I started drawing the characters from the show. Yes, like so many artists out there, anime was also one of my first forays!
(insert image of my Teknoman art- sadly I don't seem to have kept any!/
Once Teknoman ended I fell further into the anime whirlpool, starting to watch things such as Evangelion, Love Hina and many more. I also got into Japanese RPG games, name the Final Fantasy series, with Final Fantasy IX being my first (and still favourite) of the franchise.
I became known for drawing at school, but of course as Pokemon was far more popular I got colloquially known as the 'Pokemon drawer'. Prompting the always-to-fall-on-deaf-ears protest that makes the name of this phase!
 Presenting Asuka from the anime Neon Genesis Evangelion...along with a sticker one of my friends added as I often put these pictures on my locker!
 Orphen from the anime Sorcerous Stabber Orphen...I was rather obsessed with his character design, which you will see comes into play later down the line...
Thus drawing became a firmly establishing pastime, and so it was only inevitable that...
Phase 3: Deviantart and the Fanart Frenzy!
So, deviantart (at the time at least, in the early 2000s) was the biggest website to view and post art, mostly fanart of games, anime, books and everything else in between. I badly wanted to join...alas let me tell you a tale...
My history with deviantart is a little weird. In 2003, for some reason anyone who used AOL as their primary ISP (internet service provider) was blocked to make accounts on the site. I think it had something to do with troll accounts or something, and the code of the website just didn't allow for specific blocking of the troublemakers.
Of course, guess who had AOL. This was massively disappointing, as I adored the art there and wanted a place to save my favourites and post my own work.
Lo, as luck would have it, an online friend who had BT internet kindly created an account on my behalf, and it's been mine ever since. This was also when I managed to find a graphics tablet from John Lewis, and thus I ventured into digital art for the first time (see my post on Essential Tools of my Art to learn more).
Most of my early deviantart work was fanart, again from various anime as I was growing quite a taste for it, along with my favourite video games (funny how the two often coincide, isn't it?). My software of choice was Paint Shop Pro initially, but eventually I graduated to Adobe Photoshop, which has been my mainstay until very recently (I still use it to colour, but I now use FireAlpaca for lines first).
 Arima and Yukino from the anime KareKano, my first ever digital piece!
 Looks familiar? The digital version of the pencil drawing from earlier!
However, one day, everything changed, and that was when I played a game that opened the door to me creating my own characters, and taking the next step on my journey...
To be continued in Part 2!
My drawings have come a long way since I first started, and it's interesting to see the various phases I've had. So, given that I'm in a very different place where I began, I've decided to look back on my art journey and see how I've arrived here.
Phase 1: Where it Began
The very first drawings I ever did were...Sonic the Hedgehog! I got a SEGA Mega Drive age 5 with Sonic 1 bundled in, and while I used to burst into tears when I couldn't get past Marble Zone (the second level), something about the plucky blue hedgehog drew me to him. Literally haha!
 A very early drawing of Dr Robotnik (I was probably between 6-8 years old)
I even made a Sonic board game, drawing the individual panels, which I'm still rather impressed with.
 Behold the days when doctors could accept useful office stationary from the pharmaceutical companies!
As I grew older and art became a more formal subject at school, I started to enjoy it even more. I was especially interested in nature art, such as flowers and animals. It also helped that I had an extremely talented art teacher who was very encouraging of my ability. I can still remember when, not long after I had started my new school year, she caught me in the corridor and casually told me I was in the school's art club- which was quite prestigious as only kids with promising potential were allowed to join it! It made me feel very proud, and I enjoyed attending every Monday morning before lessons.
Sadly she passed away from tetanus about two years after I was in the art club, which was devastating. Her replacement wasn't nearly as enthusiastic, but I continued on, remaining a part of the school art club and making interesting fun projects such as ink paintings:
 An ink pattern based on a peacock feather
However, nature wasn't always a possible drawing subject, and I got very, very tired of constantly being told to draw still-lifes (which was eventually what made me drop Art quicker than a boiling metal pan handle). Plus, since I wasn't actually being taught useful things like how to identify a light source, measuring from a reference, shading etc (which I all had to teach myself years later, and am still learning!), I didn't find these types of drawing exercise useful.
 The joys of...fruit and veg...yaaaay...
On the days we were allowed more artistic freedom, however, I dove straight for animals. These were much more interesting and dynamic than plain old fruit and kettles, and I loved sketching them. Elephants and tigers were my most favoured, as well as dolphins and foxes.
 Hear me roar!
 Dolphins were my favourite animal at the time and this showed!
 It's supposed to be a fox, I promise you!
And so, as I left to start secondary school age 14, I left my humble beginnings for the next phase of my art journey...
Phase 2: 'It's Anime not Pokemon!'
During the ages of 12-14 I drifted away from drawing in my leisure time, sticking to only drawing in school for projects rather than my own amusement. It was only when I moved to secondary school that I got back into it, as at that time I also started to get into Japanese animation, or 'anime' as it's more commonly known.
The anime Tekkaman Blade (or as I knew it, Teknoman) aired on Fox Kids in the UK, and I got really into it. Thus my thirst for drawing came back, and I started drawing the characters from the show. Yes, like so many artists out there, anime was also one of my first forays!
(insert image of my Teknoman art- sadly I don't seem to have kept any!/
Once Teknoman ended I fell further into the anime whirlpool, starting to watch things such as Evangelion, Love Hina and many more. I also got into Japanese RPG games, name the Final Fantasy series, with Final Fantasy IX being my first (and still favourite) of the franchise.
I became known for drawing at school, but of course as Pokemon was far more popular I got colloquially known as the 'Pokemon drawer'. Prompting the always-to-fall-on-deaf-ears protest that makes the name of this phase!
 Presenting Asuka from the anime Neon Genesis Evangelion...along with a sticker one of my friends added as I often put these pictures on my locker!
 Orphen from the anime Sorcerous Stabber Orphen...I was rather obsessed with his character design, which you will see comes into play later down the line...
Thus drawing became a firmly establishing pastime, and so it was only inevitable that...
Phase 3: Deviantart and the Fanart Frenzy!
So, deviantart (at the time at least, in the early 2000s) was the biggest website to view and post art, mostly fanart of games, anime, books and everything else in between. I badly wanted to join...alas let me tell you a tale...
My history with deviantart is a little weird. In 2003, for some reason anyone who used AOL as their primary ISP (internet service provider) was blocked to make accounts on the site. I think it had something to do with troll accounts or something, and the code of the website just didn't allow for specific blocking of the troublemakers.
Of course, guess who had AOL. This was massively disappointing, as I adored the art there and wanted a place to save my favourites and post my own work.
Lo, as luck would have it, an online friend who had BT internet kindly created an account on my behalf, and it's been mine ever since. This was also when I managed to find a graphics tablet from John Lewis, and thus I ventured into digital art for the first time (see my post on Essential Tools of my Art to learn more).
Most of my early deviantart work was fanart, again from various anime as I was growing quite a taste for it, along with my favourite video games (funny how the two often coincide, isn't it?). My software of choice was Paint Shop Pro initially, but eventually I graduated to Adobe Photoshop, which has been my mainstay until very recently (I still use it to colour, but I now use FireAlpaca for lines first).
 Arima and Yukino from the anime KareKano, my first ever digital piece!
 Looks familiar? The digital version of the pencil drawing from earlier!
However, one day, everything changed, and that was when I played a game that opened the door to me creating my own characters, and taking the next step on my journey...
To be continued in Part 2!
March 16, 2019
An Essential Tool of my Art

I've been drawing for many years, and while I ventured out with traditional media, I decided to explore other avenues as I grew more confident. So I drifted away from paper and pencil toward digital media, namely Photoshop (my interest in anime and gaming might have helped steer my nose this way!).
Arguably I'd now say the most important tool I use for this is my Wacom graphics tablet. I started using these in 2006 (back before there were multiple kinds of tablet) when I saw one at my local John Lewis store. That was a small Graphire 2 tablet (which I still have, and it still works, alas the nib has seen better days), and I was super excited to try it out.
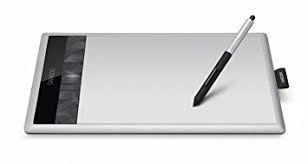
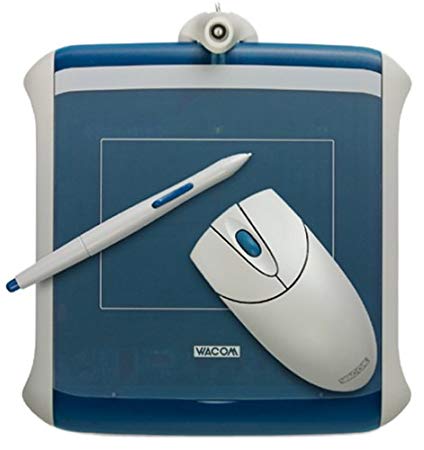 Mine is rather more worn out than this photo, but this is the same model!
Of course, whenever you start using a new toy, it takes a ways to get used to, and when I started I still had to trace over scanned paper sketches. My colouring was pretty basic, too, but that was more my inexperience.
 One of my earlier fanarts, a tracing of a sketch, this is Luke and Tear from the PS2 game Tales of the Abyss
My mum also found me a Trust tablet of similar size one day in Aldi, which I did use on occasional, but while it had a much sturdier nib, the pressure sensitivity wasn't as good, so that soon went into storage.
 Starting to form a collection now...
After a few years using my Graphire, however, I started to feel constricted by the small dimensions, as it was difficult to make longer lines or trace bigger picture. So my next investment was a Medium Bamboo Tablet, which I got from Amazon.
 It's so shiiiiny!
I remember finding it hard to decide which tablet to get, as my Graphire 2 came with a wireless mouse (which after the Graphire line ended was no longer the case with any graphic tablet), so in the end I opted for a bigger tablet and to use a mouse separately. My Bamboo was much sleeker and larger, and it was on here I gained the confidence to draw directly into Photoshop. It also came with Photoshop Elements, which I still use to colour to this day. This was my first attempt without tracing a pre-done sketch on paper:
 More fanart, this time Sothe and Micaiah from the Wii game Fire Emblem: Radiant Dawn
So began a transition phase where I graduated off pencil and paper and started to do all my art digitally (and did my part to save many trees in the process, of course). It does take some getting used to, as you're drawing on one surface and looking at a separate screen, but it is definitely feasible, so if you're new to using drawing tablets don't give up!
Alas, my wonderful Bamboo abruptly stopped working one day when I finished this picture:

Shock horror another fanart, this time Leliana from the PS3 game series Dragon Age
...which was somewhat ironic as a few days before I had been casually browsing for draw-screen tablets. I'd seen many professional artists use them and it was tempting to be able to 'draw exactly' rather than make corrections from looking at another screen. Thus, excited I had an actual excuse to splurge, I decided to dive in and I bought the Huion GT 220.
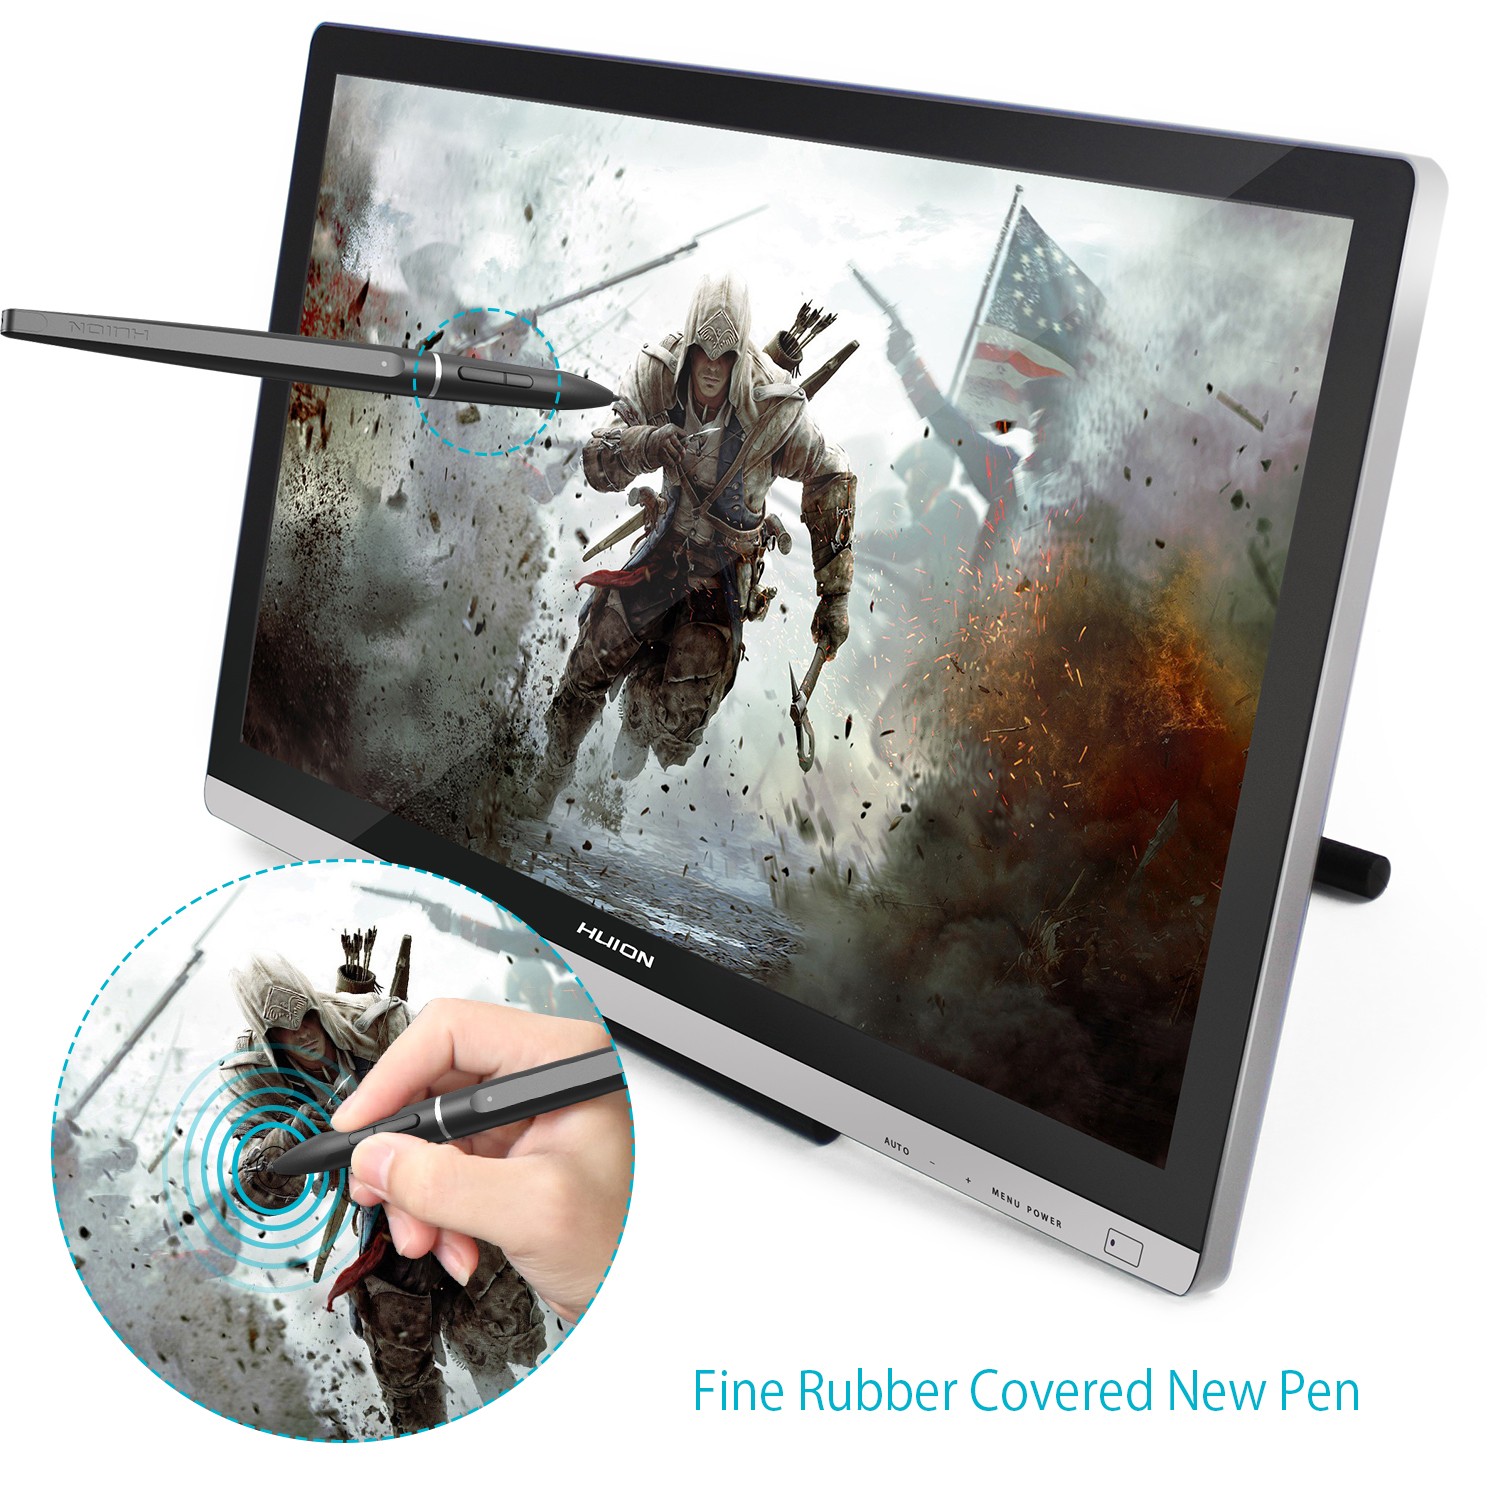 Well it looked attractive...
Alas, tragedy struck, as to my utter and complete dismay, this didn't work. Despite uninstalling my old tablet drivers, downloading the most up to date ones from Huion, and even formatting my entire PC and reinstalling everything, the pressure sensitivity just didn't work, which is so very crucial to digital painting. I spent hours and hours trying everything I knew, but eventually I had to give up.
And so with my faith shattered, I returned the tablet, and got a full refund. Huion were very good customer-relations wise, and accepted that I preferred a refund rather than a replacement. Now I don't know if it was just the tablet I received that had a fault, but this experience has left me reluctant to try other screen-tablets (they are quite a bit pricier than the pad tablets after all), but I might give it another go someday.
So, after almost a month without any means to do any digital art, I jumped back to Amazon and bought my current tool of the trade, my Wacom Intuos.
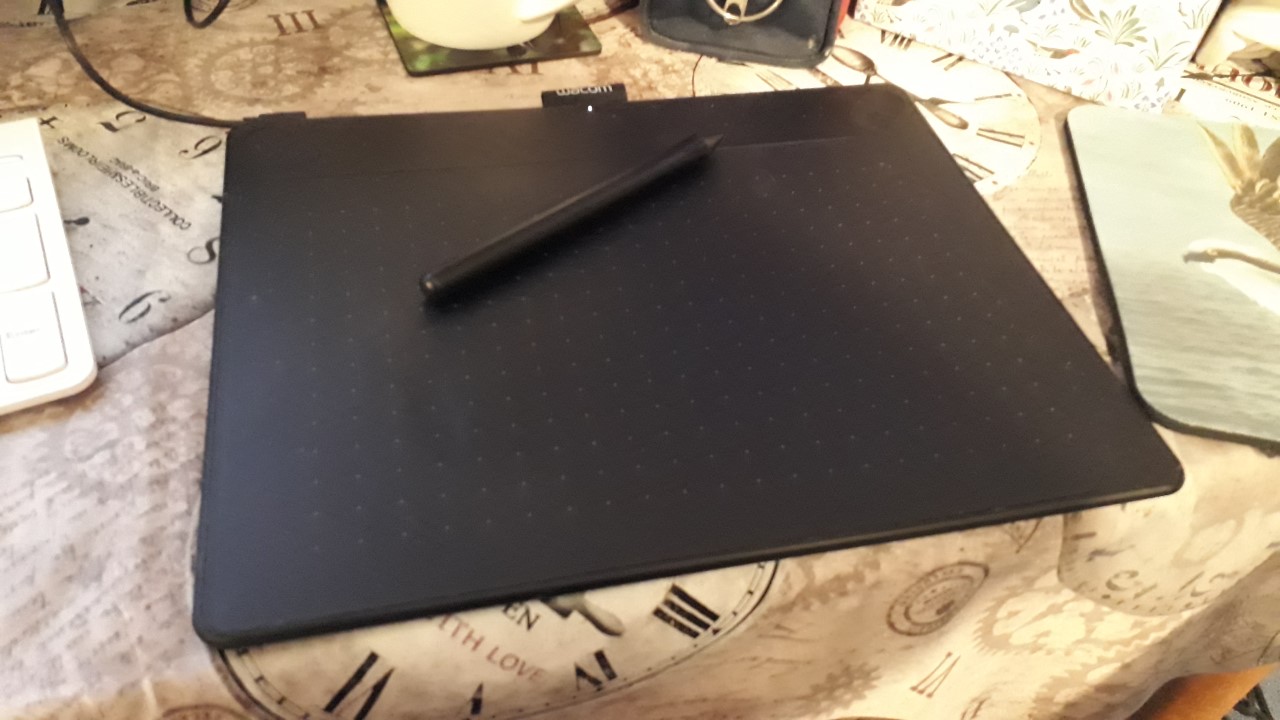 My beloved Intuos!
This has proved a good choice, though I only wish it came with more nibs and that the pen wasn't so light-weight as it can feel a bit brittle to draw with. Regardless, it's given me results I'm very happy with, and so shall it be used until it meets the fate of my Bamboo, or if I get the courage to try screen tablets again.
So, to any artists out there, what are your tools of the trade? Do you like jumping between different media or sticking to just the one? I'd love to know!
November 18, 2018
Six Most Useful Art Tutorials on Youtube
Hey everyone! So...almost a year's gone by and not a peep from yours truly. Some of that has been due to adjusting to my new job as a fully qualified GP, and some of it has been just due to having a rethink about what I want this blog to be about. While I am still very much writing, I won't have any major projects finishing anytime soon, so rather than let this place gather dust I'm going to focus more on my other creative outlet, art. It's in my name after all!
Thus, to kick things off, I'm going to share with you the six most useful Youtube art channels I follow.
So I'm a self taught hobby artist, and have been drawing since my early teens, if not earlier. However, once I gave up Art as a subject at age 14 (had to study those sciences you know for my future career!), I had no real source of guidance to progress.
Fortunately, this was just when the internet was becoming a Big Thing (TM), and I had a plethora of deviantart tutorials to peruse and improve. Now with YouTube tutorials about anything from changing a tire to baking a cake, there's never been a better resource for drawing from a variety of established artists. Whether you draw traditionally with paper and pencil or sketch digitally with the latest graphics tablet, there's a wealth of knowledge out there to help you along. While webpage tutorials are still very much a thing, the extra dimension of seeing drawings done in real-time makes YouTube a brilliant means of learning.
So in no particular order, here are six of the most useful art tutorials I've used/ continue to use on YouTube!
1. Alponso Dunn
Alphonso is an ink artist and instructor, and he has many tutorials showing the variety and versatility of the humble ink pen in drawing. He also has useful anatomy and gesture tutorials, and some mixed media pieces using watercolours as well. Perfect for traditional artists wanting to learn techniques, and for anyone wanting to practice the basics.
I particularly like his 'Master the Mannequin' tutorial as it really helps get certain gestures down without having to use an exact reference every time. I find he explains things quite clearly too and is generally easy to follow. Strongly recommended you check him out, even if pen and ink isn't your thing.
He also has some books available on amazon for pen and ink drawing.
2. Mark Crilley
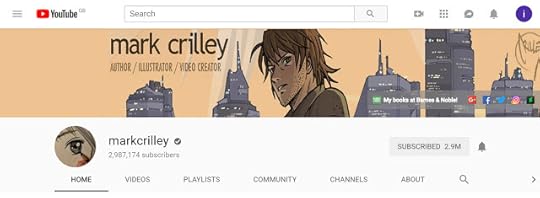
I've been following Mark for at least five years and he is an extremely talented artist and illustrator. He works in several styles, from realism to anime/ manga, and his tutorials cover pretty much everything from drawing hair and body parts to perspective and animals. He also does art challenges which just shows how honed he is at his craft!
I also enjoy his topic videos, where he'll put out a question to the community about an art-related topic, such as 'How important is originality?' or 'Do you need a defined style?'. He also comes across with a very warm personality, like a favourite uncle, and he can go completely off tangent sometimes in his ramblings, which is rather endearing.
I first came across him when looking for help transitioning from an anime style to more realistic, and found his 'Realistic Manga Face' tutorial. I've since referred to several of his other tutorials.
He also has several books out, including some how to draw books and graphic novels.
3. Sycra

I actually came across Sycra from tumblr, as his videos were referenced in an art tutorial masterpost. The one I first saw was his coil method for perspective drawing, but what I found more fascinating is his 'Drawing Methods' series of videos. Here he outlines varies ways artists begin to draw, and the pros and cons of each, and which method you really need to be using depending on how far you want to take your drawing skills.
Personally I think I rely on the copy method too much, so realising this is very useful to know what I need to do to become less reliant on reference images.
He is predominantly a digital artist but his methods apply to traditional media as well. I have yet to dig into his other tutorials but I will be sure to, as he's got a wealth of helpful videos on his channel.
4. Rapidfireart

I found Darlene's channel via Pinterest, through her 'How to Draw Faces' tutorial. I really like how she makes proportioning the face seem so easy with simple measurements, and it's a method I still use. She also has simple tutorials for drawing facial features such as the eyes, lips and nose.
She hasn't got quite as much content as some of the former channels, but she has a lot more on her website. Still, what she has is very valuable, so please check her out!
5. Proko

This is Stan Prokopenko's channel, an established artist and art teacher. He uses both digital and traditional media and the skills he confers transfer nicely between the two. He also offers drawing courses and has lots of helpful resources on his own website. I like his anatomy videos the most, but like Mark Crilley he also dips into topic videos as well. He also has caricature tutorials and help for gesture drawing.
I've found 'How to Draw the Head from any angle', 'How to Draw the Nose', 'Shading Light and Form Basics' and 'How to Draw the Lips' the most useful. His videos are also quite entertaining, and he does critiques, as well as videos with more general tips for artists. He's covered pretty much most things you'll need, and whether you're just getting into drawing or have been doing it for a while and want to improve, he's got the perfect content.
6. Istebrak
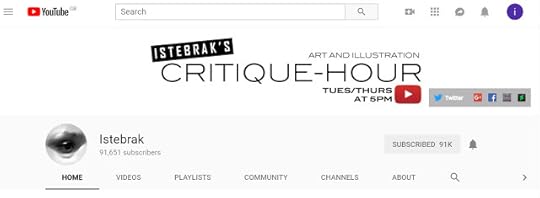
A little different to the above channels, Istebrak is an art teacher and her videos are predominantly critique videos. She is a digital artist. While she does have tutorials on facial features, form studies, some colouring techniques and drawing landscapes, her critique hour (posted usually twice weekly) is where you'll get the most benefit.
It may seem strange that I'm advising you to watch her critique other artists' work, but even just watching her feedback is invaluable as it helps you to see the flaws in your own work. She won't sugar-coat or pamper either- she'll tell you exactly what is wrong and what's needed to fix it, even if this means going right back to basics. She is mostly coming from the angle of an artist wanting to be a professional concept artist and how to render things in digital art media, however, so bear that in mind.
She also has a community on Google+ and Facebook, where she often posts challenges and you can get feedback from the rest of the community. She also offers a software called Portrait Studio which lets you render reference images with realistic lighting. I have not tried it myself but I have seen it in action in many of her videos, and it looks like a very useful tool, especially if you want to break into the professional arena.
Truthfully, Istebrak's channel has probably pushed the most improvement out of me (though I haven't directly submitted to her community, mostly because I feel I'm not up to the basic standard she expects, and given that I'm simple hobbyist, I can take my time!), so do check out her channel. She absolutely knows her stuff, and while her tough-love approach can be a bit intimidating, you'd do well to listen.
And so those were the six most useful Youtube art tutorial channels that I've been following of the last few years! I hope you also find them helpful. If you've got any more suggestions, I'd love to know!
Thus, to kick things off, I'm going to share with you the six most useful Youtube art channels I follow.
So I'm a self taught hobby artist, and have been drawing since my early teens, if not earlier. However, once I gave up Art as a subject at age 14 (had to study those sciences you know for my future career!), I had no real source of guidance to progress.
Fortunately, this was just when the internet was becoming a Big Thing (TM), and I had a plethora of deviantart tutorials to peruse and improve. Now with YouTube tutorials about anything from changing a tire to baking a cake, there's never been a better resource for drawing from a variety of established artists. Whether you draw traditionally with paper and pencil or sketch digitally with the latest graphics tablet, there's a wealth of knowledge out there to help you along. While webpage tutorials are still very much a thing, the extra dimension of seeing drawings done in real-time makes YouTube a brilliant means of learning.
So in no particular order, here are six of the most useful art tutorials I've used/ continue to use on YouTube!
1. Alponso Dunn
Alphonso is an ink artist and instructor, and he has many tutorials showing the variety and versatility of the humble ink pen in drawing. He also has useful anatomy and gesture tutorials, and some mixed media pieces using watercolours as well. Perfect for traditional artists wanting to learn techniques, and for anyone wanting to practice the basics.
I particularly like his 'Master the Mannequin' tutorial as it really helps get certain gestures down without having to use an exact reference every time. I find he explains things quite clearly too and is generally easy to follow. Strongly recommended you check him out, even if pen and ink isn't your thing.
He also has some books available on amazon for pen and ink drawing.
2. Mark Crilley
I've been following Mark for at least five years and he is an extremely talented artist and illustrator. He works in several styles, from realism to anime/ manga, and his tutorials cover pretty much everything from drawing hair and body parts to perspective and animals. He also does art challenges which just shows how honed he is at his craft!
I also enjoy his topic videos, where he'll put out a question to the community about an art-related topic, such as 'How important is originality?' or 'Do you need a defined style?'. He also comes across with a very warm personality, like a favourite uncle, and he can go completely off tangent sometimes in his ramblings, which is rather endearing.
I first came across him when looking for help transitioning from an anime style to more realistic, and found his 'Realistic Manga Face' tutorial. I've since referred to several of his other tutorials.
He also has several books out, including some how to draw books and graphic novels.
3. Sycra
I actually came across Sycra from tumblr, as his videos were referenced in an art tutorial masterpost. The one I first saw was his coil method for perspective drawing, but what I found more fascinating is his 'Drawing Methods' series of videos. Here he outlines varies ways artists begin to draw, and the pros and cons of each, and which method you really need to be using depending on how far you want to take your drawing skills.
Personally I think I rely on the copy method too much, so realising this is very useful to know what I need to do to become less reliant on reference images.
He is predominantly a digital artist but his methods apply to traditional media as well. I have yet to dig into his other tutorials but I will be sure to, as he's got a wealth of helpful videos on his channel.
4. Rapidfireart
I found Darlene's channel via Pinterest, through her 'How to Draw Faces' tutorial. I really like how she makes proportioning the face seem so easy with simple measurements, and it's a method I still use. She also has simple tutorials for drawing facial features such as the eyes, lips and nose.
She hasn't got quite as much content as some of the former channels, but she has a lot more on her website. Still, what she has is very valuable, so please check her out!
5. Proko
This is Stan Prokopenko's channel, an established artist and art teacher. He uses both digital and traditional media and the skills he confers transfer nicely between the two. He also offers drawing courses and has lots of helpful resources on his own website. I like his anatomy videos the most, but like Mark Crilley he also dips into topic videos as well. He also has caricature tutorials and help for gesture drawing.
I've found 'How to Draw the Head from any angle', 'How to Draw the Nose', 'Shading Light and Form Basics' and 'How to Draw the Lips' the most useful. His videos are also quite entertaining, and he does critiques, as well as videos with more general tips for artists. He's covered pretty much most things you'll need, and whether you're just getting into drawing or have been doing it for a while and want to improve, he's got the perfect content.
6. Istebrak
A little different to the above channels, Istebrak is an art teacher and her videos are predominantly critique videos. She is a digital artist. While she does have tutorials on facial features, form studies, some colouring techniques and drawing landscapes, her critique hour (posted usually twice weekly) is where you'll get the most benefit.
It may seem strange that I'm advising you to watch her critique other artists' work, but even just watching her feedback is invaluable as it helps you to see the flaws in your own work. She won't sugar-coat or pamper either- she'll tell you exactly what is wrong and what's needed to fix it, even if this means going right back to basics. She is mostly coming from the angle of an artist wanting to be a professional concept artist and how to render things in digital art media, however, so bear that in mind.
She also has a community on Google+ and Facebook, where she often posts challenges and you can get feedback from the rest of the community. She also offers a software called Portrait Studio which lets you render reference images with realistic lighting. I have not tried it myself but I have seen it in action in many of her videos, and it looks like a very useful tool, especially if you want to break into the professional arena.
Truthfully, Istebrak's channel has probably pushed the most improvement out of me (though I haven't directly submitted to her community, mostly because I feel I'm not up to the basic standard she expects, and given that I'm simple hobbyist, I can take my time!), so do check out her channel. She absolutely knows her stuff, and while her tough-love approach can be a bit intimidating, you'd do well to listen.
And so those were the six most useful Youtube art tutorial channels that I've been following of the last few years! I hope you also find them helpful. If you've got any more suggestions, I'd love to know!


_(32339139354),_crop.jpg)