
Miriam Sorrell's Blog, page 2
October 11, 2020
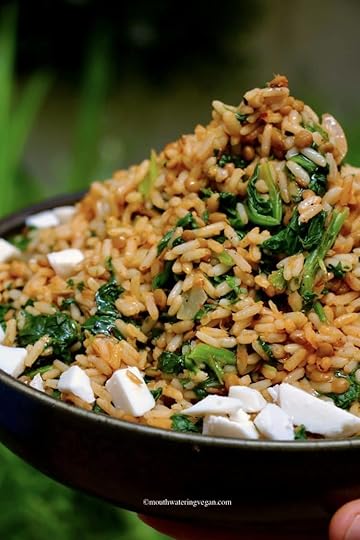
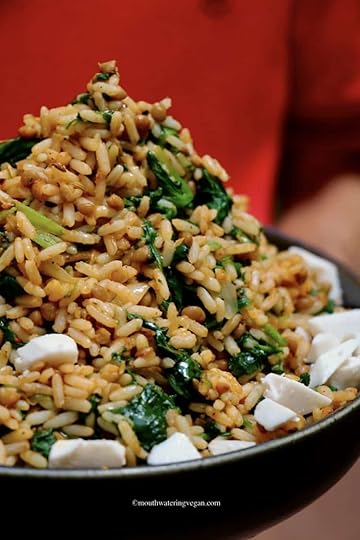
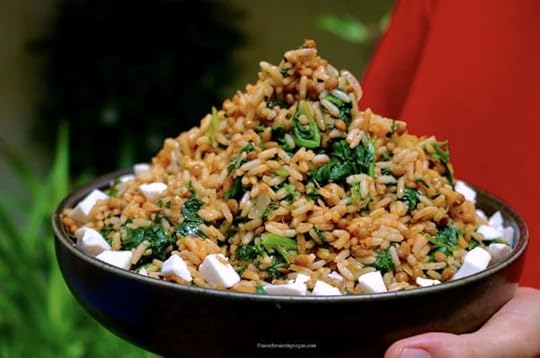
Rice & Lentils with Spinach (Pilafi me Fakes)
My mother, a Greek housewife, used to make this in different ways – here is one way with my twist. I love it most of all also because it’s delicious, and also because it’s a versatile dish and so very easy to prepare.
INGREDIENTS
1½ cups pre-cooked lentils or 2/3 cup of dried brown lentils (the flat ones), boiled and drained
1 cup pre-cooked long grain white rice (works well with basmati too)
1 shallot, thinly chopped
2 cloves garlic, chopped
3 Tbsp extra virgin olive oil
1kg fresh spinach, steamed and well drained (after it’s steamed, chop it a little)
1 Tbsp red wine vinegar
salt to taste
2 Tbsp tomato puree
½ tsp chilli flakes (optional)
cinnamon stick
2 bayleaves
a splash of lemon juice and some lemon zest
a pinch of fennel seeds
¼ tsp oregano
chopped dill or flat leaf parsley, for garnishing
vegan feta cheese (optional)
METHOD
Heat up your oil in a large pan, and sauté your onions and garlic.
Add your spices and stir well, then stir in the tomato puree, making sure it is well distributed, and keep it on a high heat for a minute or so.
Next, add the the lentils and herbs, stir well, and then add the cooked rice. Continue to stir for a couple of minutes, then gently add the remaining ingredients.
Garnish and serve with vegan feta, or eat as is.
All recipes and content © Miriam Sorrell www.mouthwateringvegan.com 2010
These are free recipes for your pleasure – all we ask in return is that you take a few moments to scroll down to the bottom of this page and leave us a constructive comment.
suitable for vegans, vegetarians and meat-eaters alike
Pin
Print
Rice & Lentils with Spinach (Pilafi me Fakes)Recipe by Miriam SorrellCourse: OtherServings
4
servingsINGREDIENTS1½ cups pre-cooked lentils or 2/3 cup of dried brown lentils (the flat ones), boiled and drained
1 cup pre-cooked long grain white rice (works well with basmati too)
1 shallot, thinly chopped
2 cloves garlic, chopped
3 Tbsp extra virgin olive oil
1kg fresh spinach, steamed and well drained (after it’s steamed, chop it a little)
1 Tbsp red wine vinegar
salt to taste
2 Tbsp tomato puree
½ tsp chilli flakes (optional)
cinnamon stick
2 bayleaves
a splash of lemon juice and some lemon zest
a pinch of fennel seeds
¼ tsp oregano
chopped dill or flat leaf parsley, for garnishing
vegan feta cheese (optional)
METHOD Heat up your oil in a large pan, and sauté your onions and garlic. Add your spices and stir well, then stir in the tomato puree, making sure it is well distributed, and keep it on a high heat for a minute or so.Next, add the the lentils and herbs, stir well, and then add the cooked rice. Continue to stir for a couple of minutes, then gently add the remaining ingredients.Garnish and serve with vegan feta, or eat as is.
The post Rice & Lentils with Spinach (Pilafi me Fakes) appeared first on Mouthwatering Vegan.


October 3, 2020
Mobile Coffee – The Complete Guide
Mobile coffee services are widely needed for different events. From corporate shindigs to on-location filming, the situations in which you need a coffee fix is endless. With thanks to coffee-on-wheels, some of the top baristas can make coffee for your friends, family, colleagues, partners and the community at large.
So no matter what you need the mobile service for, this guide will provide the latest info on what different packages there are out there and how they differ. Tips on how to research and track down the best mobile companies for coffee and caffeinated drinks will also be provided and will help you get the best deal possible.
A Valid Catering Option?
Mobile coffee services are available today and have become a popular option for those who are running events. Catering, of course, is a very important aspect of any event. While in the past, refreshments meant cheap tea bags and instant coffee, people now expect more when it comes to their hot beverages.
Catering options such as fast food, burger vans and even ice cream vans are not looked at as strange when it comes to events. However, other types of catering are still not as prevalent. But pop-up vans and stalls for the likes of halal food, vegan treats, and coffee have started to become more and more appreciated. There are a number of reasons for this.
One such reason is that people have become tired with the same old catering options. Cheeseburgers, chips and a 99p ice cream are much loved, but we’re too accustomed to seeing these foods at events. Plus, where are the healthy, vegan-friendly options?
High-quality coffee and tea is something we don’t often see, though. Rather than the usual cheap, poor quality hot drinks served by the food van, high-quality coffee made by an actual, trained barista at a mobile coffee stall will pleasantly surprise and delight.
Event organisers are always looking for new ways to engage and make event-goers happy because it means that they are more likely to stay and enjoy the festivities. So a coffee van or stall can really help keep people at your festival – particularly on a cold night! Add a selection of pastries, cupcakes and other light snacks and your guests may not even want to go home.
What Does A Coffee Van Package Actually Include?
If this is your first time hiring anything mobile coffee related, then it at first may seem quite bewildering. But don’t let the unknown put you off – it’ll be much simpler after learning a little more about what a coffee van rental package consists of. Different packages from different companies naturally possess varying attributes and qualities, but when it comes down to it, they should all contain exactly what you’d expect. Fantastic, sociable baristas; a complete range of coffees and espressos, as well as alternatives for non-coffee addicts; and an attractive, well-designed van to attract customers, locals and colleagues alike.
What differs, in essence, is the amount of time you have the coffee van and the baristas themselves for. Your first task is to decide how long you want the hire to last. The minimum time is usually four hours, but this can be extended if you need it. If you’re planning your wedding reception or on-location shooting for an ad or for television, for instance, you may well want the facility there for longer. Short, outdoor events or trade shows can be catered for at a lower cost if they’re planned to run four hours or less. Flexibility is therefore a key attribute you should seek out in a mobile caterer.
A Mobile Coffee Van For All Types Of Events
A van owned by an independent coffee company has probably travelled the length of the country in its travels to cater for different types of events – but what events are they usually hired for? Often, they’re rented out for corporate events such as conferences, technology fairs, university fairs or even on film sets to cater for the cast and crew. Equally, though, you could cause a buzz by ordering one to attend a private event, such as your wedding day or a special birthday party. It really is a mixed bag, and the best thing about having a mobile coffee van is its versatility.
While the name suggests it only caters for caffeine addicts, the top companies will also be equipped to feature a range of specialist teas, hot chocolate and other beverages at your request. Even quality snacks can be served, from vegan cakes, pastries and gourmet crisps to larger-scale catering. So no matter what event you need a mobile coffee van hire for, whether it’s an event in a major city or small gathering in a local village, rest assured. The best coffee companies will be willing and versatile enough to adapt to any surroundings and any audience.
Good For Festivals?
Coffee van services are a consideration for many people organising events today. Finding a way to offer tea and coffee to visitors isn’t exactly a new idea when it comes to festival organisation, but the standards we expect from our tea and coffee have changed over the years.
Now we don’t just want the lowest quality, cheap coffee from the ubiquitous food van that has long been a staple of every festival in the country. We want good-quality, ethically-sourced coffee provided to us by professional baristas. While that may seem like an opulent and luxurious expense, it doesn’t need to be. With the right mobile coffee services, you can have affordable, good-quality coffee available for attendees and others.
When it comes to festivals or fetes, for instance, there are going to be a number of stalls. That also means there will be stall owners and employees on their feet for most of the day. Some coffee van operators often provide a number of pre-paid coffees as part of the package. This is a great way to make your festival employees and volunteers feel appreciated and re-energised with top-quality, professionally made free coffee in exchange for their services. And for those attending, great coffee is an obvious way to help keep them feeling fresh and perky. If people are feeling more energised, they’re more likely to stick around for the rest of the events that you have planned that day. So there are plenty of great reasons for having ethically-sourced, good-quality coffee, delivered by professionals, at your festival.
The Benefits Of Hiring A Coffee Van
There are numerous advantages to hiring a coffee van to serve coffee to people at your location, event or occasion. The first, and perhaps the most important, benefit is that it means that you won’t have the added stress of providing refreshments yourself. You’ll be paying someone else to do it for you and bring all the equipment and supplies, so you don’t have to lift a finger when it comes to coffee cups or bags of sugar. Instead, you’ll be able to focus on what you do best, leaving the professionals to serve your guests or clients with panache and style.
Of course, you need to consider the benefits of coffee itself. While we should not drink it in excess, it can give a good boost of energy. There are lots of studies into the health benefits of coffee, with some even indicating that it can help with vision health! If you have eye issues to overcome, the best way to do it is, of course, by getting the right lenses, but diet changes can make a bigger difference than you may realize. Plus, coffee tastes great too!
Another key benefit of mobile coffee hire is that the van itself will become a social hub. Coffee is an increasingly popular hot drink these days, and when your audience smell the tantalising aroma and see a place where they can grab a cup, they will immediately flock to it. So if you’re putting on an outdoors event in your local area or you’re promoting your business at a trade event, having mobile coffee vans there in the midst of the action will ensure a lively, sociable atmosphere. It becomes a real magnet and an ideal opportunity for networking or catching up with friends and acquaintances.
How Can You Tell The Winners From The Losers?
When you’re looking both online and offline for mobile coffee van companies to cater for your event, it can at first be tricky to differentiate between the better companies and the ones you shouldn’t waste your time on. Often it’s quite a subtle distinction which may not be obvious at first glance. What you should primarily be looking out for in a mobile coffee van for hire, though, is a good brand message. This will generally be communicated on their website on their ‘about’ page, the design of their website, and the tone you get from the company itself. Reading the ‘about’ page is paramount to understanding their company ethos and whether it fits in with what you require. A well-established family-run business with years of experience, which upholds high standards of ethics in its sourcing of coffee and the like, and has an emphasis on quality products and service, is ideal. Another tip for finding a professional and skilled company is by testimonials appearing on its website and elsewhere on the internet. If past clients have great things to say about the coffee company in question, you’re onto a winner.
The post Mobile Coffee – The Complete Guide appeared first on Mouthwatering Vegan.
July 12, 2020
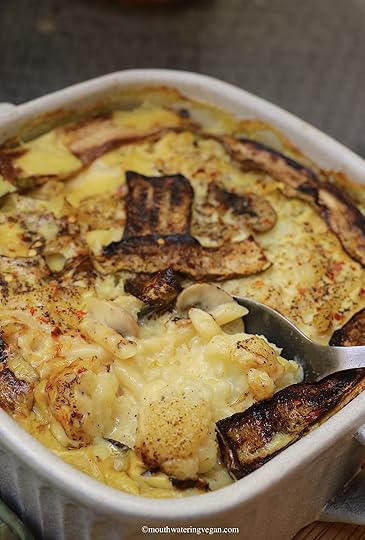
Cauliflower Mushroom Mac and Cheese
This is no ordinary cauliflower cheese, but a delicious dish I created where Cauliflower Cheese meets Mac and Cheese. They get married and have a baby called ‘more-ish’, which simply grows on you, as the term implies. The addition of the mushrooms raises its flavour to a level above either of those two dishes by themselves.
Make, bake and enjoy, but be ready to undo your jeans button for the day ! Filling, but a must, trust me. In addition, apart from being mouthwatering, it is also very easy to prepare.
The trick for this dish is either getting hold of, or making yourself, good vegan cheese in advance. So, without further ado, let’s jump straight into the recipe.
Serve with your favourite greens or salad of your choice.
NOTE : This dish can be made into a gluten free dish, simply substitute your pasta with gluten free pasta, and voila !
Serves 4-6 portions

INGREDIENTS
200g penne of your choice (gluten free if you wish)
2 to 3 cups mushrooms, sliced and chopped
1 large cauliflower, cut into florets
1 large zucchini/courgette, sliced lengthways
2 cups melting-type vegan cheese of your choice
1 Tbsp nutritional yeast
2 Tbsp tapioca starch
1 tsp sea salt
¼ tsp ground turmeric
¼ teaspoon ground garlic
3 cups soya milk, or other unsweetened plant-based milk
chilli flakes for garnishing (optional)
METHOD
Boil or steam your cauliflower florets and set aside. Don’t leave them covered once cooked and tender, and don’t overcook them to the point of almost melting, tender will do.
Boil your pasta until al dente, drain and rinse with cold water to stop the cooking process from continuing, and set aside.
Grease a large, deep enough dish in readiness for assembling the recipe. The one I used was around 10 inches in diameter and 3 inches deep.
Sauté your zucchini until golden on both sides and set aside. Then do the same with the mushrooms.

Place your cheese, plant-based milk, nutritional yeast, tapioca starch, turmeric, salt and garlic in a high speed food blender/liquidizer (I used my Vitamix) – and blend until smooth.
Then pour into a large non-stick saucepan, and heat up stirring almost constantly until it thickens. Set aside as is for a few moments.
Place your cauliflower in the cheese sauce mix and gently make sure that all the pieces are immersed in the cheese.
Then add your pre-cooked pasta and pre-cooked mushrooms and do the same.
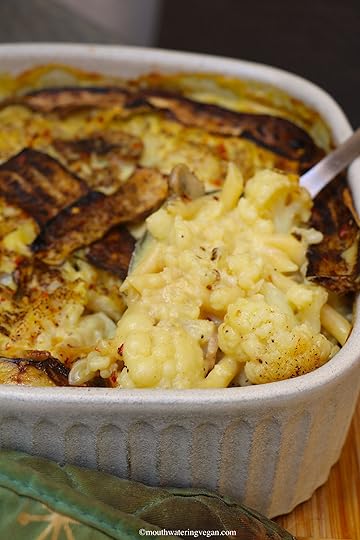
Gently spoon the mixture into your pre-greased oven dish, and carefully place your pre-cooked zucchini pieces on top around the edges, and make a cross in the middle for decoration if you wish.
Sprinkle on the chilli flakes, and bake in your pre-heated oven until golden on top.
Remove from the oven once golden, and allow to rest for 10 minutes before cutting out the portions and serving. Enjoy !
All recipes and content © Miriam Sorrell www.mouthwateringvegan.com 2010
These are free recipes for your pleasure – all we ask in return is that you take a few moments to scroll down to the bottom of this page and leave us a constructive comment.
suitable for vegans, vegetarians and meat-eaters alike


Pin
Cauliflower Cheese & Mushroom PastaRecipe by Miriam SorrellCourse: Pasta, MainCuisine: Italian, British, MediterraneanServings
4
servingsPrep time30
minutesCooking time30
minutesEasy Cauliflower Cheese & Mushroom Pasta
INGREDIENTS200g penne (gluten free if you wish)
2 to 3 cups mushrooms, sliced and chopped
1 large cauliflower, cut into florets
1 large zucchini/courgette, sliced lengthways
2 cups melting-type vegan cheese
1 Tbsp nutritional yeast
2 Tbsp tapioca starch
1 tsp sea salt
¼ tsp ground turmeric
¼ teaspoon ground garlic
3 cups soya milk, or other unsweetened plant-based milk
chilli flakes for garnishing (optional)
METHODBoil or steam your cauliflower florets and set aside. Don’t leave them covered once cooked and tender, and don’t overcook them to the point of almost melting, tender will do.Boil your pasta until al dente, drain and rinse with cold water to stop the cooking process from continuing, and set aside.Grease a large, deep enough dish in readiness for assembling the recipe. The one I used was around 10 inches in diameter and 3 inches deep.Sauté your zucchini until golden on both sides and set aside. Then do the same with the mushrooms.Place your cheese, plant-based milk, nutritional yeast, tapioca starch, turmeric, salt and garlic in a high speed food blender/liquidizer (I used my Vitamix) – and blend until smooth. Then pour into a large non-stick saucepan, and heat up stirring almost constantly until it thickens. Set aside as is for a few moments.Place your cauliflower in the cheese sauce mix and gently make sure that all the pieces are immersed in the cheese.Then add your pre-cooked pasta and pre-cooked mushrooms and do the same.Gently spoon the mixture into your pre-greased oven dish, and carefully place your pre-cooked zucchini pieces on top around the edges, and make a cross in the middle for decoration if you wish.Sprinkle on the chilli flakes, and bake in your pre-heated oven until golden on top.Remove from the oven once golden, and allow to rest for 10 minutes before cutting out the portions and serving. Enjoy !Recipe Card plugin by
WPZOOM
The post Cauliflower Mushroom Mac and Cheese appeared first on Mouthwatering Vegan.
July 11, 2020
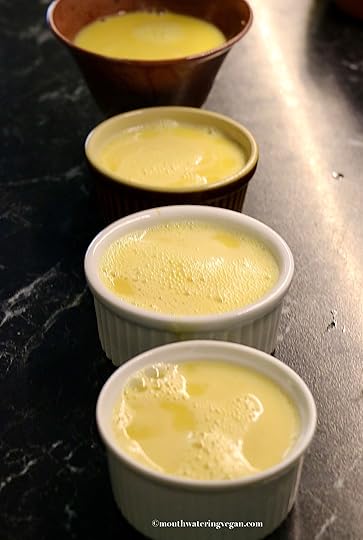
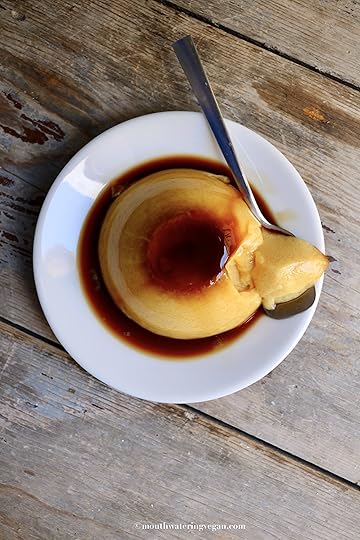
Luscious Crème Caramel
I first came up with a vegan crème caramel that was published in my first book Mouthwatering Vegan several years ago. Since then I have made many a crème caramel (known as ‘flan’ in the US), but this seems to be the simplest, fastest to make and the most rewarding to serve.
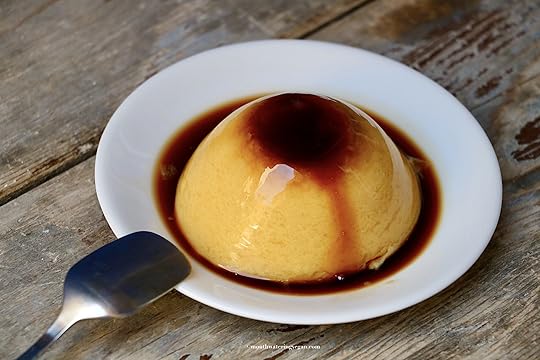
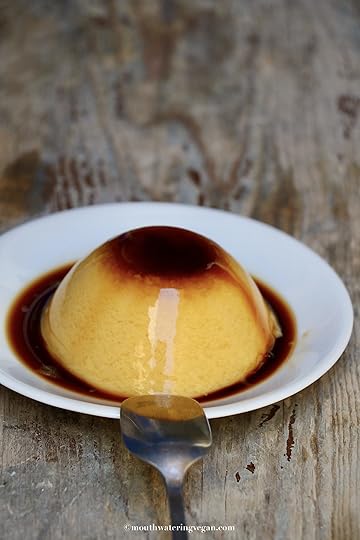
Crème caramel is a light creamy dessert and the custard gives it that vanilla hint and lovely colour – whilst the caramel sauce rounds it off nicely with a toasty rich and moreish flavour.
I love crème caramel – I made another vegan version with coffee, a semi raw version published in my cookbook YASOU. But this simple little crème caramel /flan is delightful and ideal for all seasons. As it’s vegan, it’s quite impressive to share with loved ones, and it is also delicious served with a touch of cognac during the winter months, or whipped vegan cream for that extra touch. Either way, you won’t regret the results.
Let me know how yours fairs once you’ve made it. What a relief not to have to bake this recipe, unlike the traditional non vegan version.
NOTE : I didn’t take step by step photos on this occasion as I was out of battery for the first time in years during a recipe – but, the result of the finished product speaks for itself.
Makes 4+ portions, depending on size of ramekins or serving dish, but it’s very easy to eat !
INGREDIENTS FOR THE CARAMEL SAUCE
120g sugar
50g /4 Tbsp water
METHOD FOR THE CARAMEL SAUCE
Place the sugar in a saucepan, on a low heat.
It will take 7 to 8 minutes before the sugar caramelises. Then carefully add the water and stir – be careful as the sugar will bubble. As you slowly stir the mixture, the sugar and water will consolidate and make a lovely rich brown syrup.
You will need to make sure the heat is real low, and once you’ve done that, then you’re ready to pour the syrup into your ramekin dishes or your flan dish. Be sure once you’ve done that to whirl the flan container or ramekin dishes so that the caramel syrup is evenly distributed.

INGREDIENTS FOR THE CRÈME/CREAM/FLAN
3 cups soya or creamy coconut milk
¼ cup white sugar
2 Tbsp custard powder (I use this instead of cornstarch for the colour)
a pinch of kala namak, for that slight eggy taste (optional)
1 tsp carageenan or agar agar
METHOD FOR THE CRÈME/CREAM/FLAN
Place the ingredients in a large bowl and whisk, or blend in a high speed blender.
Then pour into a saucepan and heat the mixture on a low heat, stirring continuously until it is thick. Taste for sweetness, then pour into your flan dish or ramekin dishes, allow to cool completely, and refrigerate for 3-4 hours or preferably overnight.
Turn the flan onto a plate, or onto small saucers, serve, and spoon the caramel on the top
That’s it !
All recipes and content © Miriam Sorrell www.mouthwateringvegan.com 2010
These are free recipes for your pleasure – all we ask in return is that you take a few moments to scroll down to the bottom of this page and leave us a constructive comment.
suitable for vegans, vegetarians and meat-eaters alike

Pin
Luscious Crème CaramelRecipe by Miriam SorrellCourse: Dessert, SweetCuisine: FrenchServings
4
servingsPrep time30
minutesCooking time10
minutesDelicious, easy to make Crème Caramel
INGREDIENTSCaramel Sauce120g sugar
50g /4 Tbsp water
Crème /Flan3 cups soya or creamy coconut milk
¼ cup white sugar
2 Tbsp custard powder (I use this instead of cornstarch for the colour)
a pinch of kala namak, for that slight eggy taste (optional)
1 tsp carageenan or agar agar
METHODCaramel SaucePlace the ingredients in a small saucepan, add the sugar and stir on a low heat.It will take 7 to 8 minutes before the sugar caramelises. You can then add the water and stir, so that the sugar and water consolidate and make a syrup.You will need to make sure the heat is real low, and once you’ve done that, then you’re ready to pour into your ramekin dishes or your flan dish. Be sure once you’ve done that to whirl the container or dishes so that the caramel is evenly distributed.Crème /FlanPlace the ingredients in a large bowl and whisk, or blend in a high speed blender.Then pour into a saucepan and heat the mixture on a low heat, stirring continuously until it is thick. Taste for sweetness, then pour into your flan dish or ramekin dishes, allow to cool completely, and refrigerate for 3-4 hours or preferably overnight.Turn the flan onto a plate, or onto small saucers, serve, and spoon the caramel on the top.That’s it !
Recipe Card plugin by
WPZOOM
The post Luscious Crème Caramel appeared first on Mouthwatering Vegan.
July 8, 2020
Pecan Pie
I haven’t had Pecan Pie in ages. This is my take on the classic – of course veganised, but not compromised !
The pastry is easy to make, and I’ve made it all the more easier to make and bake, by purchasing a ready made crust. I used Jus-Rol – if you’re in the UK or anywhere else within Europe, you might just find it. It’s usually sold frozen, and just as the name suggests, it is easy to ‘just roll’- anyway – on a dusted clean surface roll to shape, place on a greased dish, and then fill with savoury or sweet, cover, brush and bake in a preheated oven. Having purchased it ready, it leaves me with full concentration to focus on a fabulous filling, and saves me a great deal of time and cleaning up afterwards.
So, for the filling of this pie, I don’t use cornstarch/cornflour. Instead I use custard. Why you may ask ? Well, because of the vanilla flavour it imparts. I don’t use white sugar or eggs or corn syrup – instead I use coconut sugar, which is perfect for baking, cinnamon which completely makes a perfect marriage of consolidating the custard and the nuts together.
I served it with Alpro whipped cream, but it can also be served with beaten coconut cream from a tin left in the fridge, or just plain classic vanilla ice cream. I have to say, it’s one of the most satisfying desserts ever !
Serves approximately 6-8 portions
INGREDIENTS FOR THE DOUGH
1 packet of Jus-Rol shortcrust pastry – 400g
METHOD FOR THE DOUGH
First preheat your oven to 180°C/ 355°F.
Roll out your pastry to fit a pre-greased quick tray approximately 10 inches in diameter, and secure the edges.
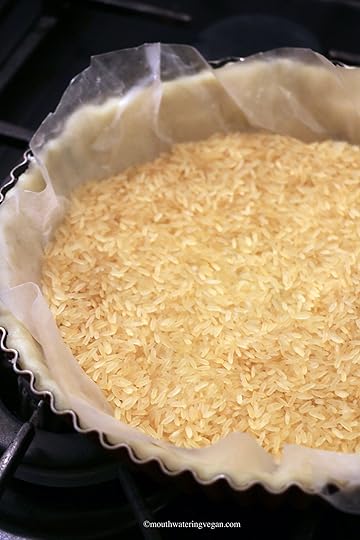
Now blind bake (use grease-proof paper/parchment and rice or beans) for approximately 7-8 minutes, take it out and let it cool off.
INGREDIENTS FOR THE FILLING
2 Tbsp vegan butter of your choice
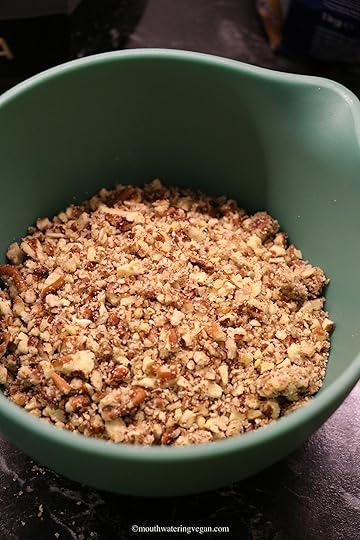
1 cup crushed pecan nuts
more whole pecans for decorating the surface (set these aside)
2 Tbsp coconut sugar
¾ cup full fat coconut milk (scoop this from the top of a pre-refrigerated coconut cream tin)
1/8 tsp sea salt
3 Tbsp custard powder or cornflour/cornstarch
4 Tbsp maple syrup (extra for brushing on the pastry)
¼ tsp ground cinnamon
a little extra plant-based milk
METHOD FOR THE FILLING
Melt your butter in a non-stick saucepan, then add your broken pecans, and stir continuously for some minutes until they become toasted.
Next, add your coconut sugar and continue to stir so that it breaks down. Then add your maple syrup and stir for a few seconds. Put the heat off.
Place your custard powder and your coconut cream in a small bowl and stir with a hand whisk, or spoon until rich, thick and creamy, and set aside.

Put the heat back on, and add the cinnamon, salt and the coconut and custard mix. Stir with a hand whisk until all is properly mixed and incorporated. It may appear to be a little too thick, so add a couple spoons of the plant based milk. You should be left with a thick mix, but not clumps.
Once your pastry has cooled down from the oven, remove the parchment, rice and beans, and pour your mix gently onto the pastry.

Brush maple syrup onto the edges, then decorate with whole pecans around the pie. Bake until golden, but keep an eye on it that it doesn’t burn. When it turns golden (25 minutes or so, depending on your oven type), it’s ready.
Take out of the oven, and allow to cool down for an hour before scoring and cutting. When properly cooled, place in an airtight container and refrigerate.
Serve with vanilla ice cream and/or vegan cream of your choice. Now put the kettle on will you !
All recipes and content © Miriam Sorrell www.mouthwateringvegan.com 2010
These are free recipes for your pleasure – all we ask in return is that you take a few moments to scroll down to the bottom of this page and leave us a constructive comment.
suitable for vegans, vegetarians and meat-eaters alike


Pin
Pecan PieRecipe by Miriam SorrellCourse: Dessert, Tea-timeCuisine: AmericanServings
6
servingsPrep time45
minutesCooking time30
minutesINGREDIENTSDOUGH1 packet of Jus-Rol – 400g
FILLING2 Tbsp vegan butter of your choice
1 cup crushed pecan nuts
more whole pecans for decorating the surface (set these aside)
2 Tbsp coconut sugar
¾ cup full fat coconut milk (scoop this from the top of a pre-refrigerated coconut cream tin)
1/8 tsp sea salt
3 Tbsp custard powder or cornflour/cornstarch
4 Tbsp maple syrup (extra for brushing on the pastry)
¼ tsp ground cinnamon
a little extra plant-based milk
METHODDOUGHFirst preheat your oven to 180°C/ 355°F.Roll out your pastry to fit a pre-greased quick tray approximately 10 inches in diameter, and secure the edges.Now blind bake (use grease-proof paper/parchment and rice or beans) for approximately 7-8 minutes, take it out and let it cool off.FILLING & ASSEMBLYMelt your butter in a non-stick saucepan, then add your broken pecans, and stir continuously for some minutes until they become toasted.Next, add your coconut sugar and continue to stir so that it breaks down. Then add your maple syrup and stir for a few seconds. Put the heat off.Place your custard powder and your coconut cream in a small bowl and stir with a hand whisk, or spoon until rich, thick and creamy, and set aside.Put the heat back on, and add the cinnamon, salt and the coconut and custard mix. Stir with a hand whisk until all is properly mixed and incorporated. It may appear to be a little too thick, so add a couple spoons of the plant based milk. You should be left with a thick mix, but not clumps.Once your pastry has cooled down from the oven, remove the parchment, rice and beans, and pour your mix gently onto the pastry.Brush maple syrup onto the edges, then decorate with whole pecans around the pie. Bake until golden, but keep an eye on it that it doesn’t burn. When it turns golden (25 minutes or so, depending on your oven type), it’s ready. Take out of the oven, and allow to cool down for an hour before scoring and cutting. When properly cooled, place in an airtight container and refrigerate.Serve with vanilla ice cream and/or vegan cream of your choice. Now put the kettle on will you !Recipe Card plugin by
WPZOOM
The post Pecan Pie appeared first on Mouthwatering Vegan.
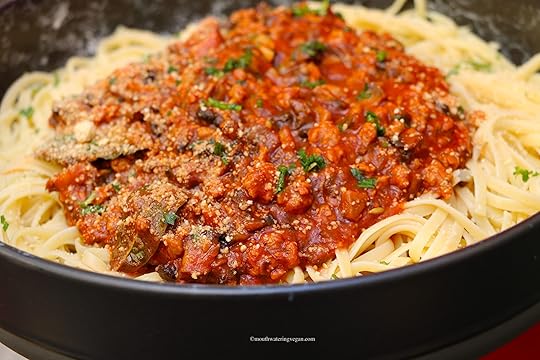
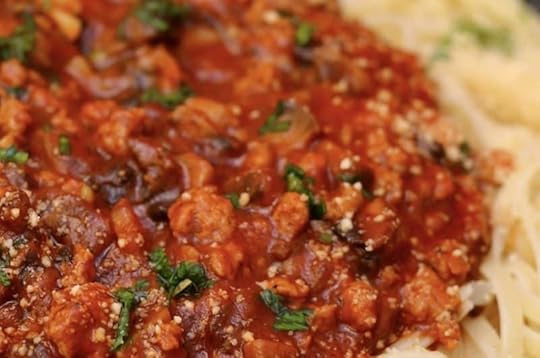
Portobello Mushroom Bolognese
I had 3 packed portobello mushrooms in my fridge, and I wasn’t going to pulp them up into burgers, or sauté them, or add them as part of a meal. No, these 3 beauties begged to be made into something bigger and better than just that, and so this recipe was born.
My love of mushrooms has no limits or bounds, here it is again, peering its head, time and time over. It’s too tempting a vegetable, and is most versatile.
In this ‘bolognese’ sauce, the juices from the mushrooms impart a delicious flavour as they merge with the mouthwatering juices from the tomato pulp.
A rich sauce, but at the same time very easy to devour. It also makes a great change to the usual bolognese.
Serves 3-4 portions

INGREDIENTS
1 Tbsp extra virgin olive oil
1 small onion, finely chopped
4 cloves garlic, finely chopped
3 large Portobello mushrooms, washed, dried and chopped into small pieces
2 cups tomato polpa
½ glass dry white or rose wine
1 tsp agave nectar, or other sweetener of your choice
¼ tsp fennel seeds
¼ tsp coriander seeds
2 bayleaves
salt and pepper to taste
1 Tbsp tomato puree
1 cup vegan mince/crumble or equivalent (optional for bulking it up further)
METHOD
Heat up your oil In a saucepan and add the onion and garlic stirring until the onion becomes a little transparent – now add your tomato puree, stirring all the time so that it mixes well with the onions and garlic mix.
Next, add the mushrooms and spices and let them cook until they soften. They will impart a lovely aroma in your kitchen. If you are adding vegan mince, do so now and give it a mix.
Now pour in your wine and lower the heat. Simmer for 10 minutes or so and add your tomato polpa and remaining ingredients.
Allow to simmer on a low heat for 15-20 minutes. Taste it for seasoning.
Serve on your favourite pasta. This sauce can be refrigerated once cooled and served the next day.
All recipes and content © Miriam Sorrell www.mouthwateringvegan.com 2010
These are free recipes for your pleasure – all we ask in return is that you take a few moments to scroll down to the bottom of this page and leave us a constructive comment.
suitable for vegans, vegetarians and meat-eaters alike
[image error]
Pin
Portobello Mushroom BologneseRecipe by Miriam SorrellCourse: Main, PastaCuisine: Italian, MediterraneanServings
4
servingsPortobello Mushroom Bolognese
INGREDIENTS1 Tbsp extra virgin olive oil
1 small onion, finely chopped
4 cloves garlic, finely chopped
3 large Portobello mushrooms, washed, dried and chopped into small pieces
2 cups tomato polpa
½ glass dry white or rose wine
1 tsp agave nectar, or other sweetener of your choice
¼ tsp fennel seeds
¼ tsp coriander seeds
2 bayleaves
salt and pepper to taste
1 Tbsp tomato puree
1 cup vegan mince/crumble or equivalent (optional for bulking it up further)
METHODHeat up your oil In a saucepan and add the onion and garlic stirring until the onion becomes a little transparent – now add your tomato puree, stirring all the time so that it mixes well with the onions and garlic mix.Next, add the mushrooms and spices and let them cook until they soften. They will impart a lovely aroma in your kitchen. If you are adding vegan mince, do so now and give it a mix.Now pour in your wine and lower the heat. Simmer for 10 minutes or so and add your tomato polpa and remaining ingredients.Allow to simmer on a low heat for 15-20 minutes. Taste it for seasoning.Serve on your favourite pasta. This sauce can be refrigerated once cooled and served the next day.Recipe Card plugin by
WPZOOM
The post Portobello Mushroom Bolognese appeared first on Mouthwatering Vegan.
July 1, 2020
Vegan Eggs Benedict
I created my first vegan fried eggs in 2012 and have been playing around with a variety of different egg recipes for a long time.
I created one of the first vegan egg omelettes at the time, as I realised so many new vegans just miss their eggs, and some long time vegans get that odd egg craving.
Eggs Benedict is an American breakfast or brunch dish, consisting of an open-faced sandwich of two halves of an English muffin each topped with a poached egg, hollandaise sauce, and Canadian bacon. It dates back to the mid-19th century, and was popularized in New York City.
So here are my ‘Eggs’ Benedict. I have made a complete breakfast out of these, with wonderful golden potatoes and some seared smoked mushrooms.
My Perfect Vegan Fried Egg recipe can be found here
Makes 2 eggs

INGREDIENTS FOR HOLLANDAISE SAUCE
1/8 cup Frenchies mustard
1/3 cup vegan mayonnaise
1 tsp white vinegar
½ tsp agave nectar
1 Tbsp soya milk

METHOD
Place these ingredients in a bowl and whisk with a fork until smooth.
Place in the fridge covered, whilst you make the eggs.
After you have made the eggs, place them hot on a toasted muffin, pour on your Hollandaise sauce, sprinkle on some pepper – load your plate with your sautéed potatoes, some seared smoked mushrooms, and you can make up some vegan sausage patties – try our wonderful Big Bang Bangers ones available here
Oh, and remember to get your coffee on the go, and enjoy yourself !

For those of you who are pressed for time and don’t have time to make a yolk, all you have to do is cut out your firm tofu (having wiped all the water off of it once you’ve drained it from it’s packing) – fry it up, and just add a pinch of Kala Namak (black salt) to the Hollandaise sauce and let it be a merge of yolk and sauce.
Enjoy !
All recipes and content © Miriam Sorrell www.mouthwateringvegan.com 2010
These are free recipes for your pleasure – all we ask in return is that you take a few moments to scroll down to the bottom of this page and leave us a constructive comment.
suitable for vegans, vegetarians and meat-eaters alike


Pin
‘Eggs’ BenedictRecipe by Miriam SorrellCourse: BreakfastCuisine: AmericanServings
2
servingsPrep time25
minutesCooking time15
minutesVegan Eggs Benedict
INGREDIENTSHOLLANDAISE SAUCE1/8 cup Frenchies mustard
1/3 cup vegan mayonnaise
1 tsp white vinegar
½ tsp agave nectar
1 Tbsp soya milk
Place these ingredients in a bowl and whisk with a fork until smooth.
Place in the fridge covered, whilst you make the eggs (see recipe here).
METHODAfter you have made the eggs, place them hot on a toasted muffin, pour on your Hollandaise sauce, sprinkle on some pepper – load your plate with your sautéed potatoes, some seared smoked mushrooms. and you can make up some vegan sausage patties – try our wonderful Big Bang Bangers ones available hereAnd you can make up some vegan sausage patties – try our wonderful Big Bang Bangers ones available hereOh, and remember to get your coffee on the go, and enjoy yourself !For those of you who are pressed for time and don’t have time to make a yolk, all you have to do is cut out your firm tofu (having wiped all the water off of it once you’ve drained it from it’s packing) – fry it up, and just add a pinch of Kala Namak (black salt) to the Hollandaise sauce and let it be a merge of yolk and sauce.Recipe Card plugin by
WPZOOM
The post Vegan Eggs Benedict appeared first on Mouthwatering Vegan.
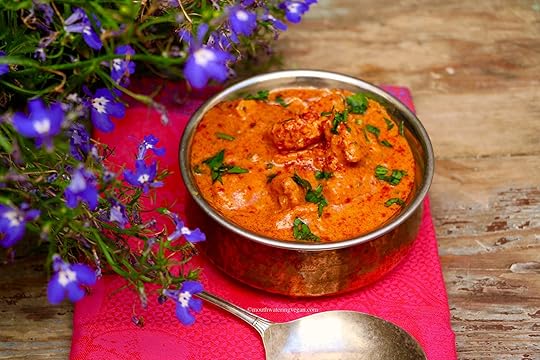
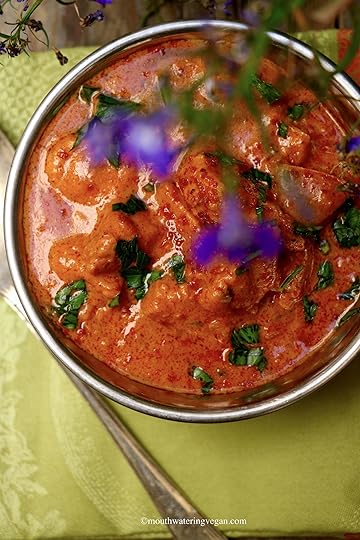
Vegan ‘Chicken’ Tikka Masala
Although chicken tikka masala is almost certainly the best known dish on any Indian restaurant menu in Britain, ironically it is not authentically Indian.
Chicken tikka itself, made with pieces of marinated boneless chicken that are usually cooked dry, originates from the Indian subcontinent, and is popular in India, Bangladesh, and Pakistan.
Chicken tikka masala combines the tikka chicken pieces in a creamy, tomato-based curry sauce. Though there are various claims to its origins, it was most likely created for the British palate, more used to having meat served in a gravy sauce, and it has since become a British institution.
Therefore a favourite, much missed by many vegetarians and vegans alike, including my English partner who admits to this being one of his favourite dishes before he became vegan.
So I took it upon myself to recreate my vegan version, being as true to the authentic spices of the original tikka marinade. I hope you enjoy it.
INGREDIENTS FOR THE MARINADE PASTE
1 tsp paprika powder
1 tsp coriander powder
1/8 tsp tamarind
1 tsp sea salt
1 tsp cumin powder
½ tsp garlic powder
4 cups frozen vegan chicken pieces
1 cup vegan yoghurt (I used mine from my Yasou book)
4-5 Tbsp olive oil
METHOD FOR THE MARINADE
Mix the ingredients together in a small bowl, and stir into your vegan chicken pieces, massage with clean hands, cover with cling film, place in the fridge for 2-3 hours to marinate.
FIRST INGREDIENTS FOR THE SAUCE
1 large white onion
4-5 cloves garlic
3 Tbsp minced ginger
1 red chilli pepper, roughly chopped
Place the above in a food blender and process until chopped very small – decant into a bowl and set aside
MORE INGREDIENTS FOR THE SAUCE
¼ cup olive oil, or other oil of your choice
1 tsp garam masala
1 tsp ground cardamom
¼ tsp coriander powder
1 tsp tandoori masala
1 Tbsp tomato puree
3 Tbsp ketchup
1 Tbsp agave nectar (more if you desire, so taste before serving)
2 cups cashew milk (see recipe below)
1 cup tomato pulp
1 tsp cayenne pepper
CASHEW MILK
¾ cup cashew nuts
3 cups water
Blend in a hi speed blender for 2 minutes on high until totally smooth, then set aside (you can make your milk whist the sauce is simmering)
METHOD FOR THE CHICKEN TIKKA MASALA SAUCE
Heat your oil up in a large casserole.
Fry your onion, garlic, chilli and ginger mix until a little transparent – 5 minutes or so, then add all the spices and mix well with a large wooden spoon.
Next, add your tomato puree, mix for another 2 minutes or so and spoon in your marinated vegan chicken pieces.
Toss your ‘chicken’ pieces around gently for 5 minutes, cover and although there will not be much liquid other than from the yoghurt marinade, simmer gently for a further 2-3 minutes.
Now add the remaining ingredients, a little at a time. Adjust heat, salt and sweetness to meet your preference.
Garnish with freshly chopped coriander, and serve with basmati rice and chapatis (see my recipe).
Bon Appétit !
All recipes and content © Miriam Sorrell www.mouthwateringvegan.com 2010
These are free recipes for your pleasure – all we ask in return is that you take a few moments to scroll down to the bottom of this page and leave us a constructive comment.
suitable for vegans, vegetarians and meat-eaters alike

Pin
Vegan ‘Chicken’ Tikka MasalaRecipe by Miriam SorrellCourse: MainCuisine: Indian, Bangaldeshi, Pakistani, BritishServings
4
servingsPrep time45
minutesCooking time45
minutesVegan ‘Chicken’ Tikka Masala
INGREDIENTSMARINADE PASTE1 tsp paprika powder
1 tsp coriander powder
1/8 tsp tamarind
1 tsp sea salt
1 tsp cumin powder
½ tsp garlic powder
4 cups frozen vegan chicken pieces
1 cup vegan yoghurt (I used mine from my Yasou book)
4-5 Tbsp olive oil
METHOD FOR THE MARINADEMix the ingredients together in a small bowl, and stir into your vegan chicken pieces, massage with clean hands, cover with cling film, place in the fridge for 2-3 hours to marinate.
FIRST INGREDIENTS FOR THE SAUCE1 large white onion
4-5 cloves garlic
3 Tbsp minced ginger
1 red chilli pepper, roughly chopped
Place the above in a food blender and process until chopped very small – decant into a bowl and set aside
MORE INGREDIENTS FOR THE SAUCE¼ cup olive oil, or other oil of your choice
1 tsp garam masala
1 tsp ground cardamom
¼ tsp coriander powder
1 tsp tandoori masala
1 Tbsp tomato puree
3 Tbsp ketchup
1 Tbsp agave nectar (more if you desire, so taste before serving)
2 cups cashew milk (see recipe below)
1 cup tomato pulp
1 tsp cayenne pepper
CASHEW MILK¾ cup cashew nuts
¾ cup cashew nuts
Blend in a hi speed blender for 2 minutes on high until totally smooth, then set aside (you can make your milk whist the sauce is simmering)
METHODCHICKEN TIKKA MASALA SAUCEHeat your oil up in a large casserole. Fry your onion, garlic, chilli and ginger mix until a little transparent – 5 minutes or so, then add all the spices and mix well with a large wooden spoon.Next, add your tomato puree, mix for another 2 minutes or so and spoon in your marinated vegan chicken pieces.Toss your ‘chicken’ pieces around gently for 5 minutes, cover and although there will not be much liquid other than from the yoghurt marinade, simmer gently for a further 2-3 minutes.Now add the remaining ingredients, a little at a time. Adjust heat, salt and sweetness to meet your preference.Garnish with freshly chopped coriander, and serve with basmati rice and chapatis (see my recipe)Bon Appétit !Recipe Card plugin by
WPZOOM
The post Vegan ‘Chicken’ Tikka Masala appeared first on Mouthwatering Vegan.
June 30, 2020
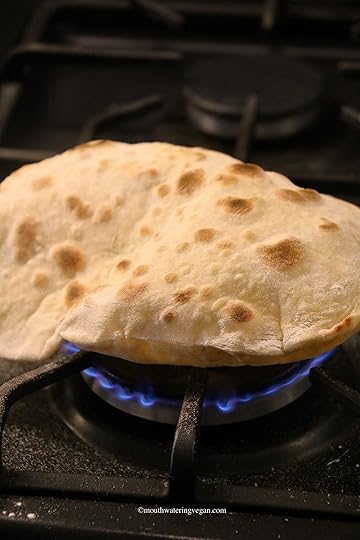
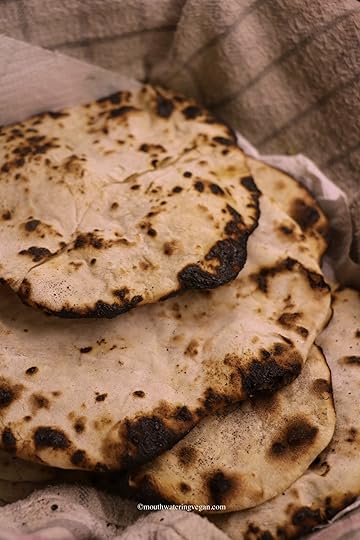
Fired Chapatis
I simply adore chapatis. I salt all my savoury dishes except for chapatis. Why ? Because I like them neutral in taste so that they can soak up the lovely curried gravies and juices from the sauces. Once you taste them, you’ll be hooked for the same reason.
It’s almost like saying I love to drink still cold water with my curries in order to fully appreciate the spices from the curries. And, like water which accompanies your meal, so too chapatis are accompaniments. Therefore they need not shine through their mains, but rather assist in scooping and mopping up the deliciousness, and acilitating the culinary experience.
INGREDIENTS
450g/1 lb chapati flour or plain strong bread flour (organic)
250ml/9 fl oz cold water
vegan butter/margarine for spreading (optional)
METHOD
Place the majority of the flour in a very large bowl for kneading, and keep the rest to one side for dusting. If you happen blessed with a marble worktop, clean it and use that.
Make a well in the middle of the flour ,and pour half your water in and mix with clean hands. Then add the rest and knead until you have a sticky dough. Use the heel of your hand to fold the dough over and continue kneading for some minutes. You will need to knead for about 10 minutes.
Set aside for a few minutes to rest, then dust your worktop with the flour you put aside.
Now roll your dough into a long sausage cylinder shape and and with a dough cutter or other, cut 7-8 equal pieces. Take each one and roll into a ball, then knead it into a round shape ready for cooking.
Heat a non stick pan, and dry fry your chapati on both sides until brown circles form. Press the chapati down with a paper kitchen towel so as to avoid burning your fingers. Flip over and repeat.
When ready, place into a warm bowl and cover to keep warm. You can use foil for this, otherwise a fabric kitchen towel will do a great job, and you can then place them in a bread basket.
Enjoy them hot. You may of course place a small knob of vegan butter on each chapati as you layer them on into the basket.
TIP : Extra dough can be refrigerated and consumed within 24-48 hours. Shape into balls as per previous instruction and dry fry.
All recipes and content © Miriam Sorrell www.mouthwateringvegan.com 2010
These are free recipes for your pleasure – all we ask in return is that you take a few moments to leave us a constructive comment !
suitable for vegans, vegetarians and meat-eaters alike


Pin
Fired ChapatisRecipe by Miriam SorrellCourse: SidesCuisine: IndianServings
4
servingsEasy Dry Fry Chapatis
INGREDIENTS450g/1 lb chapati flour or plain strong bread flour (organic)
250ml/9 fl oz cold water
vegan butter/margarine for spreading (optional)
METHODPlace the majority of the flour in a very large bowl for kneading, and keep the rest to one side for dusting. If you happen blessed with a marble worktop, clean it and use that.Make a well in the middle of the flour ,and pour half your water in and mix with clean hands. Then add the rest and knead until you have a sticky dough. Use the heel of your hand to fold the dough over and continue kneading for some minutes. You will need to knead for about 10 minutes.Set aside for a few minutes to rest, then dust your worktop with the flour you put aside.Now roll your dough into a long sausage cylinder shape and and with a dough cutter or other, cut 7-8 equal pieces. Take each one and roll into a ball, then knead it into a round shape ready for cooking.Heat a non stick pan, and dry fry your chapati on both sides until brown circles form. Press the chapati down with a paper kitchen towel so as to avoid burning your fingers. Flip over and repeat.When ready, place into a warm bowl and cover to keep warm. You can use foil for this, otherwise a fabric kitchen towel will do a great job, and you can then place them in a bread basket.Enjoy them hot. You may of course place a small knob of vegan butter on each chapati as you layer them on into the basket.TIP : Extra dough can be refrigerated and consumed within 24-48 hours. Shape into balls as per previous instruction and dry fry.Recipe Card plugin by
WPZOOM
The post Fired Chapatis appeared first on Mouthwatering Vegan.
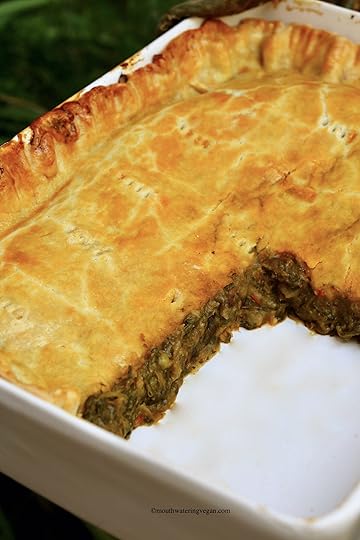
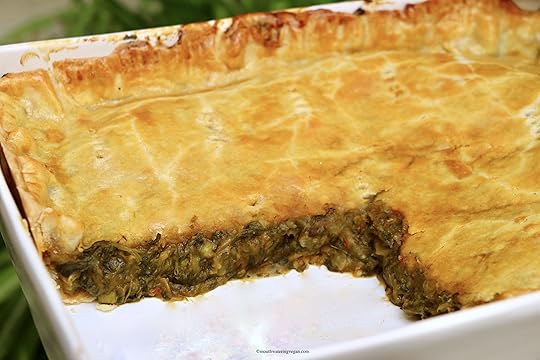
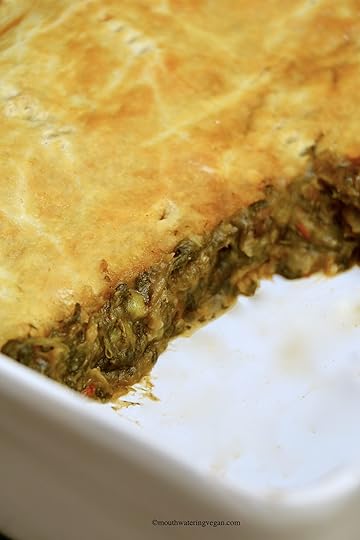
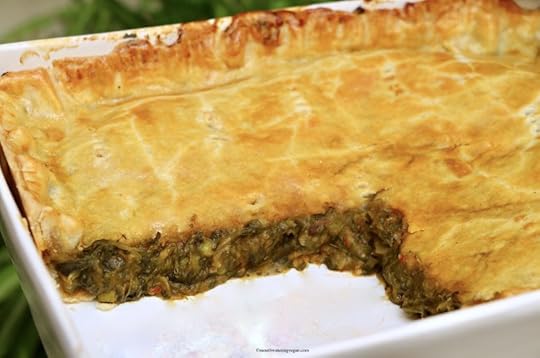
Torta Maltija – Maltese Style Spinach no-Anchovy Pie
Who doesn’t like pies ? I confess to being a pie addict all year round. I love Maltese pies, they sell them as a traditional savoury treat in the take-away snack bars, and they are made in a variety of ways.
There is also a traditional Lampuki Pie which is a fish pie made in a similar way to this recipe, but this has no fish. It is so very tasty, and has a deep Mediterranean taste about it – something deliciously sensual about the a combination of olives, spinach, and sun dried tomato flavours that become both more-ish and irresistible ! The rich salty taste of the black olives and sun-dried tomatoes taking centre stage and eloquently substituting the anchovies.
I hope you make and enjoy this as much as we do at home. I used sun-dried tomatoes instead of anchovy, as they are rich and salty, and very flavourful indeed.
INGREDIENTS
640 grams shortcrust pastry
(I used Jus-Rol the twin sheet pack)
Filling
1½ cups marrowfat peas
2 cups mashed potatoes
1 Tbsp vegan butter
2 Tbsp olive oil
1 large white or yellow onion, finely chopped
2 cloves garlic, chopped
2 Tbsp tomato puree
½ cup chopped green olives
1 tsp sea salt
6 halved Mediterranean sun-dried tomatoes, chopped
1 tsp curry powder (optional)
2 cups pre-cooked spinach (chopped)
or 380 grams cooked from a tin (wring the water out)
1 cup petit pois (yes, in addition to the other peas)
1 tsp chilli flakes (optional)
½ cup vegetable stock (bouillon)
Vegan Egg Wash
You can simply use plant milk with 1 tsp maple syrup
OR
Melted vegan butter with a little turmeric & maple syrup – mix and brush on dough
METHOD
First pre-boil your potatoes
Then place the marrowfat peas and cooked potatoes, together with a pinch of salt, in a food processor with the vegan butter, and mash until smooth – remove and place in a bowl, and set aside.
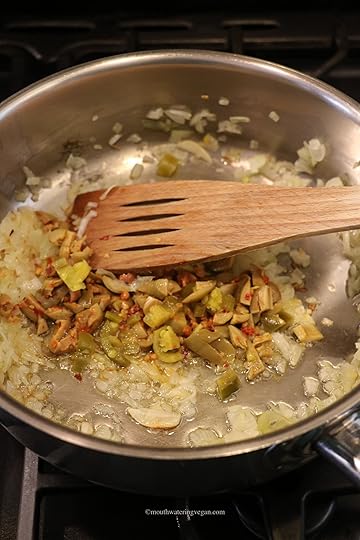
Next, sauté your onions and garlic in a large pan, and once the onion turns a little transparent, add the tomato puree and olives, and stir well. Then add your petit pois.
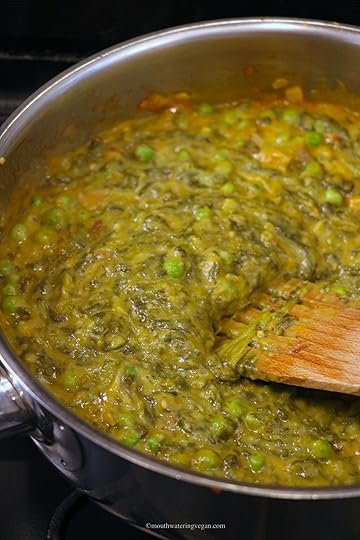
Stir in your spinach and the remaining ingredients, including your mashed up peas and potatoes. Let it simmer for 10 minutes – taste for seasoning. Allow to cool down.
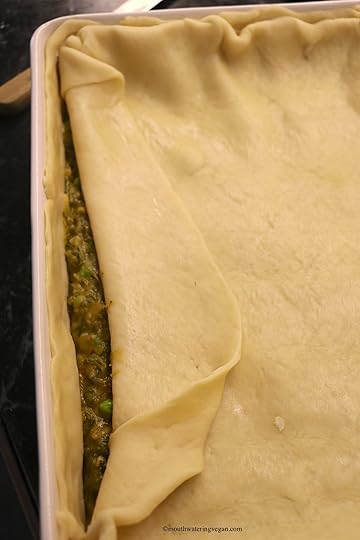
Pre-heat your oven to 180°C /350°F, and grease an oven dish approximately 12 inches by 8 inches – roll out your pastry, allowing enough for the base and sides, and a separate piece for the top.
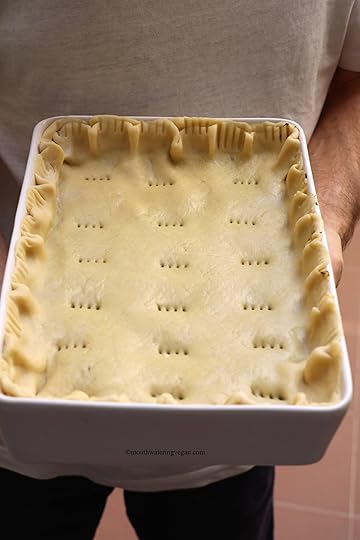
Line your dish with the pastry, including the sides, and spoon in your cooled down filling. Even it out with the back of a spoon, and place the other sheet of pastry on top – secure edges and then fork the top.
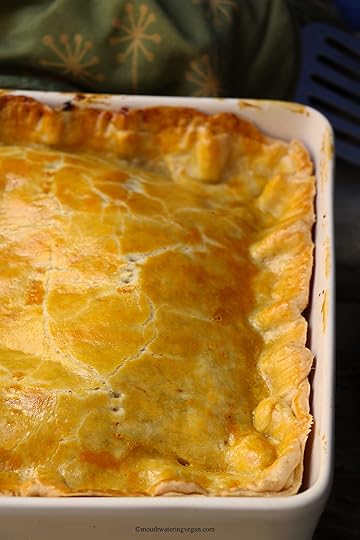
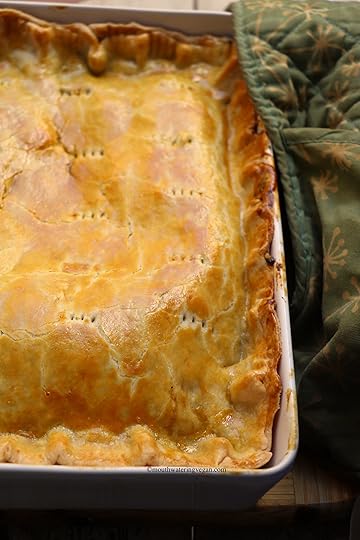
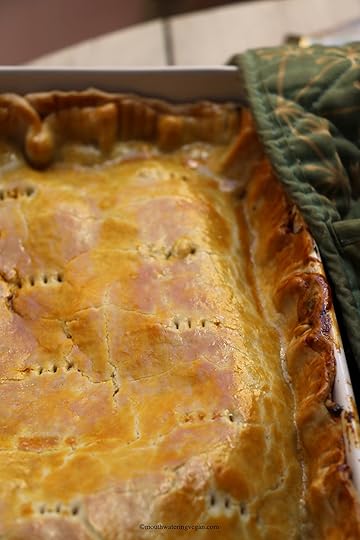
You can brush the vegan egg wash on the top, and then bake until golden in your preheated oven for approximately 30 minutes, but as all ovens vary, keep an eye, you may need a little less or a little more time.
Allow to cool for 10 minutes before scoring and serving.
All recipes and content © Miriam Sorrell www.mouthwateringvegan.com 2010
These are free recipes for your pleasure – all we ask in return is that you take a few moments to leave us a constructive comment !
suitable for vegans, vegetarians and meat-eaters alike
Pin
Torta Maltija – Maltese Style Spinach & ‘No Anchovy’ PieRecipe by Miriam SorrellCourse: Main, Starter or SnackCuisine: Maltese, MediterraneanServings
4
servingsPrep time30
minutesCooking time45
minutesMaltese Spinach & ‘No Anchovy’ Pie
INGREDIENTS640 grams shortcrust pastry
(I used Jus-Rol the twin sheet pack)
Filling
1½ cups marrowfat peas
2 cups mashed potatoes
1 Tbsp vegan butter
2 Tbsp olive oil
1 large white or yellow onion, finely chopped
2 cloves garlic, chopped
2 Tbsp tomato puree
½ cup chopped green olives
1 tsp sea salt
6 halved Mediterranean sun-dried tomatoes, chopped
1 tsp curry powder (optional)
2 cups pre-cooked spinach (chopped)
or 380 grams cooked from a tin (wring the water out)
1 cup petit pois (yes, in addition to the other peas)
1 tsp chilli flakes (optional)
½ cup vegetable stock (bouillon)
Vegan Egg WashYou can simply use plant milk with 1 tsp maple syrup, or
Melted vegan butter with a little turmeric & maple syrup – mix and brush on dough
METHODFirst pre-boil your potatoesThen place the marrowfat peas and cooked potatoes, together with a pinch of salt, in a food processor with the vegan butter, and mash until smooth – remove and place in a bowl, and set asideNext, sauté your onions and garlic in a large pan, and once the onion turns a little transparent, add the tomato puree and olives, and stir well. Then add your petit poisStir in your spinach and the remaining ingredients, including your mashed up peas and potatoes. Let it simmer for 10 minutes – taste for seasoning. Allow to cool downPre-heat your oven to 180°C /350°F, and grease an oven dish approximately 12 inches by 8 inches – roll out your pastry, allowing enough for the base and sides, and a separate piece for the topLine your dish with the pastry, including the sides, and spoon in your cooled down filling. Even it out with the back of a spoon, and place the other sheet of pastry on top – secure edges and then fork the topYou can brush the vegan egg wash on the top, and then bake until golden in your preheated oven for approximately 30 minutes, but as all ovens vary, keep an eye, you may need a little less or a little more timeAllow to cool for 10 minutes before scoring and servingRecipe Card plugin by
WPZOOM
The post Torta Maltija – Maltese Style Spinach no-Anchovy Pie appeared first on Mouthwatering Vegan.
Miriam Sorrell's Blog

- Miriam Sorrell's profile
- 4 followers


)