C.M. Simpson's Blog, page 189
March 2, 2014
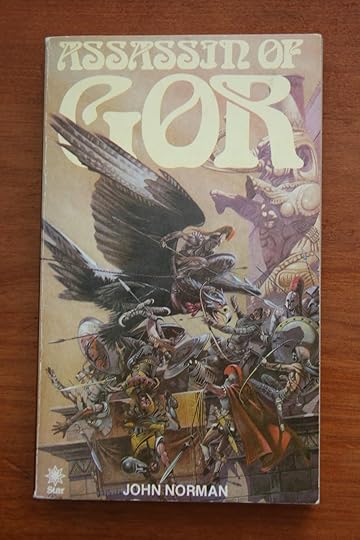
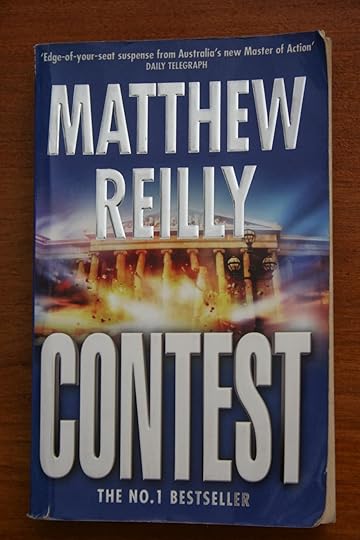
Books Read in February 2014
I did get some books read this month - mostly before I went to sleep - but not as many as usual. Here they are:


March 1, 2014
Progress Report: Week 1, March 1014
This week just gone was almost another wipe-out, but I managed to get 8,000 words completed on Saturday, which caught me up, okay on one project, brought me nearly up-to-date on a second and saw a third, fourth, and fifth cemented as ideas. Who knew? Still getting the hang of the study, family, work balance, but it’s coming along.
Overview
New words produced: 8,317Old words revised: 0Works completed: 0Works revised: 0Covers created: 0 (1-3 variations)Works published: 0 (2-3 release platforms)Works submitted: 0Competitions Entered: 0
Tier 1 Tasks
Annual 13: Added 1,189 wordsAnnual 14: Added 3,487 words
Extra Tasks
Annual20A: Added 71 wordsAnnual22: Added 3,142 wordsAnthology27: Added 428 words
Publishing Tasks
Created 1 blog posts for this blog;
New Arrivals The following ideas arrived this week:
Annual20A: to do with poetry;Annual20B: to do with more poetry;Annual21: to do with flash fiction;Annual22: to do with writing inspirations;Poem302—Stormlight and Raindrops: a series of haiku about the special light that precedes a storm;Poem303—Troll Children: a poem about the progeny of trolls;Poem304–Dragon’s Breath: a cinquain about a dragon and a storm;Poem305—Take Another Look at the World: a garland cinquain about looking at the world differently;Poem306—Starship Mine: a poem about watching a starship launch;Poem307—Seagulls in the Bus Mall: a series of haiku about seagulls in the bus mall;Poem308—Children, Machines, Humans: a garland cinquain about what might motivate children to do what they do;Poem309—The Significance of Raindrops: a poem about what raindrops might signify in another place and another time;Poem310—The Loneliness of Pioneers: a cinquain about the loneliness of pioneers in space;Poem311—Dragon’s Gold: a poem from the perspective of a thief who has stolen from a dragon;ShortStory219—Thieving Pixies: a piece of flash paranormal urban fiction about pixies causing trouble;ShortStory220—My Defender and I: a piece of flash speculative fiction about a bodyguard and his principal;ShortStory221—Troll Bridge: a piece of flash paranormal urban fiction about a troll hunter;ShortStory222—Homecoming: a piece of flash speculative fiction about pack;ShortStory223—The Dance of Life: a piece of flash science fiction about colonies meeting other sentient species;ShortStory224—When Pixies Dance the Storm Dance: a piece of flash paranormal urban fiction about pixies and unicorns and blowing stuff up;ShortStory225—Repatriation: a piece of flash paranormal urban fiction about pixies and unicorns and a homecoming with a difference;ShortStory226—Meet the Medilo Range: a piece of flash science fiction about the Medilo Ranges.
February 28, 2014
2013 Aurealis Awards Finalists are Out
So, I'm doing my blog cruise this morning (because I haven't done one for almost a month), and I drop into the Aurealis site to discover they've announced the finalists. I'm not one of them, but there are a lot of fine writers who are. Why don't you head on over and check them out. You can find the Aurealis site HERE, and the finalist announcement HERE.
February 26, 2014
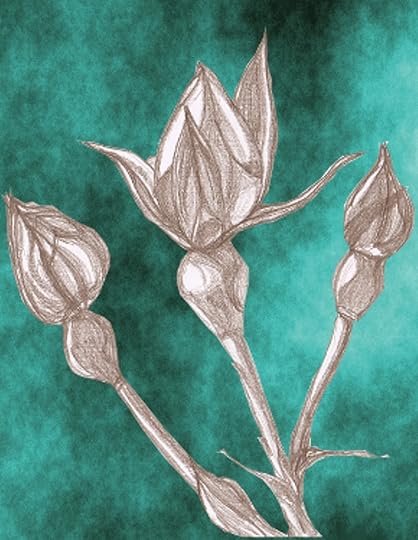
Art Development: Rosebuds and the Gimp Colorize Tool
One of the things I was curious about was how to insert different backgrounds into an image once I had isolated it... and I wanted to see what some of the effects in Gimp did when used as backgrounds. Last week, I explored the Blend and Bucket Fill tools in the Toolbox dock, and the Difference Clouds and Plasma effects under the Render-Clouds option in the Filters drop-down.
This week, I wanted to look at some of what might be done with the Colorize option under the Colors tab.
BEFORE:

What you Need:
I usually have the following dockable dialogues visible as I work: Toolbox, Brushes,Tool Options and Layers-Gradients. You will need to be able to see these to work through the following steps.
I have assumed that you already know how to resize an image using the drop-down menu under image. Please let me know if you don't, and I will write another post to explain it.
How to Colorize an Image Background:
Make sure you have a coloured background. (I used my Plasma background picture for this experiment.)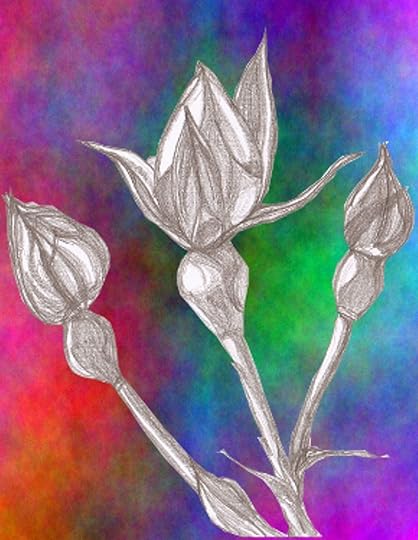 Click on the 'Colors' tab.Click on the Colorize option in the drop-down menu. (NOTE: If you click on OK at this point, you will achieve the following effect. If you want the light grey effect at the bottom, do not click OK.)
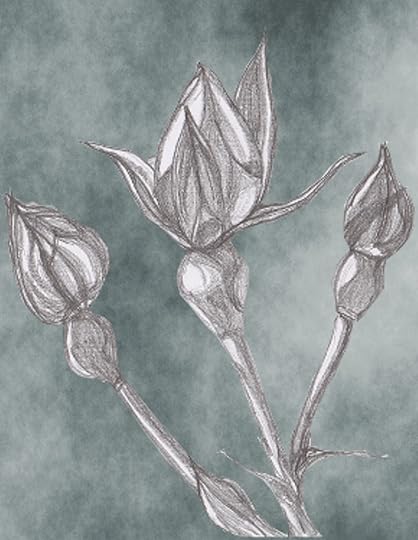
 Click on the Saturation slide bar and move it to the left until the counter to the right of the bar reaches 6. (NOTE: If you click on OK at this point, you will achieve the following effect. If you want the light grey effect at the bottom, do not click OK.)
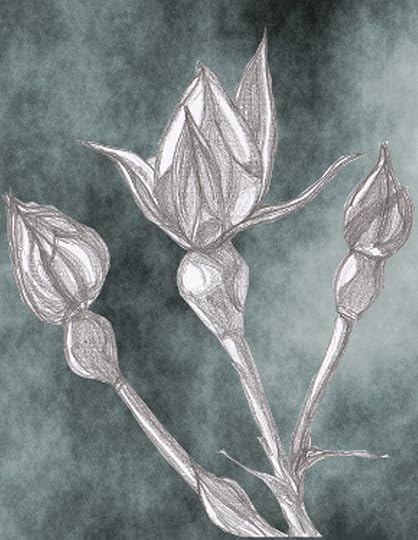 Click on the Lightness slide bar and move it to the right until the counter to the right of the bar reaches 30. (NOTE: If you click on OK at this point, you will achieve the following effect. If you want the light grey effect at the bottom, do not click OK.)
This week, I wanted to look at some of what might be done with the Colorize option under the Colors tab.
BEFORE:

What you Need:
I usually have the following dockable dialogues visible as I work: Toolbox, Brushes,Tool Options and Layers-Gradients. You will need to be able to see these to work through the following steps.
I have assumed that you already know how to resize an image using the drop-down menu under image. Please let me know if you don't, and I will write another post to explain it.
How to Colorize an Image Background:
Make sure you have a coloured background. (I used my Plasma background picture for this experiment.)
 Click on the 'Colors' tab.Click on the Colorize option in the drop-down menu. (NOTE: If you click on OK at this point, you will achieve the following effect. If you want the light grey effect at the bottom, do not click OK.)
 Click on the Saturation slide bar and move it to the left until the counter to the right of the bar reaches 6. (NOTE: If you click on OK at this point, you will achieve the following effect. If you want the light grey effect at the bottom, do not click OK.)
 Click on the Lightness slide bar and move it to the right until the counter to the right of the bar reaches 30. (NOTE: If you click on OK at this point, you will achieve the following effect. If you want the light grey effect at the bottom, do not click OK.)

February 24, 2014
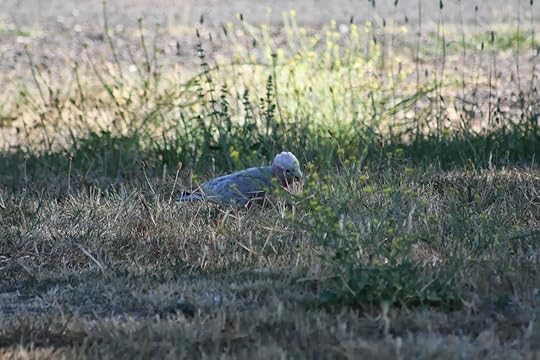
Australian Birds: Galah (Eolophus roseicapillus)
There is an amazing amount of birdlife around my house. This fellow was part of a small flock of galahs that settled down to feast on grass seeds and flower heads not far from my back fence:

They noticed the camera with human attached and kept an eye on it:
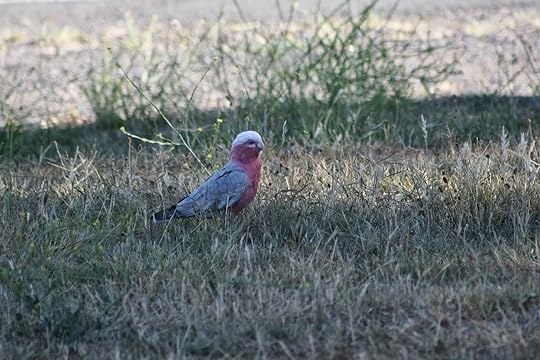
But ot even the youngest one let it disturb its feeding:
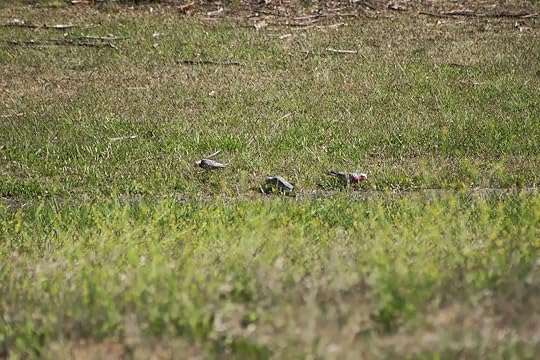
I tried to capture more than one of them together,

but this proved to be almost impossible, and got a very direct look from the youngest of the flock:

In the end, they moved to what they thought was a safer distance and I was able to take a group shot.

February 22, 2014
Progress Report: Week 4 February 2014
Well, things have really slowed down with the start of the university semester. I’ve had to withdraw from one writer activity and turn down a beta read (sorry, Greta) already, and was almost late in prepping things for the C.M. Simpson Publishing release schedule – apologies, Ellie. I did manage to complete some short work, this week on the bus, but, as it’s not in the computer, yet, it doesn’t count. I will have to see if I can manage better, this week.
OverviewNew words produced: 2,070Old words revised:0Works completed: 7 (for inclusion into a larger work)Works revised: 0Covers created: 0Works published: 0Works submitted: 0Competitions Entered: 0
 Tier 1 TasksAnnual 13: Added 329 wordsAnnual 14: Added 1,741 wordsTier 2 TasksRomNov14A—Country Rush: Added 1,296 wordsPublishing Tasks
Created 1 blog posts for this blog;Did final edit, format and upload of Ellie Moonwater’s Candy Cane Dancer for C.M. Simpson Publishing
New Arrivals
The following ideas arrived this week:
Poem299—The Storyteller’s Way: about elements in stories;Poem300—Stupidity on the Brink: about war;Poem301—Uncharted Colony: a poem about how colonies might end up being uncharted;ShortStory215—The Tradition of Laughter on Midas 357: a piece of flash speculative fiction about a weather system and laughter;ShortStory216—The Del Marina Betrayal: a piece of flash science fiction set in an alternative future;ShortStory217—Dead Man’s Park: a piece of flash crime fiction about the dead; ShortStory218—The Pixies at Wickman’s Cave: a piece of flash paranormal urban fiction about pixies and unicorns and some bad, bad men.
February 19, 2014
Art Development: Rosebuds and Gimp Backgrounds
One of the things I was curious about was how to insert different backgrounds into an image once I had isolated it... and I wanted to see what some of the effects in Gimp did when used as backgrounds.
BEFORE:
What you Need:I usually have the following dockable dialogues visible as I work: Toolbox, Brushes,Tool Options and Layers-Gradients. You will need to be able to see these to work through the following steps.
I have assumed that you already know how to resize an image using the drop-down menu under image. Please let me know if you don't, and I will write another post to explain it.
How to Create an Image:Click on the 'File' drop-down at the top of the Gimp workspace.Click on 'New'.Decide on the dimensions of your new image and type them in.Click on the 'Advance' option and increase the number of pixels to 300 dpi. (This is the minimum setting for most on-line art requirements.)Click 'OK'A new image area will appear.Note that you can see a single layer in the Layers-Gradients dock. It is labelled Background.How to Import an Image:
Click on the File drop-down at the top of the Gimp workspace.Click on the 'Open as Layers' option (fourth option down).Browse to the image file you want to import and double-click on it.Look at the Layers-Gradients dock and note that you now have a Background, Background #1, and a Dropped Buffer layer.Right click on the Background #1 layer and delete it.Click on the Move tool in the Toolbox (fourth tool down in the right-hand column).Click on the image until you are able to select the Dropped Buffer layer and move it so that it sits over the Background layer. When you have the two layers aligned how you want them, release the Move tool.
Background 1: Plain-Jane GreyClick on the Background layer so that it turns blueClick on the colour box at the bottom of the Toolbox.Select a shade of grey that you think will be a suitable background for your sketch.Click on the Bucket Fill tool in the Toolbox. (It's the eighth tool down in the left column.)Click on a part of the background in the image. The background should turn grey.
Background 2: BlendedClick on the Blend tool (eight tool down in the centre column).Drag the tool across a selection of your sketch and release it. The blend will occur automatically. (You may need to experiment before you achieve the effect you want.)
Background 3: PlasmaClick on the Filters tab at the top of the Gimp workspace.Click on the Render option (sixth option from the bottom.Click on the Clouds option (top)Click on the Plasma option (third from top)

Background 4: DifferenceClick on the Filters tab at the top of the Gimp workspace.Click on the Render option (sixth option from the bottom.Click on the Clouds option (top)Click on the Difference Clouds option (top)
NOTE: To darken the image, repeat steps 1-4 above.

BEFORE:
What you Need:I usually have the following dockable dialogues visible as I work: Toolbox, Brushes,Tool Options and Layers-Gradients. You will need to be able to see these to work through the following steps.
I have assumed that you already know how to resize an image using the drop-down menu under image. Please let me know if you don't, and I will write another post to explain it.
How to Create an Image:Click on the 'File' drop-down at the top of the Gimp workspace.Click on 'New'.Decide on the dimensions of your new image and type them in.Click on the 'Advance' option and increase the number of pixels to 300 dpi. (This is the minimum setting for most on-line art requirements.)Click 'OK'A new image area will appear.Note that you can see a single layer in the Layers-Gradients dock. It is labelled Background.How to Import an Image:
Click on the File drop-down at the top of the Gimp workspace.Click on the 'Open as Layers' option (fourth option down).Browse to the image file you want to import and double-click on it.Look at the Layers-Gradients dock and note that you now have a Background, Background #1, and a Dropped Buffer layer.Right click on the Background #1 layer and delete it.Click on the Move tool in the Toolbox (fourth tool down in the right-hand column).Click on the image until you are able to select the Dropped Buffer layer and move it so that it sits over the Background layer. When you have the two layers aligned how you want them, release the Move tool.
Background 1: Plain-Jane GreyClick on the Background layer so that it turns blueClick on the colour box at the bottom of the Toolbox.Select a shade of grey that you think will be a suitable background for your sketch.Click on the Bucket Fill tool in the Toolbox. (It's the eighth tool down in the left column.)Click on a part of the background in the image. The background should turn grey.

Background 2: BlendedClick on the Blend tool (eight tool down in the centre column).Drag the tool across a selection of your sketch and release it. The blend will occur automatically. (You may need to experiment before you achieve the effect you want.)

Background 3: PlasmaClick on the Filters tab at the top of the Gimp workspace.Click on the Render option (sixth option from the bottom.Click on the Clouds option (top)Click on the Plasma option (third from top)

Background 4: DifferenceClick on the Filters tab at the top of the Gimp workspace.Click on the Render option (sixth option from the bottom.Click on the Clouds option (top)Click on the Difference Clouds option (top)

NOTE: To darken the image, repeat steps 1-4 above.

February 17, 2014
Australian Spiders: Grey Huntsman (Sparassidae)
This not so little lady almost caused my son to leap out of his skin. He had called me out to photograph another spider,

when I saw this large dark shadow on the fence about two metres behind him.
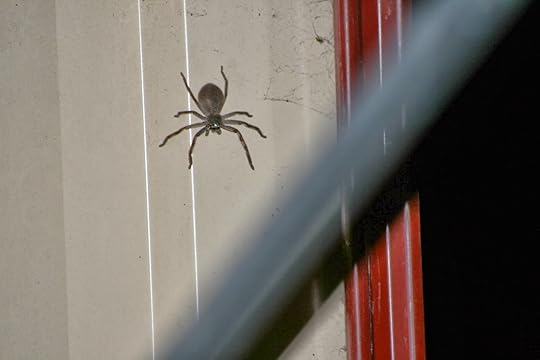
It took me a little whle to realize this really was a huntsman, just the biggest, fattest huntsman I had seen in... oh, forever...

Good thing they're not poisonous.

when I saw this large dark shadow on the fence about two metres behind him.

It took me a little whle to realize this really was a huntsman, just the biggest, fattest huntsman I had seen in... oh, forever...

Good thing they're not poisonous.
February 15, 2014
Progress Report: Week 3 February 2014
Very slow week, this week. I slacked off a good deal, had one night of classes and a day of roleplaying, and also worked out I wasn’t feeling a hundred percent. Hopefully, things will improve this week, even though I will be much busier. Stuff got done, but a lot less stuff than should have gotten done. My bad.OverviewNew words produced: 1,207 wordsOld words revised: 0Works completed: 7 (for inclusion into 2 longer works)Works revised: 0Covers created: 0Works published: 0Works submitted: 0Competitions Entered: 0Tier 1 Tasks
Annual13—Added 426 wordsAnnual14—Added 781 words
Publishing Tasks
Created 1 blog post for this blog;Created 1 blog post for the C.M. Simpson Publishing blog;
New ArrivalsThe following ideas arrived this week:
Poem296—Merciful Rain: a series of haiku about rain;Poem297—Out Amongst the Stars: about being amongst the stars;Poem298—If you are Lonely: a poem of hope, even in loneliness ShortStory211—A Lesson in the Stars: a piece of speculative flash fiction about a meeting of two cultures;ShortStory212—Tears in the Storm: speculative flash fiction about why a storm is good for hiding tears;ShortStory213—Thursday the Thirteenth: paranormal urban horror flash fiction about Thursday the 13th;ShortStory214—Mission Accomplished:flash horror, science fiction about the achievement of a mission
February 12, 2014
Art Development: Rosebuds and Gimp Manipulation - Isolating an Image
One of the things I recognised is that I would need to digitise my artwork in order to incorporate it into books, or to ship it to anyone interested in purchasing it... should I ever get good enough, and that reminded me that there are programs out there that are quite powerful, but not so intuitive to use.
Gimp, for instance, is free, but has its own quirks. I decided I would try to get my head around what this tool could do... or, perhaps, what I could manage to achieve with the tool.
I wanted to isolate the rosebuds from the background clutter by cutting them out. This is done using the 'Free Select Tool'. This is not as easy as it seems, because the clipboard will only take 525x525 pixels. There was much cussing and crying until I worked out I had to shrink the longest edge of the image to 525 BEFORE I began my cut. Of course, the trickiest thing is to remember to write down the original dimensions of the picture and then return the finalised image to the original size.
BEFORE:

AFTER:

What you Need:I usually have the following dockable dialogues visible as I work: Toolbox, Brushes,Tool Options and Layers-Gradients. You will need to be able to see these to work through the following steps.
I have assumed that you already know how to resize an image using the drop-down menu under image. Please let me know if you don't, and I will write another post to explain it.
How to Isolate an Image:
Resize the image so that no side is larger than 525 pixels. (If you don't, the cut will occur, but the piece you cut out will not be stored in full. Because the resizing shrinks the on-screen image, you will need to click on the Magnifying Glass (fourth tool down in the Toolbox)Go to the Tool Options window and make sure the dot next to the Zoom In option is selected.Click on the image until is is large enough for you to comfortably see the outline you want to trace. Click on the 'Free Select Tool'. (It's the third tool along in the top row of the Toolbox.)Place the pointer at one point on the image that you want to cut out, and then trace around the image, securing the trace by clicking on the part being traced at regular intervals. (You will need to trace the entire outside of the image as a whole. If you try to cut out extra bits, the cut won't work.)When you have completed the outline, make sure you click on the point you started on so that the line begins to flash.Click on the 'Edit' tab at the top of the Gimp work area.On the 'Edit' dropdown, click on 'Cut' (the fifth option down). This will remove the part of the picture you outlined.Click on the 'Clipboard' box in the 'Brushes' dock. This transfers what you just cut out to your pointer.Look at the 'Layers-Gradients' dock. You should only be able to see one layer. It should have an open eye next to it and be labelled 'Background'. Next, click on the image box to place the cut-out back in the picture. In the 'Layers-Gradient' dock, you should now be able to see two layers, the 'Background' layer and the 'Dropped Buffer' Layer. Both will have an open eye next to them. Click on the open eye next to the Background layer to turn the background off.Now, click on the 'Move' tool. (This is the fourth tool down in the right-hand column of the toolbox.)Click on the picture and move it around until you are happy with its positioning. (I usually try to align it with the outline on the Background layer showing where it was cut from, but this isn't necessary when the Background layer is turned off.)When you are happy with the result, resize the image so that it is back to its original dimensions and save it. Why isolate?
When I isolate an image, I can then insert the cut-out in other pictures without the background getting in the way. It also lets me play with the background without having to use the traditional method of painting or colouring one in.
More about that next week.