C.M. Simpson's Blog, page 147
January 1, 2017
Releases as Carlie Simonsen in 2016
This year, I chose to focus on writing as Carlie Simonsen, and to get my short stories as C.M. Simpson up to speed. As Carlie Simonsen, I released the following titles in 2016:
JANUARY 2016
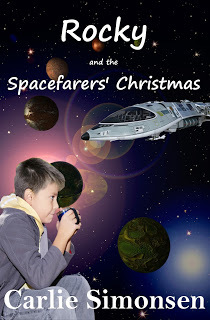 Rocky and the Spacefarers' Christmas EBook Cover
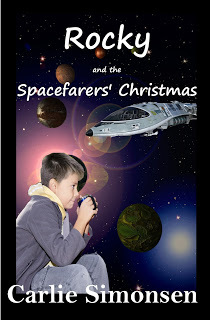 Rocky and the Spacefarers' Christmas PoD Cover
Rocky is on a starship to another world, and it’s boring. He misses Earth. He misses his farm. He misses his pony. Worst of all, it looks like he’s going to miss Christmas, too. And then he meets Elita, an alien girl missing her own end-of-year celebration—Hajranath. The two of them get to talking, and decide that a party is just what everybody needs, but how are they ever going to convince the grown-ups?
Rocky and the Spacefarers’ Christmas is the second book in the Otherworld Adventures series, which is set on Rocky’s journey to the new world where his parents will farm alongside the aliens.
FEBRUARY 2016
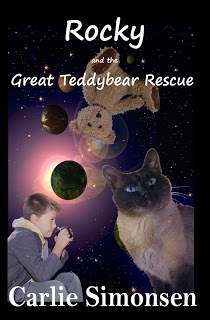 Rocky and the Great Teddybear Rescue PoD Cover
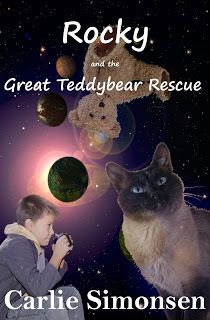 Rocky and the Great Teddybear Rescue EBook Cover
Rocky wakes up from stasis, and realises he’s nearly home, but he hasn’t been awake for five minutes when things start to go wrong. His little sister’s teddybear is missing, and it’s not the only thing. A cat has gone missing from the animals’ deck. And then his sister goes missing, too. Can Rocky find her, and maybe Teddy and the cat, before the ship arrives and all three are lost forever?
Rocky and the Great Teddybear Rescue is the third book in the Otherworld Adventures series, which is set on Rocky’s journey to the new world, where his parents will farm alongside the aliens who have asked them to help.
MARCH 2016
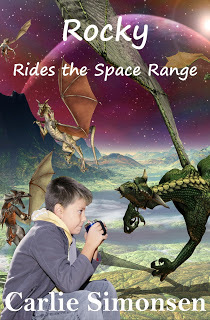 Rocky Rides the Space Range Ebook Cover
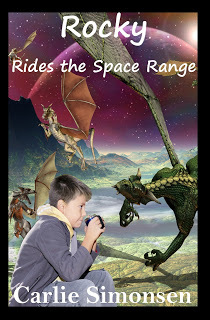 Rocky Rides the Space Range PoD Cover
When Rocky’s ship stops to resupply at Tallona’s First Moon, Rocky and his classmates head down to the surface. Seeing moon dragons, ice beetles, dangerous butterflies and flowers that grow on the moon’s surface seem like a good way to spend a day. Rocky never expects to have to deal with moon raiders as well. When his little sister runs away to protect the dragon eggs, Rocky’s troubles really begin. Can he sneak out of the base, find his sister, and bring her back without the pirates or moon base security ever finding out? All he knows is that he has to try.
Rocky Rides the Space Range is the fourth book in the Otherworld Adventures series, which is set on Rocky’s journey to the world of Tallona, where his parents will farm alongside the aliens who have asked them for help.
APRIL 2016
MAY 2016
 Legacy of Hearts Ebook Cover
 Legacy of Hearts PoD Cover
Dumped by her boyfriend, Tomas, because she ended up in a wheelchair, Stella has to rebuild her life. If she hadn’t met Ambrose in hospital, she might never have thought of playing basketball again, but he was just a friend. She never expected to see him when she got out. It comes as a total surprise, when Ambrose meets Stella after her first basketball game in a chair. More surprising is his request to see her again. Can Stella afford to let him keep visiting, or will he end up being just as much of a disaster as Tomas had been?
Legacy of Hearts is the third book in the Wheelchair Adventures series, which is based around young people getting their wheels underneath them, after they find themselves in wheelchairs.
JUNE 2016
JANUARY 2016
 Rocky and the Spacefarers' Christmas EBook Cover
 Rocky and the Spacefarers' Christmas PoD Cover
Rocky is on a starship to another world, and it’s boring. He misses Earth. He misses his farm. He misses his pony. Worst of all, it looks like he’s going to miss Christmas, too. And then he meets Elita, an alien girl missing her own end-of-year celebration—Hajranath. The two of them get to talking, and decide that a party is just what everybody needs, but how are they ever going to convince the grown-ups?
Rocky and the Spacefarers’ Christmas is the second book in the Otherworld Adventures series, which is set on Rocky’s journey to the new world where his parents will farm alongside the aliens.
FEBRUARY 2016
 Rocky and the Great Teddybear Rescue PoD Cover
 Rocky and the Great Teddybear Rescue EBook Cover
Rocky wakes up from stasis, and realises he’s nearly home, but he hasn’t been awake for five minutes when things start to go wrong. His little sister’s teddybear is missing, and it’s not the only thing. A cat has gone missing from the animals’ deck. And then his sister goes missing, too. Can Rocky find her, and maybe Teddy and the cat, before the ship arrives and all three are lost forever?
Rocky and the Great Teddybear Rescue is the third book in the Otherworld Adventures series, which is set on Rocky’s journey to the new world, where his parents will farm alongside the aliens who have asked them to help.
MARCH 2016
When Rocky’s ship stops to resupply at Tallona’s First Moon, Rocky and his classmates head down to the surface. Seeing moon dragons, ice beetles, dangerous butterflies and flowers that grow on the moon’s surface seem like a good way to spend a day. Rocky never expects to have to deal with moon raiders as well. When his little sister runs away to protect the dragon eggs, Rocky’s troubles really begin. Can he sneak out of the base, find his sister, and bring her back without the pirates or moon base security ever finding out? All he knows is that he has to try.
Rocky Rides the Space Range is the fourth book in the Otherworld Adventures series, which is set on Rocky’s journey to the world of Tallona, where his parents will farm alongside the aliens who have asked them for help.
APRIL 2016
MAY 2016
 Legacy of Hearts Ebook Cover
 Legacy of Hearts PoD Cover
Dumped by her boyfriend, Tomas, because she ended up in a wheelchair, Stella has to rebuild her life. If she hadn’t met Ambrose in hospital, she might never have thought of playing basketball again, but he was just a friend. She never expected to see him when she got out. It comes as a total surprise, when Ambrose meets Stella after her first basketball game in a chair. More surprising is his request to see her again. Can Stella afford to let him keep visiting, or will he end up being just as much of a disaster as Tomas had been?
Legacy of Hearts is the third book in the Wheelchair Adventures series, which is based around young people getting their wheels underneath them, after they find themselves in wheelchairs.
JUNE 2016


December 31, 2016
Short Stories and Poems released as C.M. Simpson in 2016
This year, I focussed on my short story and poetry writing, and on my writing as Carlie Simonsen. These are the short stories, poems, and short work collections I released in 2016:
JANUARY 2016
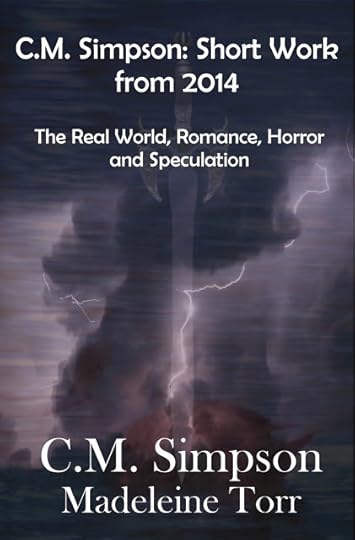
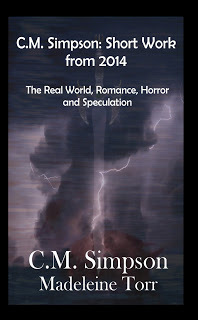
 Short Work from 2014, Vol. 1 EBook Cover
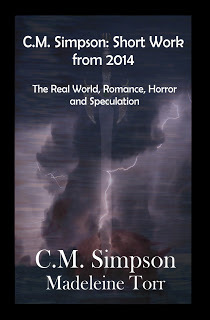 Short Work from 2014 Trade PoD Cover
 Short Work from 2014 Mass Market PoD Cover
A collection of flash fiction, short stories, poems and essays where social commentary rubs shoulders with zombies, where poems both celebrate and criticise yearly celebrations and where short stories blend genres, where inspiration is usually grounded firmly in the world and times in which the words were written, but where imagination has occasionally run a bit amok, this three-volume collection consists of all the short work written, published, or prepared for publication by C.M. Simpson during 2014—and this volume focuses on work drawing on the real world, or the romance, horror, steampunk, urban fantasy, and speculative genres for inspiration or execution.
FEBRUARY 2016
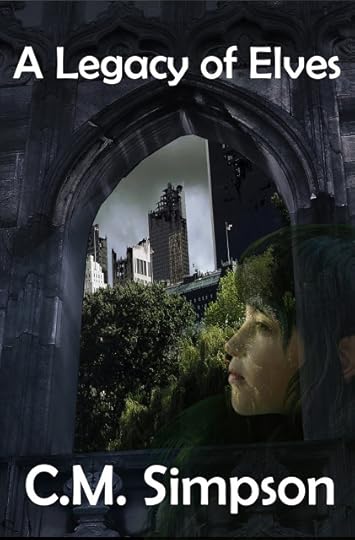 A Legacy of Elves EBook Cover
The sun was setting and the trolls were out when we discovered the chapel. From the get-go it seemed almost too good to be true, but we needed refuge from the trolls. Between them, the dust smugglers, the pixie and the unicorns, we mighta bitten off more’n we could chew, but if we could survive this little fracas, we just might have found ourselves a home... we really needed a home…
A Legacy of Elves is a short post-apocalyptic story set in a world where civilisation has been all but wiped out by a tsunami of magic, plague and natural disaster. Trolls and other creatures of legend and fairytale roam the land, and human survivors must build a new life, but everything comes at a cost, and some costs are more visible than others.
MAY 2016

A collection of flash fiction, short stories, poems and essays where social commentary rubs shoulders with zombies, where poems both celebrate and criticise yearly celebrations and where short stories blend genres, where inspiration is usually grounded firmly in the world and times in which the words were written, but where imagination has occasionally run a bit amok, this three-volume collection consists of all the short work written, published, or prepared for publication by C.M. Simpson during 2014—and this volume focuses on work drawing on the real world, or the romance, horror, steampunk, urban fantasy, and speculative genres for inspiration or execution.
JANUARY 2016
 Short Work from 2014, Vol. 1 EBook Cover
 Short Work from 2014 Trade PoD Cover
 Short Work from 2014 Mass Market PoD Cover
A collection of flash fiction, short stories, poems and essays where social commentary rubs shoulders with zombies, where poems both celebrate and criticise yearly celebrations and where short stories blend genres, where inspiration is usually grounded firmly in the world and times in which the words were written, but where imagination has occasionally run a bit amok, this three-volume collection consists of all the short work written, published, or prepared for publication by C.M. Simpson during 2014—and this volume focuses on work drawing on the real world, or the romance, horror, steampunk, urban fantasy, and speculative genres for inspiration or execution.
FEBRUARY 2016
 A Legacy of Elves EBook Cover
The sun was setting and the trolls were out when we discovered the chapel. From the get-go it seemed almost too good to be true, but we needed refuge from the trolls. Between them, the dust smugglers, the pixie and the unicorns, we mighta bitten off more’n we could chew, but if we could survive this little fracas, we just might have found ourselves a home... we really needed a home…
A Legacy of Elves is a short post-apocalyptic story set in a world where civilisation has been all but wiped out by a tsunami of magic, plague and natural disaster. Trolls and other creatures of legend and fairytale roam the land, and human survivors must build a new life, but everything comes at a cost, and some costs are more visible than others.
MAY 2016


A collection of flash fiction, short stories, poems and essays where social commentary rubs shoulders with zombies, where poems both celebrate and criticise yearly celebrations and where short stories blend genres, where inspiration is usually grounded firmly in the world and times in which the words were written, but where imagination has occasionally run a bit amok, this three-volume collection consists of all the short work written, published, or prepared for publication by C.M. Simpson during 2014—and this volume focuses on work drawing on the real world, or the romance, horror, steampunk, urban fantasy, and speculative genres for inspiration or execution.
December 30, 2016
Ingress: Tips for the Sojourner
This is the sojourners medal.

It’s probably the easiest and hardest medal to achieve in Ingress. Easy, because all you have to do is to go out there, find a portal, and hack it. Hard, because there are days when the last thing you want to do is go anywhere, whether you are sick, busy, behind schedule, or the weather is more than unpleasant. Those days, where you just ‘don’ wanna’.
The sojourner’s medal is earned by hacking an Ingress portal once a day, on consecutive days, or, as the medal says: “hack a portal within consecutive 24-hour periods”. Here are a few tips on how not to miss a day.
Hack Every Day
Sounds obvious, right? And easy. Just remind yourself of that, the next time you’re making excuses not to go out, whether they’re valid or not. While it only takes 15 days to earn the lowest tier of this medal, it’s going to take almost a year to achieve the highest tier, and that counter resets if you miss a day.
Hack Twice a Day
So, if hacking once a day is going to be so hard, why should you bother trying for twice a day? Because twice a day means you are hacking every 12 hours. It means you can miss the 12-hour period by a few hours and it doesn’t matter. If you miss the 24-hour hack by a few hours, you’ll lose your streak. Hacking twice a day removes that risk, and any stress you might feel about getting out there to hack. Hacking twice a day lets you sleep in, or stay out late and party.
Three Times a Day—or More— is Better
Before work, after work, and lunch, if you’re in an area that allows it. Hacking more is better.
Work it Into a Routine
Go for a walk, hack a portal. Go for a half-hour walk in the morning, and another in the evening. Make it part of your fitness routine. Remember that continuous walking is better for you than stop-start walking, so you can either hack as you go past a portal, and not stop, or you can hack one portal and then put your phone away and focus on your fitness for the next thirty minutes, or keep your phone away until you’re finished and use a slow wander through the portals as part of your cool-down. If you make it a habit, it’s harder to forget.
And that’s pretty much all I’ve got. If you can think of another way to make sure you do that daily hack, let me know in the comments below.
December 29, 2016
Writing Life: The Writing
To be a writer, you have to write. You have to write regularly. And you have to finish what you write.
To be earning a living from your work, you have to publish your work and have it available for sale—and even that might not be enough.
The only advice I have on this, is find time to write every day, but don’t kick yourself when life happens. After that, I would say decide what you want to publish and when, and look at what you are working on. If you don’t write short fiction, then a fortnightly schedule might be a bit unrealistic. If you can’t write more than a thousand words a day, then expecting to release a 100,000-word novel each quarter is probably too much.
Look at what you want to achieve, and then break it down into the time-frame you want to achieve it in, but keep your capabilities and real-life demands in mind. Build in a little bit of flexibility, days for being sick, family holiday, time for fitness. I call this ‘fudge time’, and I don’t mean the chocolate. I mean time for things to be fudged up so that you can recover from them and stay on schedule.
Don’t build in too much, though, or there’s a chance you’ll write less than you could, and life’s unexpectedness will affect you anyway. Just keep your expectations real—which is harder than it looks, as any of you will know from following this blog. Be prepared to adjust your expectations of yourself to the reality of your capabilities. And forgive yourself when you set the target too high, and need to adjust. Learn to accept yourself for who you are, and not an ideal you can’t achieve.
Also, there are days when the story won’t cooperate, when you need to research, when finding the words is like mining Tassie granite, when you write 209 words in three hours instead of the usual three or four thousand. There are days when you’ll have a new idea pop into your head that needs to be written down before you can keep going on the old one, and days when you just have to work on something else.
Let yourself do these things BUT set yourself a minimum, so you stay on track for the publication date. Decide on a focus project, and work on that FIRST. Have two documents open if you must. Switch between them as the muse demands, but work on that main project each and every day. You cannot finish anything in a decent timeframe without keeping it consistently on track. How you do that is up to you.
And GOOD LUCK.
December 24, 2016
PDF for GIMP Cover Creation
Free - just like the program.
Here is a very basic run-through of what I learned about building a cover using GIMP.
I hope it helps.
Here is a very basic run-through of what I learned about building a cover using GIMP.
I hope it helps.
December 23, 2016
Ingress: Locking Down Your Player Profile
Take a look at your scanner. Down the bottom, in the right-hand corner, is a button marked COMMS. Open it up. Now, see how the agent names are kind of in bold with a line under them? Press on one. Keep pressing until two options appear on your screen: View Player Profile, or Send Message. Touch View Player Profile. Now, you can see that player’s badges, their mission badges, and their stats. Wait! Can’t see their stats? They must have their profile locked down.
Why would they do that?
Well, I keep mine locked down, too, and I have done since choosing the portal I was hoping to get to black guardian with, but there are a number of reasons.
To Keep it Private. Some players like to work quietly towards their goals. They don’t like the stress of comparisons and competition, or they’re just very private people. Locking down their profiles means only the basics of their progress can be tracked, and not every little detail. I’ve kept mine locked down, because I like it quiet.To Protect their Guardian: It has been noticed that, when certain members of the opposing team can see the days for a player’s guardian continuing to climb, then that guardian is often lost before it reaches black. This could be just coincidence, but it has also been noted that player’s whose guardian progress isn’t public tend to keep their guardians longer. That, too, could be coincidence. I decided not to take any chances with my last one, but I also chose a better located portal for the attempt, and I lucked out when some friendly player from my team decided to upgrade its resonaters and add more defences – for which I am very grateful. So, I can’t be sure a private profile is what helped to get it through – although I canbe sure bigger resonators and more defences did.
Look at these two profiles. One is locked, and one is not. (I have blacked out the players' names and badges, and the AP and other data is now out of date, but this is what you'll see.)


See the difference?
Right, no progression data under the medals of the locked profile. Now, if you touch one of the achievement medals, another difference appears:


See it, again?
Correct - no progress indicated under the medal of the locked profile. This is how to keep your progress private.
HOW do you lock your profile?
Well, you go into your OPS tab (which is in the top right-hand corner of the main scanner screen), then you scroll all the way across to the end until you see the DEVICE tab. Tap on that, and then scroll down until you see the Agent Profile section, and then touch the little square so that a small, blue tick appears next to “Make agent stats private”.
Do I haveto lock my agent profile?
No, you do not. You might like to play out in the open, and that’s fine, too.
Whichever way you choose to play, have fun. It’s time to move.
December 22, 2016
Writing Life: Sales Expectations
If you decide to go independent, don’t expect to get rich overnight. It takes on average 5-10 years to make a living and that is if you do everything right. Again, there is a lot of advice out there, but it boils down to this: Produce a professional, well-written, enjoyable, well-presented product.
And therein lies the rub. You can control three of those four elements. You can produce a professional product; you can control the quality of writing within your ability, and your editor’s ability; and you can present it well. What you can’t control is if a reader finds it enjoyable, or not.
Also, beyond your control, is if a reader picks up your book in the first place.
Depressing, right?
Those are just the facts you have to live with. You can do your best, but you cannot guarantee sales, or enjoyment, because you are not your readers. All you can do is tell a story you enjoy, and tell it well. The chances are good that someone else will enjoy it, too.
There are also genre, and story-type factors that affect sales. In general:
Short fiction does not sell as well as long fiction. My sales figures reflect this, except in the case of one particularly quirky short story that I can’t explain.Poetry does not sell as well as short fiction. My sales figures reflect this, too.Collections and Anthologies sell better than individual shorts, but not as well as long fiction.Novels sell better than short fiction, collections and poetry. Sales figures say yes to this, too.The romance genre sells better than the science fiction or fantasy genres… or so it is said. Sales figures also give this the nod—I sell fantasy and romance, and will soon add science fiction to that.Regular releases build your readership more than putting your finished work out in bursts. I recently conducted an experiment on this by releasing a short story a fortnight. Why a short story? Because that was the only way to get a fortnightly schedule up and running quickly, and build in time to finish longer work to add into the schedule later. As that longer work is completed, I expect my schedule to look a lot more balanced between short and long fiction, collections and novels, and between genres and my various pen names. The main point here is: regular releases, for some reason, result in sales across the spectrum of your work regardless of similarities or differences in genre or length… or so say my sales figures.
So, in a nut-shell. You need to write and publish regularly in order for readers to notice your work. You need to produce the best quality story you can. Beyond that, your readers will choose what they want to read, and what they enjoy. Don’t expect to make a fortune overnight.
And GOOD LUCK.
Writing Life: Creating a Cover with GIMP (Part 4 - Exporting Your Cover)
Step 4: Export the Cover as a .jpg File
The final step is to save your cover as a file you can upload to sites such as Smashwords, Amazon, Draft2Digital or Kobo.
To do this, you need to click on the ‘File’ tab at the top of the page, then select ‘Save’.This will allow you to save your image as an .xcf file. It is useful to have this saved so you can easily make adjustments to your base cover.
Once you have saved your .xcf file, you need to click on ‘File’ again. This time, you need to select the eleventh option down, the ‘Export’ option. This will cause a pop-up window to appear. GIMP will default to two things. Whatever title you gave your .xcf file, will become the title of this document AND it will have a .png extension.

As most sites require .jpg files. you will need to go in and change this. It’s as simple as placing the cursor in the ‘Name:’ box and making the adjustment manually, as you would for any other file name change. When you are happy with where you are saving the file, and what as, click on the ‘Export’ button at the bottom of the page. This will cause a second pop-up to appear.

I do not make any adjustments in this window, although it is possible to do so. To have your image export as a .jpg file, just click on the ‘Export’ button here.
After that, you can go to where you saved it, and open up the image. Doing so will show any errors – and there may be some you have not noticed.

You need to go back into GIMP and move the layers until they are properly aligned. That way your cover will have a more professional finish.

Writing Life: Creating a Cover with GIMP (Part 3 - The Cover Text)
Step 3: Add the Cover Text
You will now want to add text to your cover image. After all, readers are going to be looking for a particular title and/or author name. To do this, you will want to select the Text Tool. Once you click on the Text Too, you will see the panel you need to be able to select your font, font size and font colour. This is where you’ll find those tools.

You select the font type in one of two ways: by typing the name of the font into the box next to the text symbol OR by clicking on the text symbol and using your mouse to scroll through the drop down until you find and click on the font you want to use.
You select the font size by double clicking on the number next to the word ‘Size’, and then typing in a size (in pixels) for the font to be. I usually start with 260 or 360 depending on the length of the title.
You select the font colour by clicking on the colour box in the Text tools and selecting the colour in the same way you chose the colour for the ‘Bucket Fill Tool’ you used at the beginning of this process. If you use the colour selection box you used before, it will not change the text colour.
Once you have finished designing your font, make sure the Text Tool button is clicked and then go to your canvas image. Move the cursor to the point you want to start typing, and click, then start typing. Do not worry if your text isn’t exactly where you want it to be. That is what the Move Tool is for. We will talk about how to use that below, after we have adjusted the font size
You can hit ‘Enter’ to put in a return, which you might want to do for long titles.
You will notice that the writing defaults to a left-hand justified position. This can be adjusted by clicking one of the buttons located next to the word ‘Justify’ in the Text Tool Box.

The third button along is the button that will centre your text. You will need to highlight all the text to be adjusted. You do this by clicking in the text box, and then dragging until all the text you want to adjust is highlighted.

Click the third button along, and the text will centre.

The next thing you will want to do is make the text fit on the page. Remember anything invisible will not be on the finished cover. You do not adjust the text in the Text Tool Dock. You adjust the font size of text you’ve already typed in the cover image area.

The next thing you will want to do is make the text fit on the page. Remember anything invisible will not be on the finished cover. You do not adjust the text in the Text Tool Dock. You adjust the font size of text you’ve already typed in the cover image area.

If your title is too big and you want to adjust the text until it does.

To move the text, you will want to use the Move tool. Remember that the area you want to move will have the line outlining the layer change from yellow dotted lines to a single white outline. Moving text can be difficult until you learn to position the cursor correctly. Remember: Do not move the mouse to position the text unless the line around the text you are moving is white when you hold down the left mouse button.
Repeat this process until you are happy with all your text.

Next , we will look at how to export your completed cover as a .jpg file.
December 21, 2016
Writing Life: Creating a Cover with GIMP (Part 2 - The Cover Image)
Step 2: Create the Cover ImageBefore you begin with your cover, take a look at any of your other covers. You are going to want to have a feel for the styles you’ve used for a particular series, or type of book. That style is called ‘branding’. It helps readers identify your books on the platforms they visit.
There is probably a whole series of blog posts you can do on branding. For now, I will assume you know the general feel you want your books to have, and just say it is important to retain a similar feel for your books.
As you probably guessed from the Comment section in the Advanced Options part of creating the image, I’ll be using the cover for the third volume of the 2014 Short Works collection.The first step I take as part of creating a cover mage is to colour the background back. This means you need to understand layers.
Each image is made up of layers. Some layers are as big as the image, but some aren’t. The first layer is the layer you can see when you first create the image. You will it in the menu for layers:

When you want to work in a particular layer, you need to make sure it is highlighted. This means clicking on the layer. When you do this, it will turn blue, showing it has been selected.
The first thing I do is to use the ‘Bucket Fill Tool’ and the colour selection box to change this layer from white to black. To do this, I click on the Bucket Fill Tool Icon, and then I check the colour selection is correct.

In this case the colour is not correct. So I click on the colour selection, and a small window pops up showing the current colour.

To change the colour, I can click on a black area in the large coloured square on the left, or I can click on a black square in the rows of little coloured squares on the right.
 Once you have selected the new colour, it will show up above the old colour and you can see what change you are about to make.
 When you have selected the colour you want for the background, move your cursor over the image. You will see a little bucket similar to the icon for the Bucket Fill Tool. Click on the image, and the background will change to black.
Once you have changed the background to black, you will want to position your picture in the cover image. To do this, click on the ‘File’ tab, and select the fourth option ‘Open as Layers’. This will open a pop-up window allowing you to select an image from your files.

Sometimes your chosen image will not fit your cover.

You can alter this in one of two ways. Today, we will do it in the image you are working on, but you might to prefer to resize it separately. That will be covered in a future blog. For now, you will need to know four things. The first is how to select a layer, the second is re-sizing a layer, the third is moving a layer, and the fourth is clipping a layer to an image.
To select a layer look at your layers dock.

Click on the Layer you want to work in. In this case, it is named after the image I imported, so I will click on the Lightning_dreamstime layer and it will turn blue. In the image screen, the layer will be surrounded by a dotted yellow line. Anything I do now, will be done to that layer. Because I want to resize it, I click on the Scale Tool

As soon as I have made sure the right layer is highlighted and clicked on the scale tool, I hover over the layer I want to change in main image. The cursor shows a small picture of the scale tool icon. As soon as I click on the layer, a grid appears, along with a small popup.

I can now scale one of two ways:
I can place the cursor on one of the squares hanging off the edge of the layer and stretch the layer to fit OR I can change the numbers in the Width and Height boxes in the pop-up. Because I want to keep the proportions of the picture I’m going to change the numbers. This means I will first have to make sure the link symbol beside the Height and Width number boxes is joined, since this will save me from having to work out proportions.

Click on the Broken Link. It will join together.
Now, because the height of the imported image is the main problem, you need to adjust the height measurement. Double click on the numbers in the box next to height. Click in the Width box, but do not change anything. Since you have changed the height, you should see the numbers in the box next to Width adjust automatically. If they do not, click on cancel and start again, but make sure the link if joined and not broken before you change the numbers in the box. The scale function gives you a preview, so when you change the numbers, the layer you are trying to scale will also change. This change is not final until you click the ‘Scale’ button at the bottom of the pop-up.

Now I want to move my imported image so I get the part of it I want on the book cover. To do this, I have to select the ‘Move’ tool.

Move your cursor over the main image. You will see the Move Tool icon on the end. Left click on the layer you want to move. You will notice the yellow-dotted outline around the layer turns white while you hold the mouse button down. If it does not, keep trying until the correct layer is outlined. If you do not have the correct layer outlined, you will end up moving another part of your image.
When you have the correct layer outlined, hold the mouse button down and move the mouse. This will move the image layer across the cover image you have created. You will see that only the part of the layer over the cover image is shown. When you have the part of the image you want on the cover, you will want to get rid of the rest.

To clip the image to your cover, you need to highlight the layer you want to snip. You do this by clicking on that layer in the layers dock or menu. When it is blue, you click on the Layer tab (top of the image canvas, fifth from the left).
I cannot show the drop-down menu here, but you want the fourth option from the bottom, the ‘Layer to Image Size’ option. When you click that the dotted line showing you the layer will fit snugly to the image you are creating. The invisible parts of the image will have been snipped away.
When you’re happy with the positioning of the picture, you might want to add more images, using layering, or you may wish to stop. For this cover, I added three more image layers, which I won’t go into here. Basically, position your layer as you want them to look on your cover, and then prepare to add text.
This is what my base cover image looked like once I’d finished adding in the other images.