
Sandor Ellix Katz's Blog, page 4
January 17, 2013
Raw Tomato Preserves
This summer I got my hands on a case of fresh roma tomatoes and ventured into this ferment. I’d wanted to try it for a good while, and when Sandor’s latest book came out, I decided to get to it. I followed the recipe as is on page 117 of The Art of Fermentation. . I did this in July and with warm temperatures, the ferment went quick.
First I halved the tomatoes, added salt and stirred with my hands. I did not attempt to get anything submerged at this stage. After 1 day, I could stir it down to where all the halves were submerged. (I have fermented tomatoes before for the juice [to make bloody marys], and I knew that if I let this go even a day too long the bacteria would strip and all the pulp from the skins, leaving me only the skins and a thin slurry of what was the pulp at the bottom of the vessel- and this time I wanted the pulp.)
 I stirred two or three times a day. Each morning a black spidery-looking mold would have formed atop the floating tomato halves. I would quickly stir this into the mix, and get everything coated in the bubbling liquid. After a couple days, the Kahm yeast would try to get organized in pools of juice around the floating halves, but again, a quick stir would dispel them. Once the rapid bubbling was over, and while there was still pulp on the skins, I strained off what juice there was (about 2 gallons), and processed what remained of the halves, separating the skins/seeds from the pulp. Here are the tomato halves ready to strain.
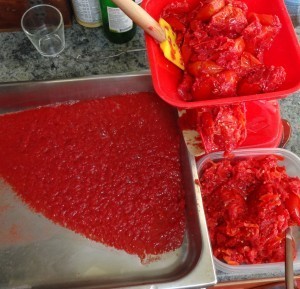 And here are the tomatoes being processed in a slick little device I borrowed from the neighbor. Tomatoes in the hopper upper right, paste into the hotel pan on the left. and skins/seeds into the container lower right.
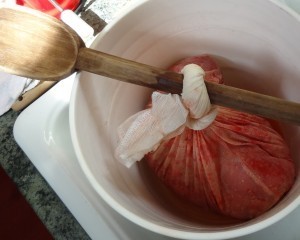 I then put the pulp in a cotton bag and let it hang over night, twisting it to get as much juice out as I could. At no time did a thick layer of mold appear on the cloth, only a very thin slight white bloom, likely yeast, and I saw no need to attempt to remove it by scraping it with a soon.
I put the juice in a vessel, and within a couple hours a lovely rich layer of Kahm yeast had formed. Since I know this can influence the flavor, I poured the juice into glass jugs with airlocks to keep out the oxygen. I ended up with 2.5 gallons of juice that are now fermenting for next year’s cocktails.
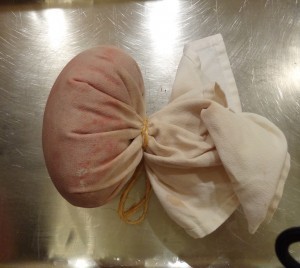 Next, I took the ball of paste that had dripped overnight and placed it into a clean cotton cloth and tied the corners. I set this to press inside a stainless steel hotel pan with a concrete block on top, further squeezing out more liquid. I put dry towels beneath and on top of the wrapped ball of paste, and changed these a couple times a day as they wicked out juice from the paste.
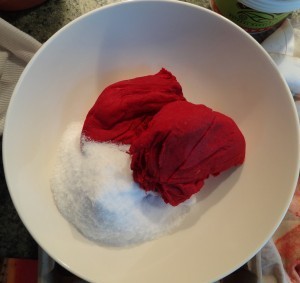
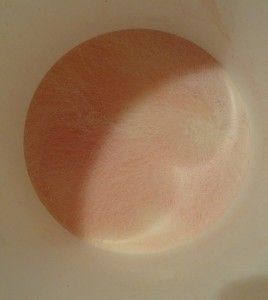
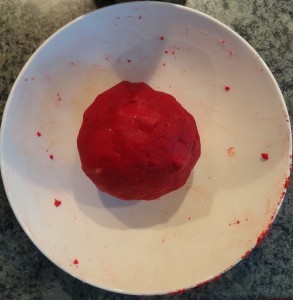
After 3 days I removed the paste and marveled at the color. Gorgeous! I added salt, 25% by weight, and kneaded it into the paste. But this proved way too much salt for my palette. If I use the paste now in a quantity where I obtain the tomato flavor I desire, it is inedible because of the high salt content. But is it ever beautiful? Beauty has its limits though, so, frustrated, I formed some of the paste into 1-inch balls and cubes and dehydrated them. I now use these to grate the dried tomato paste over foods I want to salt, and beauty comes right along with it. The red color looks spectacular on poached eggs, roasted chicken or steamed cabbage. So, I use it as I would salt, with a little elegance. The final yield was 1 pint of paste.
 Next time I’ll use half the salt. (Or I’ll add a batch of unsalted paste to what I’ve already made and see how that goes.)


January 13, 2013
From Russia, with Love, Solodukha and Ryazhenka
A letter from Russia with recipes for two new ferments I haven’t heard of before…
Dear Sandor,
Firstly, I really love your books, and thank you for helping keep traditions alive!
I have a recipe to share with you; I am from Russia, I grew up in the countryside, on what was basically a farm, and my family have a huge lore of recipes passed down generations (including a sourdough starter that predates the revolution…!)
It is a porridge known as Solodukha (from the word ‘solod’, which means ‘malt’ – the word ‘solod’ itself, in fact, basically means ‘sweet’) My granny often made this porridge for me, and its especially comforting on a chilly morning.
Ingredients
malted (sprouted, dried & roasted) rye, ground fine, around 50 gr per person
water, about 150 gr
1 tsp sourdough starter (preferably rye-based)
a few tablespoons squashberries (according to wikipedia, that is the english equivalent of kalina - a small red berry from the genus ‘Viburnum’) – if you cannot find these, raspberries or fresh ripe red currants work well too.
1/4 tsp salt
Grind the malted rye to a fine powder, add the water, salt, and starter, and leave in a warm place for at least 8 hours. Once fermented, stir in the berries, place in a clay, ceramic or cast-iron small pot, cover with the lid and cook overnight in a very low oven; for the last hour or so take off the lid. Or make a bain-marie in a slow cooker and cook on low overnight.
My granny would always put this into the Russian stove before bed, hot from a days’ baking, and the porridge would cook in the slowly falling heat. if I beat my granddad to occupying the top of the stove for the night, I would wake up to the aroma of roasted rye and berries wafting up from below…
Serve it with plenty of good, yellow butter, and a glass of fresh, or soured, creamy milk, or ryazhenka (recipe follows…)! Enjoy!
Here is also a recipe for ryazhenka, a fermented ‘baked’ milk.
Place fresh, creamy raw milk (I’m sure you know to stay away from the stuff labelled ‘milk’ in the supermarket…!) in a heavy, cast iron pot, cover with a lid and place in a very low oven overnight (not higher than 110 Celcius, lower if your oven can). In the morning you should have a beige to light-brown, slightly nutty smelling milk with a ‘skin’ on top – you can eat the skin now, or, if you can resist, leave it in for now! Once cooled to blood temperature, add a tablespoon of raw soured cream. Put in a very warm place (or in a thermos flask!!!) for about 8 hours, or till thickened and soured. If you left the ‘skin’ in, it will be deliciously chewy…*wipes drool from keyboard*
Enjoy!
From Russia with love
Milla
November 26, 2012
The Kraut Collar
I prefer to make cabbage kraut in jars: wide mouth quart and 2-quart size. (if I make larger batches, I use a ceramic crock.) A challenge is keeping the cabbage submerged, especially when the mouth of the jar is smaller then the jar’s body. I make something I call a kraut collar. (It reminds me of a collar worn by choristers over their robes.) I make mine from food grade plastic tub lids.
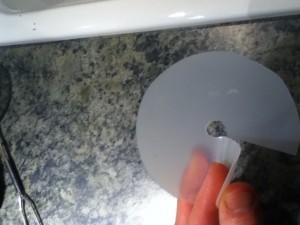
I cut the collar the same size as the inside of the body of the jar. Then cut to the center and take out a small hole (Looks like a doughnut now.) This collar can be pushed into the mouth of the jar by overlapping the two radial edges. Once inside, it expands back to its original form to fit the inside of the jar.
Then, I place a shot glass atop the collar and put on the lid. The lid pushes the collar down below the brine. (I stack shot glasses depending on the level of the kraut.)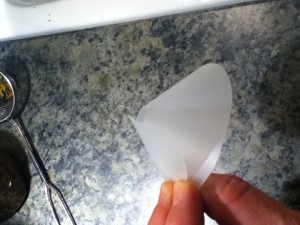
For a larger jar, you’ll need to find a larger plastic lid, but it should work the same.
November 18, 2012
Bill Mollison’s Ferment and Human Nutrition
 We are thrilled to be able to offer for sale copies of Permaculture founder Bill Mollison’s 1993 book on fermentation, which was out of print for many years. Published in Australia, the books cost $50 (a lot less than what it was going for online after a few years out of print, over $800). To purchase a copy, click here. This was the book that began Sandorkraut’s fermentation education, now expanded and revised. Topics covered include:
Storing, Preserving and Cooking foods
Fungi, Yeast, Mushrooms and Lichens
Grains
Legumes
Roots, Bulbs, Rhizomes
Condiments, Spices and Sauces
Agricultural Composts, Silages and Liquid Manures
Fruits, Flowers, Nuts, Oils and Olives
Leaf, Stem and Aguamiels
Marine and Freshwater Products, Fish, Molluscs and Algae
Meats, Birds and Insects
Dairy Products
Beers, Wines and Beverages
Nutrition and Environmental Health
In Mollison’s own words: “All the recipes given herein are traditional; they belong to humanity, even though they have been collected or tried by various authors, they have all been used for centuries by thousands of human beings. Only a few recipes are my own inventions (you may guess at these) but even these derive from my family or friends in their main ingredients or procedures.”
To purchase the book, click here.
November 17, 2012
Miso-fermented Egg Yolk
 The end result of this ferment is a creamy, rich and delicious ball of goodness. And with a texture and flavor much more reminiscent of a soft stinky cheese than of egg yolk. I first read of this process in The Book of Miso, by William Shurtleff & Akiko Aoyagi.
It’s fairly straight forward: bury egg yolks in miso, wait, recover yolk, and enjoy.
I ferment a dozen or two at a time, and my method was inspired by the playing with fire & water food blog [http://www.playingwithfireandwater.com/foodplay/].
Materials: fermenting vessel, miso paste, soft boiled or raw egg yolks, and cheese cloth. These are layered in a crock in a sandwich-like fashion. I start with a 1-2” layer of miso, and then place a single layer of cheese cloth on top. I use a handle of a wooden spoon (it has a very bulbous end) and push divots into the miso the size of the yolks, pressing the cheese cloth into the miso as I go. Next, I carefully set the yolks into the divots, and cover with another layer of cheese cloth. I then cover it all with another layer of miso paste. I repeat this process until I run out of yolks, or room in the crock.
An important detail is to keep the corners of the cheese cloth visible on top of the layer of what is on top of it , so that you can lift out what is on top of it, either a layer of miso, or of yolks, easily and cleanly. The whole purpose of the cheese cloth is to be able to recover the yolks as whole discrete balls, and not as mushy smashed blobs full of miso bits. And it works really slick, too. Here are some photographs.
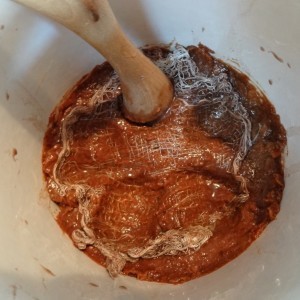 Putting divots into the miso on top of a layer of cheese cloth.
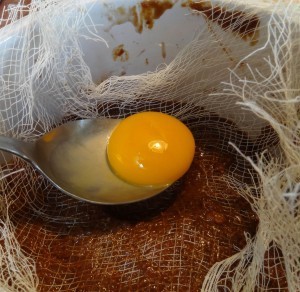 Adding a raw yolk.
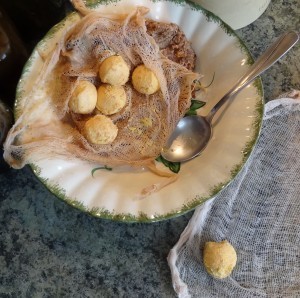
 Five soft boiled yolks wrapped in cheese cloth and ready to be covered in miso. I’ve pulled in the corners of the cheese cloth to they will be revealed after I remove the layer of miso that will sit on top of them.
 Adding a top layer of cheese cloth and miso.
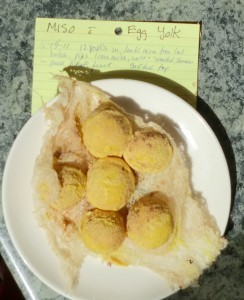
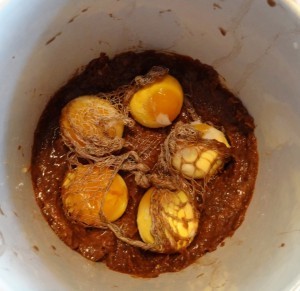
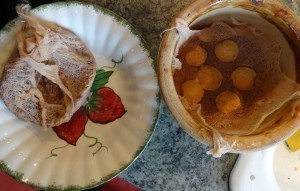 These yolks are ready to harvest. I’ve removed the top layer of miso (bowl on left) and exposed the yolks beneath.
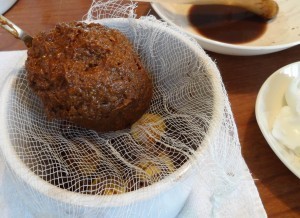
 Here is the layer of yolks removed inside their own cheese cloth, and a solo yolk about to be tied for drying.
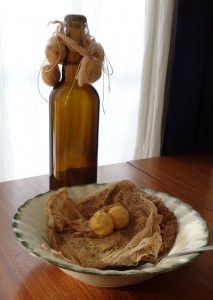 These yolks have been tied in cheese cloth and draped over a beer bottle. They’ll stand in the fridge for a couple weeks and dry out to a crumbly or even a grate-able texture.
 These yolks went into the smoker still inside their cheese cloth. They are amazingly delicious!
My first batch of yolks I let ferment 6 months. One week seemed way too short to me. Having done both, the one-week yolks achieve a very sour taste, but lack the complex flavors of the miso from a longer ferment. Both are very good. When I ferment a dozen or more, I use a crock and pack the top with a plate and weight, just as though I were making miso. I’ve made one-week yolks only in a small jar, and it sits on the counter in the kitchen until ready. I think either could go in the fridge for the ferment, though it might take longer. Which ever method you use, remember to leave head space in the top of the vessel for some CO2 expansion, and liquid/tamari collection.
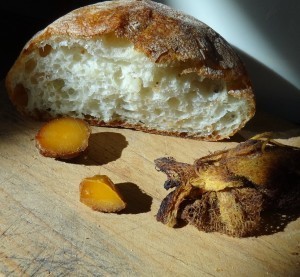
My favorite way to enjoy the yolks is as a spread on good bread or crackers. They are also great blended in salad dressing, spread on top of poached eggs (with a little tekka miso sprinkled over), or tossed with fresh noodles or pasta. They are also a fun food for a potluck, as they seem to push the limits of the culinary frontier, and the flavor of this ferment nearly always wins over a hesitant doubter.
November 3, 2012
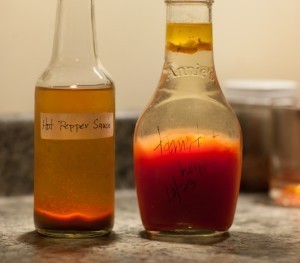
Fermented Hot Pepper Sauce
In mid-September peppers were in full swing at the local farmers market. I purchased a dozen ghost peppers, and two large red bells. Time to make fresh hot pepper sauce with four easy steps: Chop. Salt. Pack. Wait.
(Chop & Salt) I removed the stems and whirled in a Cuisinart until thoroughly blended, and then added a pinch of salt toward the end.
(Pack) I poured the slurry into a quart jar and covered with fly-deterrent cloth (not shown). As soon as the ferment gets going, the solids float and get pushed up by the CO2 production.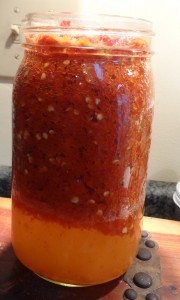
Stir twice a day to submerge the solids and to prevent mold from forming on the surface of the ferment. If it does (see below), stir it in and stir more frequently. The mold is harmless, but can impart a flavor I find distasteful. So, keep stirring.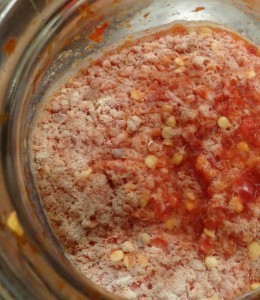
(Wait) After two weeks, I transferred the sauce to a jar with an airlock. No more oxygen means no more mold forming on top. (And no more stirring.) The sauce keeps fermenting with the airlock and it’s pH lowering. It’s normal for there to be continued separation of solids, top and bottom, and clear liquid in the middle. 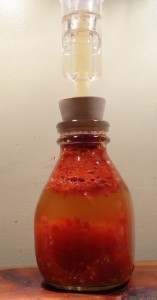
After 6 weeks from step one, I filtered the sauce through cheesecloth to remove the seeds and then added vinegar to stabilize (meaning, the pH drops even more from the acetic acid and the sauce won’t mold on top if left out of the refrigerator).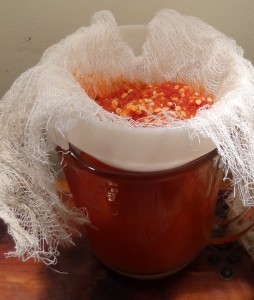
My yield was 14 ounces of ferment, and i added 6 oz. of vinegar for a total of 20 oz. of fermented hot pepper sauce.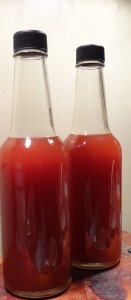
October 22, 2012
Peanut Butter and Kimchi Sandwiches!
Peanut butter and kimchi sandwiches, a shockingly delicious combination that never occurred to me, served up by the experimentalists at the Yale Sustainable Food Project.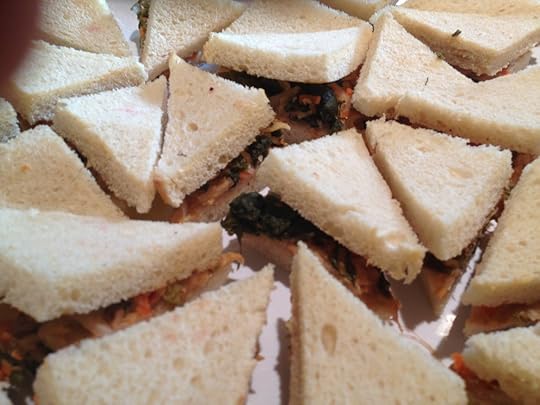
September 1, 2012
Black bean Miso with Smoked Salt
Ingredients:
5 lbs. rice koji (10 cups volume of uncooked rice)
10 lbs. cooked black beans (5# dry weight)
Salt (8% by weight), plus 5 T. smoked salt
Hijiki seaweed (2 oz.)
Garlic; fresh crushed (2 heads)
Red pepper flakes (handful)
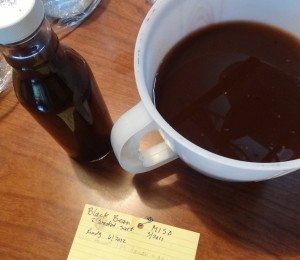
I started this batch of miso in May 2011. I harvested the tamari after 6 weeks, and replenished with salt brine. This miso formed no mold during its ferment, and I harvested tamari again when I harvested the miso last week. The second harvest of tamari tasted just as good as the first, which, for some reason, surprised me.
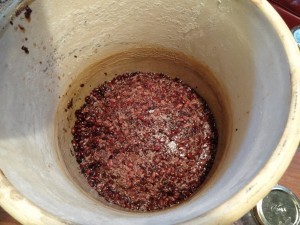
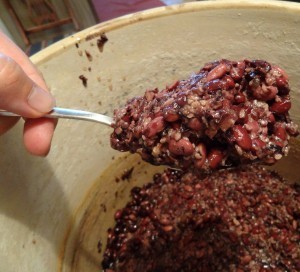
This batch of miso was also very wet, and it might be because I did not smash the beans well in the beginning. As you can see from the pics, the beans and koji are still intact (and the beans very tasty to eat whole). I used about half the miso to ferment duck and chicken egg yolks. They’ll be ready in about 6 months. I then used an immersible blender to homogenize some of the miso into a thick uniform paste.
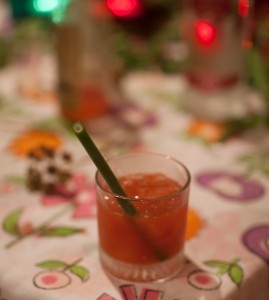
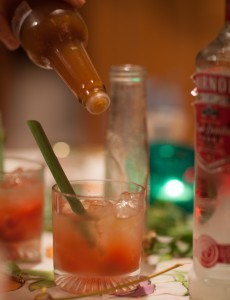
Fermented Bloody Mary Cocktail
Ingredients:
Fermented tomato juice (tomato juice and smoked salt; 12 months old)
Vodka
Salt and Pepper
Hot pepper sauce (fermented 2 yrs)
Worcestershire sauce, (fermented by Lea & Perrins®)
Loveage stem (straws)
Ice
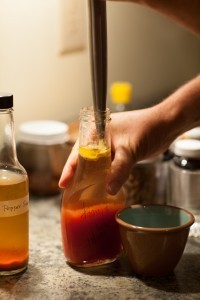
Fermenting vegetable juices is extremely easy, and the results are exceedingly delicious. Last summer I started with two cases of organic roma tomatoes. I sliced them in half, sprinkled on some smoked salt, and let it ferment in a crock for a week. After 2 days, the tomatoes were reduced to a thick slurry. After a week, the pulp was removed from the seeds and skin. I stirred 2 or 3 times every day to reduce mold establishment. After a week I strained the seeds and pulp out, and filled narrow sauce bottles with the juice. I added a tablespoon of olive oil on top of the contents of each jar to prevent oxygen from contacting the juice. Then waited a year. Fantastic flavor!
Last week we finally got our typical week or two of hot daytime temperatures and warm evenings here in Seattle. Perfect weather for cocktails in the garden. Drinking the cocktails from Loveage stems for straws was an added flavor, especially if the stem was chewed slightly. They were so delicious, we had to open another bottle of tomato juice and keep going.
If you’re up for fermenting your own cocktail mixers, this is the best resource in know: Preserving Food Without Freezing or Canning by The Gardeners & Farmers of Terre Vivante, published in 1999 by Chelsea Green.
I’ve fermented carrot, beet, celery, radish, cucumber, tomato, and various blends of green vegetable juices, all with rewarding success. Add a little salt and let time do its magic. I remove the olive oil from the narrow neck of the jar with a turkey baster. I’ve also used airlocks with success, or just let the top mold and pull the ‘plug’ out when it’s time to use the juice. The pulp and pigments typically settle to the bottom of the jar, leaving clear liquid. Stir or shake as desired. These juices are also great in soup, or to deglaze a pan when sautéing. (Photographs by Kwai Lam.)

What’s older than its Mother?
My grandma told me that riddle while we were pressing apples in the orchard when i was 13. We had just filled a 50 gallon wooden barrel with the cider we pressed, and covered it in place in the root cellar to let it ferment. We wanted the vinegar. It never occurred to me that the riddle might have more than one answer.
After fermenting water kefir for several months, I noticed a faint translucent mother had arrived on the surface of the finished ferment. It looked just like the young mother on vinegar or kombucha: thin and gelatinous. I fished it out with a scowl and discarded it after 4 or 5 harvests. The next time I went to harvest the kefir, there she was again. This time I saved her in a separate jar. As i replenished the sugar water over the kefir grains, I withheld a little of the solution for the young mother, covered both jars over and put them on the shelf to ferment. Ten days later, both had new mothers floating on top: small and thin (compared to kombucha or vinegar) but very much present.
For the past year and a half, I’ve repeated this process when i harvest the original elixer: skim off the mother from the jar with the kefir grains, and add it to the jar now full of mothers. I now treat both jars (1-gallon size) the same, and I can’t tell any difference in the resulting beverage. I feed each batch one-half Meyer lemon and one-half dried fig each time I make a new batch. This flavor combination is really over the top.
The jar with the kefir grains continues to form only a thin mother each time, where the jar full of mothers now forms a thick white mat, not unlike white wine vinegar mother.
Sandor Ellix Katz's Blog

- Sandor Ellix Katz's profile
- 250 followers

