
Josh Kilmer-Purcell's Blog, page 9
April 24, 2018
PART 1 | Create Meaningful Bouquets
In the Victorian era, and even long before that, flowers served as beautiful messengers that whispered what often could not be spoken aloud. They were the equivalent of clandestine text messages or notes of encouragement—a way to express friendship, pride, or feelings of love. Flowers told the tale of hidden emotions during a time of extreme discretion. The key to decoding the meanings was found in oral tradition, and in flower dictionaries, which sometimes held varying definitions for each flower.


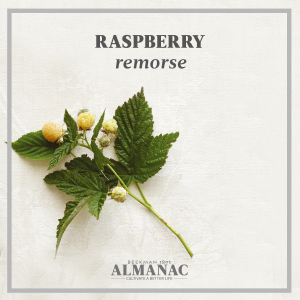


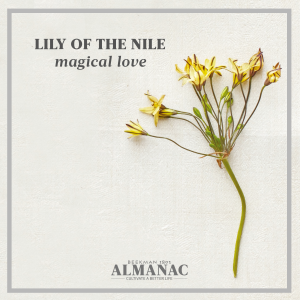

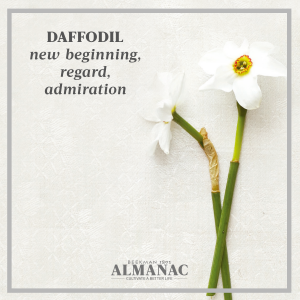


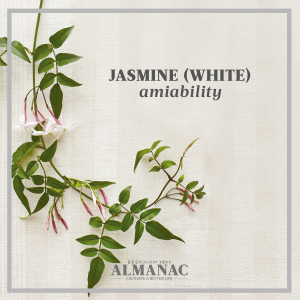


As featured in the upcoming Summer 2018 Edition of Beekman 1802 Almanac Magazine. For more, check out Meaningful Bouquets: Create Special Messages with Flowers – 25 Beautiful Arrangements[image error] by Leigh Okies and Lisa McGuinness (copyright 2016, published by Chronicle Books).

1
Spring 2017 Almanac

2
Summer 2017 Almanac

3
Autumn 2017 Almanac

4
Winter 2017 Almanac
Visit the Mercantile
The post PART 1 | Create Meaningful Bouquets appeared first on Beekman 1802.


April 15, 2018
Indoor Water Garden

This may be one of the simplest of projects you’ll come across, but it is also one of the most striking. To create “the garden,” choose a variety of water plants and feature each individually in its own container. In this arrangement, water moss floats freely, while pennywort, vallis, and amazon sword are anchored in beds of river stones.
MATERIALS
Tall clear glass containers
Aquatic plants
Black river stones
Filtered, unchlorinated water
ASSEMBLY
Choose which container best suits each plant, and work one at a time. For example, taller plants will thrive in slender vertical shapes, while spreading plants such as pennywort will need a wider container.
Layer a few river stones into the bottom of the container for a base. Carefully remove the plant from any packaging and remove any yellowing or damaged leaves. Decide on positioning; once you have an arrangement that feels comfortable, add in more stones to cover up the root basket if there is one, and anchor the plant in place.
Start adding filtered, unchlorinated water slowly a little bit at a time so as not to disrupt the plants or the arrangement.
Continue adding water slowly until you reach about 2 in from the top.
CARE
Because the water is standing and has no aeration, you’ll need to replace it over the course of a week. Keep a bucket close by and scoop out about one-quarter of the water daily and replace it with fresh water. Adding liquid carbon and an aquatic plant fertilizer (available at aquarium supply stores) will keep the plants healthy. With good care, the plants should last several years. Avoid placing aquatic gardens in direct sunlight to limit the growth of algae; filtered sunlight is best. If you must move a container, remove some of the water and always pick it up from the bottom, not the top.
As featured in the Spring 2017 Edition of Beekman 1802 Almanac Magazine. For more check out Bring the Outdoors In: Garden Projects for Decorating and Styling Your Home[image error] (Chronicle Books, 2013)
1
Spring 2017 Almanac
2
Summer 2017 Almanac
3
Autumn 2017 Almanac
4
Winter 2017 Almanac
Visit the Mercantile
The post Indoor Water Garden appeared first on Beekman 1802.
Flower Pot Pendant Light

This project was inspired by the Australian eco-designer Joost Bakker, who’s famous for using terra-cotta in surprising ways. You only need to add wiring to turn a simple terra-cotta pot into a garden-worthy light shade. We painted the cord yellow for added visual interest. Use a globe incandescent lightbulb to cast a soft, flattering light. For a video of us making our own, click here.
Materials
Painter’s canvas drop cloth
1 can Rust-Oleum Painter’s Touch 2x Sun Yellow exterior spray paint, high-gloss finish
1 cord set
Wire cutters
1 4-inch terra-cotta pot
Wire stripper
1 15-amp quick wire plug
1 clear globe 40-watt incandescent lightbulb
1 ceiling hook
Phillips-head screwdriver
Assembly
Cover a work surface in a well-ventilated room or outdoors with a drop cloth. Paint the cord with two coats of glossy yellow spray paint. Let dry.
Using wire cutters, snip the plug off the pendant cord. Thread the cord through the drainage hole in the bottom of the terra-cotta pot (the light-socket end must be inside the pot).
Use a wire stripper to strip off about a half inch of casing to expose the two wires on the cord’s open end. Follow the installation instructions included with your plug to attach the wires to the plug. After assembling, screw in the lightbulb.
Suspend the pendant light from a hook in your porch ceiling or covered overhang.
As featured in the Summer 2017 Edition of Beekman 1802 Almanac Magazine. For more check out Gardenista: The Definitive Guide to Stylish Outdoor Spaces[image error] by Michelle Slatalla (Artisan Books). Copyright © 2016. Photographs by Matthew Williams.
The post Flower Pot Pendant Light appeared first on Beekman 1802.
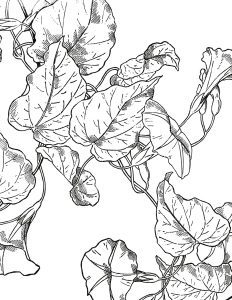
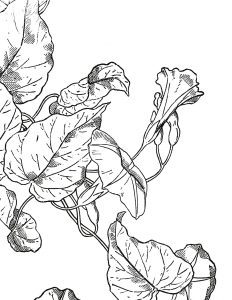
Color Our Site – Morning Glory Contest
We want you to help us color our site. Literally. Just like meditation, coloring allows us to switch off our brains and focus only on the moment, alleviating free-floating anxiety and bringing about mindfulness. In fact, everyone from professors at Johns Hopkins University to the editors of Yoga Journal suggest that coloring can be therapeutic.
Need a little encouragement to pick up those color pencils? We’re going to choose one Morning Glory design to replicate and incorporate into our summer marketing. That’s right – you can be a Beekman graphic designer for the summer! And to thank you for your work, we’ll be giving you the full MacKenzie-Childs and Beekman 1802 Morning Glory Collection.
So turn on your printer, grab your favorite coloring tools and start creating. Email a scan or a snapshot of your finished creation to contest@beekman1802.com with the subject: Morning Glory contest. Include your name, your city, your state and a few sentences describing how your finished piece was created. Were you sipping Beekman Mohka Java Blend Coffee and watching chickadees out your den window? Did you unwind between expense reports on your lunch break? We can’t wait to see all our new artisans at work!
Step 1: Click on an image below
Step 2: Right click and select “save image as.” It will save to your selected folder in your computer
Step 3: Click on the image (where it saved on your computer)
Step 4: Send to print


1
B. 1802 & MacKenzie-Childs Beauty Collection

2
B. 1802 & MacKenzie-Childs Flower Market Perfume

3
B. 1802 & MacKenzie-Childs Flower Market Palm Size Goat Milk Bar Soaps

4
B. 1802 & MacKenzie-Childs Flower Market Lotion
Visit the Mercantile
The post Color Our Site – Morning Glory Contest appeared first on Beekman 1802.
Clay Candlesticks

These faux-ceramic candlesticks are made of air-dry clay, molded around those old brass candlesticks you can find at a thrift store for a few dollars each. We love these simple and elegant hand-molded forms. You can give them a glazed look by applying a coat of non-yellowing clear enamel once the clay is completely dry. Place colorful taper candles in these holders for a playful spin and to break up the all-white look. When these aren’t in use on your table, place them on your mantel to add a little drama.
Materials
Masking tape
Plastic drop cloth
2.2-pound package of DAS air-dry clay
Water in a small bowl
Brass candlesticks
Rolling pin
Instructions
Tape down a layer of plastic drop cloth on a flat table. Remove the clay from the package and tear off a large handful. You will need about a baseball-size wad of clay for each 6- to 8-inch candlestick. Adjust accordingly if yours is smaller or larger and add more clay or take some away as you go. Wrap up the remaining clay.
Wet your hands and knead the clay for about a minute to warm it up. Place the clay at the center of the plastic and press it down with your palm. Roll it out evenly in all directions with the rolling pin, keeping it the same thickness all the way around. Stop when the clay is 2 to 3 mm thick.
Center the candlestick over the clay. The clay should stretch at least an inch past the top and bottom of the candlestick. Add more clay if needed.
Pick up the edges of the clay very gently. Push the clay around the candlestick, going in one direction until the 2 sides of the clay meet. Coax the clay into all the curves, using water as needed. Once the clay has covered the candlestick all the way around, pull off any excess clay at the meeting point (reserve any scraps). Better to leave a little extra and press it back evenly into the candlestick. Make a loop with your fingers around each curve and twist back and forth, closely conforming the clay covering to the shape of the candlestick underneath.
For the top of the candlestick, gently push the clay over, being very mindful not to rip the clay. Use water on your hands to help prevent this. Coax the clay over the edge and into the hole where the candle will rest. Once the top is even, cut away the extra clay in the hole to allow the candle to fit inside.
Now wrap the clay around the base of the candlestick until it’s completely covered (stop at the edge of the candlestick and don’t wrap any clay under the bottom). If needed, tear off a rolled-out scrap of clay, and add it back to the base with a little water. Smooth it out to look like a seamless piece of clay.
Go over all the clay one more time with wet hands, very gently smoothing out any lumps, bumps, cracks, or holes. Try to recreate the original curves as closely as possible.
Set the candlestick upright to dry for at least 48 hours before use. Make additional candlesticks if desired.
Be gentle with these clay candlesticks during use and clean them with a wet rag to remove wax and dirt spots, if necessary.
As featured in the Summer 2017 Edition of Beekman 1802 Almanac Magazine. For more check out A Well-Crafted Home: Inspiration and 60 Projects for Personalizing Your Space[image error] by Janet Crowther. Photography by Julia Wade. Published by Clarkson Potter/Publishers, an imprint of Penguin Random House, LLC
The post Clay Candlesticks appeared first on Beekman 1802.
Dowel Wall Hooks

Easily hang and simply organize coats, bags, scarves, and hats as soon as you walk in the door. This highly functional bar features the simplicity of round dowels in your favorite solid color. Think outside the entryway with this project—install it under your kitchen cabinets, or along your backsplash to provide easy access to mugs, dish towels, and dried herb bundles. For best results, mount these hooks using the correct screws or hardware, depending on your wall structure and makeup.
Materials
56 x 2 x ¾-inch pine board
Eight 4-inch long × ½-inch-diameter wood dowels
Can of spray paint and primer in one
Tape measure
Pencil
Electric drill with ½-inch drill bit
Plastic drop cloth
Wood glue
Sheet of 120-grit sandpaper
Paper towel
Instructions
Lay the pine board on a flat surface. Line up a tape measure lengthwise and centered on the board, from end to end. Starting at one end, make small pencil marks across the length of the board at the 7-, 13-, 19-, 25-, 31-, 37-, 43-, and 49-inch points, making sure that each pencil mark is centered, widthwise, on the board.
Load your drill with the ½-inch bit. Drill a hole at each pencil mark, going all the way through the board. Try to drill as straight down as possible.
Lay down a plastic drop cloth to protect your surface. Grab the wood glue and put a little wood glue into one hole. Twist a dowel into the hole until it reaches the end of the hole. Repeat with the rest of the dowels. If you are having trouble fitting the dowels, use sandpaper to sand down the edge of the dowel slightly until you can push it through the hole. If any glue seeps out through the top of the hole, wipe it off gently with a paper towel. Let the glue dry overnight.
Once the glue has fully cured, sand down any excess glue on the back so the rack will sit flush against the wall. Also, sand around the top of each dowel for a smooth edge. You can also sand the edges of the pine board to help it look more polished once you paint it. Brush off all the dust.
Spray paint using a couple light coats of paint over the whole unit. Let it dry between coats.
As featured in the Summer 2017 Edition of Beekman 1802 Almanac Magazine. For more check out A Well-Crafted Home: Inspiration and 60 Projects for Personalizing Your Space[image error] by Janet Crowther. Photography by Julia Wade. Published by Clarkson Potter/Publishers, an imprint of Penguin Random House, LLC
1
Spring 2017 Almanac
2
Summer 2017 Almanac
3
Autumn 2017 Almanac
4
Winter 2017 Almanac
Visit the Mercantile
The post Dowel Wall Hooks appeared first on Beekman 1802.
Flea Market Finder

Summer time and road trip season is approaching (yay!). Make sure your road trips this summer include detours to some of America’s top rated flea markets.
1 | THE FARM CHICKS ANTIQUES SHOW | Spokane, WA
2 | ROSE BOWL FLEA MARKET | Pasadena, CA
3 | THIEVES MARKET | Tempe, AZ
4 | MILE HIGH FLEA MARKET | Henderson, CO
5 | ROUND TOP ANTIQUES FAIR | Round Top, TX, and surround areas
6 | ORONOCO GOLD RUSH DAYS | Oronoco, MN
7 | WHAT CHEER FLEA MARKET | What Cheer, IA
8 | SHIPSHEWANA AUCTION AND FLEA MARKET | Shipshewana, IN
9 | SPRINGFIELD ANTIQUE SHOW & FLEA MARKET | Springfield, OH
10 | NASHVILLE FLEA MARKET | Nashville, TN
11 | SCOTT ANTIQUE MARKETS | Atlanta, GA
12 | RENNINGERS ANTIQUE CENTER | Mount Dora, FL
13 | ANTIQUE EXTRAVAGANZA | Adamstown, PA, and surrounding areas
14 | BROOKLYN FLEA | Brooklyn, NY
15 | BRIMFIELD ANTIQUE AND COLLECTIBLES | Brimfield, MA
As featured in the Summer 2017 Edition of Beekman 1802 Almanac Magazine. For more check out Better Homes and Gardens Flea Market Style: Fresh Ideas for Your Vintage Finds[image error].
The post Flea Market Finder appeared first on Beekman 1802.
Anthotype Photograms

Anthotype photograms are a perfect reflection of a garden’s ever-changing nature. An anthotype photogram is an image produced by placing an object directly onto a surface that has been made light-sensitive by coating it with a photographic emulsion. The emulsion used here is made from plant materials. This results in a delicate, color-infused, low-contrast print. Anthotypes by nature are temporary—they might last from six to eight months—and part of the charm of an anthotype is watching the image fade away over time. Some people scan their artwork to make a permanent record of it, others store their prints in a dark place to extend their longevity.
This project calls for using spinach leaves to make an emulsion, but you can use all kinds of petals, leaves, and berries to make emulsions. Some plant emulsions can take weeks to develop; spinach leaves have a relatively short processing time, making them a perfect introductory emulsion. Other flowers, vegetables, and fruits that you can use to make emulsions include pansies, which make a beautiful shade of deep purple in one to two weeks; marigolds, which make a light rusty yellow in three to four weeks; cabbage, which makes a purple hue in two to three weeks; onion skins, which make a rich orange in three to four weeks; and beetroots, which make a fuchsia in two weeks.
Materials
3 sheets of heavyweight watercolor paper (we used 100% cotton rag fiber, 7- × 9 1/2-inch handmade, deckle edge, 150-lb. white paper from Papeterie Saint-Armand)
Approximately 4 cups of raw spinach (you can use regular or baby spinach)
3 small trees or plants for making the photograms (we used Zelkova serrata, Juniperus pingii ‘Loderi’, and Microcachys tetragona)
Three 8 1/2- × 11″ frames
Painter’s tape
Mortar and pestle, blender, or food processor
Cheesecloth
Measuring cup or bowl
Foam brush
Towel
Directions
On each sheet of paper, just in from the deckle edge, run a length of painter’s tape along the border but leaving the deckle edges uncovered. Smooth the tape down once you have it in place. Repeat along all four edges of each sheet of paper. This will give you a uniform white border.
Grind or blend the spinach until it is completely processed and looks like coarse pesto.
Transfer the pulp to a doubled-over piece of cheesecloth.
Hold the cheesecloth over a bowl or measuring cup, and squeeze the cloth until all the liquid is extracted into the bowl.
Using the foam brush, coat the paper with the spinach emulsion, brushing from side to side in long, continuous strokes. Place the paper on a flat surface in a dark place and let dry. The drying time will vary depending on the temperature of your home—it could take about ten minutes to an hour.
While the paper is drying, pull the plants out of their pots and remove as much soil as you can by gently combing through the soil with your fingers.
Run water over the roots of the plants to rinse off all the dirt.
Place the trees on a towel and let them dry until there is no moisture left. While the tree roots are drying, check on the paper.
If the emulsion is dry coat the paper with another layer of emulsion, but this time brush the emulsion on from top to bottom. Return the paper to a dark place and let dry.
Once both the paper and plants are dry, position each plant on a single sheet of paper and cover each with the glass. The plant will compress into a two dimensional object.
Place the glass-covered print in the sun and wait 1 to 4 hours. Monitor the changing color of the print. Once the paper is very light green and significantly lighter than the area under the plant, remove the frame from the sun and remove the plant.
Remove the tape from the edges and frame the print.
As featured in the Summer 2017 Edition of Beekman 1802 Almanac Magazine. For more check out Plant Craft: 30 Projects that Add Natural Style to Your Home[image error] by Caitlin Atkinson.
1
Spring 2017 Almanac
2
Summer 2017 Almanac
3
Autumn 2017 Almanac
4
Winter 2017 Almanac
Visit the Mercantile
The post Anthotype Photograms appeared first on Beekman 1802.
April 12, 2018
How To Keep Beekman in Your Facebook Feed
We’ve gotten a lot of emails lately asking why we don’t post pictures and farm stories on Facebook anymore. Well, we are posting on Facebook…they’re just not showing up in your newsfeed. Over the years, Facebook has been sharing less content from “brand” pages onto peoples’ personal pages – even if you’ve signed up to follow us. Recently, however, it seems like they’ve stopped sharing brand page posts almost entirely.
The good news is that there still is a way that you can see all of our farm posts, right when they’re posted. It takes just five seconds. Follow these simple instructions, and you should be notified every time we post. (These instructions are easiest to follow on a desktop device.)
Go to https://www.facebook.com/FabulousBeekmanBoys.
Underneath our cover photo, click the arrow next to the “Follow” button.
Under “Notifications”, check “All On.”
To take it a step further and ensure you’re seeing our content, Under “In Your Newsfeed”, check “See First.” Now, you will see our posts when you open Facebook AND you will receive an alert whenever we post from the page.

The post How To Keep Beekman in Your Facebook Feed appeared first on Beekman 1802.
April 11, 2018
Thank You For B.ing My Mom Contest
 After a certain age, it becomes overwhelmingly clear that there is no gift that we can give mom that anyway repays her for the gifts she gave us. This year, we want to help you thank her for all those gifts. Thank her, for all the sleepless nights she spent soothing you back to sleep while keeping monsters at bay. Thank her, for the chicken soup and the tissues and maybe even an extra day off from school when you came down with the sniffles. Thank her, for teaching you how to tie your shoes and how to fry an egg and how to stand up for what you believe in without belittling the beliefs of others.
Thank her for pushing aside any self-doubt that, no doubt, crept in at some point; when she had to remind herself that the days may seem long, but the years are short. Thank her for surrounding you with love and light in a way that nobody else ever could.
Thank her for B.ing your mom.
Submit a photo of you and your mom to contest@beekman1802.com. Include both your names, your location, and a few sentences thanking your mother this Mother’s Day. (Do you and mom share a favorite Beekman product? Do you make a Beekman recipe together? Be sure to share that, too!) 5 winners will be chosen – at random – to win a Beekman 1802 bag full of products, valued at $200. Oh, and on TOP of that, each mother is going to win a full year subscription to the Beekman 1802 Beauty Box.

The post Thank You For B.ing My Mom Contest appeared first on Beekman 1802.


