Donald Buraglio and Michael Dove's Blog, page 23
August 22, 2011
Snickers Marathon Bar Review and Giveaway
Administrative note: I'm in a giveaway frame of mind lately, so the next few weekday posts will all include some kind of giveaway offer. As luck would have it, today's post involves two.
Just before this post went to press, my contact person at Pearl Izumi wrote to ask if I could help spread the word on a killer cycling gear contest they have going on this week in conjunction with the US Pro Cycling Challenge, with a grand prize of $2000 worth of Pearl Izumi gear. Awesome, right? The whole thing is being conducted through PI's YouTube channel, which is where you need to go for all the details. So check out the PI contest over there, then come back for the Marathon Bar contest here.
**
Back in June, I was invited to stop by one of the Rock 'n' Roll Marathon events to check out the new versions of Snickers' Marathon energy and protein bars. The bars have been around for a while, but Snickers has stepped up its involvement in endurance sports this year, becoming an official sponsor of the entire Rock 'n' Roll Marathon and Half-Marathon series taking place at multiple venues across the country.
However, thanks to ultrarunning, my own participation in road racing events has diminished quite dramatically over the past few years, and it was going to take a lot more than the prospect of a snappy marketing spiel and a few free samples to get me to attend a Rock 'n' Roll race. When I politely declined the invitation, the Snickers rep offered to send me a gift package anyway, and agreed to provide the same thing for a few lucky readers.
Obviously, that kind of partnership is a lot easier for me to support. So let's run through a brief review, with a giveaway contest to follow once we're finished.

Snickers' Marathon product lineup includes five flavors of energy bars, and two flavors of high protein bars. I received samples of two energy bar flavors – crunchy dark chocolate and crunchy honey and toasted almond – as well as both protein bar flavors, caramel nut rush and chocolatey nut burst. The energy bars range in calories from 150 to 220 each, and contain 10 to 14g of protein. The high-protein bars have 21g and 290 calories for chocolatey nut, and 20g/280 calories for caramel nut. All of the bars are low glycemic index foods to help provide sustained energy, and contain essential vitamins to enhance their nutritional profile.
From a taste standpoint, my preference was for the energy bars, which have a crisper texture as well as some non-chocolate flavors. (Here's a strange thing: I love chocolate, but typically don't like chocolate-flavored energy foods, gels, or anything else I might consume while active. I have no idea why.) The protein bars are both quite chewy, with a taste and texture that isn't very far removed from a candy bar – basically, they're like better-for-you, nutritionally fortified Snickers bars.
In our household, the standard for energy bars has been set fairly high: as I've described in several posts, we're an entire family of CLIF junkies. Using that comparison, there wasn't anything from a taste or performance standpoint about the Marathon energy bar to make me switch from using regular CLIF Bars, and there wasn't anything to make my wife switch from her Builder's Bars to the high-protein Marathon versions. However, we recognize that our individual preferences may vary from yours, which is why it's nice to be able to offer a few samples you can try for yourself.
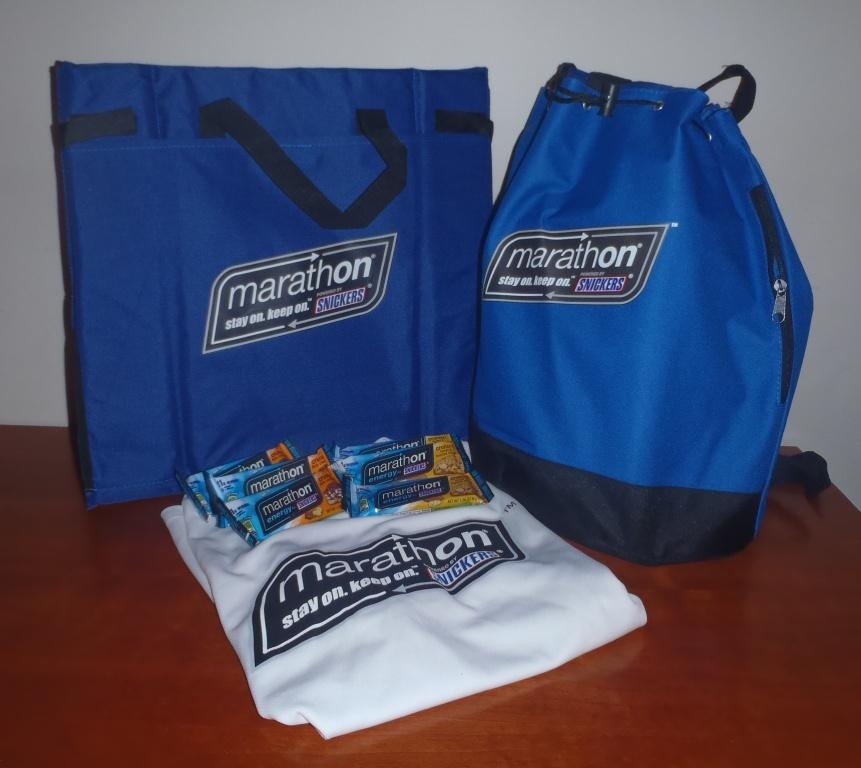
Actually, the giveaway includes more than just energy bars; Snickers will provide three winners with a Marathon prize pack (see below), including a tote bag, a tech fabric shirt, and a cool little portable chair that's great for taking to the beach or youth sports games. You'll also get the same samples of energy bars and protein bars that I tested for this review.

To enter the contest, just leave a comment below this post; on Saturday, I'll randomly select three winners to receive a prize package from Snickers. If you happen to be at one of the Rock 'n' Roll events this year, you can stop by the Snickers Marathon booth for samples, or if you want more information about their involvement in the Rock 'n' Roll series, check out their Facebook page.
Thanks very much to Snickers for sponsoring this giveaway, and good luck to everyone!
Get updates as soon as they're posted! Click here to subscribe to Running and Rambling.
Check out the Running Life book for a collection of our most popular columns.


Just before this post went to press, my contact person at Pearl Izumi wrote to ask if I could help spread the word on a killer cycling gear contest they have going on this week in conjunction with the US Pro Cycling Challenge, with a grand prize of $2000 worth of Pearl Izumi gear. Awesome, right? The whole thing is being conducted through PI's YouTube channel, which is where you need to go for all the details. So check out the PI contest over there, then come back for the Marathon Bar contest here.
**
Back in June, I was invited to stop by one of the Rock 'n' Roll Marathon events to check out the new versions of Snickers' Marathon energy and protein bars. The bars have been around for a while, but Snickers has stepped up its involvement in endurance sports this year, becoming an official sponsor of the entire Rock 'n' Roll Marathon and Half-Marathon series taking place at multiple venues across the country.
However, thanks to ultrarunning, my own participation in road racing events has diminished quite dramatically over the past few years, and it was going to take a lot more than the prospect of a snappy marketing spiel and a few free samples to get me to attend a Rock 'n' Roll race. When I politely declined the invitation, the Snickers rep offered to send me a gift package anyway, and agreed to provide the same thing for a few lucky readers.
Obviously, that kind of partnership is a lot easier for me to support. So let's run through a brief review, with a giveaway contest to follow once we're finished.

Snickers' Marathon product lineup includes five flavors of energy bars, and two flavors of high protein bars. I received samples of two energy bar flavors – crunchy dark chocolate and crunchy honey and toasted almond – as well as both protein bar flavors, caramel nut rush and chocolatey nut burst. The energy bars range in calories from 150 to 220 each, and contain 10 to 14g of protein. The high-protein bars have 21g and 290 calories for chocolatey nut, and 20g/280 calories for caramel nut. All of the bars are low glycemic index foods to help provide sustained energy, and contain essential vitamins to enhance their nutritional profile.
From a taste standpoint, my preference was for the energy bars, which have a crisper texture as well as some non-chocolate flavors. (Here's a strange thing: I love chocolate, but typically don't like chocolate-flavored energy foods, gels, or anything else I might consume while active. I have no idea why.) The protein bars are both quite chewy, with a taste and texture that isn't very far removed from a candy bar – basically, they're like better-for-you, nutritionally fortified Snickers bars.
In our household, the standard for energy bars has been set fairly high: as I've described in several posts, we're an entire family of CLIF junkies. Using that comparison, there wasn't anything from a taste or performance standpoint about the Marathon energy bar to make me switch from using regular CLIF Bars, and there wasn't anything to make my wife switch from her Builder's Bars to the high-protein Marathon versions. However, we recognize that our individual preferences may vary from yours, which is why it's nice to be able to offer a few samples you can try for yourself.
Actually, the giveaway includes more than just energy bars; Snickers will provide three winners with a Marathon prize pack (see below), including a tote bag, a tech fabric shirt, and a cool little portable chair that's great for taking to the beach or youth sports games. You'll also get the same samples of energy bars and protein bars that I tested for this review.
To enter the contest, just leave a comment below this post; on Saturday, I'll randomly select three winners to receive a prize package from Snickers. If you happen to be at one of the Rock 'n' Roll events this year, you can stop by the Snickers Marathon booth for samples, or if you want more information about their involvement in the Rock 'n' Roll series, check out their Facebook page.
Thanks very much to Snickers for sponsoring this giveaway, and good luck to everyone!
Get updates as soon as they're posted! Click here to subscribe to Running and Rambling.
Check out the Running Life book for a collection of our most popular columns.


August 20, 2011
Patagonia Summer Clearance Sale; Random Shots of Beauty
In similar fashion as last weekend, I'm leading off the customary RSOB post with an announcement about a very cool sale. Who knows - maybe I'll evolve into the Groupon of outdoor gear one of these days.
Anyway, it's no secret to anyone around here that I'm a huge fan of the Patagonia company. They make the highest quality outdoor gear imaginable - including both the shirt and shorts I wore at my 100-miler this summer - and have higher standards of social and environmental responsibility than any company I'm aware of.
Here's one example, courtesy of this month's Outside magazine: after last year's oil spill in the Gulf of Mexico, Patagonia sent 7 teams of 10 company employees to the Gulf region at various times to assist with the cleanup effort. They paid the costs of travel, living expenses, and one week's lodging for all the relief workers, and even paid the employees their regular salary while they were there. (If you can come up with a better story than that, I'd love to hear it - share in the comments below.)
Anyway, you get the idea ... Patagonia rocks. The only drawback to their apparel is that it's often considered a bit pricey - although when you consider the fact that it's top of the line stuff that typically stands up to many years of high-demand use, it should probably be considered something of a bargain. Regardless, for the next week you have an opportunity to get some amazing prices on Patagonia goods, as the company is having its annual clearance sale.

Basically, they're blowing out their spring and summer inventory, so the sizes and color options will vary depending on the item. I managed to find a couple of great shirts, and hopefully you can find something to suit you as well. You also get free shipping if your order exceeds $75. The sale is good through August 25, so click over to Patagonia's summer clearance sale and see if you can grab yourself a bargain.
**
For this weekend's Random Shot of Beauty, I didn't have to travel very far from home:

A cigar store Indian outside our local neighborhood market - a relic from a time when cigar stores still existed, and the term "Indian" wasn't considered improper. I actually have a stand-alone post about this location; not the Indian, but the store itself. It's one of those things I keep hoping to get to, but never seem to sit down and write. Maybe this post will serve as my own reminder in the next week or two.
Get updates as soon as they're posted! Click here to subscribe to Running and Rambling.
Check out the Running Life book for a collection of our most popular columns.


Anyway, it's no secret to anyone around here that I'm a huge fan of the Patagonia company. They make the highest quality outdoor gear imaginable - including both the shirt and shorts I wore at my 100-miler this summer - and have higher standards of social and environmental responsibility than any company I'm aware of.
Here's one example, courtesy of this month's Outside magazine: after last year's oil spill in the Gulf of Mexico, Patagonia sent 7 teams of 10 company employees to the Gulf region at various times to assist with the cleanup effort. They paid the costs of travel, living expenses, and one week's lodging for all the relief workers, and even paid the employees their regular salary while they were there. (If you can come up with a better story than that, I'd love to hear it - share in the comments below.)
Anyway, you get the idea ... Patagonia rocks. The only drawback to their apparel is that it's often considered a bit pricey - although when you consider the fact that it's top of the line stuff that typically stands up to many years of high-demand use, it should probably be considered something of a bargain. Regardless, for the next week you have an opportunity to get some amazing prices on Patagonia goods, as the company is having its annual clearance sale.
Basically, they're blowing out their spring and summer inventory, so the sizes and color options will vary depending on the item. I managed to find a couple of great shirts, and hopefully you can find something to suit you as well. You also get free shipping if your order exceeds $75. The sale is good through August 25, so click over to Patagonia's summer clearance sale and see if you can grab yourself a bargain.
**
For this weekend's Random Shot of Beauty, I didn't have to travel very far from home:

A cigar store Indian outside our local neighborhood market - a relic from a time when cigar stores still existed, and the term "Indian" wasn't considered improper. I actually have a stand-alone post about this location; not the Indian, but the store itself. It's one of those things I keep hoping to get to, but never seem to sit down and write. Maybe this post will serve as my own reminder in the next week or two.
Get updates as soon as they're posted! Click here to subscribe to Running and Rambling.
Check out the Running Life book for a collection of our most popular columns.
August 17, 2011
Nathan Endurance Vest Hydration Pack Review
If nothing else, the existence of Nathan's Endurance vest reveals two important yet seemingly contradictory traits about the company:
1) They're not afraid to do a little innovation, even with their most popular products, however …
2) They're smart enough to leave a good thing alone.
How can both of those things be true? Consider the words of my Nathan rep in regards to the Endurance: It started out as a modified 020, but we soon realized we had an entirely different pack.

Nathan Endurance vest
The 020 she's referring to is Nathan's omnipresent HPL 020 hydration vest, an industry standard that happens to be my favorite vest for long training runs. (You can see my original HPL 020 review here, and an updated HPL 020 review here.) The 020 has top-notch pedigree – it was developed by legendary ultrarunner Dana Miller – and has become wildly popular among ultrarunners over the past several years. So you might wonder why Nathan felt the need to revamp it.
Fortunately, at some point in the redesign process, the company had the good sense to realize that they were better off introducing a completely new product rather than changing something that works so consistently well for so many people. The end result is the Endurance, which has enough new design aspects to distinguish it from the 020, but enough similarities that if you're accustomed to the 020, you'll find the Endurance just as easy and functional to use.
That was certainly the case with me; I received my pack about two days before my pacing duties at this summer's Western States 100. I had no time to get accustomed to the pack – I literally strapped it on for the first time that afternoon, and ran 40 miles with it through the night. It felt just as comfortable as my favorite 020, with almost no adjustment period needed. It rides the same, performs the same, and has the same material construction as the 020, along with a few nice additions that are mostly upgrades. I have a couple of minor gripes – but then again, if I didn't, I wouldn't be a very good reviewer, right? (That's what I tell myself, anyway.)
So what's so different about the Endurance? It's mainly the arrangement of its cargo containers, which result in slightly greater overall storage capacity, a little better ability to compartmentalize, and a different method of accessing a couple of key areas.

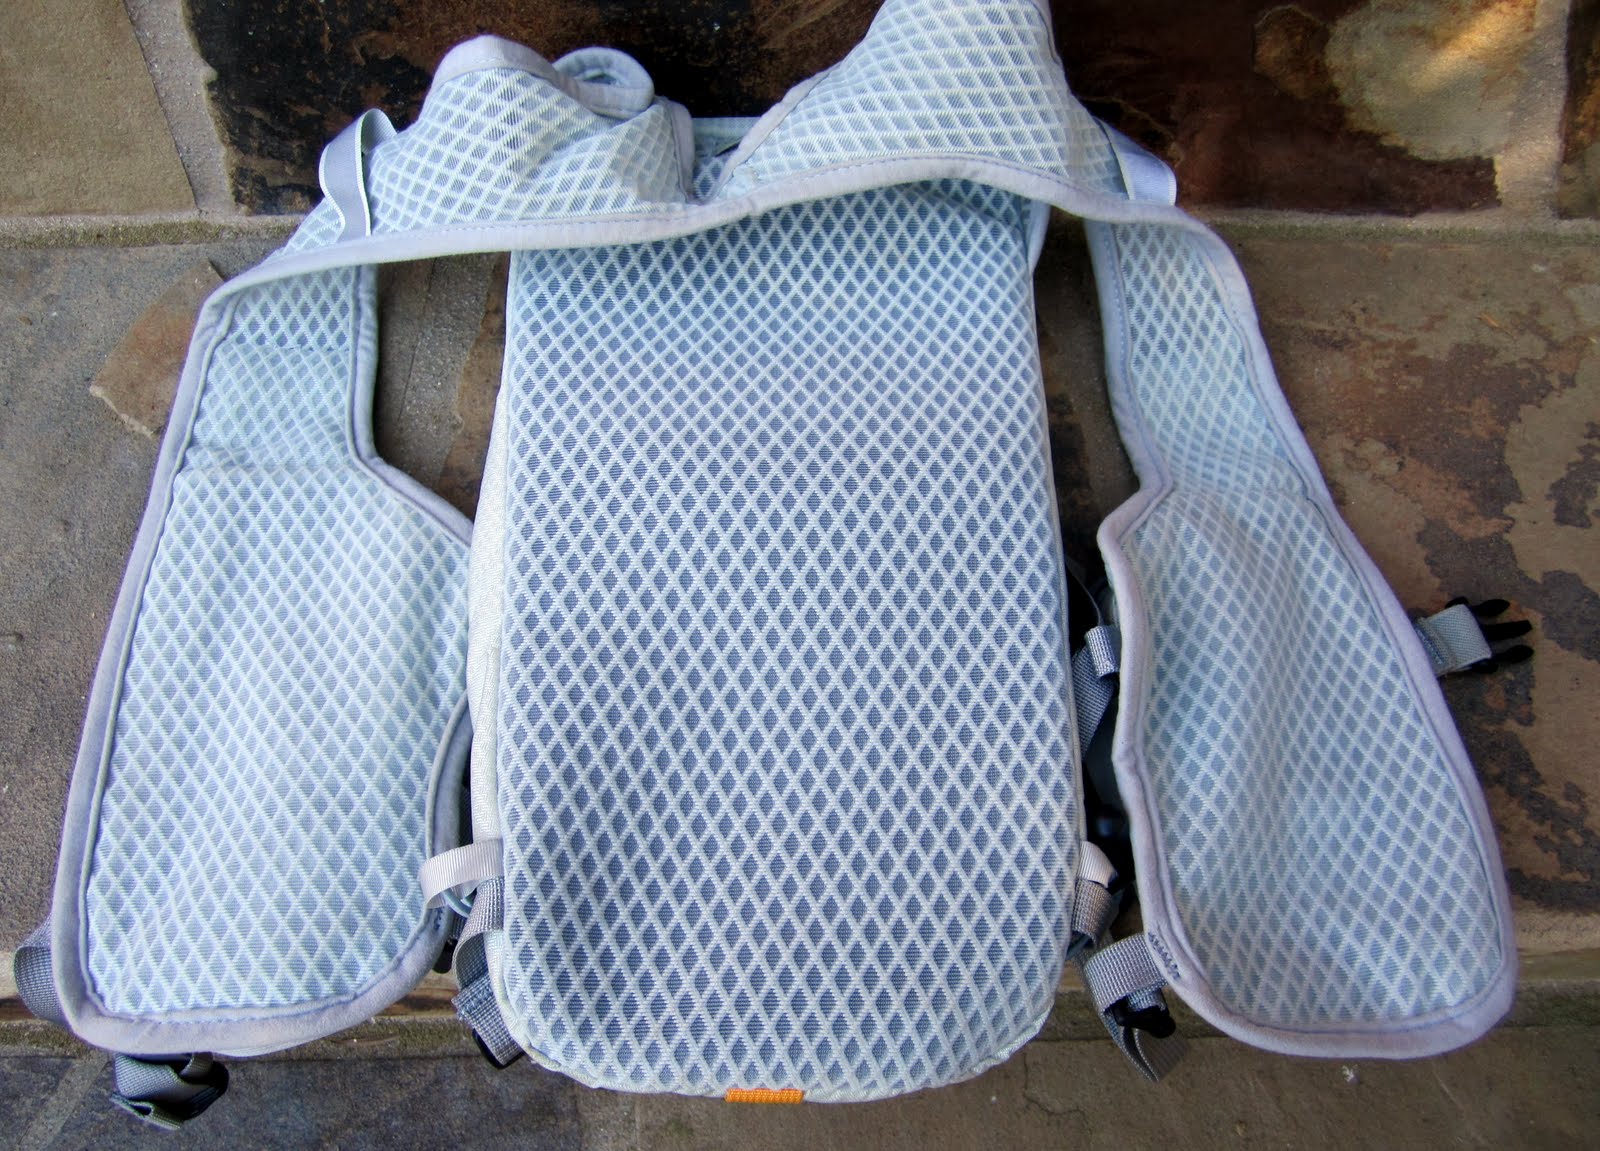
Endurance on left, HPL 020 on right (click to enlarge)
From the front, the two most noticeable changes are the different mesh used on a the larger pockets, and the addition of two small pockets: one is an elastic pouch on the left strap that's perfect for used gel wrappers, and a waterproof pill pocket on the right that's intended for electrolyte caps or any other small items that need to stay dry.
Otherwise, the size and configuration of the larger pockets is identical, with closed mesh used instead of the more porous mesh of the 020. This is actually a very nice change for me, as the right-sided bungee pouch is where I typically carry my camera. Every now and then my Canon gets gummed up with dust on the lens opening, and the closed mesh of the Endurance is much more effective at keeping excess dust out. In similar fashion, this material would improve protection for smart phones, GPS, or any other tech gadget you may be carrying.

Endurance on left, 020 on right
On the backside, the location of the external storage pocket is moved from the top of the 020 to the middle of the Endurance. I wasn't crazy about this change, as I had become pretty adept at reaching over my head to unzip and access the top pocket on the 020 without breaking my stride, but I'd have to be some sort of circus performer to accomplish that with the Endurance.

External pocket with key clasp and inner elastic pouch
Aside from the location, this external pocket is pretty much identical on both vests: there's an elastic internal pouch, a key clasp, and the same storage capacity. There's a bungee shock cord below the main pocket that can be used for stuffing a jacket or securing other large items to the outside of the pack.

Dual vertical zippers and Velcro flap
The major change on the backside is that the reservoir compartment is now accessed by dual vertical zippers with a Velcro flap instead of a single semi-circular zipper. The website copy states this change was intended for rapid access, but I have to say that this was the biggest discrepancy I found in my testing.
You may recall from my pacer report that I was feeling a bit rushed getting in and out of the aid stations while trying to keep up with Gretchen; at many aid stations, part of my difficulty was accessing the reservoir quickly for the volunteers to top me off. I found it more cumbersome to undo a Velcro attachment and two zippers compared to the simplicity of just tearing one arched zipper open. This may have been a factor of my being unaccustomed to the pack that night, but even in my continued testing afterward, the dual zipper system is definitely less efficient for me.

Breathable mesh with rectangular, contoured back panel
The interior surface of the Endurance looks very similar to the 020, but there are a couple of subtle differences. The same lightweight, highly breatheable mesh is used, but on the Endurance the "footprint" is more rectangular instead of oval, and the back panel is somewhat contoured to the natural curvature of your back. I honestly couldn't notice a difference in overall comfort, but that's probably because the 020 is already so comfortable as to be almost unnoticeable. Weight of the two vests is quite similar as well, with the 15.2-oz Endurance slightly heavier than the 14-oz 020.

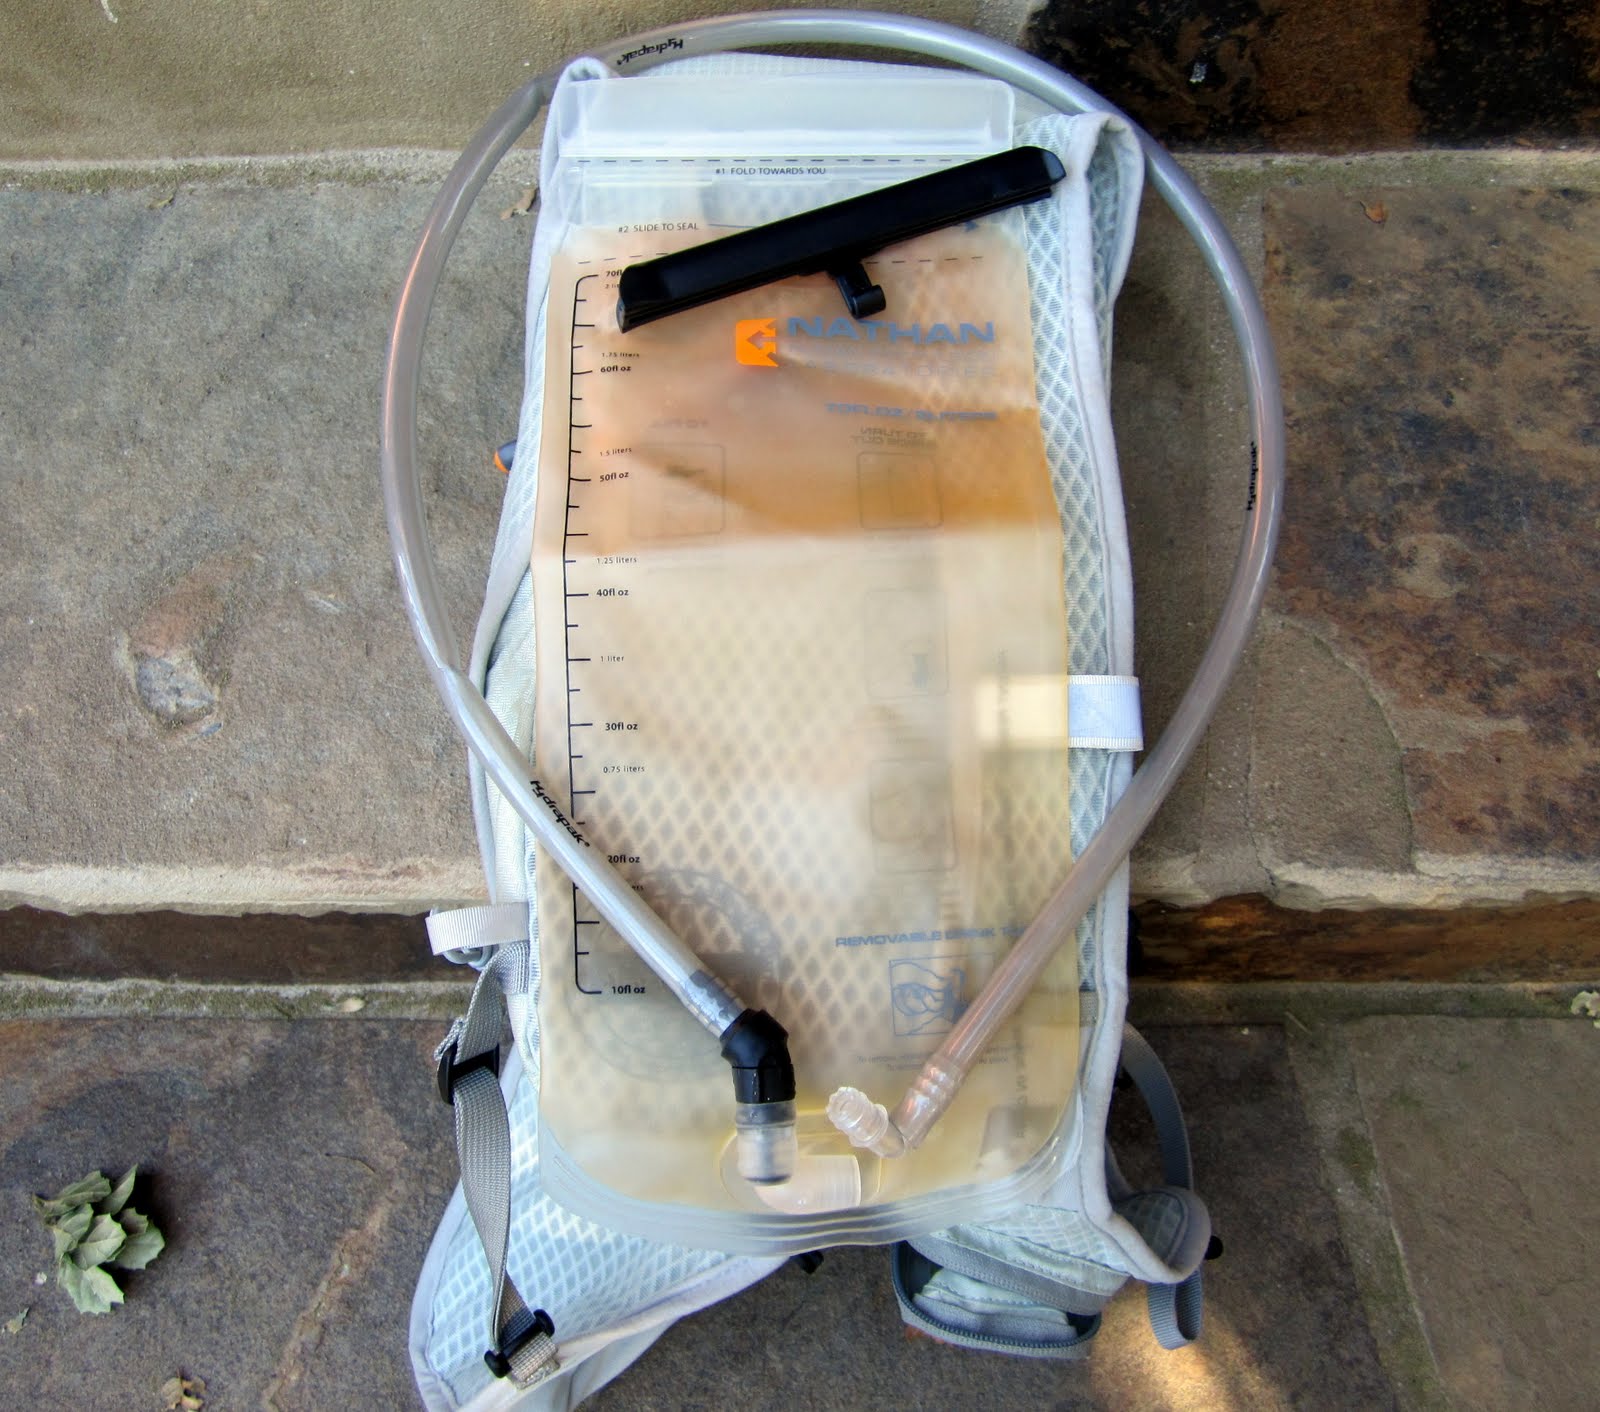
Hydrapak reservoir and drink tube
Another big strength of this pack is something I've touched on in previous reviews: Nathan uses Hydrapak reversible reservoirs for their vests – in this case, the same 70-oz fluid capacity as the 020. I'm convinced that Hydrapak is the best in the business – yes, even better than CamelBak – when it comes to fluid reservoirs. They're almost indestructible, super easy to open and close, and they can be cleaned and dried in a snap.
If there's been one problem with Hydrapak reservoirs, it's that they haven't quite perfected the bite valve, but the Endurance pack features the most recent version – with small plastic side flares for easier twisting – that's almost comparable to the top of the line in this regard as well. And since the 020 and Endurance pack both utilize the same reservoir, this particular element isn't really a point in favor of either model - but the use of Hydrapak soft goods is such a compelling feature that it was worth recognizing.

Shock cord for storage - same on both models
After a few months of testing, I'm not quite ready to say that the Endurance will replace my 020, but I can certainly say that it's almost exactly comparable in performance, with an assortment of design tweaks that will come down to a matter of personal preference for most users. I guess my one-sentence comparison is that you gain a little bit in cargo space, and lose a little bit in operational efficiency. The Endurance also has a slightly higher retail price than the 020, but the extra five bucks you pay is certainly worth it if the styling strikes you as more attractive.
The Nathan Endurance vest retails for $90 from GearX.com.*
(*Yes, it's also available at Amazon, but I'm currently link-boycotting them until their whole affiliate mess gets settled. More on this subject soon.)
*Product provided by Nathan Sports. Affiliate sales support Running and Rambling.
**See other product reviews on sidebar at right. If you have a product you'd like reviewed, contact me at info@runningandrambling.com.
Get updates as soon as they're posted! Click here to subscribe to Running and Rambling.
Check out the Running Life book for a collection of our most popular columns.

1) They're not afraid to do a little innovation, even with their most popular products, however …
2) They're smart enough to leave a good thing alone.
How can both of those things be true? Consider the words of my Nathan rep in regards to the Endurance: It started out as a modified 020, but we soon realized we had an entirely different pack.
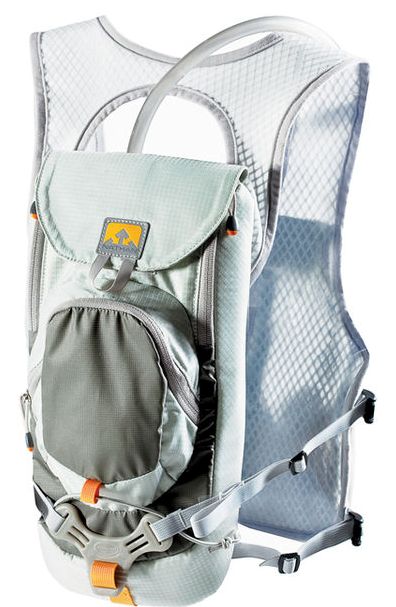
Nathan Endurance vest
The 020 she's referring to is Nathan's omnipresent HPL 020 hydration vest, an industry standard that happens to be my favorite vest for long training runs. (You can see my original HPL 020 review here, and an updated HPL 020 review here.) The 020 has top-notch pedigree – it was developed by legendary ultrarunner Dana Miller – and has become wildly popular among ultrarunners over the past several years. So you might wonder why Nathan felt the need to revamp it.
Fortunately, at some point in the redesign process, the company had the good sense to realize that they were better off introducing a completely new product rather than changing something that works so consistently well for so many people. The end result is the Endurance, which has enough new design aspects to distinguish it from the 020, but enough similarities that if you're accustomed to the 020, you'll find the Endurance just as easy and functional to use.
That was certainly the case with me; I received my pack about two days before my pacing duties at this summer's Western States 100. I had no time to get accustomed to the pack – I literally strapped it on for the first time that afternoon, and ran 40 miles with it through the night. It felt just as comfortable as my favorite 020, with almost no adjustment period needed. It rides the same, performs the same, and has the same material construction as the 020, along with a few nice additions that are mostly upgrades. I have a couple of minor gripes – but then again, if I didn't, I wouldn't be a very good reviewer, right? (That's what I tell myself, anyway.)
So what's so different about the Endurance? It's mainly the arrangement of its cargo containers, which result in slightly greater overall storage capacity, a little better ability to compartmentalize, and a different method of accessing a couple of key areas.
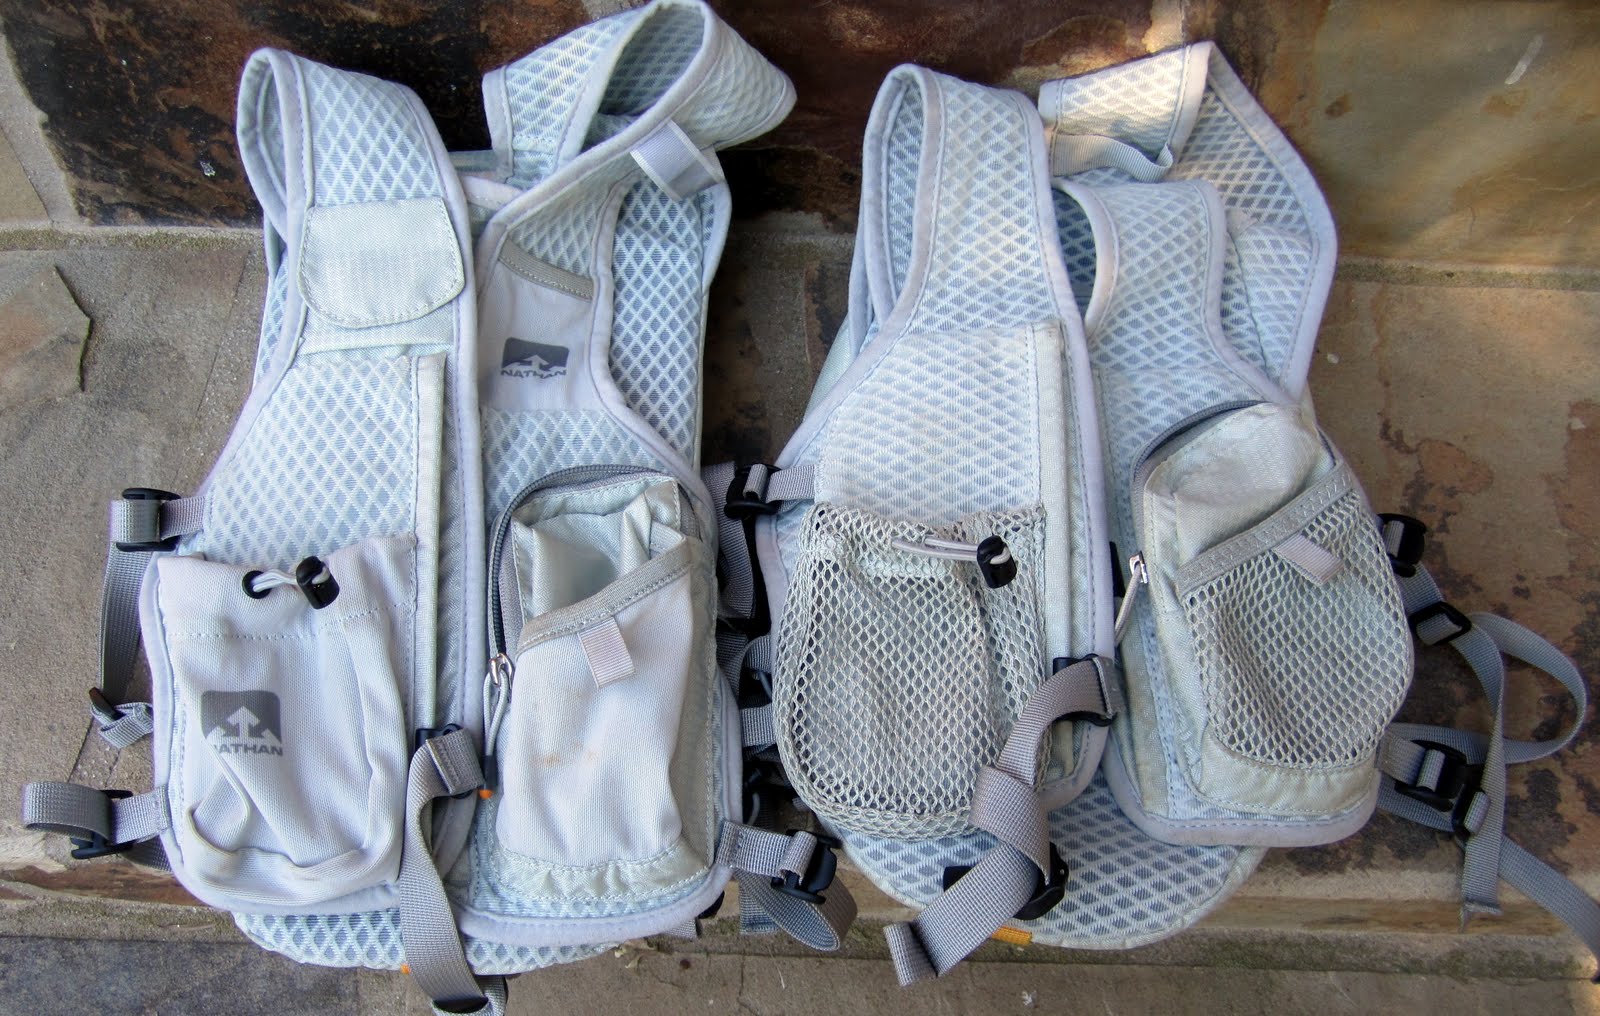
Endurance on left, HPL 020 on right (click to enlarge)
From the front, the two most noticeable changes are the different mesh used on a the larger pockets, and the addition of two small pockets: one is an elastic pouch on the left strap that's perfect for used gel wrappers, and a waterproof pill pocket on the right that's intended for electrolyte caps or any other small items that need to stay dry.
Otherwise, the size and configuration of the larger pockets is identical, with closed mesh used instead of the more porous mesh of the 020. This is actually a very nice change for me, as the right-sided bungee pouch is where I typically carry my camera. Every now and then my Canon gets gummed up with dust on the lens opening, and the closed mesh of the Endurance is much more effective at keeping excess dust out. In similar fashion, this material would improve protection for smart phones, GPS, or any other tech gadget you may be carrying.

Endurance on left, 020 on right
On the backside, the location of the external storage pocket is moved from the top of the 020 to the middle of the Endurance. I wasn't crazy about this change, as I had become pretty adept at reaching over my head to unzip and access the top pocket on the 020 without breaking my stride, but I'd have to be some sort of circus performer to accomplish that with the Endurance.
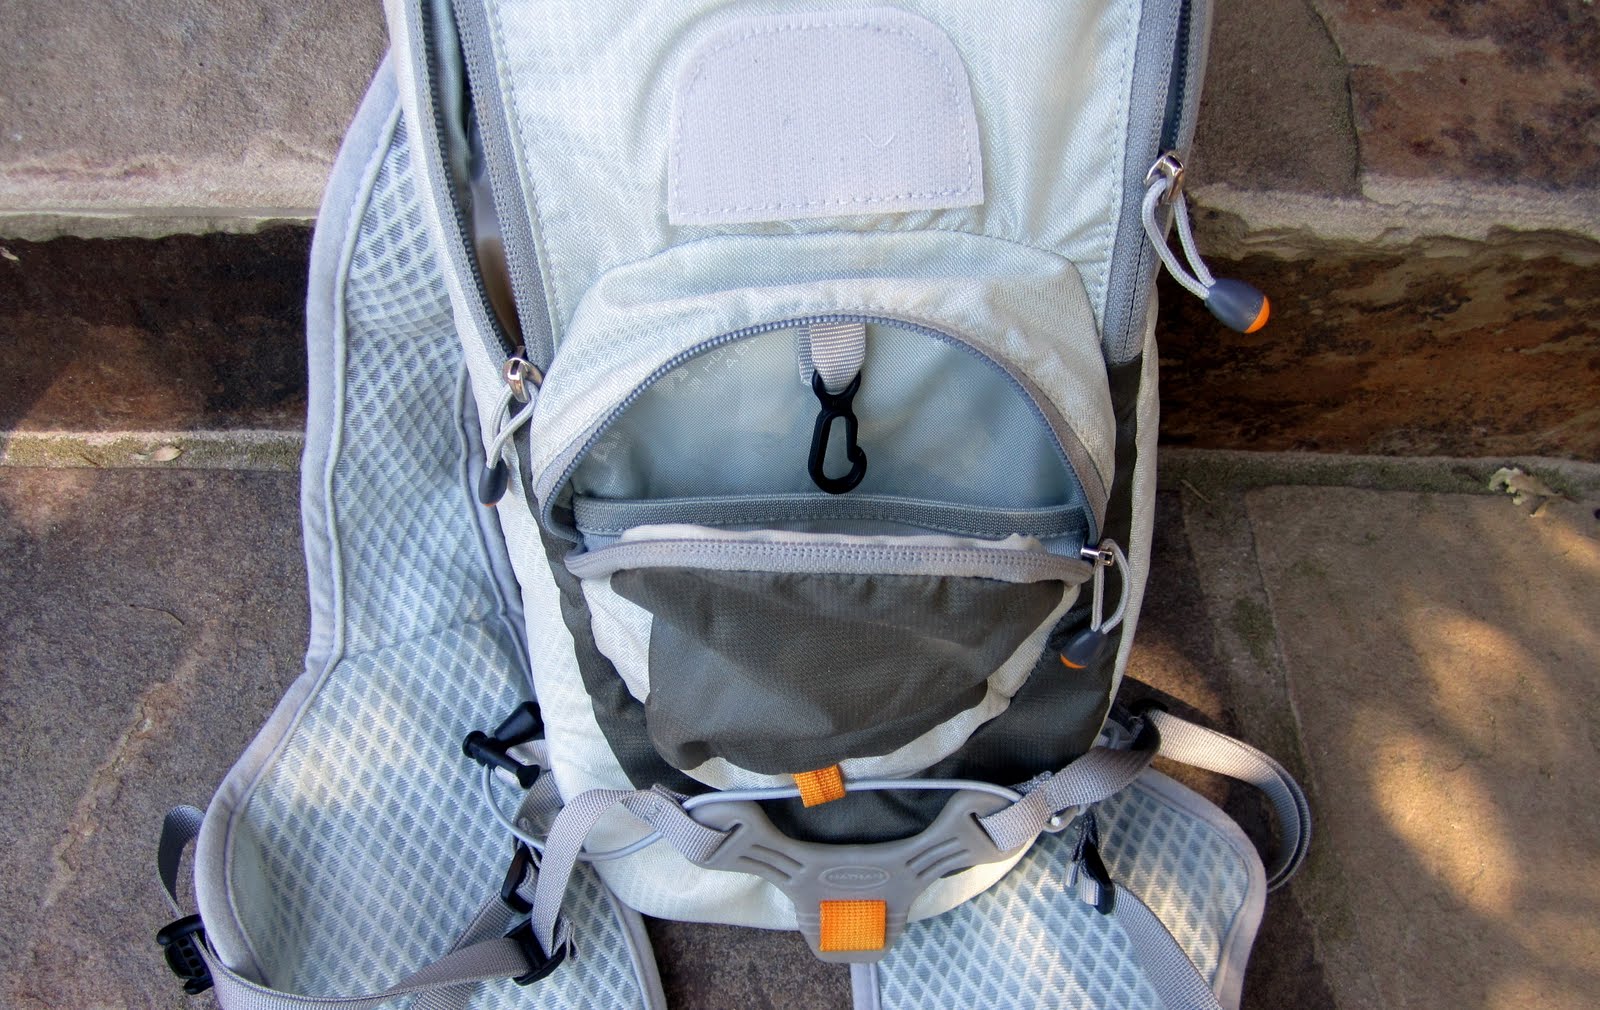
External pocket with key clasp and inner elastic pouch
Aside from the location, this external pocket is pretty much identical on both vests: there's an elastic internal pouch, a key clasp, and the same storage capacity. There's a bungee shock cord below the main pocket that can be used for stuffing a jacket or securing other large items to the outside of the pack.

Dual vertical zippers and Velcro flap
The major change on the backside is that the reservoir compartment is now accessed by dual vertical zippers with a Velcro flap instead of a single semi-circular zipper. The website copy states this change was intended for rapid access, but I have to say that this was the biggest discrepancy I found in my testing.
You may recall from my pacer report that I was feeling a bit rushed getting in and out of the aid stations while trying to keep up with Gretchen; at many aid stations, part of my difficulty was accessing the reservoir quickly for the volunteers to top me off. I found it more cumbersome to undo a Velcro attachment and two zippers compared to the simplicity of just tearing one arched zipper open. This may have been a factor of my being unaccustomed to the pack that night, but even in my continued testing afterward, the dual zipper system is definitely less efficient for me.
Breathable mesh with rectangular, contoured back panel
The interior surface of the Endurance looks very similar to the 020, but there are a couple of subtle differences. The same lightweight, highly breatheable mesh is used, but on the Endurance the "footprint" is more rectangular instead of oval, and the back panel is somewhat contoured to the natural curvature of your back. I honestly couldn't notice a difference in overall comfort, but that's probably because the 020 is already so comfortable as to be almost unnoticeable. Weight of the two vests is quite similar as well, with the 15.2-oz Endurance slightly heavier than the 14-oz 020.
Hydrapak reservoir and drink tube
Another big strength of this pack is something I've touched on in previous reviews: Nathan uses Hydrapak reversible reservoirs for their vests – in this case, the same 70-oz fluid capacity as the 020. I'm convinced that Hydrapak is the best in the business – yes, even better than CamelBak – when it comes to fluid reservoirs. They're almost indestructible, super easy to open and close, and they can be cleaned and dried in a snap.
If there's been one problem with Hydrapak reservoirs, it's that they haven't quite perfected the bite valve, but the Endurance pack features the most recent version – with small plastic side flares for easier twisting – that's almost comparable to the top of the line in this regard as well. And since the 020 and Endurance pack both utilize the same reservoir, this particular element isn't really a point in favor of either model - but the use of Hydrapak soft goods is such a compelling feature that it was worth recognizing.

Shock cord for storage - same on both models
After a few months of testing, I'm not quite ready to say that the Endurance will replace my 020, but I can certainly say that it's almost exactly comparable in performance, with an assortment of design tweaks that will come down to a matter of personal preference for most users. I guess my one-sentence comparison is that you gain a little bit in cargo space, and lose a little bit in operational efficiency. The Endurance also has a slightly higher retail price than the 020, but the extra five bucks you pay is certainly worth it if the styling strikes you as more attractive.
The Nathan Endurance vest retails for $90 from GearX.com.*
(*Yes, it's also available at Amazon, but I'm currently link-boycotting them until their whole affiliate mess gets settled. More on this subject soon.)
*Product provided by Nathan Sports. Affiliate sales support Running and Rambling.
**See other product reviews on sidebar at right. If you have a product you'd like reviewed, contact me at info@runningandrambling.com.
Get updates as soon as they're posted! Click here to subscribe to Running and Rambling.
Check out the Running Life book for a collection of our most popular columns.
August 15, 2011
CamelBak Octane LR Hydration Pack Review
"That night, he wore a shirt and trousers in Desert Digital Camouflage, and carried a silenced Sig Sauer P226 pistol, along with extra ammunition; a CamelBak, for hydration; and gel shots, for endurance."
- From Getting Bin Laden by Nicholas Schmidle, from The New Yorker
Before you get the wrong idea about things: the intro quote above doesn't really have anything to do with the product review. I just thought the fact that the Navy SEALs used CamelBaks as part of their standard assault wardrobe was an interesting detail to note from the night Osama Bin Laden was killed.
Fortunately, my own testing regimen didn't involve any sort of midnight raids or top secret assassination missions - it was more of the garden variety trail running and mountain biking that is well within my comfort zone. However, the New Yorker tidbit also highlighted another noteworthy fact about CamelBak: they are far and away the industry leader in hydration packs. They're the first choice of the US armed services, they have a monopoly in every gear shop you'll ever enter, and they're easily the most common pack I encounter on the trails from Monterey County to Yosemite National Park.

CamelBak Octane LR
That doesn't mean they rest on their laurels, though; from year to year, the company continues to innovate and advance its product line. This spring, they completely revamped the traditional 70-oz hydration pack with the introduction of the CamelBak Octane LR.

Fluid reservoir at bottom of pack
The most obvious difference between this pack and virtually every other hydration pack on the market – including CamelBak's own Octane XCT, whose design was the starting point of the LR – is that the fluid is carried horizontally around the waist instead of vertically down the back. Realignment of the reservoir necessitates other functional changes as well – most of which are either improvements or equivalents, but a few of which are drawbacks. Whether this pack is an overall upgrade compared to the XCT will ultimately come down to your individual preferences for use. (And if you want a recap of the other pack, check out my CamelBak XCT review here.)
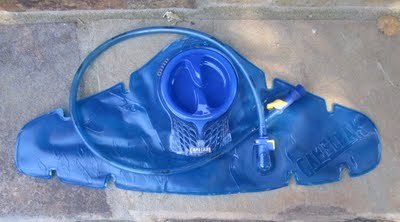
CamelBak Antidote lumbar reservoir
It all starts with this: a wing-shaped lumbar reservoir (or LR for short) that distributes fluid across your lower back instead of between your shoulder blades. The benefits of this placement for running are biomechanically obvious: the fluid weight is closer to your center of gravity, making for more efficient transport. It also decreases the strain on your back muscles during multi-hour outings, especially if you have a tendency to lean forward from the waist while running.
The reservoir also has a new feature for CamelBak: a Quick Link system that detaches the tube from the main compartment. It allows you to swap out the tubes if necessary and also makes cleaning a bit easier, although the overall cleaning of this reservoir is still somewhat difficult due to the wings; the best you can do is to stuff some paper towels into each side, because it's almost impossible to get air flow into them. Otherwise, all the great features of CamelBak's Antidote reservoir system are here: a wide mouth opening that easily locks shut with a half-turn, a Pure Flow tube, Big Bite valve, and HydroGuard coating to decrease bacterial growth.

Drink tube exiting pack at torso, and clipped to front strap
With the lumbar reservoir design, the drink tube exits the pack on the side of your torso instead of over your shoulder like on most packs. This is another of those personal preference things that some folks feel strongly about; it feels a bit strange to me when I'm running, but very natural on the bike. The bite valve clips securely in place on the front harness, so there's no issue with the tube flopping around during activity.
Diagonal zippers create flap to access reservoir
Two diagonal zippers create a lift-flap for accessing the reservoir. It's very easy to use in your kitchen, but refilling fluids in the field could be problematic for a couple of reasons. Since the access point is on the bottom half of the pack instead of the top, you have to hold the entire pack sideways or upside down if you want to keep the reservoir inside the pack while refilling. Also, if you take the reservoir out to refill it, placing it back inside the pack might be difficult if you're carrying a lot of cargo, especially in the side pouches. For training runs you might have time to work around these issues, but if you're looking for a pack to move through aid stations quickly during a race, this is a major drawback.
Low fluid levels = hard to drink
Another issue I found with the lateral fluid distribution is that the fluid doesn't completely drain into the drink tube opening when levels get low. Fluids sometimes get stuck in one of the side wing compartments without flowing to the center compartment (the one with the tube), and even if the pack is perfectly level, a small portion becomes inaccessible below the bottom of the tube entry point. By my estimation, the final 5-10oz of fluid in the reservoir is quite difficult to get through the tube without some significant manipulation of the pack – which is also something you don't want to deal with if you're in a hurry.

Large side zip pockets with key clasp on R
Other features of the pack will be quite familiar to CamelBak users. There are two spacious zip pockets on either side, one of which has a key clip inside. The air channel mesh on the back and underneath the straps maintains air movement between the pack and your body, and improves overall comfort. All the straps are adjustable to customize your own perfect fit. Overall pack weight of the LR is 12.6 oz, which is slightly heavier than the 11.2 oz XCT.
Since the entire bottom of the pack is occupied by the reservoir, CamelBak had to tweak the arrangement of the cargo storage areas for the Octane LR. In general, what they've done is a significant upgrade: total cargo capacity is 549 cubic inches, which is more than 2.5 times greater than the capacity of the Octane XCT. (However, I consider that XCT number a loose estimate, as it doesn't account for stuffing clothes and small gear into the main reservoir compartment.)

Two vertical pockets with diagonal zippers
The vertical pockets aren't as tall on the LR as they are on the XCT, but they overlap each other diagonally, with one slightly longer than the other; I can fit my 10" air pump in the deeper pocket, but not the superficial one. Both side zip pockets are roughly the same dimensions, perhaps a bit larger, than they are on the XCT. There's also a nice little pouch pocket on the front harness that's big enough for a couple of gels or energy blocks.
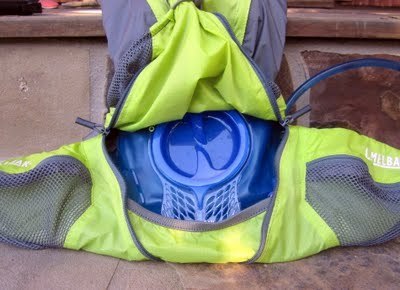
Huge central mesh pocket for large cargo
Most of the increased cargo capacity comes from the large mesh pocket that sits above the fluid reservoir compartment. You can easily stuff a jacket or a whole assortment of small items in this pocket, which latches closed with a hook and elastic cord. The extra cargo capacity is especially useful when using the LR as an MTB pack – and like most CamelBak products, the LR has great crossover appeal for both activities.

So if you're choosing between the LR and the XCT, here's a recap of the primary differences:
* LR has more comfortable and ergonomic fluid placement for running
* LR is less efficient to refill and doesn't empty as completely
* LR requires side torso tube placement instead of over the shoulder
* LR has significantly more cargo capacity
It's also worth noting that the XCT I reviewed last year had a 70-oz fluid reservoir, and the 2011 version has a 100-oz reservoir, so based on current models the LR has a lower fluid capacity, but 70 ounces is pretty much industry standard for most hydration packs.
As I mentioned, it's hard to make a clear call as to what version is best – ultimately the decision comes down to your own individual preferences and your intended use. I actually prefer the LR as an MTB pack, because I don't typically have to stop and refill during a multi-hour bike ride, but during a run of similar length I typically replenish my fluids every few hours. Regardless of what style you prefer, you can be assured that either of these packs are able to handle whatever adventures you have in mind.
The CamelBak Octane LR hydration pack retails for $89 from TravelCountry.com, where you can also find the 2011 CamelBak XCT pack for $79.
*Product provided by CamelBak. Affiliate sales help support Running and Rambling.
**See other product reviews on sidebar at right. If you have a product you'd like reviewed, contact me at info@runningandrambling.com.
Get updates as soon as they're posted! Click here to subscribe to Running and Rambling.
Check out the Running Life book for a collection of our most popular columns.

- From Getting Bin Laden by Nicholas Schmidle, from The New Yorker
Before you get the wrong idea about things: the intro quote above doesn't really have anything to do with the product review. I just thought the fact that the Navy SEALs used CamelBaks as part of their standard assault wardrobe was an interesting detail to note from the night Osama Bin Laden was killed.
Fortunately, my own testing regimen didn't involve any sort of midnight raids or top secret assassination missions - it was more of the garden variety trail running and mountain biking that is well within my comfort zone. However, the New Yorker tidbit also highlighted another noteworthy fact about CamelBak: they are far and away the industry leader in hydration packs. They're the first choice of the US armed services, they have a monopoly in every gear shop you'll ever enter, and they're easily the most common pack I encounter on the trails from Monterey County to Yosemite National Park.
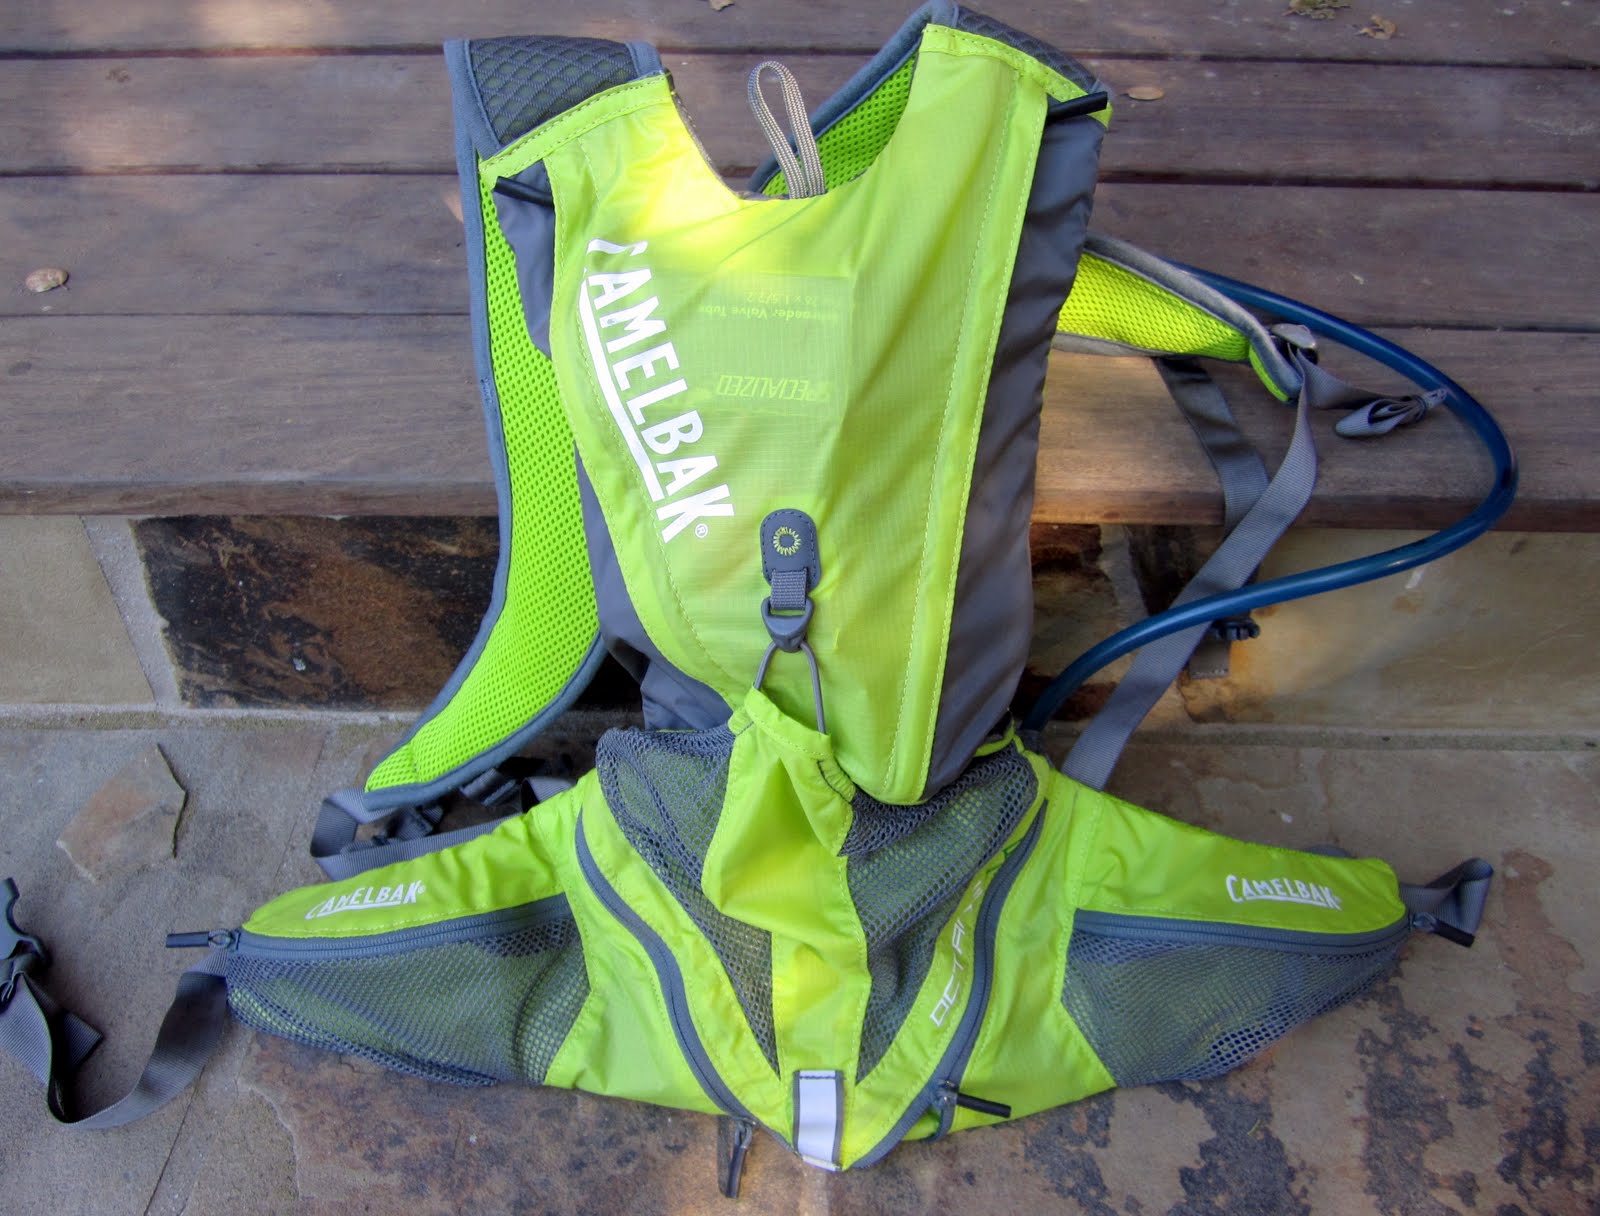
CamelBak Octane LR
That doesn't mean they rest on their laurels, though; from year to year, the company continues to innovate and advance its product line. This spring, they completely revamped the traditional 70-oz hydration pack with the introduction of the CamelBak Octane LR.
Fluid reservoir at bottom of pack
The most obvious difference between this pack and virtually every other hydration pack on the market – including CamelBak's own Octane XCT, whose design was the starting point of the LR – is that the fluid is carried horizontally around the waist instead of vertically down the back. Realignment of the reservoir necessitates other functional changes as well – most of which are either improvements or equivalents, but a few of which are drawbacks. Whether this pack is an overall upgrade compared to the XCT will ultimately come down to your individual preferences for use. (And if you want a recap of the other pack, check out my CamelBak XCT review here.)

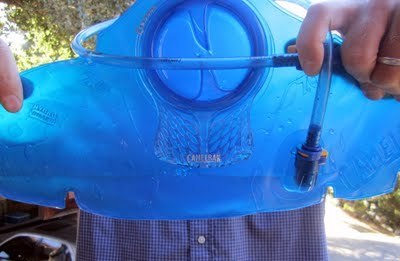
CamelBak Antidote lumbar reservoir
It all starts with this: a wing-shaped lumbar reservoir (or LR for short) that distributes fluid across your lower back instead of between your shoulder blades. The benefits of this placement for running are biomechanically obvious: the fluid weight is closer to your center of gravity, making for more efficient transport. It also decreases the strain on your back muscles during multi-hour outings, especially if you have a tendency to lean forward from the waist while running.
The reservoir also has a new feature for CamelBak: a Quick Link system that detaches the tube from the main compartment. It allows you to swap out the tubes if necessary and also makes cleaning a bit easier, although the overall cleaning of this reservoir is still somewhat difficult due to the wings; the best you can do is to stuff some paper towels into each side, because it's almost impossible to get air flow into them. Otherwise, all the great features of CamelBak's Antidote reservoir system are here: a wide mouth opening that easily locks shut with a half-turn, a Pure Flow tube, Big Bite valve, and HydroGuard coating to decrease bacterial growth.
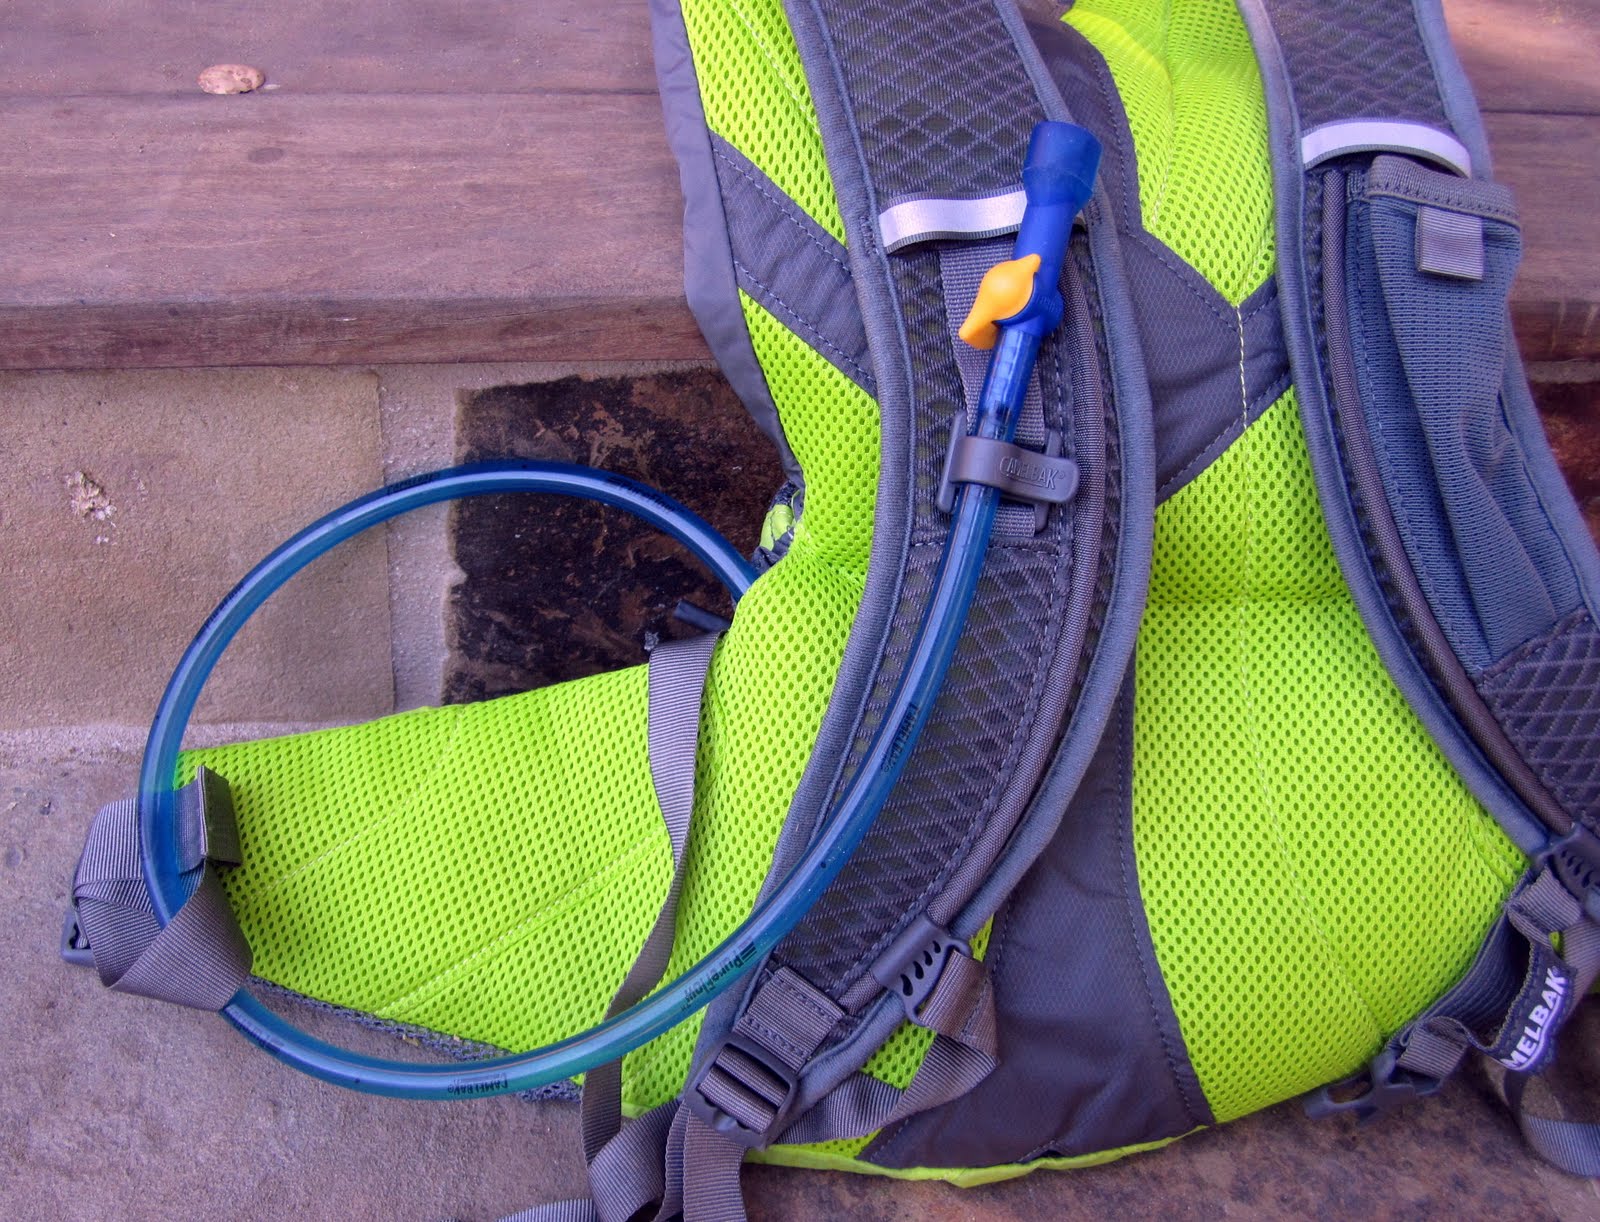
Drink tube exiting pack at torso, and clipped to front strap
With the lumbar reservoir design, the drink tube exits the pack on the side of your torso instead of over your shoulder like on most packs. This is another of those personal preference things that some folks feel strongly about; it feels a bit strange to me when I'm running, but very natural on the bike. The bite valve clips securely in place on the front harness, so there's no issue with the tube flopping around during activity.

Diagonal zippers create flap to access reservoir
Two diagonal zippers create a lift-flap for accessing the reservoir. It's very easy to use in your kitchen, but refilling fluids in the field could be problematic for a couple of reasons. Since the access point is on the bottom half of the pack instead of the top, you have to hold the entire pack sideways or upside down if you want to keep the reservoir inside the pack while refilling. Also, if you take the reservoir out to refill it, placing it back inside the pack might be difficult if you're carrying a lot of cargo, especially in the side pouches. For training runs you might have time to work around these issues, but if you're looking for a pack to move through aid stations quickly during a race, this is a major drawback.

Low fluid levels = hard to drink
Another issue I found with the lateral fluid distribution is that the fluid doesn't completely drain into the drink tube opening when levels get low. Fluids sometimes get stuck in one of the side wing compartments without flowing to the center compartment (the one with the tube), and even if the pack is perfectly level, a small portion becomes inaccessible below the bottom of the tube entry point. By my estimation, the final 5-10oz of fluid in the reservoir is quite difficult to get through the tube without some significant manipulation of the pack – which is also something you don't want to deal with if you're in a hurry.

Large side zip pockets with key clasp on R
Other features of the pack will be quite familiar to CamelBak users. There are two spacious zip pockets on either side, one of which has a key clip inside. The air channel mesh on the back and underneath the straps maintains air movement between the pack and your body, and improves overall comfort. All the straps are adjustable to customize your own perfect fit. Overall pack weight of the LR is 12.6 oz, which is slightly heavier than the 11.2 oz XCT.
Since the entire bottom of the pack is occupied by the reservoir, CamelBak had to tweak the arrangement of the cargo storage areas for the Octane LR. In general, what they've done is a significant upgrade: total cargo capacity is 549 cubic inches, which is more than 2.5 times greater than the capacity of the Octane XCT. (However, I consider that XCT number a loose estimate, as it doesn't account for stuffing clothes and small gear into the main reservoir compartment.)

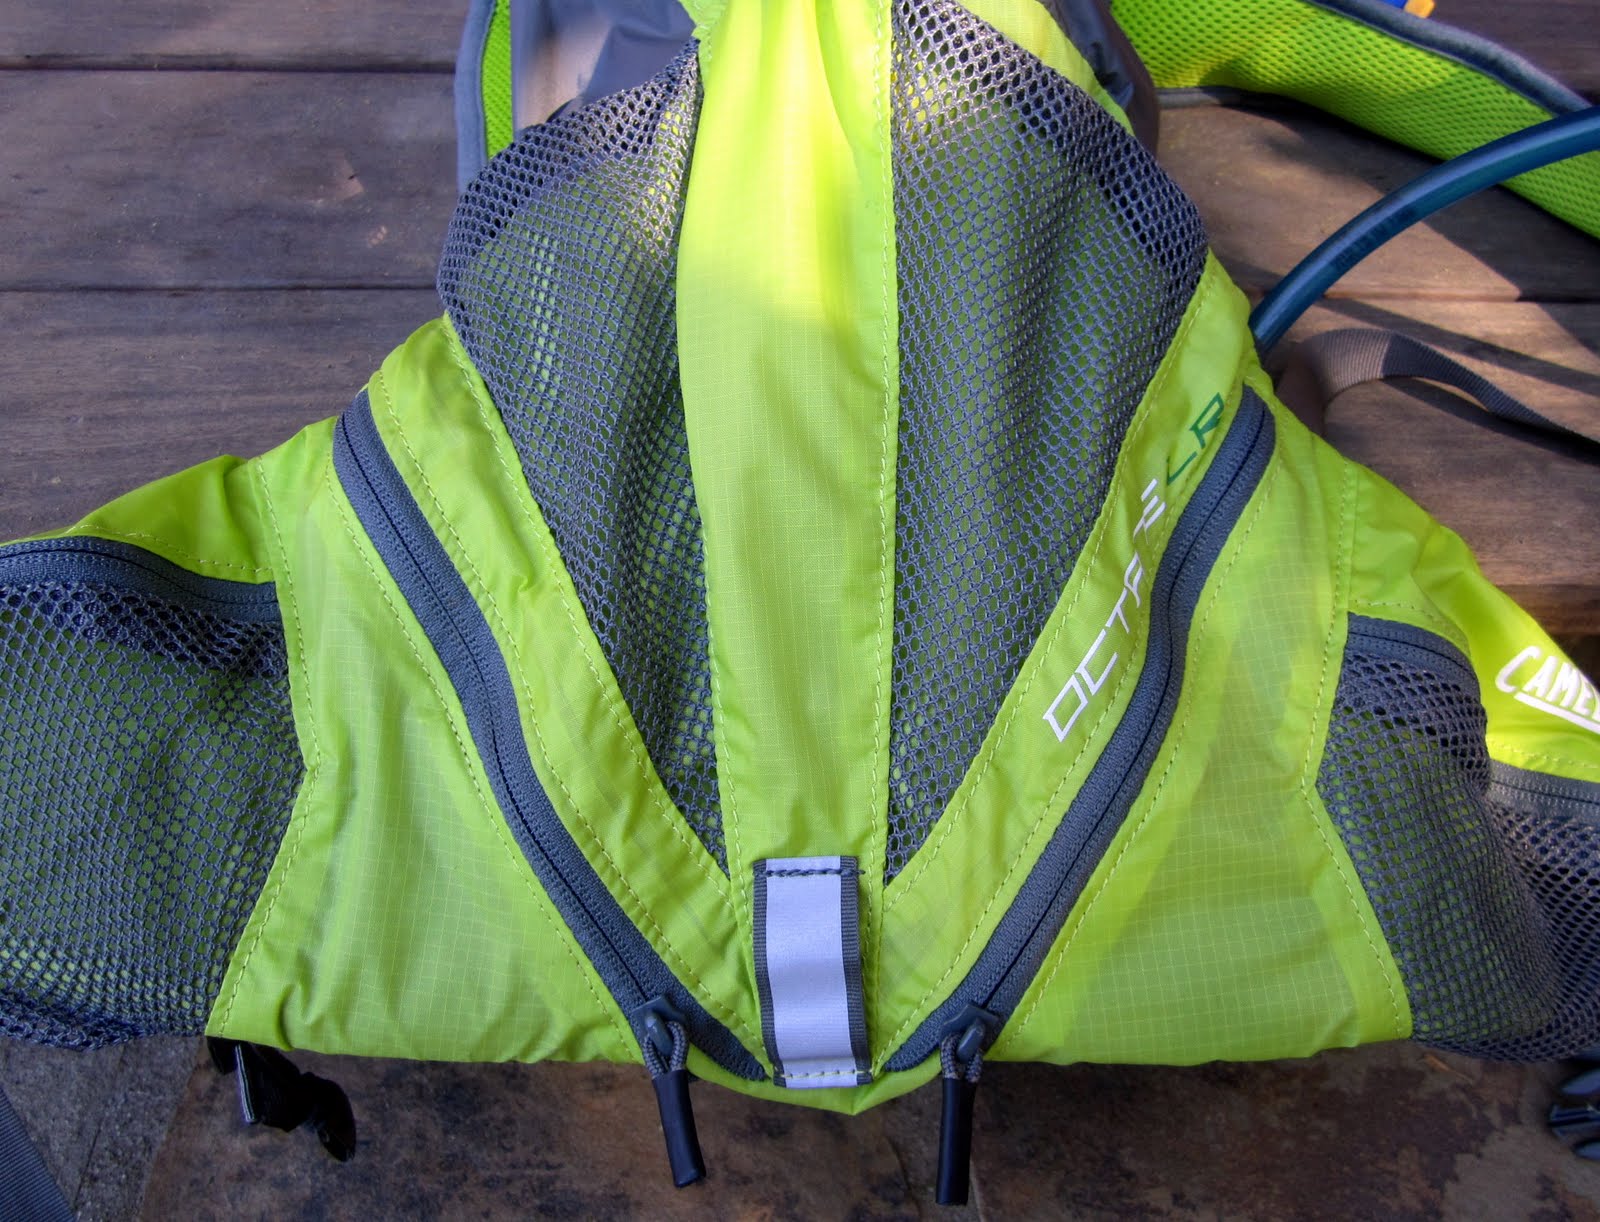
Two vertical pockets with diagonal zippers
The vertical pockets aren't as tall on the LR as they are on the XCT, but they overlap each other diagonally, with one slightly longer than the other; I can fit my 10" air pump in the deeper pocket, but not the superficial one. Both side zip pockets are roughly the same dimensions, perhaps a bit larger, than they are on the XCT. There's also a nice little pouch pocket on the front harness that's big enough for a couple of gels or energy blocks.
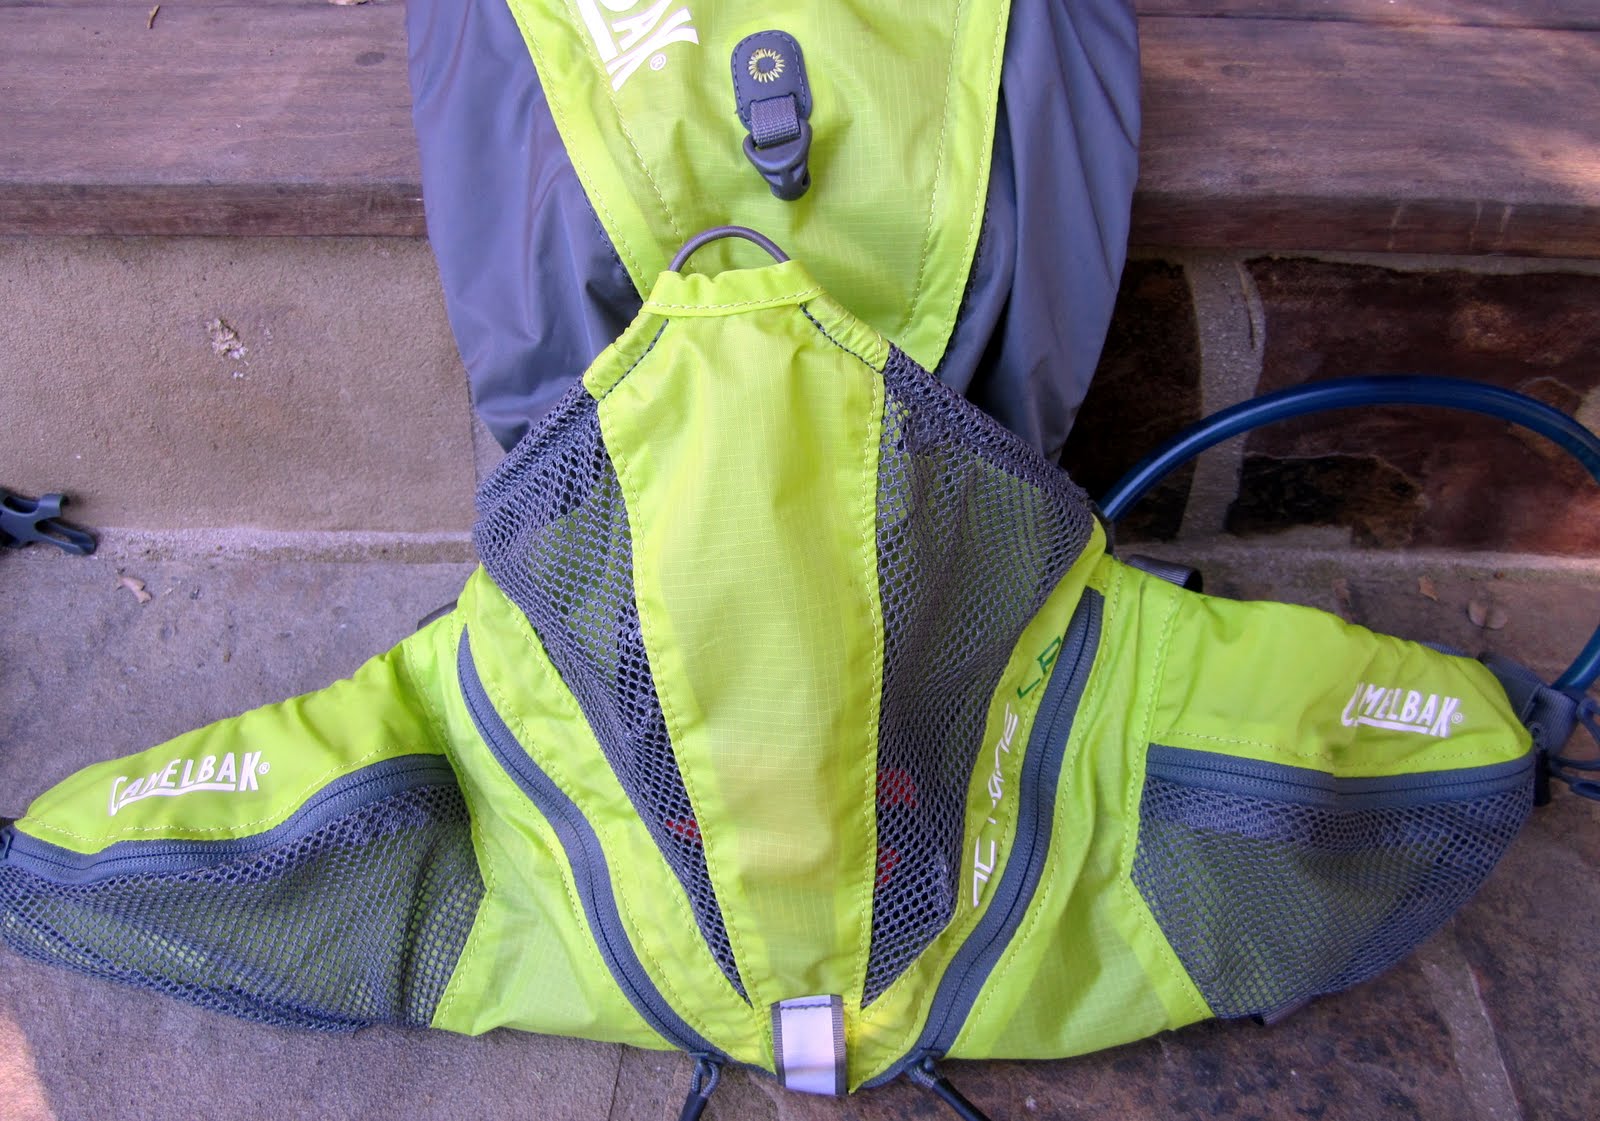
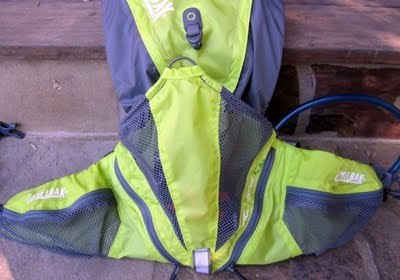
Huge central mesh pocket for large cargo
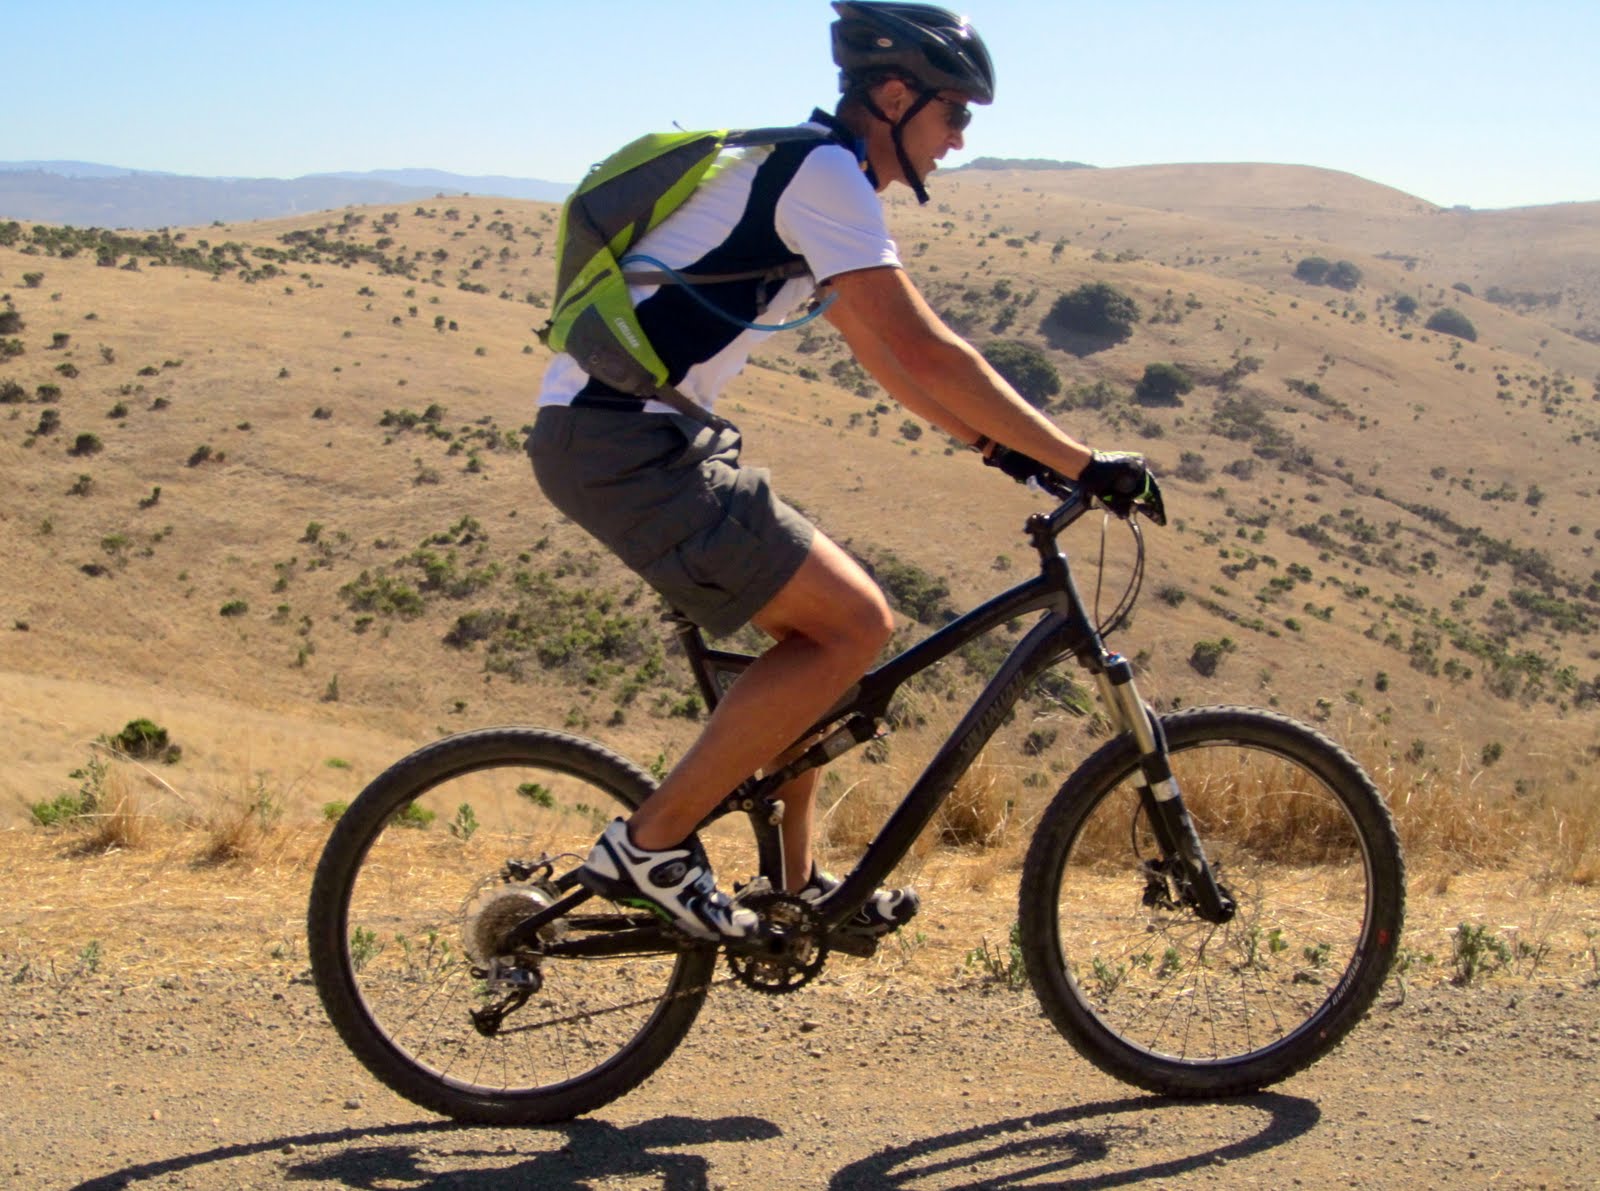
Most of the increased cargo capacity comes from the large mesh pocket that sits above the fluid reservoir compartment. You can easily stuff a jacket or a whole assortment of small items in this pocket, which latches closed with a hook and elastic cord. The extra cargo capacity is especially useful when using the LR as an MTB pack – and like most CamelBak products, the LR has great crossover appeal for both activities.
So if you're choosing between the LR and the XCT, here's a recap of the primary differences:
* LR has more comfortable and ergonomic fluid placement for running
* LR is less efficient to refill and doesn't empty as completely
* LR requires side torso tube placement instead of over the shoulder
* LR has significantly more cargo capacity
It's also worth noting that the XCT I reviewed last year had a 70-oz fluid reservoir, and the 2011 version has a 100-oz reservoir, so based on current models the LR has a lower fluid capacity, but 70 ounces is pretty much industry standard for most hydration packs.
As I mentioned, it's hard to make a clear call as to what version is best – ultimately the decision comes down to your own individual preferences and your intended use. I actually prefer the LR as an MTB pack, because I don't typically have to stop and refill during a multi-hour bike ride, but during a run of similar length I typically replenish my fluids every few hours. Regardless of what style you prefer, you can be assured that either of these packs are able to handle whatever adventures you have in mind.
The CamelBak Octane LR hydration pack retails for $89 from TravelCountry.com, where you can also find the 2011 CamelBak XCT pack for $79.
*Product provided by CamelBak. Affiliate sales help support Running and Rambling.
**See other product reviews on sidebar at right. If you have a product you'd like reviewed, contact me at info@runningandrambling.com.
Get updates as soon as they're posted! Click here to subscribe to Running and Rambling.
Check out the Running Life book for a collection of our most popular columns.
CamelBak Octane LR Review
"That night, he wore a shirt and trousers in Desert Digital Camouflage, and carried a silenced Sig Sauer P226 pistol, along with extra ammunition; a CamelBak, for hydration; and gel shots, for endurance."
- From Getting Bin Laden by Nicholas Schmidle, from The New Yorker
Before you get the wrong idea about things: the intro quote above doesn't really have anything to do with the product review. I just thought the fact that the Navy SEALs used CamelBaks as part of their standard assault wardrobe was an interesting detail to note from the night Osama Bin Laden was killed.
Fortunately, my own testing regimen didn't involve any sort of midnight raids or top secret assassination missions - it was more of the garden variety trail running and mountain biking that is well within my comfort zone. However, the New Yorker tidbit also highlighted another noteworthy fact about CamelBak: they are far and away the industry leader in hydration packs. They're the first choice of the US armed services, they have a monopoly in every gear shop you'll ever enter, and they're easily the most common pack I encounter on the trails from Monterey County to Yosemite National Park.
CamelBak Octane LR
That doesn't mean they rest on their laurels, though; from year to year, the company continues to innovate and advance its product line. This spring, they completely revamped the traditional 70-oz hydration pack with the introduction of the CamelBak Octane LR.
Fluid reservoir at bottom of pack
The most obvious difference between this pack and virtually every other hydration pack on the market – including CamelBak's own Octane XCT, whose design was the starting point of the LR – is that the fluid is carried horizontally around the waist instead of vertically down the back. Realignment of the reservoir necessitates other functional changes as well – most of which are either improvements or equivalents, but a few of which are drawbacks. Whether this pack is an overall upgrade compared to the XCT will ultimately come down to your individual preferences for use. (And if you want a recap of the other pack, check out my CamelBak XCT review here.)
CamelBak Antidote lumbar reservoir
It all starts with this: a wing-shaped lumbar reservoir (or LR for short) that distributes fluid across your lower back instead of between your shoulder blades. The benefits of this placement for running are biomechanically obvious: the fluid weight is closer to your center of gravity, making for more efficient transport. It also decreases the strain on your back muscles during multi-hour outings, especially if you have a tendency to lean forward from the waist while running.
The reservoir also has a new feature for CamelBak: a Quick Link system that detaches the tube from the main compartment. It allows you to swap out the tubes if necessary and also makes cleaning a bit easier, although the overall cleaning of this reservoir is still somewhat difficult due to the wings; the best you can do is to stuff some paper towels into each side, because it's almost impossible to get air flow into them. Otherwise, all the great features of CamelBak's Antidote reservoir system are here: a wide mouth opening that easily locks shut with a half-turn, a Pure Flow tube, Big Bite valve, and HydroGuard coating to decrease bacterial growth.
Drink tube exiting pack at torso, and clipped to front strap
With the lumbar reservoir design, the drink tube exits the pack on the side of your torso instead of over your shoulder like on most packs. This is another of those personal preference things that some folks feel strongly about; it feels a bit strange to me when I'm running, but very natural on the bike. The bite valve clips securely in place on the front harness, so there's no issue with the tube flopping around during activity.
Diagonal zippers create flap to access reservoir
Two diagonal zippers create a lift-flap for accessing the reservoir. It's very easy to use in your kitchen, but refilling fluids in the field could be problematic for a couple of reasons. Since the access point is on the bottom half of the pack instead of the top, you have to hold the entire pack sideways or upside down if you want to keep the reservoir inside the pack while refilling. Also, if you take the reservoir out to refill it, placing it back inside the pack might be difficult if you're carrying a lot of cargo, especially in the side pouches. For training runs you might have time to work around these issues, but if you're looking for a pack to move through aid stations quickly during a race, this is a major drawback.
Low fluid levels = hard to drink
Another issue I found with the lateral fluid distribution is that the fluid doesn't completely drain into the drink tube opening when levels get low. Fluids sometimes get stuck in one of the side wing compartments without flowing to the center compartment (the one with the tube), and even if the pack is perfectly level, a small portion becomes inaccessible below the bottom of the tube entry point. By my estimation, the final 5-10oz of fluid in the reservoir is quite difficult to get through the tube without some significant manipulation of the pack – which is also something you don't want to deal with if you're in a hurry.
Large side zip pockets with key clasp on R
Other features of the pack will be quite familiar to CamelBak users. There are two spacious zip pockets on either side, one of which has a key clip inside. The air channel mesh on the back and underneath the straps maintains air movement between the pack and your body, and improves overall comfort. All the straps are adjustable to customize your own perfect fit. Overall pack weight of the LR is 12.6 oz, which is slightly heavier than the 11.2 oz XCT.
Since the entire bottom of the pack is occupied by the reservoir, CamelBak had to tweak the arrangement of the cargo storage areas for the Octane LR. In general, what they've done is a significant upgrade: total cargo capacity is 549 cubic inches, which is more than 2.5 times greater than the capacity of the Octane XCT. (However, I consider that XCT number a loose estimate, as it doesn't account for stuffing clothes and small gear into the main reservoir compartment.)
Two vertical pockets with diagonal zippers
The vertical pockets aren't as tall on the LR as they are on the XCT, but they overlap each other diagonally, with one slightly longer than the other; I can fit my 10" air pump in the deeper pocket, but not the superficial one. Both side zip pockets are roughly the same dimensions, perhaps a bit larger, than they are on the XCT. There's also a nice little pouch pocket on the front harness that's big enough for a couple of gels or energy blocks.
Huge central mesh pocket for large cargo
Most of the increased cargo capacity comes from the large mesh pocket that sits above the fluid reservoir compartment. You can easily stuff a jacket or a whole assortment of small items in this pocket, which latches closed with a hook and elastic cord. The extra cargo capacity is especially useful when using the LR as an MTB pack – and like most CamelBak products, the LR has great crossover appeal for both activities.
So if you're choosing between the LR and the XCT, here's a recap of the primary differences:
* LR has more comfortable and ergonomic fluid placement for running
* LR is less efficient to refill and doesn't empty as completely
* LR requires side torso tube placement instead of over the shoulder
* LR has significantly more cargo capacity
It's also worth noting that the XCT I reviewed last year had a 70-oz fluid reservoir, and the 2011 version has a 100-oz reservoir, so based on current models the LR has a lower fluid capacity, but 70 ounces is pretty much industry standard for most hydration packs.
As I mentioned, it's hard to make a clear call as to what version is best – ultimately the decision comes down to your own individual preferences and your intended use. I actually prefer the LR as an MTB pack, because I don't typically have to stop and refill during a multi-hour bike ride, but during a run of similar length I typically replenish my fluids every few hours. Regardless of what style you prefer, you can be assured that either of these packs are able to handle whatever adventures you have in mind.
The CamelBak Octane LR retails for $89 from TravelCountry.com, where you can also find the 2011 CamelBak XCT for $79.
*Product provided by CamelBak. Affiliate sales help support Running and Rambling.
**See other product reviews on sidebar at right. If you have a product you'd like reviewed, contact me at info@runningandrambling.com.
Get updates as soon as they're posted! Click here to subscribe to Running and Rambling.
Check out the Running Life book for a collection of our most popular columns.
August 13, 2011
Killer Hydrapak Sale; Random Shots of (Geologic) Beauty
Before today's brief post, and equally brief announcement about a sweet deal on some awesome hydration packs ...
First, if you haven't yet heard of The Clymb, it's definitely worth checking out. Basically, it's a free membership club that offers periodic and very deep discounts on a small selection of outdoor gear and lifestyle accessories. You register with an e-mail address, and get a couple of e-mails per week alerting you to the current discounts. All sales are time sensitive, usually lasting only 72 hours or until all the stock is sold - which from my experience happens much more quickly than 72 hours.
This weekend The Clymb is offering 60% discounts on Hydrapak fluid packs, including the outstanding Big Sur pack that I reviewed for FeedTheHabit.com last year. While Hydrapak gear is far from my first choice for running, when it comes to MTB riding there's really nothing better, and the Big Sur pack is one of their most popular models. It normally retails for $90, but for this sale it's discounted to $40. I said the discounts were deep, right?
To get in on the sale, follow this link to The Clymb, register with your e-mail, and grab a great pack while they last. Which might not be long. The offer started yesterday and ends on Monday, August 15 at 9AM PDT.
*
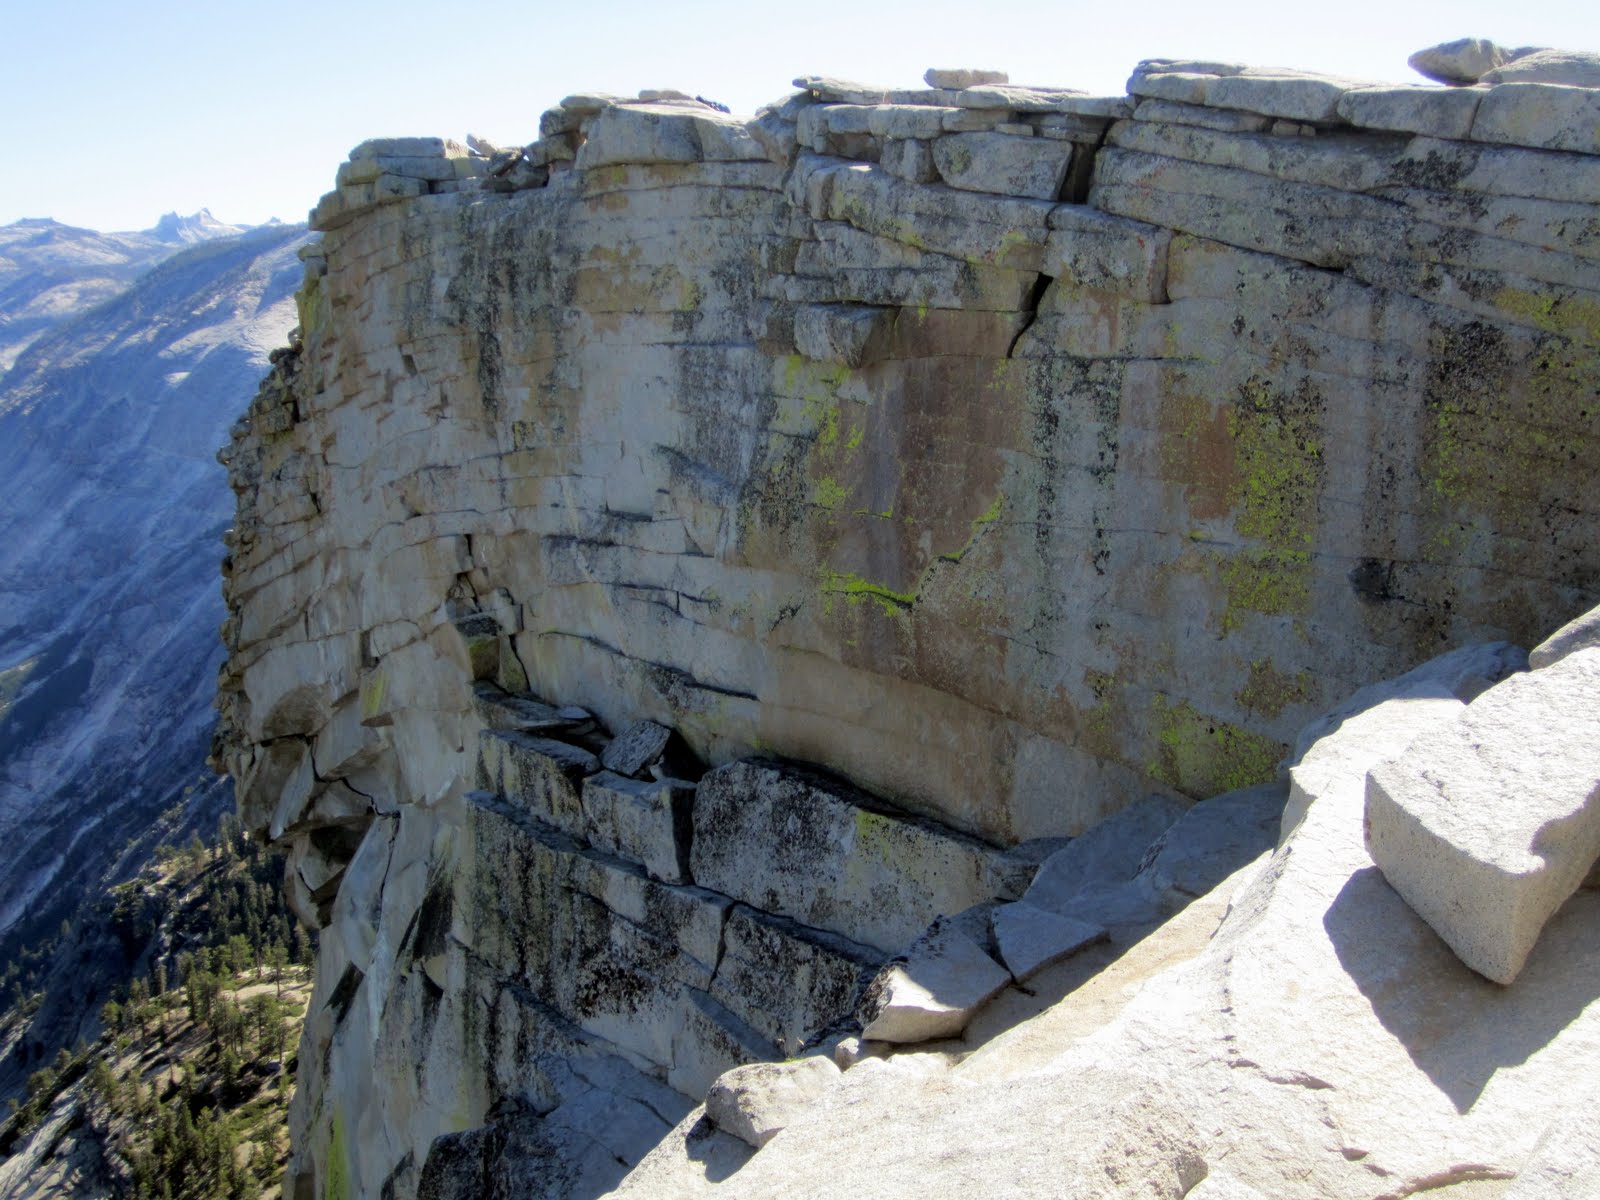
As for this weekend's Random Shot of Beauty, it's one more shot from the top of Half Dome, taken during my recent hike with my son. I wasn't quite sure how to fit this one into the report, but for some reason I find it visually mesmerizing, in a geology-geek kind of way:

The striated rocks layers that stack upon one another to form Half Dome's summit ... each one of them smoothed almost completely flat on the front surface by ancient glacial shearing. Or something like that. I'm not really a geology expert - I just thought it looked crazy cool.
Get updates as soon as they're posted! Click here to subscribe to Running and Rambling.
Check out the Running Life book for a collection of our most popular columns.

First, if you haven't yet heard of The Clymb, it's definitely worth checking out. Basically, it's a free membership club that offers periodic and very deep discounts on a small selection of outdoor gear and lifestyle accessories. You register with an e-mail address, and get a couple of e-mails per week alerting you to the current discounts. All sales are time sensitive, usually lasting only 72 hours or until all the stock is sold - which from my experience happens much more quickly than 72 hours.
This weekend The Clymb is offering 60% discounts on Hydrapak fluid packs, including the outstanding Big Sur pack that I reviewed for FeedTheHabit.com last year. While Hydrapak gear is far from my first choice for running, when it comes to MTB riding there's really nothing better, and the Big Sur pack is one of their most popular models. It normally retails for $90, but for this sale it's discounted to $40. I said the discounts were deep, right?
To get in on the sale, follow this link to The Clymb, register with your e-mail, and grab a great pack while they last. Which might not be long. The offer started yesterday and ends on Monday, August 15 at 9AM PDT.
*
As for this weekend's Random Shot of Beauty, it's one more shot from the top of Half Dome, taken during my recent hike with my son. I wasn't quite sure how to fit this one into the report, but for some reason I find it visually mesmerizing, in a geology-geek kind of way:
The striated rocks layers that stack upon one another to form Half Dome's summit ... each one of them smoothed almost completely flat on the front surface by ancient glacial shearing. Or something like that. I'm not really a geology expert - I just thought it looked crazy cool.
Get updates as soon as they're posted! Click here to subscribe to Running and Rambling.
Check out the Running Life book for a collection of our most popular columns.
August 10, 2011
Welcome to Existence: Half Dome Hike Report
"Welcome to the planet - welcome to existence …
Tension is here - between who you are and who you could be –
Between how it is and how it should be –
I dare you to move –
I dare you to move like today never happened before."
- Switchfoot, "Dare You to Move" (video after post)
Somewhere in the middle of Yosemite National Park last week, a thought occurred to me: this trip had all the makings of a rite of passage.
Not long ago, my son turned thirteen – which is something of a milestone not only for its entry into the teenage wilderness, but for the dawning of what most grownups would call "real life". Grades count. Relationships matter. The world starts keeping score. It's the beginning of a whole new existence.

Coincidentally, he's wanted to hike to the top of Half Dome for a couple of years now … and until this year, I honestly didn't think he was ready. But he's gradually become a strong kid, and at some point during all the hiking and mountain biking miles we've shared, it occurred to me that he was almost certainly capable. So we put a date on the calendar (and grabbed ourselves a permit – more on that later) which happened to fall shortly after his birthday, and finally made the pilgrimage to Yosemite.
In hindsight, our trip was a fitting adventure to mark the transition, because exploring Yosemite is about experiencing life at its most promising. It's about leaving the everyday person you are at home for a while, and getting a glimpse of the kind of person you could be. It highlights the difference between how the world is and how it should be. And it inspires you to appreciate each day for the unique wonders it beholds.
But that's enough dime store philosophy for one post, so I'll just get to the report.
(As always, click to enlarge any photo.)

The journey we had before us was certainly daunting - an 18-mile round trip with nearly 5000' of climbing - but one of our biggest challenges of the day was the very first task: getting out of our Curry Village tent cabins 90 minutes before sunrise. My son saw this one coming; in fact, it was one of my criteria for taking him to Yosemite in the middle of summer. There was no way I wanted to deal with the crowds or heat that both become insufferable in the mid-afternoon - and to my son's credit, he didn't protest at all when the alarm went off at 4AM. I took that as a good sign.

Fortunately, he and I had hiked the Mist Trail a couple of times before, so he wasn't concerned with doing much sightseeing on our journey into the dark.

I'm skipping through the report on the Mist Trail up to Nevada Fall for a couple of reasons: 1) the majority of it was too dark for good photos, and 2) I've done two separate reports on the Mist Trail – one here, and the other here – you can read. However, I have to say that it was pretty cool making our way up the rock stairs and alongside cliffs with the roaring of the massive waterfalls in our ears; those falls don't have to be visible to make their presence known.

Above Nevada Fall, we made our way into Little Yosemite Valley, which was a welcome sight because it's the only flat section of the entire hike …

… and because daybreak was finally lighting the trail for us, as well as brilliantly illuminating our destination in the distance.

From the base of Yosemite Valley you encounter a relentless climb through beautiful Sierra forests of the John Muir Trail …

… and finally branch onto the Half Dome Trail that marks the beginning of the dedicated ascent of the mountain.
Incidentally, by the time we reached this point, we had been on the trail for approximately three hours, and saw only two people: a pair of rock climbers making their way to the Snake Dike route up the southwest face. Earlier, I told my son that if we woke up early enough, we'd have almost the whole park to ourselves – and luckily, that's just the way it worked out.

After 7 miles of mostly climbing, as the hike was beginning to take a toll on our legs, we got our first real look at the peak through the trees in the distance.

Seeing the top of the hill has an almost magnetic effect in pulling weary hikers closer to the final goal, which is a good thing, since the most difficult climbing still lies ahead …

… such as scrambling up over the shoulder of Half Dome, a steep grade where the trail eventually fades into a raw expanse of granite. As long as you're going uphill, you're headed the right way.

Cresting the shoulder, the sight of the curved dome and the cables is almost enough to take your breath away – and for my son, it also triggered a minor case of high mountain jitters.

We sat down at the base of the cables to put on harnesses, a safety decision that I planned long before arriving in Yosemite, but one I was especially happy to have made in light of the fact that someone had fallen off the cables and died a mere three days before. However, this was also one of the few moments where my carefully crafted plan faltered a bit.

On the whole drive up and throughout the hike, I purposely didn't say anything to my son about someone dying very close to the exact spot where we now stood. But as we were at the base of the cables and I was giving him a lesson on carabiner use, we spotted a woman coming down the cables using the same kind of harness system. I pointed her out and told my son to watch how she alternated the clips as she went along. When the woman arrived at our spot, she started the following conversation:
Her: I'm glad to see that you guys are using harnesses.
Me: I figured we'd feel a lot more secure with them.
Her: Yeah, that's good … because you know that someone died here this week, right?
And with that, I cut off the conversation and pushed my son toward the cables.

Thankfully we were the only ones on the cables, which meant that we could take all the time we needed. We inched our way through the first minor slope together, and by the time he was about halfway up, my son was managing on his own quite well – which was great for me, since I was having my own concerns about staying anchored to the granite on the nearly 45-degree pitch.

My son's persistence was finally rewarded, and we made it to the top of the rock, with practically the whole summit to ourselves. By this point, the early morning wake-up call was a distant memory.

Apparently there's some confusion about the name of this spot; in my previous report, I called it the Diving Board, only to find out that another location on the western slope of Half Dome has the same name. I think the official name is the Visor, but if this Google image search is any indication, that name has a long way to go before it sticks.
Incidentally, want to hear what my wife calls it? The "You guys are going to give me a heart attack" spot. But for some reason, that one's not on Google.

Once we safely arrived at the top, we spent about an hour enjoying the killer views while munching on some trail mix …

… a healthy portion of which we ended up sharing with this marmot. True story: at one point when we were walking around the rock, I returned to find Mr. Marmot sitting on my backpack, right next to the pocket that he unzipped and the Ziploc seam he opened to get into my food. I suspect he's pretty well-practiced at that sort of thing.

Two side notes about our footwear for the day:
1) My son wore a pair of Merrell Barefoot Trail Gloves that the company offered when I was setting up an upcoming children's shoe review, even though my son was too large to fit in any of the kids' models. They were absolutely perfect for him, with the best outsole traction imaginable on Half Dome's smooth granite … and the fact that Merrell stepped up to provide them even though I'd already reviewed the shoe tells you all you need to know about the company.
2) I wore the Vibram FiveFingers KSO Treks that have become my gold standard for day hiking. For as common as Vibrams have become at trail races, they're still very much a novelty among hikers. About 2 miles down the trail on our return trip, my son said "We should count the number of people who say something about your shoes" … and we both lost count somewhere in the 30s.

When we were finally ready to leave the summit, it was time to rope up again – a technique that's probably even more beneficial for the descent than it is for the climb. On my last visit here, I didn't use clips, and it didn't seem like that big of a deal – but when there's a kid involved, it's absolutely non-negotiable. I can't overemphasize how much peace of mind being clipped into the cables gave both of us …

… especially as the slope steepened and seemed to curve downward into the abyss.

It was only at the base of the cables that we encountered any noticeable foot traffic. My plan to be off the cables before the summer gridlock started was executed to near perfection. Have I mentioned the benefits of waking up early already?
(And for the record, yes, every single person on the cables asked about my Vibrams.)
A few people have inquired about the impact of this year's new permit requirement on crowding, but because we got up and down so early in the day, it's tough for me to assess this for sure. However, I can offer two observations …

Making our way down the shoulder, we initially enjoyed an open path, but encountered increasing numbers of people as we went further down the trail – so I suspect that if you're on the shoulder or near the cables anytime in the middle of a summer afternoon, you're still going to deal with a good-sized crowd. We also overheard at least a few groups making comments like, "maybe we can sneak past the ranger," or "maybe the ranger won't be there," so the deterrent factor isn't 100% effective.
As for the aforementioned ranger …

She was there, but not until sometime around 9AM. This photo was taken on our way down; when we passed this spot at about 8:15, there wasn't anyone in sight. So there is definitely a ranger on duty, but apparently they keep something close to bankers' hours – which isn't too surprising, as I imagine the commute is a bit of a challenge.
We weren't asked for our permit on the way down, so it turned out that we didn't even need it; whether that's the way it always works on every day of the season is uncertain.

What wasn't uncertain was how expertly my son handled himself throughout the hike. His legs wore down a bit over the final miles, especially going back down the countless rock steps of the Mist Trail at the end of a 10-hour day. But through it all, he never complained, and never did anything foolish to get himself into trouble.
And I didn't have to wonder very long whether he thought doing this sort of thing was the way he wanted life to be …

... because when we were less than a mile down the trail on our return, he pointed out Clouds Rest a few miles further (and 1100' higher) into the wilderness, and said "That's the one we'll do next." And we talked about the beauty of Yosemite almost the whole rest of the way down.
Appreciating the experiences we have, while looking hopefully to the promise of days to come: I'd say this kid is officially ready to venture into the world.
*
Switchfoot, "Dare You to Move" (click to play):
*See other photo tours under tab at top of page.
Get updates as soon as they're posted! Click here to subscribe to Running and Rambling.
Check out the Running Life book for a collection of our most popular columns.

Tension is here - between who you are and who you could be –
Between how it is and how it should be –
I dare you to move –
I dare you to move like today never happened before."
- Switchfoot, "Dare You to Move" (video after post)
Somewhere in the middle of Yosemite National Park last week, a thought occurred to me: this trip had all the makings of a rite of passage.
Not long ago, my son turned thirteen – which is something of a milestone not only for its entry into the teenage wilderness, but for the dawning of what most grownups would call "real life". Grades count. Relationships matter. The world starts keeping score. It's the beginning of a whole new existence.
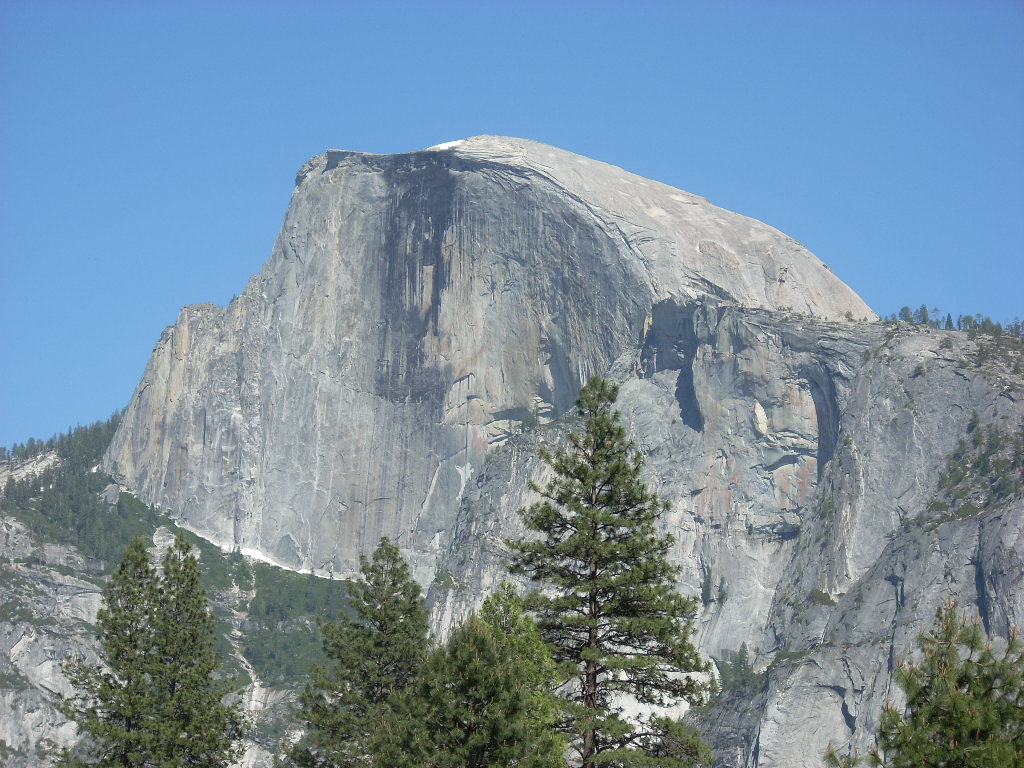
Coincidentally, he's wanted to hike to the top of Half Dome for a couple of years now … and until this year, I honestly didn't think he was ready. But he's gradually become a strong kid, and at some point during all the hiking and mountain biking miles we've shared, it occurred to me that he was almost certainly capable. So we put a date on the calendar (and grabbed ourselves a permit – more on that later) which happened to fall shortly after his birthday, and finally made the pilgrimage to Yosemite.
In hindsight, our trip was a fitting adventure to mark the transition, because exploring Yosemite is about experiencing life at its most promising. It's about leaving the everyday person you are at home for a while, and getting a glimpse of the kind of person you could be. It highlights the difference between how the world is and how it should be. And it inspires you to appreciate each day for the unique wonders it beholds.
But that's enough dime store philosophy for one post, so I'll just get to the report.
(As always, click to enlarge any photo.)

The journey we had before us was certainly daunting - an 18-mile round trip with nearly 5000' of climbing - but one of our biggest challenges of the day was the very first task: getting out of our Curry Village tent cabins 90 minutes before sunrise. My son saw this one coming; in fact, it was one of my criteria for taking him to Yosemite in the middle of summer. There was no way I wanted to deal with the crowds or heat that both become insufferable in the mid-afternoon - and to my son's credit, he didn't protest at all when the alarm went off at 4AM. I took that as a good sign.
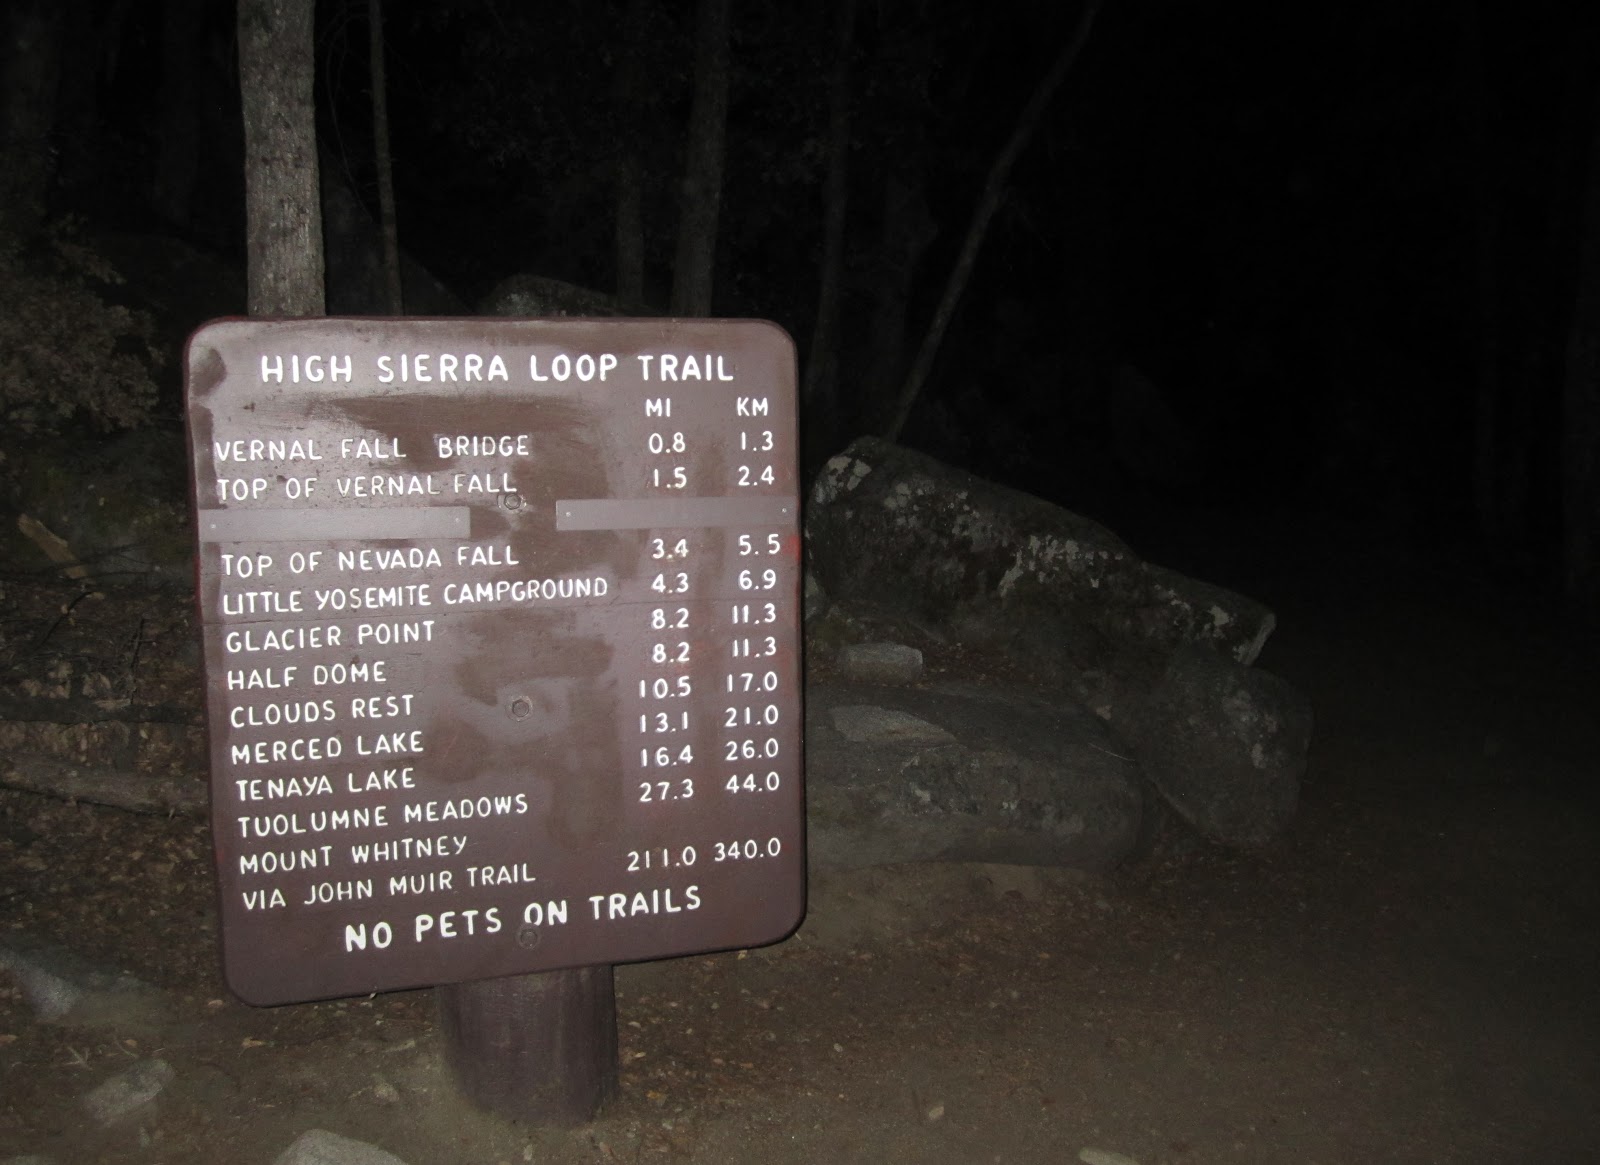
Fortunately, he and I had hiked the Mist Trail a couple of times before, so he wasn't concerned with doing much sightseeing on our journey into the dark.

I'm skipping through the report on the Mist Trail up to Nevada Fall for a couple of reasons: 1) the majority of it was too dark for good photos, and 2) I've done two separate reports on the Mist Trail – one here, and the other here – you can read. However, I have to say that it was pretty cool making our way up the rock stairs and alongside cliffs with the roaring of the massive waterfalls in our ears; those falls don't have to be visible to make their presence known.
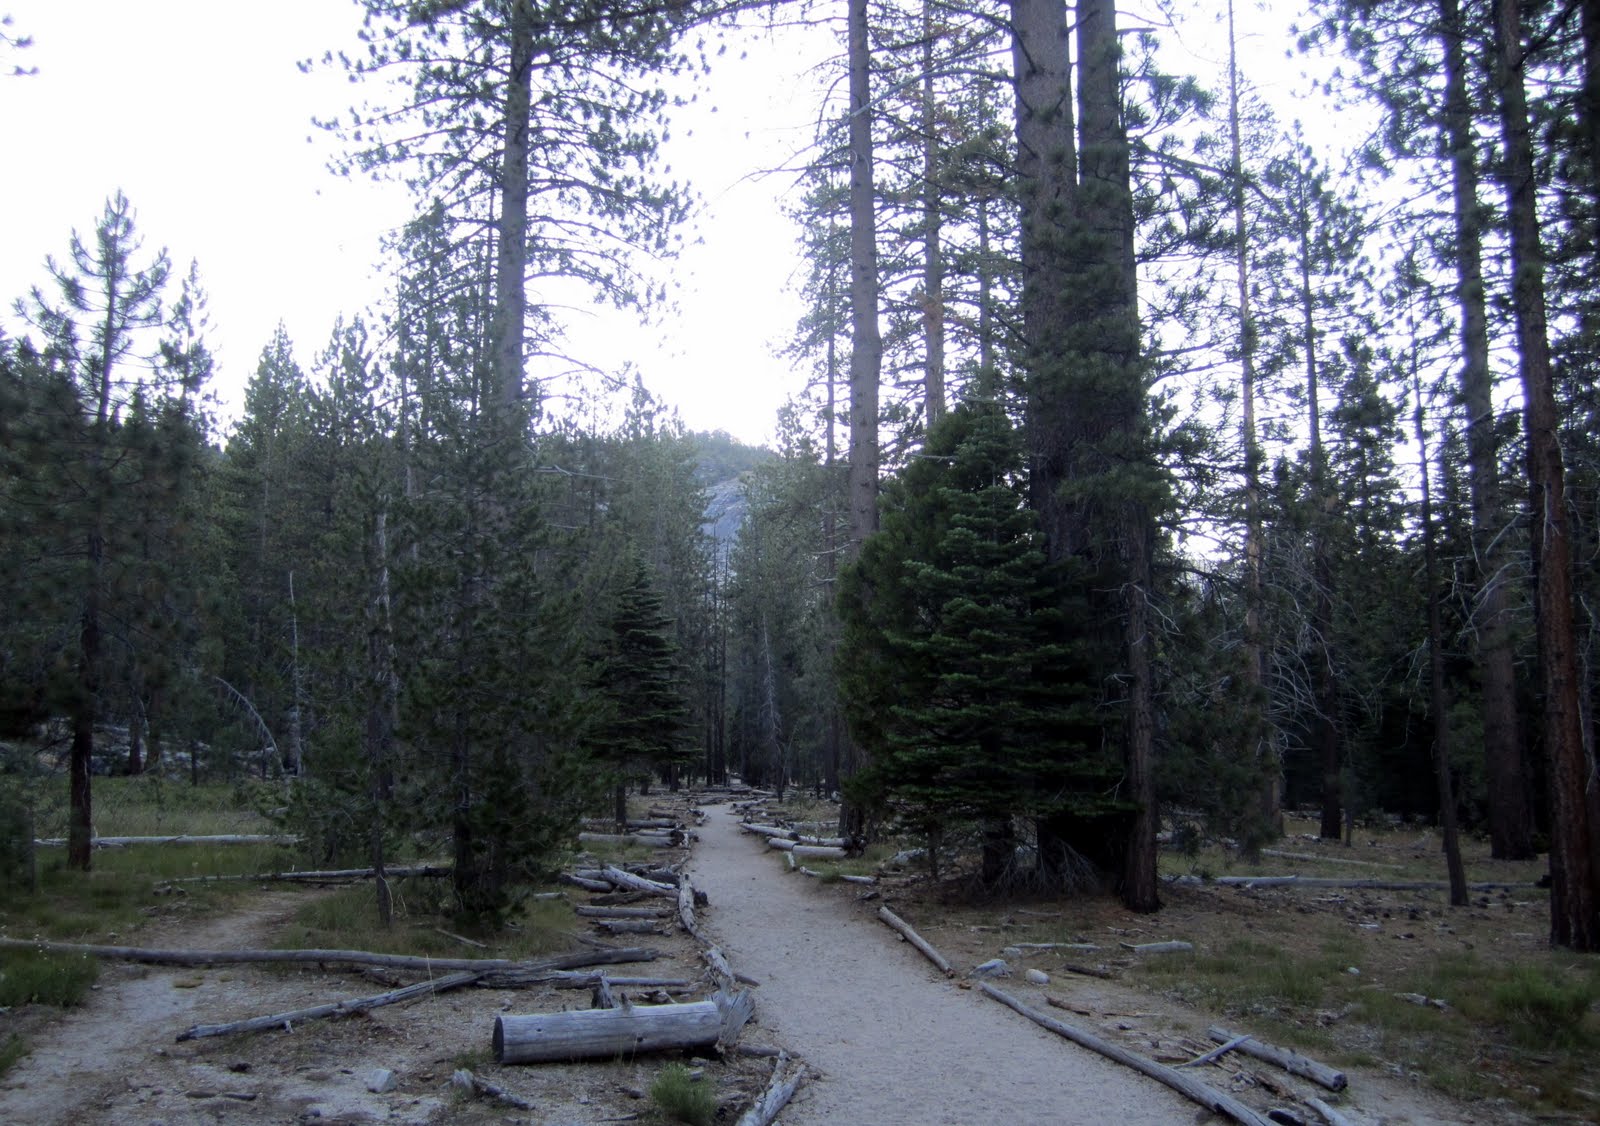
Above Nevada Fall, we made our way into Little Yosemite Valley, which was a welcome sight because it's the only flat section of the entire hike …

… and because daybreak was finally lighting the trail for us, as well as brilliantly illuminating our destination in the distance.

From the base of Yosemite Valley you encounter a relentless climb through beautiful Sierra forests of the John Muir Trail …
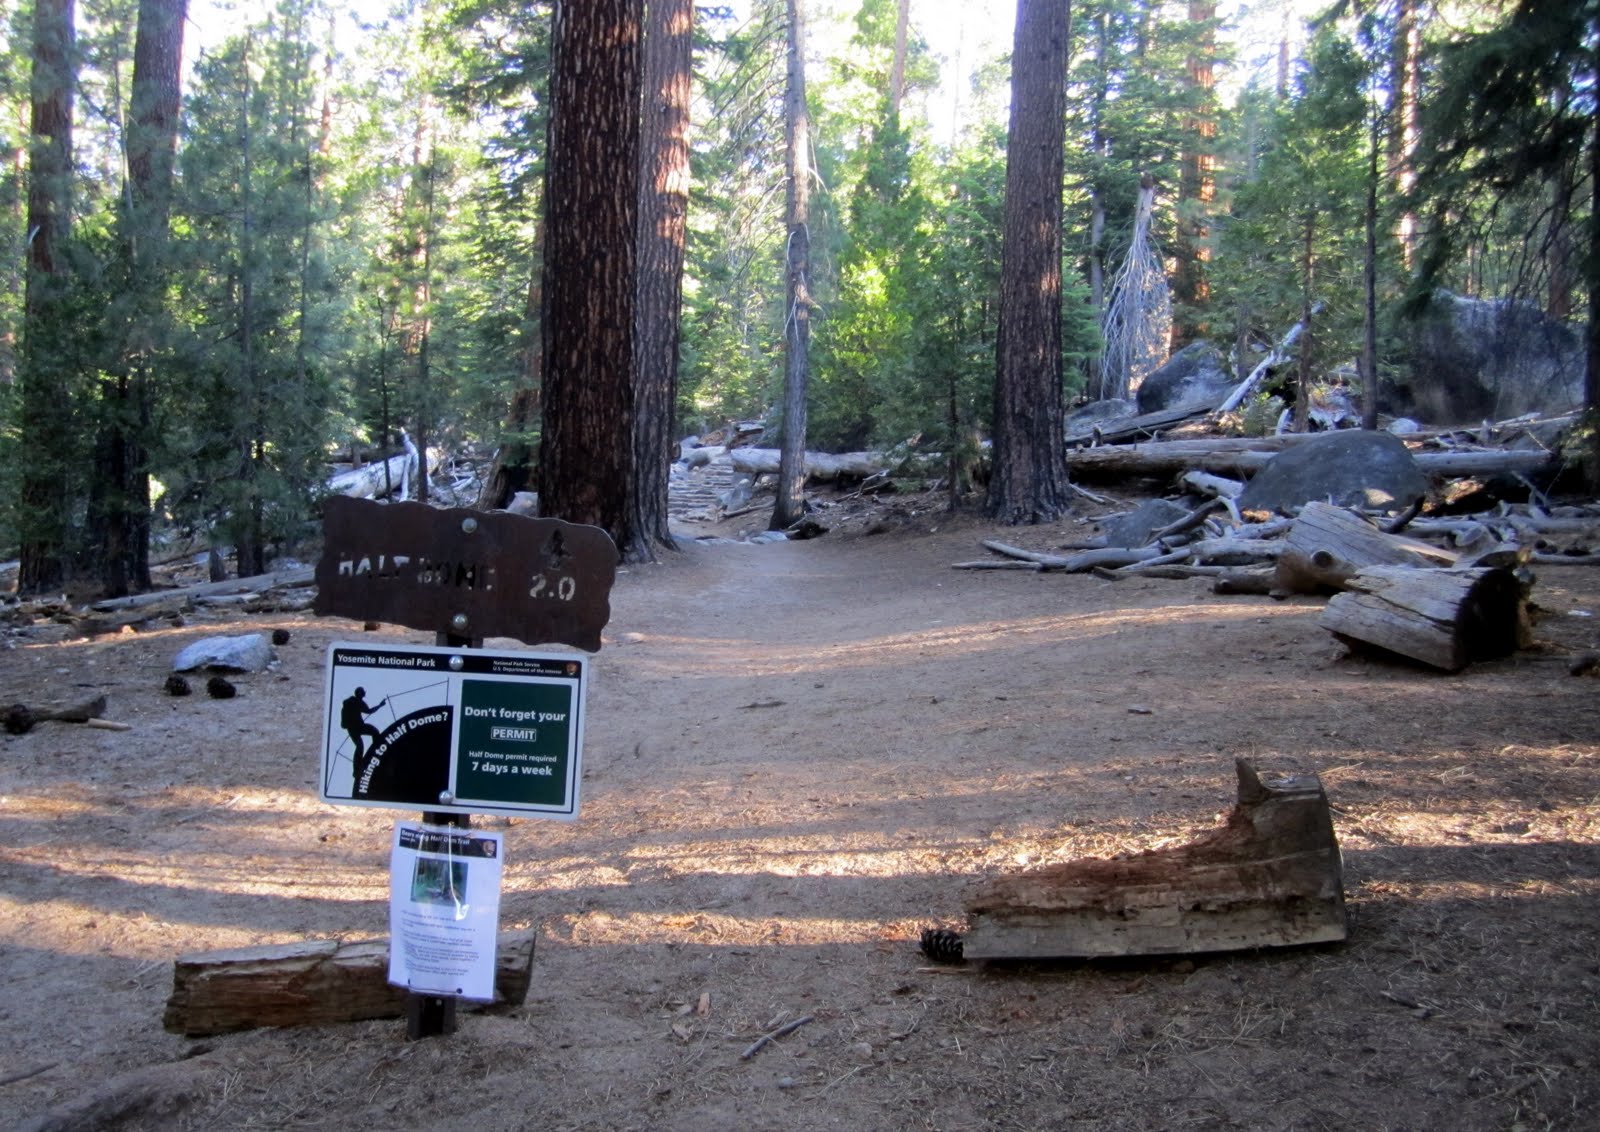
… and finally branch onto the Half Dome Trail that marks the beginning of the dedicated ascent of the mountain.
Incidentally, by the time we reached this point, we had been on the trail for approximately three hours, and saw only two people: a pair of rock climbers making their way to the Snake Dike route up the southwest face. Earlier, I told my son that if we woke up early enough, we'd have almost the whole park to ourselves – and luckily, that's just the way it worked out.
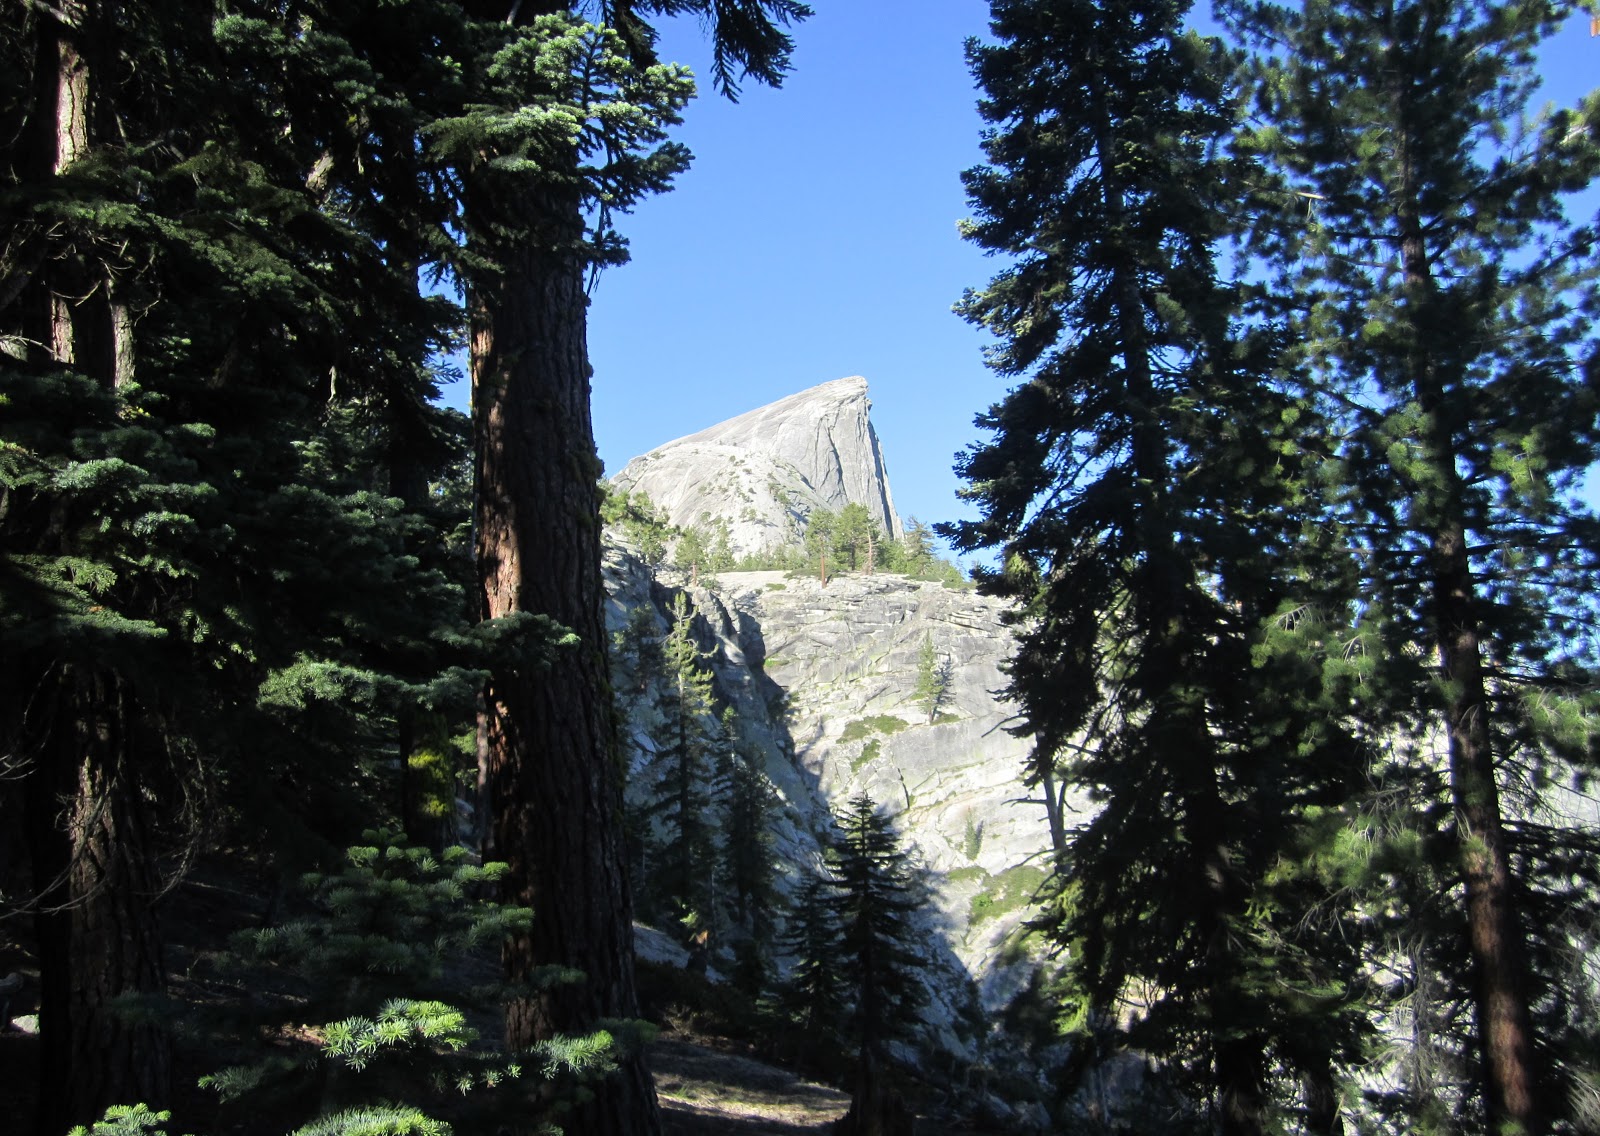
After 7 miles of mostly climbing, as the hike was beginning to take a toll on our legs, we got our first real look at the peak through the trees in the distance.
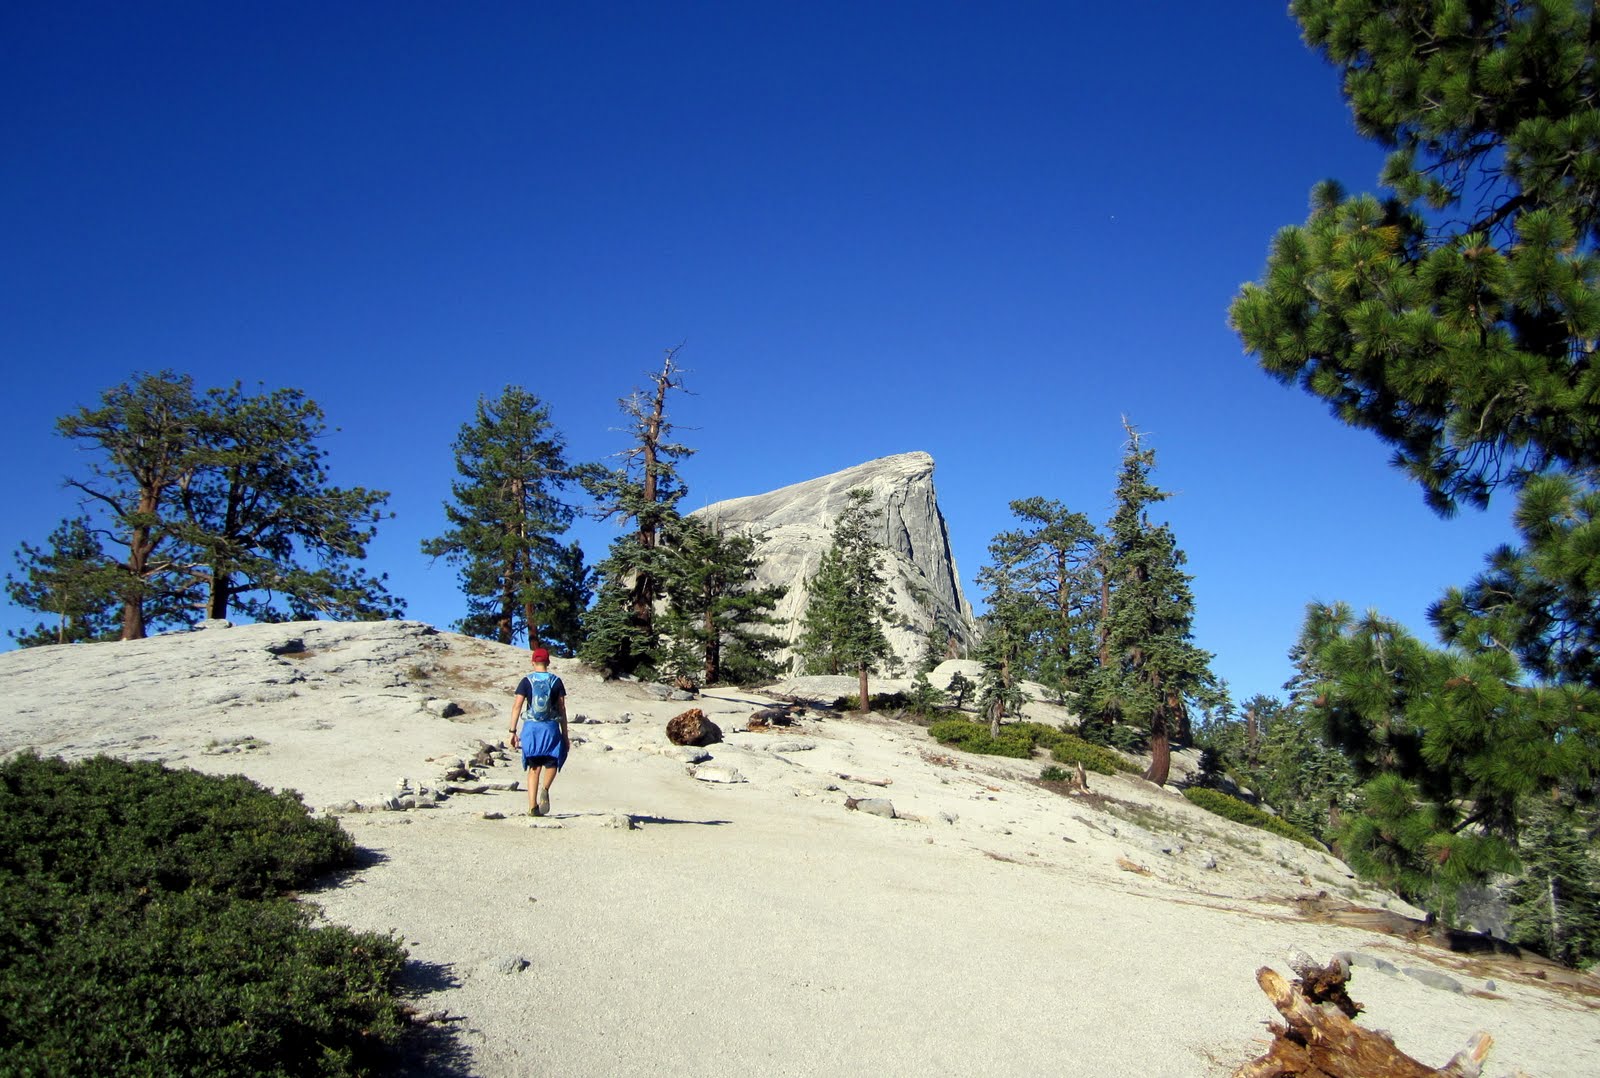
Seeing the top of the hill has an almost magnetic effect in pulling weary hikers closer to the final goal, which is a good thing, since the most difficult climbing still lies ahead …
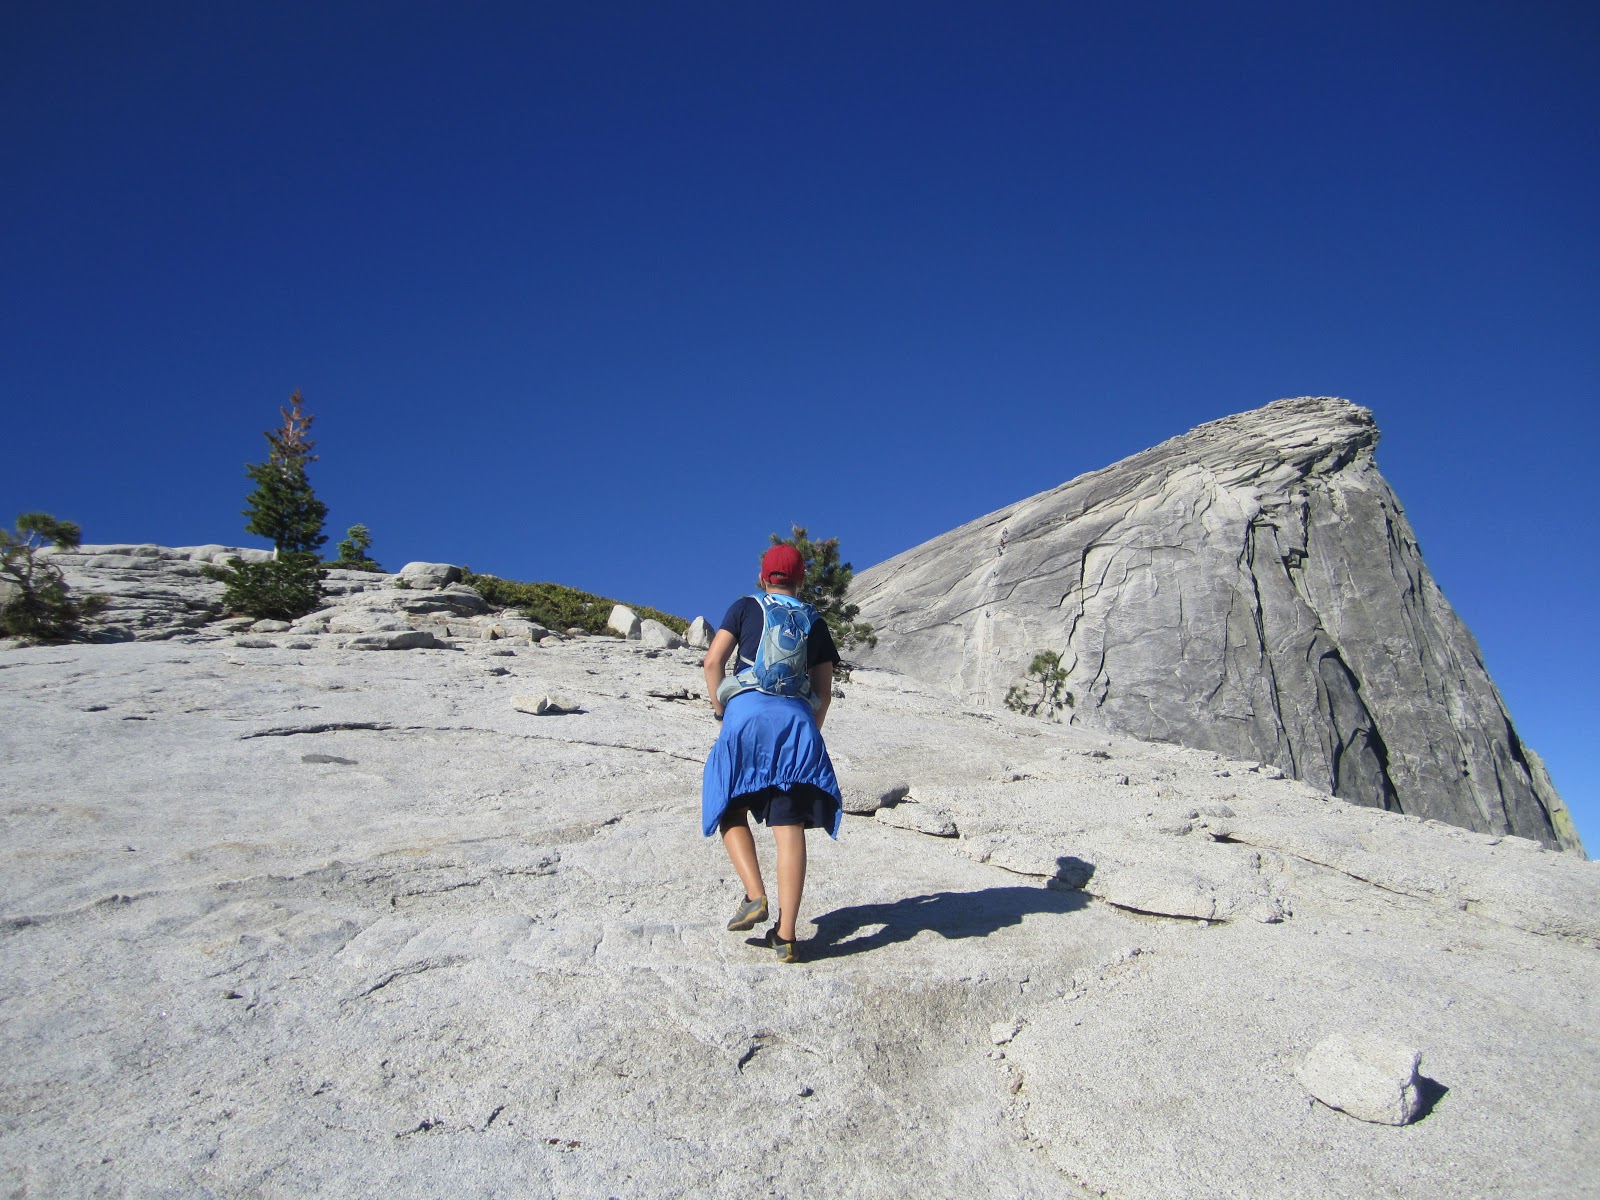
… such as scrambling up over the shoulder of Half Dome, a steep grade where the trail eventually fades into a raw expanse of granite. As long as you're going uphill, you're headed the right way.

Cresting the shoulder, the sight of the curved dome and the cables is almost enough to take your breath away – and for my son, it also triggered a minor case of high mountain jitters.
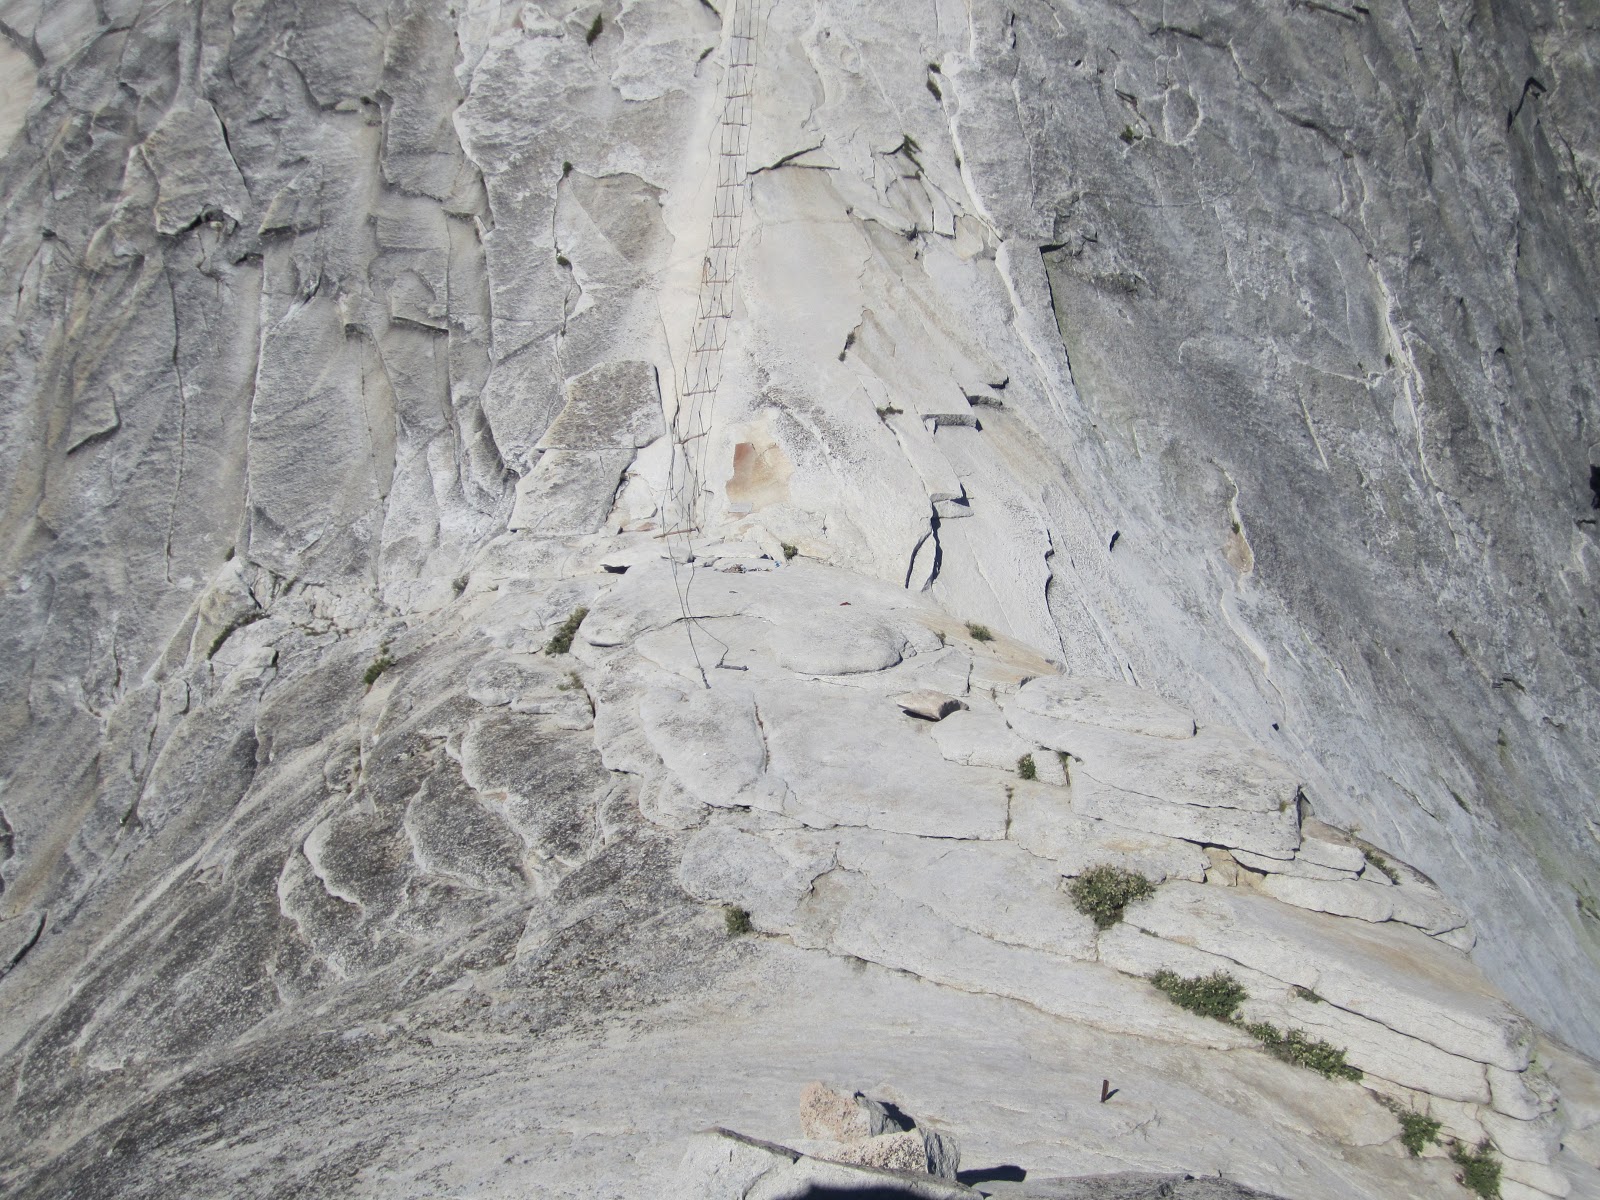
We sat down at the base of the cables to put on harnesses, a safety decision that I planned long before arriving in Yosemite, but one I was especially happy to have made in light of the fact that someone had fallen off the cables and died a mere three days before. However, this was also one of the few moments where my carefully crafted plan faltered a bit.

On the whole drive up and throughout the hike, I purposely didn't say anything to my son about someone dying very close to the exact spot where we now stood. But as we were at the base of the cables and I was giving him a lesson on carabiner use, we spotted a woman coming down the cables using the same kind of harness system. I pointed her out and told my son to watch how she alternated the clips as she went along. When the woman arrived at our spot, she started the following conversation:
Her: I'm glad to see that you guys are using harnesses.
Me: I figured we'd feel a lot more secure with them.
Her: Yeah, that's good … because you know that someone died here this week, right?
And with that, I cut off the conversation and pushed my son toward the cables.

Thankfully we were the only ones on the cables, which meant that we could take all the time we needed. We inched our way through the first minor slope together, and by the time he was about halfway up, my son was managing on his own quite well – which was great for me, since I was having my own concerns about staying anchored to the granite on the nearly 45-degree pitch.
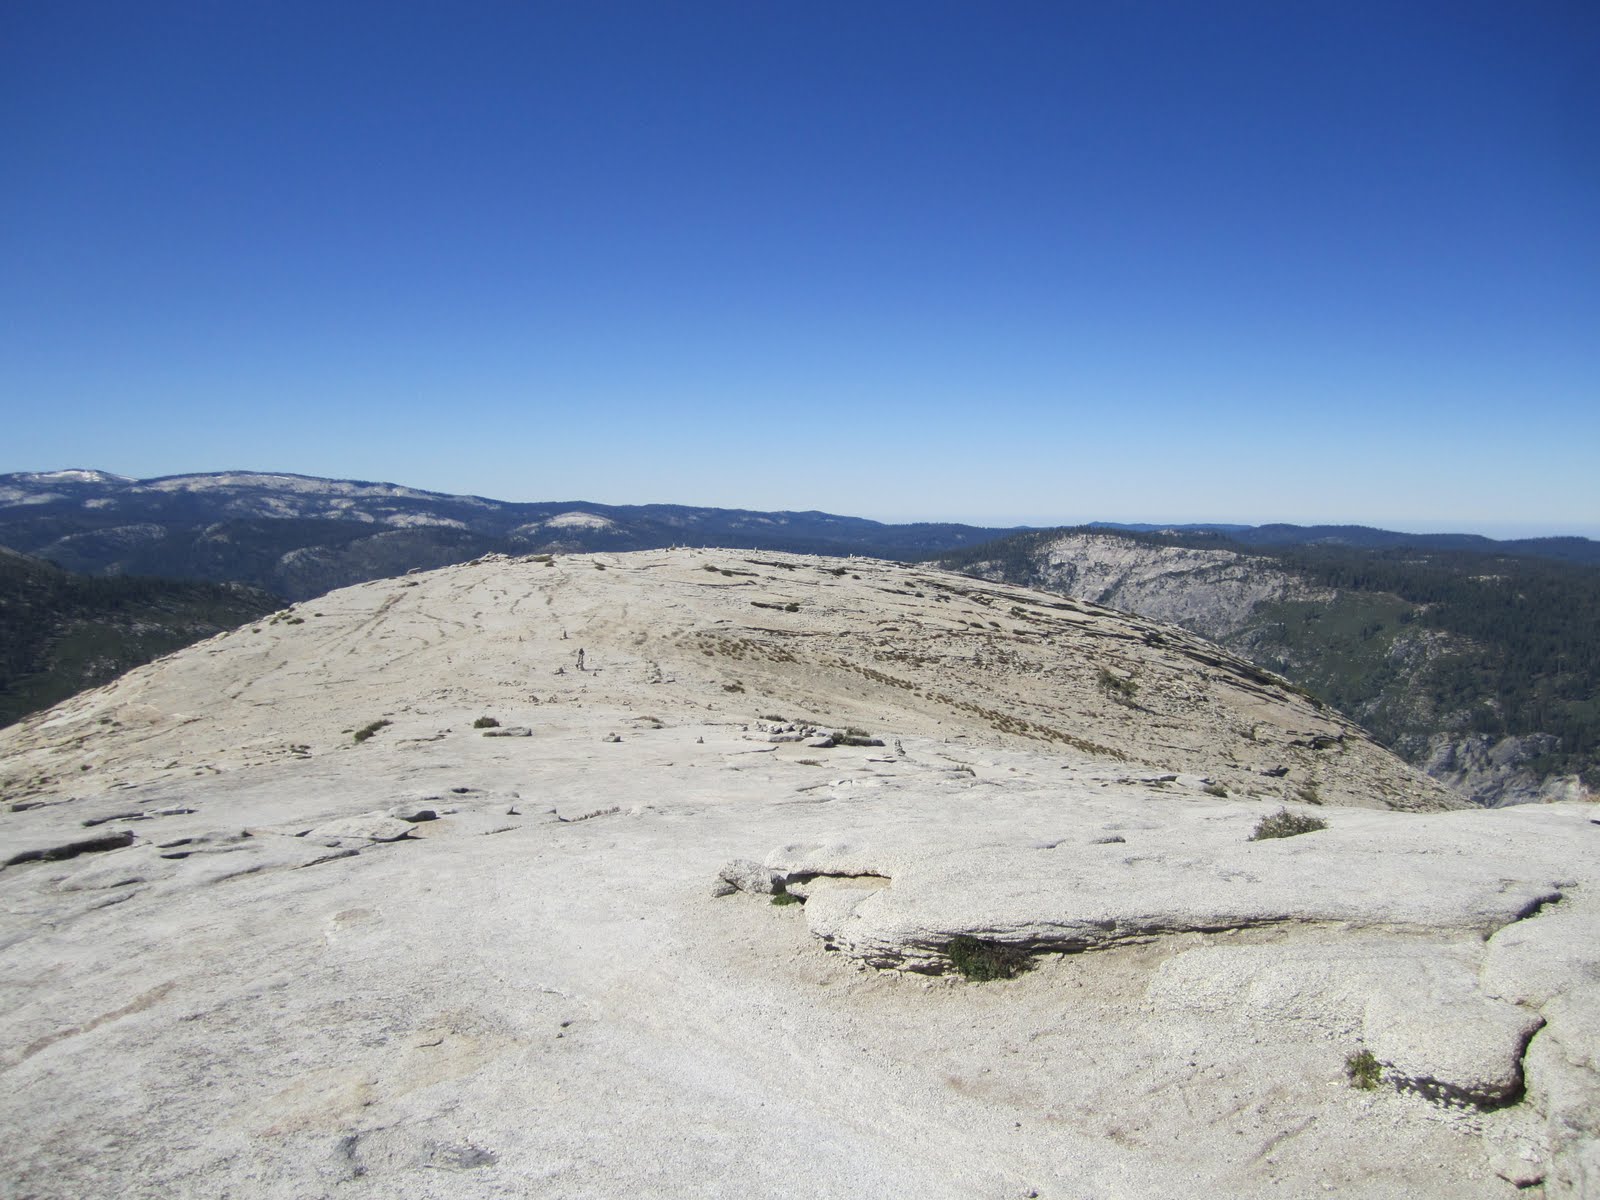
My son's persistence was finally rewarded, and we made it to the top of the rock, with practically the whole summit to ourselves. By this point, the early morning wake-up call was a distant memory.
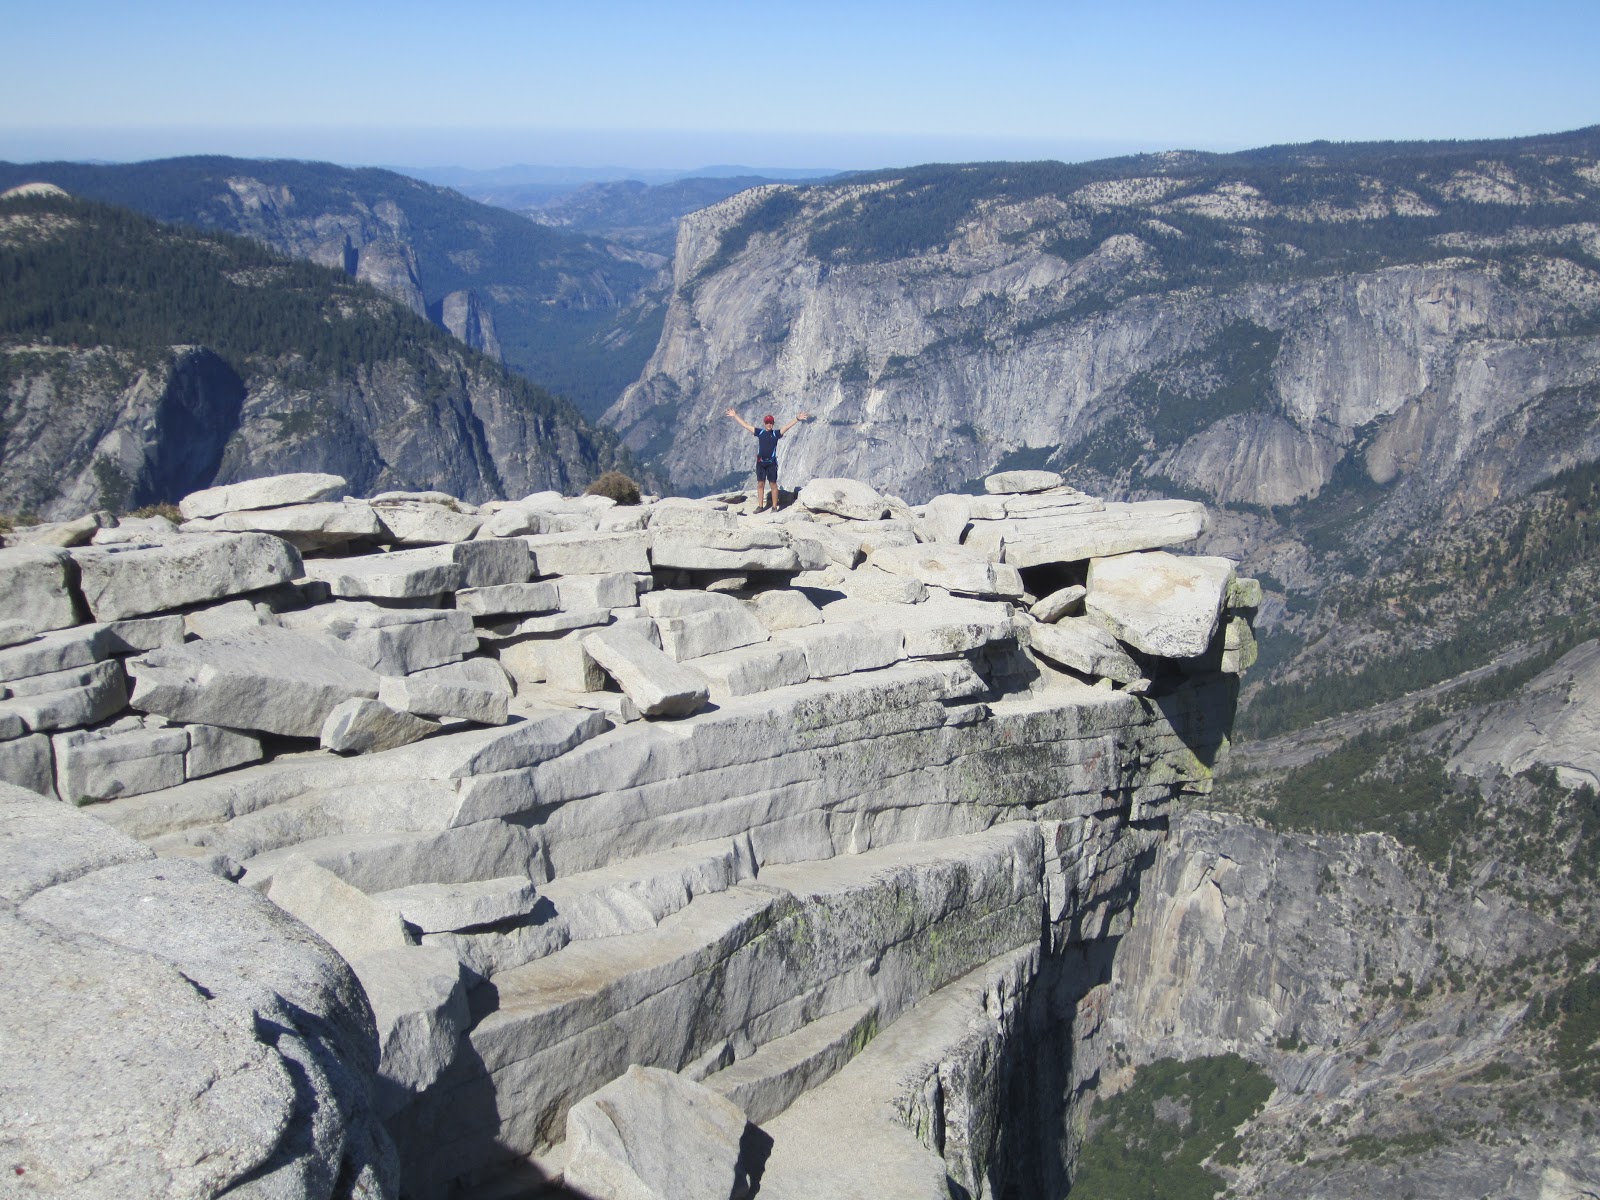
Apparently there's some confusion about the name of this spot; in my previous report, I called it the Diving Board, only to find out that another location on the western slope of Half Dome has the same name. I think the official name is the Visor, but if this Google image search is any indication, that name has a long way to go before it sticks.
Incidentally, want to hear what my wife calls it? The "You guys are going to give me a heart attack" spot. But for some reason, that one's not on Google.
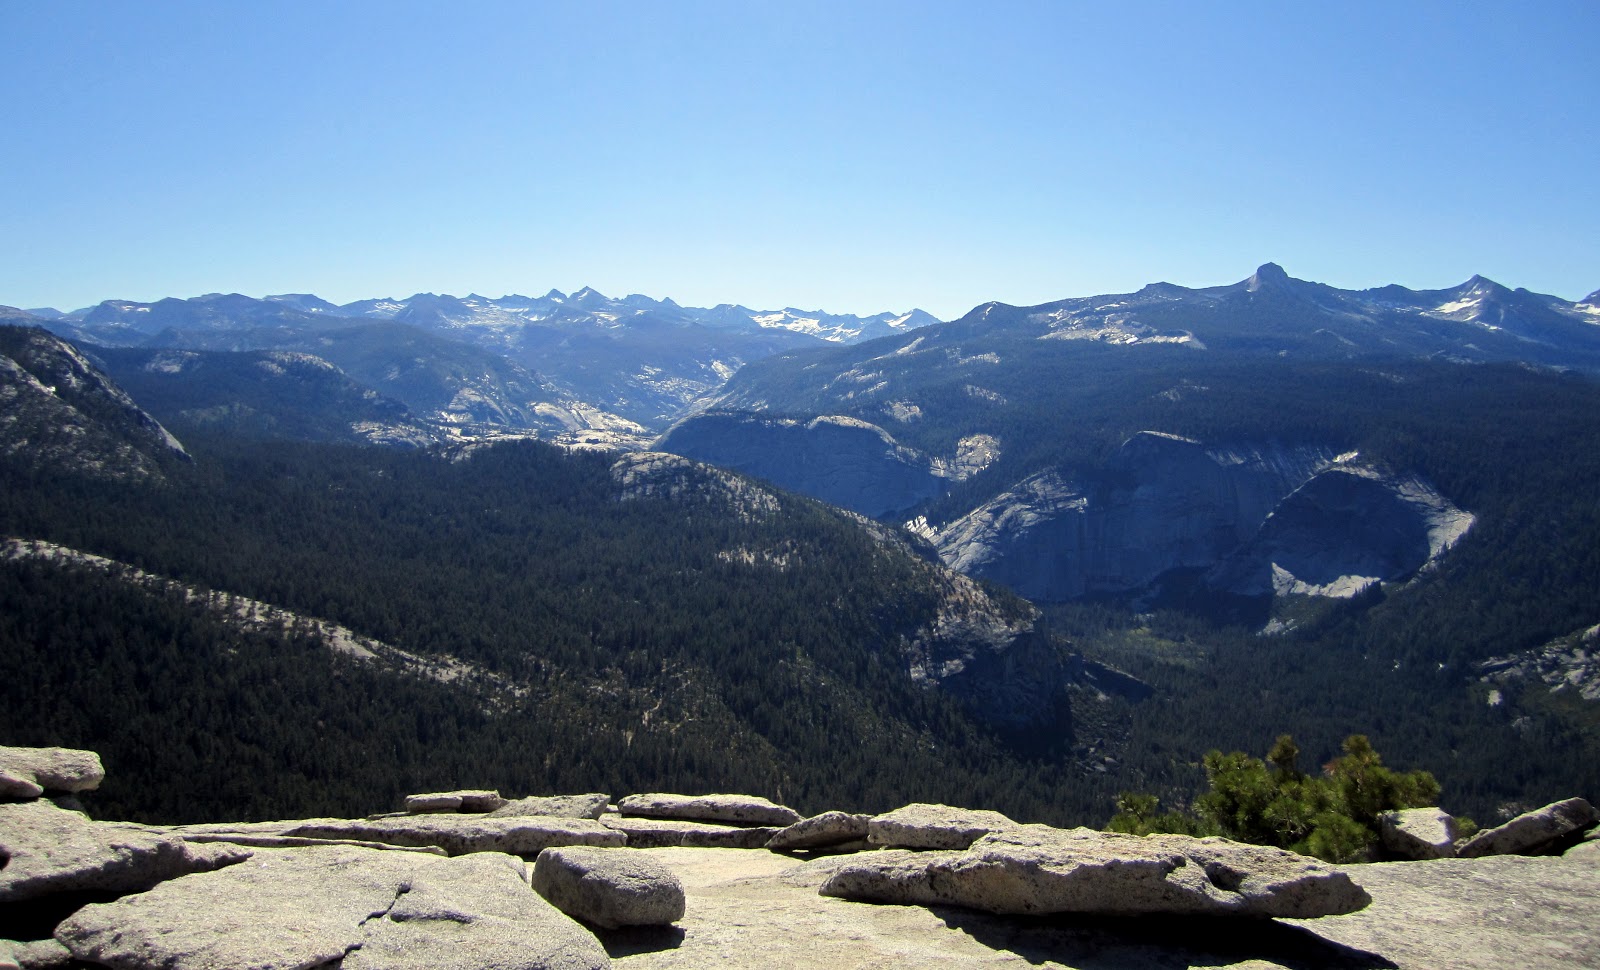
Once we safely arrived at the top, we spent about an hour enjoying the killer views while munching on some trail mix …
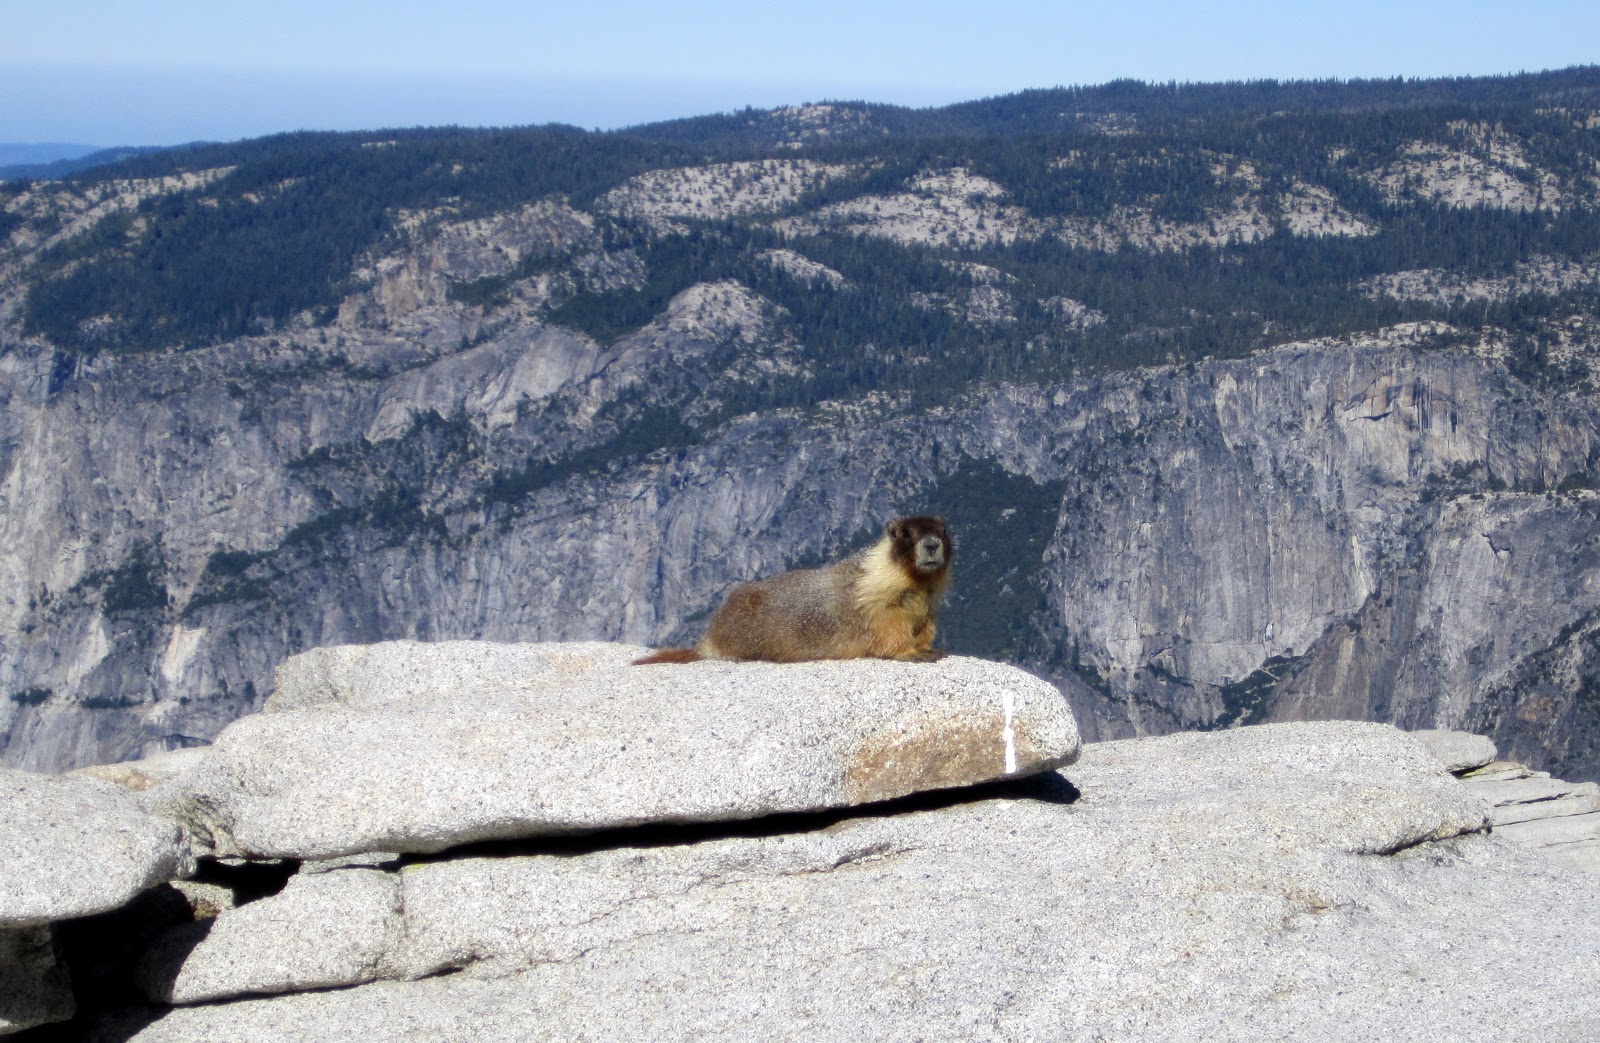
… a healthy portion of which we ended up sharing with this marmot. True story: at one point when we were walking around the rock, I returned to find Mr. Marmot sitting on my backpack, right next to the pocket that he unzipped and the Ziploc seam he opened to get into my food. I suspect he's pretty well-practiced at that sort of thing.
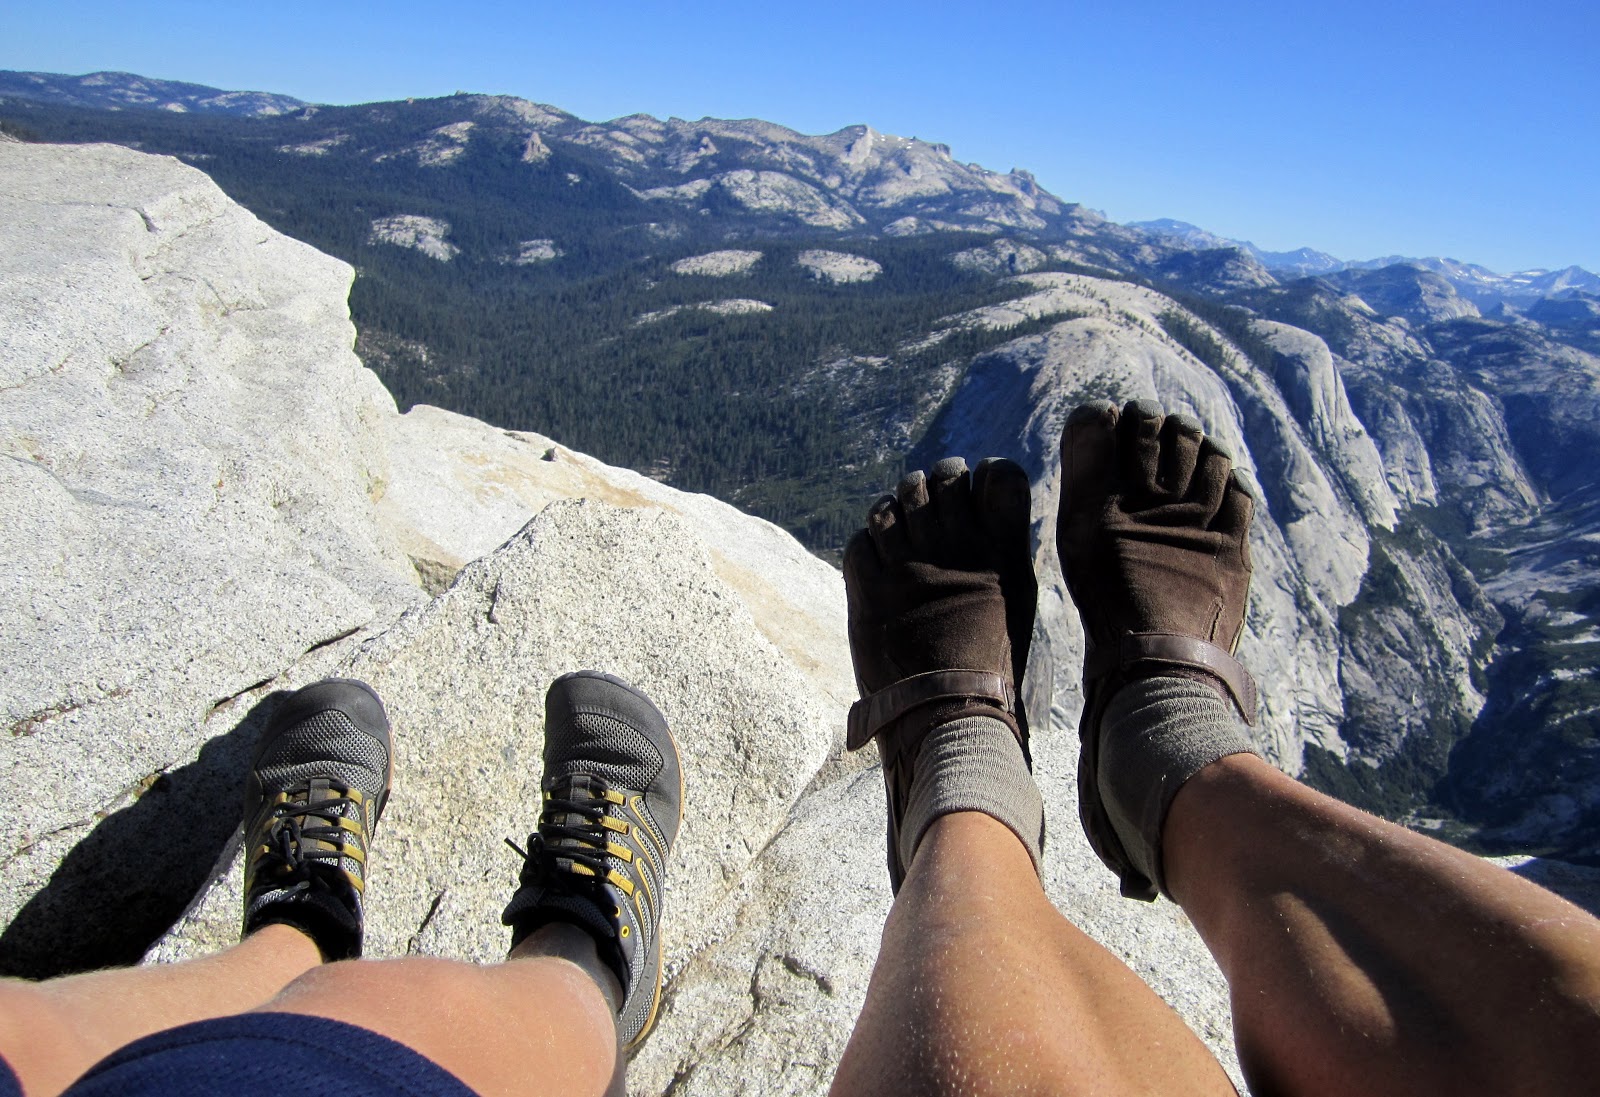
Two side notes about our footwear for the day:
1) My son wore a pair of Merrell Barefoot Trail Gloves that the company offered when I was setting up an upcoming children's shoe review, even though my son was too large to fit in any of the kids' models. They were absolutely perfect for him, with the best outsole traction imaginable on Half Dome's smooth granite … and the fact that Merrell stepped up to provide them even though I'd already reviewed the shoe tells you all you need to know about the company.
2) I wore the Vibram FiveFingers KSO Treks that have become my gold standard for day hiking. For as common as Vibrams have become at trail races, they're still very much a novelty among hikers. About 2 miles down the trail on our return trip, my son said "We should count the number of people who say something about your shoes" … and we both lost count somewhere in the 30s.
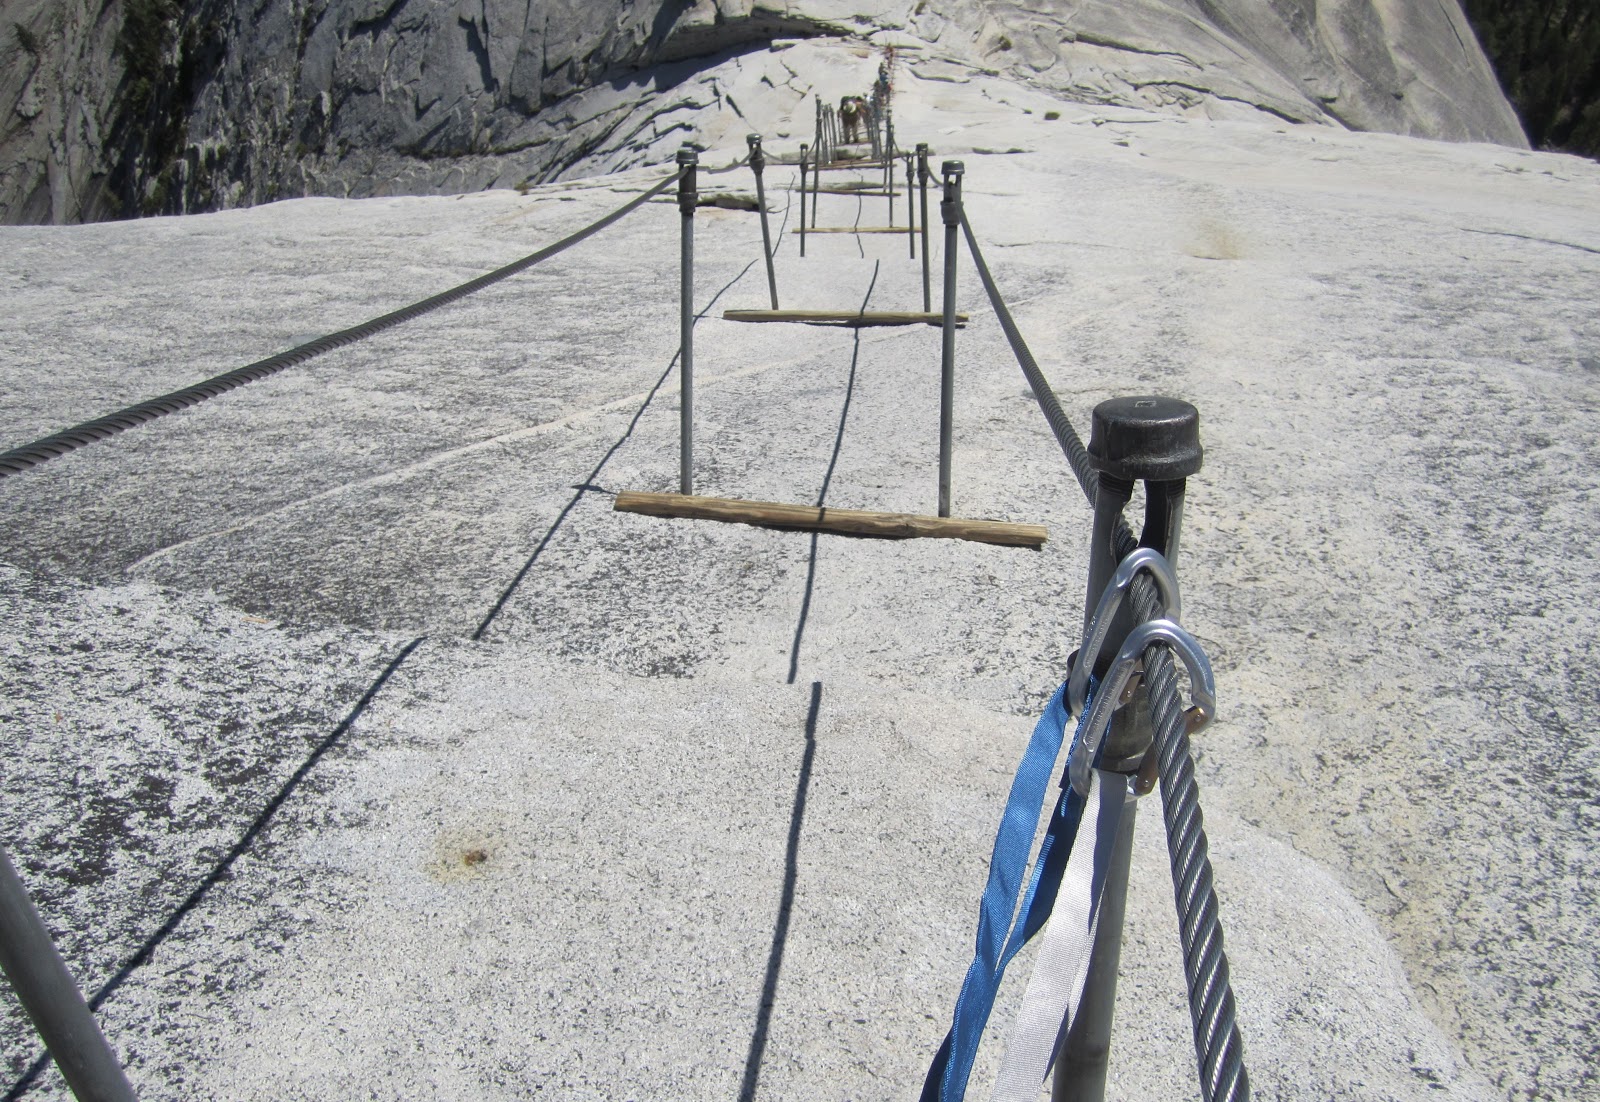
When we were finally ready to leave the summit, it was time to rope up again – a technique that's probably even more beneficial for the descent than it is for the climb. On my last visit here, I didn't use clips, and it didn't seem like that big of a deal – but when there's a kid involved, it's absolutely non-negotiable. I can't overemphasize how much peace of mind being clipped into the cables gave both of us …
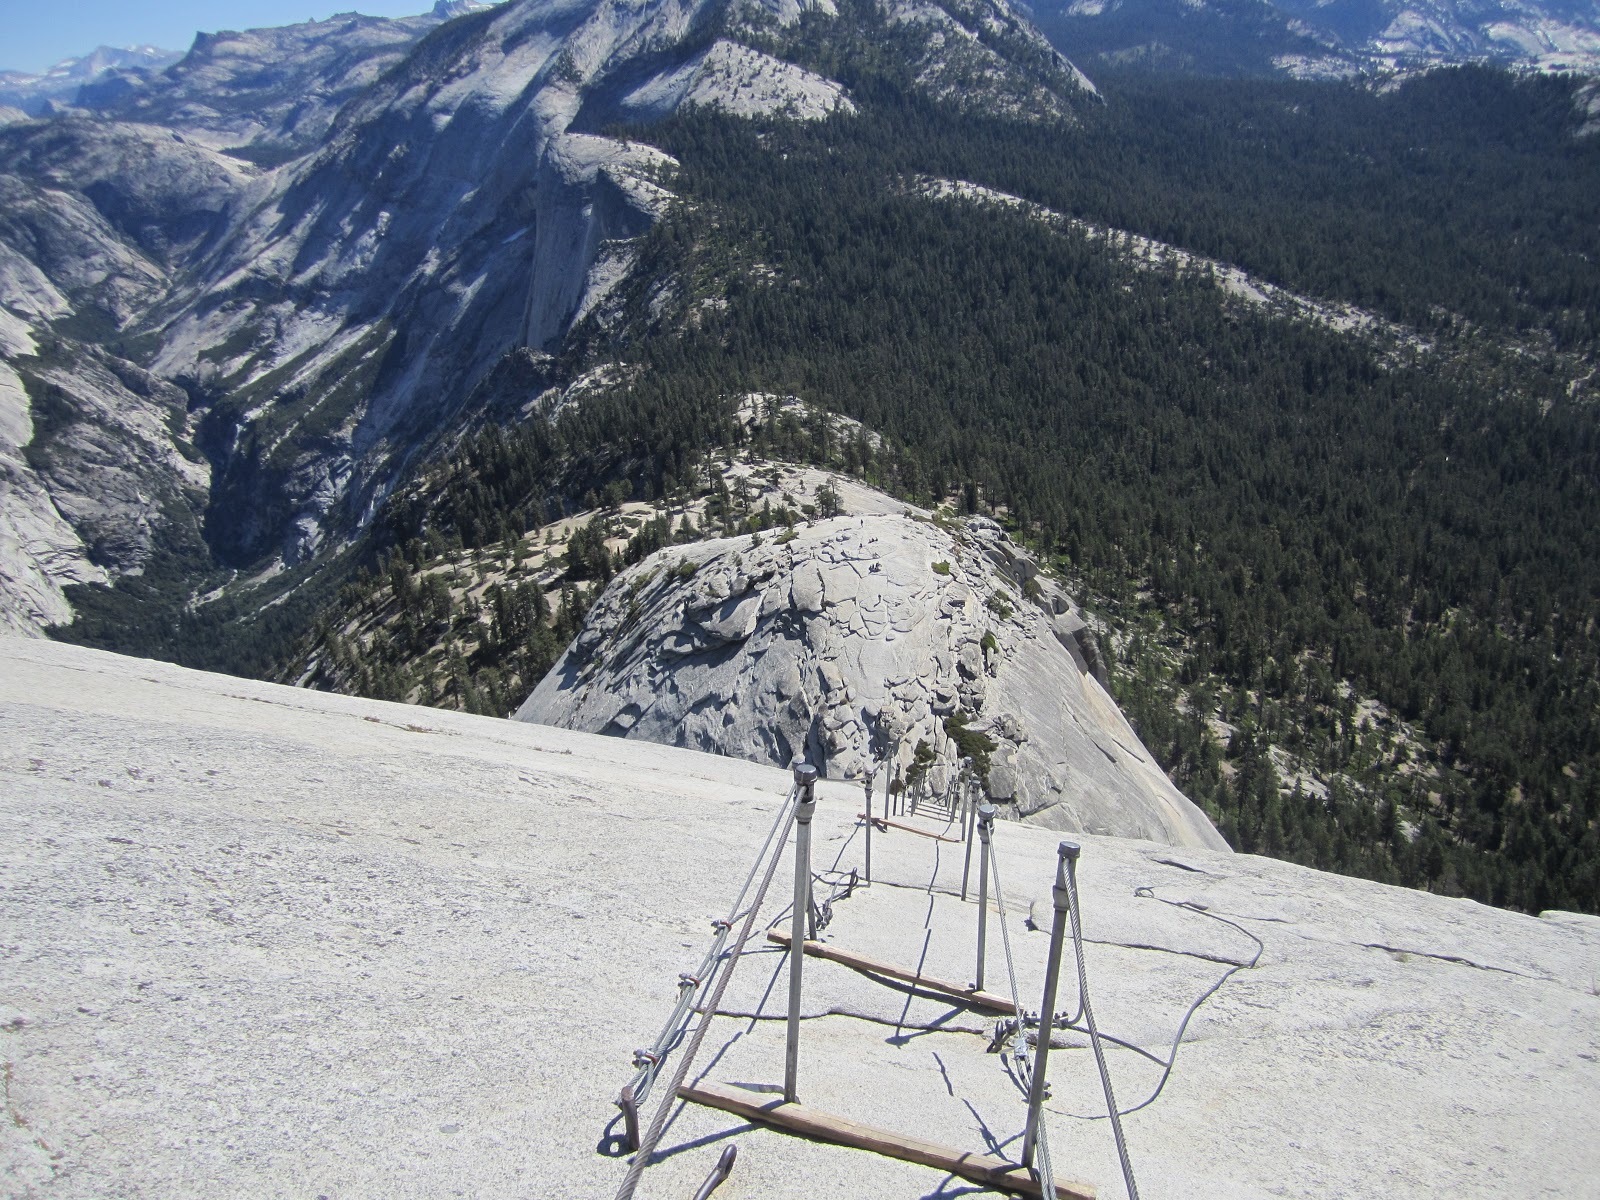
… especially as the slope steepened and seemed to curve downward into the abyss.
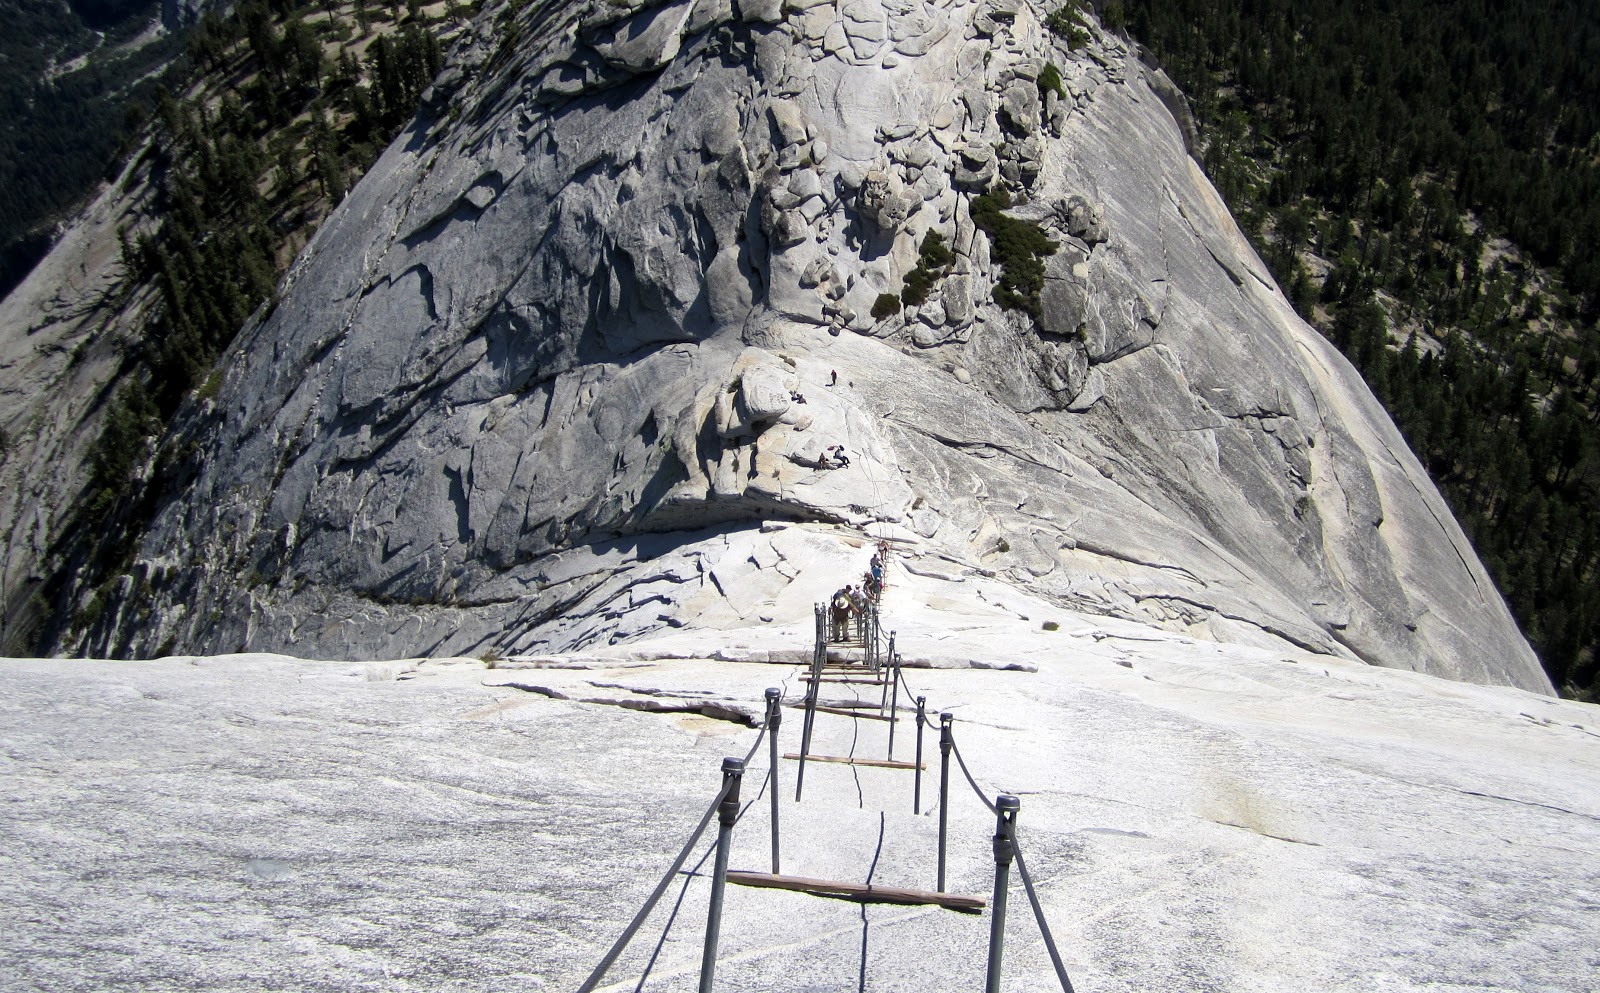
It was only at the base of the cables that we encountered any noticeable foot traffic. My plan to be off the cables before the summer gridlock started was executed to near perfection. Have I mentioned the benefits of waking up early already?
(And for the record, yes, every single person on the cables asked about my Vibrams.)
A few people have inquired about the impact of this year's new permit requirement on crowding, but because we got up and down so early in the day, it's tough for me to assess this for sure. However, I can offer two observations …
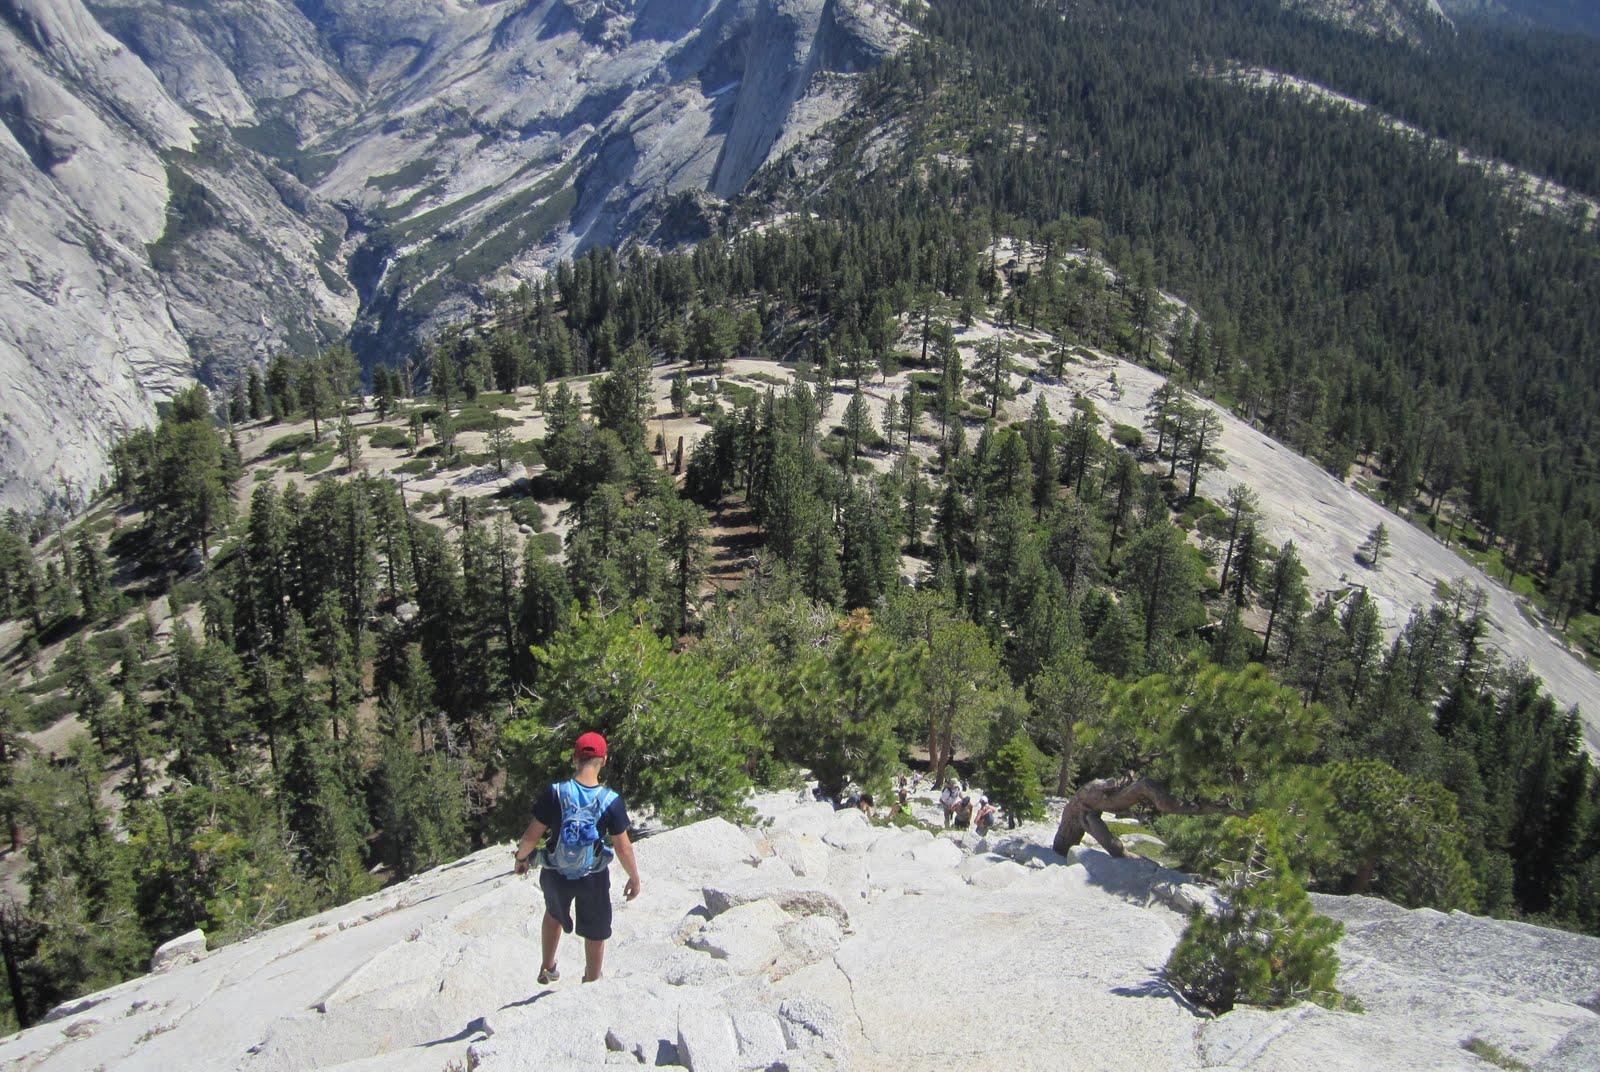
Making our way down the shoulder, we initially enjoyed an open path, but encountered increasing numbers of people as we went further down the trail – so I suspect that if you're on the shoulder or near the cables anytime in the middle of a summer afternoon, you're still going to deal with a good-sized crowd. We also overheard at least a few groups making comments like, "maybe we can sneak past the ranger," or "maybe the ranger won't be there," so the deterrent factor isn't 100% effective.
As for the aforementioned ranger …
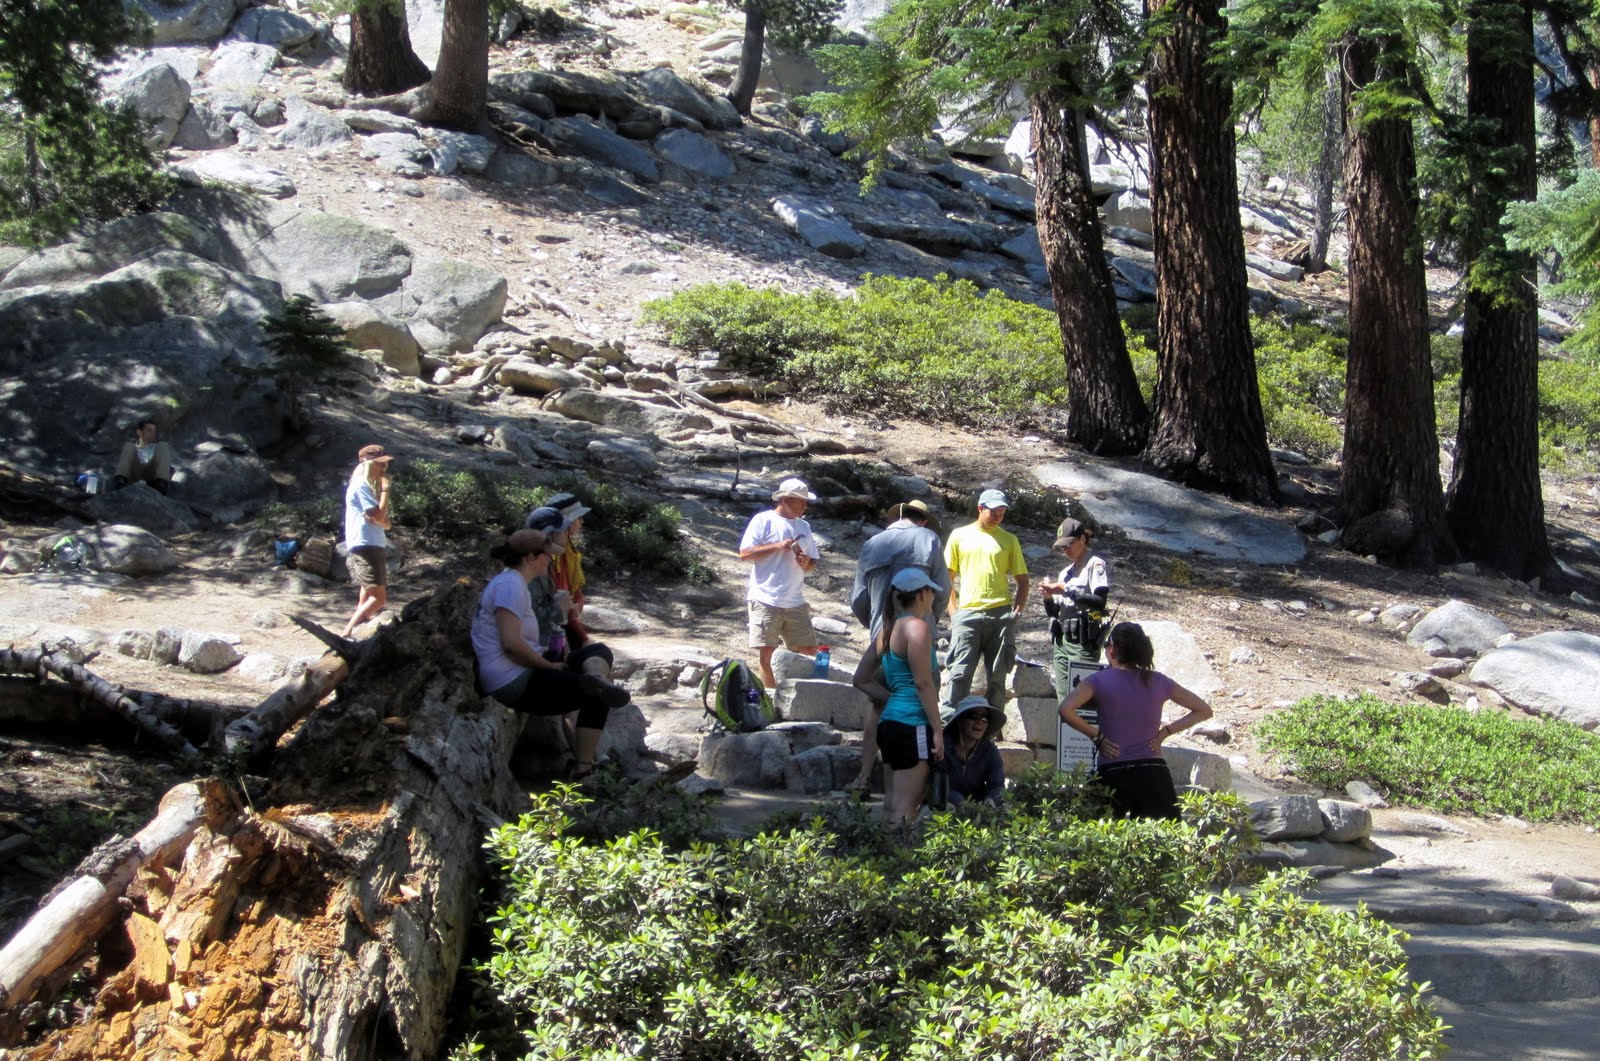
She was there, but not until sometime around 9AM. This photo was taken on our way down; when we passed this spot at about 8:15, there wasn't anyone in sight. So there is definitely a ranger on duty, but apparently they keep something close to bankers' hours – which isn't too surprising, as I imagine the commute is a bit of a challenge.
We weren't asked for our permit on the way down, so it turned out that we didn't even need it; whether that's the way it always works on every day of the season is uncertain.

What wasn't uncertain was how expertly my son handled himself throughout the hike. His legs wore down a bit over the final miles, especially going back down the countless rock steps of the Mist Trail at the end of a 10-hour day. But through it all, he never complained, and never did anything foolish to get himself into trouble.
And I didn't have to wonder very long whether he thought doing this sort of thing was the way he wanted life to be …

... because when we were less than a mile down the trail on our return, he pointed out Clouds Rest a few miles further (and 1100' higher) into the wilderness, and said "That's the one we'll do next." And we talked about the beauty of Yosemite almost the whole rest of the way down.
Appreciating the experiences we have, while looking hopefully to the promise of days to come: I'd say this kid is officially ready to venture into the world.
*
Switchfoot, "Dare You to Move" (click to play):
*See other photo tours under tab at top of page.
Get updates as soon as they're posted! Click here to subscribe to Running and Rambling.
Check out the Running Life book for a collection of our most popular columns.
August 8, 2011
VIVOBAREFOOT Achilles Sandal Review
Considering that VIVOBAREFOOT's new sandal is called the Achilles, there are two popular points worth mentioning about the greatest warrior in Greek history:
1) He was unanimously acknowledged as the most handsome of all the heroes in the Trojan Wars, and …
2) The heel thing.

VIVOBAREFOOT Achilles
In light of that, some folks might consider the name bestowed upon this sandal to be only 50% accurate; while there's no doubt that the Achilles is open in the same region where the mighty warrior's armor was vulnerable, the question of whether or not this sandal is handsome is certainly open to debate.

Do these shoes make me look Greek?
As a mater of fact, this exact debate took place within my own house as soon as I opened the package. My wife immediately thought they were one of the strangest things she'd ever seen – and not in a good way. I was a little more receptive, although I fully admit that they are unusual, and will attract some stares in the same way that wearing FiveFingers used to a couple of years ago. Overall I've grown pretty comfortable with the design, mainly because it's intended for bare-bones functionality without any unnecessary flourishes, but still allows some higher level performance than you can experience from traditional huarache styling.
I should also make one disclaimer before moving forward: when it comes to running, I'm not much of a sandal fan. I spend 95% of my time off-road, and I don't like stopping to remove debris that invariably slips between my feet and the insole surface. If I want to go super-minimalist, I'd rather go with a sock-like product that covers the whole foot rather than something that only covers the bottom half. After all, if I were willing to deal with pebbles and twigs and thorns against my skin, I may as well just go completely barefoot.
So when VIVOBAREFOOT labels the Achilles a multi-terrain running sandal, I'd take that description with a grain of salt. Over the past couple of months that I've tested it, I don't find it ideal for multi-terrain, and I don't really prefer it for running. However, I do consider it a highly functional, very durable walking sandal that would probably be perfect for hot summer days when the dirt or asphalt gets too hot to comfortably go barefoot.

Uppers of the Achilles are constructed from TPU material formed around a polyurethane footbed with the same wide anatomic last used on all VIVOBAREFOOT models. The perimeter of the last is flared slightly upward to cradle the foot, to limit the amount of debris that infiltrates the footbed, and to provide a margin of protection, especially at the front toes. There's also a TPU bridge on the medial side intended to enhance balance reception at the ball of the foot.

The most noteworthy feature of the uppers is the molded split toe design that separates the big toe from the rest of the foot. I found this design to be quite comfortable for walking around, but somewhat problematic while running. Basically, when my foot flexed forward, the TPU at the base of my big toe and second toe created a pressure point that caused some chronic discomfort. My hope was that there might be a breaking-in period after which the material would soften or my foot would get accustomed to the feeling, but unfortunately neither of these things happened.

A fully adjustable and removable nylon strap helps secure the foot inside the upper. The strap has neoprene padding which sits very comfortably against the muscle tendon – and of course, the back of the heel remains open, just as it did on Achilles's suit of armor. As far as ease of use goes, the straps prevent you from sliding your feet into these like you do with a pair of flip-flops, but it's a far simpler process than tying a pair of laces on huarache-style sandals.

In general, the styling of the Achilles results in an outstanding fit, as the front of the sandal doesn't catch on the ground, the footbed stays relatively close to the bottom of the foot, and the ankle strap prevents excess lateral movement on top of the footbed. However, proper sizing might be an issue for some users, as the Achilles is made in S-M-L-XL instead of the customary numeric sizing. Each letter size encompasses two number sizes (for example, medium equates to size 43 and 44), which means that some folks might find them slightly roomy or slightly snug. If they're too big, you'll probably drag part of the heel footbed behind you when stepping forward, and if they're a little tight you risk rubbing your toes against the front of the TPU. Having said that, I'm a pretty true size 44 and the medium sandal fits quite well.

Another clear strength of the Achilles is the outsole, which is a mere 3mm thick, and is completely flat with no support mechanisms. The sole is puncture resistant and uses VIVOBAREFOOT's trademark hexagonal tread pattern for traction. It's an ideal combination of lightweight flexibility with enough protection and durability to take on virtually any activity. Even though I'm not running in my Achilles very often, I have no doubt that the outsole would be the equal of the VIVOBAREFOOT running models – primarily the Evo and Neo – that I use for all conditions on every kind of terrain.

Perfect flexibility and durability
Overall weight of the Achilles is 6.5 oz, which is more than many "slab of rubber and piece of string" styled sandals, but significantly less than VIVOBAREFOOT's standard running models. (It's also almost identical to the weight of a pair of Vibrams.) Just like the outsole, the weight represents a nice compromise as well, maintaining the lightweight feel of being barefoot with the minimal structure necessary to ensure long-term functional use.

Finally, the price of the Achilles is also a nice middle ground between the cheaper, less durable minimalist styles on the market, and the high-end performance models that some companies (VIVOBAREFOOT included) stick on their "better than barefoot" creations. The sandal retails for $60 from the VIVOBAREFOOT website.

*Product provided by VIVOBAREFOOT
**See other product reviews on sidebar at right. If you have a product you'd like reviewed, contact me at info@runningandrambling.com.
Get updates as soon as they're posted! Click here to subscribe to Running and Rambling.
Check out the Running Life book for a collection of our most popular columns.

1) He was unanimously acknowledged as the most handsome of all the heroes in the Trojan Wars, and …
2) The heel thing.

VIVOBAREFOOT Achilles
In light of that, some folks might consider the name bestowed upon this sandal to be only 50% accurate; while there's no doubt that the Achilles is open in the same region where the mighty warrior's armor was vulnerable, the question of whether or not this sandal is handsome is certainly open to debate.
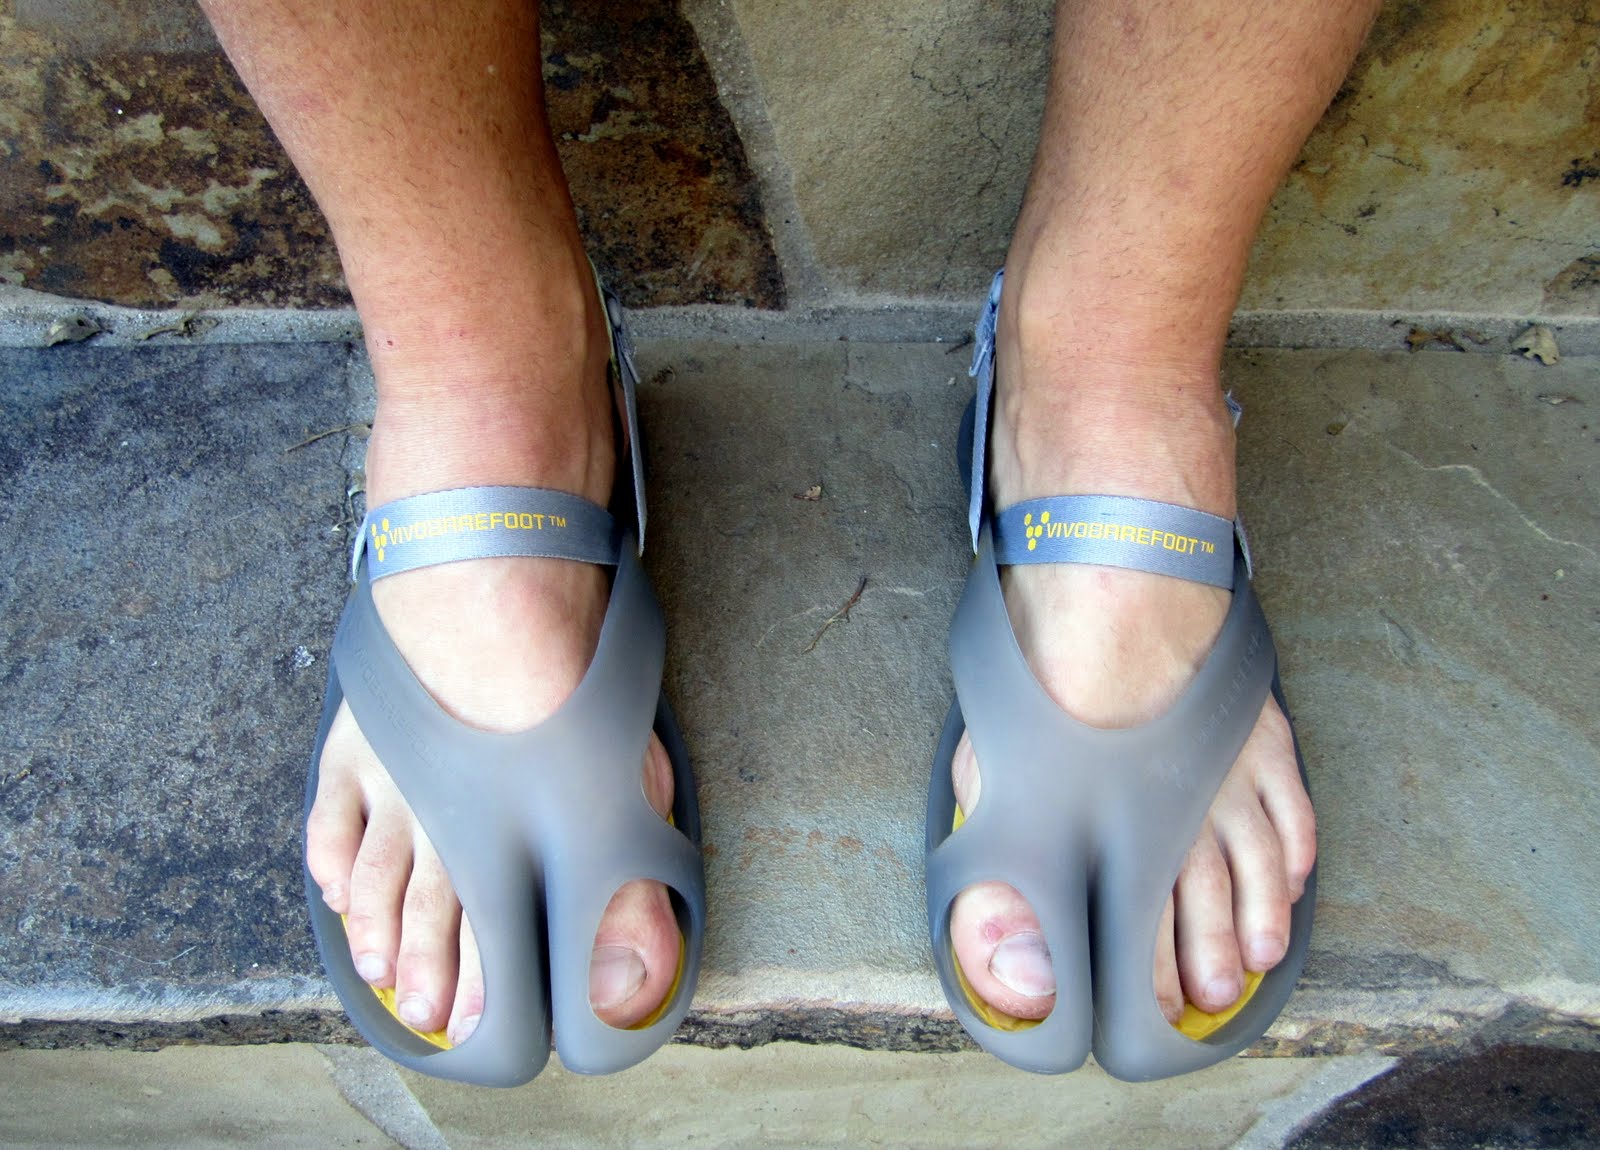
Do these shoes make me look Greek?
As a mater of fact, this exact debate took place within my own house as soon as I opened the package. My wife immediately thought they were one of the strangest things she'd ever seen – and not in a good way. I was a little more receptive, although I fully admit that they are unusual, and will attract some stares in the same way that wearing FiveFingers used to a couple of years ago. Overall I've grown pretty comfortable with the design, mainly because it's intended for bare-bones functionality without any unnecessary flourishes, but still allows some higher level performance than you can experience from traditional huarache styling.
I should also make one disclaimer before moving forward: when it comes to running, I'm not much of a sandal fan. I spend 95% of my time off-road, and I don't like stopping to remove debris that invariably slips between my feet and the insole surface. If I want to go super-minimalist, I'd rather go with a sock-like product that covers the whole foot rather than something that only covers the bottom half. After all, if I were willing to deal with pebbles and twigs and thorns against my skin, I may as well just go completely barefoot.
So when VIVOBAREFOOT labels the Achilles a multi-terrain running sandal, I'd take that description with a grain of salt. Over the past couple of months that I've tested it, I don't find it ideal for multi-terrain, and I don't really prefer it for running. However, I do consider it a highly functional, very durable walking sandal that would probably be perfect for hot summer days when the dirt or asphalt gets too hot to comfortably go barefoot.
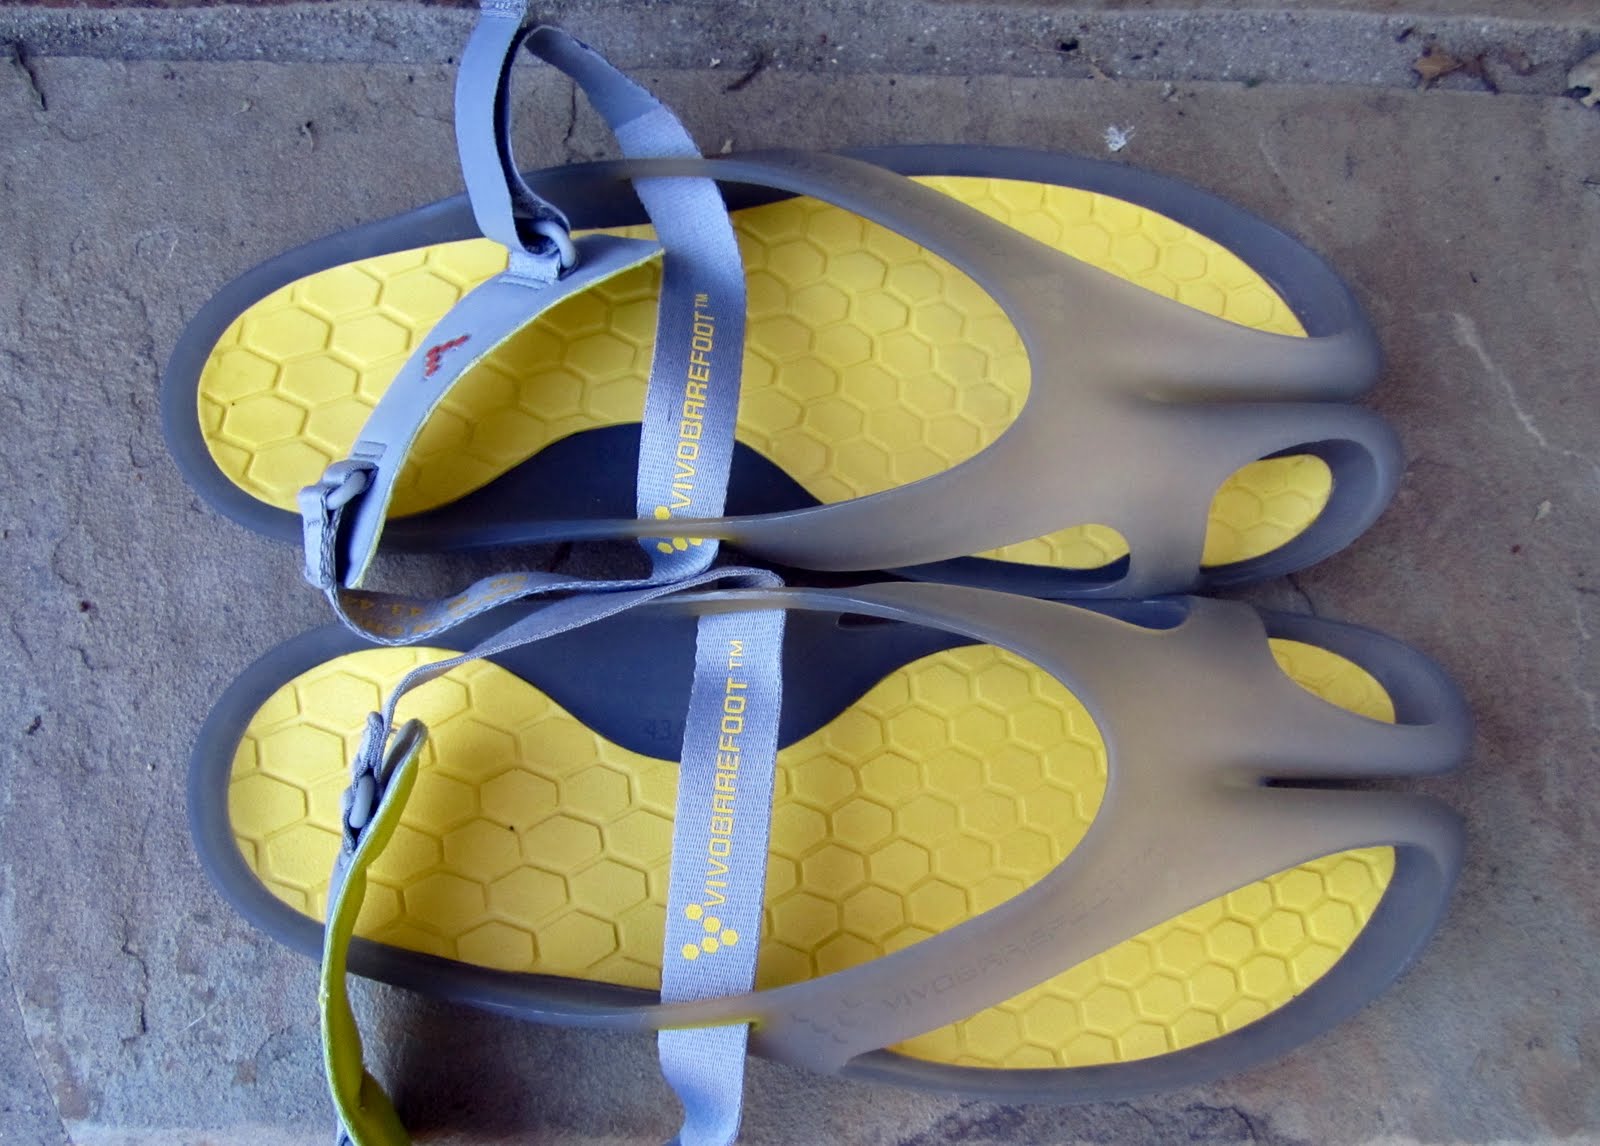
Uppers of the Achilles are constructed from TPU material formed around a polyurethane footbed with the same wide anatomic last used on all VIVOBAREFOOT models. The perimeter of the last is flared slightly upward to cradle the foot, to limit the amount of debris that infiltrates the footbed, and to provide a margin of protection, especially at the front toes. There's also a TPU bridge on the medial side intended to enhance balance reception at the ball of the foot.

The most noteworthy feature of the uppers is the molded split toe design that separates the big toe from the rest of the foot. I found this design to be quite comfortable for walking around, but somewhat problematic while running. Basically, when my foot flexed forward, the TPU at the base of my big toe and second toe created a pressure point that caused some chronic discomfort. My hope was that there might be a breaking-in period after which the material would soften or my foot would get accustomed to the feeling, but unfortunately neither of these things happened.

A fully adjustable and removable nylon strap helps secure the foot inside the upper. The strap has neoprene padding which sits very comfortably against the muscle tendon – and of course, the back of the heel remains open, just as it did on Achilles's suit of armor. As far as ease of use goes, the straps prevent you from sliding your feet into these like you do with a pair of flip-flops, but it's a far simpler process than tying a pair of laces on huarache-style sandals.

In general, the styling of the Achilles results in an outstanding fit, as the front of the sandal doesn't catch on the ground, the footbed stays relatively close to the bottom of the foot, and the ankle strap prevents excess lateral movement on top of the footbed. However, proper sizing might be an issue for some users, as the Achilles is made in S-M-L-XL instead of the customary numeric sizing. Each letter size encompasses two number sizes (for example, medium equates to size 43 and 44), which means that some folks might find them slightly roomy or slightly snug. If they're too big, you'll probably drag part of the heel footbed behind you when stepping forward, and if they're a little tight you risk rubbing your toes against the front of the TPU. Having said that, I'm a pretty true size 44 and the medium sandal fits quite well.
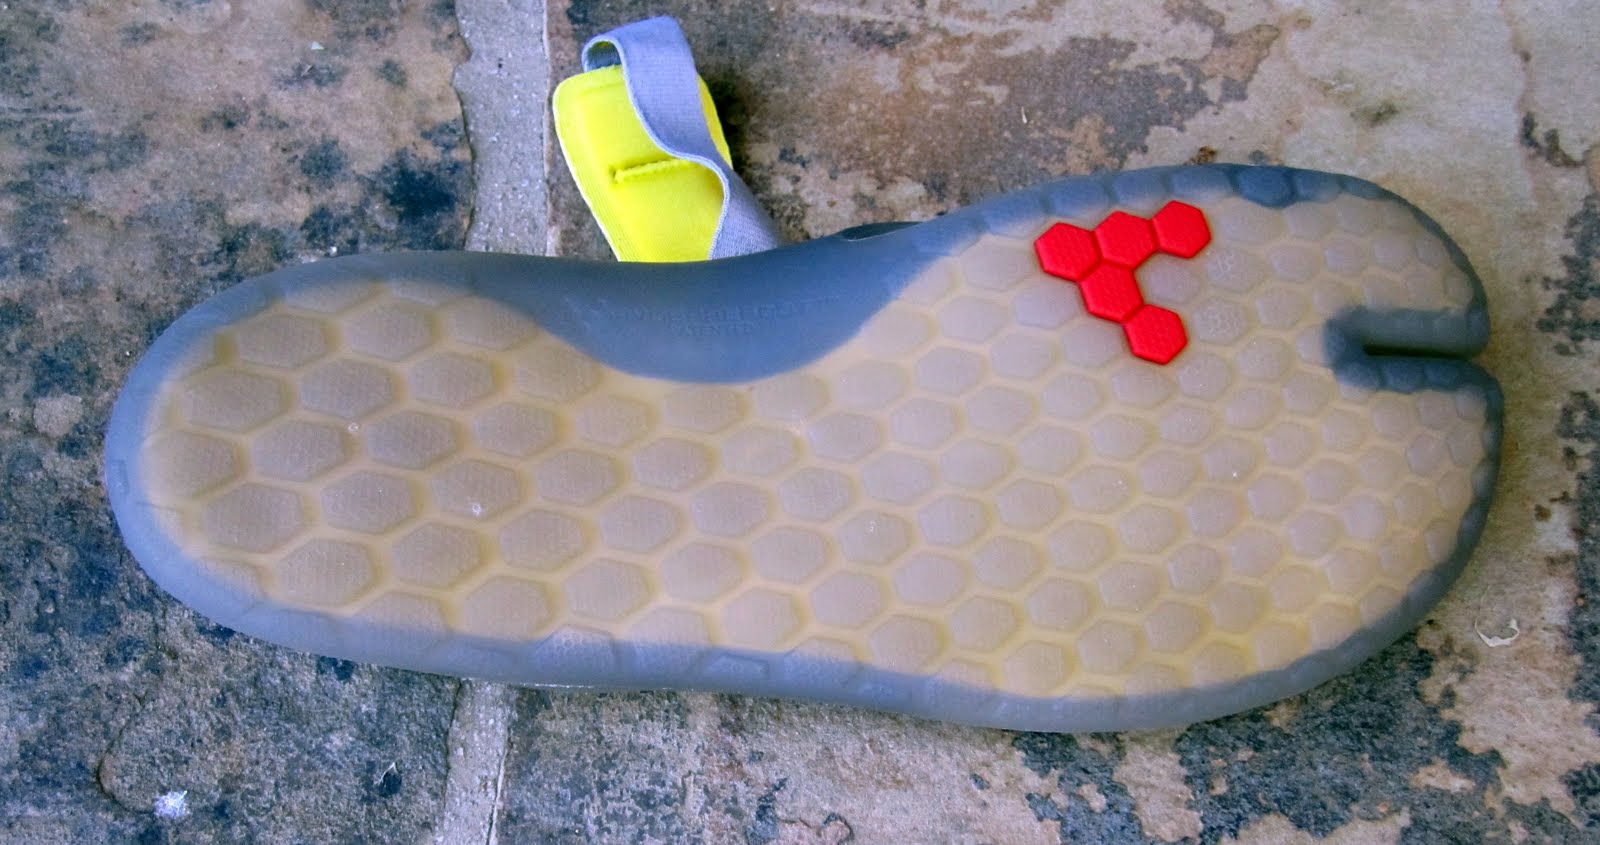
Another clear strength of the Achilles is the outsole, which is a mere 3mm thick, and is completely flat with no support mechanisms. The sole is puncture resistant and uses VIVOBAREFOOT's trademark hexagonal tread pattern for traction. It's an ideal combination of lightweight flexibility with enough protection and durability to take on virtually any activity. Even though I'm not running in my Achilles very often, I have no doubt that the outsole would be the equal of the VIVOBAREFOOT running models – primarily the Evo and Neo – that I use for all conditions on every kind of terrain.

Perfect flexibility and durability
Overall weight of the Achilles is 6.5 oz, which is more than many "slab of rubber and piece of string" styled sandals, but significantly less than VIVOBAREFOOT's standard running models. (It's also almost identical to the weight of a pair of Vibrams.) Just like the outsole, the weight represents a nice compromise as well, maintaining the lightweight feel of being barefoot with the minimal structure necessary to ensure long-term functional use.
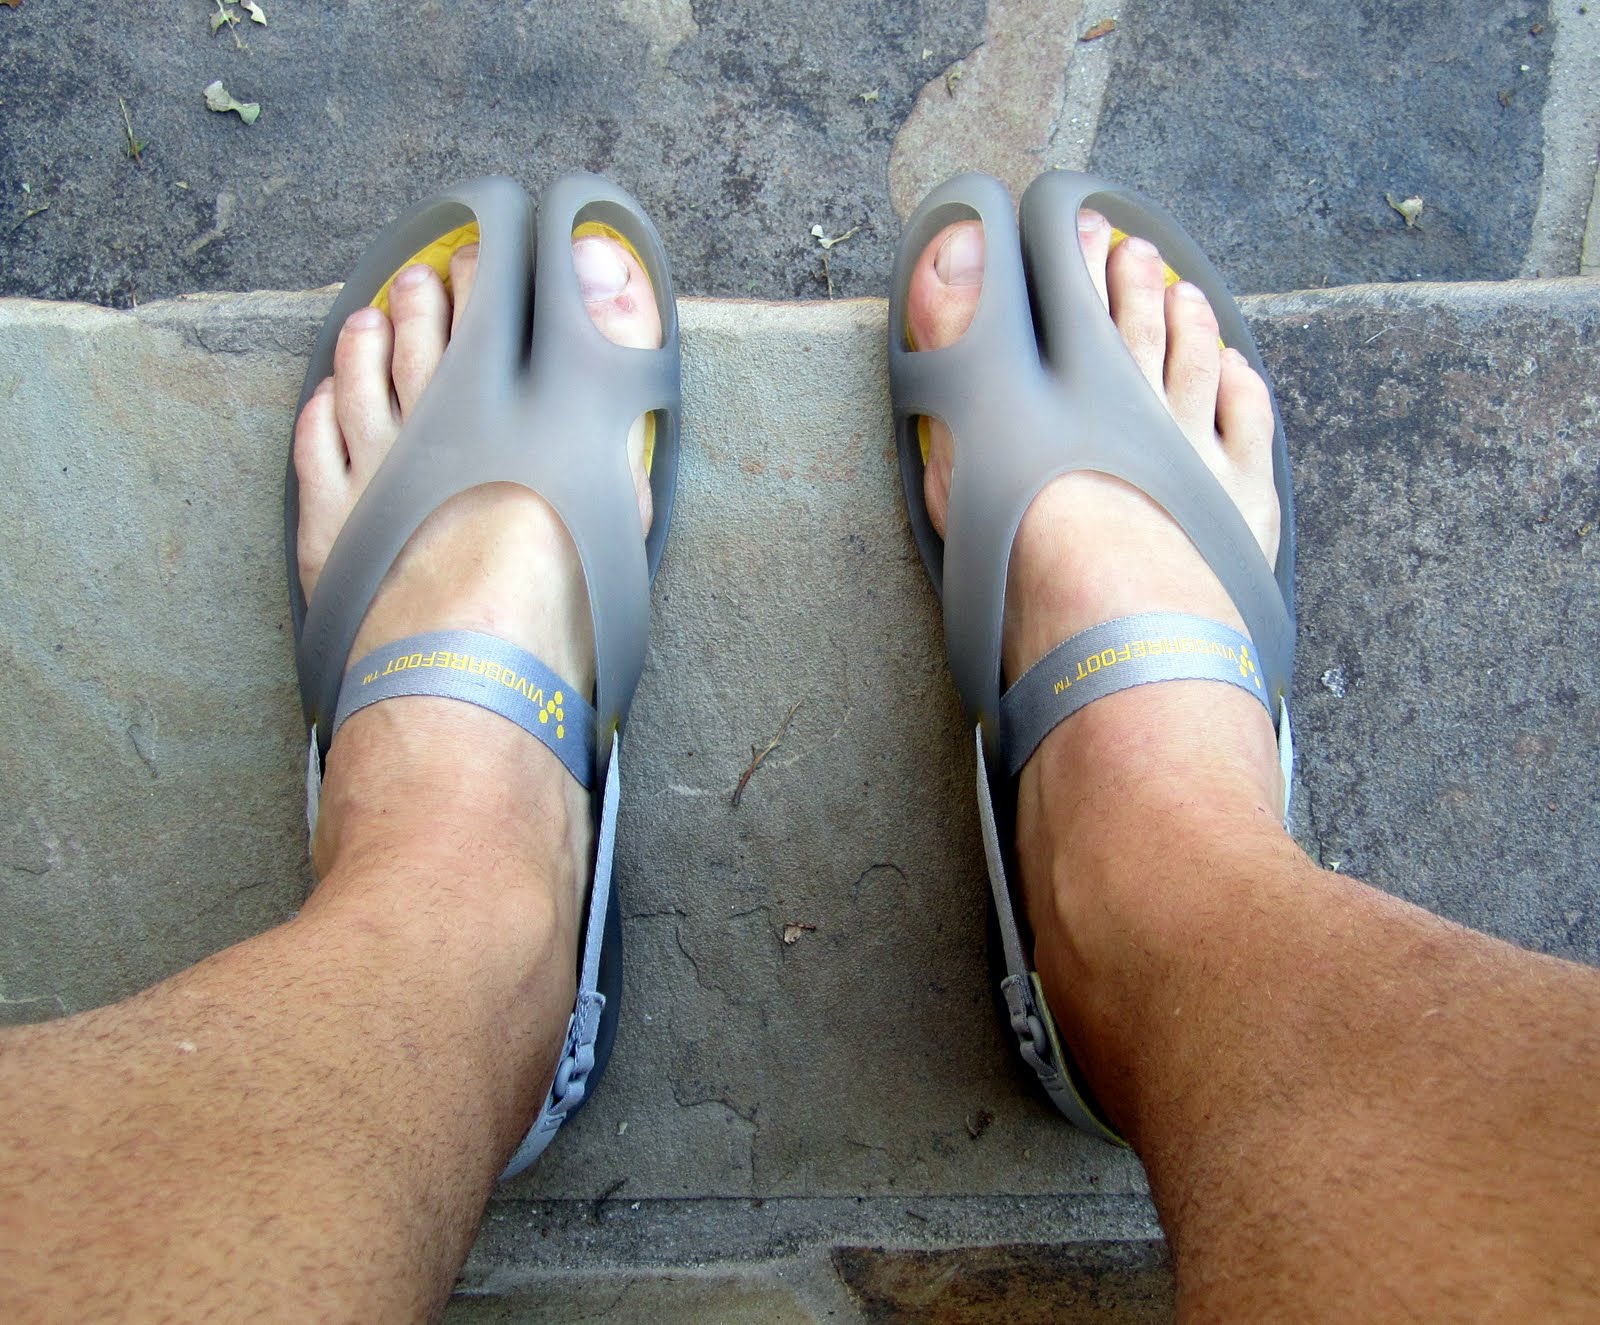
Finally, the price of the Achilles is also a nice middle ground between the cheaper, less durable minimalist styles on the market, and the high-end performance models that some companies (VIVOBAREFOOT included) stick on their "better than barefoot" creations. The sandal retails for $60 from the VIVOBAREFOOT website.

*Product provided by VIVOBAREFOOT
**See other product reviews on sidebar at right. If you have a product you'd like reviewed, contact me at info@runningandrambling.com.
Get updates as soon as they're posted! Click here to subscribe to Running and Rambling.
Check out the Running Life book for a collection of our most popular columns.
August 6, 2011
Random Shots of Beauty
Administrative note: I know I promised a VIVOBAREFOOT Achilles review this week, but I had a unexpected attack of post-Yosemite laziness, so that one's getting pushed to next week. Stay tuned.
*
In the meantime, here's your Random Shot of Beauty:

Daybreak under heavy fog near Soledad, California, taken this morning on my approach to the start line of the Salinas Valley Half Marathon. I basically ran the same high-mileage version as I did at last year's race (including the Vibrams), except I didn't take nearly as many photos; this year, I was leading a pace group in the half-marathon, and I figured that pulling over every quarter-mile or so to snap pictures might be frowned upon.
Pacing was a fun gig, but I have to confess that when it comes to deciding which part of the morning I enjoy more - sharing a race experience with hundreds of friends and fellow runners, or having the quiet beauty of the pre-race run all to myself - I'd pick the lonely miles just about every time.
Get updates as soon as they're posted! Click here to subscribe to Running and Rambling.
Check out the Running Life book for a collection of our most popular columns.
August 3, 2011
View From the Top

(Click to enlarge)
The Half Dome Hiking Club has a new member today. Full report to follow next week.
In case anyone is wondering: yes, I was very much aware of this terrible story that happened two days before our arrival - so to have my son's accomplishment safely completed gives me equal parts satisfaction and immense relief.
It was truly a day to be thankful for our blessings.
Get updates as soon as they're posted! Click here to subscribe to Running and Rambling.
Check out the Running Life book for a collection of our most popular columns.