
Matador Network's Blog, page 1080
June 7, 2019
Anthony Bourdain’s favorite hotels

If there’s one thing to learn from Anthony Bourdain’s hit CNN travel docuseries, Parts Unknown, it’s that good travel experiences should be anything but cookie-cutter. He taught us to seek out hand-crafted meals and throw any notion of a comfort zone to wind, showed us and that there are few occasions not improved by a cold beer or a stiff cocktail, and that random acts of kindness from a total stranger are one of life’s greatest joys. A good hotel should embody these characteristics, he believed, writing on the (sadly defunct) li.st app, “A hotel where I know immediately where I am when I open my eyes in the morning is a rare joy.”
“I want to find a hotel in a neighborhood that has charm and character — the sort of place where I can walk to a café, sit down and feel the place,” Bourdain told Money in a 2018 interview. “One with a unique look — old colonial hotels are a favorite.” These were Bourdain’s favorite hotels, according to his list entitled “Hotel Slut (That’s Me)“.
1. Chateau Marmont — Los Angeles, California

Photo: 4kclips/Shutterstock
Over 16 years in travel television, no hotel piqued Bourdain’s fancy quite like LA’s Chateau Marmont. Episode two of Parts Unknown’s first season put his love for this hotel on full display, and he said many times that the Hollywood property topped his list. “I would not feel cheated by life if I died in Chateau Marmont,” Bourdain told Travel & Leisure. “I love that hotel above all others.”
2. Chiltern Firehouse — London, England
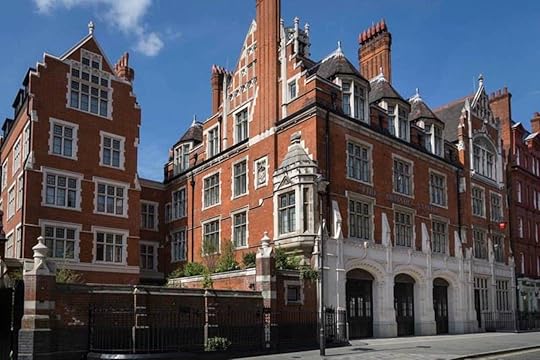
Photo: Chiltern Firehouse
“Pretty much perfection” is how Bourdain described London’s Chiltern Firehouse on li.st. The former Victorian firehouse turned upscale lodging property is the Chateau Marmont’s sister hotel, so it’s no surprise he liked it so much.
3. The Raleigh — Miami, Florida
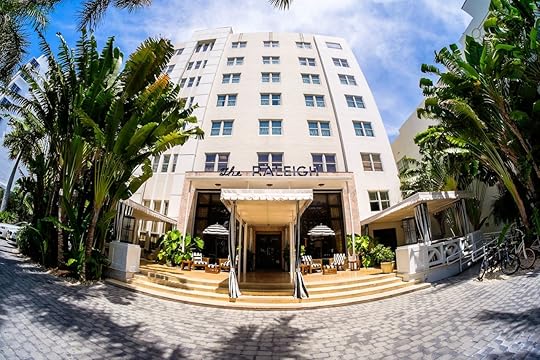
Photo: Fotoluminate LLC/Shutterstock
“The pool. The pool!” he writes. In season one, episode four of Bourdain’s often overlooked show The Layover, he spent 48 hours in Miami and overnighted at The Raleigh in Miami Beach. The hotel’s pool impressed him so much that it appeared on his Instagram.
4. Hotel Continental Saigon — Ho Chi Minh City, Vietnam
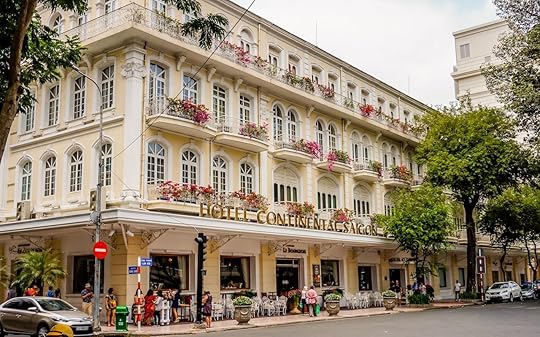
Photo: mizaki26/Shutterstock
Ho Chi Minh City’s Hotel Continental Saigon was one of Bourdain’s favorite Vietnam crash pads, which he loved “for the history.” This was Vietnam’s first official hotel, built in 1880. Frangipani trees planted that same year still line the outdoor dining courtyard, something Bourdain would surely appreciate, and not just because they look great on camera.
5. Hotel Oloffson — Port-Au-Prince, Haiti
View this post on InstagramA post shared by Angelika Marcella (@angelihamburg) on May 16, 2019 at 3:43am PDT
Haiti’s 19th-century, Gothic-style Hotel Oloffson basically makes you feel like you’re back in the 1800s — the place both looks and feels old. But that’s why Bourdain loved it, saying that it is “Sagging, creaky and leaky but awesome.” It’s also a frequent getaway for celebrities and high personalities, a nod to its luxurious ambiance and classic facade.
6. Park Hyatt — Tokyo, Japan
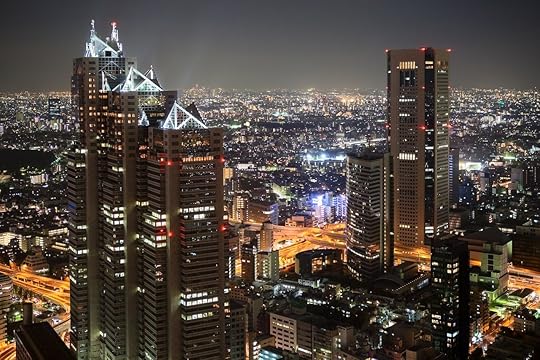
Photo: Kekyalyaynen/Shutterstock
The Park Hyatt Tokyo’s claim to fame — pre-Parts Unknown — was its appearance in Lost In Translation. Bourdain was a self-proclaimed film geek, but we suspect he also appreciated the unparalleled view of the city that kicked off his television career.
7. Edgewater Hotel — Seattle, Washington
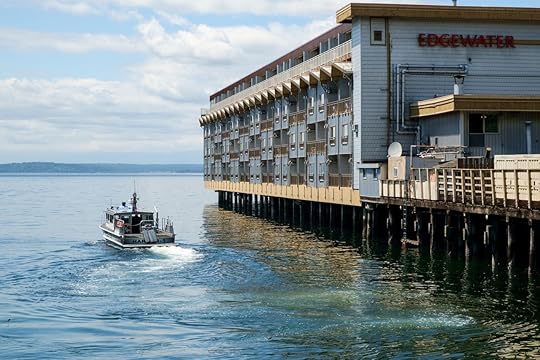
Photo: vewfinde/Shutterstock
Seattle’s Edgewater Hotel is the closest a visitor can stay to Elliot Bay within the city, one of the things Bourdain loved about the hotel. He wrote, “kind of a lumber theme going on… ships slide right by your window. And the Led Zep ‘Mudshark incident,’” which… we’ll let you read the details for yourself on that. Bourdain actually fished out the window of his room in The Layover episode in Seattle, saying, “Look Ma! Just like the Beatles! I got to fish out the window at the legendary Edgewater Hotel.”
8. Hotel Metropole — Hanoi, Vietnam
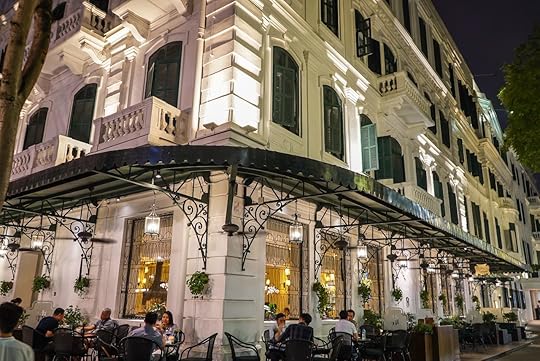
Photo: Benson Truong/Shutterstock
The on-screen highlight of Parts Unknown’s Season 8 opener was Bourdain’s dinner with President Barack Obama in Hanoi, Vietnam. But off camera, Bourdain fell in love with Hotel Metropole. He claimed he stayed here because writer Graham Greene had stayed in the same hotel, but it must have been the French-colonial architecture or streetside dining and drinking that hooked him.
9. Raffles Grand Hotel D’Angkor — Siem Reap, Cambodia
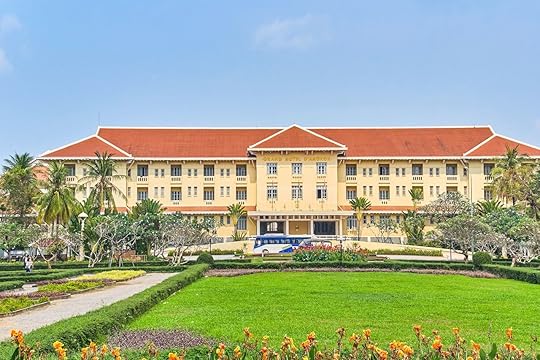
Photo: Pelikh Alexey/Shutterstock
“I’m a sucker for grand, colonial-era hotels in Asia,” Bourdain wrote, and the Grand Hotel D’Angkor is among the most iconic representations of colonial-era hotels anywhere on the continent. The lobby is accessed via a grand pebble driveway, with rooms opening to large balconies overlooking the expansive flower garden and pool.
10. The Murray Hotel — Livingston, Montana
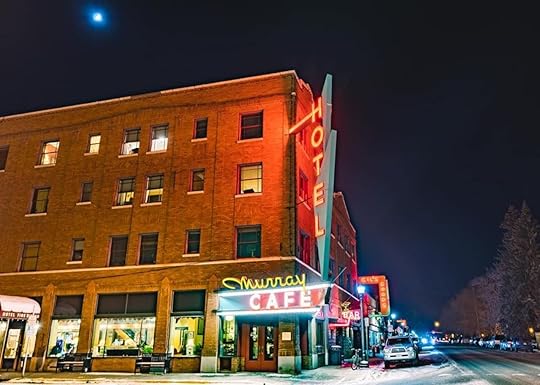
Photo: The Murray Hotel/Facebook
A century is enough time for any establishment to accumulate a story of its own. Bourdain appreciated the 110-year-long story of The Murray Hotel in Livingston and writes, “You want the Peckinpah Suite.” 

More like this: The 13 wisest things Anthony Bourdain said about travel
The post Anthony Bourdain’s 10 favorite hotels and why he loved them appeared first on Matador Network.


New Jersey schools LGBTQ history

New Jersey has just taken a major step forward in the fight for inclusiveness by becoming the second state in the country, after California, to require schools to teach LGBTQ history. The measure requires public schools to include lessons about the political, economic, and social contributions of gay and transgender individuals, as well as disabled persons, beginning in the 2020-2021 school year. Civil rights leaders believe the law will not only give students a more complete view of US history but also promote tolerance and acceptance within communities.
Jamie Brueshoff, who has a 12-year-old transgender child named Rebekah, openly supported the bill and said, “This bill is so important for our young people. They need to see examples of themselves in the history being taught and in classes they are going to each day. We know representation matters. By learning about LGBTQ people who have made amazing contributions to their country, they are seeing possibilities for themselves and hope for the future.”
The law was based on a similar law that took effect in California in 2012 and does not apply to private schools, including religious-affiliated schools. Last September, New Jersey also provided special guidance to schools regarding the proper use of names and pronouns when referring to transgender students. In February, another law went into effect making it easier for transgender residents to change their gender on birth certificates.
H/T: Northjersey.com
More like this: 12 queer companies that can help you plan your next vacation
The post New Jersey becomes second state to require public schools to teach LGBTQ history appeared first on Matador Network.

Boy calls out woman’s bad manners

We’ve all been in a situation on a plane where we wish we could call someone out on their disruptive behavior. Whether that’s talking loudly on their phone, leaning too far over the armrest, or not exercising proper hygiene, there’s always that one person we want to turn around and scold. Well, this four-year-old wasn’t shy about doing just that. Rodney Small was traveling with his father from Orlando to Houston when he smelled something amiss. Sure enough, the woman behind him had rested her foot on his chair’s armrest.
The boy turned to his father and said, quite audibly, “Some stinky feet behind me,” and then added, “It’s a lady!” Afterward, it appears he turned around to the woman and asked (quite reasonably), “Why do you have your feet behind me?”
The entire exchange was caught on video by Rodney’s father, Darryl, who had been filming with the hope of capturing his son’s reaction to takeoff. What he actually captured was much funnier, and the video has received over 57,000 views on Facebook at the time of publication.
“Sometimes adults hold back with confronting others to keep the peace,” said Rodney’s father, “but as a child, he voiced his concerns and his facial expressions and reaction made it hilarious. The lady quickly moved her foot and apologized to him, but as a parent, I was not offended at all. I found it humorous.”
H/T: Global News
More like this: You’re being rude when you board an airplane. Here’s why.
The post 4-year-old boy filmed calling out woman behind him on a plane for poor etiquette appeared first on Matador Network.

Ikea’s new biodegradable packaging

Sweden’s reputation for forward-thinking is continuing to grow. Ikea, the worldwide Swedish furniture giant, is planning to use biodegradable packaging made from mushrooms, which will replace polystyrene and can decompose in a garden within a few weeks. This new “fungi packaging” is part of Ikea’s efforts to reduce waste and promote recycling.
Mushroom Packaging was developed by Ecovative Design, by letting the mycelium grow around clean agricultural waste like corn stalks or husks. In the course of a few days, fungus fibers bind the waste together, creating a solid shape which then dries, stopping it from growing any further. Compared with polystyrene, which takes thousands of years to decompose, mycelium will biodegrade within just a few weeks.
Joanna Yarrow, head of sustainability for Ikea in the UK, said, “The great thing about mycelium is you can grow it into a mould that then fits exactly. You can create bespoke packaging.”
And the new Mushroom Packaging isn’t Ikea’s first sustainable innovation, either. It has already launched a vegetarian alternative to its famous in-store meatballs, due to concerns surrounding greenhouse gas emissions from raising animals for beef and pork.
“Ikea wants to have a positive impact on people and planet,” said an Ikea spokesperson, “which includes taking a lead in turning waste into resources, developing reverse material flows for waste materials and ensuring key parts of our range are easily recycled.”
H/T: National Post
More like this: The 8 most amazing, sustainable restaurants in the world
The post Ikea to use ‘mushroom packaging’ that will decompose in weeks appeared first on Matador Network.

Arranmore Island looking for people
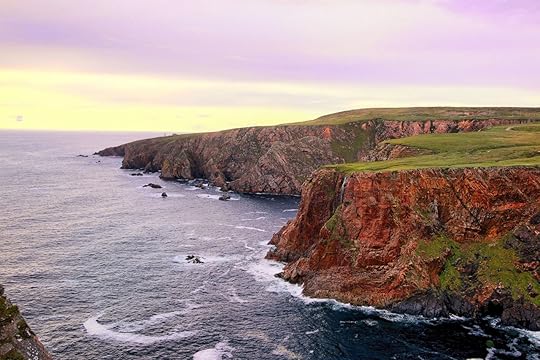
If you’re thinking about retiring to a quiet, remote community, this island in Ireland could be your next home. After its population dwindled to a mere 469 people, Arranmore Island, just three miles off the coast of Donegal, is looking for new residents. And perhaps surprisingly, it’s Ireland’s first offshore digital hub, making it perfect for remote and online workers. The island has written open letters to the people of the US and Australia imploring them to relocate to Arranmore, touting its high-speed internet and sophisticated digital resources.
Its letter to the US reads, “Your commute, no matter where you are, will only ever be five minutes. You’ll have the best diving in Ireland on your doorstep and seafood to rival the tastiest New England chowder. There are fewer people here than would fit in a couple of Amtrak carriages, but enough musicians and good Irish whiskey to keep the party going well into the night.”
The island itself measures just five by three miles, and is defined by dramatic cliffs, sandy beaches, and sea caves. Historically, traditional industries like farming and fishing have dominated the island, but they’re not enough to keep young people from leaving. The advent of high-speed internet, however, has changed the professional landscape of Arranmore, making it more attractive to workers from a broad range of digital professions. The island is now home to graphic designers, game and app developers, photographers, and artisan craftspeople.
Neil Gallagher, an Arranmore native and CEO of a tech company called Caped Koala Studios, said, “The digital hub means people working for tech companies like mine can now work on Arranmore. The set-up is as good as any city in the world, but the view is so much better.”
For more information about relocating, or to get a sense of Arranmore’s community, visit its Facebook page.
H/T: MSN
More like this: How to get a job and move to Ireland
The post This magical island in Ireland is looking for new residents from the US appeared first on Matador Network.

Uber Copter coming to NYC
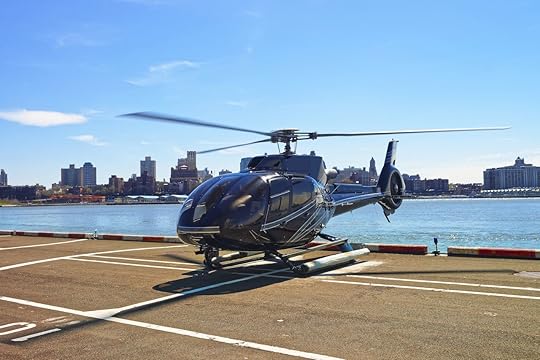
Traffic in New York City is notoriously horrific, and Uber is trying to give people an alternative to sitting in gridlock for three hours. This alternative is called “Uber Copter,” a service that flies people between Lower Manhattan and JFK Airport during the afternoon rush hour Monday to Friday. The option is only available for users who have achieved Diamond or Platinum status, which are the highest echelons of Uber’s user rankings.
Uber Copter is a full-service operation, including an initial car journey to a heliport near the Staten Island Ferry, the flight itself, and the final car journey to a helipad near Terminal 8 at JFK. Including the eight-minute flight, the entire trip takes around 30 minutes. Be aware that you’re only allowed to bring a personal item and luggage that weighs less than 40 pounds, and it’ll be weighed prior to boarding. In total, the trip will cost about $200 each way.
While flights are currently only available in New York, they may eventually expand to other cities if the service proves successful. Flights can be booked up to five days in advance, and will be available starting on July 9.
Uber Copter might be revolutionizing the convenience of the transportation game, but it’s probably not doing the environment any favors. With Uber Copter contributing to the city’s already excessive emissions, the helicopters may ultimately be doing more harm than good.
H/T: The New York Times
More like this: The 7 worst airports in the world for getting an Uber (and how to get one)
The post Uber helicopters are coming to New York City to get to JFK appeared first on Matador Network.

If need to know Japanese to travel
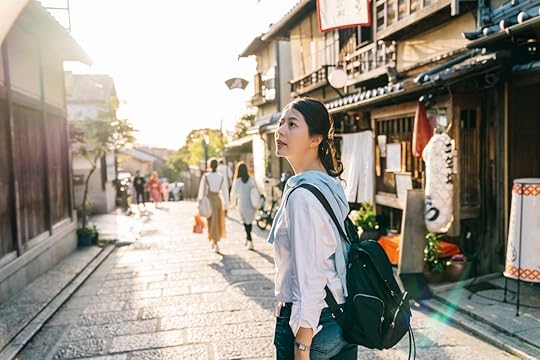
Best known for its dichotomy between ultra-modern cities and ancient cultural landscapes, Japan has an annual tourism growth rate among the highest in the world. Equally notable is its population of over 89 percent native Japanese people. While there’s been an increase in English-speaking initiatives as the small nation prepares for an influx of visitors for the Olympics in 2020, English is not widely heard or spoken outside of tourist epicenters. Therefore, getting by without knowing the language can be a challenge, but it’s still completely doable. If you’re considering a trip to Japan, here is a helpful beginner’s survival guide offering tips on how to navigate the country without speaking Japanese.
Ride the trains using basic knowledge of colors, numbers, and shapes.
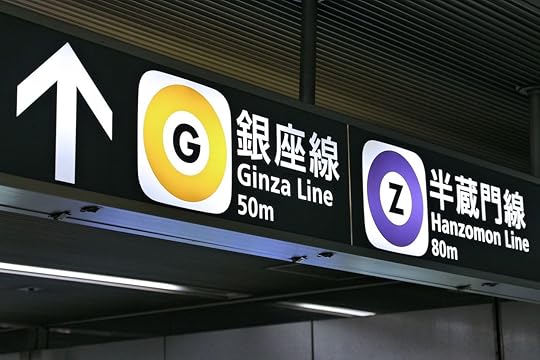
Photo: Tupungato/Shutterstock
Globally revered for its sophistication, cleanliness, and staggering punctuality, Japan’s railway system is an attraction in and of itself, serving over 20 million people every day in greater Tokyo alone. In the cities, train announcements are repeated in English and signs are written in both Japanese and Romanji — the romanization of Japanese that can be sounded out phonetically and read in alphabetical characters. For example, しんじゅく is followed by its Romanji, “Shinjuku,” which is the busiest train station in the world and located in the heart of Tokyo.
When in doubt, rely on an elementary understanding of colors, numbers, letters, and shapes. Each train line has its own color and abbreviation, and each train stop has its own number, so follow color-coordinated signs inside the station to ensure you’re on the right track — literally. Stop numbers should ascend or descend accordingly depending on the direction you’re going. Subtract the lower number from the higher number to determine how many stops your ride is in total.
To commute like a local, pick up a Suica card and avoid wasted time buying single-ride tickets. The prepaid smart card grants access to most public railways and buses, and it functions as an electronic wallet to make small purchases from vending machines, convenience stores, and select casual restaurants. Suicas cost around $18 up front, split into a $4.60 issuing fee and a $13.80 initial charge. They can be purchased and recharged at most stations and convenience stores. Note: They do not cover high-speed bullet trains (shinkansen) or long-distance buses.
If you’re making more than one long-distance trip, e.g. from Tokyo to Kyoto, the Japan Rail Pass, or JR Pass, is the most cost-effective option. A one-time fee of $300-600, which covers between seven to 21 days, will give you unlimited entry onto major railways, high-speed bullet trains, buses, and ferry boats. To be eligible for a JR Pass, you must be a foreign passport holder and a temporary visitor. JR Passes must be purchased before entering the country.
Maximize independence with these digital must-haves.

Photo: LINE
Pocket Wi-Fi
Wi-Fi is a must. If switching out your SIM card seems invasive, and mobile carrier options for staying connected while abroad are confusing or expensive, there is a simple answer in pocket Wi-Fi. The small, portable router provides high-speed internet and unlimited data for up to 10 devices including your phone and laptop, relieving the need to hunt down public Wi-Fi or buffer through a spotty connection. Pocket Wi-Fi is priced per day and available for online order, and you can pick one up at kiosks in Japanese airports upon arrival or have it delivered to your hotel.
Google Maps
Plug in the information and Google Maps will lay out exactly which steps to take by foot, car, or train with varied departure and arrival times, so you can choose the route that best fits your schedule. It will tell you when there are delays, how much fares will cost, and which station exit to use that’s closest to your final destination. If you don’t have a data connection, you can save the maps for offline use while you’re still connected to Wi-Fi.
LINE
For texts and calls, consider downloading Wi-Fi-based messaging app LINE, the most widely used social platform in Japan. Aside from a buffet of cute stickers and animations to decorate conversations, LINE offers free voice and video calls and does not require exchanging phone numbers to start a chat. An app-generated QR code or username is all you need, which allows for greater privacy and quicker connection to others.
Keep cash on hand to make everyday purchases.
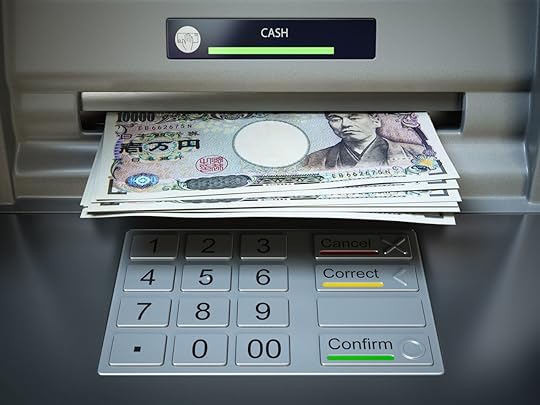
Photo: Maxx-Studio/Shutterstock
For better or worse, blending in and keeping the peace is important in Japanese society. For travelers, this means not disrupting the natural flow of things and conforming to norms, an important one being having cash.
Credit cards, Apple Pay, and cryptocurrency may hold up in other parts of the world, but in Japan, they won’t go far. The Japanese stick to the basics when it comes to money. Cash is king and the most efficient and common form of payment for daily purchases. Department stores, boutiques, restaurants, and bars in heavily trafficked tourist areas will accept card payment, but if you want to experience lesser-known gems and facilitate fluid transactions, preserving a healthy wad of bills is a priority. ATMs are your best bet, rather than money exchange services, and are available with an English language option in all major convenience stores.
Use convenience stores as one-stop shops for daily needs and a mental reprieve.

Photo: robbin lee/Shutterstock
Being “on” all the time while in a foreign setting can be tiring. The simplest tasks back home, like finding a trash bin or restroom can become daunting abroad due to unfamiliar territory and a stark language barrier. For a mental reprieve should filling the nooks and crannies of a jam-packed schedule catch up to you, convenience stores in Japan offer an ideal place to rest.
Unlike in the US, convenience stores in Japan are high-functioning hubs equipped with products and knickknacks to satisfy the needs of your daily minutiae. The Japanese use their 7-Elevens, Family Marts, and Lawsons in the purest sense of their purpose: as a resting stop to grab a quick drink or meal, pick up a necessary item, and even pay bills or pick up a package. Located on every street corner, there may not be an English word in sight, but there will be seats to take a breather and plan out your next move.
Eating out does not require a huge amount of conversation.
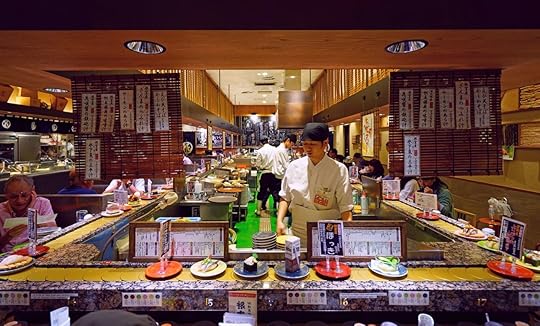
Photo: EQRoy/Shutterstock
The nature of everyday dining in Japan caters to the lone soldier and those in a hurry. Enjoying a meal alone is not only normalized but favored. Restaurants often have limited seating or a streamlined process with minimal to no human interaction. For those nervous about a language barrier, there are a number of options that will help you out.
Conveyor belt sushi
Also called kaiten sushi or a sushi train, conveyor belt sushi is the premier choice for hungry travelers with limited Japanese. All it requires is to sit down at an open seat and choose from a revolving parade of sushi, sashimi, and various small dishes. It is the ultimate visual menu where what you see is what you get. If a plate sparks your interest, claim it from the conveyor belt, and bon appetit. Or, itadakimasu, as the Japanese would say. Prices vary by plate color, pattern, and shape — again, surfacing skills acquired in kindergarten — and cost between one to five dollars each, a reasonable demand for sushi in its birthplace. When you’re finished, departing body language will summon a waiter to tally your plate count and guide you to the cashier.
Ticketed vending machines
Walk into most fast-casual restaurants and ramen shops, and you’ll be immediately greeted by a ticketed vending machine: a host, menu, and waiter wrapped into one bulky jukebox. Some will have photos, others will have letters or numbers corresponding to a photogenic menu displayed in the front window. Unfortunately, some machines will have only written Japanese, in which case intuition is your best bet for those with an open mind and palate. Insert bills into the machine and receive a paper ticket. Bring the ticket to an open seat, hand it to a waiter, and food will be on its way.
Two popular chains guarantee an English language option on their ticketed machines, Matsuya and Yoshinoya, the cheapest, most convenient hot meals money can buy. Guaranteed results with no awkward hand signaling or stammered Japanese required.
Learn essential, catch-all phrases to use in every interaction.

Photo: PR Image Factory/Shutterstock
All this being said, the true secret to getting around in Japan is, of course, knowing a little Japanese. These brief phrases will take the edge off and carry you farther than you think:
Thank you: arigatou gozaimasu
The most basic verbal gesture of human decency to show your appreciation, nowhere more important than in Japan.
Excuse me: sumimasen
Use this when pardoning yourself on a busy street or train, calling a waiter over to your table, or when you need to ask for something.
Please: onegaishimasu
This is good to use when speaking to anyone you are asking something of. For example, getting directions or a recommendation. Onegaishimasu can also be thought of as “thanks for helping me” or “thank you for your kindness.”
I’m fine or no thank you: daijoubu desu
You may use this phrase to decline something. Or, if you want to tell someone you are, or something is, okay as is.
Yes: hai
When in doubt, say yes!
I don’t understand: wakarimasen
Let others know you don’t understand what they’re saying, and they will likely switch to their best efforts in English or leave you alone.
For more good-to-know phrases, visit the Japan Travel Centre. If you really want to impress locals, check out our guide to Japanese idioms.
Be mindful of social etiquette.
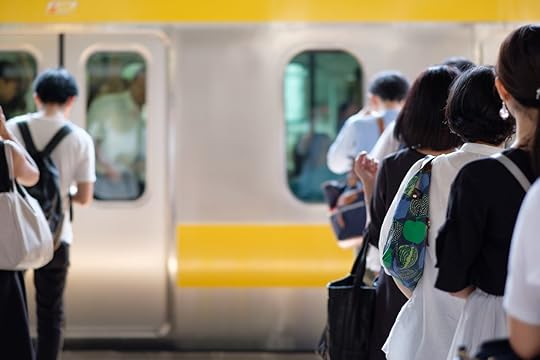
Photo: Benoist/Shutterstock
To authentically communicate in Japan is to understand and speak its unofficial language: a fundamental common courtesy. If there is one piece of wisdom to keep in mind as a foreign visitor, it’s be mindful. The Japanese value group needs over individual gain and operate at a more diligent default setting than most around the world to keep a harmonious society. Not speaking on trains, maintaining polite body language, properly disposing of trash, and standing on the correct side of an escalator are all good starting points, but upholding yourself to the same degree of integrity as the Japanese will dismiss any hiccups you may face by not knowing how to speak the language.
Ganbatte! That means good luck.
More like this: A perfect day in Tokyo in 12 beautiful photos
The post How to survive Japan without speaking Japanese appeared first on Matador Network.

What to do in Hat Yai, Thailand
Thailand is an entry point to Southeast Asia for many travelers, drawn by the allure of fresh street food, cheap lodging, and epic parties. Many of those visitors, however, stick to a well-trodden route — namely Bangkok, Chiang Mai, and Phuket — and leave a vast majority of the country uncovered. This is their mistake, and you should use it to your advantage. Not that you don’t need to see those places, but a comprehensive Thai experience includes a visit to Hat Yai. This southern Thai city is both cheaper and less frenetic than Bangkok. Explore slightly further than the metropolis and you’re in a completely different domain — a land of open beaches and a massive seven-story high waterfall. Here are five reasons why you need to visit this underrated Thai city.
1. Hat Yai is Bangkok’s laid-back, cheaper cousin.
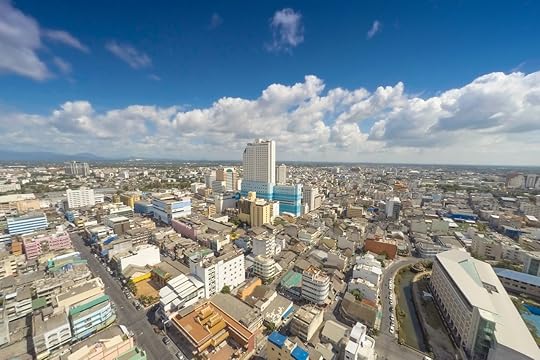
Photo: anantachat/Shutterstock
Hat Yai’s stark difference compared to destinations more popular with western tourists is the type of traveler it attracts. Not to bash the city’s nightlife, but being somewhat of a travel secret of its own, this southern hub shies away from the pulsating nightclubs found in the capital and on the islands. Its tourism is built mainly of Malaysian and Singaporean visitors, attracted as much by the natural surroundings as the city life itself. It’s a smaller city, but even then, the lack of western tourists is surprising because, besides the cosmopolitan flair of rooftop bars and shiny hotel-operated riverboats, it has most of the things that appeal to Bangkok visitors. And it has them for even less money.
It’s still totally possible to spend under $200 over the course of three days here. A plate of Pad Thai can be found for $0.80. Mango sticky rice is even cheaper at $0.30 while in Bangkok, you’ll pay up to $2.55. A tuk-tuk ride across the city will cost you about $0.60, and it may be even cheaper if you’re riding with others — the cost of transport is typically shared evenly among all passengers.
The restaurant scene, like the nightlife scene, is also far more casual than that of Bangkok. Pull up a stool at a random street vendor and settle in for a plate of mango sticky rice or coconut ice cream, both of which are common and cheap. Due to the high number of visitors from Malaysia, you’ll also find many stalls catering to the Muslim tourist. Expect to see plenty of fusion dishes you wouldn’t find easily elsewhere in Thailand — just don’t expect to see a lot of pork. Order a freshly caught crab dish instead and, per a local’s tip, top off your meal with a foot massage from the nearest massage vendor for a truly chilled out experience.
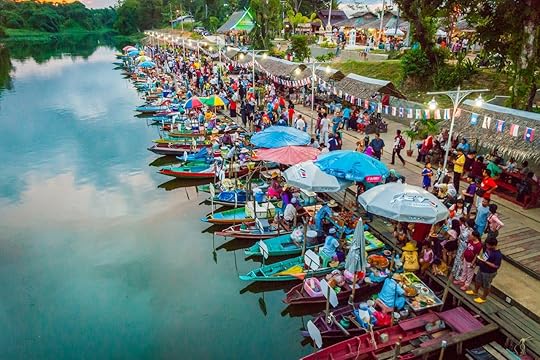
2. The day markets are beautiful and relaxing.
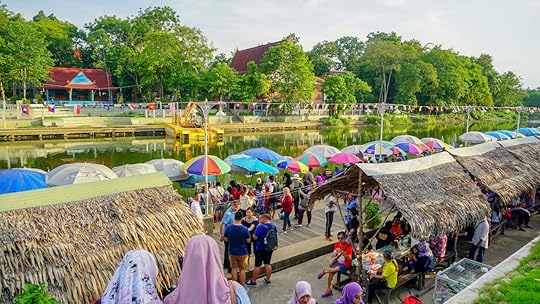
Photo: TAUFIK ART/Shutterstock
The Khlong Hae Floating Market is a big part of local life in Hat Yai, and the ease of experiencing it and lack of crowds separate it from Bangkok’s. Here, vendors pull their boats up to the water’s edge and hawk wares straight to buyers. To fully soak up the atmosphere, wander along the canal side and strike up a deal when something catches your fancy. The markets are only open on weekends, and the earlier you get there, the better, especially if you’re actually out to find a specific food item or souvenir.
Another popular day market is the Kim Yong Market on Supasarnrangsan Road. Tropical fruits, dried chilies, smoky grilled meats right off the grill, and anything you may have forgotten in your hotel room — a change of clothes, snacks, beachwear — are on offer here. This is also a great place to put those bargaining skills to good use. The city’s rickshaws line up along the roadside starting at around 6:00 AM, and you’ll want to get there early for the best pickings.
3. And the night markets are delightfully chaotic.
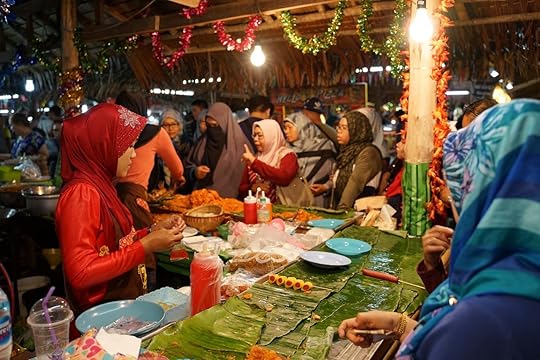
Photo: imrankadir/Shutterstock
Hat Yai also has three separate night markets within walking distance of the center of town. The two-story Asean Night Bazaar is similar to the Kim Yong Market in its thorough diversity of offerings — but tailored to a more frenzied evening crowd that’s left the day’s to-do list far behind. It’s livelier, louder, and generally has the air of a raucous festival event. The largest and newest mall in southern Thailand, Central Festival, attracts all kinds of travelers and is the most streamlined of the bunch.
Next up is the open-air shopping at Greenway Night Market, which is more like a commercial mall than the Bazaar. Greenway Night Market is the city’s largest food haven and is divided into 26 zones, so be sure to note where you are when you come in. An almost overwhelming amount of stalls sell all sorts of snacks and finger foods like takoyaki, coconut jelly, and icy blended drinks. Among the most popular is a stall called What Koa Cheese by TTT. Similar to an Amsterdam fries shop, this vendor serves generous portions of hand-cut fries. In addition to the traditional hot and melty cheese sauce, you can have your fries slathered with nori, BBQ, paprika, or pizza sauces. All this should run you only $1.50.
4. You can easily escape the city for a hike in the forest.
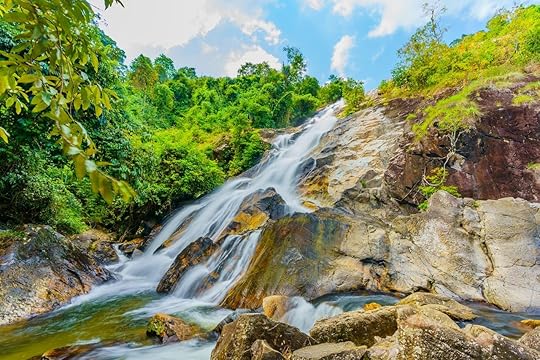
Photo: LegendORC/Shutterstock
Part of city travel is getting out of town for a dose of nature, and the best place to do that near Hat Yai is the seven-story Ton Nga Chang Waterfall, the top attraction in the wildlife sanctuary of the same name, located about 17 miles outside of the city. Reach the sanctuary by motorbike or by hiring a tuk-tuk, a trip doable in a half day or less. Most visitors stay down below the cliffs that the waterfall tumbles over, but if you venture up higher, you’ll enjoy views of the surrounding greenery without working up too much of a sweat (though this is Thailand, so don’t plan to be perfectly dry). The jungle vista from the second tier is already stunning, but once you’re up on the seventh, you have an unrivaled view of the huge primeval forest beyond the waterfall. Plastic bottles are not allowed on the trail, so it is best to bring your own bottle and have it refilled at one of the food stalls nearby. Do wear sports shoes as the excursion requires climbing up the steep slopes to the upper tiers.
5. Beach access is easy.
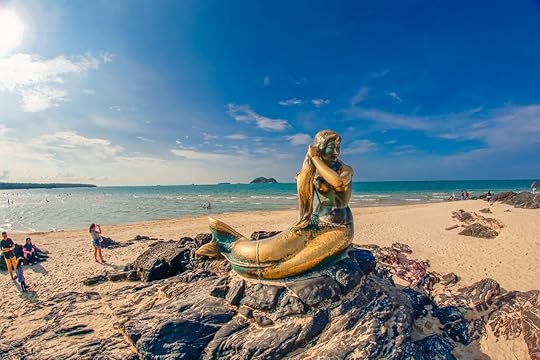
Photo: Fiqah Anugerah Dah Besa/Shutterstock
And, because you’re in southern Thailand, a trip to the beach is in order. The long stretch of sand and famous mermaid statue at Samila Beach are the city’s primary sunbathing spots. Though not as visually stunning as the beaches in Trang to the South, Samila is pretty darn secluded and still manages to offer some of the best scenery of the expansive Gulf of Thailand offshore. A five-minute drive from the beach leads you in the somewhat hidden Khao Kao Saen, a scenic park and fishing village a couple of miles outside of town with a temple at the back open to the public for worship or a quick walk-through. Few non-Thai visitors travel here, making this is your best chance to find a bit of solitude. With massive and jaunty rocks to climb on, you’re bound to find an ocean view that rivals those in Phuket.
More like this: The definitive guide to the best street food in Thailand (and where to find it)
The post Hat Yai is the chillest big city in all of Thailand appeared first on Matador Network.

Cycling through Death Valley
The typical trip to Death Valley National Park is a quick one. Enter the park by car from the east or west side, stop at a handful of key spots for pictures, maybe take a short hike, and work your way out the other side. It’s hot — the average summer high temperature hovers around 110 degrees and is often higher, with the odds of an afternoon rainstorm to cool off the sweltering landscape landing, at best, slightly above no way in hell.
As such, this park in eastern California may appear to the casual national park enthusiast as a mere blip on an otherwise star-studded itinerary through America’s western heartland. But for anyone seeking a new take on the iconic national park, cycling across Death Valley may be your next adventure. Here’s how to make that happen, but be forewarned — be ready to sweat, grind, and curse yourself through one of the most rewarding excursions on federally protected land.
First up: preparing yourself
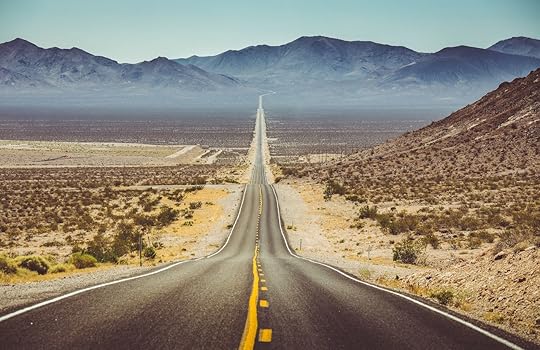
Photo: canadastock/Shutterstock
Death Valley is known for its suffocating heat, stifling aridity, and for being the site of the lowest point in the western hemisphere — Badwater Basin — 282 feet below the level of the sea. Yet the national park is the largest outside of Alaska, at 3.4 million acres, and all of the park’s paved and dirt roads that are open to vehicles are also open to bicycles. And with more than 750 miles of tarmac and dirt track waiting to be explored, the park deserves the kind of up-close, slow-paced experience that cycling provides.
Located fewer than 200 miles away from both the Grand Canyon and Yosemite, two of America’s most beloved and visited national parks with 6.3 million and 4 million visitors in 2018, respectively, Death Valley attracts a paltry 1.7 million annual visitors. Other than the occasional car whizzing by, you’ll essentially have the place to yourself. Have backup bike gear and a first-aid kit in your pack. This route is easy to follow and follows established highway the entire time — but it’s 250-plus miles from Las Vegas to Lone Pine, California, lined with curves and one rather intense mountain pass in the heart of the park. It’s not for the casual bike commuter — but that said, you don’t need to be a pro rider either. If you’re in good physical condition and are adept at route planning, camping, and waking up early, you have the basic criteria. Here are some considerations to work out before leaving home:
Drop off and pick up. You and your party need to arrive on the east side of the park, in Nevada, with your bikes, backpacks, water, food, and all necessary equipment. On the other end, you’ll find yourself in the tiny town of Lone Pine, exhausted but enchanted, and will need to get back to where you came from. You can take the Eastern Sierra Transit bus to Mammoth Lakes or Reno and fly out from there or arrange for pickup on your own.
Any functional touring or mountain bike can be up to the job if maintained properly and outfitted correctly. But your fitness level will be the determining factor for how far you can ride each day and whether you can ride over the mountain passes or be forced to walk your bike or hitchhike (and remember, people are few and far between). Know what to expect from your bike and, learn the ins and outs of maintenance before you go.
Pack enough tools and spare parts for your trip. Depending on your exact itinerary, this can include a few spare tubes, a patch kit and pump, and various wrenches for screws, bolts, pedals, and perhaps even axles. If you find yourself on a remote dirt road needing to replace a broken chain link, you’ll be happy you brought a chain tool and spare links. You may not need to replace your rear cassette while touring, but you may well need to remove it to replace a drive side spoke or two.
We all know the saying about best-laid plans, but sometimes making last-minute changes — due to road closure, weather, or another factor — can lead to the most exhilarating and rewarding moments of our trips. Your plans will get you started, but your ability and willingness to adjust on the way will ultimately get you where you want to go.
The real limiting factor on how far you can ride each day will probably not be your gear but you. Don’t push yourself too hard — there’s never any shame in stopping for a rest.
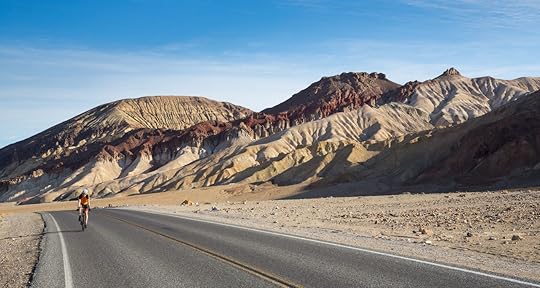
Consider your starting point.
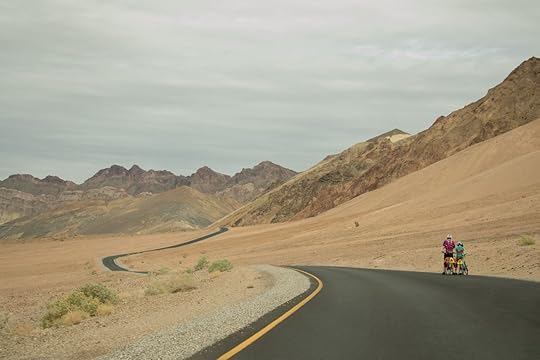
Photo: V-ron/Shutterstock
While the notion of crossing the park from boundary to boundary might be romantic, you must consider the logistics of your arrival and departure. An east-to-west route can start in Las Vegas, where you can rendezvous with your travel buddies and assemble your bikes. This was the route a friend and I chose for our recent excursion, cranking our way out of Sin City into the wind for most of the first day’s 85 miles on US 95.
This busy, two-lane highway has wide shoulders, making for a comfortable ride. The best place to stop for lunch is in Indian Springs, Nevada, 45 miles outside of Vegas. We ate under an aluminum carport next to a grocery store here, watching drones from nearby Creech Air Force Base circle overhead. Later, we took another break under an overpass on the outskirts of Mercury, NV, a closed-to-the-public town on the southern end of the Nevada Test site, where the US Department of Energy conducted nearly a thousand nuclear tests between 1951 and 1992.
Amargosa Valley, Nevada, located at the junction of US 95 and State Route 373, could be an alternative starting point to cut out the first day, assuming you can get yourselves and your bikes there. This is where we camped on our first night, comfortable in a rest area across the highway from a fireworks stand, brothel, and the Area 51 Alien Center, a kitschy gift shop presumably filled with UFO bric-a-brac. The below map outlines the route from start to finish.
Wait out the hottest part of the day.
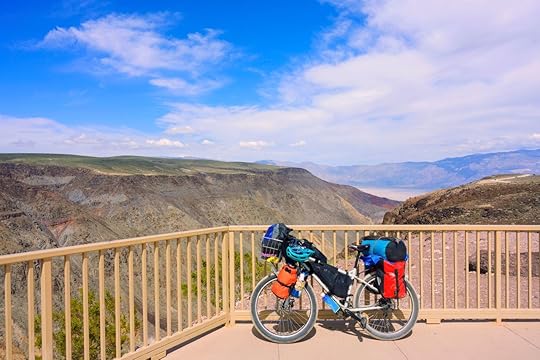
Photo: Jantira Namwong/Shutterstock
The key to pedaling across the park is to plan your day to take advantage of the cooler morning hours for most of your day’s miles. Get started in the early morning — it’s tough to sleep in when the sun starts pounding down anyhow — and push on until lunch. Use the afternoons to rest and beat the heat. This is true even on day two, your first day within the park itself.
Cross into California onto State Route 127 before turning west at Death Valley Junction, and climb State Route 190 along the southern slope of the Funeral Mountain Wilderness Area. After 11 miles of climbing, you’ll drop toward the national park and enjoy a 3,000-foot descent over 20 miles to Furnace Creek. Don’t miss the photo opportunities at the park’s entrance sign and at Zabriskie Point, where you can gaze over the rust-colored Furnace Creek rock formation or take a short hike to view the surrounding badlands. Furnace Creek campground is the ideal camping spot for night two, your first night in the park.
This puts you at right around 50 miles of riding on the day and, in all likelihood, ready for a well-deserved evening of relaxing at the campsite. Just remember that each of the park’s public campgrounds are first-come, first-served with payments to be made on-site. Bring cash, and check in as early as possible. Three campgrounds are available there — check seasonal opening and closing dates for Furnace Creek, Sunset, and Texas Springs campgrounds.
On the way in, don’t miss the visitor’s center where you can fill your water bottles, watch a 20-minute film about the cultural and natural resources, and pay your fee of $15 for individuals without a vehicle. While at the visitor’s center you also can check on road conditions and weather. Here is also where you’ll grab free backcountry camping permits and inquire about where you’re allowed to camp.
Plan your itinerary based on water.
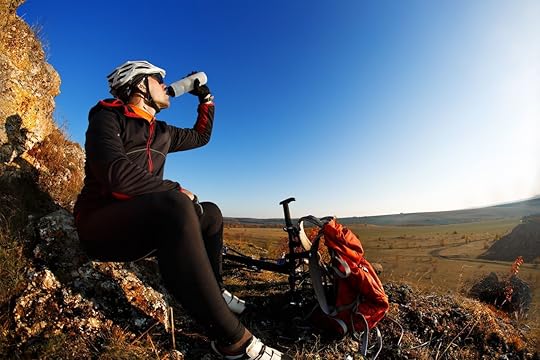
Photo: Oleksiy Rezin/Shutterstock
Staying hydrated cannot be overstated. The physical exertion of such a ride — plus temperature and weather conditions — will put huge hydration demands on your body. Be equipped to carry more than enough water than you think you will need, then carry more still — a CamelBak pouch plus a canteen, at the very least. Also, check at the visitors center or call ahead to find out which facilities have potable water, and plan your stops throughout each day based on those places.
Our original itinerary had us pedaling north from Furnace Creek on State Route 190 on day three, then continuing north on Scotty’s Castle Road until we met Big Pine Road, which would take us over the northern mountains and finally out of the park toward Big Pine. But when we considered our water resupply points along the route, we decided instead to continue on 190 and exit the park through Stovepipe Wells and Panamint Springs toward Lone Pine.
After camping off the main road and starting early again, we pulled into Stovepipe Wells around mid-morning on our third day, where I was humbled and more than a little embarrassed to be standing outside the gas station with my thumb out, trying to hitch a ride over 4,956-foot Towne Pass, the saddle between the Panamint Range and the Cottonwood Mountains.
The 30-mile section between Stovepipe Wells and Panamint Springs, in the next valley over, is the shortest full day in terms of mileage, but the arduous 14 miles over the pass is the steepest climb on the entire ride. Your reward on the other side is Panamint Springs Resort, which has camping facilities but also rustic lodging accommodations if you prefer a night tucked into an actual bed.
From Panamint Springs, ride the next morning up the winding road past Father Crowley Overlook and toward the park’s western exit through the Coso Range. I walked my bike off and on during this part of the trip, exhausted, while my partner rode on. I eventually reached the last pass around Saline Valley Road and began the long descent against the wind and joined State Route 136, which loops into Lone Pine. The final night of the trip can be camped in a municipal campsite in the evening shadow of Mt. Whitney, the highest point in the 48 contiguous states. At this point, you’ve successfully pedaled Death Valley National Park.
More like this: 7 amazing bike tours you should take this summer
The post How to plan a cycling trip across Death Valley appeared first on Matador Network.

June 6, 2019
Phoenix to Grand Canyon road trip
If you’ve come all the way to Phoenix from another point in the world, then you absolutely must take a day to visit the Grand Canyon, the natural wonder of the world Arizona is known for. Formed by a geologic erosion in the desert, showcasing different rock layers, the canyon’s sheer size at 277 miles, up to 18 miles in width and depths of a mile, overwhelms visitors. But it is its beauty rather than its size that makes it memorable. The changing colors of the rocks combined with their sharp edges, along thousands of formations as far as you can see, will leave you in awe.
This unique combination of geological form, size, and color makes this natural wonder deservedly popular. You simply need to see it, even if you have to fight the crowds while there. The South Rim of the park is open year-round, and entrance fees are $35 per vehicle, $30 per motorcycle, or $15 for someone arriving on foot for a seven-day pass; annual passes are $70 for just the Grand Canyon, but it’s well worth springing for the $80 pass to all national parks at that point.
Though it makes for a long day, it is possible to visit the Grand Canyon from Phoenix in one day. And while your main destination is the canyon, you have an opportunity to see a few other sites, including ancient ruins, a city in the pine forests, and a Native American trading post. So make sure you get up early and hit the road for the best experience of your Arizona vacation.
Stop at Montezuma Castle National Monument.
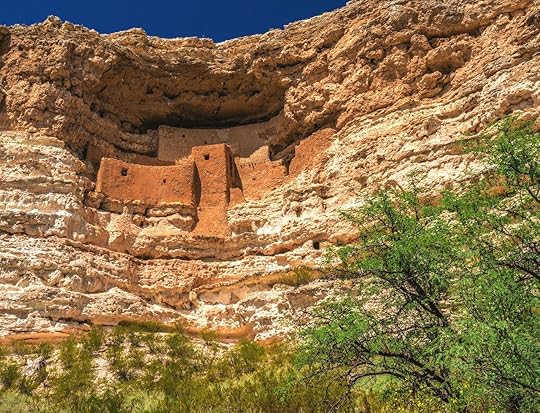
Photo: Abbie Warnock-Matthews/Shutterstock
Get up really early and grab a quick breakfast, then head up North towards Flagstaff on I-17. After about 30 minutes on the road, you’ll see signs for Montezuma Castle National Monument.
Though it has nothing to do with Montezuma, and it’s not really a castle, this national park is worth a stop. You’ll learn about the ancient inhabitants of the Arizona desert, who built a structure impressive enough to have early explorers call it a castle and believe it to be the home of the famous Aztec king.
While Montezuma and the Aztecs lived thousands of miles South of this area, the ancient inhabitants of the desert were just as ingenious. They carved entire villages inside the walls of the surrounding desert limestone. Called cliff dwellings, these sites are prevalent in the US Southwest, and Montezuma Castle is one example.
The five-story-high structure you’ll visit here, built around 1150, housed about 50 people. Called Sinagua, meaning without water, those who lived here were the ancestors of the modern Pueblo people of Arizona, including the Hopi and Yavapai.
Even the name Sinagua is a misnomer though. When you visit, you’ll see a canal the ancient villagers built. While in the summer months it looks like a dry riverbed, in the winter you’ll see water flowing through it.
Give yourself about 30 minutes to an hour to visit the site, then get back on I-17 North and drive to Flagstaff.
Take a break in Flagstaff, the Arizona city in the pines.
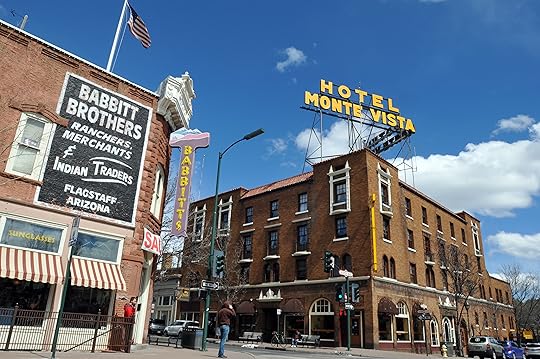
Photo: BD Images/Shutterstock
At the foot of the highest mountain range in Arizona, the San Francisco Peaks — also known by locals by its original name, the Kachina Peaks — Flagstaff is surrounded by tall ponderosa pines. In stark contrast with the desert where the trip began only two hours earlier, the town offers a respite from the sweeping vistas, low vegetation, and heat, especially if you’re visiting in the summer.
Take some time to enjoy the surroundings and the fresh pine-scented air here. After parking at the Historic Train Depot and Visitor Center, walk inside to learn about the town and its surroundings; you can even watch a train go by if you’re there at the right time. Then walk across the street and stroll through Downtown Flagstaff, stopping for an espresso at Firecreek Cafe.
Offering a variety of restaurants for all tastes, Flagstaff is a good place to grab lunch if you stay here long enough. However, for authentic Southwestern fare and setting, wait until your next stop for your midday meal.
Drive on to the Grand Canyon.
From here, you have two choices to drive on towards the Grand Canyon. If you are visiting mid-week, and off-season, you could take Route 180 Northwest towards the South Entrance to the park. However, this route is busy and the main entrance gets crowded, with long lines of cars waiting at the gate. To avoid standing in line to get in, and drive through some beautiful high-desert scenery, we recommend taking Highway 89 towards Cameron.
Stop at the Cameron Trading Post for lunch and shopping.
Stop at the historic Cameron Trading Post for lunch at the restaurant on the premises, where the menu reflects its Native American roots though you can get Mexican and American fare, too. We recommend trying the Navajo tacos made with authentic fry bread, ground beef, beans, and mild green chilis. The generous portions might be enough to share.
Then, visit the art gallery and browse through Native American arts and crafts, including Navajo etched pottery, sand paintings, jewelry, and rugs. If you are there at the right time, visit the rug room and watch a weaver demonstrate the art of weaving a Navajo rug.
After this stop, continue on the scenic Route 64, also called Desert View Drive, to the East Entrance of the Grand Canyon.
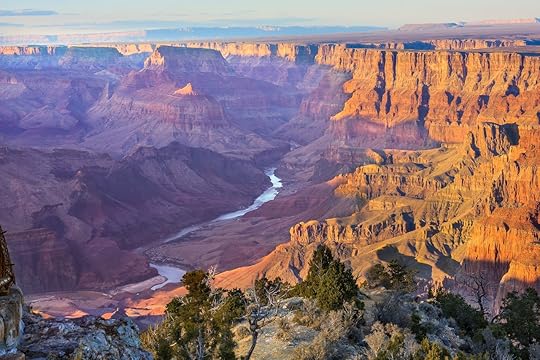
Desert View Point and the Watchtower
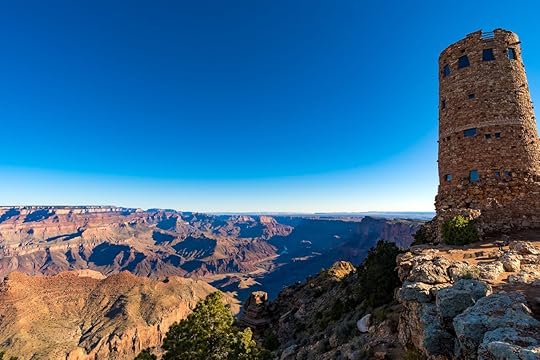
Photo: segawa7/Shutterstock
Stop at the Desert View Point for your first glimpse of the Grand Canyon and some of the most spectacular views of the famous landmark. This viewpoint is one of the few places on the rim where you can see the Colorado River at the bottom of the canyon and the Painted Desert to the east.
But the view is only the beginning. Desert View offers a look into the history, art, architecture and Native American culture. The Watchtower, built in 1932, is one of the best works of renowned architect Mary J. Colter, who modeled it after structures built by the ancient Puebloan people. Take your time walking up the tower, and enjoy the original murals of known Hopi artist Fred Kabotie on the first landing. Climb up the spiral stairway to the Kiva Room, and look through the telescopes for a different view of the canyon, the river below, and the Painted Desert in the far distance.
The Main Visitor Center
Continue on to the Main Visitor Center and park your car. Learn about the Grand Canyon from the exhibits, pick up a map and brochure, or buy a ticket to one of the tours or programs you might like to join. Then, you have a choice of taking the free shuttle through the rim, walking, or renting a bike for your further explorations.
Walk the Trail of Time.
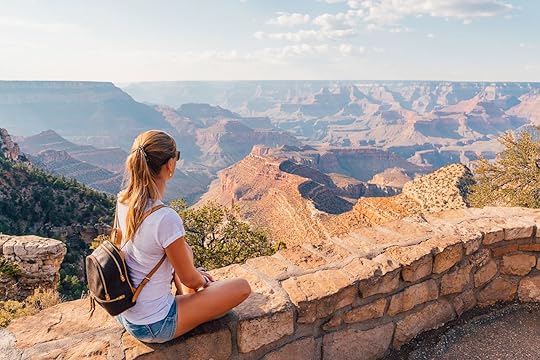
Photo: Ingus Kruklitis/Shutterstock
After a short stop at the Visitor Center, we recommend walking the Trail of Time to the Grand Canyon Village for great views of the Canyon and even solitude on some stretches. At 1.7 miles, the Trail of Time is short enough to enjoy walking it without feeling overwhelmed. This interpretive section of the Rim Trail uses age markers, signs, and rock samples to represent the geological timeline of the Grand Canyon. The exhibits along the trail showcase rocks of the canyon taking visitors on a 2,000 million years old geological journey through the history of the Earth. Each brass marker represents one million years of geology, where you can stop and learn about the layer of rocks in the Canyon representing each particular time. Enjoy this walk through geologic history and gorgeous views while making your way to the Grand Canyon Village.
Grand Canyon Village Historic District
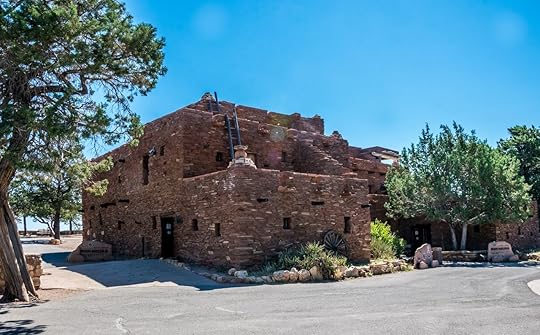
Photo: Konoplytska/Shutterstock
Whether you walk the whole distance or get on the shuttle in between viewpoints, you’ll make it to the Grand Canyon Village. Built to accommodate tourists in 1901, when the railroad was completed, it brought large numbers of visitors to the Grand Canyon. Most of the buildings originate from that era, so they are worth a look.
But before exploring the historic village, make a reservation for dinner at the El Tovar Dining Room in the historic El Tovar Hotel, built in 1903.
Walk across the street for a look at the Train Depot, another national historic landmark, built in 1901 and still working, welcoming visitors who take the train from Williams. Then visit and spend some time in the Hopi House, dating from 1904 and designed by Mary J Colter. While enjoying the architecture of the building, browse the array of Native arts and crafts available. Return to El Tovar before your reservation to spend some time in the lobby and learn about the history of the building.
Dinner
With a menu that reflects the Southwestern culture, and views of the Grand Canyon, the elegant El Tovar Dining Room is the perfect setting for your main meal at the park. Meat lovers can enjoy a hand-cut Arizona-grown fillet mignon while those who prefer seafood should try their signature salmon tostada. Vegetarians are not left out, either, with choices like the falafel platter with mixed greens, hummus, quinoa, and tzatziki.
Watch the sunset across the Grand Canyon.
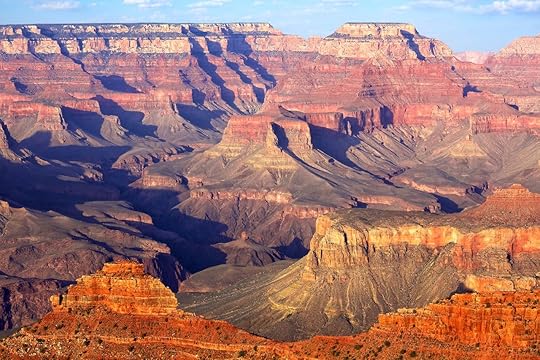
Photo: dibrova/Shutterstock
For a perfect end of the day, watch the sunset over the Grand Canyon before heading back to Phoenix. There will be crowds trying to nab the perfect photo, but the Canyon is pretty big — you’ll be able to find your own little spot to enjoy the best view of the state.
Look at the night sky through a telescope at Lowell Observatory.
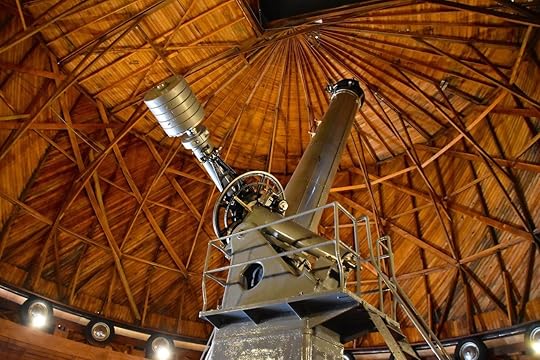
Photo: Lissandra Melo/Shutterstock
Take the shorter route back, through the South Entrance, and Route 180 to Flagstaff. Since you will reach Flagstaff after dark, drive up to Mars Hill and visit the Lowell Observatory, established in 1894. Learn about the night sky and Earth’s astronomical history, and look through a few different telescopes, even the one used to discover Pluto in 1930. Then head back to Phoenix, taking I-17 South. You’ll probably be exhausted by this point, but if you’re up for it, Phoenix has no shortage of bars and nightlife options to keep the party going.
More like this: 15 places that get overlooked in Phoenix
The post The ultimate day trip to the Grand Canyon from Phoenix appeared first on Matador Network.

Matador Network's Blog

- Matador Network's profile
- 6 followers

