
Gabi Moskowitz's Blog, page 4
May 20, 2016
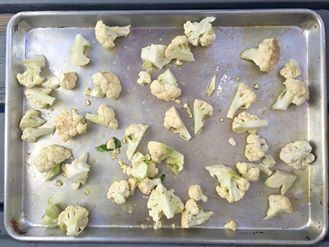
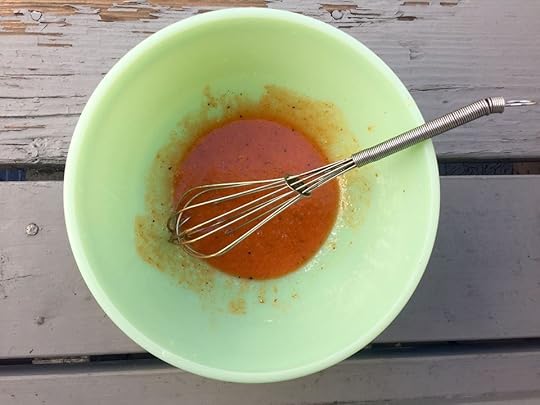
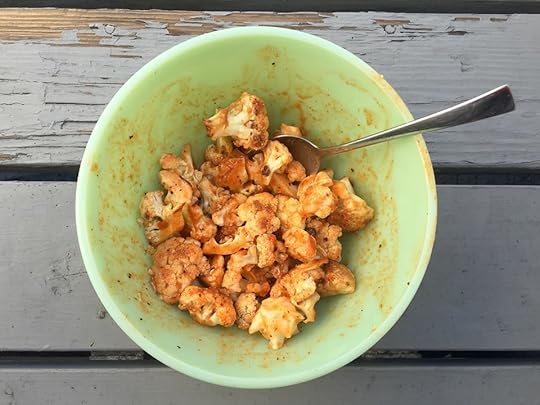
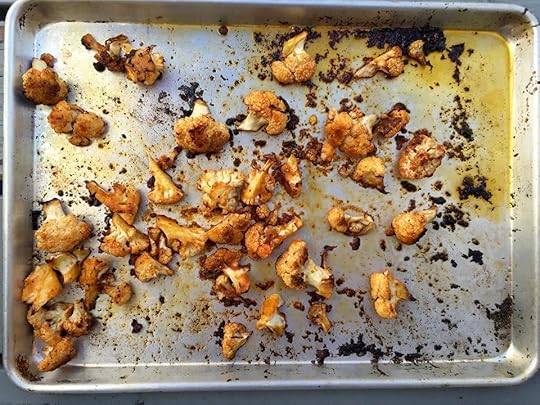
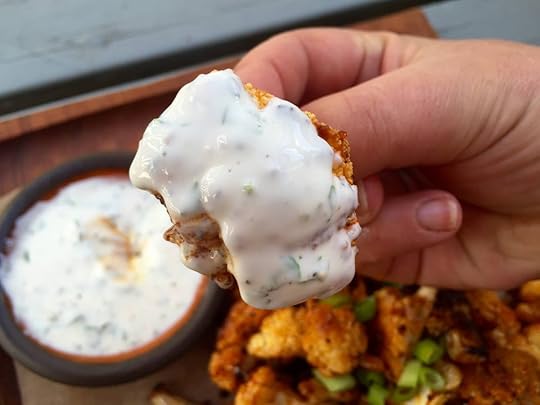
Buffalo Cauliflower
I've been thinking a lot about adaptation lately. And also about cauliflower. But...I am pretty much always thinking about cauliflower.
Anyone who follows my blog or knows me in person is familiar with my tendency to rhapsodize about the magical transformative abilities of humble cauliflower. From pizza to rice to tortillas to this layered lasagna thing I make every week (which I promise to eventually write about here) lower-carb, cauliflower-ified versions of high-carb starchy foods are my jam (and usually, my dinner).
The thing about cauliflower transformation is that, even as a chewy tortilla, or in crispy-edged pizza form, its true flavor and texture never actually, truly disappears. No cauliflower creation ever ceases to truly be cauliflower...it's just presented in a different, gussied-up form. Sort of like when I have my hair and makeup done: the results are different, fancified, maybe prettier, but at the core, essentially the same as before.
Or maybe like when I get married in just six weeks? I'll be transformed to an extent then, right? I'll wear a special dress, have my hair and makeup done. Put on a ring made especially for me? And then, in front of friends and family, Evan and I will make our union legal. After the wedding, as he and I have been doing for the past four years, we'll continue to adapt. To married life, to permanent love.
But underneath it all, after the ketubah and marriage license have been signed, after my dress, with its intense boob-securing infrastructure (I have been promised several times that the dress won't require a bra. I am suspicious of this.), has been exchanged for a pair of jeans and a t-shirt, and Evan's dapper suit has been replaced by a more casual (but still extremely dapper) get-up, we'll find that, at our respective cores, we are still the same as before. Transformed, adapted--maybe with a few new ingredients added, as it were--but essentially the same as we've always been.
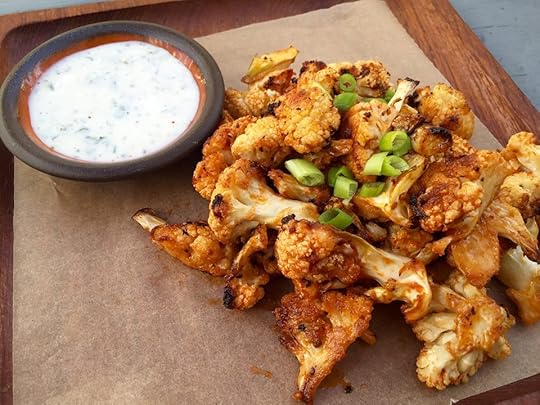
Kind of like this Buffalo Cauliflower: decorated, adapted, transformed...but at its heart, still cauliflower.


March 2, 2016
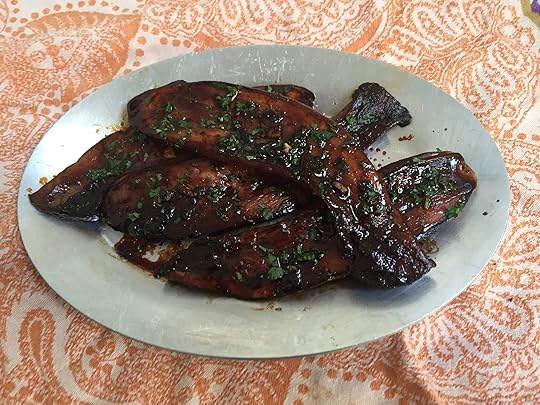
Mushroom Steaks
I spent last week in NYC. I had a few meetings, caught up with old friends, and went to the set of The Rachael Ray Show to shoot a few scenes for Young & Hungry (tune in on March 9th at 8/7 Central on Freeform to see it--I'll also be in the episode!).

One evening after working all day, I met up with my NYC-living friends, Jocelyn and Lisa for dinner in Brooklyn at a great restaurant called Flatbush Farm. As the name suggests, the menu was focused on farm-to-table dining; seasonal, fresh, and rustic.
We decided to share a few entrees, and one of them was a "Carrot Steak." When the dish arrived, it looked to be some thickly sliced carrots that had been roasted, and topped with a hearty grain and kale salad. It was a delicious vegetable dish (and one which I would probably order again) but it did not in any way resemble steak.
I don't have a problem with calling foods something they are not (I often call cauliflower everything from tortillas to rice to pizza), but I do feel strongly that if you are going to do that, you should at least make an effort to serve the food in the same manner as the food you are referring to. Even though the carrot steak we ordered was quite tasty, the restaurant hadn't quite accomplished this.
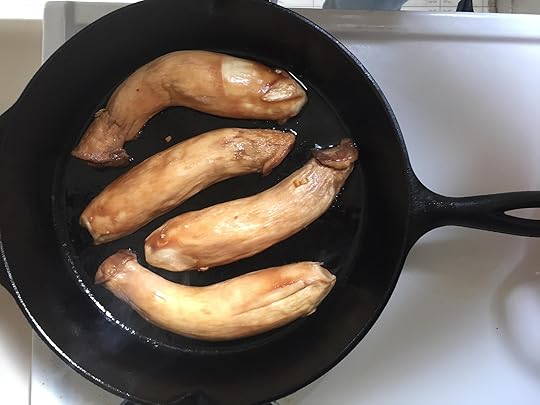
With this in mind, I was inspired to turn the enormous King Oyster mushrooms I bought recently into the steaks I knew they could be. I first discovered the meaty potential of King Oyster mushrooms when I turned them into mushroom bacon a few months ago.
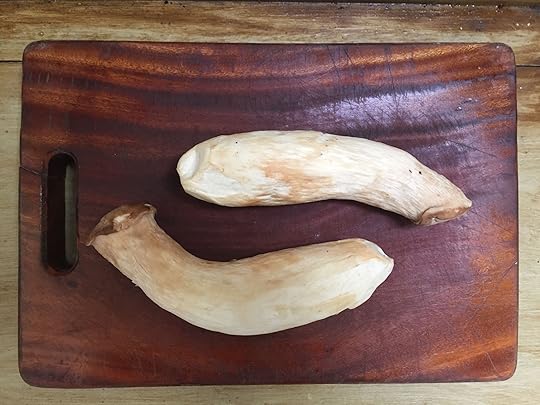
Because mushrooms are meaty but not naturally juicy enough to resemble steak, I knew I needed to add moisture and a bit of umami flavor. To accomplish this, I plunked them, halved, into a simple marinade of soy sauce, smashed garlic, brown sugar, black pepper, olive oil, and water.
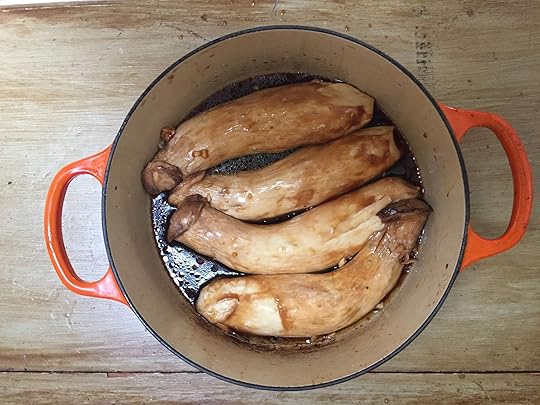
After marinating for about 30 minutes (I could have left them in for longer but didn't want them to start to break down), they went into a hot cast iron (my favorite way of cooking steaks of any kind).
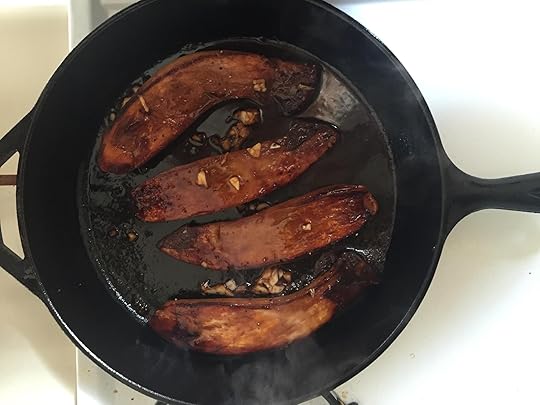
After getting a good long sear, the steaks get flipped and topped with about half of the marinade, just ensure they get as much flavor and moisture as possible.
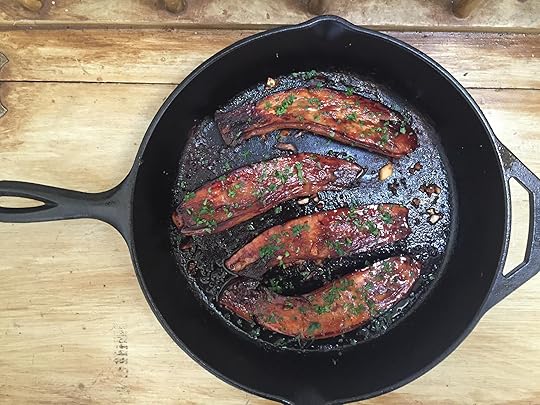
After a good long sear, the get a little fresh parsley. Not required, but adds lovely color and flavor.
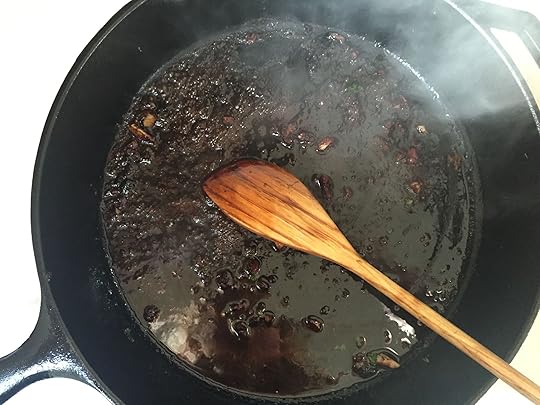
If you really want to put it over the top, add a little vermouth or broth to the empty pan and scrape up those delicious brown bits to make a quick pan sauce (this is optional but quite recommended).
And over the top it goes, giving the 'shrooms a steaky glaze.
These "steaks" make a great side dish, but I dare you to try them as an entree, maybe with some mashed potatoes and seared broccolini or creamed spinach. I think you'll find that the steaks' meaty texture and juicy, umami flavor is more than enough to satisfy carnivorous cravings.

January 26, 2016
Cauliflower Crust Pizza
I don't believe in ruling out any foods. As soon as you do that, in my experience, you are bound to think of nothing but forbidden delicacies all day long, until you inevitably crack and eat whatever you swore you wouldn't on the kitchen floor at 3 o'clock in the morning. Rather, I like to make a practice of eating healthfully most of the time so that when I'm invited to a 9-course pasta dinner, or a donut shop opening, or, more likely these days, a wedding cake tasting, I can freely partake without any guilt. An 85% virutous/15% decadent rule tends to work well for me.
The key to staving off cravings when it's not quite time to indulge in that 15%, I have found, is to replicate white, starchy, not-so-good-for-you foods with the king of vegetables, cauliflower. So far, I've done this with tortillas, rice, a pizza like this one, and even my beloved Brown Butter Pumpkin Mac & Cheese. These dishes knock out cravings (I've even begun to develop cravings for the cauliflower versions of my favorite starchy carbs), and keep you satisfied with plenty of fiber, thanks to their vegetable base. Of all the knock-off white carb cauliflower recipes in my arsenal, this is my favorite, and the one I make most often (generally at least once a week).
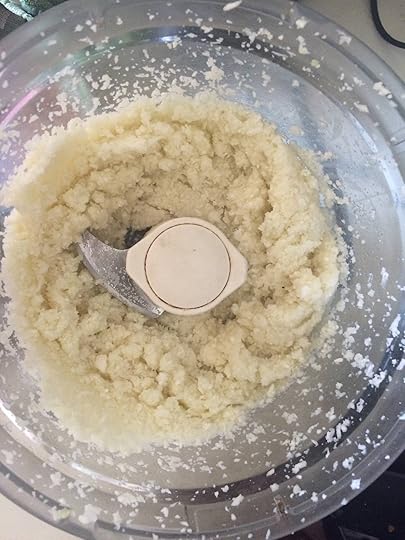
It starts with about half a cauliflower, cut into florets. I puree it in the food processor until it resembles ricotta cheese, and each piece is about the size of couscous (check out my tip in the recipe for how to deal with cauliflower that just doesn't want to be processed correctly).
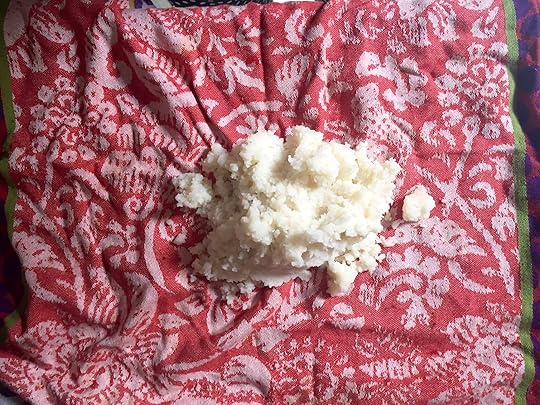
The cauliflower gets microwaved until it is very soft, then dumped onto a clean dish towel.
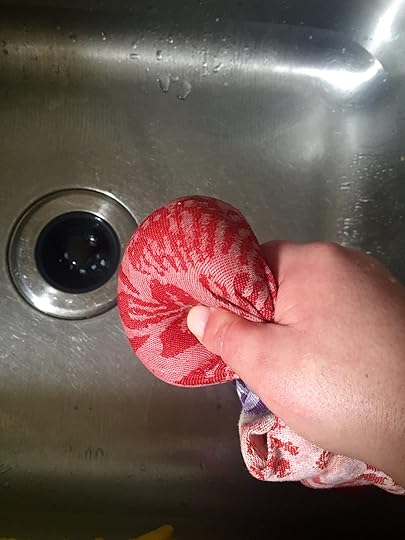
Then I gather up the corners of the towel to make a bundle, and carefully squeeze as much liquid as possible from the cooked cauliflower. The drier the better. It's important to be really careful here, as the cauliflower may be quite hot to the touch, even through the towel.
The squeezed-out cauliflower goes into a mixing bowl with a beaten egg, some olive oil, a pinch of salt, and 1/2 cup grated Parmesan. You can use other cheeses, but I find that Parmesan yields the crispest crust. If you are avoiding dairy, try a mix of almond or coconut flour and nutritional yeast in place of the Parmesan.
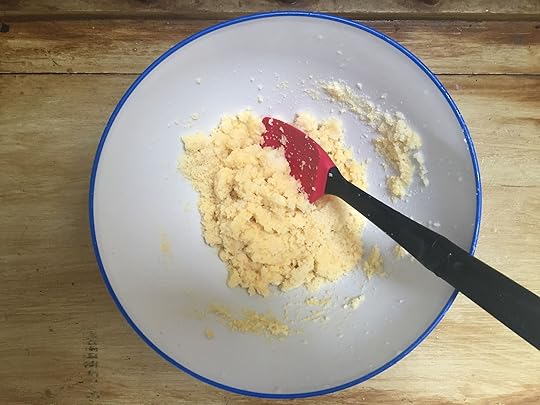
I scrape the "batter" onto a parchment-lined baking sheet (do NOT skip this part--an oiled or floured surface will not work; parchment is essential).
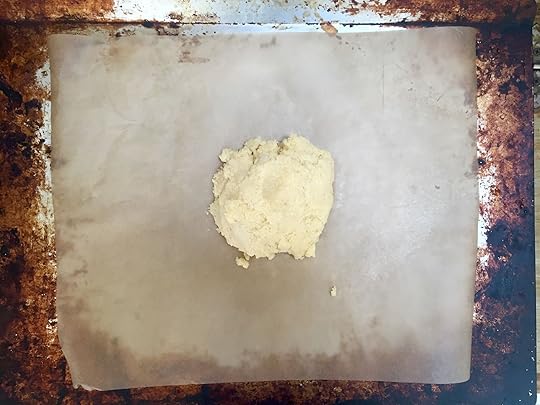
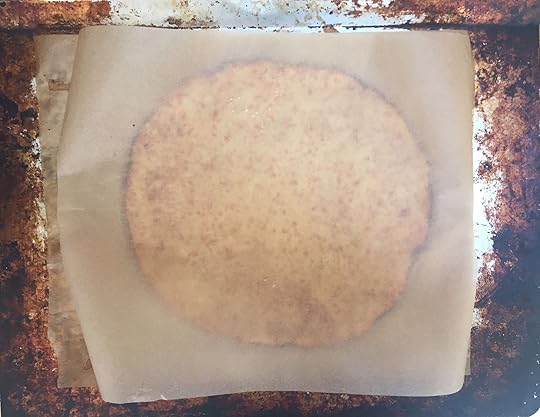
With wet hands (very helpful in keeping the cauliflower mixture from sticking), I pat the mixture into a circle (you could probably do any shape you want), about 1/4-inch thick. I top it with a drizzle of olive oil, which helps get it nice and golden brown.
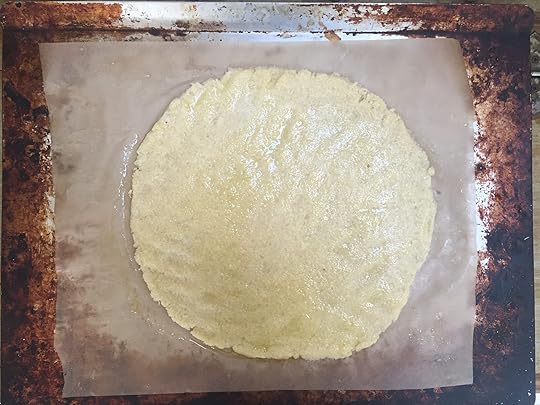
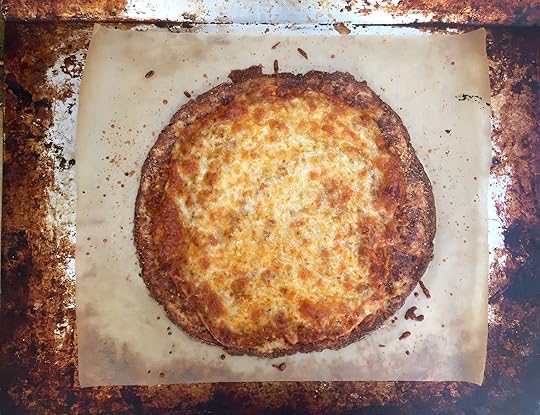
Into the oven it goes, until it's brown and crisp. This is very important. If you take it out too early, it will make for limp pizza.
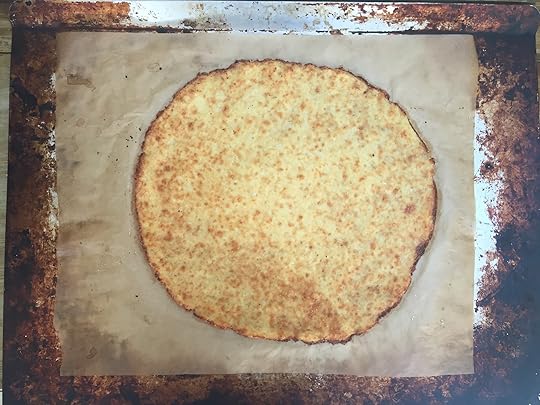
If you think you can fip it by hand, go for it. I don't trust my hand-eye coordination enough to do that, so I top it with a second piece of parchment and carefully turn it over.
Then I carefully peel the now-on-top layer of parchment off (save it for the next time you want to make this pizza--you can usually get 2 or 3 uses out of each piece of parchment).
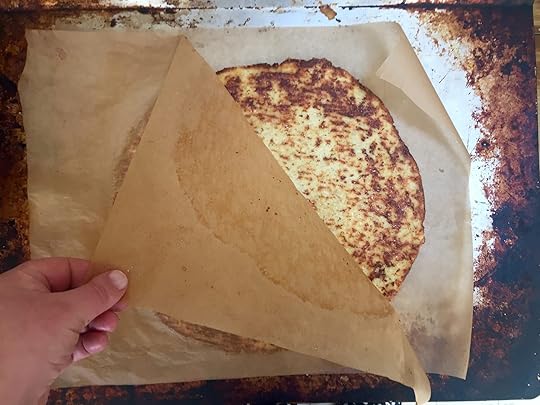
And here is my pizza base!
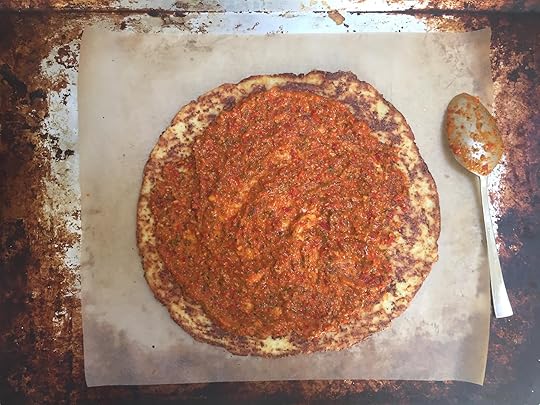
Now it's time for toppings. I recommend going light, so as not to overload the crust with toppings it can't adequately hold. I usually just do sauce and cheese--maybe some sauteed greens or caramelized onions now and then.
Start with sauce all over, leaving a 1-inch border for the crust. Here I'm using some leftover romesco sauce, but this is great with pesto, tomato sauce, or even just a little olive oil and garlic.
And since this is pizza, I top it with shredded mozzarella cheese and a light touch of Parmesan (feel free to experiment with other cheeses though--I've used cheddar or dollops of ricotta and goat cheese in place of the mozzarella). Again, don't overload it. A single layer will suffice.
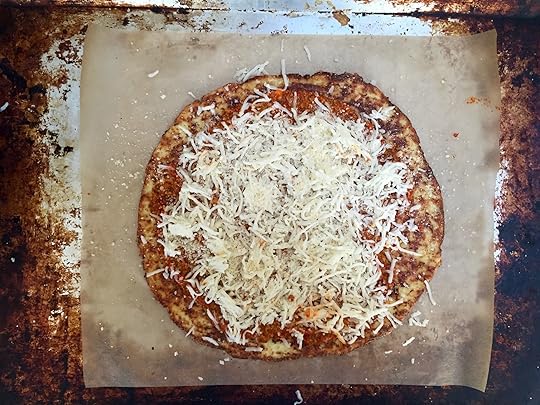
Bake until brown and bubbly.
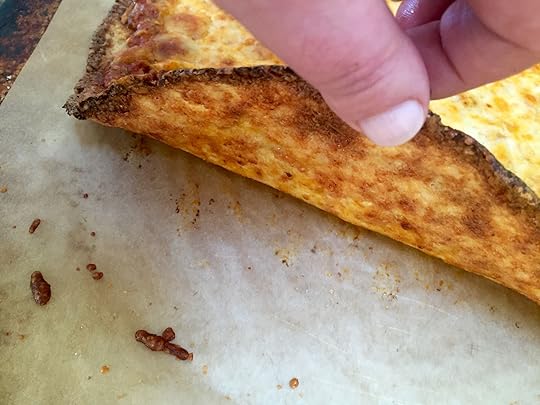
Check out that bottom crust. So crisp.
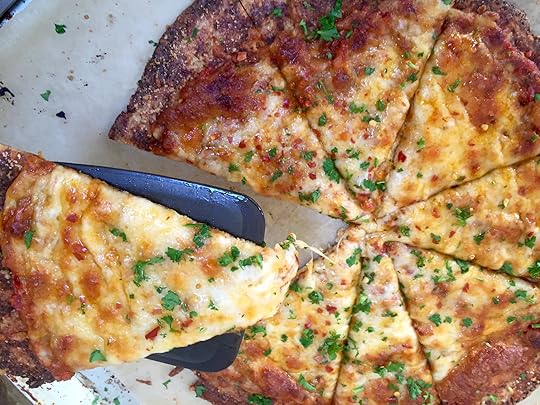
I add a smattering of fresh herbs and maybe some red chili flakes, and I'm ready to slice.

It's pizza time.
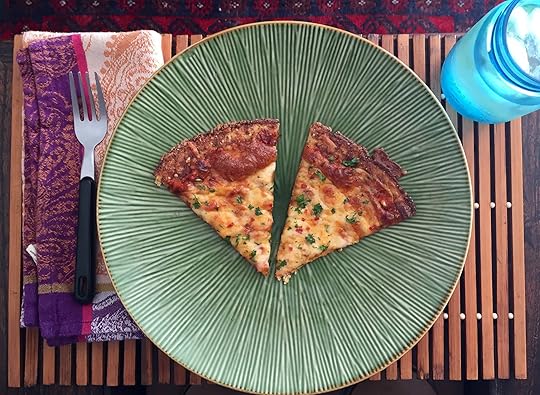
Say hello to your new favorite.

January 6, 2016
Cast Iron Chicken and Sweet Potatoes
But if I'm honest, I know it doesn't have to be that hard. After all, I have a cast iron pan. The holy grail of cookware. The simplest and yet most useful of any pan I've ever owned. Cooking with it is not only a great way to get extra iron into your diet (truly--it seeps into the food and is very good for you), it also produces gorgeously browned, crisped food. It's a great place for the Maillard Reaction to play out.
When I think about how much I have to get done over the next few months, I want to cry.
(In case you're interested: finishing the manuscript for my third cookbook, freelance pieces for The Washington Post and The Bold Italic, and planning my wedding).
And also scream with glee because it's fun and exciting stuff.
But also hide under the covers and refuse to come out, both because reality is overwhelming and because it is freezing in my apartment.
Of course, I'm going to rally. I'm going to get it all done. I might have to do it wearing three sweaters and consuming enough caffeine to wake up a small village, but it'll happen.
When I am deep in work, there's this severely annoying thing that happens around 5:30 PM: I realize I have absolutely no idea what the plan for dinner is. I haven't shopped. I haven't prepped. I certainly haven't preheated the oven. And the amount of work that I know will go into getting dinner for two on the table feels like more than I can bear.
But if I'm honest, I know it doesn't have to be that hard. After all, I have a cast iron pan. The holy grail of cookware. The simplest and yet most useful of any pan I've ever owned. Cooking with it is not only a great way to get extra iron into your diet (truly--it seeps into the food and is very good for you), it also produces gorgeously browned, crisped food. It's a great place for the Maillard Reaction to play out.
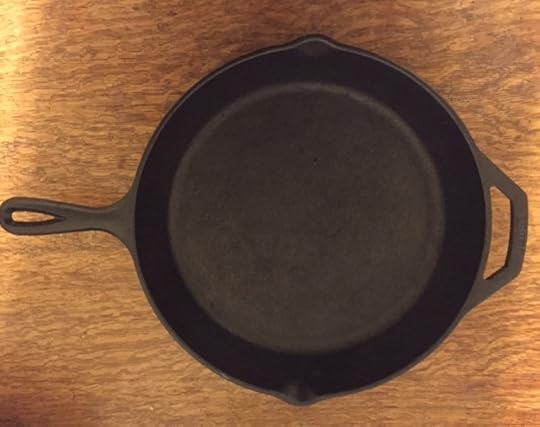
If you don't have a cast iron pan, I recommend getting one immediately. Specifically this one. When you get it, keep it clean, but don't wash it down with soap. Oil it lightly before storing. Use it often, but treat it gently. Love it and it will love you back. Hard.
Oh, and make this chicken. Especially when you feel overwhelmed by deadlines, pressure, and the world at large. Because at the end of the day (literally and figuratively), there is nothing better than a dinner that takes just minutes of hands-on effort, is healthy, and tastes like it was made with love.
I love making this with sweet potatoes (because if you know me, you know I love a sweet potato), but it would also be great with regular potatoes, cubed, peeled butternut squash, or even chunks of eggplant.
Start with a cast iron pan.
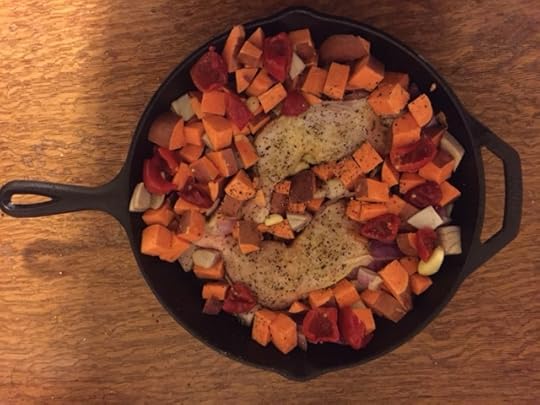
Slick it with extra virgin olive oil, then land a couple of juicy chicken legs in the center of it.

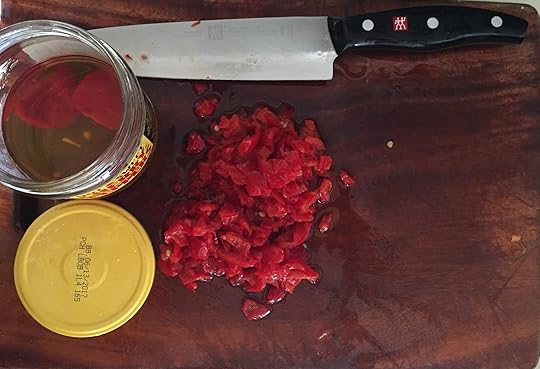
Add some olive oil-coated chopped vegetables, salt, pepper, and some cherry peppers, if you dare.
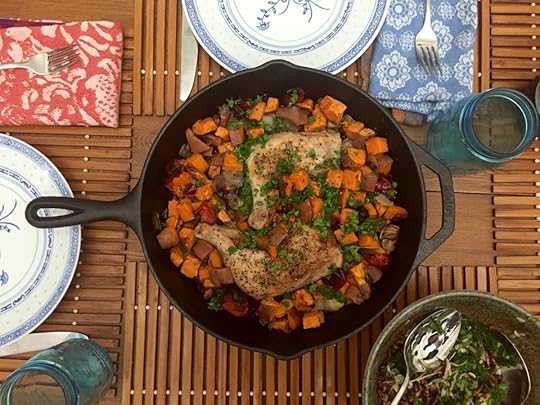
Roast, garnish with parsley, and sigh a deep sigh of relief. Dinner is served.

December 8, 2015
Spicy Sweet Potato Latkes
When it comes to traditional Jewish food, people love to grouse about how it's really only worth eating when it's made traditionally. These are the same people who wax poetic about how it's impossible to find a good bagel outside of New York. "It's the water," they'll tell you. "You can't replicate New York City water."
Well I live in San Francisco and my water comes from the Hetch Hetchy dam, and it somehow produces Marla Bakery's bagels, which are the best I've ever had, in or outside of New York City. And speaking of defying tradition, I also happen to prefer sweet potato latkes to traditional potato ones.
I have no problem with traditional potato latkes, lest you accuse me of betraying my Eastern European roots. But if you follow my blog, you know that just about any time I can replace a regular potato with a sweet potato I'll do it without shame. And while I love the idea of a crispy potato, I love the idea of the crispy sweet, earthy depth of a sweet potato even more.
And of course, because I can't just shred sweet potatoes, fry them in oil, and call it a day, I have to add a little flavor, and, yes, a little heat. I'm bring the heat to these latkes with straight up sriracha (though you could use your favorite hot sauce), and my new favorite ingredient, sweet-hot chilies, also known as peppadews. I buy them where I buy almost everything else, Trader Joe's, but they can usually be found in jars or at the olive bar of well-stocked grocery stores.
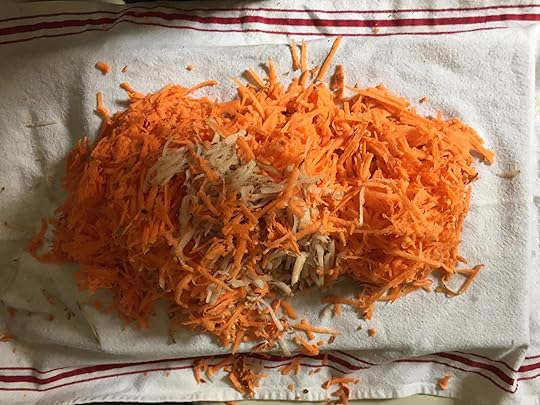
I hand-shred (feel free to use a food processor, but I think hand-grated potatoes get crispier) my sweet potatoes (and one Russet potato, to give it some starch, which helps make for crispy latkes), right onto a clean dish towel. I salt them to release their moisture (essential), and then gather up the corners of the dish towel and squeeze the daylights out of it.
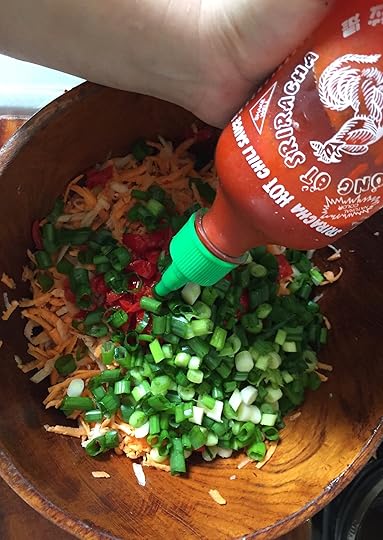
Then I add sriracha for more spice (I eyeball it, but start with one tablespoon and go from there) green onions for freshness, pepper, the sweet-hot chilies, eggs, and flour. And yes, you may use gluten-free flour. Either GF all-purpose, or coconut flour, which adds a nice background flavor which complements the sweet potato.
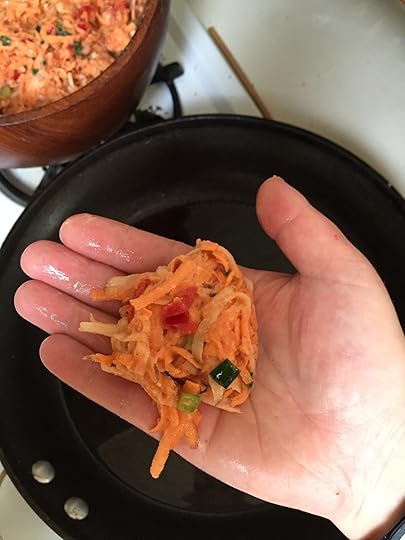
It's important to mix well between each step. I use my hands or a wooden spoon. Then, once the mixture is well incorporated, I form nice little patties.
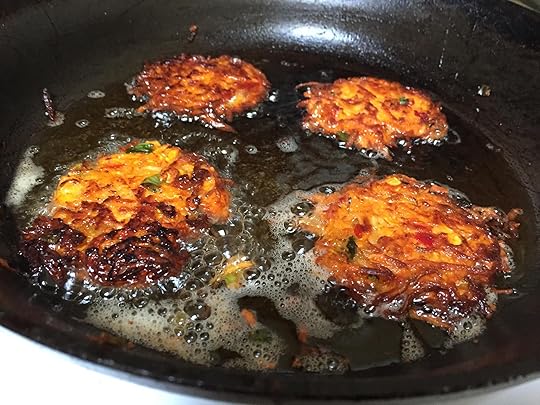
It's important to fry the latkes in a decent amount of oil. Like, more oil than you think you need. It's not deep-frying, exactly, but it's not...not deep-frying. Remember, we're celebrating the miracle of the oil, here.
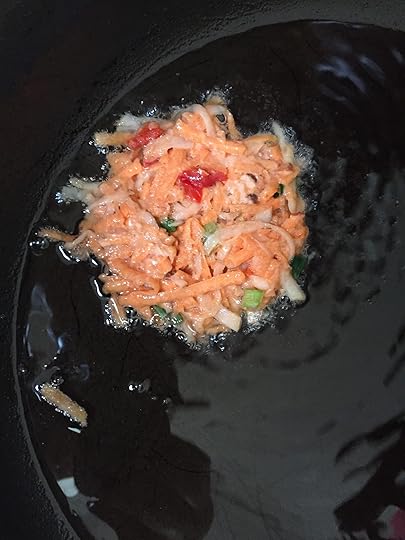
It's tempting to crank up the heat and really sear them, but medium-heat oil is best. It cooks the latkes evenly and thoroughly. It's important to let time do the work.
Draining the latkes well helps make for an even crispier exterior.
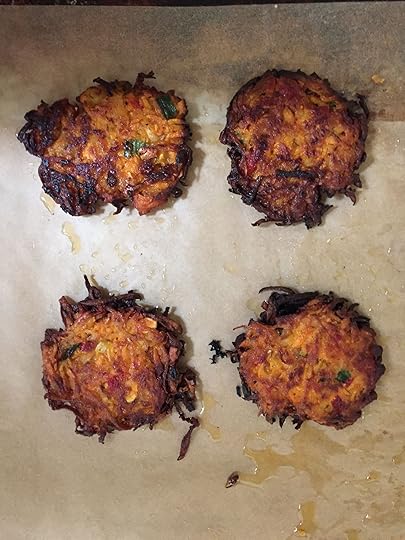
Keeping them warm in the oven encourages even more crispness, so these can even be made ahead. Just make sure you don't stack them--stacking leads to sogginess, and that is the antithesis of what we're looking for here.
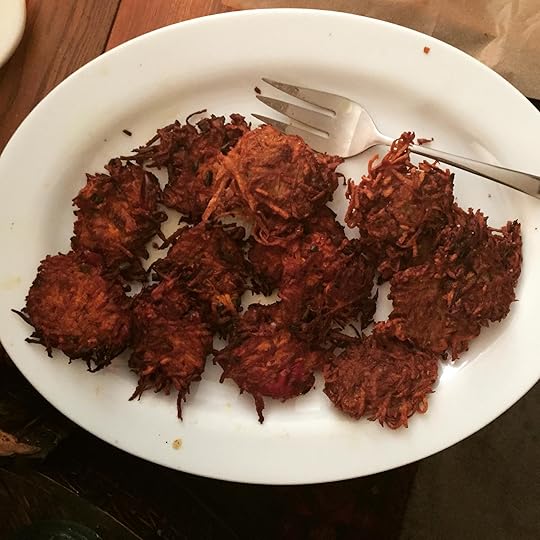
Then just plate 'em up, put out bowls of applesauce and sour cream (see recipe for details), and crank up your favorite Hanukkah tunes (this year it's this song by Rachel Bloom, on repeat). Happy Hanukkah!

November 12, 2015
Perfect Piecrust
Welp, I am going to delcare it officially pie season.
I have no problem with storebought piecrust (the kind from Marie Callender's is actually pretty great), but it cannot be overstated that there is just nothing like a homemade piecrust.
Whether you're making pot pie, empanadas, quiche, sweet fruit pie, tomato pie, or a custard-filled cream pie, it's cheaper and frankly more delicious to make piecrust at home. And if you have a food processor, it's actually pretty darn easy.
There are a few things to keep in mind when you make piecrust:
1. Have your ingredients totally measured and ready before you start mixing. There are only 4 ingredients in this recipe including the ice water, so this shouldn't be hard. The recipe moves quickly, so you'll want to have everything right there.
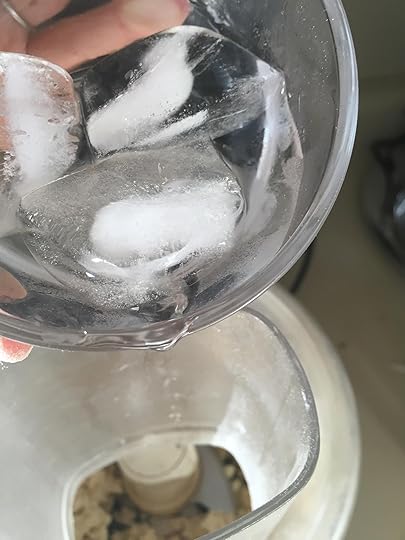
2. The colder the better. The cardinal rule of piecrust making colder your butter and ice water, the flakier your crust will be when it bakes. I always keep the butter in the refrigerator until the moment I'm ready to use it, and I start icing down the water well in advance so it has a chance to get really chilly.
3. A food processor is helpful but not required. Home cooks made flaky, buttery pie crusts for centuries before Cuisinart came to town. That said, if you can get your hands on a food processor, it sure makes piecrust making easy.
4. Handle your pie crust gently and quickly. Warm hands warm up the butter, and that is bad. Work fast and use a tender touch to keep this from happening.
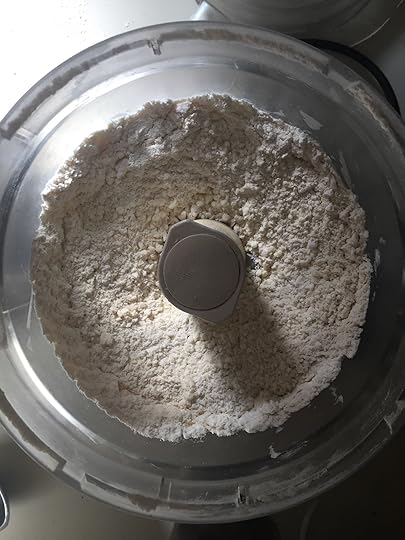
I start by combining flour, a pinch of salt and (super cold) butter.
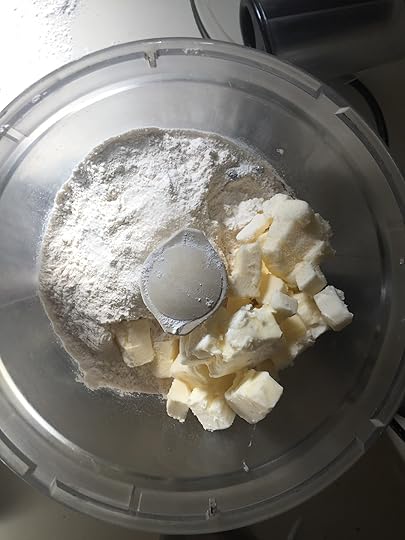
I get the ingredients mixing until they look like buttery sand.
Next the cold water goes streaming in, a little at a time.
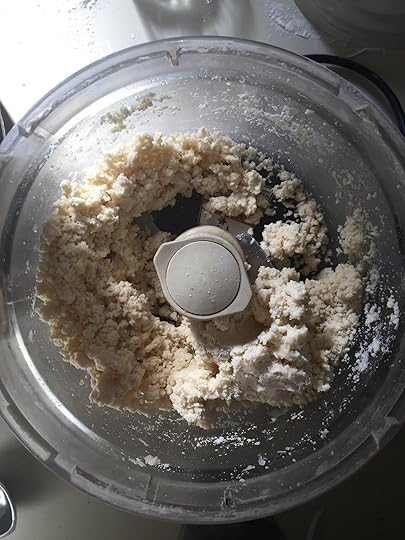
Until the dough starts to stick together.
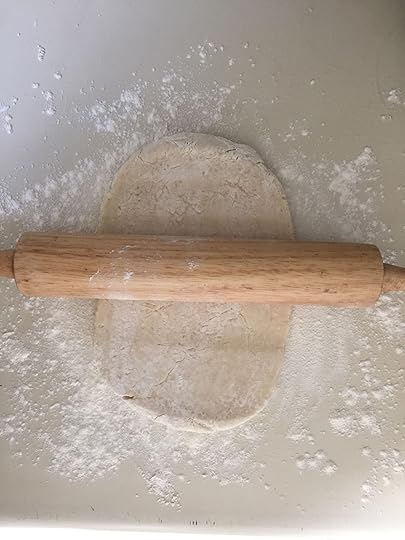
Then onto a floured surface it goes, to be tamed.
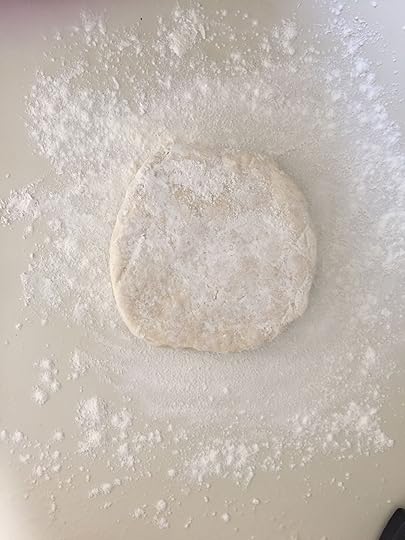
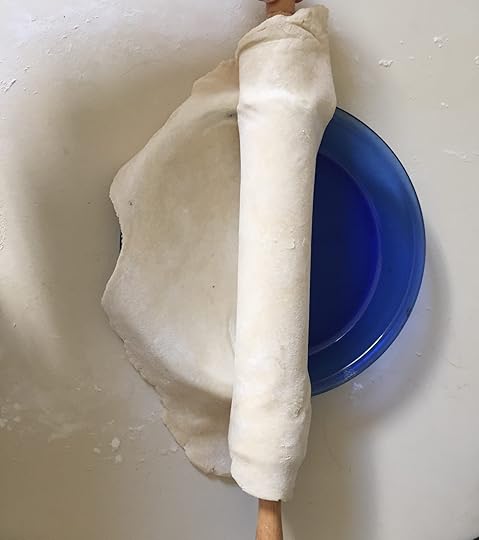
At this point, I wrap it tightly in plastic wrap and refrigerate it for at least an hour. Once that's done, it may be rolled out.
This recipe makes enough for two open pies or one pie with a top.
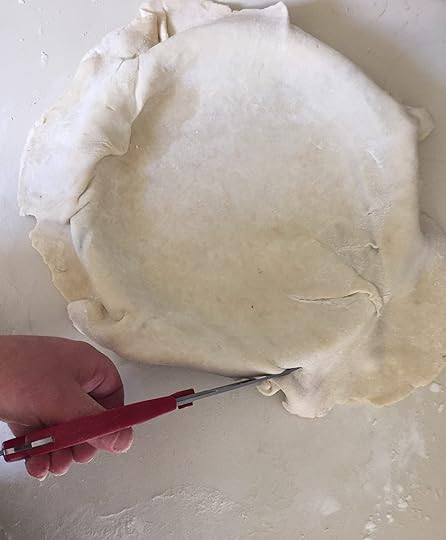
Just trim the excess and re-roll.
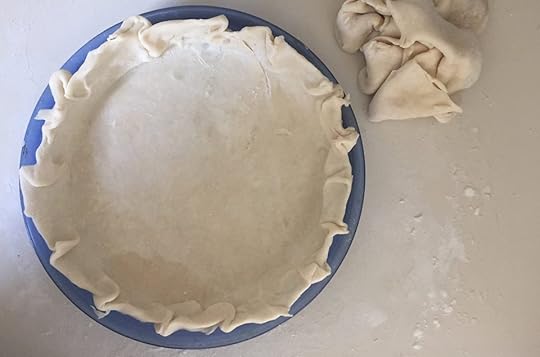
Make pretty, decorative pleats if you wish. Then pre-bake (if necessary for your pie recipe) or simply fill, bake, and serve.
If you're as corny as I am, you might say it's easy as pie.

November 2, 2015
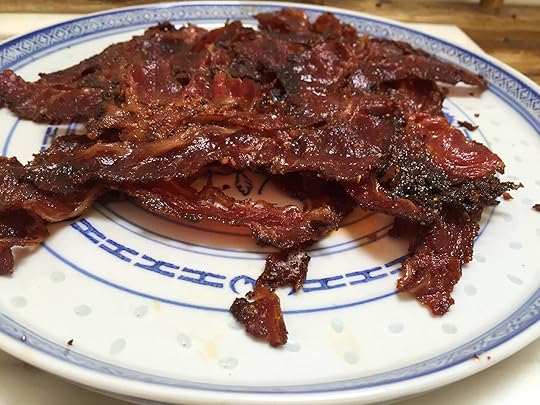
Pastrami Bacon
When we got engaged this summer, Evan's parents decided to throw us a party in Wisconsin. A few weeks before our visit, they called to ask what kind of food we wanted for the party. Evan had one thing to say:
"All I want is a big kosher pastrami sandwich on rye." His parents were on it.
After much discussion of what kind of pastrami, and which brand of rye, we quickly discovered that it's actually not so easy to find kosher pastrami in Mequon, Wisconsin. His parents called local grocery stores to no avail, and even contacted a synagogue, but no such luck. Eventually they decided to do what we all do when we can't find the thing we're looking for: order it online.
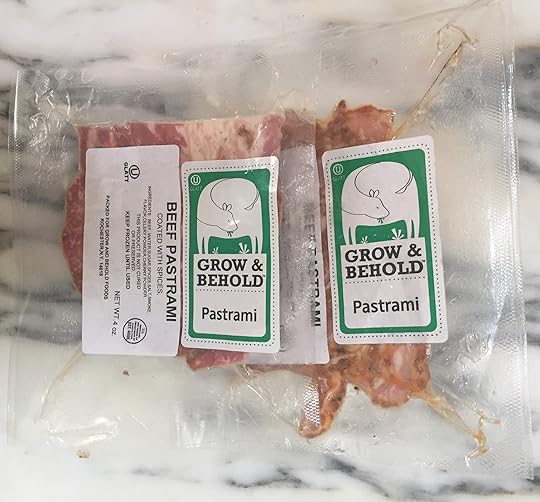
They landed on the website for Grow and Behold, a company committed to pasturered, kosher meats. Knowing their son's appetite for pastrami, they ordered enough to feed a small village.
When we arrived at their home, Evan made a beeline for the freezer to check out the goods. It was indeed pastrami, but it was also about 50% fat.
That beef fat, which is actually delicious on hot pastrami, where it gets a little melty and is very flavorful, wouldn't be very good on the cold sandwich Evan had been envisioning. It would be flaccid and rubbery.
The party was still wonderful (no fatty pastrami could keep that from happening), and when it was all over, his parents put us on a plane with the leftover pastrami (hopefully the people on our plane enjoyed the meaty aroma wafting from row 23). They also arranged for the company to send us a second, hopefully improved, shipment of the pastrami to make up for the first one they sent.
We received it.
It was also a bit too marbled for our taste.
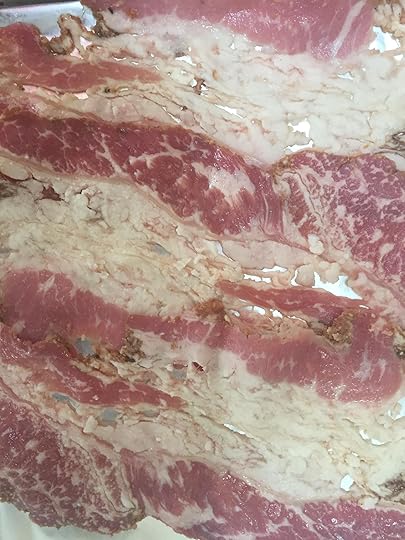
But it got me thinking: the pastrami didn't look too different from raw bacon in that it was mostly fat. And with bacon, the idea is to render that fat until most of it melts away and you're left with crispy pieces of meat.
So I mixed up my trusty bacon spice mix of smoked paprika, brown sugar, pepper, and smoked salt.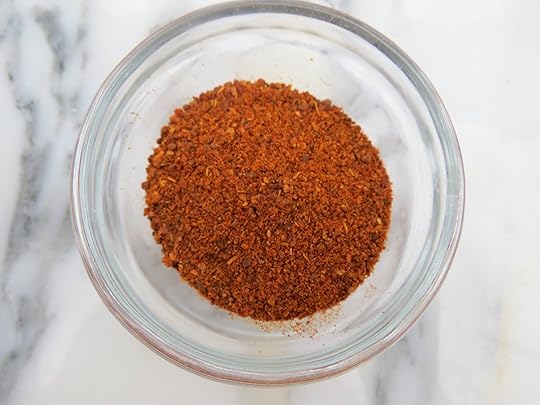
And sprinkled it all over the pastrami slices.
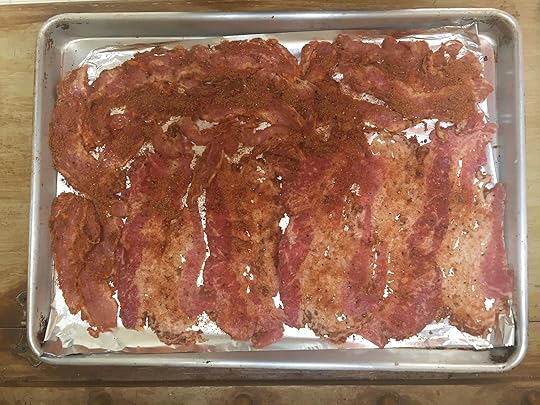
I baked them for about 15 minutes, then flipped them, and baked them for another 7 or so. After draining them on paper towels, the results were, as i'd hoped, pretty much like pork bacon.
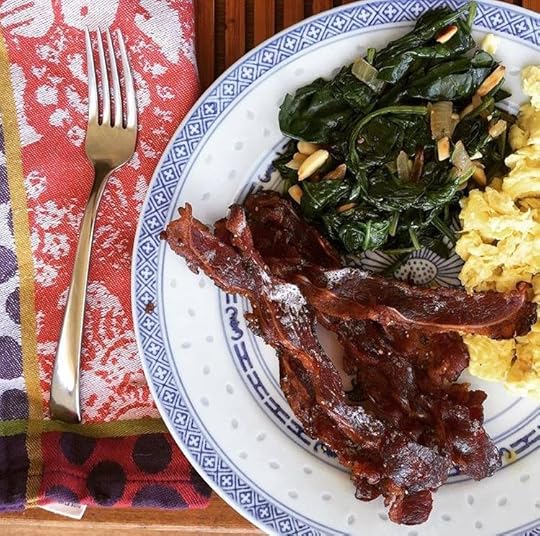
We ate it with scrambled eggs and garlicky spinach for breakfast.
And since we now have about 47 pounds of this pastrami left in the freezer, we know it won't be long before we can make it again.

October 13, 2015
Hoorray: Recipes meet shopping lists
I grocery shop more often than the average American. Firstly, because I am a professional food writer and recipe developer, and therefore require more groceries for the work I do. But also because I like to shop in small increments, buying only what I need for a few days at a time, which means everything (well, almost everything) in my refrigerate is fresh (and nothing gets wasted--I really hate waste).
So, every few days, I create an email to myself or open up the "Notes" app on my iPhone, and start to create a grocery list with ingredients for the meals I plan to cook in the next few days. It's generally a decent system (unless I accidentally delete the email or Note, which, clumsy phone user that I am, has been known to happen), but it's not perfect.
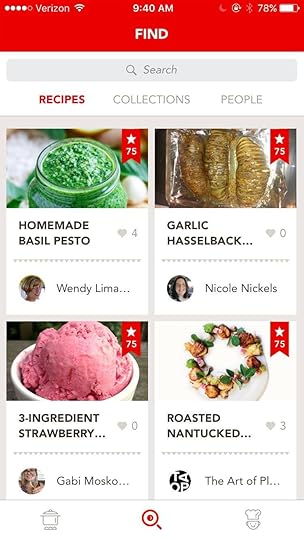
But recently, I learned about a brand new cooking app called Hoorray! It's billed as a "social network for food enthusiasts," and it is. Users can share recipes, find recipes and save (like Pinterest, you can create collections of things to cook), and interact with their favorite food content creators (like Serious Eats). But as far as i'm concerned, the coolest thing about Hoorray is that it's a completely brilliant grocery list generator.
This is what it looks like when you open it up. Like Facebook or Twitter, you have a feed based on whom you follow (so to speak).
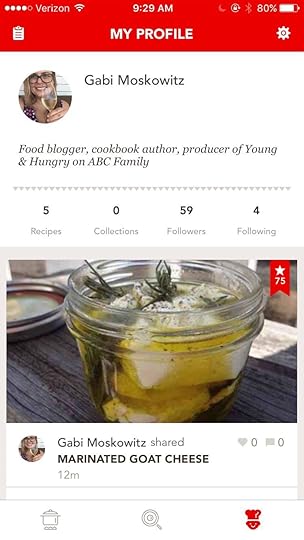
Click on a recipe, and you're brought to easy-to-follow, scrollable content. See, for example, my recipe for Marinated Goat Cheese:
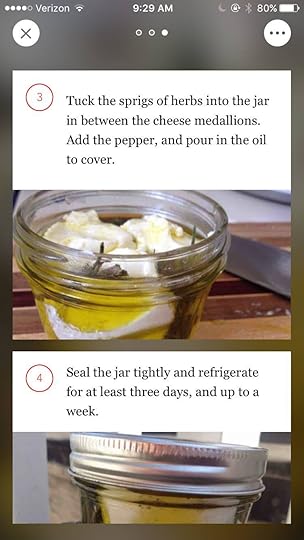
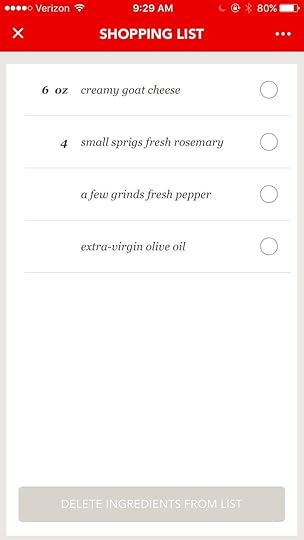
So you scroll through your feed, checking out the recipes you'd like to cook. But rather than having to type out the ingredients your need (or go find a freaking piece of paper and a pen), you simply ask the app to send the ingredients to your grocery list, which gets handily created for you, with easy-to-use checkboxes for your grocery trip.
I'll be uploading recipes to Hoorray regularly in the coming weeks, and would love to see you on there. You can find me here:

To celebrate this exciting launch, the good people at Hoorray are giving me a $50 Williams Sonoma gift card to give out to one lucky BrokeAss Gourmet reader! To be eligible for this awesome giveaway, download Hoorray, create a profile, and comment on this post with your Hoorray handle. The winner will be chosen at random.
Hoorray is available for iOS and Android. Come cook with me!

October 7, 2015
Brown Butter Pumpkin Cauliflower Gratin
Recently, I read a recipe for a lightened-up mac and cheese, where half of the pasta had been replaced by cauliflower. I was intrigued. I'm not eating a ton of pasta these days, so I figured I'd give it a go using 100% cauliflower. And why not try it with my trusty brown butter-pumpkin combo?
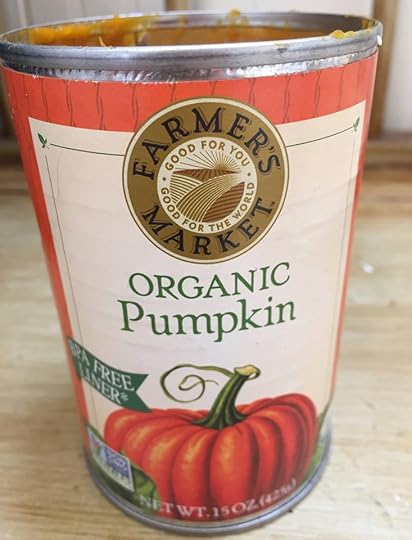
My Brown-Butter Pumpkin Mac and Cheese is probably my most-searched recipe. I invented it a whopping five years ago, when I was looking for a way to lighten up some mac and cheese (read: eat mac and cheese more often), and so I added some canned purreed pumpkin to a cheese sauce. The resulting mac was creamy and cheesy, but the addition of pumpkin meant I needed significantly less cheese to make enough sauce to coat my pasta. It also added some much-appreciated fiber, along with its rich, nutty flavor, which gorgeously complemented the cheese.
Recently, I read a recipe for a lightened-up mac and cheese, where half of the pasta had been replaced by cauliflower. I was intrigued. I'm not eating a ton of pasta these days, so I figured I'd give it a go using 100% cauliflower. And why not try it with my trusty brown butter-pumpkin cheese sauce?
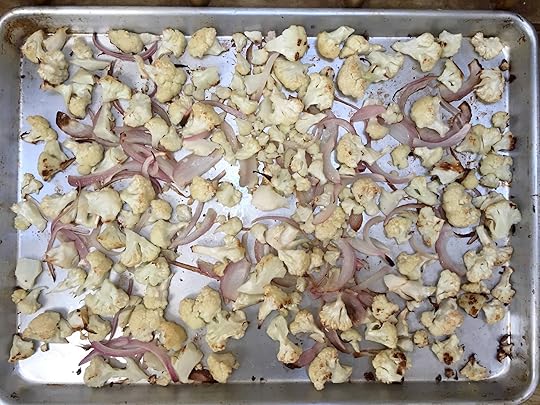
I started by roasting a whole cauliflower with half an onion.
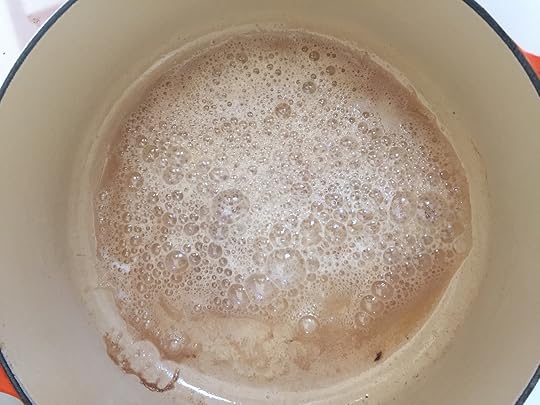
Next, I browned some unsalted butter, just until it got nutty and really good-smelling.
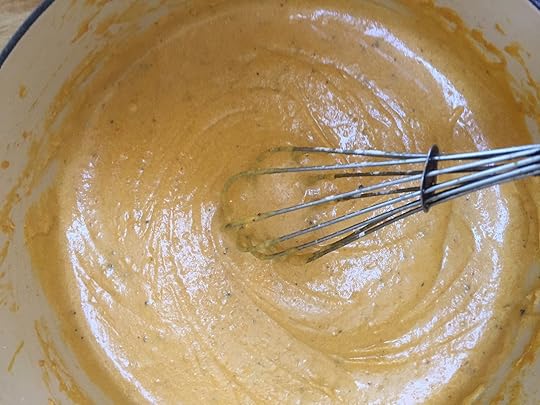
I whisked in some pumpkin, milk, and sharp cheddar cheese, plus salt, pepper, and a touch of nutmeg, which works nicely with cheese and pumpkin, to make the sauce.
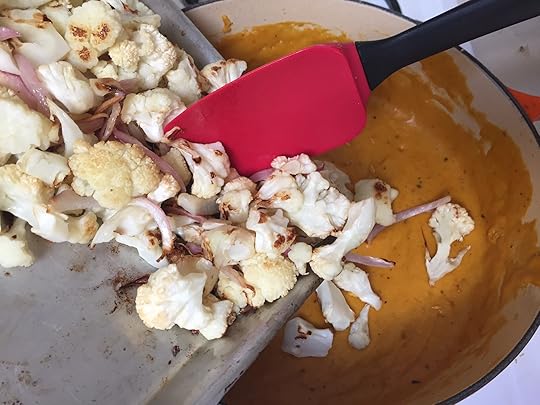
I stirred in the roasted cauliflower, right into the pot (all hail the multi-purpose Dutch oven!).
And topped the whole thing with a little more cheese.
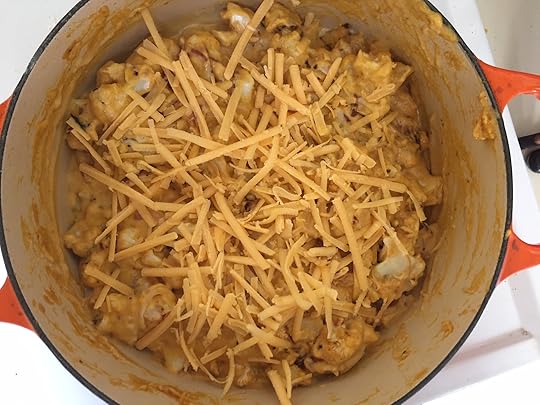
Into the oven it went, and the result was astonishing.
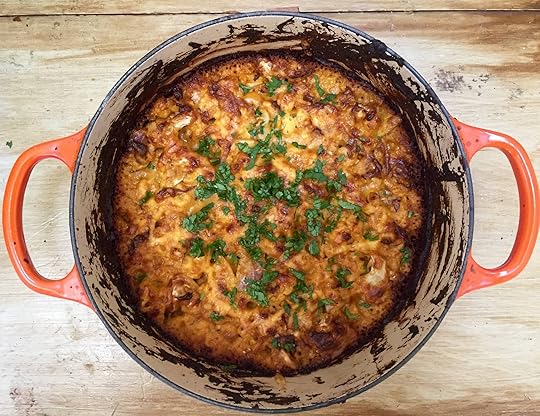
I mean. Oof. Just, wow.
I'm not going to lie to you and tell you it tasted like mac and cheese, mostly because this dish is delicious and worth making in its own right, mac and cheese-likeness aside. That said, if you're hankering for mac and cheese but, like me, you're keeping half-an-eye on your carb intake, this cheesy baked casserole will most definitely conquer that craving.

Gabi Moskowitz's Blog

- Gabi Moskowitz's profile
- 30 followers

