Seth Apter's Blog, page 82
April 3, 2014
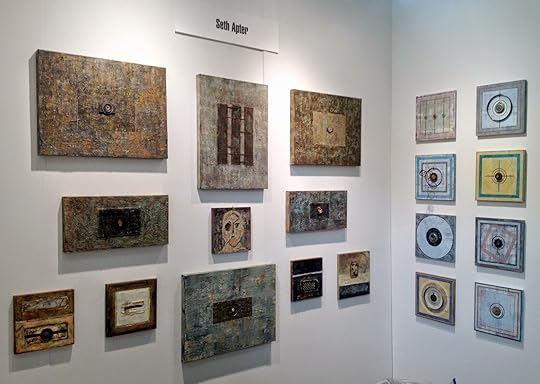
It's a Setup
I have been creating work for Artexpo New York for a number of months now. Today was the day I was finally able to see it all come together -- booth setup.
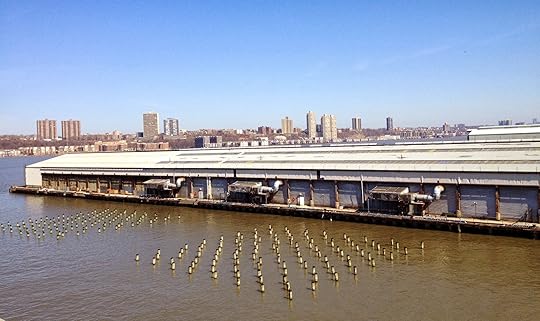 Artexpo is being held inside Pier 94 in NYC
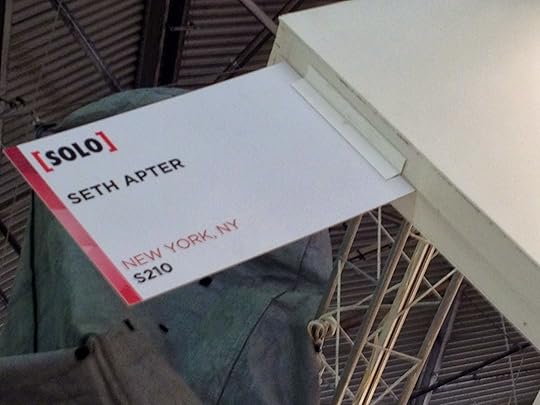 I am in booth 210 -- home sweet home
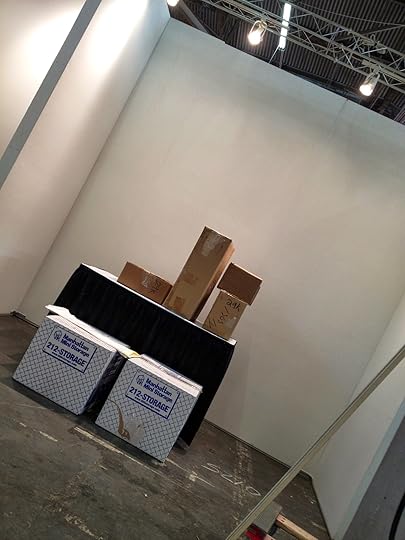 This is how it all began today -- like a blank canvas
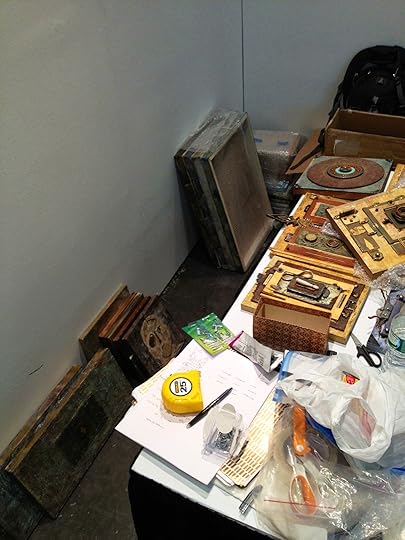 Unpacking is always a good way to start
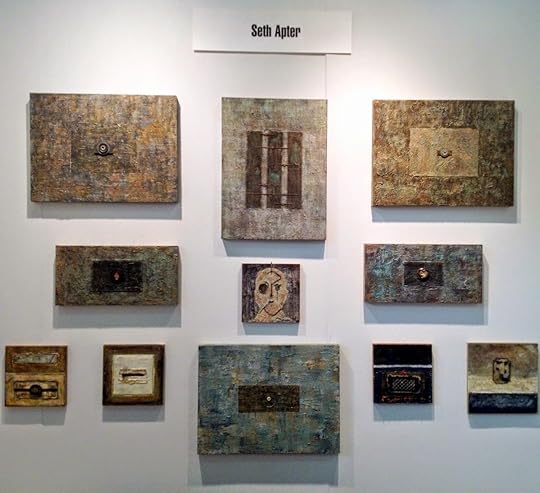 The main wall - 10 feet wide. The 4 small pieces in the lowest row were completed in collaboration with Roxanne Evans Stout.
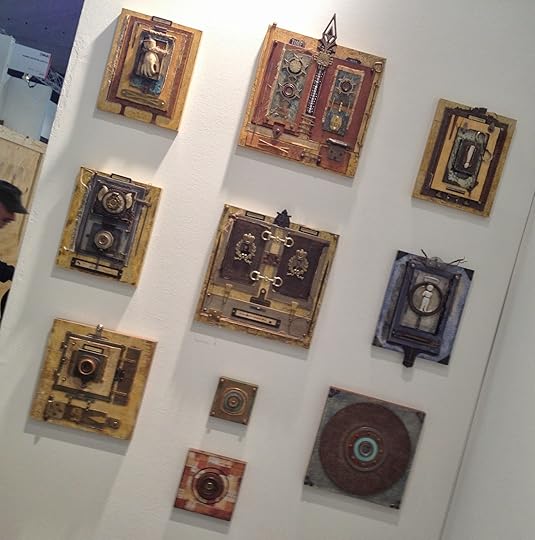 Work from my Passages series on one 4 foot side wall
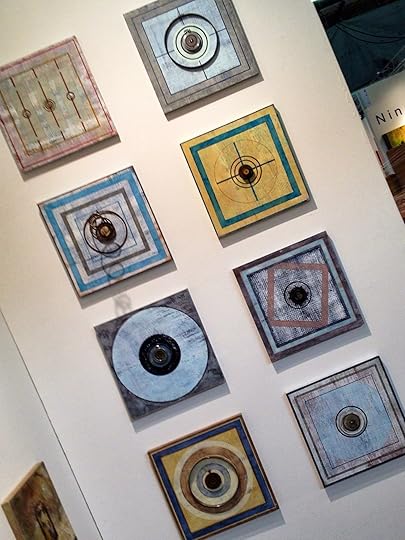 Work from my Interior Angles series on the opposite wall
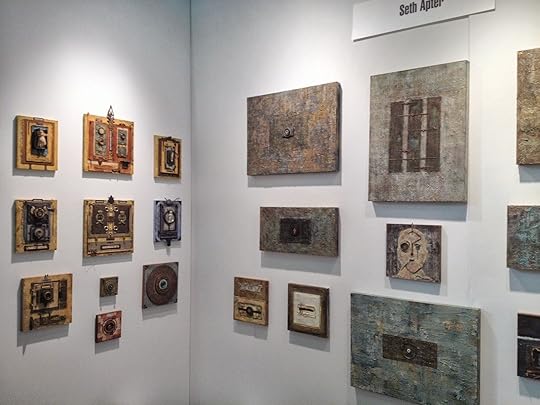 A corner view
 The other corner view
Artexpo New York opens Friday 4/4 at 10am and runs through Sunday 4/6. I will share more pics from the event in the coming days -- the next best thing to being there!
 Artexpo is being held inside Pier 94 in NYC
 I am in booth 210 -- home sweet home
 This is how it all began today -- like a blank canvas
 Unpacking is always a good way to start
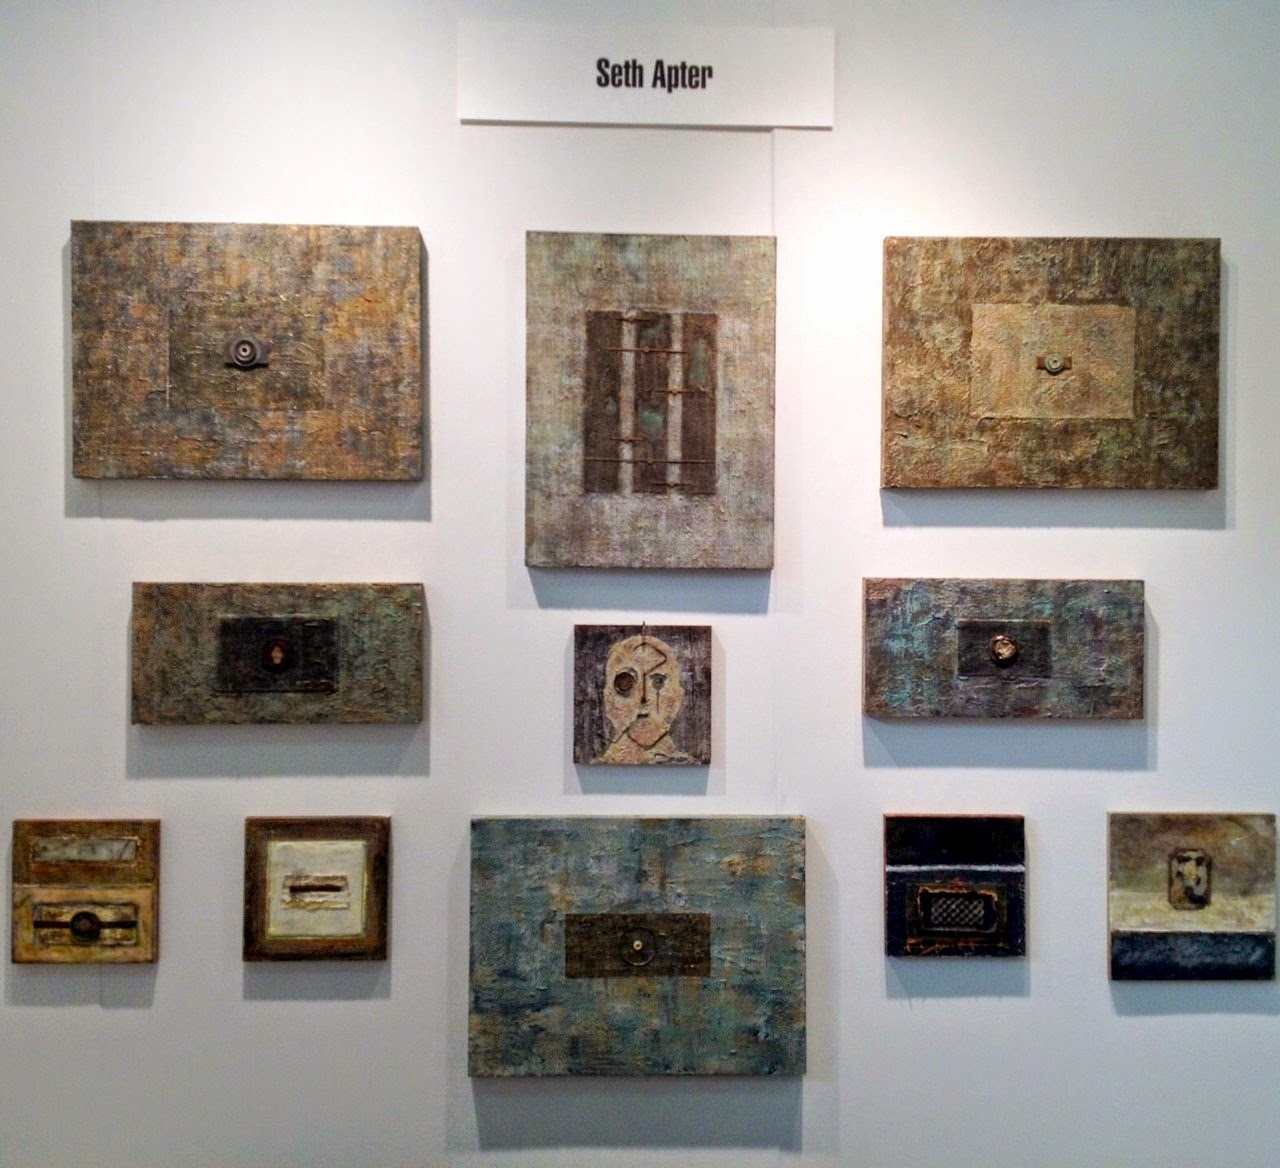 The main wall - 10 feet wide. The 4 small pieces in the lowest row were completed in collaboration with Roxanne Evans Stout.
 Work from my Passages series on one 4 foot side wall
 Work from my Interior Angles series on the opposite wall
 A corner view
 The other corner view
Artexpo New York opens Friday 4/4 at 10am and runs through Sunday 4/6. I will share more pics from the event in the coming days -- the next best thing to being there!


April 2, 2014
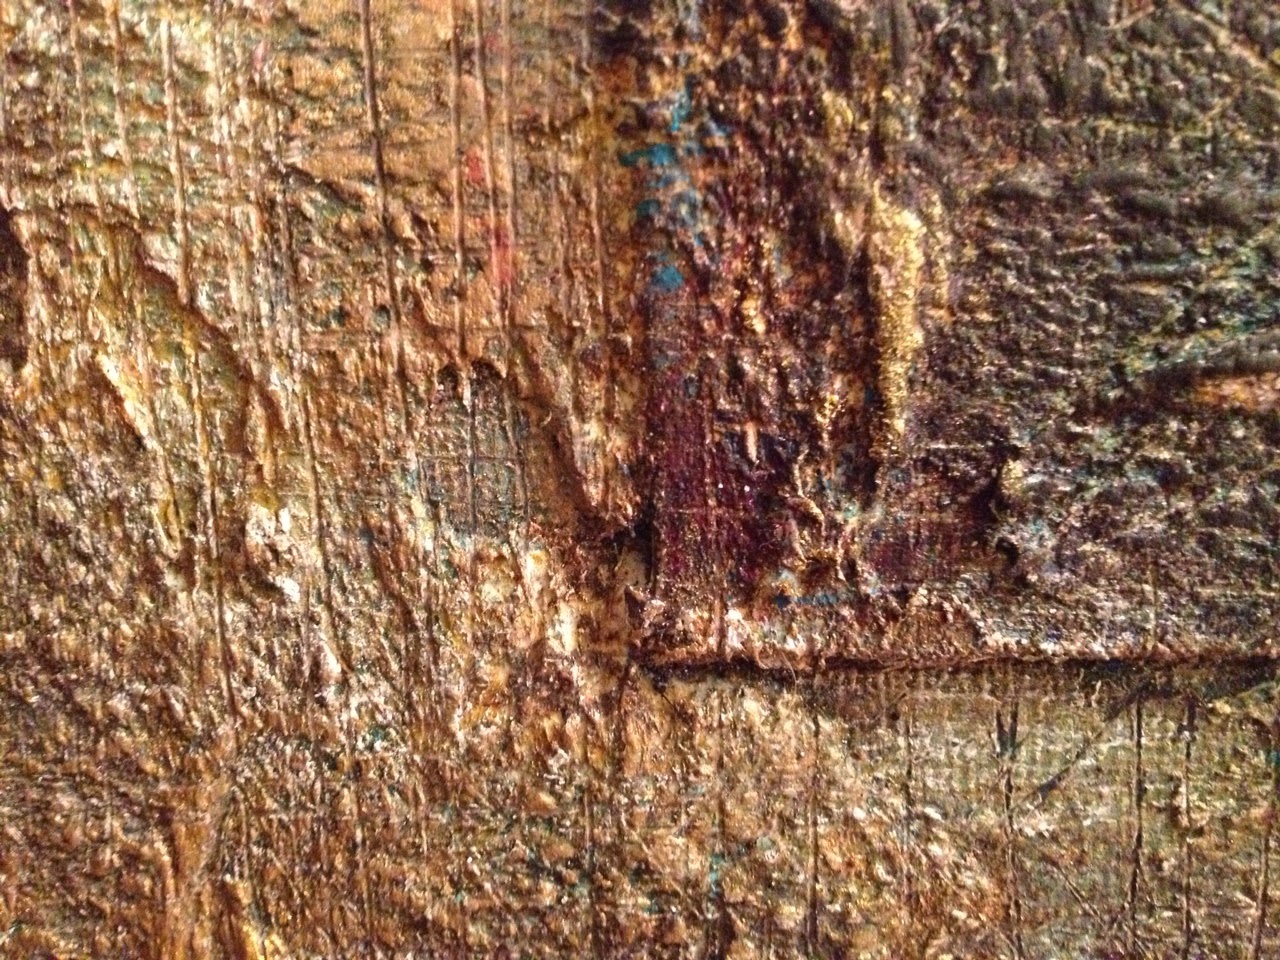
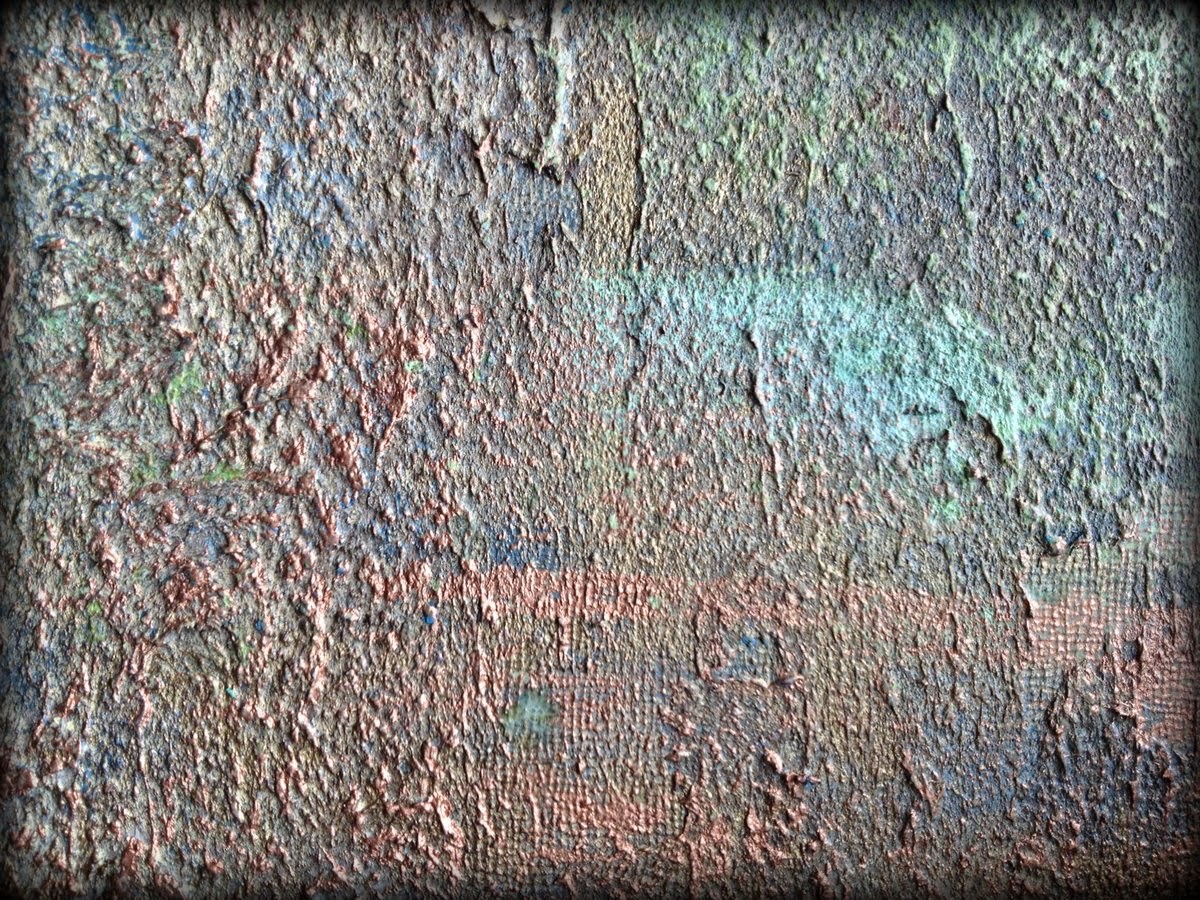
Nooks and Crannies

Detail shots of new work created for Artexpo New York - opening this Friday 4/4 and running through Sunday 4/6. Decided to go all nooks and crannies for this series.


Contact me for complimentary tickets if you would like to attend.
March 29, 2014
One of a Kind Giveaway
I am happy to report that I am a guest blogger on the Spellbinders blog today. To make it even better, I will be giving away the project I have created for this tutorial. And to make it even better than that, Spellbinders is hosting a giveaway (details are at the end of this post) of some of the products I used to create my card.

Card? Yes...card. I have never made a traditional card (shared with the public at least) before but thought that today was the perfect time. As a blogger for Spellbinders, one of my goals is to introduce mixed media techniques to all the card makers and scrapbookers who use their products. Figured I should walk the walk, step inside their shoes, and make a card. Who knows -- maybe I will scrapbook next. I believe creative people come in all forms and that there is every reason for us to cross over to "the other side" -- whichever that may be.
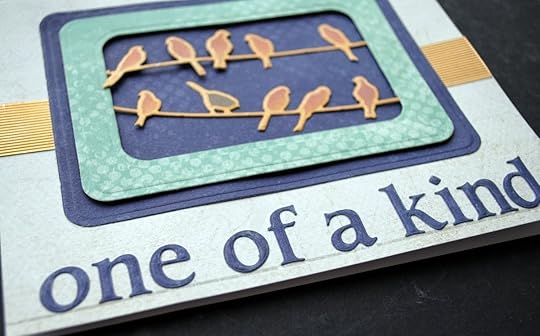
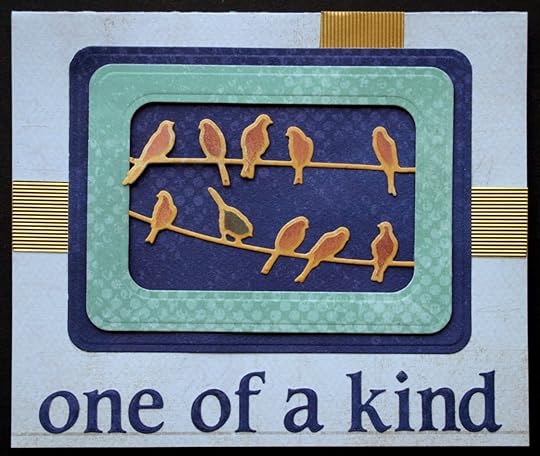
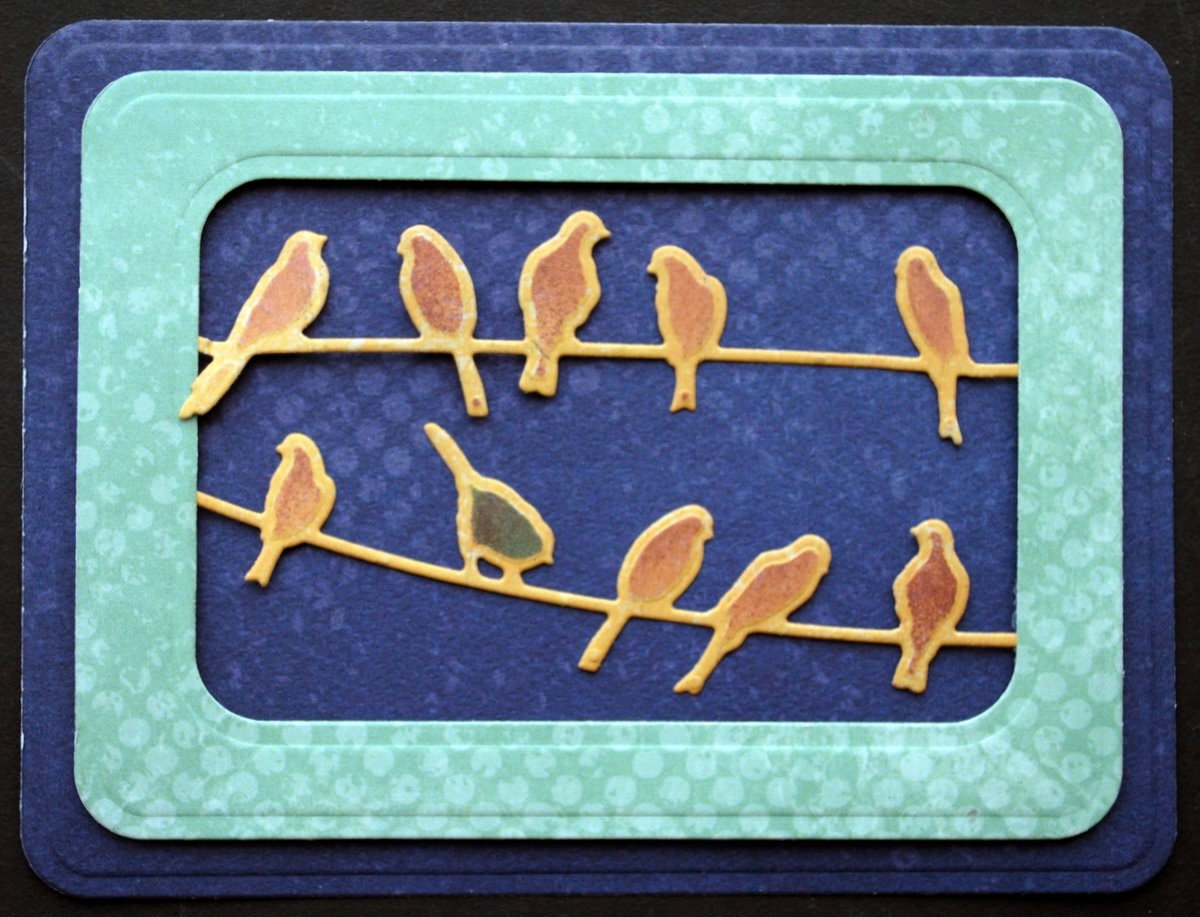
This card was inspired by Spellbinders new Birds on a Wire die. I die cut and embossed some decorative paper to start the project. Leaving the cut paper in the die, I used the die as a stencil and inked the birds as well. You will note that one bird is in a different shade.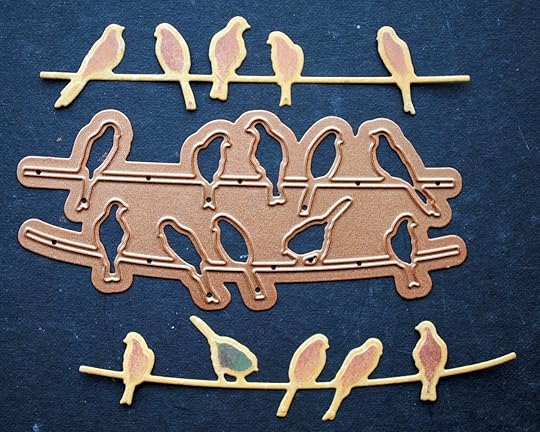
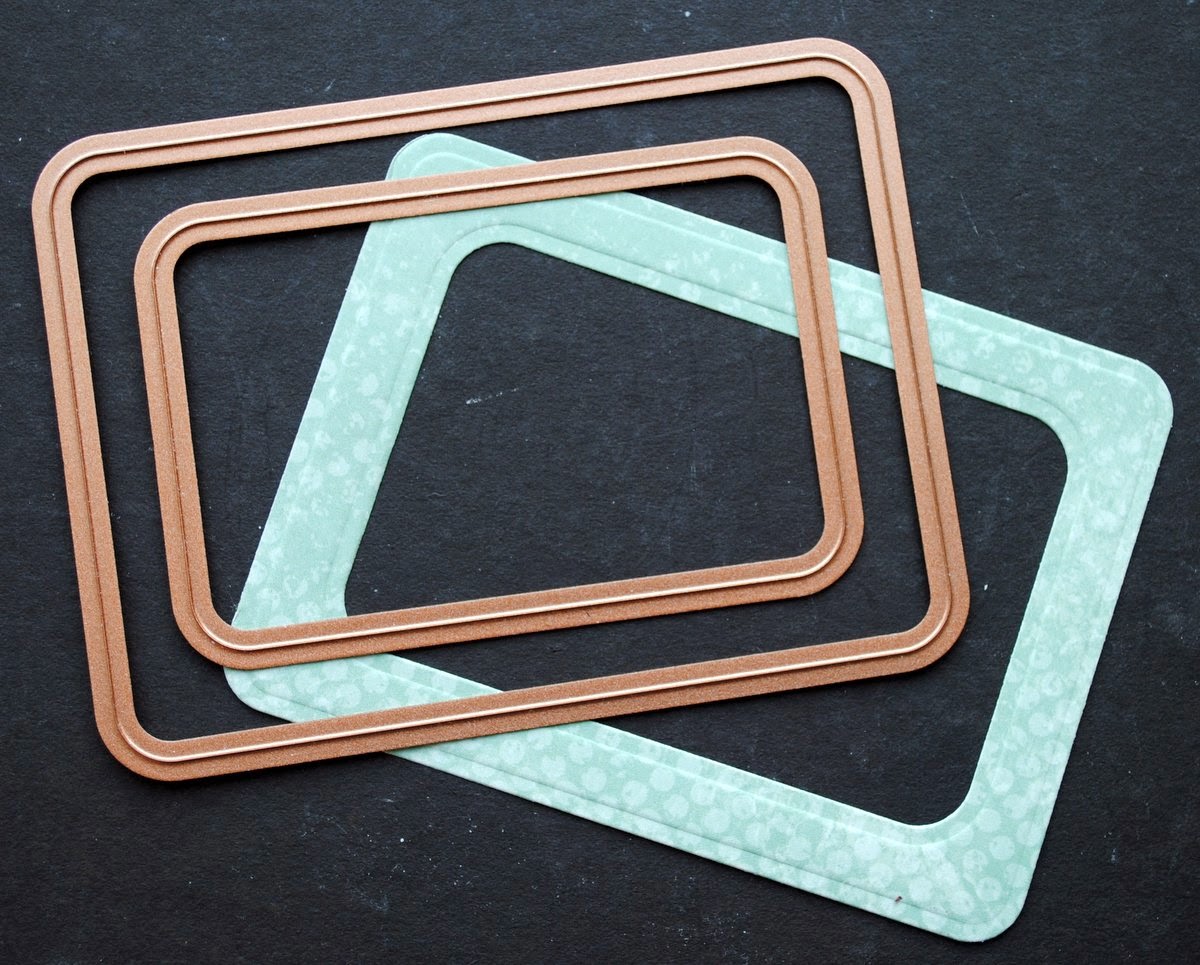
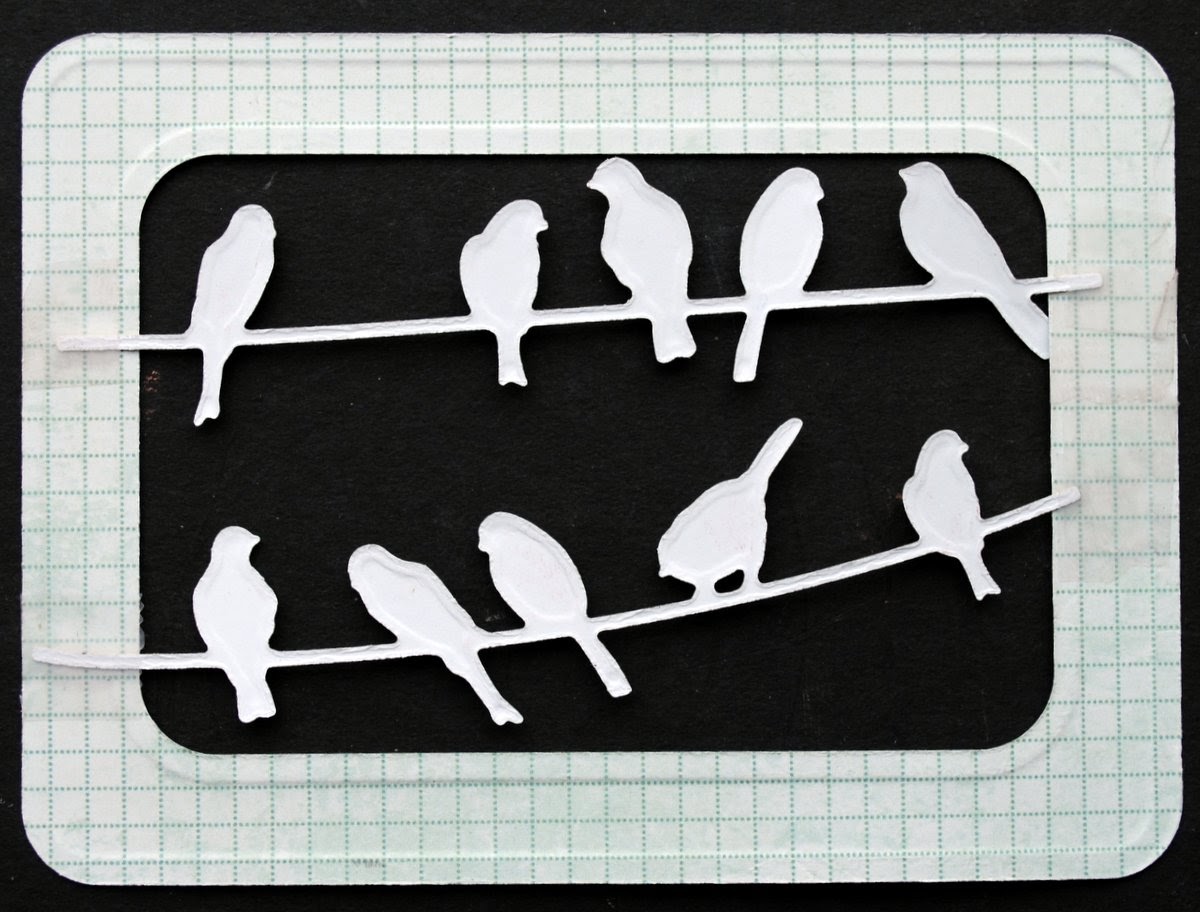
I selected Spellbinders A2 Curved Matting Basics B die set to create a window, using dies #4 and #6 and decorative paper.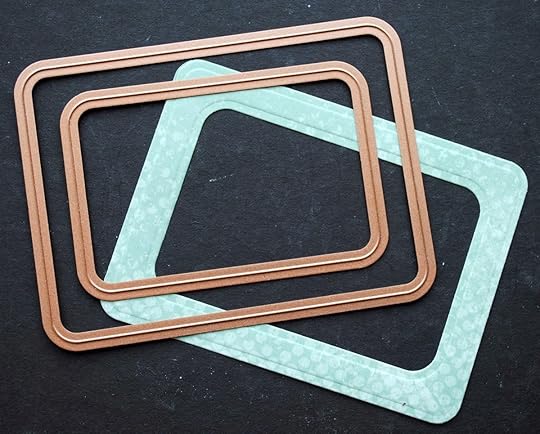
Turning the window over, I taped the birds to the reverse side...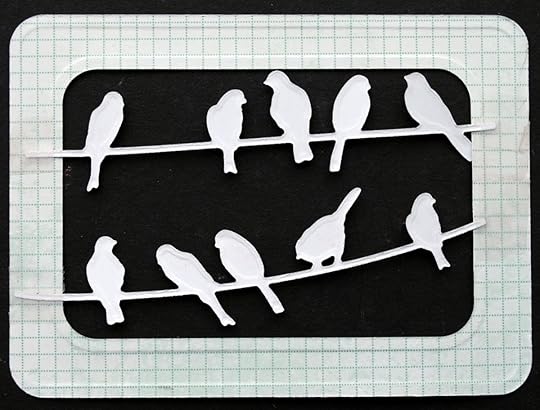
...so, when turned back over, they would be strung through the window on the front.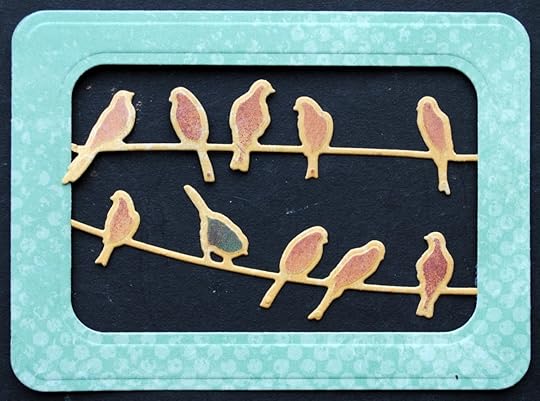
I next used the largest die in the same set to cut and emboss a different color paper to use as a base for the window.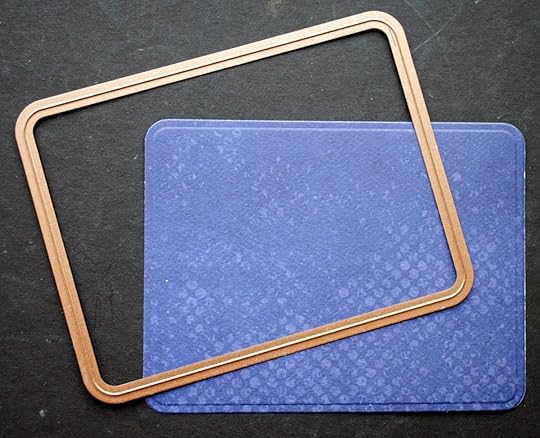
Using adhesive pop dots to create dimension, I then adhered the window to the base.
You can better see the layers from this angle.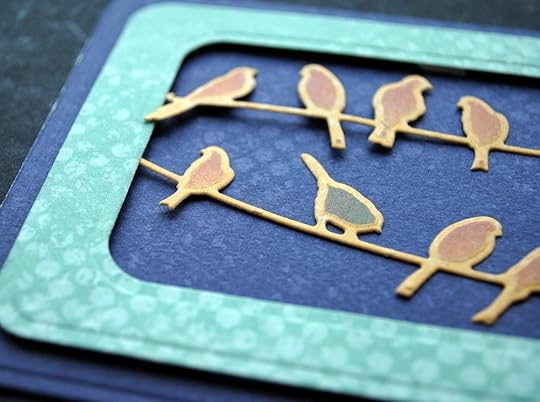
I then used Spellbinders Scratch Lines Texture Plate to create additional embellishment for the card. This plate deeply embossed a piece of foil so that I can add a bit of texture as well. I cut this strip into 3 pieces to place in different areas on the card.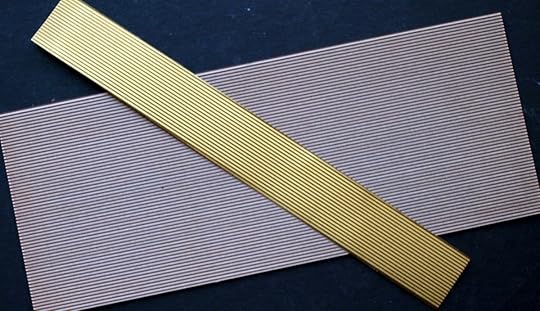
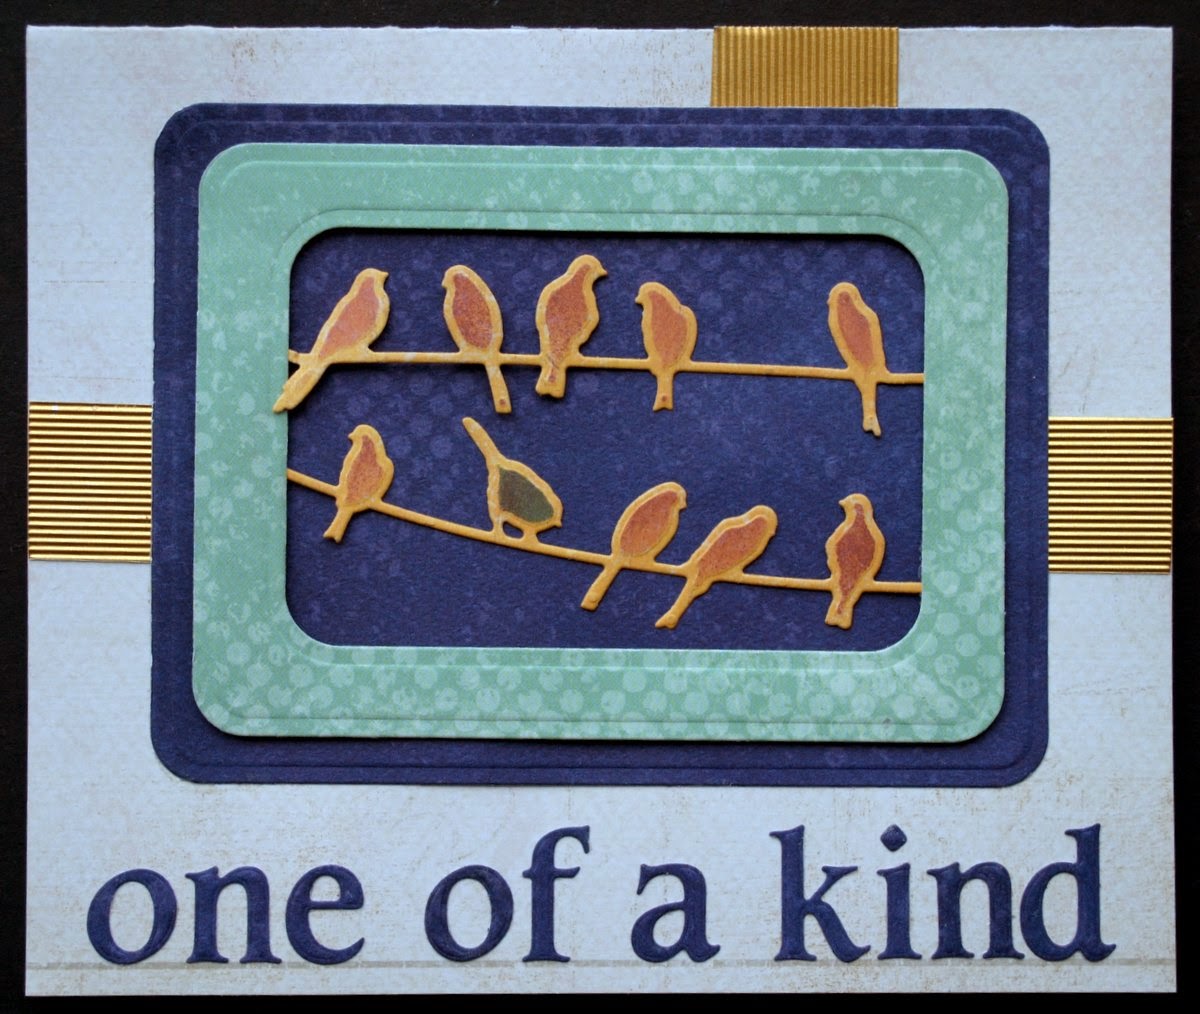
Using Spellbinders Font One - Lowercase die set, I cut a phrase that was inspired by the birds out of decorative paper.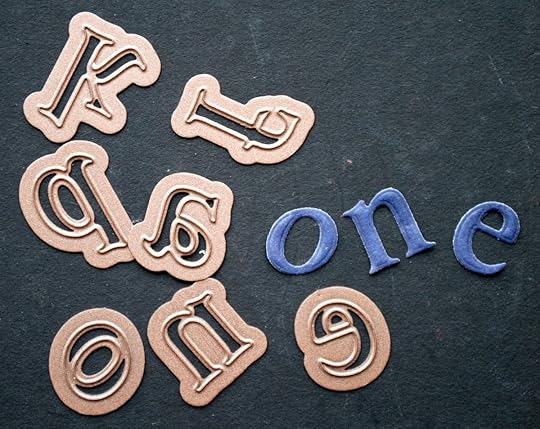
With all my components ready, I used a piece of decorative paper to make the card itself. I chose to cut it to a size of approximately 6 ½" x 5 ½" when folded based on the measurements of all the pieces that I had made.
Finally the time had come to put together all the individual parts and create my first card.
------------------------
Supply List
Spellbinders Paper Art Supplies:
MMM-001 Spellbinders® Artisan X-plorerIN-024 Spellbinders® Shapeabilities® Birds on a Wire
S5-172 Spellbinders® Nestabilities® A2 Curved Matting Basics B
GLT-001 Spellbinders® Scratch Lines Texture PlateS5-199 Spellbinders® Shapeabilities® Font One Lowercase
F-012 Spellbinders® Precious Metals Premium Craft Foils
Preferred Promotional Partners: Tsukineko® Dew Drop Brilliance Pigment Ink Pad, Tsukineko® Dew Drop Momento Die Ink Pad, Imagine Crafts® Inkblushers Sponge
Cross Promotional Partners: Authentique™ paper, DCWV® paper
Other: scissor, adhesive, pop dots, tape
--------------------------Giveaways
To be entered into the giveaway sponsored by Spellbinders and be eligible to win many of the products I used to create my card, head over to the Spellbinders blog and follow instructions there.
For a chance to win this "one of a kind" card, please leave a comment on this blog post and make sure I have your email address. Comments will close end of day Wednesday 4/2 and the winner will be contacted by email.

Card? Yes...card. I have never made a traditional card (shared with the public at least) before but thought that today was the perfect time. As a blogger for Spellbinders, one of my goals is to introduce mixed media techniques to all the card makers and scrapbookers who use their products. Figured I should walk the walk, step inside their shoes, and make a card. Who knows -- maybe I will scrapbook next. I believe creative people come in all forms and that there is every reason for us to cross over to "the other side" -- whichever that may be.
This card was inspired by Spellbinders new Birds on a Wire die. I die cut and embossed some decorative paper to start the project. Leaving the cut paper in the die, I used the die as a stencil and inked the birds as well. You will note that one bird is in a different shade.

I selected Spellbinders A2 Curved Matting Basics B die set to create a window, using dies #4 and #6 and decorative paper.
Turning the window over, I taped the birds to the reverse side...
...so, when turned back over, they would be strung through the window on the front.

I next used the largest die in the same set to cut and emboss a different color paper to use as a base for the window.

Using adhesive pop dots to create dimension, I then adhered the window to the base.
You can better see the layers from this angle.

I then used Spellbinders Scratch Lines Texture Plate to create additional embellishment for the card. This plate deeply embossed a piece of foil so that I can add a bit of texture as well. I cut this strip into 3 pieces to place in different areas on the card.

Using Spellbinders Font One - Lowercase die set, I cut a phrase that was inspired by the birds out of decorative paper.

With all my components ready, I used a piece of decorative paper to make the card itself. I chose to cut it to a size of approximately 6 ½" x 5 ½" when folded based on the measurements of all the pieces that I had made.

Finally the time had come to put together all the individual parts and create my first card.


------------------------
Supply List
Spellbinders Paper Art Supplies:
MMM-001 Spellbinders® Artisan X-plorerIN-024 Spellbinders® Shapeabilities® Birds on a Wire
S5-172 Spellbinders® Nestabilities® A2 Curved Matting Basics B
GLT-001 Spellbinders® Scratch Lines Texture PlateS5-199 Spellbinders® Shapeabilities® Font One Lowercase
F-012 Spellbinders® Precious Metals Premium Craft Foils
Preferred Promotional Partners: Tsukineko® Dew Drop Brilliance Pigment Ink Pad, Tsukineko® Dew Drop Momento Die Ink Pad, Imagine Crafts® Inkblushers Sponge
Cross Promotional Partners: Authentique™ paper, DCWV® paper
Other: scissor, adhesive, pop dots, tape
--------------------------Giveaways
To be entered into the giveaway sponsored by Spellbinders and be eligible to win many of the products I used to create my card, head over to the Spellbinders blog and follow instructions there.
For a chance to win this "one of a kind" card, please leave a comment on this blog post and make sure I have your email address. Comments will close end of day Wednesday 4/2 and the winner will be contacted by email.
March 28, 2014
Artexpo New York 2014
 Six pieces from my Passages series to be shown at Artexpo New York
One week from today I will be standing in my booth at Artexpo New York. This art exhibition has been running for 35 years in NYC but this will be my first time exhibiting. If you are in or close to New York, this is definitely going to be a must see event. There are over 400 exhibitors and more than 17,000 people have already gotten their tickets online.
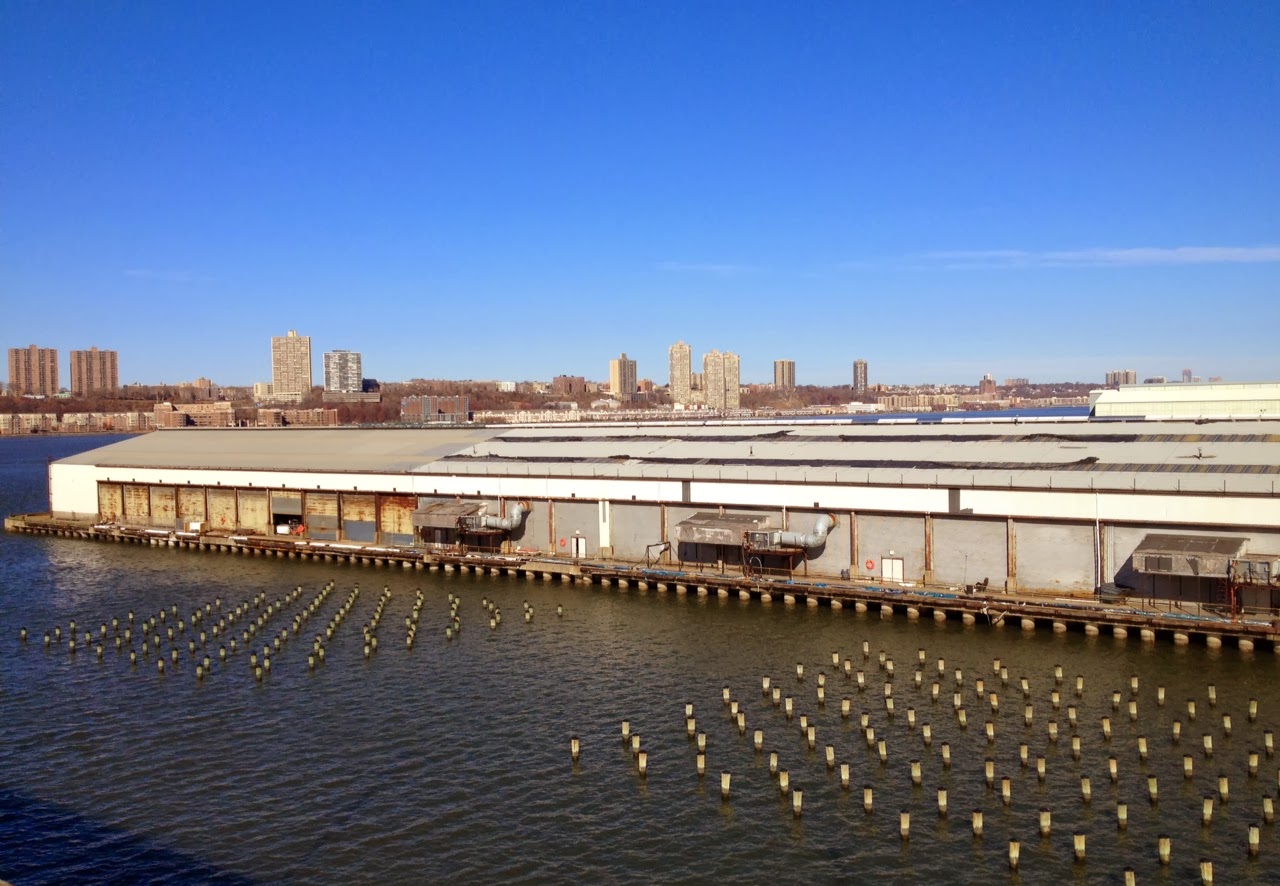
Artexpo New York is being held at Pier 94, on the Hudson River on the West Side of NYC. The Piers, each 1,100 feet long, were completed in 1935. While Pier 94 is exclusively used for exhibition space, the others are used as passenger terminals for cruise ships and as the home of USS Intrepid.

Artexpo is really three shows in one. The Solo Pavilion includes emerging and mid-career artists who have been juried in. I am part of this area, in booth S210. Artexpo also includes a more traditional exhibition area which is gallery-based. Finally, there is the Deco Expo Showcase which focuses on art and framing.
Those of you who are able to attend can also take advantage of a huge array of educational opportunities hosted by well-known industry professionals at the Topic & Trends Education Series. There are nearly 25 seminars, demonstrations and lectures over the course of the three days. For example, special guest David Bromstad, winner of the first HGTV Design Star, will be speaking on Friday.
The exhibition is open on Friday April 4 from 10am-7pm, Saturday April 5 from 10am-7pm, and Sunday April 6 from 10am-6pm. There is an opening night party being held on Friday from 4-7pm - and this includes food, drink and gift bags to all attendees. Tickets for the Artexpo are $20 but if you contact me directly, I can provide you with complimentary admission.
I have not yet had time to photograph all of my work, but I have been shooting detail shots along the way. Here are just a few...


March 25, 2014
The Court of Common Pleas

I am continuing to create new mixed media work for Artexpo New York. This art fair, which has been taking place in NYC for 35 consecutive years, will take place from April 4-6 on Pier 94. Over 400 artists and galleries will be exhibiting and more than 17,000 people have already preregistered online to attend.
I will be filling my booth with several different series of artwork with the common element being the inclusion of found objects, often blended with altered hardware and commercial embellishments.
The inspiration behind my most recently completed piece, The Court of Common Pleas, was two identical, antique gold Regal Wreath pendants from A Gilded Life, one of the new line of products from Spellbinders.

Also included are vintage book covers, vintage tintypes, found and altered metal, vintage paper, and fabric fragments -- all mounted on a hand-painted, cradled wood panel.


-------------------------Please contact me if you are able to attend so that I can provide you with complementary tickets. I will be in booth S210 all three days and hope to see some of you there!
March 22, 2014
Top 5 Workshop Tips: Execution
My top 5 tips for workshop instructors involving execution...

1)Preparation: Being prepared is equally important on the day of the workshop as it is in the planning stages before. You will be more successful if you pack your supplies in advance, arrive early, set up your worktable in a manner logical for the workshop, and have the class day well planned out. It is also good to prepare yourself for having students at a variety of experience levels and with differing expectations of the class.
2)Flexibility: Things happen. The instructor who expects this and reacts with flexibility will handle the situation better and create a better experience for the entire class. It is always good to have a Plan B.
3)Focus: The more successful workshop will be the one where the instructor focuses on two things: the workshop project and the attendees. Even if your students are self-proclaimed groupies, they are not paying to hear you talk only about yourself.
4)Generosity: Students are choosing to spend money to learn from their instructor. Be generous in terms of information, assistance, support, guidance, feedback and the like. Don't let the fear that a student will take your workshop and then teach it themselves create an atmosphere where you resist sharing.
5)Positivity: The successful instructor enters the workshop with positive expectations. She/he assumes that the class will go well, the students will learn, the room will be filled with creative energy, and the works will be balanced with some fun. The successful instructor also realizes that she/he is responsible to make all this come true.
This is an except from my article and interview published in the current digital Mixed Media Art Magazine Issue 10.
March 20, 2014
Making it My Own

One of my most favorite parts of creating new work is taking commercial products and making them my own. As a mixed media artist - almost by definition - no supplies are off limits for me. And that is most definitely true for the endless supply of materials available via the craft industry. My preference though is to alter these supplies so that they better fit my personal approach, seamlessly blend with all the other components I use, and end up looking uniquely my own. There is a wonderful challenge in taking something that is available to anybody and transforming it into something that only I have created.
Much of my work includes found objects and finds from the hardware store. So when I can integrate commercial products with these treasures, I am definitely a happy camper. For this reason, I have been highly inspired by one of the new lines from Spellbinders -- A Gilded Life. Designed by Debbie Murray and Shea Fragoso, this line includes pendants, bezels, dies, texture plates and relics -- all with a distinctive, European flair.
I have recently been making mixed media medallions using the pendants and bezels as the main ingredient. Click the link below each picture to be taken to the step-out tutorial for each medallion.
 Mixed Media Medallion I
 Mixed Media Medallion II
 Mixed Media Medallion III
 Mixed Media Medallion IV
My aim in making these medallions, was to create pieces that could be further integrated into the mixed media artwork that I was creating for an upcoming exhibition at Artexpo New York on April 4-6 in NYC. I have been working away, creating new work in my ongoing Passages series and wanted to share one with you. As you can see, this piece uses my Mixed Media Medallion I as a focal point.


March 18, 2014
Top 5 Workshop Tips: Planning
My top 5 tips for workshop instructors involving planning...
1)Preparation: A prepared instructor will be a better instructor. A lack of time and effort put into the behind-the-scenes planning of a workshop will be evident to all on the day of the workshop.
2)Workshop Content: There are a lot of workshops being offered these days. Successful workshops will be the ones that are unique, well developed, and truly reflective of the instructor's style as an artist.
3)Venue Selection: Choosing the right workshop for the right venue is an art in and of itself. And instructor will attract more students if she/he tries to match the type of venue being considered to the theme of the workshop.
4)Timing: They say it is all in the timing and that is true for a successful workshop as well. Avoid scheduling on major holidays, at the same time as another artist is teaching in the same area, and in the period just before, during, or just after a major art retreat. Weekends are almost always better than weekdays.
5)Professionalism: Word travels fast in our small community. Always communicate with your contacts at the venue in a professional, personable and timely manner. Actually, make this a matter of course with everybody!
This is an except from my article and interview published in the current digital Mixed Media Art Magazine Issue 10.
March 16, 2014
I'm in Fifth Grade in Brazil

I am excited to have some of my artwork published in a textbook for elementary school students in Brazil. "Artes - 5 ano - Ensino Fundamental I" is authored by Ana Herminia Leoni Souza and published by Editora Poliedro Ltda.
Two of my mixed media pieces are included, both of which happen to be covers of books I made as part of collaborative projects.
 Contexture
 Distressed Elements
The accompanying text loosely reads "Let's learn about some artists who use the technique of mixed media in their work and see how they feel and think about this process. For Seth Apter, his exploration of different techniques brings the feeling of freedom and offers him the chance to express his art in a flexible, varied, and creative way."
How cool is it that 5th graders in Brazil are being exposed to mixed media arts!
March 14, 2014
Mixed Media Art Magazine

In the past year, 10 issues of The Mixed Media Art Magazine have been released and each one is filled cover to cover with creative inspiration. Though published out of Portland, Oregon, this digital magazine is international with regard to both the editorial team and the artists it spotlights.

In any issue you might find artist profiles, step-out tutorials, book reviews, product introductions, artistic tips, city guides, inspirational articles, and much more.

I am so pleased to be on the pages of the current release, issue #10. On these pages, you will find step-by-step instructions and photos so that you can follow along as I create The Key...

In addition, you can read my interview where I share "the keys" to running an art workshop and talk about my top 10 considerations for organization and execution which can be the difference between a workshop that works and one that doesn't.
You will also find an artist profile on Luthien Thye, a tutorial on how to anneal and patina metal, a city guide to Kuala Lumpur for the artist, thoughts from Martha Marshall on how to let intuition guide your creative process, a window into Tara Pappas' use of her handmade stencils in her artwork, a lesson using Golden's new Liquid Acrylics from Nancy Smith Klos, a profile on the work of German collage artist Marko Koppe, and more.
-------------------------------
You can find more information on the Mixed Media Art Magazine on their website or Facebook page. Or head directly to iTunes where you can purchase a subscription and download the issues.