Kelly Fiore Stultz's Blog, page 6
November 15, 2013
GoodReads Giveaway: Just Like the Movies!
Over on GoodReads, there are two copies of Just Like the Movies up for grabs! Go enter for a chance to win!
Goodreads Book Giveaway

Just Like the Movies
by Kelly Fiore
Giveaway ends February 01, 2014.
See the giveaway details
at Goodreads.
November 10, 2013
Foodie Fall Week Two: Win a Chipotle, California Tortilla, or Panera Gift Card!
Congratulations to Kat, who won last weeks Burger Joint gift card!
Now, t’s Week Two (November 10th to November 16th) of the TASTE TEST Foodie Fall Giveaways!
Here’s this week’s giveaway: a TASTE TEST Dish Towel and a $20 gift card to Chipotle, Panera, or California Tortilla
To win , you need to answer the following question:
In TASTE TEST, main character Nora Henderson loves cooking with spices — especially savory spices like cayenne pepper and chili powder. What is your favorite spicy dish or recipe and why do you love it so much?
Enter the contest by writing your answer and adding it as a comment to this post — and make sure your contact information (email) is included in your entry.
Want to enter twice? Tweet about this giveaway! You can write your own tweet about the contest (make sure you put the website, www.kellyfiorewrites.com, and my handle, @kellyannfiore, in your tweet) or you can use tweet the following message:
Could you use some free Chipotle or Panera? Go enter @kellyannfiore’s TASTE TEST Foodie Fall giveaway and enter to win a $20 gift card! www.kellyfiorewrites.com
or
It’s Foodie Fall on @kellyannfiore’s blog – enter to win a popular restaurant gift card every week this month! www.kellyfiorewrites.com
Good luck everyone! Thanks for giving me something to be so thankful for!
November 1, 2013
Foodie Fall: TASTE TEST giveaways all November long!
FREE FOOD!!!
For the four weeks of November, to celebrate the focus on both food and family in TASTE TEST, I’m giving away a swag pack that includes a fun kitchen tool or item that you can use while cooking (or even eating) Thanksgiving dinner and your choice between three gift cards to popular restaurants.
Week One (November 2nd to November 9th): TASTE TEST spatula set and a $15 gift card to Five Guys, Red Robin or Elevation Burger
Week Two (November 10th to November 16th): TASTE TEST Dish Towel and a $20 gift card to Chipotle, Panera, or California Tortilla
Week Three (November 17th to November 23rd): TASTE TEST Oven Mitt and a $25 gift card to Cheesecake Factory, Outback or Macaroni Grill
Week Four (November 24th to November 30th): The Thanksgiving Week Finale! Set of TASTE TEST Paring Knives, TASTE TEST Dish Towel, TASTE TEST Oven Mitt AND and a $40 gift card to any one of the restaurants listed above.
So…
Let’s jump right into Week One!
To win a TASTE TEST spatula set and a $15 gift card to Five Guys, Red Robin, or Elevation Burger, you need to answer the following question:
In TASTE TEST, main character Nora Henderson has a deep connection to food from her childhood. What is your favorite food or dish that you remember your family making when you were little? It can be a meal you loved, a recipe from the holidays, or just a simple snack.
Enter the contest by writing your answer and adding it as a comment to this post — and make sure your contact information (email) is included in your entry.
Want to enter twice? Tweet about this giveaway! You can write your own tweet about the contest (make sure you put the website, www.kellyfiorewrites.com, and my handle, @kellyannfiore, in your tweet) or you can use tweet the following message:
It’s Foodie Fall on @kellyannfiore’s blog – enter to win a popular restaurant gift card every week this month! http://kellyfiorewrites.com/2013/11/0...
Good luck everyone! Thanks for giving me something to be so thankful for!
October 22, 2013
When to shelve it for good.
Sometimes, you have to be honest with yourself and say…it’s just time to let go.

Sourced from www.crookedstripes.wordpress.com
I know, I know. It’s hard. You have that novel/script/manual/handbook/tome that you wrote a few years ago and it was something special to you. Maybe it was the first book you wrote ever. Maybe it was based on something that happened to you or your family. Maybe it’s the story you wrote that inspired you to be a writer in the first place.
But, here’s the thing — just because you FEEL emotionally about this work doesn’t really mean it’s actually good.
In my case, this was a lesson that took about, oh, five years or so to learn. In 2008, I’d stumbled upon the Twilight books and did what a lot of beginning writers did at that time period — I thought, “Hey, this is a “thing.” Maybe I could do this.” I put some thought into a good hook and storyline. I’d spent time in Greece and Turkey, and I knew quite a bit about mythology, so I decided to go with that. (Obviously, I hadn’t heard of Rick Riordan or Percy Jackson — if I had, I may not have continued on that path.)
Anyway, I wrote a book called Gods of Rock, about a girl who goes to Greece to be an intern on a rock tour. I adored this book. I wrote it in about 30 days, then started querying immediately. Knowing what I know now about writing/querying/the business now, I NEVER would have sent this book out to agents. It was a mess.
But, somehow, the concept was solid enough that my first agent found something redeemable in me, and I’ll be forever grateful for that. But I guess it isn’t a huge shock that she wasn’t able to sell it, even after it went through extreme revisions. Since then, I’ve revised it multiple times between writing and selling other books. This past summer, I tried reformatting it into a New Adult book because I felt that the subject matter would work really well if the characters were a bit older.
But, in the end, it just isn’t working. The truth — THE TRUTH — is that, if I really wanted to make this book something viable, I need to start from scratch. And that means shelving the current MS.
It’s hard. I learned a lot writing this book and I credit it for helping me pull out of the doldrums of post-partum blues and getting me an agent. But, in the end, I’ve learned so much SINCE writing that book that it really isn’t a product of how I write anymore. I have a lot of other fish to fry with my publisher(s) and I don’t really have time to start from scratch, no matter how much I adore the characters and the story line.
So, I’ve come to the conclusion that it’s time to shelve this baby for good. It makes me a little sad, but I’m so excited about my writing future. It really makes putting away this book a little bit easier. It’s always important to look toward the future.
I’ve never been as happy as I am at this very moment.
*Warning: This post is gonna have A LOT of gifs*
So, when it all went down, I felt a lot like this:

And then like this:
And, ultimately like this:
I’ve been waiting a while to tell everyone this information and it’s almost killed me  Truly, I wanted to shout this from the rooftops from the second it happened…but life doesn’t always work that way. So I told a few people close to me and waited patiently for the go-ahead.
But now — NOW — I can tell everyone. We should probably start with the deal announcement in Publisher’s Weekly:
Karen Chaplin at HarperTeen has pre-empted a YA novel by Kelly Fiore, author of Taste Test and the forthcoming Just Like the Movies. Her new book, The People vs. Cecelia Price, was pitched as Sara Zarr meets Breaking Bad; it features a teenage girl accused of murdering her drug-addicted brother, though the truth is a lot more complicated. It will be published in fall 2015; Suzie Townsend of New Leaf Literary and Media was the agent.
So, what does this mean?
Well, obviously, my agent sold my book – THE PEOPLE VS. CECELIA PRICE – to Harper Collins.
And that makes me feel like this:
What else does it mean?
It means that, including Taste Test, I have four books coming out over the next four years. It could actually be more if I get the opportunity to continue my option books with Bloomsbury, and I really, really hope I do. I love my editor there so very much.
So, let me take a moment to talk about Cecelia Price (which is what I usually call the book — adding “The People vs.” at the beginning gets a little cumbersome.)
For me, Cecelia Price is “The Book.” I think I can say with some authority that most authors have their own version of “The Book.” “The Book” is, for me anyway, the thing I’m most proud of in my writing life. It shows the best of my writing and it shows how much I’ve grown as a writer. It was the book that spoke to me all on its own and had such important things to say.
“The Book” is what makes everything worth it. It makes me giddy, proud, and emotional all at once.
I am a very quick writer most of the time. This book, though? It took me the better part of three years to complete it — that’s a long time for someone who usually only takes 3-4 months for a good first draft. The reason, more than anything else, was the subject matter. Cecelia Price is about addiction to prescription medication, among other tough subjects. It’s a character study of a brother, sister, and father, all of whom live in their own versions of denial. Here’s the pitch from my query letter:
Cecelia Price murdered her brother, Cyrus. At least, that’s what the police are saying. So is the district attorney.
But CeCe knows the story is more complicated, that a terrible thing happened when she was trying so hard to make things right. Cyrus was addicted to prescription pain killers and had deteriorated into an angry, violent version of his former self. CeCe had no choice but to adopt a fragmented identity: part drug dealer, part honor student, part sister, part daughter. Now, locked up and facing a murder charge, CeCe must make her lawyer understand how sometimes the best intentions lead to the worst possible outcome.
The book alternates between three different perspectives — CeCe’s memory from her childhood, CeCe’s life from months before her brother’s death, and CeCe now (after her brother’s death) as she prepares for court. While we focus specifcally on CeCe’s character, we also watch the slow deterioration of her family through the lense of a desperate girl. Similarly, we get to know her love interests — both good and bad influences in her life — as well as two female figures helping to keep her out of prison: her lawyer, Jennifer, and her counselor, Trina.
It’s a book that’s both sad and real. It was written as a direct response to the feeling one has when a family member is in drug crisis – a feeling I know extremely well from my own family’s past. In some ways, for me, this book feels angular, like it would be hard to hug and love. Sometimes it’s hard for me to read it. I can’t even tell you how many times I cried while writing it. But it’s the best thing I’ve ever done, save having my little boy. If I died tomorrow and Cecelia Price was the last book I ever wrote, I’d be okay with that. I can only hope to be known for this story I love so very much.
So, that’s it. My big news. I am a happy, happy, happy girl.
October 20, 2013
Melt in your Mouth Monday: Making your own Girl Scout Cookies
Not eating dairy isn’t as hard as it sounds.
Well, I should strike that. I actually do eat dairy — not a ton of it, but I have milk in coffee and on cereal, and I love a good cheesy pizza and greek yogurt with honey.
But my son has a dairy allergy and can’t have it at all, which means I’m always on the lookout for dairy-free recipes — in particular, dairy free treats. There are so many delicious things he can’t have. I try to replace them with lots of delicious, if not exactly healthy, alternatives. Here’s one that is tried and true in our kitchen.
width=”224″ height=”300″ /> ”Samoa Imposters” (otherwise known as Caramel Delights)
These are based on the Girl Scout Cookie of the same name, but these are completely vegan. I adapted my recipe from www.godairyfree.org by adding old fashion oats to my coconut, making the cookie a little more healthy (not that it’s necessary.) I also used coconut oil in the cookie itself — they recommend soy margerine, which just isn’t my thing.
Dairy-Free Samoa-ish Cookies (a.k.a. Caramel deLites)
This recipe is Vegan, Dairy-Free, Egg-Free, Nut-Free, Soy-Free, and I suppose you could make it Gluten-Free by using your favorite GF flour blend in place of the plain flour.
Shortbread Cookies (Adapted from Baking Bites )
1/2 Cup Dairy-Free Margarine (I used Spectrum Coconut Oil)
1 Tablespoon Milk Alternative (I just used a little of the coconut milk that I had opened for the caramel topping, but use whichever plain or vanilla milk alternative that you like)
1/4 Cup Sugar
1/2 Teaspoon Vanilla Extract
1 to 1-1/4 Cups Flour
1/8 Teaspoon Baking Powder
1/8 Teaspoon Salt
Preheat your oven to 350ºF.
In a mixing bowl, beat together the margarine, milk alternative, sugar, and vanilla, until creamy. Add 1 cup of the flour, the baking powder, and the salt, and mix until well combined. Add in up to 1/4 cup of additional flour to keep the dough from sticking to your hands.
Roll or pat the dough out on a floured surface until it is 1/8 to 1/4-inch thick. Using a 1-1/4-inch cookie or biscuit cutter, cut the cookies out and move to a baking sheet lined with parchment paper or a silicone mat. I actually (gently) cut the cookie dough right on my silicon baking mat, since the cookie dough can be hard to move.
Bake the cookies for 10 to 12 minutes, or until they just begin to brown around the edges. Let cool while you prepare the caramel topping.
Caramel-Coconut Topping (Adapted from the Dulce de Coco recipe in Go Dairy Free: The Guide and Cookbook )
1 Cup Regular Canned Coconut Milk (I use the full-fat version, not light)
2/3 Cup Packed Brown Sugar
1/4 Teaspoon Salt
1/2 Teaspoon Vanilla Extract
1 cup Unsweetened Shredded Coconut (or use sweetened coconut if you prefer a more sugary treat)
1/2 cup rolled oats
Combine the coconut milk, brown sugar, and salt in a small saucepan and bring to a simmer or low boil. Reduce the heat to medium-low, cover, and let simmer for 10 minutes. Keep an eye to be sure it doesn’t threaten to boil over. Uncover and continue to let it slowly boil / simmer for 20 to 25 minutes, stirring occasionally. It should become somewhat thick, like a caramel sauce … but keep in mind, it will thicken more as it cools and when you add all of that coconut!
Remove the caramel mixture from the heat, and stir in the vanilla, followed by the coconut and oats.
Samoa Assembly
1 Cup Semi-Sweet Chocolate Chips(I used Guittard)
1 Tablespoon Coconut Oil (optional)
Top each shortbread cookie with the caramel-coconut mixture. I use it all up, making a fairly thick layer of topping. My topping was thick, so I wet my hands (to prevent sticking) and pressed it down to evenly cover the tops of the shortbread.
Melt the chocolate chips with the coconut oil, if using. I place them in a bowl and put them in the microwave on high for 1 minute, then stir vigorously until smooth. You may need more or less time in the microwave … just make sure you do not overheat the chocolate … it burns easily.
Dip the shortbread bases in the chocolate. You can either coat just the bottoms, or submerge up to the caramel layer.
Place them chocolate side down on parchment paper or a silicone baking mat to firm up. Then, somehow drizzle the tops of the cookies (over the caramel layer) with chocolate. I’ve read that you can do this with a fork … but that didn’t work for me. For the prettiest results, piping the chocolate on would work best. I just sort of drizzled it on.
Let the cookies sit in a cool area so that the chocolate can set up. Usually this will happen at room temperature, but my husband had our heat set on “melt chocolate” that day (15 degrees outside, well over 70 degrees inside), so I placed them in the fridge for 30 minutes to firm up.
Makes 2 dozen cookies
Recipe adapted from Go Dairy Free – to see the original recipe, go here: http://www.godairyfree.org/recipes/samoa-girl-scout-cookie-recipe
October 19, 2013
New Blog Schedule
I’m not so good at this blogging thing. Mostly, I run out of stuff to talk about. Or I feel weird talking about myself all the time.

But, I feel like it’s important that I keep this blog current, so I’m going to attempt to start following a schedule.
Melt -in-your-mouth Mondays, where I write about food and share recipes
Writing Wednesdays, where I focus on all things writing and craft related
Free Write Fridays, where I write about — well, whatever I feel like writing about
I know. It isn’t exactly a complex schedule. I just feel like I should be better about keeping up with this. It’s part of my job in it’s own way.
This week, I will break this schedule at some point — I have at least one BIG announcement to share with readers, although I’m not sure which day I’ll do it. But stay tuned. 
September 30, 2013
TASTE TEST gets a lovely review from School Library Journal.

Reviews are hit or miss. Sometimes they’re good, sometimes they’re bad, sometimes they’re meh. But, for the most part, you have to take them with a grain of salt.
That being said, however, the reviews you get from publications like Kirkus, Publisher’s Weekly, and School Library Journal tend to be a bit more coveted. You want a good review from these publications. Which is why I’m so thrilled to share this one, from SLJ, about TASTE TEST:
FIORE, Kelly. Taste Test. 336p. Walker. 2013. Tr $17.99. ISBN 978-0-8027-2838-8. LC 2012027331.
Gr 7 Up–Nora Henderson has been cooking in her dad’s BBQ restaurant her whole life. But Weston, North Carolina, is a tiny town, and she wants out. She applies to compete in the hottest new reality show, Taste Test, where teens vie for a scholarship to the International School of Cuisine in Paris and a $50,000 cash prize. The aspiring chefs are friendly but also ultracompetitive, and battle lines, including the requisite drama and sabotage, are quickly drawn. Nora learns that all’s fair in love and war, and that sometimes the good guy can finish first. This debut novel is a sweet confection about overcoming the odds and being true to oneself. Nora is an everygirl with a realistic voice and a great sense of humor about her fish-out-of-water situation. Readers who are not interested in cooking will still relate to the reality-show setting and enjoy the friendships and romance. The food descriptions are mouthwatering, and the contestants’ recipes included in the back matter feature sophisticated flavors that might even get some readers cooking.–Laura Lutz, Pratt Institute, New York City
I must say a big thank-you to Laura Lutz, who is not only an amazing librarian and reviewer, but also a food/wine blogger. Her review feels all the more special because of that.
September 11, 2013
Throwback Thursday: I think I can, I think I can!
I Think I Can, I Think I Can
This post was originally writen for my friend, Lauren’s blog (www.oatmealafterspinning.com, but I’ve been doing a lot of canning lately, so I wanted to revisit it.)
I’ve recently dealt with a lot of food storage issues — mainly, I don’t have enough of it. Well, I have PLENTY of food — but I’m short on the storage, no pun intended. I’m a member of a local farm share, which leads me to the subject of this post — canning produce. Let me begin by saying this — if I had known how EASY canning was, I would have been doing it for years. Seriously. YEARS. It’s that easy!
The farm we work with was cursed with tomato blight pretty early on in the season, which forced/allowed us to get gallons of fresh, ripe tomatoes “out of bag” – which basically means free. I don’t turn down free produce, but I hate when things go to waste and I have to admit that happens a lot in our house. Between buying different things and forgetting them, having a few major power outages, and losing a fridge this summer, we’ve really wasted a lot of food. I was determined to save and use these tomatoes. I could have frozen them – Barbara Kingsolver’s book Animal, Vegetable, Miracle gives great directions on this — but I decided to try canning. I’m so, SO glad I did.
Below are a few of my new “tried and true” staples that I hope you’ll find helpful, especially as some of us become inundated with tomatoes over the next month or so.
Canning Tomatoes
Before canning tomatoes, I was a canning virgin. When the cucumbers and tomatoes began coming in full force, I grabbed one flat of quart jars, one gallon of white vinegar, and a package of dill. I figured that, with those ingredients, I could at least attempt pickles. But the tomatoes were beckoning me, mostly because they were over-ripe and really needed to be eaten. You can find a lot of good recipes online, but I kept it simple.
What you need:
Tools –
Quart or Pint Ball Jars with two-piece lids
A very large pot
A rack to go into that pot (or something you can use as a rack)
Tongs
Potholders
Lots of towels (the small, kitchen kind are fine)
Strainer (I use a baking sifter.)
Ice and Water
Cutting Board
Sharp Knives
Large Bowl or Two
Ingredients –
Tomatoes (the amount will vary based on the number of jars you want to fill; it takes about 5 tomatoes to fill a quart jar and 3 to fill a pint, but that is a very inexact science)
Lemon Juice
Water
Steps:
1. Prepare your tools.
You’ll want to begin by sanitizing your jars. This is NOT as scary as it sounds – basically, you fill up your pot with water, bring it to a strong simmer, but not to a boil, and drop the jars and lids in.
You don’t want the glass to touch the very hot bottom of the pot, so you need some sort of rack to go at the bottom. I use a steamer insert but, in a pinch, you can use extra Ball lids (the part with a hole.)
You will need another, smaller pot of almost boiling/gently boiling water to skin the tomatoes, as well as a bowl with cold water and ice (herein called an ice bath.) These will make your tomato peeling quick and easy.
2. Prepare your tomatoes.
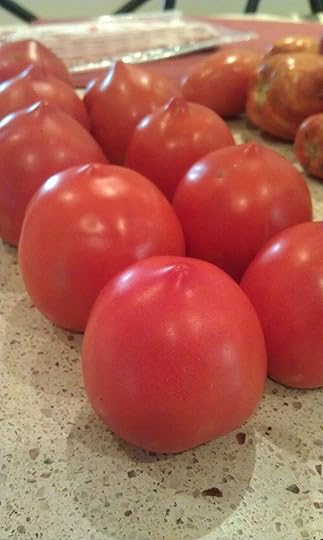
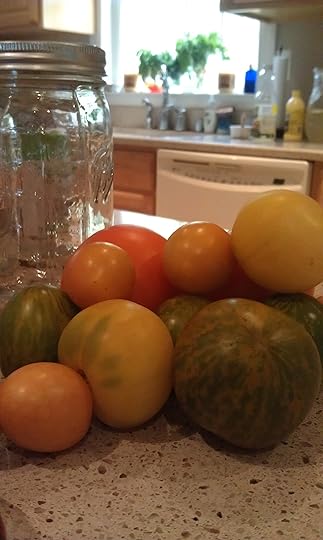
It’s up to you what kind of tomatoes you use. Different farmers/growers/seed catalogs/chefs will tell you that different tomatoes are better for different dishes, and I don’t dispute that. However, all tomatoes taste, well, tomatoey. Don’t feel like you have to get a certain kind. I encourage you to try many varieties. The San Marzanos (above right) are world renowned for their excellence and are used in many Italian dishes. They are the ones I canned in their own juice, as opposed to making marinara sauce or salsa.
To prep your tomatoes, you want to rinse them, then cut out the stem/core area with a sharp knife. Flip the tomato over and cut a small “X” into the bottom of the tomato’s skin. Don’t go too deep into the flesh.
3. Skin your tomatoes.
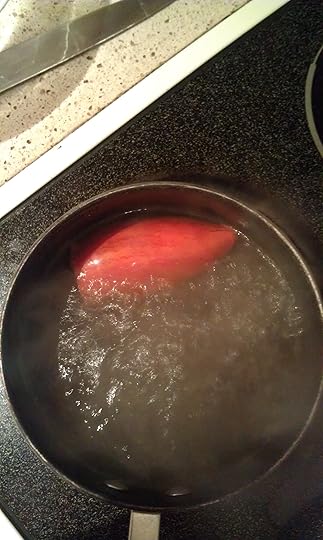
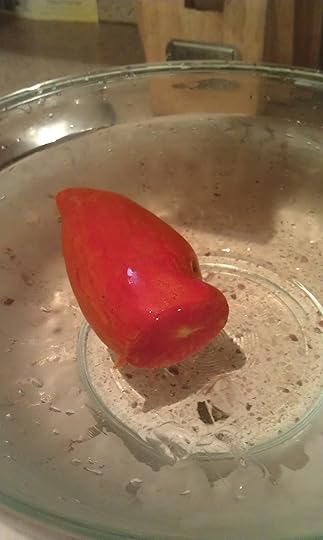
Above, from left to right: San Marzano in boiling water and then an ice bath.
This is as easy as it sounds/looks. Take the prepped tomatoes. Drop one or two in boiling water. Give it about 30 seconds. Pull them out with a slotted spoon and drop them in the ice bath. They can stay in there for as long as you need them to, but the longer they are in there, the more ice will melt and the more you’ll need to refresh it.
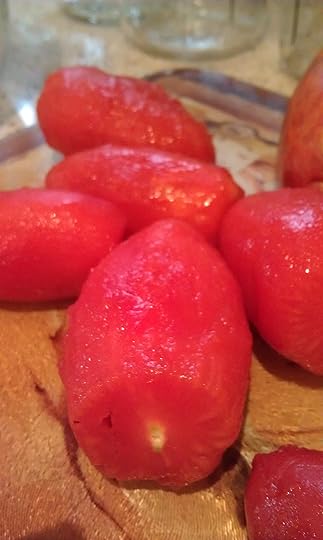
Pull them out of the bath and, using your fingers, gently peel back the skin from the flesh. Be careful not to squeeze too hard – you want to save that juice! When you’re done, they should look like this:
4. Seed/Juice your tomatoes.
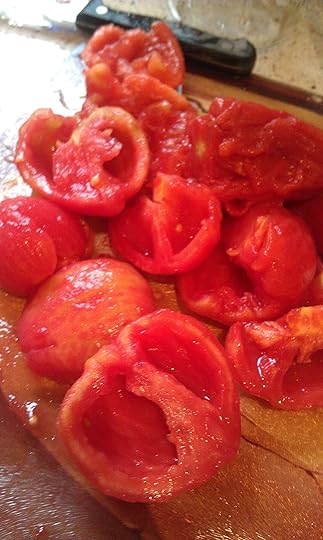
This is really the messiest part, but it’s necessary and worth it. With your knife, cut your tomatoes in half. Squeeze all the juice and seeds into a strainer. I use a sifter (seen above). Place the strainer over a bowl and continue until all your tomatoes look hollow, but still intact (like the other picture above.) They may get a little mangled, but you’re not making sauce with this batch, so you want the flesh to keep its firmness.
Once you’ve got all the juice and seeds in the strainer, you want to push them through, getting as much juice as possible. When you’ve done your best, pitch the seeds, but keep the juice.
5. Canning the tomatoes.
Take your tomato halves and drop them in the sanitized jars (at this point, the jars should be clean and dry, waiting for you – do that before you start any of this tomato business). Pile them in there pretty loosely. You don’t want to pack them in, or the juice won’t reach them all.
Dump your tomato-blanching pot of water and pour in the reserved tomato juice you just squeezed. Add enough water to make 2 cups (for a quart). Add two tablespoons of lemon juice. Bring this mixture to a simmer.
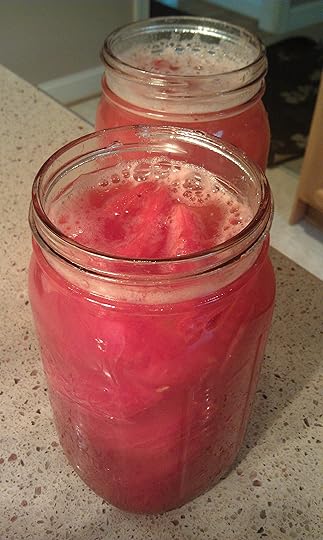
Ladle the liquid into the tomato jars, leaving a half-inch at the top. Securely fasten both parts of the lid, screw on tightly, and wipe the edges of the jar. Drop the jar into your large pot of water (the same one you used for sanitizing). You want to make sure that the jars are covered with water.
Now, from here, it varies on how you want to do this – many experts who are very well-versed in canning say many different things. For my part, I let my cans simmer on medium heat for 40 minutes. I then removed them with tongs and pot holders (canning tongs work best here) and let them rest on dry cotton towels until they were room temperature.
Tomatoes are acidic – while you can certainly keep these into the fall and early winter, I wouldn’t necessarily wait too long into 2013 to use them.
Another Option? Marinara Sauce
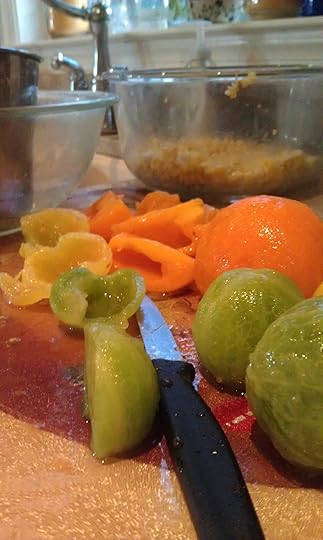
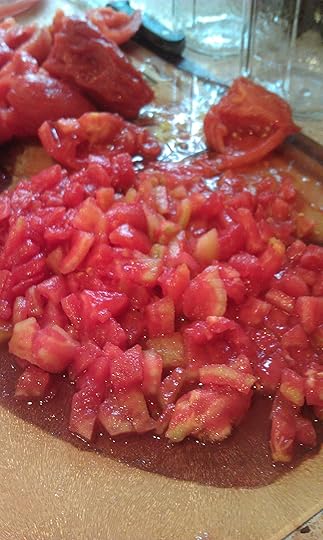
Here’s my recipe, which I LOVE and is totally delicious. You’ll do all the same steps as above, except you’ll chop the tomatoes pretty roughly, like this:
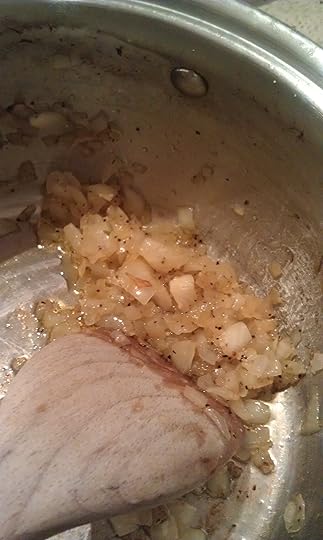
After that, you’ll sauté a small to medium onion in some olive oil. I add about a teaspoon of salt and a ¼ teaspoon of pepper here. You want them to get kind of golden and translucent, like this:
After this, you add the chopped tomatoes and the reserved tomato juice you strained to the pot. Simmer it as long as you want – I make a quart of sauce at a time and I let it cook for about 30-40 minutes on the stove. I wait until I’m happy with both the thickness of the sauce and how much the tomato chunks have broken down. In the meantime, you’ll want to chop a handful of fresh basil and fresh Italian flat-leaf parsley.
Keeping your herbs in a window and in water works out really well – these were about a week old and still looked fresh and were deliciously potent.
I do a basic chiffonade of the herbs, but you can chop, slice, or even just rip them up into larger pieces. There aren’t any rules here.
When you are ready to can, take the sauce off the heat and stir in the fresh herbs. Pour your sauce into sanitize jars and put them in the water bath on the stove for 40 minutes. Same rules apply in terms of storage – this is just as acidic and, honestly, when you taste it, you’ll want it right away.
Some non-tomato options?
Dill Pickles and Dill Green Beans
You’ll Need:
2-3 medium cucumbers
1 lb. green beans
2 cups white vinegar
1 ½ cup water
6 whole cloves of garlic
6 stems of dill
6 tablespoons of salt
Boil the water and vinegar. In six sanitized pint jars, drop in 1 clove of garlic, one sprig of dill (pretty bushy, about 4” long), and 1 tablespoon of salt.
Wash and slice/trim the cucumbers and green beans. Put them in the jars on top of the garlic, etc. Pack them in fairly loosely, leaving ½ inch of space at the top. You may need to trim any longer beans.
Pour boiling vinegar/water mixture into jars, keeping that ½ inch a the top clear. Fasten the lids and put in canning water bath for 15 minutes.
These pickles and green beans need at least 6 weeks to really cure and become their best selves – however, there are LOTS of recipes for refrigerator pickles (pickles that only take a few days to…well, pickle.)
***
I hope some of these recipes appeal to you and that you’ll be willing to give them a try. Canning really is simple – in the end, it’s the prep work and time that goes into it that requires a little more effort. That being said, I canned this morning for two hours while entertaining my 5 year old, so it certainly is possible.
September 10, 2013
The Taste Test Release Whirlwind…
Deep breath, Kelly. Inhale through the nose and out through the mouth. It’s just a blog post.
I’ve been doing a lot of deep breathing and calming down lately. Ever since the book came out, I feel like life has been speeding by. I’ve had to force myself to stop and “smell the roses.” It truly is a magical time.
So, of course, I’d like to share a little bit of that Taste Test magic with all of you!
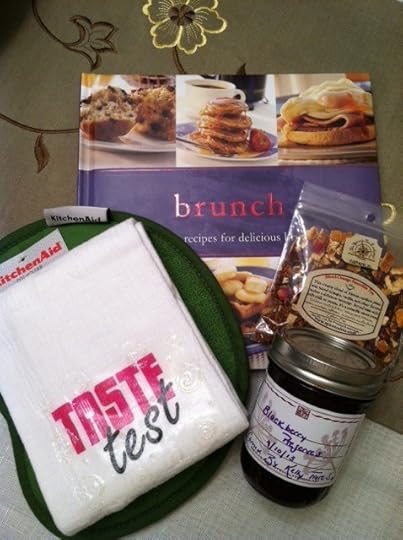
Breakfast is one of my favorite meals, particularly when I have time to “do it up right” — pancakes or waffles, a casserole, eggs and bacon. You name it. I have a copy of this Brunch book and it has amazing recipes — so many, in fact, that I had to share them with my fellow foodies.
The giveaway includes of a Taste Test dish town, a Kitchen Aid silicone/heat resistant cloth pot holder, the “Brunch” cookbook, a packet of Orange Smoothie Tea from the Spice and Tea Company in the Georgetown neighborhood of Washington DC, and a jelly jar of homemade black berry preserves. (I just opened one of them this morning and it is JUST delicious. And, yes, I did can them myself  )
)
So, there you have it — a Taste Test/Brunch giveaway, inspired by my love of breakfast foods and my desire to share that with you! Enter now!

