Mandi Ehman's Blog, page 58
April 22, 2014
Free Printable Chalkboard Labels
The following post is from Jason & Jennifer Bruce of New Season Design :
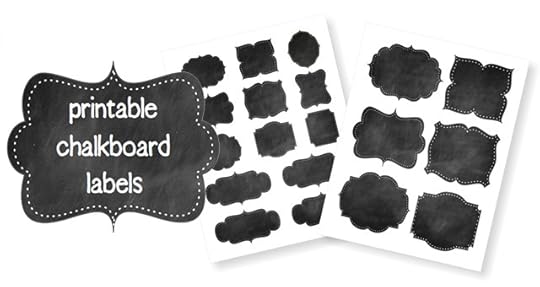
I’ve seen a ton of posts lately about how to make your own chalkboard labels for everything from kitchen staples to laundry supplies. I think they’re really cute and love the idea of being able to erase and change the words on the labels. However, there’s no way I would take the time to make the template, buy the materials, and paint layers of chalkboard paint to make them. So here’s a little bit of a cheat that will give us chalkboard labels without the hassle.
Simply edit the text on each label, print, trim, and attach these labels wherever you need them. You get the chalkboard label look without the hours it takes to create them!
Click here to download or print the labels.
Where will you use these chalkboard labels?!

Jason & Jennifer Bruce are the husband-and-wife design team behind New Season Design, where they work together to help clients put their best foot forward online. Jason is a pastor-turned-graphic designer, and Jennifer is a teacher-turned-blog designer who also blogs at The Simple Pen about life, learning and the things she loves.
Free Printable Chalkboard Labels
© 2010-2014 Purple Martin Press, LLC | All rights reserved


 Related StoriesFree Printable Spring Thank You CardsNew Printables: Insurance Information, Mileage Log & Notebook CoverCelebrate Every Day with American Greetings Personalized Video eCards


April 21, 2014
Mom’s Superfood Brownies {Plus Other Ways to Use Pumpkin All Year Long!}
This is a Sponsored post written by me on behalf of Libby’s for SocialSpark. All opinions are 100% mine.
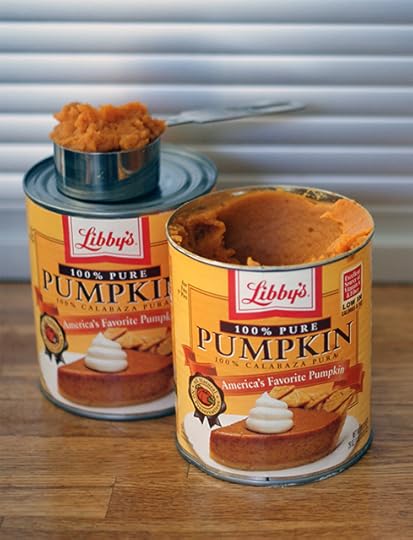
When you think of pumpkin, is your first thought pumpkin pie?
I know mine is — or at least was – but while that decadent dessert is a seasonal treat, pumpkin is actually a superfood that can be added to a variety of recipes all year long! It helps boost the Vitamin A, Beta Carotene and fiber content, not to mention flavor, of a variety of sweet and savory recipes.
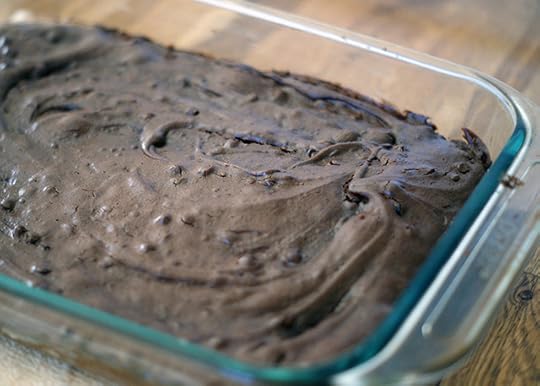
I decided to try adding some to our homemade brownies, and these are amazing. They’re slightly cakey but with the characteristic crispy top that makes brownies so irresistible. My family scarfed them down, and I didn’t even feel guilty about the ones I ate! (Okay, not too guilty!)
Mom’s Superfood Brownies

Ingredients:
1-1/2 cups flour
2 cups coconut sugar
3/4 cup unsweetened cocoa powder
1/2 teaspoon sea salt
3/4 cup light olive oil
1/2 cup Libby’s Pumpkin
3 eggs
2 teaspoons vanilla extract
1/2 cup mini chocolate chips
Directions:
In a medium bowl or blender, mix sugar, flour, cocoa and sea salt. Add olive oil, pumpkin, eggs and vanilla extract and beat for 3 minutes.
Fold in chocolate chips.
Pour into a greased 9×13 pan and spread with a spatula.
Bake at 350° for 30 minutes or until a toothpick inserted in the center comes out clean.
Let cool for 20-30 minutes before cutting.
Other Uses for Pumpkin
But brownies aren’t the only way to increase your family’s pumpkin intake. Try some of these ideas as well:
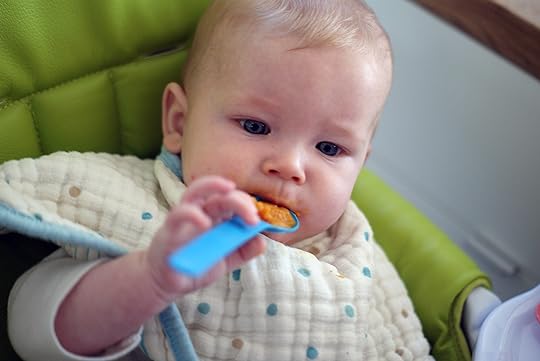
Who needs expensive baby food when baby can eat Libby’s pumpkin right out of the can?
Mix with vanilla yogurt and a little pumpkin pie spice for pumpkin pie flavor all year long.
Add a spoonful to smoothies, oatmeal or even macaroni & cheese. The flavor is mild enough that you won’t notice it!
Hint: If you won’t use the whole can of pumpkin, you can divide it into ice cube trays and freeze it in smaller portions to make it easy to measure out for other recipes.
Pumpkin Can

Visit Libby’s Pumpkin Can for a chance to win a Vitamix blender or a chance to shop or get your work out on with Lo Bosworth in New York City. You can also share your favorite #PumpkinCan fact via Twitter, Facebook and Pinterest for a chance to win weekly prizes!

Mom’s Superfood Brownies {Plus Other Ways to Use Pumpkin All Year Long!}
© 2010-2014 Purple Martin Press, LLC | All rights reserved
 Related StoriesRaspberry Spinach Turkey Wraps {Lunch or Dinner on the Go!}Traditional Cream Puffs Recipe
April 19, 2014
Giveaway: Einstein in a Box 3-Month Subscription

I’ve mentioned before that our family is fairly obsessed with the sciences, and our shelves overflow with books about biology, chemistry, physics, etc.
However, when it comes to actually studying science, we’ve never found a curriculum that was a great fit for us. The experiments we’ve done always feel disjointed and a little pointless in the grand scheme of things.
Late last year, I discovered Einstein in a Box, and I was immediately intrigued by this monthly subscription.
Einstein in a Box isn’t just science. Drawing from the Next Generation Science Standards (NGSS), each box contains a STEM project using the Engineering Design Process. If you’re not familiar with STEM, it’s an area of study that combines science, technology, engineering and mathematics since those disciplines are all closely intertwined as it is. In addition, the Engineering Design Process holds students to a variety of standards as they work on their project, giving them the opportunity to engage their imaginations and apply critical thinking.
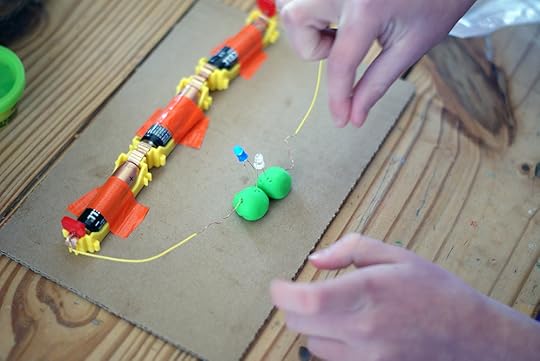
I had the opportunity to speak with Elaine, one of the co-founders, and she is truly passionate about educating, engaging and equipping children as STEMists. She was also kind enough to send us the It’s Electric box, which my girls have loved working through — learning about static electricity and circuits and learning what they need to know to design and build their own working dance pad.
It took us a couple months to really dive in — between the holidays, a new baby, the site transfer, etc. — but there is so much I love about these boxes:
It’s not just a “sit down and complete it in one session” project but really one that can be drawn out over a week or even a whole month.
The website includes a ton of extra resources and activities for each theme in the Beyond a Box section.
The projects are engaging, and while our oldest two are the ones actually working on the STEM projects, the little ones gather around whenever we get started.
With a new box on its way each month, I feel confident that we’ll cover a wide range of topics in a year. (Yep, I subscribed when we were halfway through our first box because we’re all enjoying it so much!)
Each box comes with everything you need, including a fun lab notebook with clear explanations, directions and thought-provoking questions plus all of the supplies for each activity so that I don’t have to go hunting for supplies!
Elaine also mentioned the other day that they’re working on a K-2nd grade version of the boxes, which I can’t wait to see!
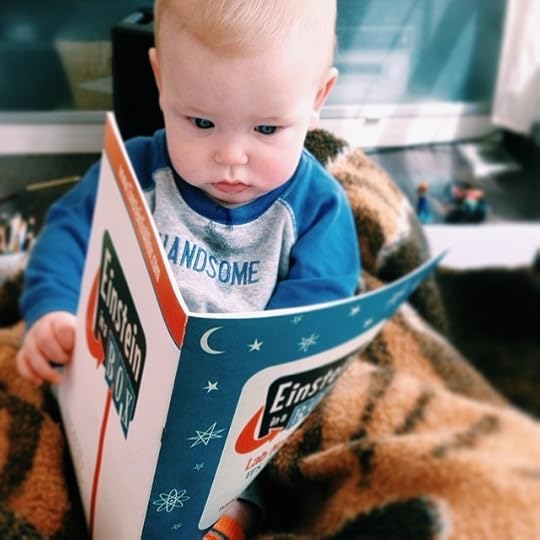
Here’s a peek inside our experience with the It’s Electric box, including our working dance pad that the girls designed and built (with just a little bit of help from us!):


Enter to Win
This week, Einstein in a Box is giving one lucky Life Your Way reader a 3-month subscription!
To enter, fill out the form below:
The giveaway ends at 11:59 p.m. ET on Friday, 4/25. The winner will be selected randomly and notified by email, and this post will be updated with their name as well. Unfortunately, due to the international laws governing sweepstakes and lotteries, we’re only able to offer these giveaways to U.S. residents 18 years and older.
Giveaway: Einstein in a Box 3-Month Subscription
© 2010-2014 Purple Martin Press, LLC | All rights reserved
 Related StoriesGiveaway: Card Cubby Store Card Organizer {5 Winners!}Giveaway: WiseDecor Decorative Lettering $75 Gift CertificateGiveaway: Wood Watch from JORD ($129 Value!)
Weekend Reading: April 19. 2014
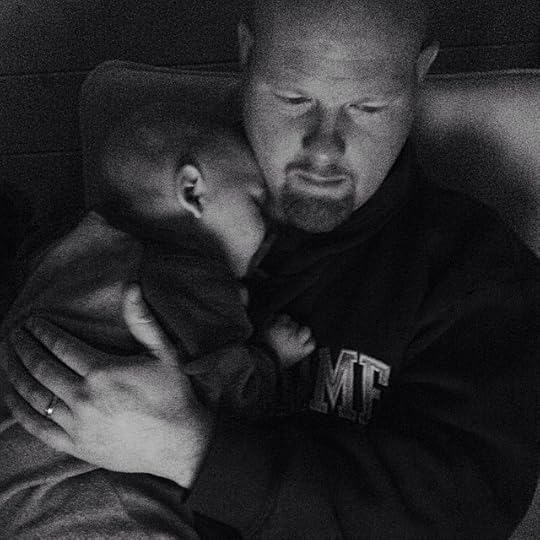
How I love these two!
As we approach 6 months, Jackson’s personality is blossoming. Not only is he quite the ham, but he’s also started expressing his displeasure in squeals and screams and yells. And it happens most frequently when Sean dares to walk into the room without picking him up. It’s pretty cute to see how much this little man loves his daddy (and how much his daddy loves him!), and I’m excited to watch that special relationship grow.
He’s also sitting independently, rolling over both ways and learning to spin and scoot around on his back.
The first few months were easy to savor and enjoy, but time seems to be flying now, and I really have no idea where my tiny baby went!
Here are some of my favorite posts from this week. As always, check out what I’m reading and what I’m pinning to see the other posts that make me stop and think (or, you know, drool…). You’ll find new posts all week long!
Discovering the Important
This is Sometimes More Important Than Praying | Storyline
Focusing on the Important Stuff in an Age of Distraction | Goins, Writer
When a fresh start means selling your stash | The Art of Simple
What the Future Holds
The Next America | Pew Research Center
National Geographic Concludes What Americans Will Look Like in 2050, and It’s Beautiful | PolicyMic
Is Butter Good for You? Or Bad? What Does Science Say? | Bon Appétit
*I know this seems like it’s miscategorized based on the title, but you have to read this to understand!
Just for Fun
Magical World Of Snails Captured In Macro Photography By Vyacheslav Mishchenko | DeMilked
This Is Why Some People Should Not Be Allowed On Facebook | The Meta Picture
“How Frozen Should Have Ended” Shows Us a Better Way to Bring Up Elsa | Tor.com
Have a wonderful Easter weekend. He is risen!

Mandi Ehman is the blogger behind Life Your Way. She and her husband have four beautiful girls plus one baby boy, and together they live, work and homeschool on a little slice of heaven in wild, wonderful West Virginia. Mandi loves coffee, chocolate, easy meals, beautiful things and minimalist spaces.
Weekend Reading: April 19. 2014
© 2010-2014 Purple Martin Press, LLC | All rights reserved
 Related StoriesWeekend Reading: April 12, 2014Weekend Reading: April 5, 2014Weekend Reading: March 22, 2014
April 18, 2014
A Simple Easter Weekend Tradition

Our Easter traditions continue to evolve with our girls’ understanding of our faith in general — and Easter specifically. But this simple tradition is our very favorite.
It’s slightly more meaningful when Easter falls in March and the sun sets earlier, but my girls have been talking about it all week nonetheless, and we’ll let them stay up a little later for the next two nights so that they can fully appreciate it:
At 3pm on Good Friday, the time the Bible says that Jesus breathed his last breath, we turn out any lights that are on. As it begins to get dark later that evening, we light candles instead of turning lights on, in a kind of simplified, not-quite-Tenebrae service at home.
We continue to live by candlelight until Sunday morning, when we excitedly turn them back on and rejoice that Jesus has risen.
Admittedly, one of the things I love about this tradition is its simplicity. There’s nothing we need to buy or prepare ahead of time, and it’s not dependent on the kids paying attention or being in the mood to participate. We do talk about why we were doing it — to symbolize Jesus’ death and separation from God for the three days until His resurrection — but it’s a conversation, not a structured lesson.
This morning we also read the story of Jesus’ crucfiction in the Jesus Storybook Bible…and then we shut the book without reading about his resurrection — despite many protests — to think about how his disciples must have felt, not knowing what was to come.
We’ll prepare our resurrection rolls by candlelight tomorrow night, and then we’ll bake them Sunday morning for breakfast and read the rest of the story.

All in all, it’s a simple way to remember Jesus’ death and sacrifice — one that our girls really seem to get — and it makes our Easter celebration even brighter. A poignant reminder that there wouldn’t be a celebration on Easter morning without the sacrifice and pain of Good Friday!
What are your favorite Easter traditions?
Mandi Ehman is the blogger behind Life Your Way. She and her husband have four beautiful girls plus one baby boy, and together they live, work and homeschool on a little slice of heaven in wild, wonderful West Virginia. Mandi loves coffee, chocolate, easy meals, beautiful things and minimalist spaces.
A Simple Easter Weekend Tradition
© 2010-2014 Purple Martin Press, LLC | All rights reserved
 Related StoriesSochi 2014 Winter Olympics Websites, Printables & Activities {Mom’s Idea Book}
April 17, 2014
2014-2015 Homeschool Curriculum Plans
It’s that time of year when homeschool families are planning out next year’s curriculum, and we’re no exception. However, we try to adjust as we go, and since we school year round, we don’t have any big changes planned for the new school year, other than the addition of Classical Conversations Essentials program for our 4th grader (more on that in a bit!).
That said, as I was making this list, I realized things have changed quite a bit since I wrote last year’s post, so here’s a peek into our plans (as they stand today). For more about our philosophy and methods, be sure to read through these posts:
The Whys Behind Our Decision to Homeschool
Our Homeschooling Philosophy {And How It’s Changed}
What Is a Classical Christian Education?
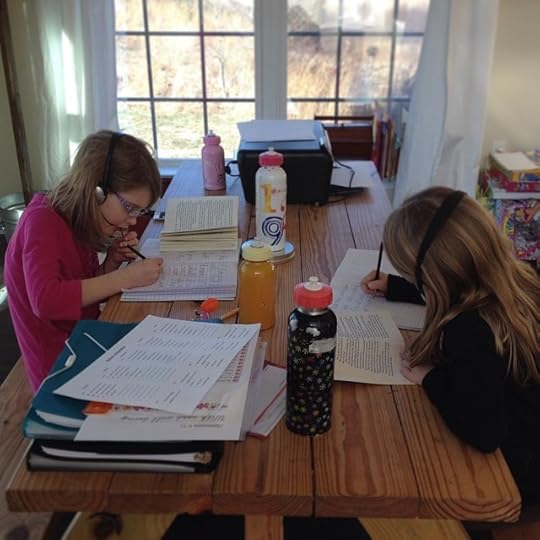
What Independent Work Looks Like in Our Homeschool
5 Benefits of Homeschooling Year-Round
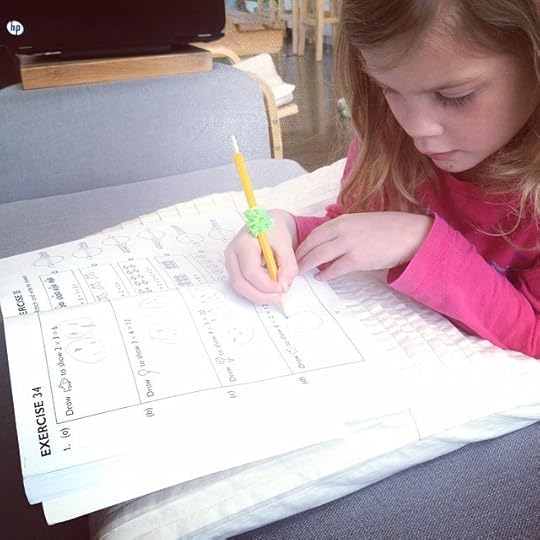
This fall, we’ll have a 4th grader, a 3rd grader, a 1st grader and a kindergartener! Plus a toddler. Whew.
We’re very laid back during the first year of kindergarten, ramping up slightly during the second year (one of the benefits of fall babies is that we can take our time in the early years). In 1st grade, we increase the expectations a little bit more but still stick with the basic subjects, and 2nd grade is when we get “serious” about academics.
Language Arts
Language arts is by far my favorite subject, and it’s the one we focus on pretty heavily right from the beginning. We’ll be rejoining our local CC community this year, but only for Essentials in the afternoon. I’ll actually be tutoring one of the Essentials class this year, which I’m so excited to do! Essentials focuses on English grammar, including the parts of speech, diagramming sentences and writing, and I think our oldest, who is already an amazing writer, will really blossom as we focus on the mechanics of good grammar.
kindergartener:
Logic of English Foundations (this is new for us, since we normally start with Explode the Code, but I’m excited to give it a try!)
1st grader:
Explode the Code
First Language Lessons (Level 2)
Rhythm of Handwriting Cursive
3rd grader:
First Language Lessons (Level 3)
daily copywork
4th grader:
CC Essentials
daily copywork
Math
kindergartener:
Singapore Earlybird Math, A
1st grader:
Teaching Textbooks, 3rd grade
3rd grader:
Teaching Textbooks, 5th grade
4th grader:
Teaching Textbooks, 5th grade
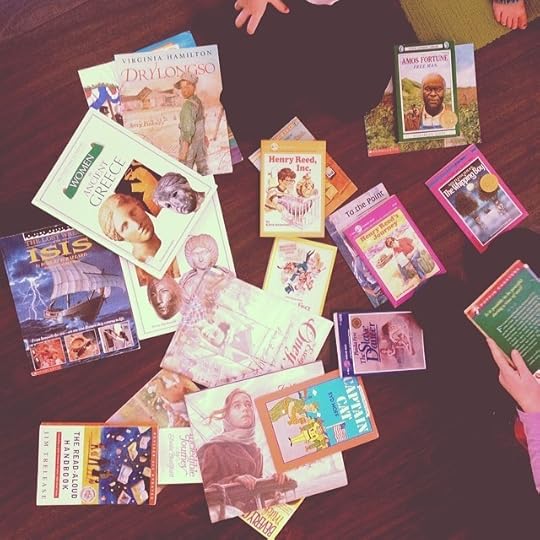
History
History is one of the areas we’ve made the biggest change. Although doing CC at home was working in the first part of the year, it became increasingly difficult for me to set aside the time to work with them on history after Jackson was born, and I began to feel like it had turned into busy work that the girls were just rushing through.
Instead, we’re using Story of the World following the model outlined in A Well-Trained Mind: reading a chapter, asking questions, writing a few sentences, a little bit of map work, an extra activity (occasionally) and reading related books.
While our little girls often listen in to our history discussions, I don’t plan to formally do history with them until they reach 2nd grade since that seems to be working for our older girls!
We are, however, still doing CC memory work, and I’m hoping to create some other playlists of memory work around the suggested lists in A Well-Trained Mind as well. The big question, which I haven’t answered yet, is whether to move on to Cycle 3 for their memory work or stick with Cycles 1 & 2 since those more closely relate to where we are in Story of the World.
3rd & 4th graders:
Story of the World (2 & 3)
everybody:
CC memory work
Science
I’ll share more details about this on Saturday (watch for a fun giveaway!), but we plan to use the Einstein in a Box monthly STEM boxes for our science moving forward. I love the design of these boxes and that we’ll have a new theme each month, and the girls are really enjoying them as well.
kindergartener & 1st grader:
Einstein in a Box (K-2nd grade boxes, coming soon)
3rd & 4th graders:
Einstein in a Box
everybody:
CC memory work
Geography
While most of the time we find ourselves scaling back over time to get rid of unnecessary busy work, I am feeling like I’d like to add another geography resource to help the girls memorize the countries and features of the world, but I’m not yet sure whether I want a book, a computer game or something else. We’ve tried using the CC weekly memory work, but it’s just not working for us right now. I’d love your geography suggestions!
3rd & 4th graders:
The Complete Book of Maps and Geography
map drawing, following the outline from The Core
Languages
My big girls really surprised me this year with their excitement about learning foreign languages. Okay, they’re not quite that excited about Latin, which we’re doing anyway, but they each chose another language to study, and they’re highly motivated to learn more and practice their skills!
4th grader:
French, Duo Lingo
3rd grader:
Spanish, Rosetta Stone Homeschool
3rd & 4th graders:
Song School Latin 2
Bible
Bible is the other area where we’re still struggling, but I think we may have finally settled on a system. It’s simple, but it seems to be work for us (of course, I said that last year too!):
Starting in the New Testament, the big girls read one chapter a day and then select a verse to copy into their journal. We then chat about what happened in that chapter and what they liked about it or learned.
That’s really it. I like it for two reasons: 1) It is building the habit of daily Bible reading. 2) It doesn’t rely on pretty pictures or fun projects to hold their attention but just puts the focus on the Word.

Extracurriculars
kindergartener, 1st & 3rd graders:
art (while our oldest and I are in Essentials)
1st, 3rd & 4th graders:
biweekly piano lessons
3rd & 4th graders:
Ambassadors, the drama our church puts on each spring
ChessKid.com
everybody:
local field trip group, 1-2 field trips per month
individual ice cream & library dates with Dad
American Heritage Girls
books, books & more books
I think that’s it!
How about you? I love curriculum posts, so feel free to leave a link to yours in the comments! Do you adjust as you go or wait and make changes at the beginning of a new school year? What areas do you struggle with?
Mandi Ehman is the blogger behind Life Your Way. She and her husband have four beautiful girls plus one baby boy, and together they live, work and homeschool on a little slice of heaven in wild, wonderful West Virginia. Mandi loves coffee, chocolate, easy meals, beautiful things and minimalist spaces.
2014-2015 Homeschool Curriculum Plans
© 2010-2014 Purple Martin Press, LLC | All rights reserved
 Related StoriesGiveaway: Logic of English Foundations Set A ($156 Value!)Make Pre-K Fun with EmbarK12 Learning ToolsGiveaway: Level 1 Homeschool Language Program from Rosetta Stone
April 16, 2014
Love to Live, Live to Love {On Tattoos, Life Mottos & Being You}

I’ve wanted a tattoo for as long as I can remember — something small and meaningful, but pretty too.
My grandfather had a tattoo on his arm that said his name, Russ, and I can distinctly remember sitting at his kitchen table with him, just studying it. I loved it, and while it was faded and a bit wrinkly, that tattoo was so beautiful to me.
I’ve thought about getting a tattoo off and on since I turned 18 and more often since becoming a mother — a group of birds to represent each of our kids, a flower with the petal outlines made out of tiny letters spelling each of their names, etc. — but Sean’s never really been on board.
However, for the past few months, I’ve really been wanting wrist tattoos.
I knew I wanted words that would really mean something — words that would remind me to be joyful and the type of life I want to lead:
Grace & mercy.
Joy & love.
My word of the year is LIVE.
My favorite sweater, from Old Navy, says LOVE LIFE. in big bold letters.
Nothing seemed quite perfect, especially since one of our daughter’s middle names is Joy and another’s is Grace. As much as I love both of those words (as well as their sisters’ — Faith and Hope), I really didn’t want to end up with just one child’s middle name on my wrist!
And then a few weeks ago our Pastor preached a sermon in which he quoted Amy Carmichael, who’s life motto was “Love to live, live to love.”
The minute he said it, I knew I wanted those words to be my life motto as well, and I knew I wanted them on my wrists.
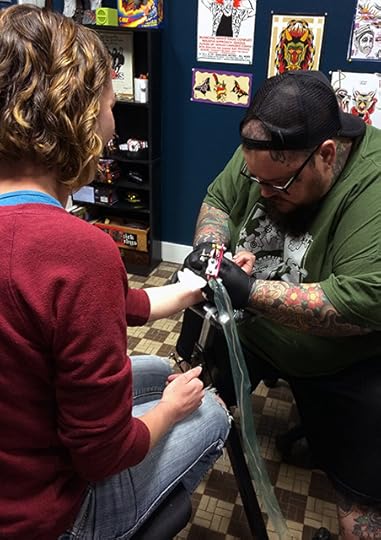
I brought up the idea of a tattoo to my husband again and asked if he would consider taking me to get them for my birthday.
He didn’t say no, so I started getting recommendations on Facebook for local tattoo artists.
I’ve since been reminded by several people (who don’t like tattoos in general) that they are permanent. I promise that, at 32 years old, I do realize that, and I finally put my thoughts about it into words the other day when I was chatting with a friend:
I can only hope that I’ll live to 80 and be proud of my wrinkly tattoos and a life characterized by the motto!
You see, I think my 20s were characterized by worrying about what other people think: I was almost always the youngest person in any given situation — the first of our friends to get married (and the youngest in the group to start with), the first to have kids (with 4 by the time I was 27), the youngest in most professional circles — and I thought people were watching and judging me a lot more than they probably were.
I think, however, that my 30s will be characterized by me being me. I don’t find myself worrying about other people’s opinions nearly as much. I’m quicker to admit to my hipster friends that I’m just not that cool, to my conservative friends that I fall somewhere closer to the middle, to anyone who asks that I don’t have all the answers and my life’s not perfect.
So even though I know there are plenty of people — even people I greatly respect — who don’t like tattoos and might judge me for having one (two?), I found that I really wasn’t too worried about it. I love the tattoos — the way they look and what they say — and I got them for me. (My friend Kara recently wrote a beautiful post about being brave and doing what makes you feel like you, and I identify with so many of her words!)
I love that every day I’ll be reminded of my desire to really live and really love. I’m not always good at either — preferring to hide myself in the busyness of work when things get tough and easily annoyed by “people” in general — but I want to keep working on both of them for as long as I live.
I love that I now have permanent accessories for all of those times when I forget to put on jewelry. (Ha!)
I love that they’re unique and my own, and that I didn’t get a tattoo when I was younger just to get one or not get one this time because I was afraid what people would think or say.
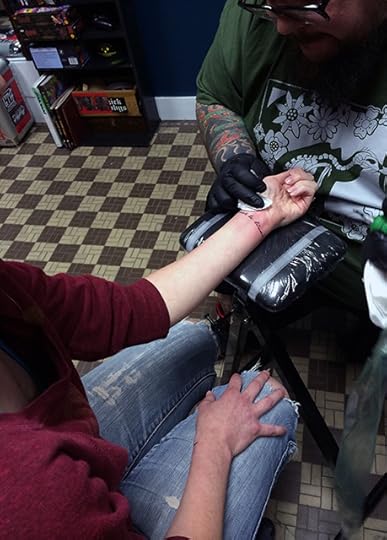
And because I’ve been asked multiple times in 24 hours: Yes, it hurt, but it was a very localized pain and just hurt in little bursts, so it was definitely bearable. Afterward, it welted up pretty bad for a couple hours, and it felt a lot like a bad sunburn last night. Today it just feels like a scrape. And it took about 30 minutes for the actual tattoo(s). (I still can’t figure out if it counts as one tattoo or two separate ones — ha!)
Do you have a life motto? A tattoo? Do you worry about what other people think, or are you comfortable being you?
Mandi Ehman is the blogger behind Life Your Way. She and her husband have four beautiful girls plus one baby boy, and together they live, work and homeschool on a little slice of heaven in wild, wonderful West Virginia. Mandi loves coffee, chocolate, easy meals, beautiful things and minimalist spaces.
Love to Live, Live to Love {On Tattoos, Life Mottos & Being You}
© 2010-2014 Purple Martin Press, LLC | All rights reserved

CommentsI do NOT have any tattoos, though I've long had an idea rolling ... by JessieLeighI personally love them, and I'm so glad you decided to do them ... by Shaina OlmansonRelated Stories25 Ways to Choose Joy When You’re StrugglingGiveaway: Wood Watch from JORD ($129 Value!)10 Ways to Choose Joy at the Start of Every Day
April 15, 2014
15 Ways Your Kids Can Help Spring Clean
The following post is from Emily of Live Renewed:
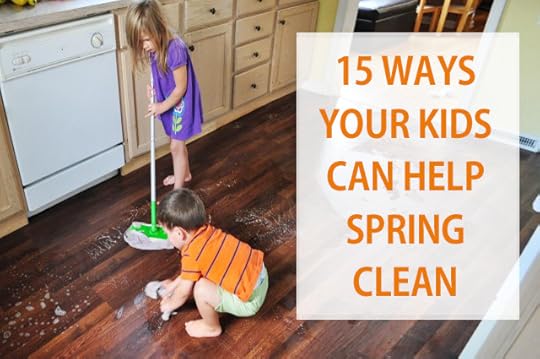
The more kids I have, and the more messes they make, and the older they get, the more grateful I am that I switched to homemade, non-toxic cleaning products all those years ago. Because, now when it’s time to do the deep cleaning around the house, I can have my kids help right along side me. I don’t have to worry about the chemicals they are coming into contact with or the fumes they are breathing in.
I can take advantage of the fact that at their young and tender ages (6, 4.5, and 1.5) they actually still think using a spray bottle and a wipe to clean is fun! They actually ask me to play “Soapy Bubbles” – the term we’ve given to the “game” of making up a bowl or bucket of soapy, bubbly water that they get to use to mop and wipe up our floors. Woot! Mommy thinks this is a fun game too!
If you’re in the mood for some Spring Cleaning this time of year, be sure not to do it by yourself. With the right supplies on hand it’s easy to get your kids involved in making homemade cleaners and helping you clean around the house.
Get started by mixing up your own homemade cleaning solutions. {Here are my five favorite homemade cleaners.} Then have your kids get in on the fun with one, or several of these tasks!
Here are 15 ways your kids can help you green spring clean all around the house:
1. Give them a microfiber cloth and they can dust all around the house.
2. Mix vinegar and water 50/50 in a spray bottle and let them spray it on the windows and wipe it off with a microfiber cloth.
3. Put a little baking soda on a damp cloth for them to scrub their crayon marks off the walls.
4. They can spray stained clothing in the laundry with homemade stain remover.
5. Have them scrub tile grout with an old toothbrush and homemade soft scrub made with cream of tartar, castile soap, and hydrogen peroxide.
6. They can wipe just about any surface around the house with homemade multipurpose cleaner.
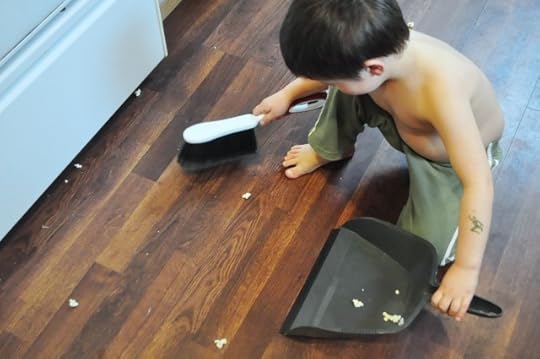
7. Give them small broom or brush and dustpan to sweep the floors.
8. Let them sprinkle baking soda mixed with essential oils on the carpets and rugs around the house and if they’re old enough they can also vacuum it up.
9. They can clean the floors with soapy water and a mop or rag.
10. Run a sink full of warm water with dish soap and they can wash dishes.
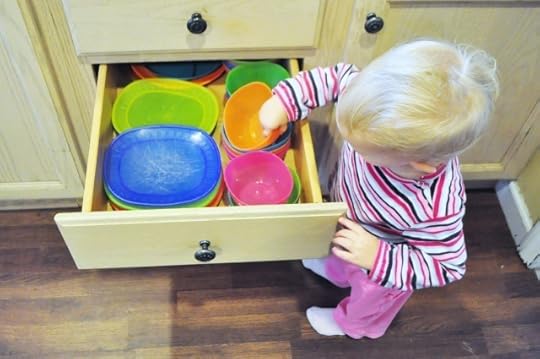
11. Or have them help with filling up and emptying the dishwasher. (Even my one-year old can help empty the dishwasher!)
12. Have them spray down the tub and shower every day with homemade daily shower cleaner.
13. Give them homemade disinfecting wipes to clean the bathroom sink and maybe the outside of the toilet too.
14. Let your kids use the vacuum, even if they don’t actually vacuum up much.
15. Have them help you fold your clean cloth rags and wipes.
All around the house there are tasks your kids can do to help you with spring cleaning this year!
How do your kids help you spring clean?

Emily McClements is passionate about living with compassion and caring for creation in a way that will impact the world. She is a blessed wife and mama to three young children, and blogs about her family’s journey toward natural and simple living at Live Renewed.
15 Ways Your Kids Can Help Spring Clean
© 2010-2014 Purple Martin Press, LLC | All rights reserved
 Related StoriesLife Your Way Monthly on Facebook & Spring Cleaning in AprilOverwhelmed with Green and Natural Living? You Need These 5 Simple Truths
The Power of a Smile {And How You Can Help Children Around the World Find Theirs!}
{Me, at 7 years old. I’ve always loved to smile!}
It’s recognized around the world. Wearing one can change the way you feel about yourself, your circumstances and even other people. It spreads joy. It transcends language barriers and makes people feel welcome. And it builds a bond with strangers, neighbors, friends and those you love.
What is it?
A smile, of course.
Because they truly believe in the power of a smile, Smile Train is on a mission to help the millions of children in developing countries with unrepaired clefts. These children live in shame and have difficulty eating, breathing and speaking.
Here’s the thing: cleft repair surgery is simple, and the transformation is immediate. And the surgery can cost as little as $250! Smile Train’s sustainable model provides training and funding to empower local doctors in 85+ developing countries to provide 100%-free cleft repair surgery in their communities. These doctors then train other doctors who train even more doctors so that this surgery can become as routine around the world as it is in the U.S.
Through this model and the support of donors and partners, more than one million children have discovered the power of a smile, with 340 new surgeries every day!
Can you even imagine living your entire life with a cleft that makes simple tasks like eating or drink difficult and being given the gift of this surgery?
Here’s what one Indonesian father had to say:
“After surgery, now my children are highly motivated. They are very active. I think that now they have their future back. They have their smile back. They can smile like other children.”
Join Smile Train today and change the world one smile at a time.
This is a sponsored conversation written by me on behalf of Smile Train. The opinions and text are all mine.
The Power of a Smile {And How You Can Help Children Around the World Find Theirs!}
© 2010-2014 Purple Martin Press, LLC | All rights reserved

April 14, 2014
Raspberry Spinach Turkey Wraps {Lunch or Dinner on the Go!}
 The thing I have struggled with the most, both from a budget and a healthy eating perspective, is meals on the go. Because of the distance we live from “town”, we end up eating in the car several times a week — after a morning field trip, before an evening activity, etc. It’s pretty much all I can do to get everybody out of the house on time for these various activities, let alone packing a meal for each of us to eat while we drive. Sometimes we’ll do PB&J sandwiches, but let’s face it: those get old pretty fast! Our oldest daughter is obsessed with tortilla wraps, but our other girls don’t especially like the combinations she comes up with, so I started searching for new recipes to try. I found a few recipes, and we began experimenting, but so far this one is our favorite. Our youngest daughter is not a fan of baby spinach (which she calls “weaves”), but everybody else loves these. In fact, our 8-year-old, who has been the most picky lately, must have told me three times how much she liked them the first time I made them! These are perfect for the road. I usually fill a sandwich bag with some pretzels or chips and then add a few sections of the turkey wrap on top. They’re pretty filling, a great change from plain ol’ sandwiches and packed full of nutrients!
Raspberry Spinach Turkey Wraps
Ingredients
For each wrap:
flour tortilla
cream cheese, softened
raspberry jelly (we use all fruit, no-sugar added jelly)
avocado, mashed
4-5 deli turkey slices
handful of baby spinach
Directions
Spread a layer of cream cheese on the tortilla, followed by a layer of jelly and then a layer of avocado. If you’re making quite a few, you could always mix the cream cheese, jelly and avocado together (1-2 tablespoons of each per tortilla) so that you only have to spread one layer.
Next, distribute the turkey slices evenly across the tortilla. Spread out the baby spinach on top.
Roll tightly. Slice into 1-2″ pieces and secure with a toothpick. Refrigerate until ready to serve.
3.2.1284
What’s your favorite on-the-go recipe?
Mandi Ehman is the blogger behind Life Your Way. She and her husband have four beautiful girls plus one baby boy, and together they live, work and homeschool on a little slice of heaven in wild, wonderful West Virginia. Mandi loves coffee, chocolate, easy meals, beautiful things and minimalist spaces.
Raspberry Spinach Turkey Wraps {Lunch or Dinner on the Go!}
© 2010-2014 Purple Martin Press, LLC | All rights reserved
 Related StoriesTraditional Cream Puffs RecipeMore Than 200 Recipes for Just $7.40! {BundleoftheWeek.com}