Bob Sehlinger's Blog, page 1285
October 18, 2013
Observations from the Magic Kingdom: Special Edition – The Cinderella Castle Suite
• Facebook • Twitter • Google Plus • Pinterest
The last two weeks of Limited Time Magic at Walt Disney World have featured tours of popular rides with Disney Ambassadors and Imagineers. Week one was a detailed look at Hollywood Studios’ Tower of Terror with the Disney Ambassadors, while the following week treated guests picked via e-mail entry to a walk-through of Animal Kingdom’s Expedition Everest. When the third announcement was distributed via the Parks Blog, Disney upped the ante: this week’s tour included both Be Our Guest Restaurant and the Cinderella Castle Suite. It’s an understatement that I was excited to get in, and I’m equally excited to share what I saw and learned with you. While Be Our Guest was certainly beautiful, there was so much information between the two locations that I’m going to split the posts and start with Cinderella Castle. I hope you enjoy.
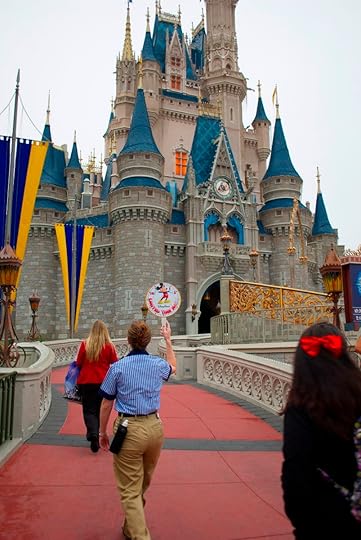
Our morning started with check-in and lining up behind a Cast Member with a Limited Time Magic sign.I thought about starting a chant as we walked behind a person holding a sign high in the air, but there were only seven people in my group, and I didn’t think it would have quite the effect of the tour groups we all know and love.
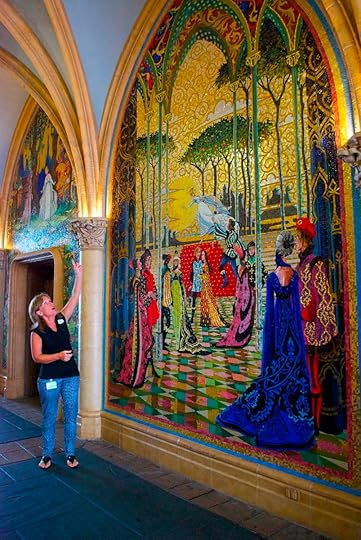
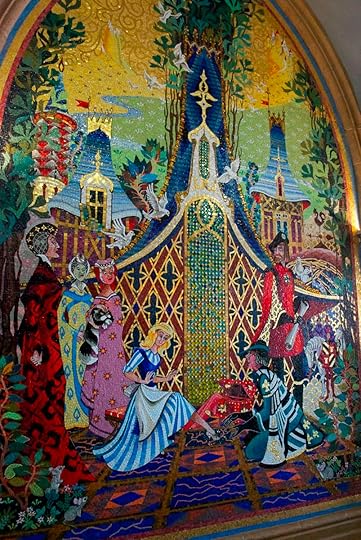
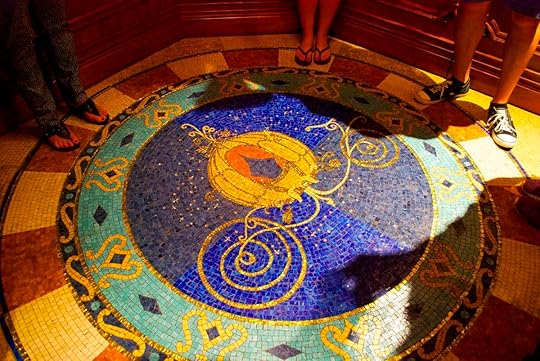
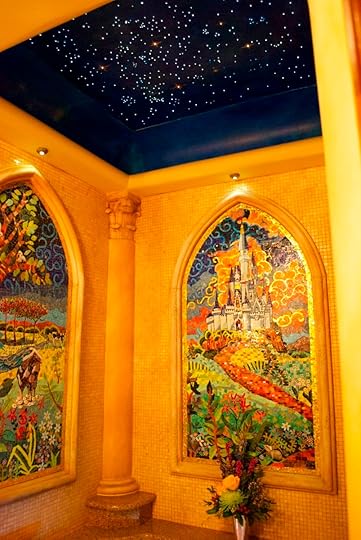
Once we reached the breezeway we were introduced to Disney designer Cathy Carver. Cathy has been with Disney for a very long time and was really excited about sharing the story of her work as lead designer on the Cinderella Castle Suite with us. She started out by describing the mosaics in the breezeway. Designed by Imagineer Dorothea Redmond and constructed by a team of six artists, the mosaics incorporate more than three hundred thousand pieces of Italian glass, as well as some sterling silver and 24-carat gold fusing. They took nearly two years to complete, and each of the five is fifteen feet high by ten feet wide. More than 500 colors were used to tell the story of Cinderella. I think one of the most telling examples of the detail in these mosaics is the design on train of the blue dress in the first picture below.
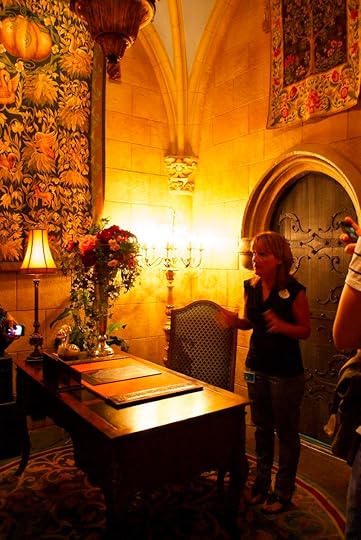
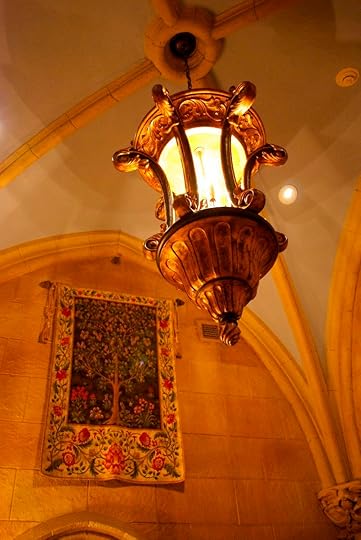
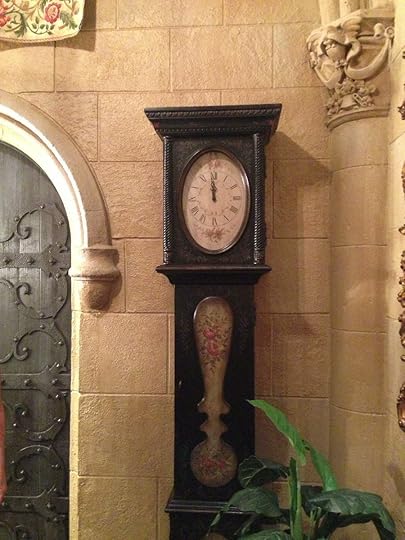
Through a small door in the breezeway that, honestly, I’ve never even noticed before, sits the first room guests staying in the suite will see, the reception room. This is where the staff greets guests of the suite, usually around 4 p.m., for their night’s stay. While the suite sleeps a maximum of six people, there are seven Guest Relations Concierge team members on duty for each stay. The decor is rich and detailed all the way up to the tapestries, and the clock in the corner has stopped at 11:59 so that guests’ magic, unlike Cinderella’s, never has to end.
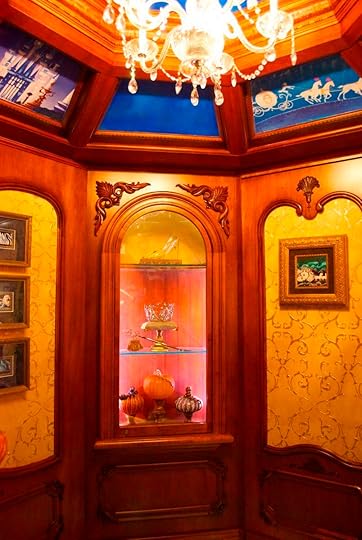
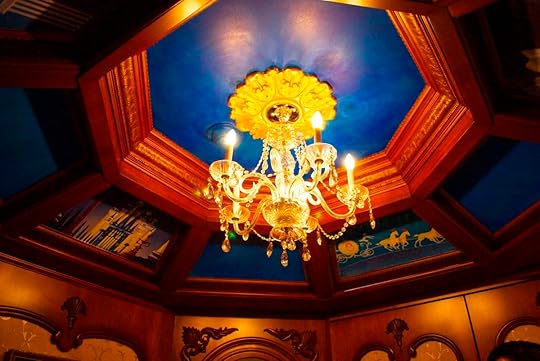
We crowded into a very small elevator, and Ms. Carver explained that one of the most challenging aspects of the suite was ADA compliance. Cinderella Castle’s infrastructure is a web of solid steel I-beams, making design work pretty difficult. Originally the space that the suite now occupies was intended to be an apartment for the Disney family when they visited, so the elevator wasn’t very big. After the redesign, it meets standards, but Ms. Carver relates that it was a huge challenge to add space. When the elevator doors open, guests step out into the suite’s foyer, an octagonal room with artwork inspired by Mary Blair.
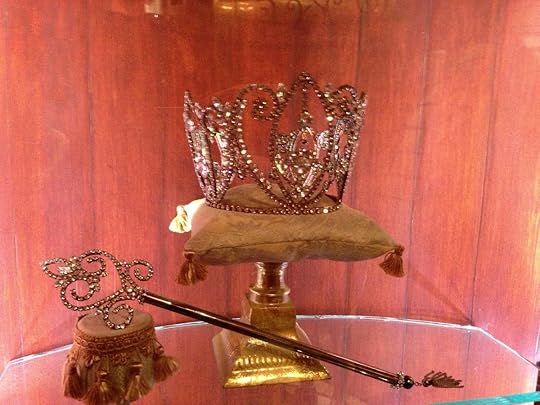
Ms. Carver explained that Ms. Blair’s influence on Cinderella and so many Disney attractions and productions after needed to be referenced in the suite. With six months to complete the design from drywall to done, Ms. Carver explained that she and her team drew heavily on Ms. Blair’s work for inspiration. She showed us two original pieces of Ms. Blair’s work that drove many aspects of the design. Because they’re original pieces, we weren’t allowed to take pictures, but they were really fabulous. The ceiling and floor in this room are so fabulous that you nearly miss the case featuring a glass slipper, pumpkins, and Cinderella’s crown and scepter.
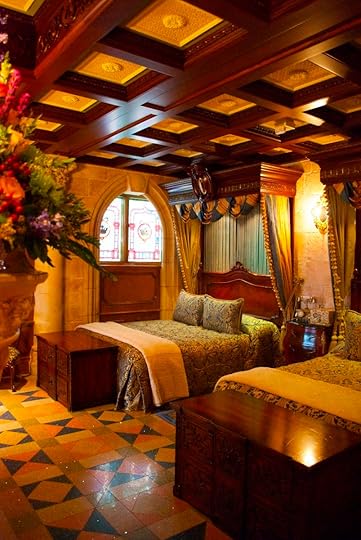
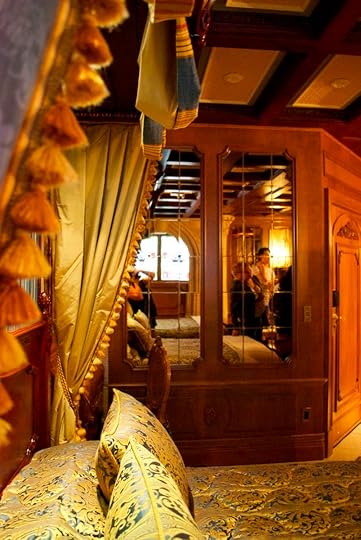
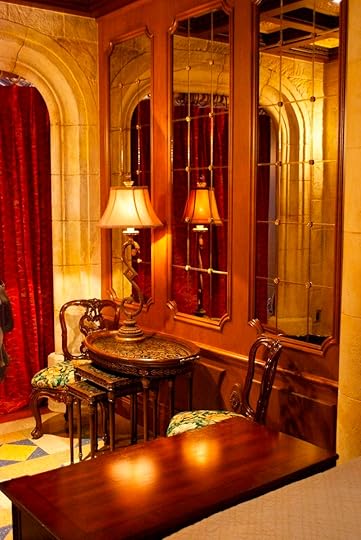
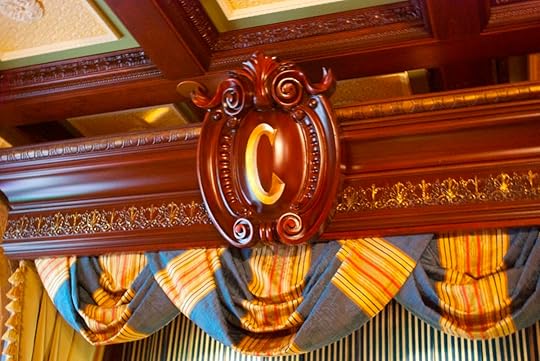
Once you’ve had your fill of the foyer (I could have stayed for a good 30 more minutes just looking at the floor), it’s through a door (equipped for MagicBand entry, by the way) and into the master bedroom of the suite. The first thing you’re struck by is just how small the suite itself is. Though lots of design elements like vaulted ceilings and mirrors have been employed to make the space seem larger, it’s only 600 square feet total. The bedroom is amazing nonetheless, with fantastic details from floor to ceiling.
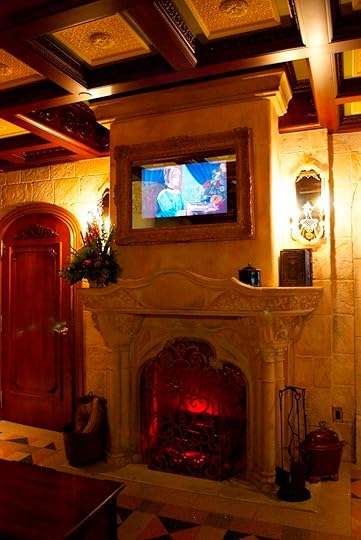
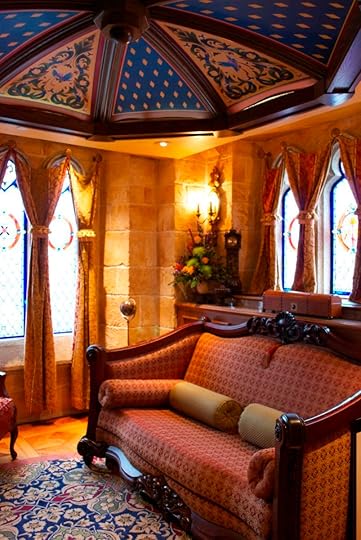
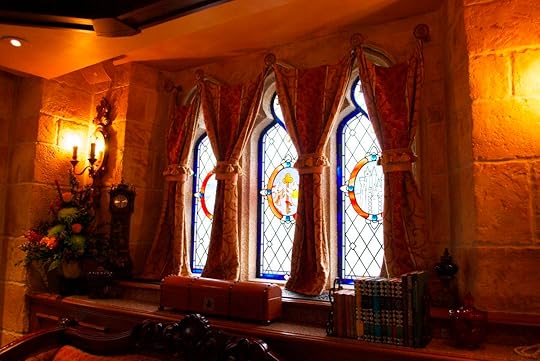
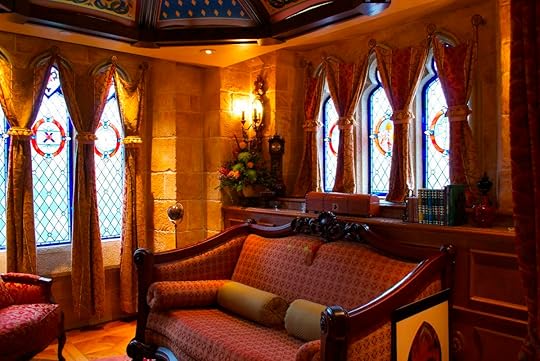
From the bedroom we moved into a lovely sitting room with two sets of stained glass windows. While many people think that the suite’s windows can be seen from the front of Cinderella castle, you can only actually see them from the Liberty Square side and back. The suite is four stories up. The sitting room is just as opulent as the rest of the suite. The couch, designed to appear to be renaissance-era, is actually a pullout bed that sleeps two. The ceiling is vaulted and painted with decorative details inspired by one of the original Mary Blair artwork that Ms. Carver showed us. The floors are parquet and echo the wood paneling that hides the closet, mini-fridge, and other 21st century amenities. The television is hidden behind an ornate French mirror.
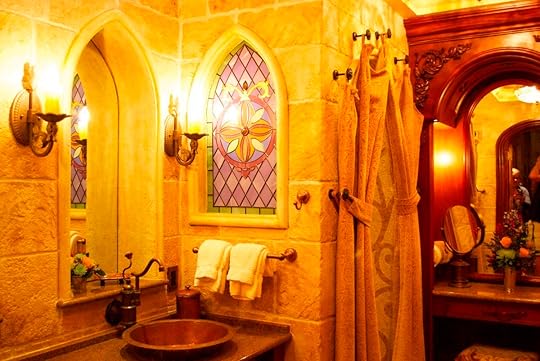
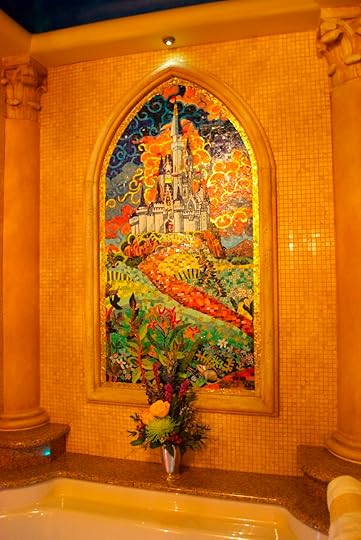
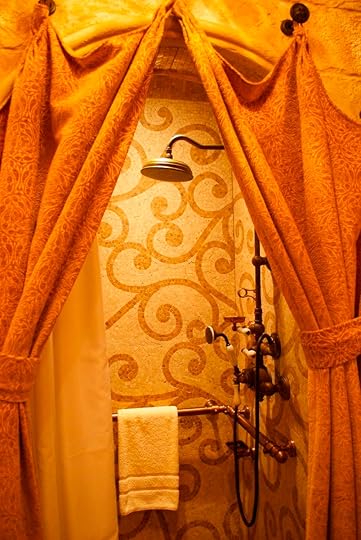
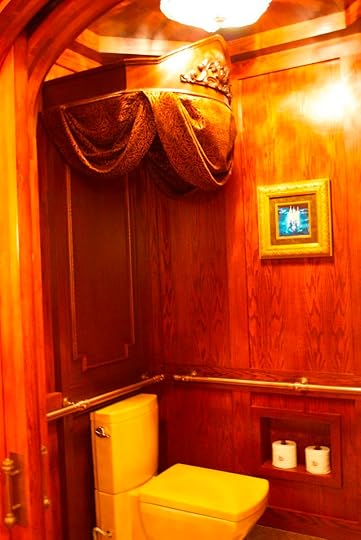
Last but certainly not least, we toured the bathroom. In an interesting twist, it’s one of the most photographed spaces in the suite, and, as Ms. Carver describes it, one of the most challenging spaces to design. With the constraints of the construction of the space as well as the requirements of the ADA and the necessities of one bathroom to possibly accommodate six people, she related that a ton of thought and serious design went into the room. That’s definitely apparent from the starry sky and mosaics over the square jacuzzi tub to the stained glass window in the shower wall, and even the toilet designed to echo a throne. The overall effect of the entire suite is history combined with modern convenience to create an amazing space.
Ms. Carver was so down-to-Earth about what she’s done with the suite and even took the time to tell us a few stories about the first family who stayed and her experiences designing for Disney. It was easy to see that her heart is in every space she designs, from the grandest of rooms to the most serviceable, and listening to her talk about her joy in seeing other people experience her work was a reminder of why I keep coming back to the Disney parks. I hope you enjoyed the photos. Until next time, keep it magical.
Share on Facebook
Retweet this
Observations from the Magic Kingdom: Special Edition – The Cinderella Castle Suite is a post from the TouringPlans.com Blog. Signup for a premium subscription today! Or get news via Email, Twitter, & Facebook.

Resort Hopping: Disney’s Caribbean Beach Resort
By Daisy Lauren
• Facebook • Twitter • Google Plus • Pinterest
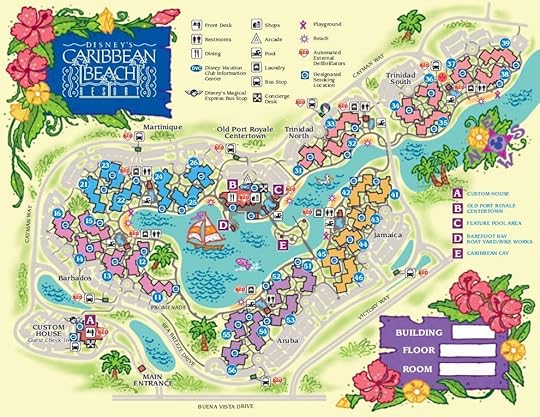
Recently we were lucky enough to spend a night at Disney’s Caribbean Beach Resort! There is a lot to love about this property, and I’m excited to tell you about our experience. This beautiful property just marked 25 years since opening, and she has aged beautifully! For starters, below is the property map that guests receive at check-in.
Now, I had to request an extra map to share with you guys because mine had tons of writing on it to get me to the room. If I had to describe the resort in one word, it would be: massive. While I know lots of the resorts inside and out, this isn’t one I frequent, and I can see where it would be very confusing for some. Also, due to the large size there is an internal bus system to get you around the resort. That doesn’t sound like a negative until you can’t walk to breakfast or the pool. However, that is the only negative I found, and it is a minor one considering all the beauty that comes with this resort!
Resort Amenities: Looking at the map above I thought it would be best to take each of the lettered amenities one by one.
(A) Custom House: This is where all guests go to check-in or visit Guest Services.
(B) Old Port Royale Centertown: At this location there is a lovely indoor gift shop with more than just the normal sundries you’d find by the pool. We found lots of great Disney merchandise and even a coconut designed to mail to your friends back home! There are several quick service dining options, including grab-and-go cold snacks and hot dishes like pizza and burgers. There is also a huge and lovely indoor seating area in which to sit and enjoy your meal. And this area houses in a nice indoor arcade!
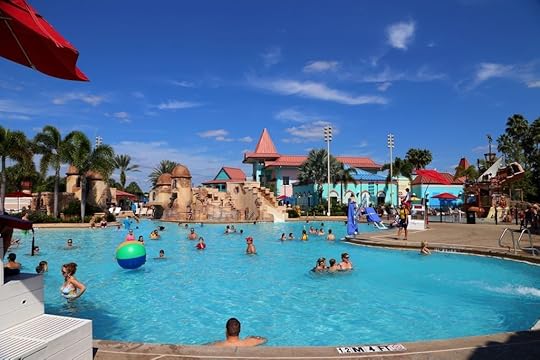 (C) Fuentes del Morro Feature Pool Area: This is the enormous and beautiful pool area for the resort. It must be one of the most grand pools in the entire Central Florida area! If you are bringing your kids to Florida to swim, then look no further – you’ve found the ideal place to stay! This area also features several hot tubs hidden around away from all the madness by the pool. The little ones will also have fun in their own splash area themed after a pirate ship! While we were there it seemed like there were activities going on around the pool to keep the kids entertained most of the day. The only trouble is your kids might not want to actually leave to go to the park with a pool like this back “home!”
 (D) Barefoot Boat Yard / Bike Works: This is where you can rent a boat to take out on the lake or a bike to ride around the resort!
(E) Caribbean Cay: This is a beautiful “island” in the middle of the lake accessible by walkways. There are tropical alcoves all over in which to sit and enjoy the views. My favorite spots were the shady areas with hammocks! It took me a few minutes to put my finger on what this reminded me of, and then it hit me – Disney’s private island, Castaway Cay! The lush greenery and secluded seating areas are very similar. There is also a very nice playground for the kids!
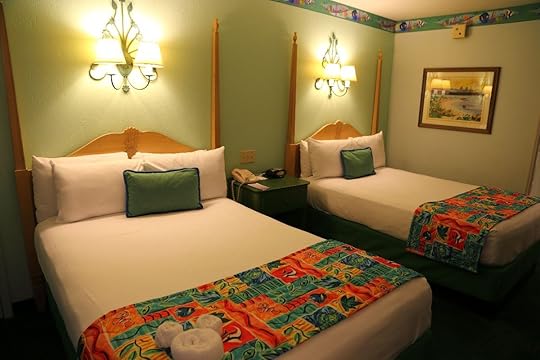 Room Amenities: I found the rooms at Caribbean Beach to be slightly larger than the rooms at the value resorts, but the buildings still have exterior corridors. Our room was in the Jamaica area, which was lovely with lots of little paths and sitting areas to enjoy. I don’t know what kind of air conditioner was in the room, but it was industrial strength!! We checked in around 6pm and found the room to be freezing cold, so we turned the air conditioner off. When we returned at 10pm, the room was still freezing! (Yes, we are the people who turned the heater on when it was 90 degrees outside!) Other in-room amenities include: iron, ironing board, valet laundry, coffee maker, hair dryer, and in-room safe. Note that the safe had an actual metal key. There was also a large cabinet that would usually house a mini fridge, but it was empty; perhaps my room was part of the resort-wide project to replace faulty in-room refrigerators.
Overall, Disney’s Caribbean Beach is not just a great place to stay during your Disney vacation; it is just a great place to stay! After spending a night here, I can see us spending a few nights here for a staycation without ever visiting the parks. This relaxing, tropical resort is a perfect escape from a busy day in the parks.
Have you stayed at Disney’s Caribbean Beach? Is there something you love about this property that I missed? Do you have questions about the hotel? Please let us know in the comments below, and – as always – thanks for reading!
Share on Facebook
Retweet this
Resort Hopping: Disney’s Caribbean Beach Resort is a post from the TouringPlans.com Blog. Signup for a premium subscription today! Or get news via Email, Twitter, & Facebook.

October 17, 2013
Kosher Table Service Meals at Walt Disney World
• Facebook • Twitter • Google Plus • Pinterest
I’m back again, this time blogging about your table service kosher options in Disney World. I would like to note that my opinions are my own and that I do not presume to speak for anyone’s personal tastes, but I will tell you straight off the bat: I’m not a fan. For those of you who keep kosher regularly, think “typical airline meals” but way more expensive. Way more.
I have been impressed however, with the Disney staff’s knowledge of kashurus laws. At times they are even better than my own, which admittedly may not be saying a whole lot.
Kosher meals are available at Disney World’s sit-down restaurants, even the ones Disney does not own. This includes Yak and Yeti in Animal Kingdom, the Rainforest Cafes in both Animal Kingdom and Downtown Disney, and T-REX Cafe in Downtown Disney. It’s always a good idea to call ahead and verify since the non-Disney owned kosher options are subject to change.
Your breakfast options should include your choice of either cheese blintzes with hash browns or cheese omelets with home fries. Cold cereal, fruit, and Lenders bagels with Philly cream cheese are generally available without advanced reservations.
Lunch and dinner choices are, as of this writing, brisket with gravy, honey glazed chicken, filleted salmon, or cheese lasagna. Sounds good, doesn’t it? So did the concept for Stitch’s Great Escape. Just saying.
You will have several dessert options, including chocolate cake, apple strudel, non-dairy cheese cake, and chocolate chip cookies. It’s worth mentioning that Mickey Bars and most other kiosk-available desserts are kosher, as well.
All meals are prepared in a three-layered plastic, oven safe bag. Nothing new to those of you who are used to this sort of dining out. Wrapped utensils are provided as well.
As always, prices and availability will vary depending on your dining location. Disney will tell you that a minimum of twenty four hours of notice must be given in order to ensure your meal will be ready for you, but from personal experience, I would call much earlier and verify the day before, not make the initial call at that point.
Again, all reservations and requests can be made by calling 407-WDW-DINE. And while this is the way to reserve your table, I would also call the restaurant and speak to the chef. Do not be discouraged if the person answering the phone at said eatery has no clue what kosher is; the chef most certainly will.
There are other dining options while staying at Disney, including off site restaurants, delivery, grocery options and sending food ahead yourself. I will discuss all of these options soon.
Share on Facebook
Retweet this
Kosher Table Service Meals at Walt Disney World is a post from the TouringPlans.com Blog. Signup for a premium subscription today! Or get news via Email, Twitter, & Facebook.

Site Maintenance Related to Crowd Calendar 4
By Len Testa
• Facebook • Twitter • Google Plus • Pinterest
We’re un-doing today’s release of Crowd Calendar 4 to fix some issues with page loading speed and touring plan optimizations. The rollback should be done by noon Eastern.
I apologize for the impact this release has had, especially to families in the parks over the last two days. We’ll work to improve this experience. If you’re in the parks and there’s anything we can help with, please contact us.
We’ll have a new release schedule for Crowd Calendar 4 within the next few days.
Share on Facebook
Retweet this
Site Maintenance Related to Crowd Calendar 4 is a post from the TouringPlans.com Blog. Signup for a premium subscription today! Or get news via Email, Twitter, & Facebook.

Disneyland’s Tomorrowland: A Whale of a Tale
By Sam Gennawey
• Facebook • Twitter • Google Plus • Pinterest
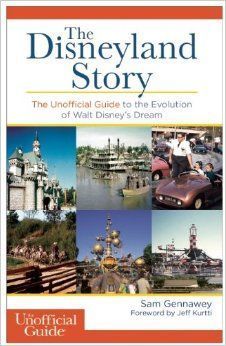
The Disneyland Story
From the publisher of The Unofficial Guide books comes The Disneyland Story: The Unofficial Guide to the Evolution of Walt Disney’s Dream by Sam Gennawey, the story of how Walt Disney’s greatest creation was conceived, nurtured, and how it grew into a source of joy and inspiration for generations of visitors. Here is a brief excerpt:
Walt was desperately trying to fill space in Tomorrowland, and an employee suggested that he bring some of the sets and props from the popular 1954 film 20,000 Leagues Under the Sea down to the park. Ken Anderson was pulled away from his work in Fantasyland in the last two weeks before the park opening to work on the show. He said, “I was up all night with two other studio artists just before opening day painting the giant squid. Walt was supposed to be at a party his wife, Lillian, was giving for some VIPs at the park, but he was too nervous about everything being ready on time to stay there. He went around from ride to ride and exhibit to exhibit, checking work, helping out. He even came into where we were painting the squid, put on a mask, and did a little painting himself.” John Hench also joined in.
The walk-through display opened on August 5, 1955. Guests entered the exhibit through a 40-foot mural of the Nautilus and the giant squid. Originally, costumed guides would have provided a tour but that idea was scrapped in favor of a prerecorded narration track voiced by Thurl Ravenscroft (possibly best-known for Tony the Tiger’s, “They’re grrrreat!” for Frosted Flakes). As the guests entered the exhibit, the movie’s theme song, “Whale of a Tale” played in the background while they peered through portholes to see a model of the Nautilus in its final resting place. The guest’s point of view was from the stern window of a sunken ship with treasure chests spilled out in the sand in the foreground and the upper deck of the submarine in the distance.
Next, guests passed through a full-size interior of the wheelhouse, designed by Harper Goff for the film. Throughout was ironwork that was Victorian in feel but without the frivolous ornamentation. Goff called this “sewing machine Gothic.” A spiral staircase led to the chart room and Professor Pierre Aronnax’s cabin, where his writing desk could be seen from the passageway.
The salon was completely furnished and included the famous pipe organ from the film. Through the view port guests could see the scary giant squid moving closer. The prop was hung on cables and animated. In the pump room was a bank of lights that were cleverly made out of the bottoms of glass salad bowls. From there, guests moved into the diving chamber with the equipment hanging in the fitting chamber. The original diving suits were made of rubber, which rotted, and the diving helmets were dressed-up Japanese sponge diving helmets. Occasionally, a bubble would pop from the water at the bottom of the diving chamber. Once past the power supply room the guests got another glimpse of the Nautilus.
Based on the Jules Verne story set more than a century earlier than Tomorrowland’s 1986, the 20,000 Leagues Under the Sea attraction may have seemed an odd fit in Tomorrowland. When asked, the Disneyland publicity department would explain that the submarine was powered by atomic energy; therefore, it fit in perfectly.
The 20,000 Leagues Under the Sea attraction had been slated to run six months but stayed until August 1966. Over the years, the park replaced the original rented props. In the early 1960s, fiberglass castings replaced the original rotted diving suits. When the attraction finally closed, the pipe organ was reused in the Haunted Mansion and the glass curio cabinets were installed in the One-of-a-Kind shop in New Orleans Square.
Share on Facebook
Retweet this
Disneyland’s Tomorrowland: A Whale of a Tale is a post from the TouringPlans.com Blog. Signup for a premium subscription today! Or get news via Email, Twitter, & Facebook.

October 16, 2013
Observations from Disneyland: October 14, 2013
• Facebook • Twitter • Google Plus • Pinterest
Welcome to Disneyland! We’re at that point of the year where weekdays see mid-level crowds and weekend see crowds at the upper end of the scale. For example, this last weekend saw a 9 out of 10 crowd on Saturday, and an 8 out of 10 on Sunday. This weekend will see similar crowds, with an 8 out of 10 on Saturday and a 6 out of 10 on a Sunday.
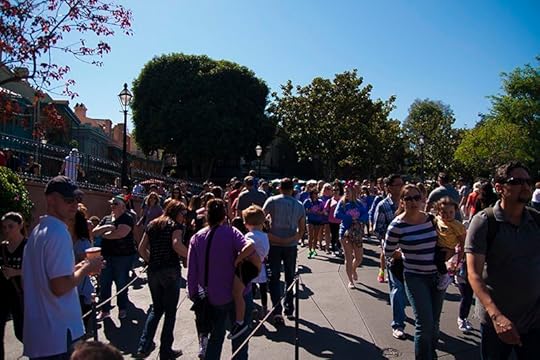 We predicted today (Monday, October 14) as a 7. Even though a 7 seems high the attraction wait times were actually quite manageable. Some queue lengths can be deceptively long on days like this. For example here is the Pirates of the Caribbean extended queue. It extends out of the regular queue and under the New Orleans Square bridge and to the right. It looks long but…
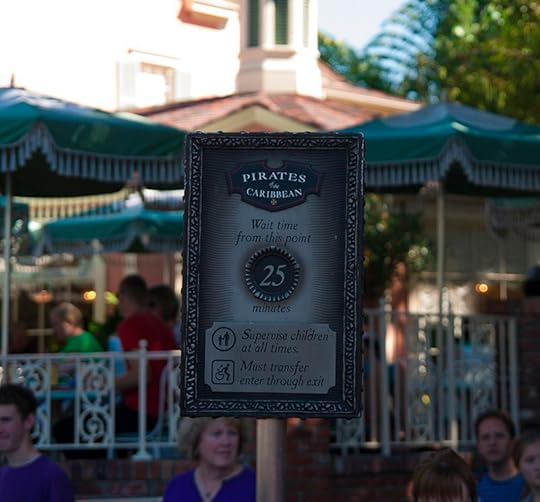 The posted wait time is only 25 minutes!
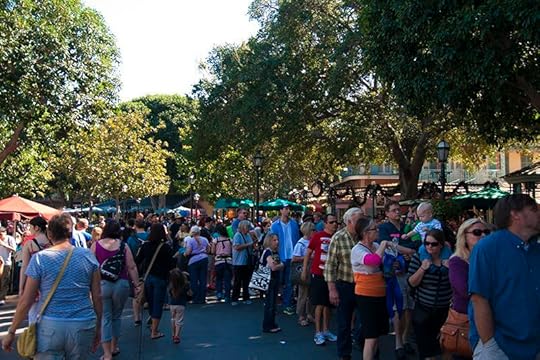 Another deceptively long queue is the one found at Haunted Mansion Holiday. The queue extends outside of the Mansion gates and fills up basically the entire Magnolia Park (the area in front of New Orleans Square Train Station).
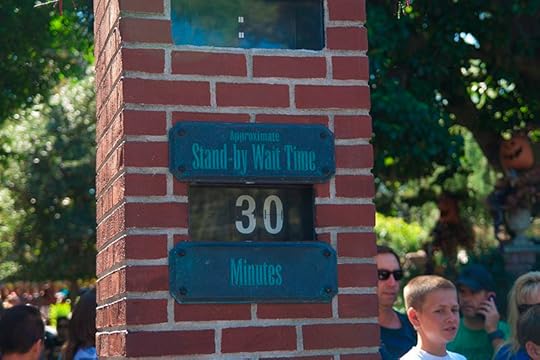 Even after that huge amount of queue the wait time is only 30 minutes. It also seems like a lot less because it is constantly moving (thanks to no FASTPASS being offered this year).
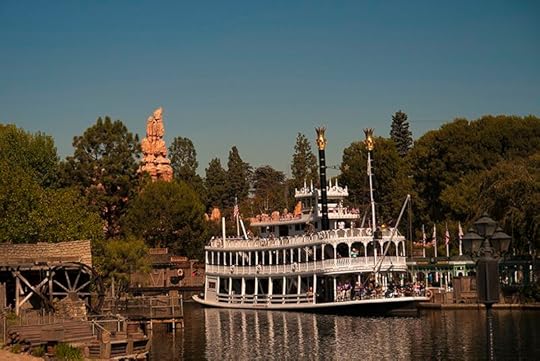 The Rivers of America and Mark Twain are always peaceful, no matter how busy the park is.
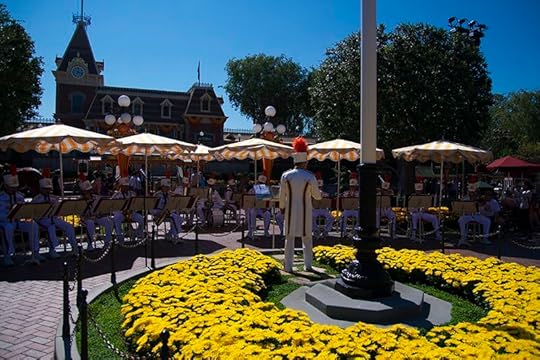 Jumping back a bit here, as I was entering the park the wonderful Disneyland Band was playing its daily noon concert in Town Square. If you’ve never stopped and watched the band perform you should definitely make it a part of your next visit.
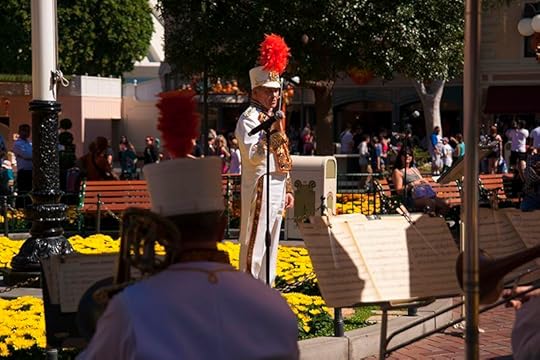 The band leader directs the band from his spot near the Disneyland dedication plaque.
 Today I ate the Chicken Sausage in a Pretzel Roll from Village Haus Restaurant in Fantasyland. This is one of those items that I put in the “surprisingly good” category of Disneyland food. The sausage is a bit on the small side, but the taste is great. It has a pleasant snap as soon as you bite into it. But best of all is the pretzel roll. The world would be a better place if everything were served on a pretzel roll.
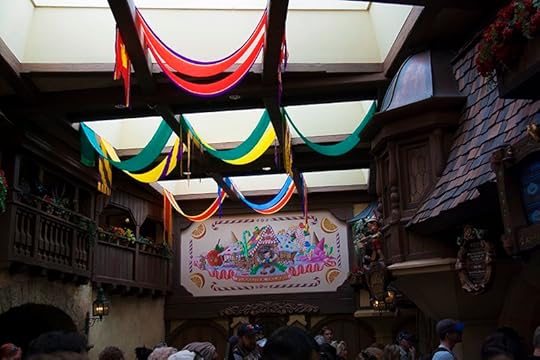 Moving on from the food, the decor of the Village Haus is very nice and perfectly matches the rest of Fantasyland. It actually reminds me a lot of Germany in World Showcase at Epcot. But then I guess that makes sense considering Epcot and 1983 Fantasyland were designed and built at the same time.
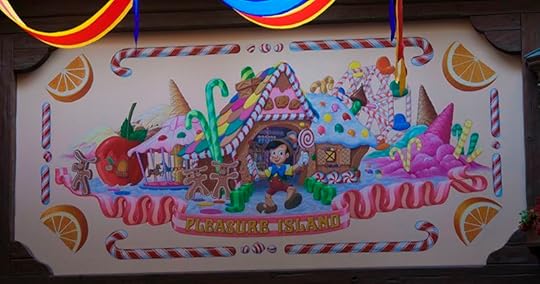 A close up of the Pleasure Island mural inside Village Haus.
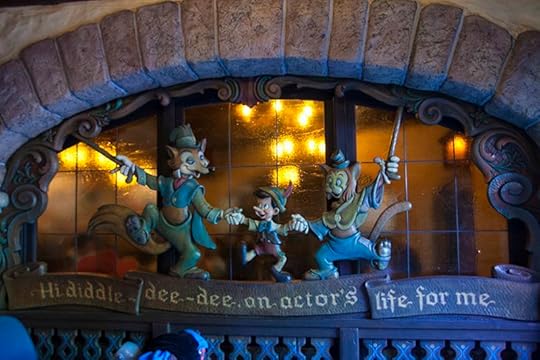 The entrance is flanked by two identical wooden murals of Pinocchio.
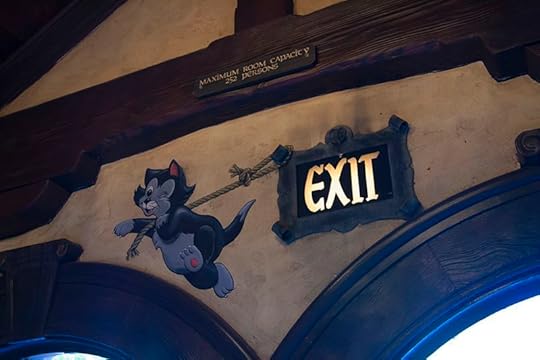 Who could forget the classic Figaro exit sign? Legend sayd the sign is off-center thanks to an error during construction. But when Imagineers got a chance to build it again in Disneyland Paris, they got it right. The Parisian version of the sign has Figaro giving a thumbs up.
 Moving on to the pumpkin carving area of Big Thunder Ranch Jamboree… This area has been open since September 13, and by now Cast Members have created a number of amazing pumpkin sculptures. A pumpkin dragon is pretty much the coolest thing I will see all week.
 Here’s King Candy from Wreck-It Ralph.
 Pumpkin sculptors work throughout the day on new pumpkins. It’s fun to check back every week to see what they’ve been working on. It’s also fun to buy your own pumpkins and then try to replicate what they sculpt in the park. It’s ALSO fun to then smash your pumpkins on the ground after you realize you’ll never be as good as they are. Not that I’ve ever done that.
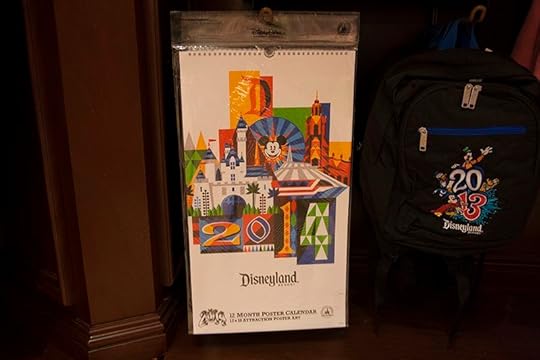 This week in merchandise brings us a fantastic new 2014 calendar. Usually the “year” merch is visually appalling (2013 tie-dye shirts!), but this piece is nice!
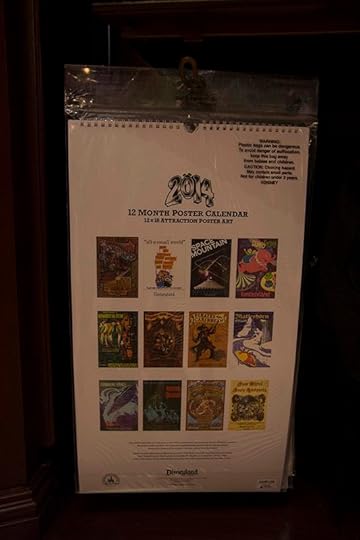 $19.99 gets you a a huge calendar featuring some of the classic attraction posters from Disneyland’s history. What makes it even better is that the calendar is printed on nice thick paper, and each page can be removed and placed in a 12×18-inch frame!
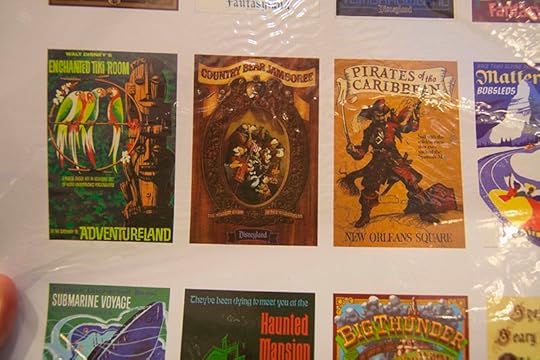 The calendar even features some attractions that are no longer with us. Try not to stain it with your tears like I did!
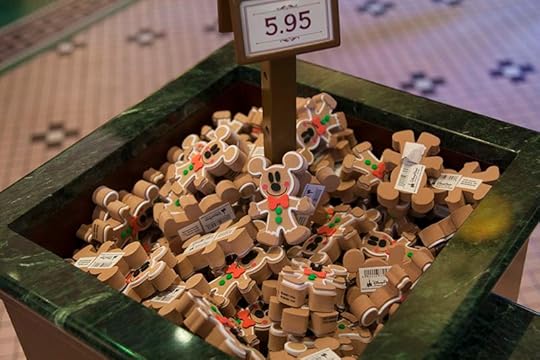 While waiting in line I noticed some of the first pieces of holiday merchandise have been added to The Emporium. These little Mickey gingerbread antenna toppers are $5.95 each.
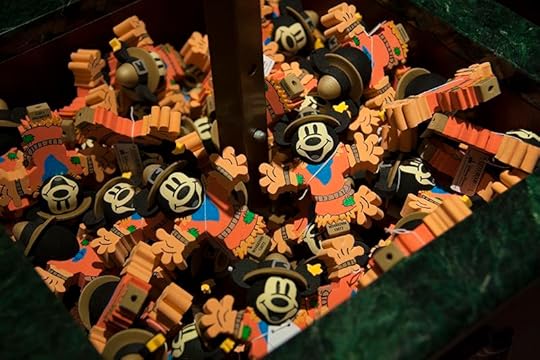 Also $5.95 and new to me are these Mickey scarecrow antenna toppers.
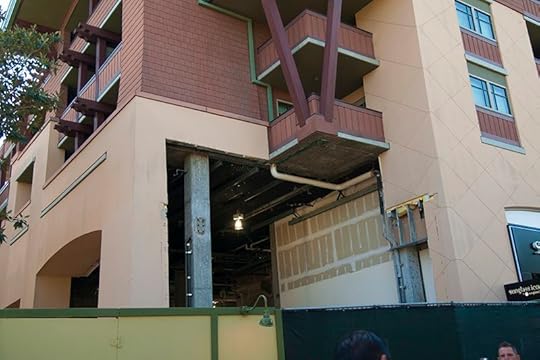 I don’t want this post to turn in to a construction update, but I had to share the Starbucks Downtown Disney progress. They are really going to town on this thing!
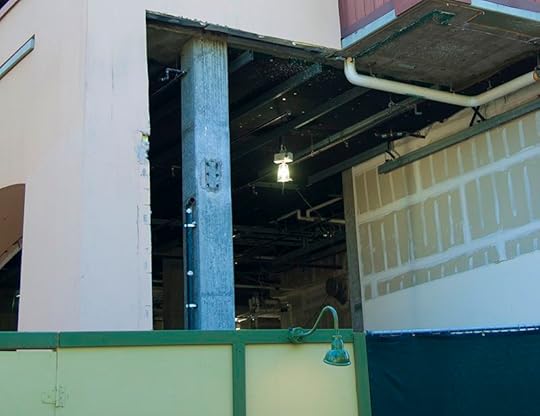 The entire store front has been removed, and the inside looks like it has been stripped completely. They have a lot of work to go on this location, especially considering they have to install plumbing to a location that never had it before.
Anyway, that’s all for this time! Thanks for reading. If there’s anything in the parks you’d like to see, or if you have any questions, please leave them in the comment section below.
Share on Facebook
Retweet this
Observations from Disneyland: October 14, 2013 is a post from the TouringPlans.com Blog. Signup for a premium subscription today! Or get news via Email, Twitter, & Facebook.

October 15, 2013
Ultimate Halloween Horror Nights 23 Touring Plan
• Facebook • Twitter • Google Plus • Pinterest
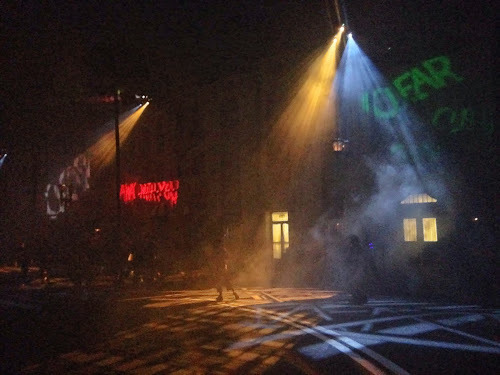
We’re heading into the home stretch of Universal Orlando’s Halloween Horror Nights 23, and if you plan on facing the undead hordes you’ll need a good plan now more than ever. Luckily for you, we’ve been on the ground every weekend of the event so far, and have recorded over 300 pieces of wait-time data for the haunted houses.
Here’s the final result: field-tested touring plans, designed to help you tackle all eight mazes in a single evening without the use of extra-cost express passes — provided you pick the right night to attend (Wednesday or Thursday are best, Saturdays are worst, and Sunday can be surprisingly busy), arrive early, and stay late.
For starters, find general information about the event and ticket types in this blog post. Once you know whether you will be eligible for Stay & Scream early entry, pick your plan below:
Stay & Scream Option A (Recommended):
1. Arrive at the park no later than 4:45pm and enter using a daytime ticket.
2. Proceed to the New York area across from the Transformers ride, where you will show your HHN ticket and receive a wristband.
3. Wait outside or inside Finnegan’s Bar and Restaurant (reservations are almost fully booked for the event).
4. When released from the holding area at approximately 5:45pm, head directly to An American Werewolf in London (enter through the Twister facade).
5. As soon as permitted, at approximately 6:00pm, enter Cabin in the Woods (next to Despicable Me: Minion Mayhem).
6. Cross through the New York area past Mel’s Drive-In, and shortcut through the Garden of Allah to KidZone. Experience The Walking Dead.
7. The Walking Dead exit leads directly to La Llorona‘s entrance.
8. Afterlife: Death’s Vengance‘s entrance can be found next to La Llorona’s exit near MIB Gear (opens at 6:30pm).
9. Check your map for the first showtime of Bill & Ted’s Excellent Halloween Adventure, and arrive at the Fear Factor Live stadium 15 to 20 minutes prior.
10. After Bill & Ted, watch out for the Chainsaw Team while walking to Havoc2: Derailed in San Francisco.
11. Exit to your right and continue to the New York area. Experience Evil Dead and/or Resident Evil if the wait is 30 minutes or less (both open at 6:30pm).
12. Check your map for the next showtime of The Rocky Horror Picture Show tribute, and arrive at the Beetlejuice stage 10 to 15 minutes prior.
13. Before or after the show, ride Transformers, Revenge of the Mummy, Hollywood Rip Ride Rockit, or MEN IN BLACK: Alien Attack using the Single Rider line.
14. Walk around the park counter-clockwise, exploring the scarezones. Start with the “Fall of Atlanta” in New York (watch for victims-turned-walkers), walk towards the entrance and then up Hollywood through “Clear,” explore the burning barn (look in the well out back), and traverse the woods (home of the “deer eater” and legless “bicycle walker”) to the survivor’s camp outside KidZone, complete with Dale’s RV and gory projection effects.
15. Consider taking a break from the park in CityWalk; hold onto your ticket and have your hand stamped at the gate.
16. Return to the park 90 minutes before closing to experience any houses you missed or want to see again. Wait times drop dramatically in the last hour, and you can join the queue for a haunted house right up until closing time.
17. To avoid a traffic jam, leave the park 30 minutes before closing, or wait to be one of the last to exit.
Stay & Scream Option B:
1. Arrive at the park no later than 4:45pm and enter using a daytime ticket.
2. Proceed to the KidZone area, where you will show your HHN ticket and recieve a wristband.
3. Wait in the shaded area outside Animal Actors until allowed to queue for The Walking Dead.
4. Experience The Walking Dead when it opens at 5:45pm.
5. The Walking Dead exit leads directly to the entrance of La Llorona, which opens at 6pm.
6. After La Llorona, cross the park to An American Werewolf in London (enter through the Twister facade).
7. Return to the other side of the park, where Afterlife’s entrance can be found next to La Llorona’s exit near MIB Gear (opens at 6:30pm).
8. Check your map for the first showtime of Bill & Ted’s Excellent Halloween Adventure, and arrive at the Fear Factor Live stadium 15 to 20 minutes prior.
9. After Bill & Ted, watch out for the Chainsaw Team while walking to Havoc2: Derailed in San Francisco.
10. Exit to your right and continue to the New York area. Experience Evil Dead and/or Resident Evil if the wait is 30 minutes or less.
11. Check your map for the next showtime of The Rocky Horror Picture Show tribute, and arrive at the Beetlejuice stage 10 to 15 minutes prior.
12. Before or after the show, ride Transformers, Revenge of the Mummy, Hollywood Rip Ride Rockit, or MEN IN BLACK: Alien Attack using the Single Rider line.
13. Walk around the park counter-clockwise, exploring the scarezones. Start with the “Fall of Atlanta” in New York (watch for victims-turned-walkers), walk towards the entrance and then up Hollywood through “Clear”, explore the burning barn (look in the well out back), and traverse the woods (home of the “deer eater” and legless “bicycle walker”) to the survivor’s camp outside KidZone, complete with Dale’s RV and gory projection effects.
14. Consider taking a break from the park in CityWalk; hold onto your ticket and have your hand stamped at the gate.
15. Return to the park 90 minutes before closing to experience Cabin in the Woods and any other houses you missed or want to see again. Wait times drop dramatically in the last hour, and you can join the queue for a haunted house right up until closing time.
16. To avoid a traffic jam, leave the park 30 minutes before closing, or wait to be one of the last to exit.
General Admission:
1. Arrive at the park no later than 5:40pm and pass through the security checkpoint, using the “no bags” line to the left if possible.
2. Line up as close as possible to any turnstile (including the temporary ones at the center gate) and watch the pre-opening skit on the balcony above the ticket booths at approximately 5:50pm.
3. When the gates open at 6pm, walk quickly through Hollywood past Mel’s Drive-In, and shortcut through the Garden of Allah to KidZone to experience The Walking Dead.
4. The Walking Dead exit leads directly to the entrance of La Llorona.
5. Afterlife’s entrance can be found next to La Llorona’s exit near MIB Gear (opens at 6:30pm).
6. Check your map for the first showtime of Bill & Ted’s Excellent Halloween Adventure, and arrive at the Fear Factor Live stadium 15 to 20 minutes prior. If you miss the first showing, try to see the last or second-to-last performance.
9. After Bill & Ted, watch out for the Chainsaw Team while walking to Havoc2: Derailed in San Francisco.
10. Exit to your right and continue to the New York area. ExperienceAn American Werewolf in London (enter through the Twister facade), Evil Dead and/or Resident Evil if the wait is 30 minutes or less.
11. Check your map for the next showtime of The Rocky Horror Picture Show tribute, and arrive at the Beetlejuice stage 10 to 15 minutes prior.
12. Before or after the show, ride Transformers, Revenge of the Mummy, Hollywood Rip Ride Rockit, or MEN IN BLACK: Alien Attack using the Single Rider line.
14. If you have only seen 3 or 4 houses at this point, you may want to bite the bullet and wait in line for one, but try to avoid any queues over 60 minutes
15. Walk around the park counter-clockwise, exploring the scarezones. Start with the “Fall of Atlanta” in New York (watch for victims-turned-walkers), walk towards the entrance and then up Hollywood through “Clear”, explore the burning barn (look in the well out back), and traverse the woods (home of the “deer eater” and legless “bicycle walker”) to the survivor’s camp outside KidZone, complete with Dale’s RV and gory projection effects.
16. Consider taking a break from the park in CityWalk; hold onto your ticket and have your hand stamped at the gate.
17. Return to the park 90 minutes before closing to experience Cabin in the Woods and any other houses you missed or want to see again. Wait times drop dramatically in the last hour, and you can join the queue for a haunted house right up until closing time.
18. To avoid a traffic jam, leave the park 30 minutes before closing, or wait to be one of the last to exit.
Share on Facebook
Retweet this
Ultimate Halloween Horror Nights 23 Touring Plan is a post from the TouringPlans.com Blog. Signup for a premium subscription today! Or get news via Email, Twitter, & Facebook.

Dos And Don’ts At A runDisney Expo
• Facebook • Twitter • Google Plus • Pinterest
You’ve registered on time, trained for months, and the moment is finally here: your runDisney race weekend! Whether you’re running in a 5K, 10K, 10 mile, or half or full marathon event, it’s a big accomplishment to have made it this far, and you’re ready to run…but before you can line up in your corral, there’s one stop left to make the magic real: a visit to the Expo!
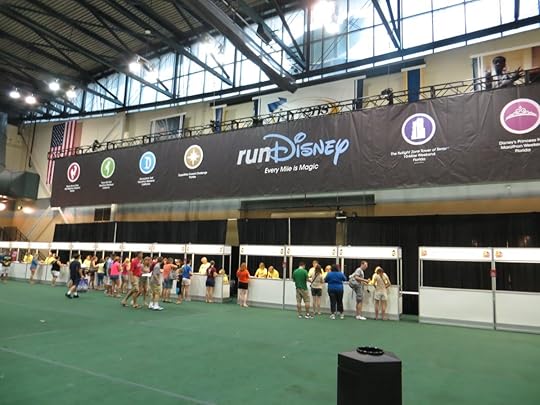
2013 runDisney Tower of Terror 10 Miler Expo at Jostens Center.
Although each race weekend’s size dictates its corresponding Expo’s size, it’s always a hurricane of activity that can be overwhelming to anyone attending one for the first time, especially with wide-eyed kids (or spouses) in tow. Fortunately, I’ve uncovered a few tips and tricks to getting in and out in one piece – so whether it’s your first or fiftieth expo – these pointers should be helpful.
BEFORE THE EXPO:
DO: print out your waiver from the runDisney website before arriving
DON’T: worry if you forget to print your waiver – there are computers/printers there just in case, but you can avoid waiting in another line if you already have your waiver.
DO: Check the schedule to see when Expo hours are. There are NO race day pickups for “day” races so check the runDisney site for optimal planning.
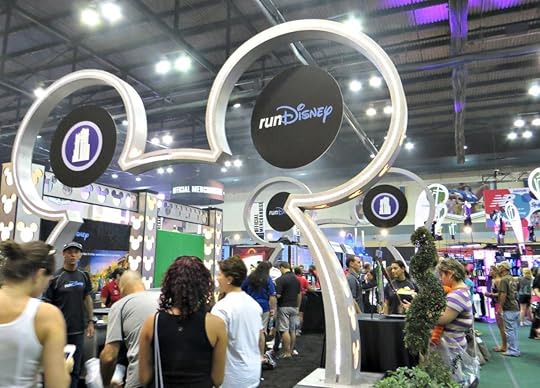
runDisney booth at the Tower of Terror 10 Mile Expo.
AT THE EXPO:
DO: bring your photo ID – volunteers will check this against your waiver. (If you absolutely cannot attend the expo, you may have a friend/family member pick up for you, but you will need to complete the “Pick Up Authorization” forms – these are available on the runDisney event sites, under the “Runner Info” tab – and provide your “picker upper” with a copy of your photo ID).
DON’T: meander off course! There are two important stops you must make: (1) Bib pickup (which is divided by bib numbers, as denoted on your waiver) and (2) T-Shirt & Goody Bag pick up. Shopping and strolling the expo floor are optional.
DO: Wear comfortable shoes! Between parking (or walking from the bus) and walking the Expo floor, it is not uncommon to travel several miles on foot.
DON’T: forget to bring your cash and/or credit card if you want to shop – there will be many vendors selling everything from running shoes to Clif Bars, fun themed souvenirs, and more!
DO: take advantage of the water coolers stationed around the expo! Being hydrated is very important, especially when you’re about to run a race.
DON’T: be tempted to purchase an entirely new race outfit and shoes at the expo. You SHOULD be racing in something you’ve worn before, and this includes the race shirt. Celebrate your accomplishment post-event!
DO: consider attending the runDisney speaker series! Talks are free of charge, and past speakers have included runDisney official Nutritionist Tara Gidus and Former Olympian and runDisney Coach Jeff Galloway. Plus, it’s a chance to get off your feet for a while!
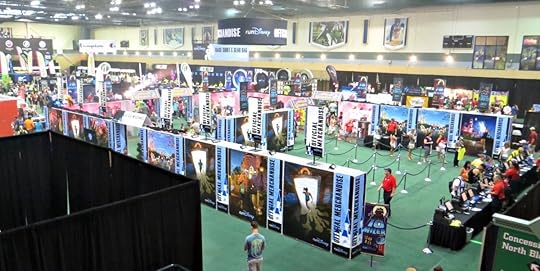
runDisney Official Merchandise
OTHER TIPS:
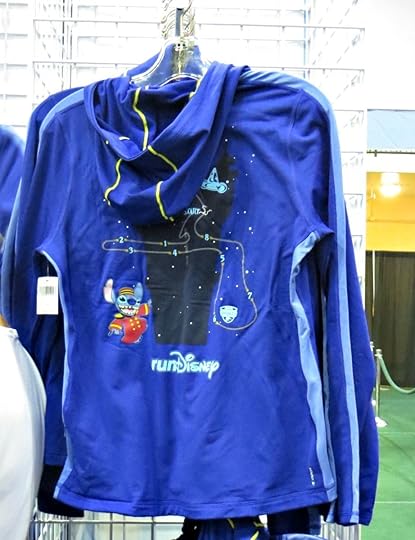
2013 Tower of Terror 10 Miler tech hoodie.
Special runDisney merchandise is often sold in limited supply, so if purchasing these items (often previewed on the Disney Parks Blog) is a priority, consider attending the Expo on the first day as close to opening time as possible.
If shopping is not a huge priority for you, consider visiting the Expo in the middle of the day or late in the day, as locals often stop in “after work” hours (4-5 PM).
Concessions, such as sandwiches, salads, and snacks are sold on premises, in case you need a bite to eat.
Official runDisney merchandise is subject to the same discounts that you would find in the parks (i.e. Annual Passholder discounts, DVC discounts, and Cast Member discounts), so don’t forget to take advantage of those as possible. Please note, however, that there may be restrictions on quantity.
The race program is often posted ahead of time on the runDisney site, complete with Expo map, so you can plan your shopping route in advance.
—
What am I missing? What tips do you have about runDisney Expos – or if you’ve never been, what questions do you have that haven’t been covered?
Share on Facebook
Retweet this
Dos And Don’ts At A runDisney Expo is a post from the TouringPlans.com Blog. Signup for a premium subscription today! Or get news via Email, Twitter, & Facebook.

Do’s And Don’ts At A runDisney Expo
• Facebook • Twitter • Google Plus • Pinterest
You’ve registered on time, trained for months, and the moment is finally here: your runDisney race weekend! Whether you’re running a 5K, 10K, 10 Mile, half or full marathon, it’s a big accomplishment to have made it this far, and you’re ready to run…but before you can line up in your corral, there’s one stop left to make the magic real: a visit to the Expo!

2013 runDisney Tower of Terror 10 Miler Expo at Josten’s Center.
Although each Race Weekend’s size dictates its corresponding Expo’s size, it’s always a hurricane of activity which can be overwhelming to anyone attending one for the first time, especially with wide-eyed kids (or spouses) in tow. Fortunately, I’ve uncovered a few tips and tricks to getting in and out in one piece – so whether it’s your first or fiftieth expo – these pointers should be helpful.
BEFORE THE EXPO:
DO: print out your waiver from the runDisney website before arriving
DON’T: worry if you forget to print your waiver – there are computers/printers there just in case, but you can avoid waiting in another line if you already have your waiver.
DO: Check the schedule to see when Expo hours are. There are NO race day pickups for “day” races so check the runDisney site for optimal planning.

runDisney booth at the Tower of Terror 10 Mile Expo.
AT THE EXPO:
DO: bring your photo ID – volunteers will check this against your waiver. (If you absolutely cannot attend the expo, you may have a friend/family member pick up for you, but you will need to complete the “Pick Up Authorization” forms – these are available on the runDisney event sites, under the “Runner Info” tab – and provide your “picker upper” with a copy of your photo ID).
DON’T: meander off course! There are two important stops you must make: (1) Bib pickup (which is divided by bib numbers, as denoted on your waiver) and (2) T-Shirt & Goody Bag pick up. Shopping and strolling the expo floor are optional.
DO: Wear comfortable shoes! Between parking (or walking from the bus) and walking the Expo floor, it is not uncommon to travel several miles on foot.
DON’T: forget to bring your cash and/or credit card if you want to shop – there will be many vendors selling everything from running shoes to Clif Bars, fun themed souvenirs and more!
DO: take advantage of the water coolers stationed around the expo! Being hydrated is very important, especially when you’re about to run a race.
DON’T: be tempted to purchase an entirely new race outfit and shoes at the expo. You SHOULD be racing in something you’ve worn before, so this includes the race shirt. Celebrate your accomplishment post-event!
DO: consider attending the runDisney speaker series! Talks are free of charge and past speakers have included runDisney official Nutritionist Tara Gidus, Former Olympian and runDisney Coach Jeff Galloway. Plus, it’s a chance to get off your feet for a while!

runDisney Official Merchandise
OTHER TIPS:

2013 Tower of Terror 10 Miler tech hoodie.
Special runDisney merchandise is often sold in limited supply, so if purchasing these items (often previewed on the Disney Parks Blog) is a priority, consider attending the Expo on the first day as close to opening time as possible.
If shopping is not a huge priority for you, consider visiting the Expo in the middle or late in the day, as locals often stop in “after work” hours (4-5 PM).
Concessions, such as sandwiches, salads and snacks are sold on premises, in case you need a bite to eat.
Official runDisney merchandise is subject to the same discounts that you would find in the parks (i.e. Annual Passholder discounts, DVC discounts, and Cast Member discounts) so don’t forget to take advantage of those as possible. Please note, however, that there may be restrictions on quantity.
The Race Program is often posted ahead of time on the runDisney site, complete with Expo map, so you can plan your shopping route in advance.
—
What am I missing? What tips do you have about runDisney Expos – or if you’ve never been, what questions do you have that haven’t been covered?
Share on Facebook
Retweet this
Do’s And Don’ts At A runDisney Expo is a post from the TouringPlans.com Blog. Signup for a premium subscription today! Or get news via Email, Twitter, & Facebook.

Ask Jim Hill Episode 10: What Happened With Lord of the Rings and Universal?
• Facebook • Twitter • Google Plus • Pinterest
On this episode, Jim Hill and Len Testa answer a viewer question Lord of the Rings and Universal. Are they still trying to obtain the theme park rights? Where would a Lord of the Rings land be built? Find out in this week’s episode.
New episodes are posted every Tuesday, so be sure to subscribe on YouTube!
If you have a question about Disney or Universal history, you can submit it to AskJimHill@TouringPlans.com, and Jim may answer it on the air!
Share on Facebook
Retweet this
Ask Jim Hill Episode 10: What Happened With Lord of the Rings and Universal? is a post from the TouringPlans.com Blog. Signup for a premium subscription today! Or get news via Email, Twitter, & Facebook.

Bob Sehlinger's Blog
- Bob Sehlinger's profile
- 30 followers


