Becca C. Smith's Blog, page 4
October 14, 2016
3 things to do to prepare for Nanowrimo
 If you're like me, you are both excited and nervous for NaNoWriMo! (More excited than nervous, but it's the anxiety that gives me the feeling of being overwhelmed.)
I usually write an average of one or two books a year so NaNoWriMo is always a wonderful boost when I'm either starting a new novel, or trying to finish the one I'm currently working on. Every summer, I tell myself that I'll use the entire month of October to prepare for NaNo, then hit the ground running on November first.
Yeah, that's never happened.
Something ALWAYS comes up in October. Every. Year. This year being no exception. To make an extremely long story short: my husband and I bought a house, moved in, someone tried to break in, we moved out, then decided we'd fortify the place, and are now moving back in. Phew! A hard lesson, but we've learned it and so begins packing up all our stuff for the third time and moving into Fort Knox (aka our new house).
So, if you're having time constraint issues or life is just getting in the way of your NaNoWriMo prep time. Here's three easy things you can do to make sure you're ready for November first!
 1. Notes!
I don't care if it's in a waiting room, or in-between packing boxes, or on your lunch break at work, writing down any thought or idea you have for your book is a must. I can't tell you how many times I've thought of something that I think will work perfectly for my story and I'll swear up and down that I'll remember it. How could I not? It's such an awesome idea! And yeah. Totally forgot it later.
You can type it in your phone. There are a ton of apps that can organize all your notes. Evernote is what I use. It's priceless. It has a search option which is vital for me since I can never remember where I put anything and that includes my thoughts!
If you're an outliner like me, then puking out as many ideas and notes as possible will help you piece together a solid outline, which will allow you to write like the wind come November first.
2. Rough Outline
This is like your pre-pre-outline. It's a little more sophisticated than simply note taking. When you don't have a lot of time on your hands, outlining can be a difficult task. Depending on how in-depth your plot line is, outlines are vital to staying on target while writing your book.
If I didn't outline, I'd meander. And trust me, my meandering reads like meandering and that can be frustrating for the reader. You don't want your audience to ask the question: "Where is this going?"
So, if you're short on time, start your rough outline the same way you tackled your note taking: whenever and wherever you can. Sift through y0ur notes and circle or highlight the scenes that you feel are an absolute must to making your book great.
Make a new document, and using bullet points, place those scenes in the order you want them to be in the novel. Then put in spacers approximately where you think the natural 'beats' should go leading up to each scene like this:
 3. Final Outline
Now you're ready to fill in the rest. Take the time to think through what events you want to happen to lead up to each beat. I find my best ideas come to me while I'm either driving or taking a shower. You can't really jot down anything in either case, but hopefully your memory is good enough for whenever you get to your destination or turn off the water.
Think of the "filling-in process" like you did your notes. Whenever you come up with a great scene that will help move the story to the next beat, fill it in appropriately like this:
 Hope this helps! When I don't have a lot of time, I find this process works well for me!


September 9, 2016
OUtline is finished!
 I’m finally done with my outline for the Riser/Atlas mash-up book. I’m excited to combine both worlds and get back into Chelsan and Kala’s heads! I miss Chelsan terribly! It’s been three years since I’ve written a Riser book and I honestly thought Ripper would be the last one. (Sometimes your characters have something else in mind though lol!)
As I wrote the prophecy of Atlas in Grigori Returned, I just knew: Chelsan had to be the one to break Kala’s curse. It was an exhilarating moment and now I can’t believe I get to actually start writing it! I had to finish the last two Atlas books first, but now I’m ready to smash these two worlds together!
The outline was difficult. Juggling ten to twenty characters from the combined universes was quite challenging. I want to give everyone their due. I don’t want the reader to feel as if there wasn’t enough time spent on one of their favorite characters.
For Kala, it’s been three hundred years since we last saw her, so there’s A LOT of baggage and history to catch up on. Think about it: she’s had to commit over 27,000 acts of atrocity in three hundred years! She’s not the same Kala Hicks she was back in 2016, and yet she is as well. The core of her is the same, it’s just the years and years of doing horrible things to keep the universe balanced has left her a little jaded, but also a little impatient for Chelsan to break the curse.
I’m going to delve in and enjoy every second of it! Can’t wait to share it with the world!
August 31, 2016
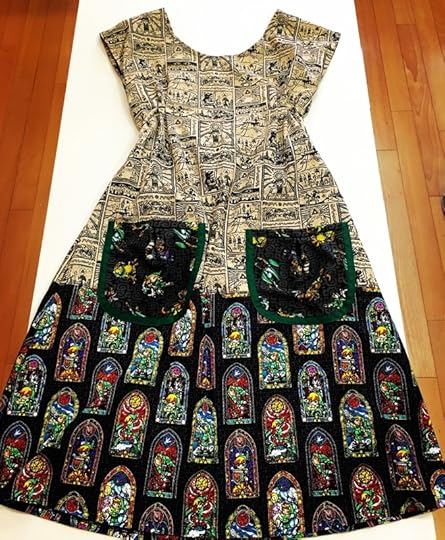
Zelda fashion: Review of Simplicity pattern 1080
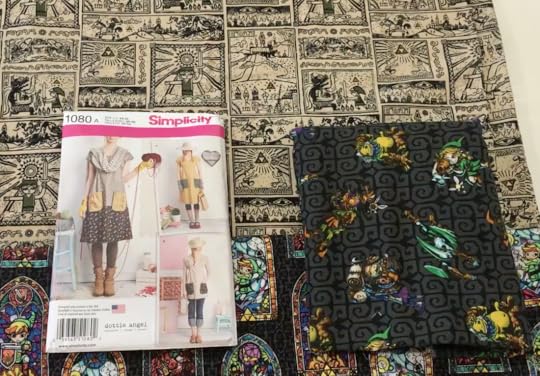 I found three amazing Zelda fabrics at JoAnne’s and wasn’t sure what I wanted to do with them. At first I was thinking I could make three skirts, or maybe another tunic, but then I came across Simplicity’s 1080 pattern and I knew it was perfect.
It was a very easy, straightforward pattern. I made View C and View B since I over-purchased some of the fabric. (The clerk told me that they couldn’t keep the Zelda fabric in stock it was so popular!) So, in a panic, I bought the rest of the bolt.
Overall, I’m happy with the way both items turned out. They’re super comfy and now I have something to wear in Hyrule!
 Here's a time-lapse of how I made it!
July 26, 2016
Mother of Dragon Purses
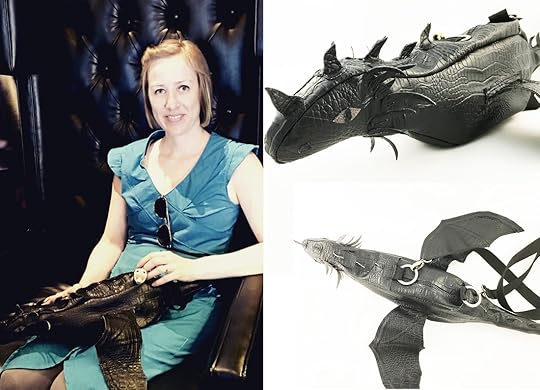 My obsession with dragons runs deep lol. I grew up reading and watching fantasy so dragons are pretty much a staple of that genre. From the terrifying Smaug to the magical Falkor, I found my spirit animal early in life.
So, after years of sewing bags, I finally decided to tackle the elusive dragon bag. First, I had to make a pattern.
Luckily, the year before, I spent more time than I care to admit coming up with a Serenity (Firefly) bag for Captain Mal cosplay at Comic-Con. It. Was. Hard. It’s somewhat dragon shaped though, so it got my wheels turning.
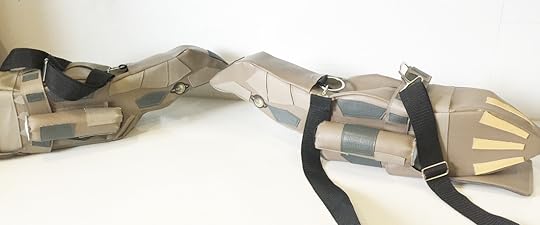 The first dragon I made was way too big. I’m talking the size of a duffel bag big. I mean, it’s kind of bad ass to walk around with a three foot dragon strapped around your chest, but not very practical. (Yes, I realize I wrote the word “practical” when talking about a dragon purse :-))
So, I had to go back to the drawing board. I sized down the pattern by half. Even though it “looked” too small, I knew once I fattened the base up with middle shaping strips, it would be a good size for a purse.
The details came next: spikes and ridges for the body and bone-stitching for the wings.
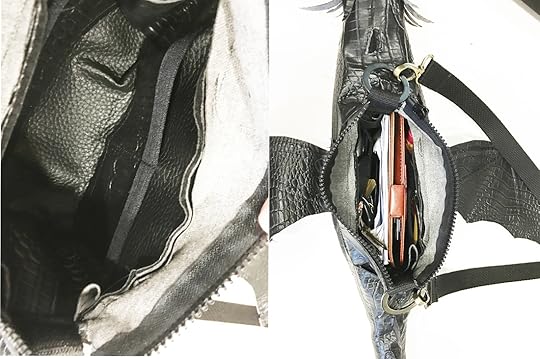
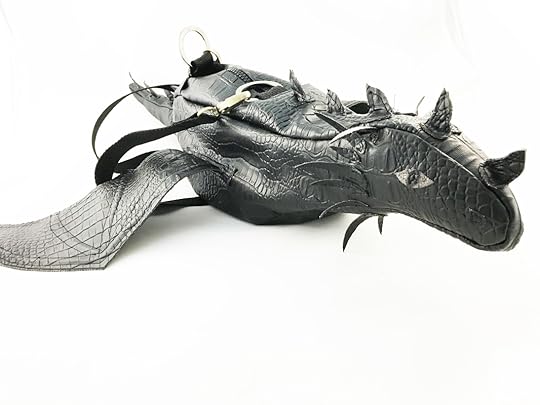 Last but not least, I made a pocket insert to better organize the space, put in some stuffing for the tail and head, and voila! Finished dragon purse!
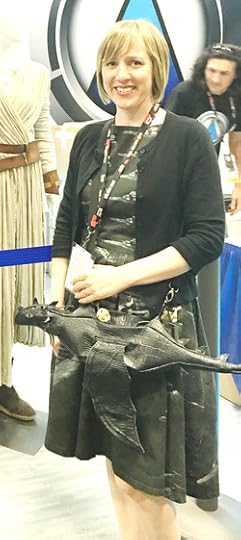
 I found some fantastic fabrics in several different colors, so I’ll be making an armada of dragon purses for my personal collection.
But I’m also going to sell them on my Etsy store! Right now, I’m only selling the black dragon, but there will be more to come soon :-) I have to share the dragon love after all!

June 1, 2016
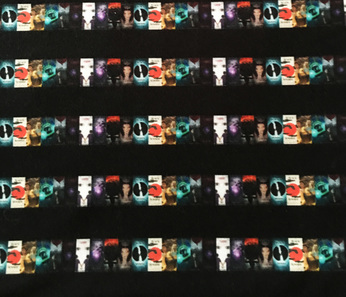
The making of my Battlestar Galactica dress. I call it: “The Fleet.”
 One of my favorite shows is the re-boot of Battlestar Galactica! I loved the 1978 version as well when I was a kid, but it doesn’t hold up as well as Ronald Moore’s re-telling.
Sure, there were parts of the series that drove me bonkers (the episode “Black Market” can just go away and die, thank you very much) but other than a few hiccups, the show was brilliant. And to me, season 1 and season 2.0 are perfection. (Season 2.5 contains aforementioned “Black Market” so you know how I feel about that.)
But overall, there are so many reasons why I love this series. Powerful moments in the series will just randomly pop in my brain. (One of my favorites being Adama’s rescue in Season 3.) Goosebumps, just thinking about it!
 The heart of the show is the fleet. It’s the last of humanity running away from the Cylons to start anew. So this seemed to be the best representation of the show in terms of what to put on the fabric.
I designed the fabric myself using www.spoonflower.com. I used Vipers for the top of the dress and the rest of the fleet for the bottom. I hadn’t expected the picture of the actual Battlestar to be so huge!
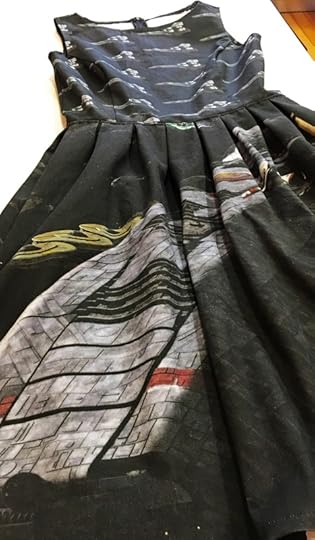 But it turns out, it worked out perfectly.
Here's a time-lapse of the whole process!
May 17, 2016
Designing my own Nerd fabric? Yes, please! My new obsession: Spoonflower.com!
 Okay, yes, there are a TON of licensed fabrics out there for my nerd fashion needs, but sometimes I have an idea and I need to create my own! Spoonflower.com is the best site for custom-made fabrics on the market, in my opinion. And it’s oh-so-easy to use which makes it even more appealing! The first thing you do is make a log-in account. Then click Create Fabric. Upload your design. Pick what fabric you want and how many yards you want and Voila! You have your own custom made fabric coming your way.
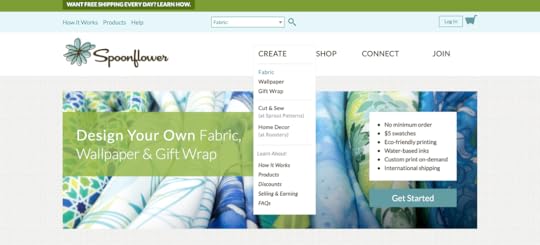
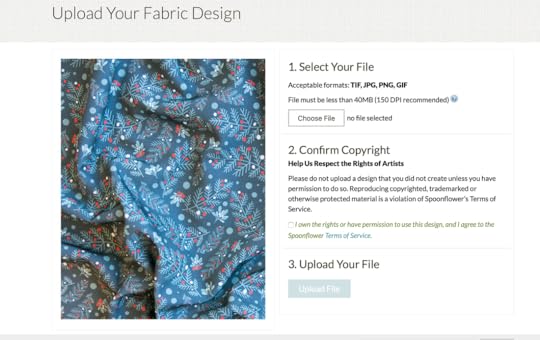
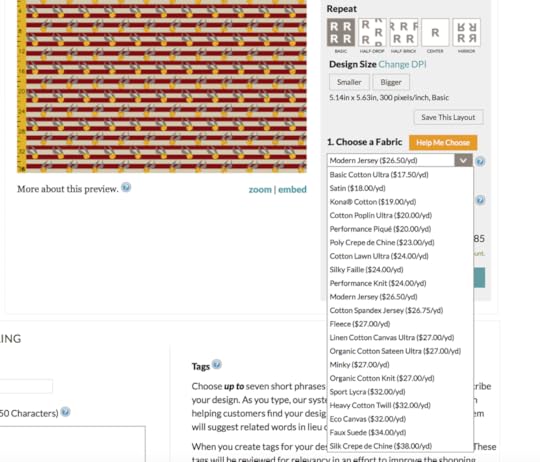
You can choose to sell your fabric design as well, but I don’t use this feature. First off, even though it is my own artwork and drawings, some of the things I draw are from my favorite movies, TV shows and books. I wouldn’t want to get into any licensing issues and they have a strict policy against using unlicensed images. Since I’m making clothing for my own personal use and have no intentions of selling any of the fabric or the clothing, I feel like I’m safe. The first fabric I ever designed with Spoonflower.com was using an art piece I had drawn a few years ago called, “Buffy in the Scythe.” I’ve never found a licensed fabric for Buffy the Vampire Slayer, so I really wanted to make my own. I certainly have an insane amount of Buffy t-shirts (thanks to TeeFury) but I wanted to wear something more feminine and the only way to do that is to make it myself!
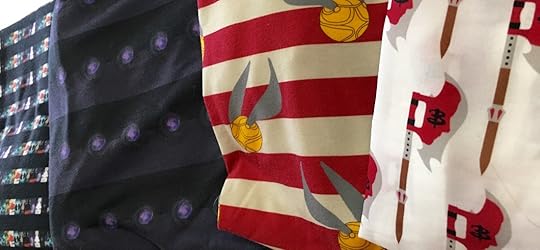
 Also, being an author, I wanted to make some clothing out of my own cover art, just for fun. My first book, Riser, has a blackish purple swirl on the cover so I added those to black and purple stripes. I also took all my covers and made them into a stripe. (I’m kind of on a stripe kick lately!)
 But my favorite so far is my Harry Potter inspired shirt, made of stretch-jersey. I chose to make maroon and tan stripes with a golden snitch for my Gryffindor Quidditch pride! But I could change the colors of the stripes for any of the houses if I wanted to!
  I recently made Battlestar Galactica fabric (can’t find that in JoAnnes!) to make a dress I’m going to call “The Fleet.” It’s shipping now, so I’ll be sure to post the results of that one in the next week or two!
Bottom line is: Spoonflower.com is awesome!
May 15, 2016
The Belle of Hell’s Kitchen: A Daredevil fit & flare dress. Review of New Look Pattern 6723.
 Fit and flare is my absolute favorite style of dress. It’s flattering to everyone! Put a little ¾ sleeve sweater over the top and you’re ready to go anywhere.
When I purchased this Daredevil fabric I knew I wanted to make a dress out of it. I love the design and the color scheme so when I saw this New Look Pattern I knew it was a perfect match.
 I don’t necessarily recommend what I did with the pattern, but for me, it worked. The pattern calls for interfacing and a lining in the bodice. I chose not to use either. I did this because I wanted a nice, light dress for summer. Whenever I make a shirt or dress with a lining, it always makes it a little too hot for me.
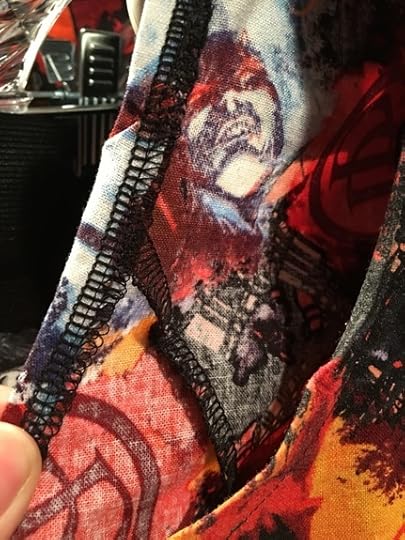
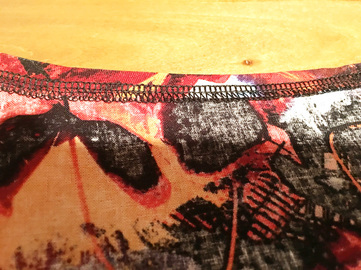
Since I have a serger machine, I sewed an edge along the neckline, armholes and bottom of the dress so I could easily fold the fabric to hem.
 The only reason I don’t recommend this for everyone is the simple fact that some people really like the stiff structure that interfacing and a lining give, especially with this style of dress. I, personally, don’t feel that it’s needed, but I think it looks great either way.
 The second thing I changed about the pattern was: pockets! I have to have pockets on my dresses, it’s a thing with me. I feel weird without pockets. So I borrowed a simple pocket from another pattern and added it to the dress.
 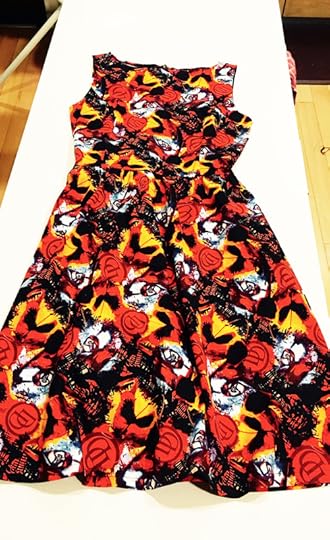 Overall though, the pattern was easy to use and I liked the way it turned out!
Here’s a timelapse video of how I made it!
May 11, 2016
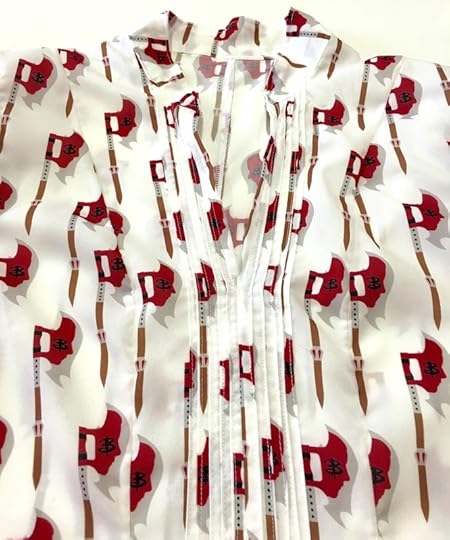
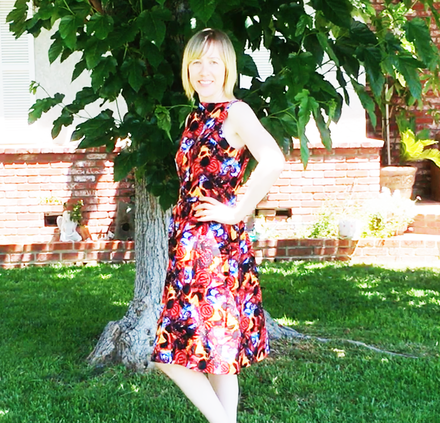
Nothing says “The Punisher” like princess sleeves… My review of New Look 6022 Pattern.
 As you can tell I’m really getting obsessed with these licensed fabrics. (I’ll have a Dare Devil and Zelda dress review blog coming soon!) But when I found this Punisher fabric I knew I had to make something out of it.
 I decided to go for a simple dress. I like the juxtaposition of a masculine fabric being turned into an overly feminine dress pattern, hence the princess sleeves.
The Punisher is one of my favorite comic book characters. (I’m all about revenge! It’s why Westerns are my favorite movie genre!) And I especially love the portrayal of The Punisher on the Netflix series, Dare Devil. I was more than thrilled when I discovered this fabric at JoAnnes. I was actually on my way out of the store and it happened to be in a separate bin! So I guess it was destiny that we found each other :-)
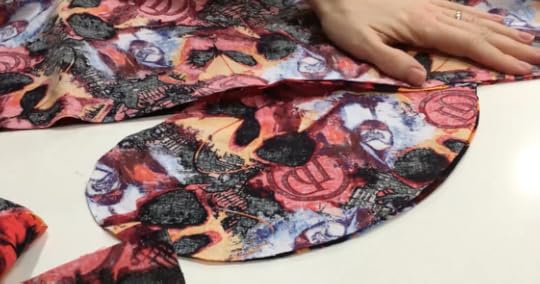
The pattern is as simple as they come, which was why I purchased it. I wanted something quick and easy. From cutting to final hem, it took about an hour to make so you can’t go wrong with that!
The pattern consists of 4 pieces: Front, Back, sleeves and neckband. Since it’s a type of tunic pattern there isn’t a zipper either. The pleats are very easy as well, with a quick baste stitch to hold them in place, all you have to do is sew up the back, sides, neckband and sleeves! And voila! You have a dress!
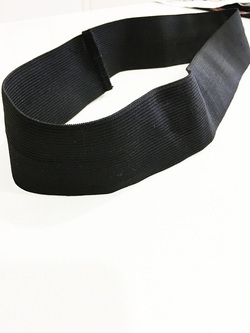
I like to give it a little more shape though so I made an elastic belt. This is quite possible the easiest belt you could ever make. Just measure your waste, cut the elastic to length, sew it up and you’ve got yourself a belt.
Here’s a 30 second video of me sewing this little number together!
May 4, 2016
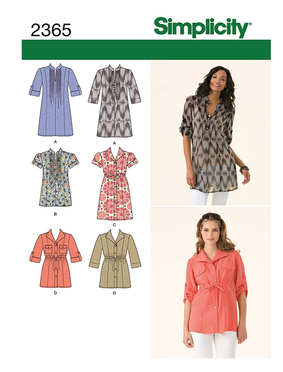
Finding the perfect tunic pattern, nerd style… Review of Simplicity Pattern2365.
 I’m one of those people who loves wearing comfortable clothing all the time. My problem over that last few years is that I’ve gotten extremely lazy with my wardrobe choices. My version of “comfortable clothing” has pretty much equated me to me looking like a slob (i.e. sweats and a tank top). I try to fashionably nerd it up a bit by wearing TeeFury tanks (I turn my t-shirts into tank tops), but all-in-all a nerdy-tank and sweat pants has pretty much been my day-to-day wardrobe for a very long time now.
That’s why I’ve been on a sewing frenzy the past couple of months. My goal is to create a wardrobe that consists of three things: comfort, nerdiness and style. I’ve been having a lot of fun with this, especially since I discovered the obscene amounts of licensed fabric at JoAnne’s and the best website ever, Spoonflower.com (you can make your own fabric desgins!)
I’ve been sewing since I was seven-years-old, so I’m no stranger to a sewing machine. The past two decades I’ve mostly sewn nerdy bags/purses and cosplay clothing, so I’m super excited to finally make clothes I can wear every day.
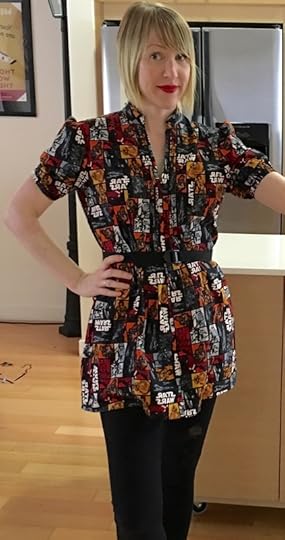
The first item on my list was to find a cute tunic pattern so that I could wear leggings. Easier said than done. I wanted my tunic to be the length of a short dress so I don’t have to worry about the leggings being see-thru or any other horror fashion faux pas I’ve seen on the Internet.
I liked Simplicty Pattern 2365 because it had the right length and I really like the French pleating on the front.

My only problem was that I didn’t like the sleeves. I’m not a fan of the button-strap sleeve. I did like the princess cut in view B though, which gave me the idea to use a different pattern: New Look 6732 I had used for cosplay (I’ll definitely write a review of that awesome pattern in the future!). I love the sleeves on that pattern, so I decided to mix and match patterns.
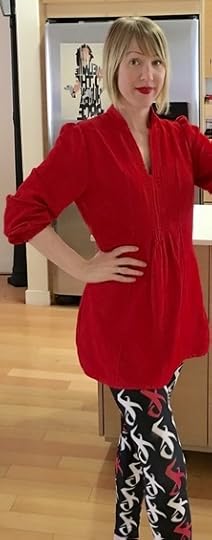
 Instead of doing a cuff or hem on the sleeve though, I chose do use 1/4 inch elastic. (In the case of the red tunic I sewed three hem slots for the elastic to give it an almost cuff-like appearance.) I made two of the tunics short-sleeved and the red one 3/4 sleeved. I chose to do a solid red so I could wear leggings I designed and created on RedBubble.com. Pictured here are my Shadowhunter Love Rune leggings! (I’ll be doing a blogpost on RedBubble as well!)
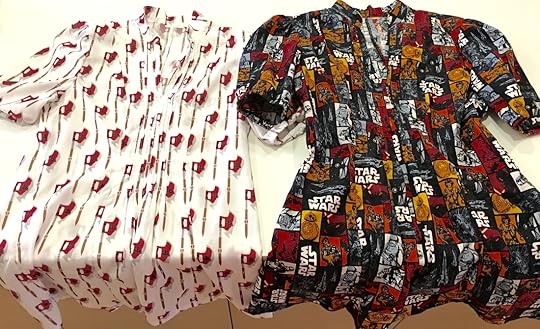
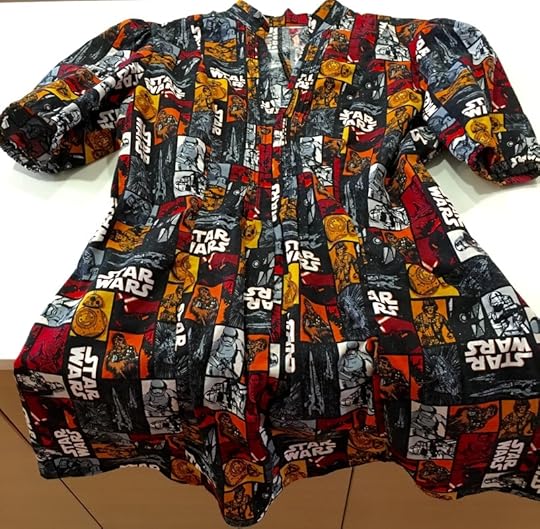
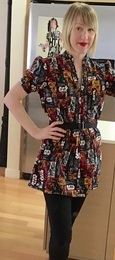
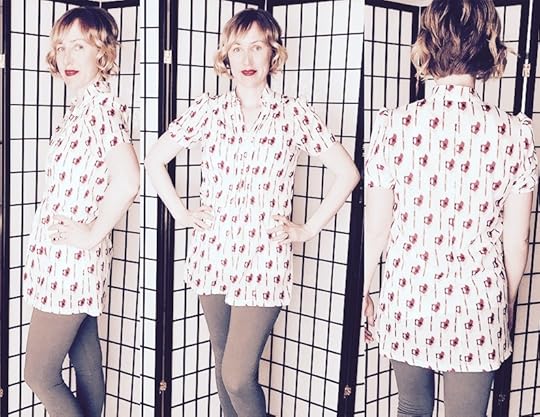
As for the other two tunics: I chose to do one with licensed Star Wars fabric and the other with fabric I designed on Spoonflower.com of a Buffy the Vampire Slayer drawing I had done years before called, Buffy in the Scythe.
 Aside from the sleeve swappage, I stuck to the pattern’s instructions. The French pleats were a little bit of a challenge. They weren’t difficult, just tedious and time consuming. Oh the things we do for fashion lol!
The collar proved a bit a challenge as well. It ended up being slightly too long. This is because of the French pleating. I used too much fabric in folding my pleats, hence making the neck length shorter than the collar. But it was a simple fix. I sewed the collar to match the length of the neck and it fit perfectly.
I’ll probably make more of these tunics as they are extremely comfy and easy to make. And the best part is I can wear my leggings without looking like I’m perpetually going to a yoga class!
April 29, 2016
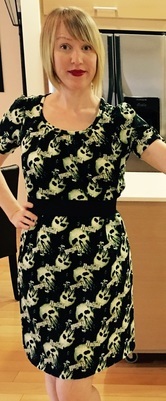
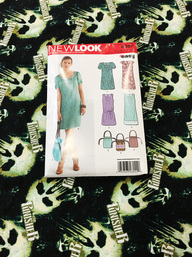
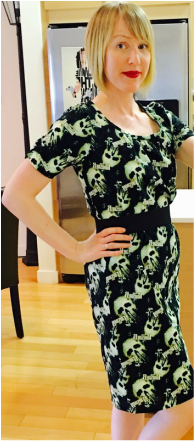
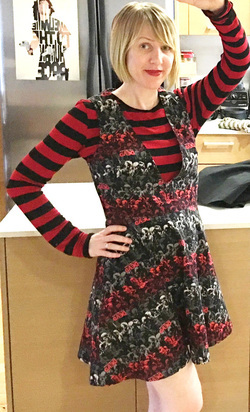
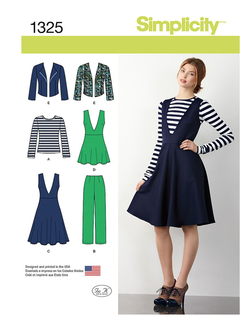
Making “Nerd” Clothing! Review of Simplicity Pattern 1325
 I admit it, I’m a nerd. And I’m proud of it! I love to sew, but in the last few years I’ve limited myself to making bags and purses instead of clothing. Or, let me re-phrase that: clothing I wear everyday. I’ve made a lot of cosplay clothing over the years, but I can’t really wear my Victorian Tardis dress out to the grocery store.
I’ve been a little obsessed lately making clothes for my geek chic wardrobe. Especially since I found a website called Spoonflower.com where I can create my own fabric with my own artwork! I’ll have a dedicated blog post on Spoonflower in the next week or two once I finish a few more projects.
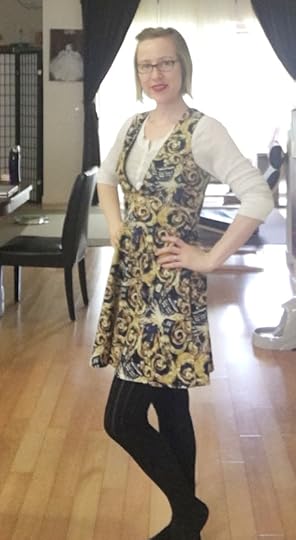
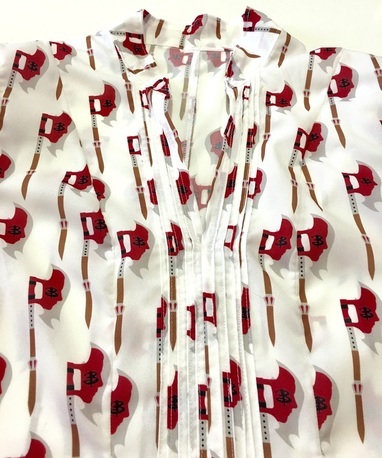
As for now, I wanted to show some of the stuff I've done with licensed fabric. I used The Walking Dead and Doctor Who fabric for the jumpers.
 I found this Simplicity pattern and fell in love with it.
My review:
This pattern is actually quite easy. At first I was a little intimidated by the top of the jumper. For some reason, I couldn’t seem to wrap my head around turning something with arm holes inside out, but it was very simple.
The instructions were straightforward and easy to follow. I ended up making the jumper in less than two hours from cutting to final hem.

The only adjustment I made was to the length of the dress. I didn’t want it as long as View C, or as short as View D, so I made it somewhere in the middle.
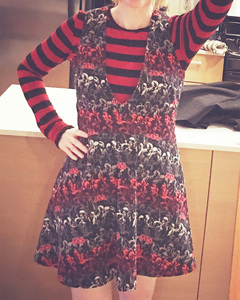 The shirt pattern was even easier! The only hard part was matching up the stripes, but that’s not the pattern’s fault, that’s my own OCD-everything-has-to-match-perfectly fault.
All-in-all I highly recommend this pattern. If you want to make a simple jumper, with a simple top underneath, then this pattern is perfect for you.
I chose to use nerdily awesome licensed fabric, but as you can see from the pattern’s cover, a solid color looks great too.
I went a little crazy in the sewing department, so I’ll be posting more reviews on other patterns I used and even some I made up myself!