Christine M. Butler's Blog, page 5
September 15, 2020
The Cost of Indie Publishing
I was asked this question privately: How much does it cost to publish a book?
The honest answer here is from zero to several thousand dollars. I'm going to break down this answer though and tell you why that $0 option is a pipe dream for 99.9% of people (especially if you ever want to sell a book). Let's start with a list of fees, some of which you may not have considered as a cost of publishing!
A list of costs/fees you may incur:
1) Manuscript (software usage/time)
MS Word
Libre Office
Google Drive (free)
Apache Open Office (freeware)
Scrivener
Jutoh
Pages (Mac - free with Mac)
Vellum (Mac)
There are many more possibilities (including freeware versions - I'll get to those too).
2) Book Covers (cost variants listed below)
Cover Artist fees (ebook, full paperback wrap, and audibook)
software usage - Photoshop (or other program)
stock images
professional photo shoot
professional photo from model/photgrapher (without shoot)
3) Editing/Proofing software/services
Pro Writing Aid (software)
Writerly (software)
MS Word Read Aloud (software)
Proofreading
Content editing
Copy editing
Developmental editing
Structural editing
Line editing
Fact checking
Beta Readers
4) Formatting Services/Software
Professional formatting service
Programs to help you format yourself (see manuscript software in #1 above)
Free formatting guides available from Smashwords (that give great tips, no matter where you plan to publish your books.
5) Publishing (ebook and print)
Print poof copies
Ebook - you should never be charged to upload/publish your ebook
6) Marketing/Advertising
Professional Marketing Services
Professional Ads made
Video trailers for books
BookBrush App
Advertising on sites like Amazon
Advertising on social media
Advertising on book deal sites/newsletters/etc.
Social Media time commitment
Website, newsletter, etc.
Book Signings
7) Audiobook Production/Publication
Professional production/narration fees
professional equipment to make studio space at home
programs needed for audio production
training needed to properly narrate a book (some people are naturals, you probably aren't).
You cannot use the aforementioned MS Word Read Aloud voice to narrate your books! You also wouldn't want to. It is a tool, not a professional quality reading.
Audiobook Merchants (never pay to upload, but do pay attention to those contracts, your rights, terms of service, and pricing scenarios for YOUR audiobook)
8) Language Traslation Services
Professional manuscript translators
DO NOT USE GOOGLE TRANSLATE FOR YOUR MANUSCRIPT - EVER!
Section One - The Manuscript Costs!
While there are some freeware software options out there, you have to weigh what will work for you! Here are the things I use, and their cost. I'll format each as such: product, cost, and reason(s) why.
MS Word - $99 (annually) - I have a family Office 365 Subscription since my daughter also writes and edits for/with me. Obviously, we both use this program to write our manuscripts in. The process I use to write/format is in two previous blogs I did, so I will spare you all that detail. We also use Google Drive (for edits and collabs). Why not just Google Drive (since it's free)? It's also buggy and doesn't have a lot of the features that make MS Word worth paying for. That Read Aloud feature is a huge help when editing a first draft. Also, MS Word/Office works BETTER in conjunction with editing tools like Writerly and Pro Writing Aid (my preferred app).
Jutoh - $90 (one time for Jutoh plus) - I use Jutoh to convert my manuscripts into ebook format. It makes the process far easier since there are various file types that need to be made. You can just upload a PDF pretty much everywhere you publish ebooks, and they will convert it for you. I find some of the extra things I do get messed up if I don't do the conversions myself and upload the proper files. If you're not worried about the extras - you probably won't need a program like Jutoh.
Scrivener - $80 (for Mac and PC Bundle - one time) If you only need for Mac OR PC (not both) then it's only $49 - This program allows you produce a manuscript, organize notes, format for publication, and create the file types necessary. I downloaded it to try it out (purchased to) and while I liked the "idea" of it, especially organizing notes right in a document, I didn't enjoy using it. That was mostly because I didn't have time to deal with the learning curve, as it is different from other programs.
Pro Writing Aid - $299 (lifetime license to use - there are cheaper options. The 2-year use fee is around $90) - I highly recommend this program! It is an app that will work within your MS Word document. It does work with Google Docs too, but in a limited capacity as opposed to the features available in use with Word. If you are running on a MAC - you may see some some limited capabilities as well (run a windows mirroring program to avoid this). You will run into the same issues if you decide to use writerly instead. Both Writerly and Pro Writing Aid have a trial version you can test run.
So, up front costs for creating my manuscript, self-editing, and formats = $469. $170 of that are for programs you may not need, and you definitely won't need both of them. So, for the sake of the average author (who doesn't experiment - or can't afford to) $299 static (one time payment) and $99 annually. So for the year of 2019, my out of pocket cost for manuscript production were: $398 (I already owned the other one-time cost software). I created 14 manuscripts in 2019. That means my base manuscript cost was: $28.43 per book (so far).
Writing time cost: If I'm writing a 70,000 word novel, and I write 5,000 words per day on it, it would take 14 days to finish. Writing those 5,000 words can take anywhere from three to eight hours. Why the difference in time? Factor in research times, fact checking (yes even in fiction), immediate rewrites, plotting times, character, scenery, plot change info that needs to be logged in notes, and times when notes need to be referenced because you forgot what color eyes a character has. If all I had to do was write - it would be three hours. In order to have a solid number for this, we'll go with a solid five hours. That's 1,000 words written per hour. Seems simple. Sometimes, it's not! ;)
If we take five hours per day times 14 days, that becomes 70 hours of writing time. If we simply use the US Federal Min. Wage for 2020 - $7.25 per hour. I should have earned $507.50 for my "time" spent writing that first draft. Hold on to that for later though, because I know some of you are thinking - that's not even a full-time job. Writing is actually a small part of my job though. You'll see. So, we established that I wrote 14 books in 2019. Lets break that down into words. I published 1,002,100 words for 2019. Divide that by the 5,000 words per day on average and we are using to figure cost of time. That is 200.42 days of work. We'll round to 200. We said an average of 5 hours per day spent writing. That's 1,000 hours. That's $7,250. Plus the cost of the programs for that year of $398. We're up to $7,604 as my cost of writing those books at the FIRST DRAFT stage (again, factoring only minimum wage for time spent). You have to factor in time spent, because that is also time lost working another job that could bring income in.
Moving on to Book Cover Cost.
This section starts with a warning! If you do not have a solid background in art/design/photo manipulation/etc. then you should not even consider making your own book covers. Just because you are an artsy person with words, does not mean you are with images. It also does not mean you can use the software required. You must also be able to understand different concepts, have an eye for marketing, trends, and other things.
HIRE A PROFESSIONAL!
You can get gorgeous premade covers for under $200 per book. You can get fantastic custom covers for anywhere from $150-3,500. It really will depend on how original you want the artwork to be, whether the artist is using stock images, they come from a photo shoot and you will have exclusive use of them, etc. This is one of the few places you will be able to play around with cost to suit your needs. But go into this process knowing this is also the part of the process where YOU WILL HAVE TO SPEND MONEY!
Since we are using my 2019 books as an overall example for this blog. I do not hire cover designers. I do the work myself, but I've been trained in photography (old school even with darkrooms and all), design, layout for books and print media since the early to mid 1990s. I've been using Photoshop (many variations of it, along with its freeware counterpart GIMP) for an embarrassing number of years that we won't talk about. ;) My point is this: My early book covers were still shit! I also still have people edit/critique my covers now just to be sure they're not complete shit when I finish them.
That said, let's examine the cost for an author who does their own covers. For the sake of this post, I am going with individualized pricing on images per book. Some of my images, I get through a bundle which makes them a little cheaper on the back end per piece, but if you're just starting out the bundle won't be a prudent option (they're only feasible if you're downloading tons of images and using them).
I use Photoshop and Lightroom for book covers (and other programs that are used for different books stuff). I have a Creative Cloud (Adobe Suite) subscription with all the pertinent apps in it that costs me $59.98 per month or $719.76 per year.
Now, out of the 14 books I created last year, plus the two ebook series bundles (16 book covers for the purposes of 2019 numbers). I spent $908 on stock images. What? Why so much for stock? Well, some of the stock images I purchased to use for the books have extended licensing which allows me to use them longer and gives me the option to merchandise the image for book merch. Also, some of those books have chapter head images inside of them that also must be paid for (that comes into formatting later). One more thing that most people don't realize when they license stock images for use in the book world. That license is only good for ONE ENTITY. That means when I added 5 of my book covers to the Aces High MC Charleston Book Bundle, that I had to go in and purchase a secondary license of each for their use in another cover because that is now being sold as a separate book (or a separate entity).
ALWAYS READ THE FINE PRINT OF THE LICENSING!
Fonts - I know that some sources say fonts are FREE! You should be reading the fine print. Most fonts you find online are free for personal use. Anything that you use a font on that you will be selling, or used in advertising something you have for sale, is considered COMMERCIAL USE! In 2019, I spent $426.00 on font licensing. Some of them didn't make it to books yet, some did, and some of that cost was because I was licensing for a major series/world of books which required more than a one-time usage deal with the creator.
So, now, I've spent a total of $2,053.76 on book covers for 2019 (so far). As we did with the first draft writing, we factor in time. Some covers take a grand total of an hour to make. Others take days and loads of Ibuprofen for those headaches. ;)
Why would it vary? Each cover uses 1-3 images, specific fonts, placements, etc. Sometimes, the original image(s) you make end up not working for you (for that project). I did not factor in the cost for fail images. SIGH. It would honestly probably double my cost above. I do reuse them on other projects sometimes though, so it all works out, eventually. On average, I would guestimate it took about 6 hours of my time for each book, mostly because of image and font searches. Six hours each times 16 books (2 bundles get included here because the cover work took extra time) equals 96 hours.
Finding the right image can happen right away, or it can take hours and days of searching. For an average per book cover for the purposes of this blog, I'm going to say 6 hours each (for ebook, paperback, and audio covers). Then, I also make the chapter head images, we'll say about 3 hours for that process because each chapter head in each book gets a custom image (in my books) Almost all of the books from 2019 had them so we'll say: three hours each times 14 books equals 42 hours.
We also have to factor in Marketing and advertising images created here (for time purposes). Book ads take time too. I probably spent about 24 hours on book ads and another 72 or so hours on marketing materials (bookmarks, magnets, etc.) By the way, these are extremely low estimates. I spend hours per day on these sometimes throughout the year. ;)
I also spend about two hours per week on training and learning new things, which is essential. That is about 104 hours of training/research time.
We are now at 338 hours of my time in photo editing and manipulation for covers, formatting, and marketing. Again, this is probably a wild underestimate. When we take 338 hours times minimum wage, that works out to: $2,450.5. That means These books have cost me: $4,504.26 for the visual stuff. And $12,108.26 so far in total. For those of you looking for a single book average, I'll give that to you at the end, but just take whatever my latest total is and divide by 14 (the extra two books in the image portion of this blog can just become dust. ;) For those of you wondering why I am still factoring my time as a "COST" to me. That number, the $12,108.26 is how much I need to earn in book royalties (at this point) to BREAK EVEN on time and money spent. And again, we're only using federal minimum wage as the standard for my time, and we're also not done yet.
And now we move on to EDITING. SIGH!
YOU CANNOT SELF EDIT!
I repeat, in different words, in case they sink in better:
YOU CANNOT EDIT YOUR OWN WORK!
I mean, technically you can, and you should - to start! Wait? What? Don't worry, you didn't read that wrong. It's not a contradiction either. You should always edit your own work. Use that Read Aloud function of MS Word. Read aloud will help you catch those little missed word mistakes and the accidental word (example: "a the" - from when you change something and don't erase all the stuff you should have). It will also help you find those really awkwardly worded sentences that need to be fixed. This is one of the reasons I recommend MS Word or a program that has the same functionality. It doesn't work as well for you to read your own work aloud, because your brain will fill in blanks that it shouldn't. ;)
This is also the point where you should be using either Writerly or Pro Writing Aid (or other editing tool that you can work well with). THEY ARE SO WORTH THE MONEY. Pro Writing Aid is especially good for catching redundancies overused words, homophone abuse, etc.
Once you get your initial rough draft edited, you're ready to move on to the professionals. So, how much should this cost?
There are so many answers to this question, because there are also so many variables. There are different levels/types of editing. But let's play around with the basics here.
First, you have to know what you need. I listed the types of editing above in section 3) from proofreading to beat readers and everything in between. You can look up each of those, learn more, and decide what is important to you. In an ideal world, you would want all of them. In a broke-ass world, you might struggle to just get in one or two. No matter what you decide, get another pair of experienced and unbiased eyes on your work.
For the sake of argument though, here are some rates to play around with:
I found an editorial service who charges: $0.0235 per word for fiction for copyedits, proofing, and light structural editing (that's a good rate for all that). For a 70,000 word book that would come out to: $1,645.
Some authors will do work swaps with you. You edit for them, they'll do so for you. That's great, as long as you both know what you're doing. If you can work something like this out, then you just factor your time spent editing as part of your cost (even though it came out in time rather than out of pocket).
I pay anywhere from $1,250 to 1,600 for edits (depending on what I need done and who is helping out) per book. For the sake of this blog and our final total, I'm going to say I paid $1,250 for each of my 14 books in 2019. That is a total of $17,500.
Now, before a book goes to an editor I'm paying, it usually goes though a round of Read Aloud, and a round of Pro Writing Aid assisted edits by me. It takes about 1 hour per nearly 10,000 words read. So, for a 70k book it would be 7 hours of Read Aloud time, if we were just reading. But there are pauses to fix things along the way. It generally takes me about 10-13 hours to get through a book that size. Then another 8-10 to get through all the possible editing issues that can be investigated using Pro Writing Aid. So, we are at 18 hours there on the low side, but we'll use that as our hourly calculation. It usually takes another 5-8 to get through the edits sent back by my editor (this is why you cannot self edit)! You will miss a lot. It might take about 2-4 hours to get through another round. On the low end, that makes 25 hours to get through the editing process, on my end. That equals out to $181.25 for my time during edits. That means edits for the 2019 books cost around: $17,681.25.
And that brings our current total cost for 14 publications in a year up to: $29,789.51 (consequently, this cost so far is almost double what I would make if I had a real 40 hour per week minimum wage job - perspective for you). I've already counted my cost of formatting (minus my time spent doing it). I have formatting down to a science (you can read about it in previous blogs) so unless we have a special issue that pops up, formatting usually only takes me about 2 hours per book. That would add $203 to our total for 14 books at minimum wage rates. Our total is now, $29,992.51. Remember, this is how much money I need to make back in royalties just to BREAK EVEN at this point.
Formating - if you hire a professional it can cost you anywhere from $100 to $1,500. HOWEVER, this is the one area I will tell you to skimp and save on if you're short on funds and have the time to do it yourself. Go to Smashwords, download ,,Mark Coker's Smashwords Formatting Guide, and read it! Or find a good Youtube video or blog post about formatting books. Learn something, and put it to use for you. Factor your time spent learning into your cost to publish rather than spending out of pocket up front. If you don't want the headache down the road, you can always hire someone else to do it for you when you have the money to hire people.
Everything else in the numbered lists below is "OPTIONAL". Will it benefit your book sales to do those things? ABSOLUTELY! Are we going to talk about them here, not really. They are for a secondary blog post because this one is already too long. I will go ahead and enter in the expenses I incurred for all that stuff though in the breakdown below.
We are at: $29,992.51.
Advertising: $3,000.00 (Amazon, social media, and book deal ads/newsletters)
Marketing/Merch/Swag/Book Proofs: $2,500
Book Giveaways & shipping costs (I count giveaways in my advertising expense normally, but I separated it from traditional advertising on websites and whatnot for this blog & I'm including shipping costs for both giveaways and sales here): $13,720 (THIS WAS A LOT - YOU DON'T HAVE TO DO THIS)
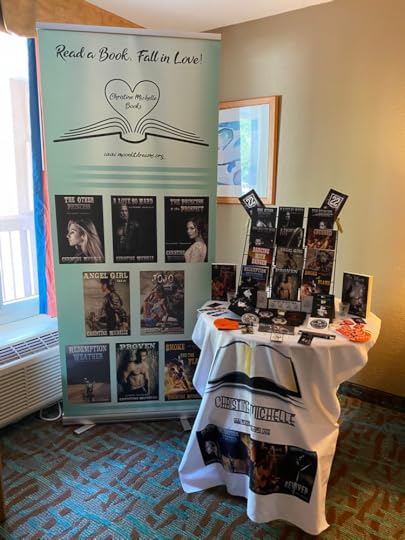
Book Signing Table Fees: $550
Book Signing Travel Expense: $5,500 + time
Book Signing Prep Cost (Banners, etc): $350 + time
Audiobook Production: $4,000 (for 3 audiobooks) + 28 hours of contract negotiations, editing, etc hours of my time. $203 + 4,000 = $4203.
Website/Newsletter/New release text line: $580 (annual)
Translations: $0 (because I haven't found translators I trust enough to do this yet).
My 2019 cost of producing 14 titles, 2 bundles, and 3 audiobooks was: $34,195.51.
Advertising, marketing, fan giveaways, and book signings cost: $25,620 in 2019 (minus time spent on all of that).
That means in 2019 I needed to make a little more than $60,395.51 before I started earning a profit! And we won't even talk about the taxes! ;) Don't forget, we have to pay our own, it doesn't automatically get deducted. We also pay a higher rate of taxes than the average working person.
SINGLE BOOK COST (leaving out audiobooks and all the extras like - advertising, merchandising, giveaways, book signings, etc)... PRODUCTION COST OF ONE EBOOK AND PAPERBACK: $2,142.00. Again, this is a low end estimate because of all the work I do on my own. Professionals want to earn more than minimum wage for their time! ;)
Time spent on social media promoting, hanging with readers, and hosting special events also was not factored into this. I don't factor it because while it is a part of the job, I enjoy doing it too (not that I don't enjoy the rest of my work), but work/fun lines get blurred so I don't count it.
*Reminder - for those of you just starting out: this was an exceptionally productive year with a great return, which made those numbers possible. HOWEVER... a word of warning. I've been in this business for a decade and I've had years where I only made around $12,000 off of my books (not counting my expenses). Some Indie authors never make their production cost back. My worst year - I put out 2 books with production cost of around $4,284 and I made around $12,000. That means I really only earned $7,716 or so and was obviously working a day job. This is a tough business and you have to be prepared to fight for it or forget it! Fighting doesn't mean you get vicious with "competition" either. It means you hustle, you work your ass off, and you work with your fellow authors to cross-promote. It's the only way you'll make it and stick.
I'll cover all the rest of the "optional publication cost stuff" in a later post! Hope this helps someone.
PS - sorry for any typos, I totally didn't edit this post! :D


September 11, 2020
November Book Box (Limited Edition)
The November Book Box has been announced and preorders are now available!
Per requests I received, I have added a preorder for the November Themed Book Box!
There will be 4 levels of boxes (also per request).
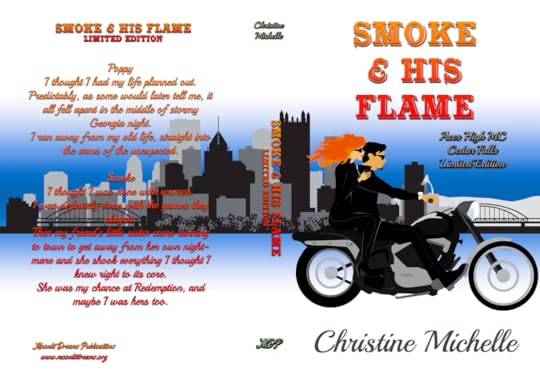
This book box theme is Smoke & His Flame! It will feature a signed paperback (in most boxes) with A large, signed, paperback featuring the two previously released novels: Redemption Weather and Smoke and the Flame there will also be a never before released novella featuring the characters from the previously mentioned two novels. Most of the merchandise found inside the boxes will also be limited edition items that coincide with the theme. As with all boxes and book packages, some extra items may appear in your boxes that aren't mentioned in the descriptions below because we love surprises!
SHIPPING IS INCLUDED IN THE PRICES SHOWN (if you purchase a box, USA = priority shipping). Add-on books with purchase of a box include additional shipping in their rates (except where overseas orders have 5+ books - sorry that weight will kill the shipping rates beyond that amount and I will have to charge extra).
FULL-SIZE BOX
(all costs in US dollars) USA: $65; UK/Germany: $110; Canada: $100; Australia (and other countries): $115.
Box includes:
* A signed, limited-edition paperback of Smoke & His Flame. This book is a special edition paperback that combines Redemption Weather, Smoke and the Flame, and a never before released novella featuring the characters from both previously released books!
* *LE Smoke & His Flame Post It Notes
* *LE Smoke & His Flame Pen
* *LE Smoke & His Flame Bookmarks
* *LE Smoke & His Flame Post Card (plus bonus Aces High MC - Cedar Falls coloring post cards)
* *LE Smoke & His Flame Sticker
* *LE Smoke & His Flame Button
* *LE Smoke & His Flame Magnet
* *LE Smoke & His Flame 15 oz Mug
MID-SIZE BOX
(all costs in US dollars) USA: $45; UK/Germany: $65; Canada: $60; Australia (and other countries): $70.
Box includes:
* A signed, limited-edition paperback of Smoke & His Flame. This book is a special edition paperback that combines Redemption Weather, Smoke and the Flame, and a never before released novella featuring the characters from both previously released books!
* *LE Smoke & His Flame Pen
* *LE Smoke & His Flame Post Card
* *LE Smoke & His Flame Sticker
* *LE Smoke & His Flame Magnet
SMALL-SIZE BOX
(all costs in US dollars) USA: $40; UK/Germany: $60; Canada: $55; Australia (and other countries): $65.
Box includes:
* A signed, limited-edition paperback of Smoke & His Flame. This book is a special edition paperback that combines Redemption Weather, Smoke and a never before released novella featuring the characters from both previously released books!
* *LE Smoke & His Flame Bookmark
* *LE Smoke & His Flame Magnet
EXTRAS BOX (does not include paperback)
(all costs in US dollars) USA: $16; UK/Germany: $26; Canada: $20; Australia (and other countries): $26.
Box includes:
* *LE Smoke & His Flame Button
* *LE Smoke & His Flame Post Card
* *LE Smoke & His Flame Sticker
* *LE Smoke & His Flame Magnet
* *LE Smoke & His Flame Bookmark
Book Add-ons when purchasing with a limited edition box: $11 (USA), $12 (World) per book, up to 5 books. For those outside the USA, anything over 5 add-on books will incur higher shipping rates due to destination/weight shipping costs.
For those ordering just add-on books without any of the boxes, you will be charged $10 per book plus shipping based on weight (USA residents will be invoiced media mail rates for books, world-wide customers will be invoiced based on weight/destination).
**BE SURE YOU FILL EVERYTHING OUT CORRECTLY! YOUR FULL NAME AND FULL ADDRESS ARE VERY IMPORTANT!
Click here to preorder!
A look at a few of the limited edition items:

July 31, 2020
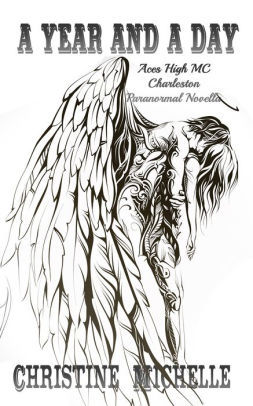
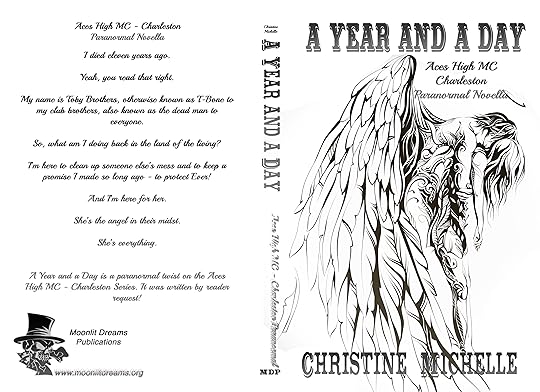
A Year and a Day
THIS POST, CONTAINING THE COMPLETE NOVELLA HAS BEEN REMOVED.
Due to pirating (and profiteering) that someone has done using
I'm sorry for the inconvenience, but I will NEVER tolerate my hard work being used for someone else's profit!
June 22, 2020
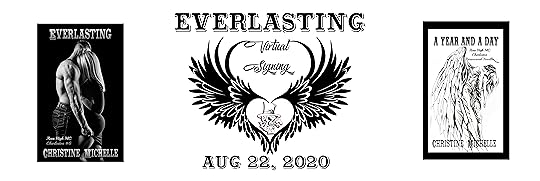
Everlasting Virtual Signing
This is a reader demand event for those of you who missed the orders from the Queens of MC Virtual Signing coming up this weekend (June 27-28, 2020).
,The Everlasting Virtual Signing!
You guys asked for more, so this is what we put together!
,PREORDER DATE: June 22 - July 1
Invoices need to be paid in 7 days after pre-order or they will be canceled.
,LIVE BOOK SIGNING DATE: Aug. 22nd (Times will vary in order to make it convenient for people around the world! They will be announced by Aug. 1st)
,Books/Packages ship on: Aug. 24, 2020
,PACKAGES AVAILABLE All of these options will be in the
USA readers - you will be given a choice on shipping options, pay attention to that!
Overseas readers - there are no choices because I'm going with the cheapest one in order to keep shipping costs as low as possible. Even though overseas shipping looks pretty high in the following options, it is actually lower than the actual cost for many of the packages (I am eating the extra cost on the others in an effort to help out).
USA readers - If you choose the media mail option (where available) be warned NOTHING BUT BOOKS can go in the package. I will not be able to add magnets, koozies, or anything else.
,Package 1
- $40 (plus shipping) - Includes: Signed copies of Everlasting and A Year and a Day plus A Year and a Day drawstring tote bag, signed 11x17 signed poster, magnets for Aces High MC Charleston Series (assorted), bookmarks, can cooler (koozie).
Package 1 Shipping Rate:
Inside USA ($12 - 2 day priority shipping), $10 - Regular mail /Overseas - $30
,Package 2
- $30 (plus shipping) - Includes: Signed copies of Everlasting and A Year and a Day plus A Year and a Day drawstring tote bag.
Package 2 Shipping Rate:
Inside USA ($10 - 2 day priority shipping), $8 - Regular mail/ Overseas - $25
,Package 3
- $20 (plus shipping - Includes: Signed paperback copies of Everlasting and A Year and a Day.
Package 3 Shipping Rate:
Inside USA ($10 - 2 day priority shipping), $4 - media mail/ Overseas - $20
,Package 4
- $60 (plus shipping) - ALL SEVEN Aces High MC Charleston Books (signed).
Package 4 Shipping Rate:
Inside USA $12 - (2 day priority shipping) /Overseas - $45
,Package 5
- $80 (plus shipping) - ALL SEVEN Aces High MC Charleston Books (signed) plus the A Year and a Date tote, signed poster, magnet(s), bookmark, can cooler (koozie).$
Package 5 Shipping Rate:
Inside USA $12 - (2 day priority shipping) /Overseas - $50
,Individual Book Add-Ons
$11 per book
Crushed
Dancing with Danger
Whiskey Tango Foxtrot
Redemption Weather
Proven
Smoke and the Flame
Angel Girl
JoJo
Entwined
Breathless
The Voodoo Follies
The following books are available individually for people who may already have most of them and only need 1 or 2.
, (If you are ordering all of them or the last two, please see the above package options!)
:
The Other Princess
A Love So Hard
The Princess and the Prospect
The Killing Ride
A Twist of Fate
Everlasting
A Year and a Day
Here is a look at some of what you'll get in the above mentioned packages (drawstring tote not shown yet. Paperback books and poster will be signed):


April 15, 2020
Today in Quarantine Part 5...
April 13, 2020
Today in Quarantine Part 4
April 12, 2020
Formatting-102
Again, for the purposes of this tutorial, I use a conversion program called Jutoh. Why? It just happened to be one of the first ones I tried, and got really familiar with early on in my career, and you know the old saying, "if it ain't broke, don't fix it". Some people use Scrivner or Vellum (for Mac users). I use both PC and MAC and I'm still solidly an MS Word/Jutoh user when it comes to formatting. Again, this post isn't me telling which way to go. That is for you to decide what you are most comfortable with. This tutorial is based solely on what I do for my books. One more thing, before we get started. If you do not plan on making paperback books, you can use Jutoh from start to finish for your ebook projects. I DO NOT recommend doing this as you will not have the benefit of spell & grammar check software to help you out. Just note that it CAN be done, if you want to. Let's get started...
Yesterday, we went through the steps to format and save a paperback manuscript word document. Today, we're going to take that word file and show you how to turn it into an ebook. For the purposes of this tutorial, I am using a novel that was previously saved (remember, my template was used to create this novella previously). I will be using a different title name than the actual book just so I don't confuse my files. Step 1 - Open the Jutoh program on your MAC or PC (it works well on both with no issues). When you first open Jutoh a "tip box" (scene below) will pop up. You may want to take a while to go through all the tips and write some of them down for future reference, if you're new to the program. If you want to skip ahead for now, simply keep the "show on startup box" checked and click on close, and next to you open the program the tip box will appear again. Step 2 - Create a New Project
Since we're just starting out here, obviously we're going to be creating a new project. As you can see from the screenshot below, I already have several projects (my most recent) in the list to chose from if I need to go back to them quickly. There are three yellow arrows in the screenshot, indicating the multiple ways you can get your new project started. Take a look at that, take your pick, and let's get started. Step 3 - Creating the new project A new project box will pop up and you will have to fill in all the information present in order to move on. It's pretty self explanatory. The areas I have highlighted are what I would actually write in for a title instead of having "tutorial for..." added to the front. The title should be the same as your actual book title. Everything else, you can see how to fill out based on what I have (or what the notes say in the screenshot below). Once you get it all filled out, click "NEXT". Step 4 - Project Location This step produced another box for you to fill out. It looks intimidating at first, but it's not. Here's the breakdown.
Your project name - should probable contain your book title. Even if you only used your book title for your manuscript word doc name, it won't matter. These will all be a different type of file. Your Project Location - this is simply telling Jutoh where you want to save the file. I recommend using the default setting. It creates a Jutoh Document folder in your "Documents" on your computer. That way you can find all of your Jutoh files in one place, easily enough. Now, when you're used to using it, some people like to save each book file to a folder they created for that specific book or series. You can absolutely send it there if you prefer. Use Template - we're going to ignore this for now, as it isn't important to what I'm showing you in this tutorial. Ebook Formats - You can leave all of these checked if you're unsure of which formats you will need. Generally speaking, I only need to choose epub and mobi. The mobi file format is used by Amazon for Kindle. The epub file format is used by most other places that sell ebooks. PDFs are great to have too for different purposes. Once you've decided on what you need, go ahead and click that "next" button. Step 5 - Layout Choice This is the easiest thing box we'll deal with today! The choice has already been selected for you. You can play around with the other option at your leisure, but but the normal reflowable book option is the one we will choose for this tutorial. Then, click "next". Step 6 - Import Options Because we will be importing our word document to Jutoh, you want to make sure you the settings look as they do in the screenshot below. Then click "next". Step 7 - Import Method For the Import Method we are going to choose the second radio button (as highlighted below). We will be uploading an existing file containing all sections. You will click on browse and find the word document you saved your manuscript in. If you have multiple word files for your book (working manuscript, edits, final revision, etc). make sure you grab the correct, final, version! Then, you're going to click "next". Step 8 - Single File Import Once you clicked on "next" in the previous step, you will see the program working until the Single File Import box pops up. This is where you check to make sure all the book sections you need are showing.
We are going to choose "split by style" and make sure the style used to split the book sections will be Heading 1. Next, you're going to scroll through the "preview" section to make sure all of your book sections are there. This includes things like: Dedication, Acknowledgements, every single chapter of the book, About the Author, etc. Then make sure those first two boxes are checked (as highlighted below). And now, click "next". Step 9 - Cover Design This may be where we differ. I produce my own covers using Adobe Photoshop and Lightroom. I have the files for my book covers ready prior to getting to this step. I HIGHLY encourage you to get PROFESSIONAL help with your covers. People can spot amateur covers a mile away, and very often avoid them. This isn't a dig at people who use templates to produce covers. Myself and some other authors did a lot of experimenting with cover design and important it was early on. After changing a friend's template cover to a more professional looking one, her books sold better by leaps and bounds. She went from only a handful of sales to being able to pay her bills. That is a difference that should not be ignored! If you have no graphic design experience or artistic/photo manipulation skills, then I suggest you seek out a cover designer. Yes, it's an upfront cost, but it is the ONE upfront cost that will bring you the most return on your money! I promise.
Okay, so back to the tutorial - If you have your cover image already, you will choose the "use an existing file" option and browse for that file on your computer. If you are going to roll the dice with a template created cover, you will chose the other option to "create a new design". For the purposes of this tutorial, I am choosing to use an existing file and then I'm going to click the "finish" button. Step 10 - Finishing the Setup Once you click "finish" in the previous step, you will go through the "creating a project" step where the program is working to import all of your information from the word doc and cover image files. Once that is done, the "file converted box" will pop up to let you know that everything has been converted to the Jutoh file. Close that out, and you're ready to tidy up this project. Step 11 - Tidying everything up. As you can see from the image below, My title page also has the copyright info in it. I usually make a new section for that. You don't have to. I just think it looks better. I'm going to take you step-by-step through that process really quick, just so that you can see how to add a book section in case you need to. The first thing I'm doing is taking everything from below the author name, highlighting it, and clicking on "CTRL X". Or Right clicking and choosing "Cut". Make sure the "Title Page" is the one highlighted in your projects content. Then goto Documents at the top left of the screen. In the drop down menu choose "add book section". You will see a pop up asking for the title of new section. For this purpose it will be "copyright". Once done, you will see that just below the Page Title Section you now have a Copyright section that shows up in your projects contents. Click on that. It will have a blank page. Now click "CTRL V" or right click on the blank space and then choose "paste". All of the copyright info that you cut from the title page will now appear in the new section you made for copyright info. Now we can format that copyright info to look a little better. Granted, I don't attempt to make the copyright info look fancy. I simply center it. BUT... you might decide to go wild. So, here are the different ways you can go about that. There is a format option at top left of screen, near where you found "documents" earlier. There is also a Palette on your right-hand side of the screen. (if you don't see it, or any of the other extra windows displayed in my screenshots, they can be toggled on and off through by clicking on VIEW and clicking on each item you want displayed.) Formatting your fonts, styles, etc. through Jutoh will not be much different than how you would do it MS Word. Same basic concepts. Don't forget to SAVE any changes you make to your document. FINAL STEPS - Ebook File Conversion: Go to your Organizer (under projects/content) and you will want to look at each section listed there. When you click on a section in the organizer, that specific section pops up in the big central window. As you can see from the highlights in the screenshot below, underneath that main window you will also see a list of all the book sections you have opened. Make sure every single section looks as it should. If it doesn't, use your palette or formatting to change what needs to be changed to make sure it looks exactly the way you want to see it in ebook format. NOW, you have to go to the control panel, choose Epub under configuration (even if you aren't going to use an epub file. Why? Because Epub is going to allow you to see any errors when you compile and check your book. The first screenshot below shows where everything is. The steps you would use (assuming there are no errors) would be choose epub, click on "compile". Once you get the all clear for errors, you click on "Check". Once that is finished, you will click on "Launch". In order to launch an epub file, you must have an epub app available to launch it in. I keep iBooks on my MAC and PC laptop for this purpose. You can also use Kobo, Nook, or any other ereader app that runs epub files. If you get an error (see screenshot below). Once you hit compile, you will see error messages pop up in your log at the bottom of your screen. You can not skip this step if there are errors. You must fix them. As you can see, I choose a version of my manuscript that had errors in it on purpose to show this. One of the most common errors at this stage is from someone using the "tab" button in their word document. The TAB key should not exist for you when compiling a manuscript. Anywhere you think you might need to tab, should be handled with FORMATTING (using the format option in WORD and/or here). NEVER USE THE TAB KEY. It will cause an error and cause your ebook to get rejected. Smashwords actually has this as one of their ebook guidelines as well. If you've never formatted before, I highly recommend starting out by reading their FREE Smashwords Style Guide. It is super helpful! Jutoh doesn't leave you high and dry when you have an error. You can double click on each of those warnings, and you will see your screen change to this (see screenshot below) so that you know exactly where you have to fix something and why. (*I double-clicked on the first warning in order to get this screenshot). Now, let's assume that you've fixed any errors, or you are perfect and didn't have any to begin with! Next, you will hit "Compile" and when the program is done doing its thing, you will then click on launch, and your shiny fresh ebook will launch in the epub program of your choice so you can take a look at it, and see it how the readers will see it. IF everything looks great - you just made your epub file. The file will be located in that Jutoh Docs file in your Documents (or wherever you told Jutoh to download it's documents in the beginning).
If you need to work on it some more because you don't like the font, or the image sizes need to be adjusted, or whatever you didn't like about it. You will fix everything to your liking and then go back through the compile/check/launch process.
Once that process is done - you can change that configuration to Mobipocket (Amazon's Kindle file type). We'll rinse and repeat only this time, we will click on "compile" and then click on "launch" because we've already done the check for the other file type. You will need to have the Kindle Previewer App downloaded to your computer. Your book will launch in the Kindle Previewer, you will check it out, and if you want to keep that version it will now be waiting for you in your Jutoh Files (it is saved there as soon as you click on compile). If you need to make changes, do so, and then rinse and repeat the compile/launch process. Why would you need to change the file after you made an epub? If you are going to put clickable links to your other books in your ebook, you must follow the guidelines everywhere your book is uploaded. For instance, you can't have Amazon links in a book that you are selling on Smashwords, iBooks, Kobo, etc. So, we have now reached the end of this tutorial. You should now be able to produce a fully functional ebook, and as I'm sure you noticed when you launched your ebook to check through it, you also have a fully functional, clickable table of contents as well. That is why we initially set those headers up in the word doc the way we did, as well as changed the settings when starting your Jutoh file. If you have any questions, please, feel free to ask in the comments.
Have fun, play around, learn everything that your program can be, because I only touched on the very basics here. The basics will get you to your goal, but there is so much more to it. Next time... I'll be going over how to make a simple book cover using Photoshop. If you don't have PS, you can get GIMP, which is a freeware program very similar to PS. See you then!
April 11, 2020
Formatting 101
Okay, now that I have given that little warning, let's get started. I do all my formatting using Microsoft 365 (Word) and Jutoh. You do not have to use these programs. They are simply the ones that I will be using for this demonstration (and the ones I prefer after a decade of testing multiple programs).
Step ONE:
Go to Amazon (click on the highlighted, underlined word Amazon to go direct to the download page) and download their paperback manuscript template. Grab the one that says "templates with sample material" as it will be easier for our "starter template" purposes. Now, once it's downloaded, go to the place on your computer where your downloads go (usually your downloads folder, unless you changed your preference). You will see a zip file there. Click to open it up and you will be greeted with a language preference selection. Choose the language you need. Obviously, I chose English. Now that you have chosen your language, you will be prompted to choose your paperback book size. I believe the most popular size option is 6x9, which is a really tall book. I prefer to use the 5.25x8 size. If you're not sure what is right for you, and you have paperbacks by your favorite authors, you can always ask them what size they use for reference. I know it's hard to figure out without visuals. I started out, with my first book, by ordering several proofs in different sizes in order to test this out. That also meant formatting several different sizes, etc. It was a daunting process. I do not recommend. That was a long ago writing trauma though. So, let's just choose a size and stick with it for the sake of this tutorial. 5.25x8. Okay, so now we have our language, our paperback trim size, and we're ready to open this bad boy up and take a look at our starting point. Once you open the word doc, you may see a little bar at the top of the document that asks you if you'd like to enable editing. YES! You absolutely have to enable editing.
Now that you have, first thing is first, go ahead and scroll through all the pages. Get familiar with them. Now, here's what I do, because this is just not going to work as is (for me). You'll see why I make some of the changes I do later on when we drop our file into Jutoh for conversion.
My first change is to delete the contents page. Why? It's unnecessary for fiction. That is a personal opinion. Some people like to have it in paperbacks, some don't use it anymore. I did for years, but I've decided it just adds to the page count unnecessarily. Besides, I'm going to delete it for the ebook version anyway (you'll see why later). So, just highlight the whole contents area and hit that delete button, or leave it for now, if you want to explore table of contents options later. Our next step is going to be formatting chapter heads so that they will ease the transition and setup in Jutoh (and other programs) when you go to format ebook file types. I typed the directions for this step onto the page image and used a color coding system just to point out where to look for each step. "Highlight the Chapter Name. Then makes sure you click on the HOME tab in the upper left hand corner. Go over to STYLES and look for “HEADING 1” Click on that. Now click to center the text. Adjust the chapter title to the font you want to use, and add an image if you need to, in order to make pretty chapter heads. WARNING - pretty chapter heads in ebooks create a larger file size and lessen your royalties (Amazon)" ***I forgot this in the image, but you will also want to change the font color back to black. WHY are we changing the way the heading looked? You don't have to, but this will make for a very easy transition when you upload the manuscript into Jutoh (or other conversion software). Using the headings will make all of your sections for your book that will need to appear in your ebook contents as well. I know, I said we don't need a table of contents for paperback books, but you do for ebooks (for easy movement through the book electronically). BUT, the clickable links in an ebook are formatted in a different way than a mundane paperback table of contents. It's the difference between a muggle newspaper and one belonging to the wizarding world. Here are four examples of how you can address Chapter Heads. These are not the be-all, end-all of chapter heads. Just some examples of what I have done, or decided against, in the past. Now, remember, while you can add images to your chapter heads to make it look a bit more appealing to the eye there are a few things to keep in mind. 1) Images don't come for free. Images in chapter heads might be something you want to reserve for paperback versions only because in ebooks file size matters. The more images in your ebook, the higher the file size. The higher the file size, the more your royalties are penalized, and also the higher your initial price point is for your ebook. I have an ebook that can not sell on Amazon for any less than $1.99 because of its file size. I also lose about $.65 per book sold to file size. Sixty-five cents is a lot to lose per book, just so that it looks prettier! I have polled readers on this subject and they don't care if those chapter head images are there, especially if it costs the author to put them there. I offer that tidbit as a sidenote - so you can decide how you want to approach that for yourself later. 2) You can do a lot with fonts. While you might sacrifice a little style and pizzazz by not using images, you can certainly make up for that (a little bit) with using a special font in your chapter heads. 3) This is a place where you can do a lot of experimentation later to come up with your own chapter head vibe. Don't forget to redo the chapter heads for book sections like "dedication", "acknowledgements", and "about the author". Once you figure out what you want to do with those pesky chapter heads, and you have it settled and they're all changed, it's time to move on to the author and book title that you will see at the top of the pages in your paperback (Header of the manuscript). Change this to match your book title and/or author name. In my books, I usually have them alternating pages. Odd number pages have Book Title, even numbers have author name. Change this to the font and size you want to use for your book (obviously something that will need to changed for every book you do). For the purposes of the template you can leave them as is for now, if you like, just be aware of it so you don't forget when working on a new manuscript. You get into the header area by double clicking on it and then you will see the page look as it does in the image below (I have mine zoomed way out to show more than one page). When you are done changing things, you simply double click back on the body of your manuscript. As you can see in the image above, I haven't fixed "chapter 6" as I indicated should be done for all the chapter heads. When you look to the left in the navigation pane, you can see the chapters where I did fix the "chapter head" formatting using the Heading 1 style. You notice that only the first 5 chapters (the ones I fixed using the heading style) are showing in the navigation pane? This is why we fix them. First, it makes it easier for you, as the author, to navigate between chapters when necessary as you work on your manuscript. Second, it will make the ebook contents auto-populate when we upload the manuscript to Jutoh for ebook formatting. OR if you choose to use Amazon, Smashwords, or some other conversion program directly while uploading your books to them, this will also help them to convert those chapters/book sections properly and be able to make the usable table of contents for the ebook as well.
Now, you can decide if you want a specific font for the body of your manuscript. I choose Garamond font size 11. I think that might be the default for the template already. If that's not what you want, you will go to the Design Tab, then fonts drop down menu and customize your fonts. You will also want to decide what type of paragraph spacing you use for your manuscript. I use single spacing for my manuscripts because it lowers page counts in the paperbacks.
Why on earth would you want a lower page count for paperbacks?
For Indie authors especially, we have a hard time keeping paperback pricing low. We are charged more for more pages and that means not only does our author copy cost go up, but so does the consumer's cost. My books may look like they have 1/3 to 1/4 of the pages as a book with the same word count using 1.5 or 2 line spacing, but it will also be able to sell at a cheaper price point while still offering comparable or better royalty return too. It also makes readers who like physical copies happier, because they don't have to pay as much. Okay, so now, we have one more quick step and you're ready to fill in the blanks on this manuscript template with your story!
The final prep-step is how to add more chapters because the template from Amazon only starts you out with 10. You can see from the first image below that I deleted all but the chapter head, paragraph 1 and paragraph 2 from the template gibberish that was used. Do that. Now, highlight from the top of the page (including any empty space that you want from the top of the page to the chapter head and those two paragraphs below). I actually shorten each of those paragraphs down even further so there are only one line in each for my own personal template, just enough to hold the formatting for me. You can leave it as is or do the same. Once you have that portion of the page highlighted, copy it (CTRL C on your keyboard or right click and copy). Now, you're going to move down to the last sentence in your second paragraph, click there, and then hit enter a couple of times. Once you have a little safe-space, you will click on the INSERT tab at the top (see second picture below). Now click on Page break. Your cursor will automatically be in the correct place on the next page, now all you have to do is click CTRL V on your keyboard or right click with your mouse/trackpad and paste. Now, change your chapter head to reflect the new chapter title and/or number. Rinse and Repeat for every chapter you need to add. If you want to add extra back matter to your book, like a playlist for music to read/write to, you will do it the same way. NOW - SAVE YOUR TEMPLATE! I usually save mine as "5.25x8formattedtemplate" THEN I click "save as" and save another version for the book I'm going to work on. I title that "BOOKTITLEMS", or for example "AngelGirlMS" (MS=manuscript). As I work on various progressions of my manuscript I will save as AngelGirlEdits or AngelGirlFINAL. I warn you to do something similar, because you DO NOT want to grab the wrong file to upload when you're ready.
So, this is the part where I tell you happy writing. One more thing I do (as a plotter) is I wind up adding notes to each chapter before I even start writing. I don't always stick to them, but they're a helpful guideline for me and keep me from getting stuck with the dreaded "what's next" as I'm working through a manuscript. As I finish a chapter I usually delete the notes out. In the example below, I "saved as" to keep a copy of a recent manuscript with notes still in it to use for this tutorial. I'm the type of plotter who does so in a notebook first, so I always have those notes for reference later even if I delete them out of my working manuscript. You can also see (from the image below) what I meant about my template only using one line of gibberish text for each of the first two chapters to hold formatting for me. It's really all you need, rather than Amazon's pages of "Insert chapter one text here". Once you have a template like this set up, you will never have to format for paperback books again (unless you change your book trim size). You just open your template file, save as your current manuscript name and now you still have your template, plus your new project. Then it simply needs you to add your story to the pages. BUT WAIT... what about Jutoh and formatting for ebooks? I'll do the Jutoh half of the tutorial in another post tomorrow, because they take forever to put together, and I have to actually go write a book too! See you tomorrow!