Judith M. Fertig's Blog, page 3
March 25, 2015
The Cake Therapist's Rainbow Cake

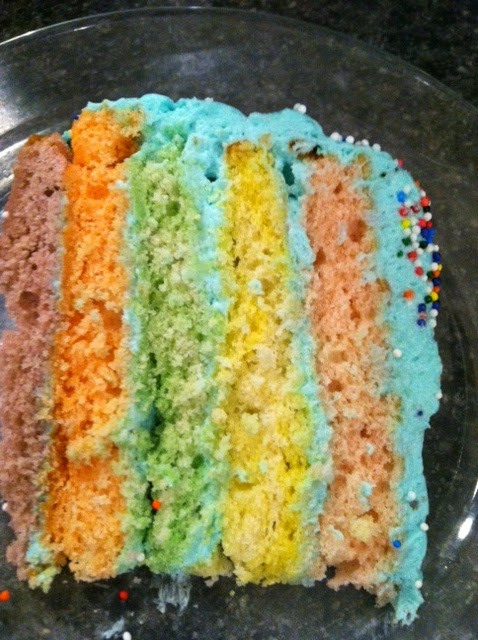
I have a thing for rainbow cake. It's an American layer cake gone happy, happy, happy with color. There’s something about a rainbow cake that just makes me smile. Every colorful layer seems to suggest a different story.
When I was working on The Cake Therapist, my debut novel, I wanted a signature cake for the main character. Pastry chef Claire "Neely" O'Neil Davis can see flavors like a rainbow. Her bakery's name is "Rainbow Cake," and she highlights a different color and flavor pairing every month. So her bakery is colorful. And her specialty is individual rainbow cakes with robin's egg blue frosting.
At home, you can make a rainbow cake large or individual-sized , as you can see in this previous blog post. You can go more vividly colored or more pastel. You can do an ombre effect, dark to light layers in the same color family, such as purple to lavender to purplish pink to raspberry to pale pink to white. Making a rainbow cake taps into your inner colorist.
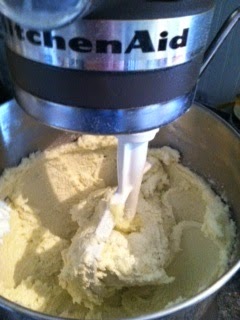
For the cover of The Cake Therapist, the rainbow cake is what pastry chefs call "naked," meaning without frosting on the sides of top. If you want to do that, I'd use a white cake that doesn't brown at the edges. This cake recipe, below, is rich with butter and whole eggs, turning the batter more of a creamy color that does brown at the edges.
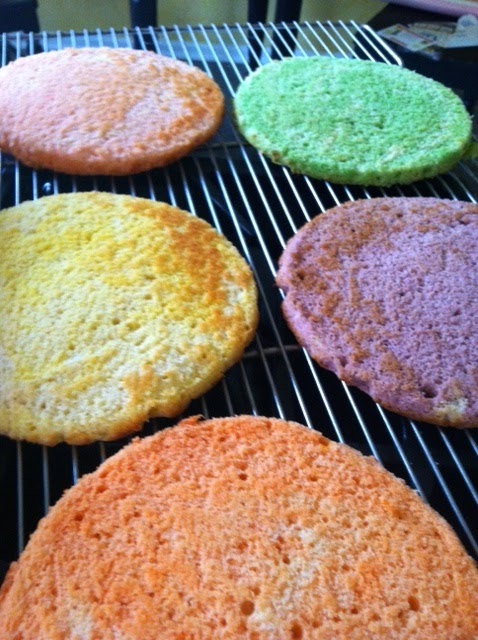
Here is that batter turned into a four-layer rainbow cake I whipped up in my kitchen for Bake Happy. You can find cake buntings (that you can use again and again) on Etsy.

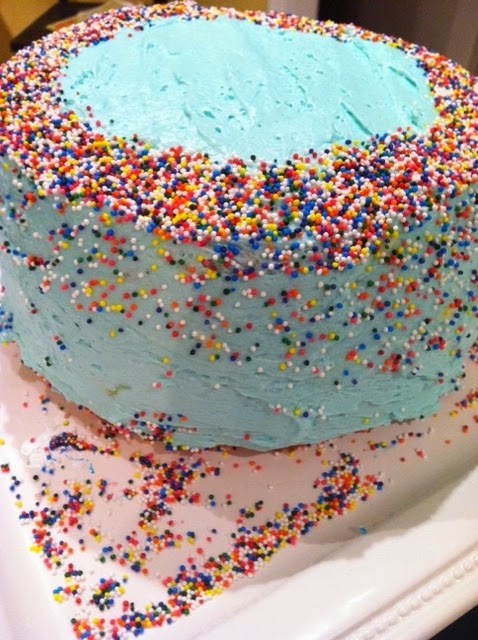
My new favorite way to make one is in five thin layers, each a different pastel, with robin's egg blue or pale turquoise buttercream frosting to finish. Maybe a generous sprinkling of colored sprinkles.
Here's a taste of Neely's famous rainbow cake that you can whip up for a special occasion, a birthday, or just because.
Neely’s Rainbow CakeAdapted from a recipe in Bake Happy, this is the larger version of Neely's individual rainbow cakes that she makes at her fictional bakery in The Cake Therapist. The cake is rich, moist, comes out of the pans easily, and keeps well. Makes one 8-inch (5-layer) cake Unsalted butter for the pans11/2 cups (340 g) unsalted butter, at room temperature3 cups (700 g) granulated sugar3 large eggs, beaten3 cups (248 g) sifted cake flour2 teaspoons baking powder1/2 teaspoon salt11/2 cups (375 g) non-fat Greek yogurt, or full-fat dairy sour cream11/2 teaspoons vanilla or almond extract or a combinationGel food coloring, as desiredPreheat the oven to 350°F (180°C). Butter five (8-inch) cake pans and set aside.In a large bowl, with an electric mixer on low speed, cream the butter and granulated sugar for 5 to 7 minutes or until the mixture is almost white. (Don't rush it. Beating air into the butter helps make a lighter cake.)
Beat in the eggs, sour cream, and vanilla. Then beat in the flour, baking powder, and salt for 1 minute, scraping down the sides and the bottom of the bowl. Set out 5 small bowls. In each small bowl, place about 1 generous cup of the batter and tint with food coloring to your desired color, such as Neely's pale yellow, green, coral, lavender, and pink. Keep in mind that the color will somewhat darken and brown during baking. Spoon the tinted cake batter into each prepared pan and smooth with a spatula or knife.Bake for 20 to 23 minutes or until the cake comes away from the sides of the pan and is springy to the touch in the center. Let cool in the pan. Invert the cakes onto a cooling rack and cool completely.
To assemble the cake, save the most domed layer for the top (or make Neely's pattern with lavender on the bottom, then coral, lime, yellow, and pink on top). Place the flattest layer on a serving plate and spread lightly--a skim coat-- with about 1/3 cup Robin’s Egg Blue Buttercream Frosting. Place another layer on top and frost lightly with another 1/3 cup frosting. Repeat with the third and fourth layers. Place the top layer.

Using an offset spatula, frost the sides of the cake with half of the remaining frosting. Frost the top. If you like, decorate with colored sprinkles.
Robin’s Egg Blue Buttercream FrostingYou can never have too much of this silky-textured, light and airy frosting. Makes about 5 cups 5 large egg whites1 cup plus 2 tablespoons (224 g) granulated sugar1/4 teaspoon salt2 cups/454 g unsalted butter,cut into tablespoons, at room temperature11/2 teaspoons (7 ml) vanilla extractGel food coloring, such as Wilton’s Teal
Combine egg whites, sugar, and salt in the metal bowl set over a pan of simmering water so that the water does not touch the bottom of the bowl. Whisk the mixture by hand, constantly, until you can rub the warm mixture between your fingers and feel no sugar grit and an instant-read thermometer inserted in the mixture registers 160°F (75°C), about 5 minutes.
Mix on medium-low speed with an electric mixer for several minutes until the sugared egg whites become foamy. Then increase the speed to medium-high and beat for several minutes until the egg whites are white and soft peaks form. Then increase the speed to high and whip until white, glossy, and stiff peaks form that just fall over at the tip when you test with your fingertip. Beating the egg whites should take a total of about 10 minutes.
Start adding the butter, a tablespoon at a time, beating on medium speed, and mixing well after each addition. When all the butter has been added, beat in the vanilla, food coloring, or any other flavoring until the buttercream is smooth and thick. Use right away or store, covered, in the refrigerator for up to 1 week. Let the frosting come to room temperature before using.
Recipe adapted from:


January 12, 2015
Delicious Scenes for a Novel
My Vision Board for The Cake Therapist

I enjoy writing cookbooks ever since my first one about Kansas City restaurant recipes was published in 1995 (I was in second grade). My cookbooks have been nominated for awards (IACP, James Beard, ForeWord) and won them (IACP and ForeWord). Some have become bestsellers.
You can see all the cookbooks on my amazon author page.
I have a method for starting cookbooks, one that I call "The Box Method." Brilliant, no?
I gather recipe ideas for a new book and put them in a plastic storage box along with photos. I brainstorm on a title for the book and from that comes the theme, then the recipe list, and then the chapters.
But a novel is different.
When my kids were little, I wrote a novel called Hadley's Dower about the story behind a mysterious antique. The story went back and forth in time. I wrote this in the days before Microsoft Word became the software of choice and you had to print everything out on paper, package it, and ship it to prospective agents.
Of course, that took forever. My life changed. I moved three times. I put Hadley's Dower away in the proverbial desk drawer along with my dream to write a novel. I had to make a living.
A few years ago, still writing cookbooks, I decided to take that dream out and dust it off.
To help me focus, gather ideas, and spark my imagination, I created a vision board. I used a long piece of poster board, magazine clippings, photographs, postcards, and other visual elements like rainbow ribbon and a fanciful "Hand of Fatima" golden clip. My vision board is not fancy, as you can see.

But it has been powerful.
My debut novel, The Cake Therapist, has become real.

Martha Beck, a life coach extraordinaire and Oprah Magazine columnist, has her own great take on creating a Vision Board --for whatever you want to set your sights on for the future. (Just don't let her catch you putting up photos of a new car, a guy with six-pack abs, or a new phone. Go big or go home.)
She recommends "regularly picturing delights that don’t yet exist, emotionally detaching from them, and jumping into action when it’s time to help the miracles occur. I’m barely learning this," she says, "to be (in T.S. Eliot’s words) 'still and still moving.' But in the moments I get it right, every step I take seems to be matched by a universal mystery, which obligingly, incredibly, creates what I can’t."
Amen, Sister.
Here's a flavor hint for a story line in The Cake Therapist. If you want the recipe--and it's yummy-- go this blog post . Sample a virtual cookie, then pre-order The Cake Therapist!
January 7, 2015
The 12 Days of Holiday Cookies: Days 10, 11, 12
The New Cookie Plate for a New Year
 Gluten-free Chocolate Christmas Crinkle Cookie by Jennifer Peters of Vancouver’s NextJen Gluten Free (nextjen.ca)
This year, make a resolution to create a much more interesting cookie plate.
When you order the cookie plate, restaurants might serve the cookies on ho-hum, doily-dressed plates, maybe with a cup of hot chocolate or a glass of milk for a nostalgic dessert.
But why not make the cookie plate artful, visually appealing as Vancouver baker Jennifer Peters has done?
You'll need a little bit of Plate Paint, your cookies, and a scattering of little bits to add color and texture. Peters used cookie crumbs, tiny pieces of fresh orange, and chopped pistachios. Simply put the Plate Paint in a squeeze bottle and squeeze out a pattern on a white plate. Arrange the cookies around the squiggles, then scatter the crumbs, orange segments, and pistachios.
And while you're at it, look for more great ideas and playfully delicious recipes in Bake Happy, which you can pre-order right now!

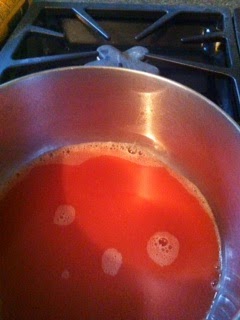
Plate PaintAdapted from the upcoming Bake Happy, which will be out in May 2015.I wanted a thick, viscous, translucent “paint” made with fruit juice in order to create dots, squiggles, zigzags, or spirals to plated desserts. So, I went into the kitchen and played around a little bit.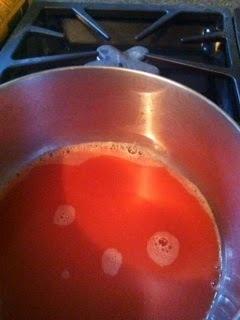
The happy result is this Plate Paint, which is edible, colorful, easy, vegan, gluten-free, and very shapeable at room temperature. Use any type of colorful bottled fruit juice (cherry, cranberry, kiwi, mango, papaya, or pomegranate). You can also try frozen Goya “fruta" concentrates (pink passionfruit, deeper pink guava, or blackberry).Makes about 2/3 cup (150 ml)1 tablespoon cornstarch1 cup (250 ml) colorful bottled fruit juice or frozen fruit juice concentrate, thawedSpoon the cornstarch into a small jar with a lid. Add the fruit juice, secure the lid, and shake to blend. Pour the juice mixture into a small saucepan over medium-high heat, and whisk it constantly until the juice begins to boil and turns from a lighter opaque color to a darker, more transparent one. Keep whisking until the “paint” begins to thicken slightly. Remove the pan from the heat and set it aside to cool to room temperature. Use the paint right away or store it in a jar with a lid in the refrigerator for up to 1 week. Let the paint come to room temperature before using.
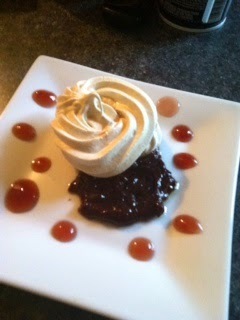 Plate Paint dotted around a meringue with fruit compote. Paint Your PlateAdd a playful or colorful dimension to a slice of pie, a meringue, a brownie, or any other dessert by embellishing the plate with fun, edible color.. To make a dot, let about 1/2 teaspoon of Plate Paint drip off a small spoon, held just above the plate. To make a squiggle, spoon 1 tablespoon of Plate Paint at the 12 o’clock point on the plate. Use the back of a teaspoon to press down into the paint and zigzag down to the 6 o’clock point on the plate.
To make a zigzag, pour the paint into a plastic squeeze bottle and secure the top. Make sure the opening is at least 1/4 inch in diameter. Turn the bottle upside down and squeeze a zigzag onto each plate.
Gluten-free Chocolate Christmas Crinkle Cookie by Jennifer Peters of Vancouver’s NextJen Gluten Free (nextjen.ca)This year, make a resolution to create a much more interesting cookie plate.
When you order the cookie plate, restaurants might serve the cookies on ho-hum, doily-dressed plates, maybe with a cup of hot chocolate or a glass of milk for a nostalgic dessert.
But why not make the cookie plate artful, visually appealing as Vancouver baker Jennifer Peters has done?
You'll need a little bit of Plate Paint, your cookies, and a scattering of little bits to add color and texture. Peters used cookie crumbs, tiny pieces of fresh orange, and chopped pistachios. Simply put the Plate Paint in a squeeze bottle and squeeze out a pattern on a white plate. Arrange the cookies around the squiggles, then scatter the crumbs, orange segments, and pistachios.
And while you're at it, look for more great ideas and playfully delicious recipes in Bake Happy, which you can pre-order right now!

Plate PaintAdapted from the upcoming Bake Happy, which will be out in May 2015.I wanted a thick, viscous, translucent “paint” made with fruit juice in order to create dots, squiggles, zigzags, or spirals to plated desserts. So, I went into the kitchen and played around a little bit.
The happy result is this Plate Paint, which is edible, colorful, easy, vegan, gluten-free, and very shapeable at room temperature. Use any type of colorful bottled fruit juice (cherry, cranberry, kiwi, mango, papaya, or pomegranate). You can also try frozen Goya “fruta" concentrates (pink passionfruit, deeper pink guava, or blackberry).Makes about 2/3 cup (150 ml)1 tablespoon cornstarch1 cup (250 ml) colorful bottled fruit juice or frozen fruit juice concentrate, thawedSpoon the cornstarch into a small jar with a lid. Add the fruit juice, secure the lid, and shake to blend. Pour the juice mixture into a small saucepan over medium-high heat, and whisk it constantly until the juice begins to boil and turns from a lighter opaque color to a darker, more transparent one. Keep whisking until the “paint” begins to thicken slightly. Remove the pan from the heat and set it aside to cool to room temperature. Use the paint right away or store it in a jar with a lid in the refrigerator for up to 1 week. Let the paint come to room temperature before using.
 Plate Paint dotted around a meringue with fruit compote. Paint Your PlateAdd a playful or colorful dimension to a slice of pie, a meringue, a brownie, or any other dessert by embellishing the plate with fun, edible color.. To make a dot, let about 1/2 teaspoon of Plate Paint drip off a small spoon, held just above the plate. To make a squiggle, spoon 1 tablespoon of Plate Paint at the 12 o’clock point on the plate. Use the back of a teaspoon to press down into the paint and zigzag down to the 6 o’clock point on the plate.
 To make a zigzag, pour the paint into a plastic squeeze bottle and secure the top. Make sure the opening is at least 1/4 inch in diameter. Turn the bottle upside down and squeeze a zigzag onto each plate.
December 27, 2014
The 12 Days of Holiday Cookies: Day Nine
The Irresistible Un-Cookie
Crispy caramel. Chocolate-covered. Gluten-free. Easy.
This treat looks like a free-form cookie, you can nibble it like a cookie, but it isn't a cookie.
It's Chocolate-Covered Buttercrunch Toffee
After all the holiday excess of baked goods, are you ready for a taste break?
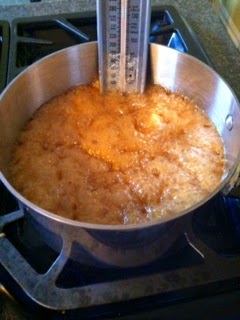
Made with ingredients you probably have on hand, the toffee mixture comes to a boil in a saucepan. You simply let it cook until it reaches 300 degrees F.

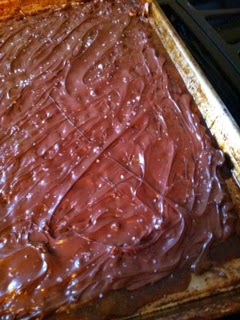
Carefully pour the toffee mixture onto a baking sheet, then strew with chocolate chips. Let them melt for 2 minutes, then swirl the melted chocolate with a knife or thin metal spatula.

Add-ons could include chopped toasted pecans or walnuts, flaked almonds, toasted pumpkin seeds, or coarse sea salt.
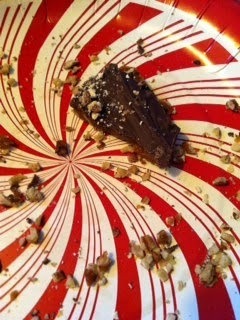
And the other amazing thing about Chocolate-Covered Buttercrunch Toffee is that is just seems to disappear.
You start off with a full plate (okay, you may have had to taste just a little bit to make sure it turned out all right)

You come back a little later, and this is what you see
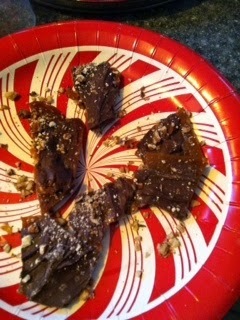
And before you know it, you have to make another batch.
Chocolate-Covered Buttercrunch Toffee
Adapted from a recipe by David Lebowitz
Makes enough toffee to last about 24 hours.
You can double this recipe and pour it out onto a large 11 x 17-inch baking sheet to cool. When the candy thermometer registers 250 degrees F., my advice is to stand watch. A watched pot does actually boil and will produce a perfect toffee.
2 cups (8 ounces) toasted, chopped nuts (optional), flaked almonds, or toasted pumpkin seeds
2 tablespoons water
1/2 cup (1 stick) salted or unsalted butter, cut into pieces
1/8 to 1/4 teaspoon fine salt
1 cup granulated sugar
1/4 cup packed light brown sugar
1/4 teaspoon baking soda
1 teaspoon vanilla extract
5 ounces bittersweet or semisweet chocolate, chopped, or 1 cup chocolate chips
Optional: Fleur de sel or coarse sea salt to sprinkle on at the end
Use a vegetable oil (such as canola) to lightly oil an 8 x 10-inch baking sheet and set aside.
If using the nuts, sprinkle half on the baking sheets; reserve the remaining half.
In a medium heavy-duty saucepan fitted with a candy thermometer, bring the water, butter, salt, and sugars to a boil over medium-high heat. Cook, stirring as little as possible, until the mixture just reaches 300 degrees F, about 15 to 20 minutes.
Immediately remove from the heat and stir in the baking soda and vanilla. Quickly pour the hot toffee mixture onto the prepared baking sheets, trying for an even layer. If necessary, gently but quickly spread with a metal spatula.
Strew the chocolate over the hot toffee and leave to melt for 2 minutes. Use a table knife or a metal spatula to spread the melted chocolate in an even layer.
Sprinkle on the remaining nuts and fleur de sel, if you like.
Crispy caramel. Chocolate-covered. Gluten-free. Easy.
This treat looks like a free-form cookie, you can nibble it like a cookie, but it isn't a cookie.
It's Chocolate-Covered Buttercrunch Toffee
After all the holiday excess of baked goods, are you ready for a taste break?
Made with ingredients you probably have on hand, the toffee mixture comes to a boil in a saucepan. You simply let it cook until it reaches 300 degrees F.
Carefully pour the toffee mixture onto a baking sheet, then strew with chocolate chips. Let them melt for 2 minutes, then swirl the melted chocolate with a knife or thin metal spatula.
Add-ons could include chopped toasted pecans or walnuts, flaked almonds, toasted pumpkin seeds, or coarse sea salt.
And the other amazing thing about Chocolate-Covered Buttercrunch Toffee is that is just seems to disappear.
You start off with a full plate (okay, you may have had to taste just a little bit to make sure it turned out all right)
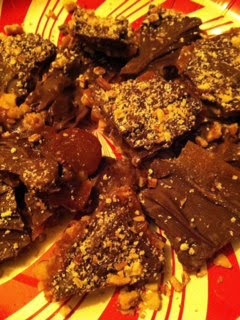
You come back a little later, and this is what you see

And before you know it, you have to make another batch.

Chocolate-Covered Buttercrunch Toffee
Adapted from a recipe by David Lebowitz
Makes enough toffee to last about 24 hours.
You can double this recipe and pour it out onto a large 11 x 17-inch baking sheet to cool. When the candy thermometer registers 250 degrees F., my advice is to stand watch. A watched pot does actually boil and will produce a perfect toffee.
2 cups (8 ounces) toasted, chopped nuts (optional), flaked almonds, or toasted pumpkin seeds
2 tablespoons water
1/2 cup (1 stick) salted or unsalted butter, cut into pieces
1/8 to 1/4 teaspoon fine salt
1 cup granulated sugar
1/4 cup packed light brown sugar
1/4 teaspoon baking soda
1 teaspoon vanilla extract
5 ounces bittersweet or semisweet chocolate, chopped, or 1 cup chocolate chips
Optional: Fleur de sel or coarse sea salt to sprinkle on at the end
Use a vegetable oil (such as canola) to lightly oil an 8 x 10-inch baking sheet and set aside.
If using the nuts, sprinkle half on the baking sheets; reserve the remaining half.
In a medium heavy-duty saucepan fitted with a candy thermometer, bring the water, butter, salt, and sugars to a boil over medium-high heat. Cook, stirring as little as possible, until the mixture just reaches 300 degrees F, about 15 to 20 minutes.
Immediately remove from the heat and stir in the baking soda and vanilla. Quickly pour the hot toffee mixture onto the prepared baking sheets, trying for an even layer. If necessary, gently but quickly spread with a metal spatula.
Strew the chocolate over the hot toffee and leave to melt for 2 minutes. Use a table knife or a metal spatula to spread the melted chocolate in an even layer.
Sprinkle on the remaining nuts and fleur de sel, if you like.
December 16, 2014
The 12 Days of Holiday Cookies: Day Eight
Decadent Chocolate Chunk Cookies with a Latte for Dunking
Sometimes during the holiday season, the cookie baker needs a treat, too.
For maximum pick-me-up and minimal fuss, I vote for this chocolate chip cookie that is fortified by chopped walnuts and tastes fabulous dunked in a latte.
Even better if the latte has a holiday ornament/apple/pomegranate artfully inscribed in the foam!

There's something positively therapeutic about warm, oozy chocolate and a milky, espresso-dark latte.
I feel better just thinking about that combination.
Chocolate Chunk Cookies(Adapted from Judith Fertig's Bake Happy, to debut in May 2015)Erin Brown of Dolce Bakery in Prairie Village, Kansas, welcomes the relaxed pace of baking in her home kitchen. Brown’s husband, a professional athlete, “trains like a beast,” she says, but he saves room for her Chocolate Chunk Cookies, adapted here, dipped in an . For these cookies, bigger is better to achieve a gooey interior and a crispy exterior. If you want to work ahead, mix and place the cookies on a baking sheet. Freeze, then remove the unbaked cookies from the baking sheet and freeze them in a sealable plastic bag for up to 3 months. Bake from frozen about 8 longer.Makes 24 (2-ounce) cookies2 cups plus 2 tablespoons (265 g) unbleached all-purpose flour 1 teaspoon baking soda 1/2 teaspoon kosher salt 11/2 cups (270 g) semisweet chocolate chunks 1 cup (180 g) large bittersweet chocolate chips 11/2 cups (180 g) cups finely chopped walnuts 1 cup (227 g) unsalted butter, at room temperature 1 packed cup (220 g) dark brown sugar1/2 cup (100 g) granulated sugar 2 large eggs 2 teaspoons vanilla extract (or 1 teaspoon vanilla bean paste)Preheat the oven to 375°F (190°C). Line 2 large baking sheets with parchment paper and set aside. In a medium bowl, sift the flour, baking soda, and salt; set aside. In a second bowl, combine the chocolate chips, chunks, and walnuts.Place the butter and sugars in a large bowl and cream together with an electric mixer on medium speed , about 5 minutes. Scrape down the sides of the bowl. Add the eggs, one at a time, beating and scraping after each addition. Beat in the vanilla. Beat in the dry ingredients on low speed, a fourth at a time, adding the chocolate chip and nut mixture with the last of the flour. Scoop 2 tablespoons of the dough at a time onto the prepared baking sheet, leaving 2 inches between each cookie. until browned and crispy at the edges and soft in the middle, about 8 to 10 minutes. Cool in the pan for a few minutes, then transfer to wire racks to . Store in an airtight container for up to 1 week or freeze for up to 3 months. To warm, microwave a frozen cookie on high for 15 to 20 seconds or until warm and gooey.
So Happy Together:Chocolate Chunk Cookies + AffogatoA warm Chocolate Chunk Cookie dunked in an affogato can elevate a wonderful experience into the unforgettable—if you love coffee. To make an affogato, Italian for “drowned,” simply put a scoop of ice cream or gelato in a coffee cup and pour a shot or two of hot espresso over it. Let the ice cream melt just a little, then dunk a still-warm Chocolate Chunk Cookie.
December 15, 2014
The 12 Days of Holiday Cookies: Day Seven
Shimmer Cookies
When I'm in the midst of a baking project, I have King Arthur Flour Company on speed dial. (And no, this is not a sponsored post. It's simply a fact.)
Whatever it is that I need--a special type of flour, unique flavorings, the right pan, or unique cupcake wrappers--I can find in their online or paper catalogue.
What's even better is their treasure trove of baking recipes on their web site, kitchen-tested and approved by many readers.
That's where I found this recipe for Shimmer Cookies, flavored with Fiori di Sicilia (Flowers of Sicily), a unique blend of vanilla, citrus, and flower essences.
 Shimmer Cookies, photo courtesy of King Arthur Flour CompanyThese cookies sparkle just like snow. With their mellow, creamy citrus flavor, they're a refreshing complement to the usual spicy, decadent cookie selection at holiday time.
Recipe courtesy of King Arthur Flour
Makes 24 to 26 filled cookies
Cookies 1 cup (16 tablespoons) unsalted butter, softened 3/4 cup confectioners' sugar 1/4 teaspoon salt 1/4 teaspoon Fiori di Sicilia (or vanilla) 2 cups King Arthur Unbleached All-Purpose Flour
coarse white sparkling sugar, for coatingFilling 1 1/2 cups confectioners' sugar 6 tablespoons unsalted butter 1 to 2 teaspoons grated lemon peel 1 to 2 teaspoons grated orange peel colored sparkling sugar or sprinkles, for coating
1) Preheat the oven to 350°F, and grease two baking sheets, or line with parchment paper. 2) To make the cookies: Beat together the butter, sugar, salt, and Fiori until creamy. 3) Add the flour, and mix just until incorporated. 4) Shape teaspoon-sized balls of dough, and roll them in sparkling sugar. 5) Place the cookies 1" apart on the prepared baking sheets. 6) Bake the cookies until they're just beginning to brown along the edges, 16 to 18 minutes. Remove from the oven, and cool completely. 7) To make the filling: Beat all the ingredients together until light and fluffy. 8) To assemble the cookies: Sandwich a 1/4"-thick layer of filling between two cookies, and roll the filling edge in the colored sugar or sprinkles.
December 13, 2014
The 12 Days of Holiday Cookies: Day Six
Swedish Wishing Cookies
Today's cookie post involves a bit of a travelogue.
We're going to Lindsborg, Kansas, a wheat-farming college town founded by Swedish settlers in the 1860s and proud of its Swedish heritage.
 Nick Fertig eating an ice cream cone at Lindsborg Town Hall.
Throughout the year, the community holds ethnic celebrations.
Today marks St. Lucia Fest (follow the link to a 6-minute video), held on the Saturday closest to the traditional December 13 Saint Lucia Day.
Lindsborg celebrates both its wheat-farming and Swedish identities with holiday decorations.

Christmas trees, indoors and out, are decked with red-ribboned wheat sheaves and tiny white lights.

Instead of greenery, bundles of prairie grains, also tied with red ribbon, really give you a sense of place.
You start off the day with a Swedish Bake Sale

but you better get there early or all the best Swedish specialties will be gone.
Then, the Swedish folk dancers in traditional costume

start their procession down the main street to the Lutheran church. Its architecture is part Swedish, part small town America.

The Swedish dancers pass out pepparkakor or crisp ginger cookies, sometimes called Swedish Wishing Cookies, to those savvy enough to line the streets.
Inside the church, the St. Lucia pageant participants gather.

There is a Star Boy.

And lots of little Saint Lucias (with battery-operated candles in the crowns!).
After the Saint Lucia pageant at the church, you might wander downtown again and come across a demonstration of sweet yeast rolls known as Lucia Buns, flavored with saffron, formed into traditional shapes, and decorated with currants or raisins before baking.

After all that, you're hungry again.
Good thing you can go home and bake a batch of Swedish Wishing Cookies to remember your day.
Swedish Wishing Cookies
Adapted from All-American Desserts by Judith M. Fertig
For St. Lucia Day in the homes of families of Swedish descent, the eldest daughter wears a white gown with a red sash and crown of tiny white lights. In the darkness of a December 13 morning, she brings a tray of saffron-flavored Lucia buns or cookies like these in to her parents’ bedroom. In public celebrations, a teenage girl playing the role of St. Lucia offers pepparkakor or these cookies to both adults and children who attend the festivities that might include Swedish folk dancing and the St. Lucia and Star Boy pageant. When these spice cookies are rolled very thinly and cut out in heart shapes, they become “wishing cookies,” a charming holiday tradition. St. Lucia gives a child a cookie to hold in the palm of one hand and tells the child to make a wish. With the index finger of the other hand bent, the child strikes the cookie with a knuckle. If the cookie breaks into three pieces, the wish will be granted. If not, there are still those delicious cookie pieces to gobble up. Makes 5 dozen1/2 cup (1 stick) butter, softened3/4 cup sugar1 large egg3/4 cup light molasses2 1/2 teaspoons freshly grated orange rind1 teaspoon baking soda1 1/2 teaspoons ground ginger1 1/2 teaspoons ground cinnamon1 teaspoon ground cloves1/2 teaspoon ground cardamom3 1/2 cups all-purpose flourIn a large bowl, cream the butter and sugar together with an electric mixer. Beat in the egg, molasses, and orange rind. Sift together the dry ingredients and add to the egg mixture, a cup at a time, beating well with each addition. Cover and refrigerate the dough for several hours or overnight.
Preheat the oven to 375 degrees. Line several baking sheets with parchment paper and set aside. Roll out the dough, a portion at a time, on a floured surface to a 1/8 inch thickness. Cut out with heart-shaped cookie cutters or the shape of your choice. Transfer the cookies to the prepared baking sheets. Bake for 7 to 9 minutes, or until browned at the edges. Cool on wire racks. Store in airtight containers.
Today's cookie post involves a bit of a travelogue.
We're going to Lindsborg, Kansas, a wheat-farming college town founded by Swedish settlers in the 1860s and proud of its Swedish heritage.
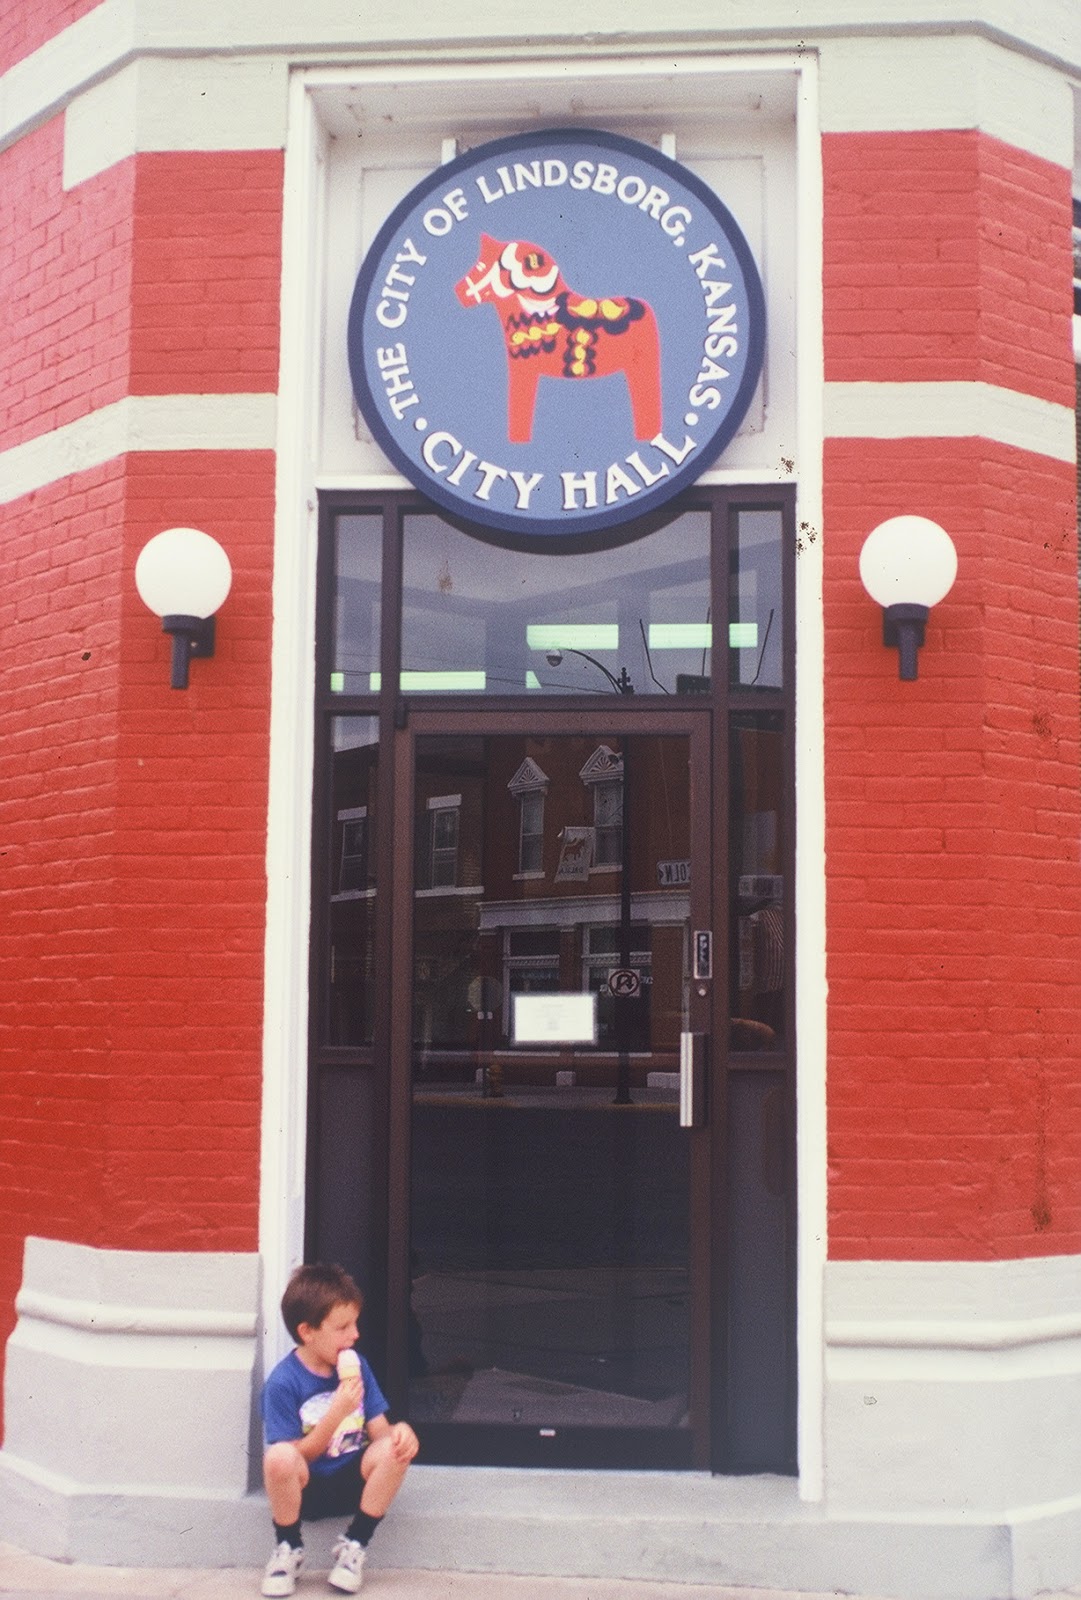 Nick Fertig eating an ice cream cone at Lindsborg Town Hall.
Throughout the year, the community holds ethnic celebrations.
Today marks St. Lucia Fest (follow the link to a 6-minute video), held on the Saturday closest to the traditional December 13 Saint Lucia Day.
Lindsborg celebrates both its wheat-farming and Swedish identities with holiday decorations.

Christmas trees, indoors and out, are decked with red-ribboned wheat sheaves and tiny white lights.

Instead of greenery, bundles of prairie grains, also tied with red ribbon, really give you a sense of place.
You start off the day with a Swedish Bake Sale

but you better get there early or all the best Swedish specialties will be gone.
Then, the Swedish folk dancers in traditional costume

start their procession down the main street to the Lutheran church. Its architecture is part Swedish, part small town America.

The Swedish dancers pass out pepparkakor or crisp ginger cookies, sometimes called Swedish Wishing Cookies, to those savvy enough to line the streets.
Inside the church, the St. Lucia pageant participants gather.

There is a Star Boy.
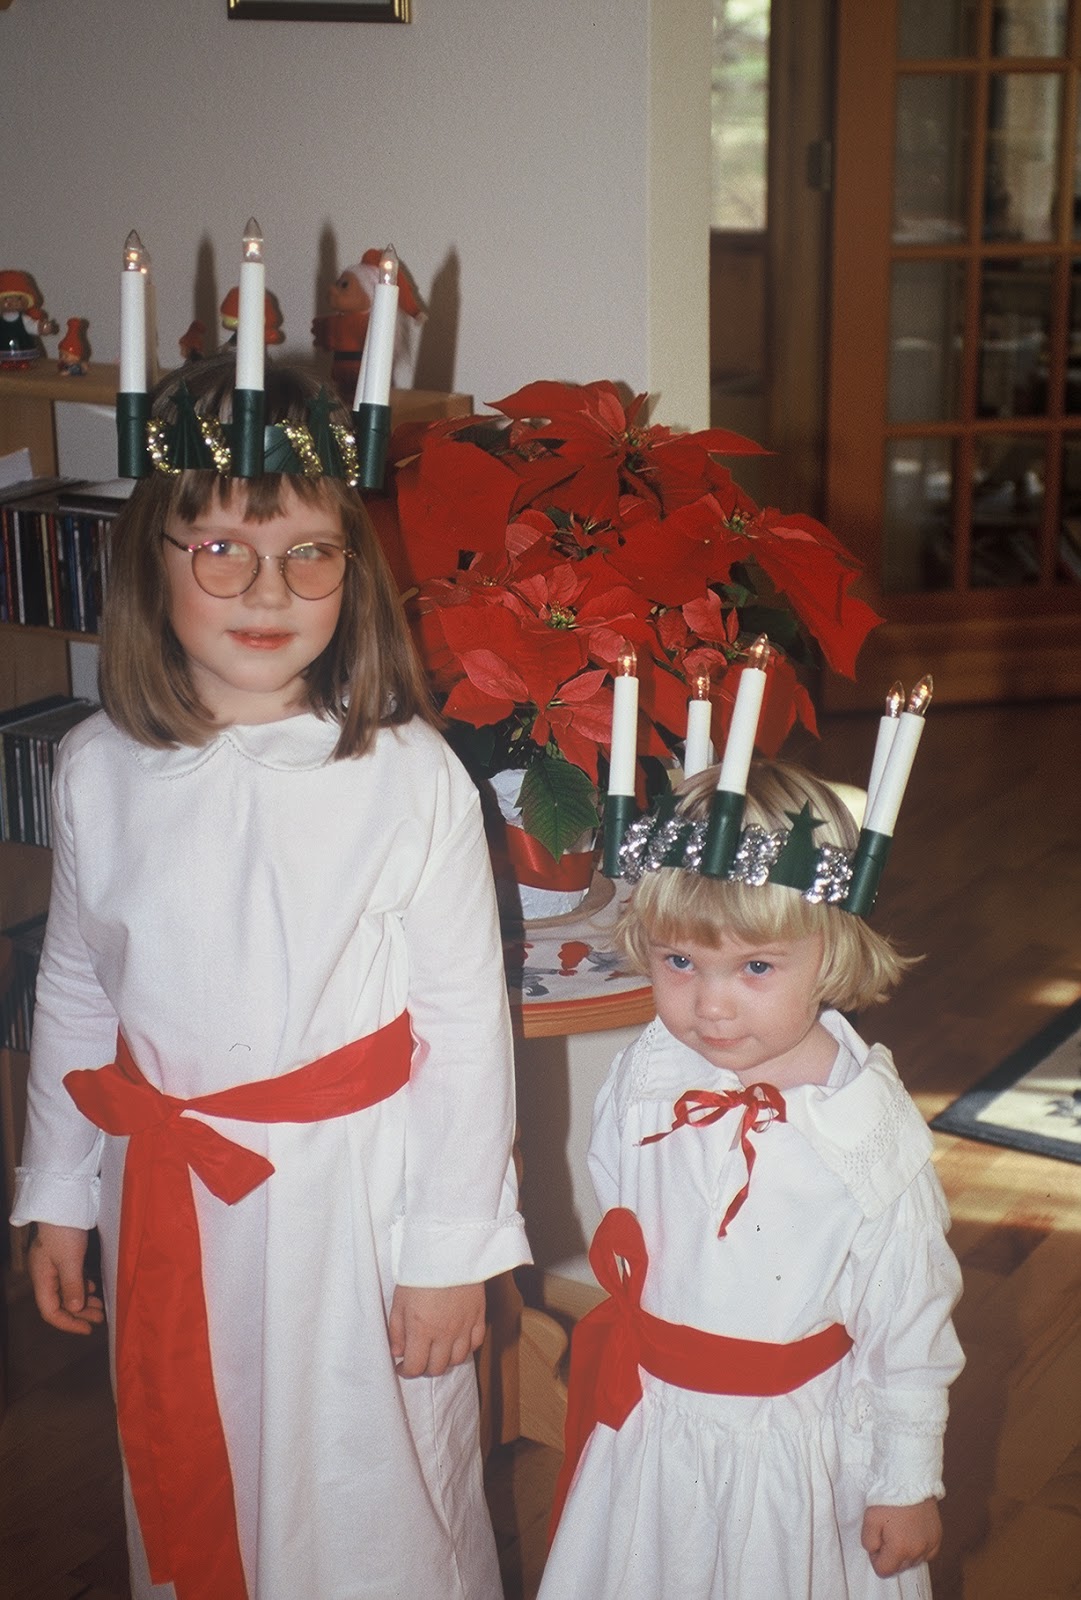
And lots of little Saint Lucias (with battery-operated candles in the crowns!).
After the Saint Lucia pageant at the church, you might wander downtown again and come across a demonstration of sweet yeast rolls known as Lucia Buns, flavored with saffron, formed into traditional shapes, and decorated with currants or raisins before baking.

After all that, you're hungry again.
Good thing you can go home and bake a batch of Swedish Wishing Cookies to remember your day.
Swedish Wishing Cookies
Adapted from All-American Desserts by Judith M. Fertig
For St. Lucia Day in the homes of families of Swedish descent, the eldest daughter wears a white gown with a red sash and crown of tiny white lights. In the darkness of a December 13 morning, she brings a tray of saffron-flavored Lucia buns or cookies like these in to her parents’ bedroom. In public celebrations, a teenage girl playing the role of St. Lucia offers pepparkakor or these cookies to both adults and children who attend the festivities that might include Swedish folk dancing and the St. Lucia and Star Boy pageant. When these spice cookies are rolled very thinly and cut out in heart shapes, they become “wishing cookies,” a charming holiday tradition. St. Lucia gives a child a cookie to hold in the palm of one hand and tells the child to make a wish. With the index finger of the other hand bent, the child strikes the cookie with a knuckle. If the cookie breaks into three pieces, the wish will be granted. If not, there are still those delicious cookie pieces to gobble up. Makes 5 dozen1/2 cup (1 stick) butter, softened3/4 cup sugar1 large egg3/4 cup light molasses2 1/2 teaspoons freshly grated orange rind1 teaspoon baking soda1 1/2 teaspoons ground ginger1 1/2 teaspoons ground cinnamon1 teaspoon ground cloves1/2 teaspoon ground cardamom3 1/2 cups all-purpose flourIn a large bowl, cream the butter and sugar together with an electric mixer. Beat in the egg, molasses, and orange rind. Sift together the dry ingredients and add to the egg mixture, a cup at a time, beating well with each addition. Cover and refrigerate the dough for several hours or overnight.
Preheat the oven to 375 degrees. Line several baking sheets with parchment paper and set aside. Roll out the dough, a portion at a time, on a floured surface to a 1/8 inch thickness. Cut out with heart-shaped cookie cutters or the shape of your choice. Transfer the cookies to the prepared baking sheets. Bake for 7 to 9 minutes, or until browned at the edges. Cool on wire racks. Store in airtight containers.
December 12, 2014
The 12 Days of Holiday Cookies: Day Five
Ugly Sweater Sugar Cookies
A good sugar cookie recipe and a collection of cookie cutters can take you through any occasion.
Snowflakes and mittens, flowers and ducks , baseballs and flags, autumn leaves and squirrels, Christmas trees and the Star of David.
Making and decorating sugar cookies can be a lengthy and messy process, especially if you do it with kids.
I can do something about the lengthy and messy process business--a sugar cookie dough you can make, roll out without a mess in batches, and even freeze.
But you're on your own with the kids. Chaos is just part of the whole experience.
When I came across these Ugly Sweater Cookies from Cookie Jar Bakery in Lee's Summit, Missouri, I thought Perfect!
 Photo from Cookie Jar Bakery
They also have a way with traditional shapes, as in these Christmas trees. Great idea for a new twist on a classic theme.
 Photo from Cookie Jar BakeryCookie Jar Bakery has also done Pumpkin Pie Slice Cookies and Turkey Leg Cookies for Thanksgiving.

What I'm leading up to is adding a little humor to some of your holiday baking.
Look for a sweater cookie cutter and a squeeze bottle or two or three (for outlining and filling in cookie decoration with royal icing), make up batches of sugar cookie dough and royal icing, put some holiday music on, and bake something that will make someone smile. Or chuckle. Or snort. You know who you are.
Ugly Sweater Sugar Cookies
(The shape was inspired by Cookie Jar Bakery, but the recipe is mine.)
A standout sugar cookie starts with a dough that tastes good and performs well under adverse conditions (like a pack of preschoolers in a small kitchen). This one definitely does. The dough has a buttery, vanilla-scented flavor; is easy to roll out; and doesn’t spread during baking. The dough can also be frozen for up to three months, then can be rolled out, cut out, and baked into cookies. Once the dough is made, the process of cutting out the sugar cookies is a great opportunity for nostalgia and collecting. In our family, making holiday sugar cookies with the kids has always been fun—and messy. For the best results, sift the flour first, then measure it. Rolling out the dough between two sheets of parchment paper keeps the mess to a minimum and results in more tender cookies without that extra flour. Paint the cookies with Cookie Paint (royal icing). You can find meringue powder at hobby, craft, and cake supply stores or online.Makes 30 (3-inch) cookiesClassic Sugar Cookie Dough:3 cups (285 g) sifted unbleached all-purpose flour11/2 teaspoons baking powder1 teaspoon salt1 cup (227 g) unsalted butter, at room temperature1 cup (200 g) granulated sugar1 large egg1 teaspoon vanilla, almond, or lemon extractCookie Paint:2 tablespoons meringue powder1/4 cup (50 ml) cold water1 teaspoon vanilla, almond, lemon, or raspberry extract2 cups (240 g) confectioners’ sugarFood coloringFor the Classic Sugar Cookie Dough, sift (again) the flour with the baking powder and salt into a medium bowl; set aside. Cream the butter and sugar together in a large bowl with an electric mixer until very pale and fluffy, about 3 minutes. Beat in the egg and extract. Beat in the dry ingredients, a third at a time, until the dough just comes together. Gather the dough into a ball and knead for 1 minute. Cut it in half and form each half into a flattened disc. Use right away or wrap and freeze for up to 3 months. Let the dough come to room temperature before rolling out.When ready to bake, preheat the oven to 350°F. Line two large baking sheets with parchment paper and set aside.Have ready two large (11 by 17 inches) sheets of parchment paper or two silicon baking mats. Place one on a flat surface. Place one disc of dough in the center and cover with the second piece of parchment or silicon baking mat. Roll out the dough to a 1/4-inch thickness. Cut out the cookie shapes and place close to each other on the prepared baking sheet. Repeat the process with the remaining dough.Bake the cookies until the edges are golden brown, about 8 to 10 minutes. Cool on the baking sheet for a few minutes, then transfer to wire racks to cool completely.
For the Cookie Paint, whisk the meringue powder, water, extract, and confectioners’ sugar together in a medium bowl until smooth and of a paint-like consistency. If you like, divide the paint among separate bowls and tint each bowl a different color. Using a clean, large watercolor, paint, or pastry brush (or a squeeze bottle) paint the cookies and leave to dry for at least 1 hour. Serve right away or store in an airtight container for up to 1 week.
A good sugar cookie recipe and a collection of cookie cutters can take you through any occasion.
Snowflakes and mittens, flowers and ducks , baseballs and flags, autumn leaves and squirrels, Christmas trees and the Star of David.
Making and decorating sugar cookies can be a lengthy and messy process, especially if you do it with kids.
I can do something about the lengthy and messy process business--a sugar cookie dough you can make, roll out without a mess in batches, and even freeze.
But you're on your own with the kids. Chaos is just part of the whole experience.
When I came across these Ugly Sweater Cookies from Cookie Jar Bakery in Lee's Summit, Missouri, I thought Perfect!
 Photo from Cookie Jar Bakery
They also have a way with traditional shapes, as in these Christmas trees. Great idea for a new twist on a classic theme.
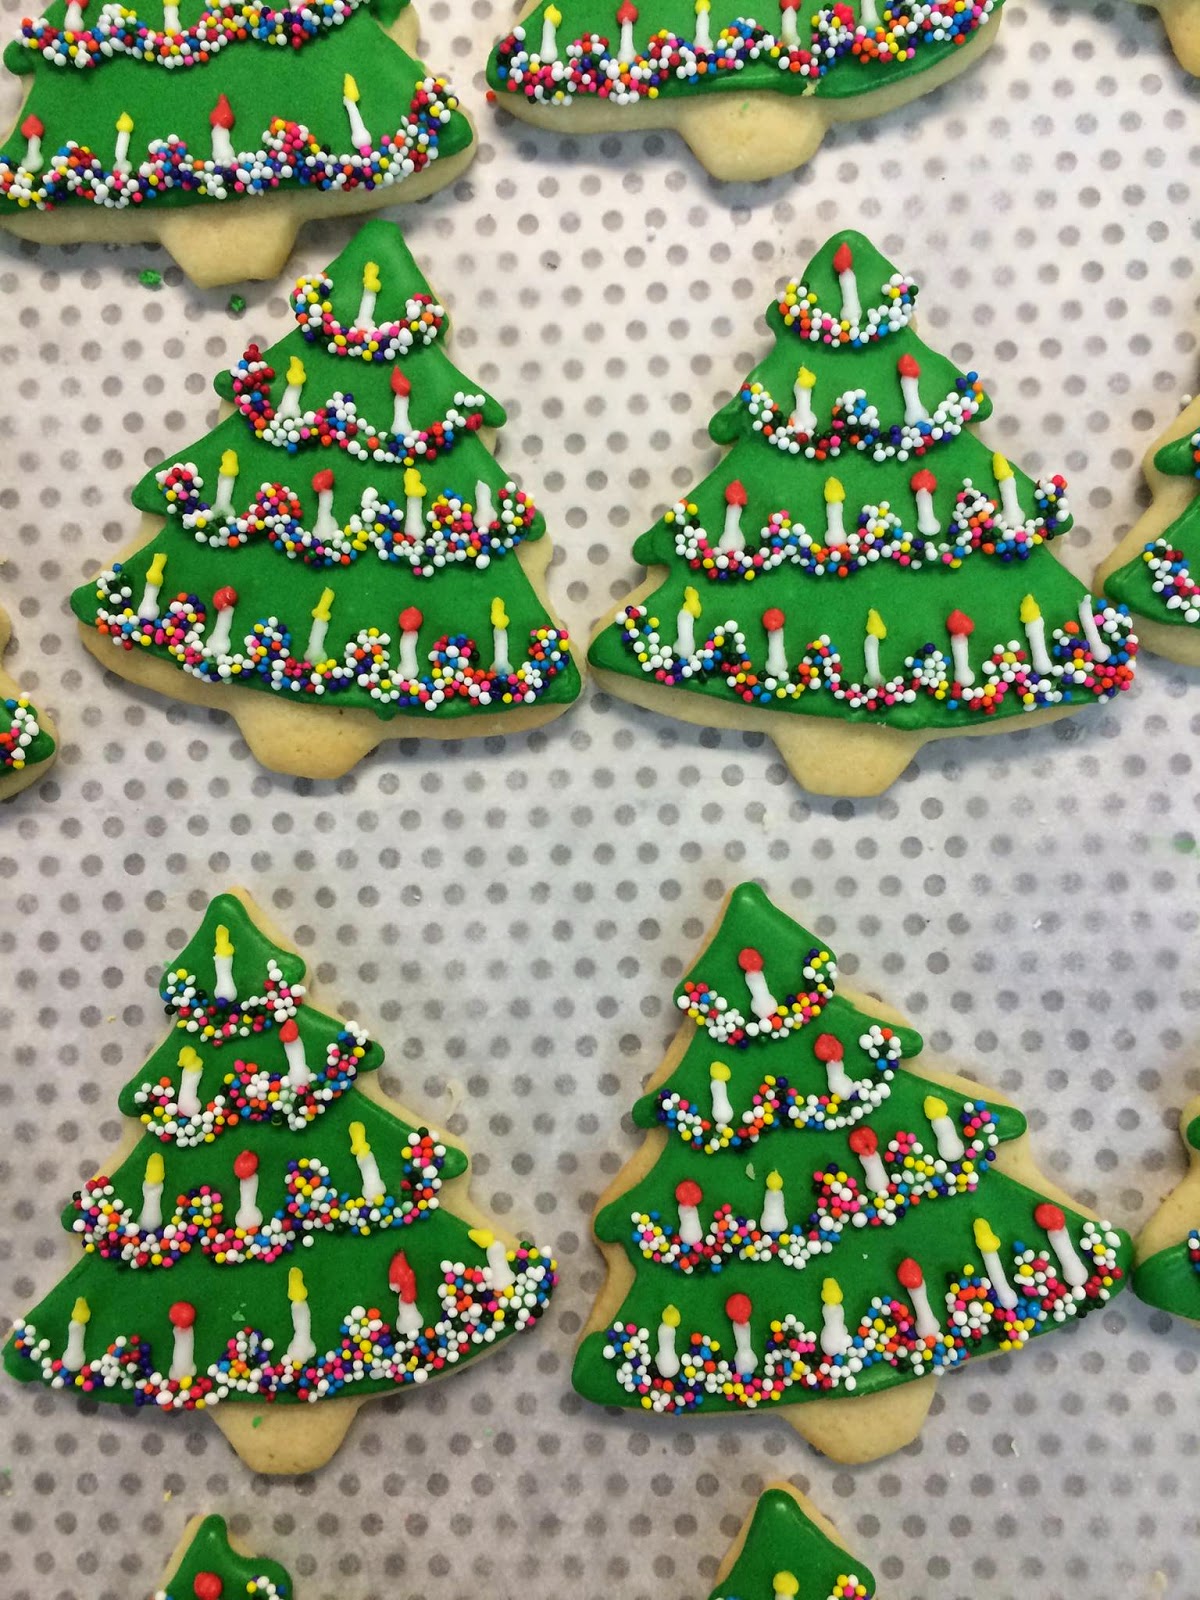 Photo from Cookie Jar BakeryCookie Jar Bakery has also done Pumpkin Pie Slice Cookies and Turkey Leg Cookies for Thanksgiving.
What I'm leading up to is adding a little humor to some of your holiday baking.
Look for a sweater cookie cutter and a squeeze bottle or two or three (for outlining and filling in cookie decoration with royal icing), make up batches of sugar cookie dough and royal icing, put some holiday music on, and bake something that will make someone smile. Or chuckle. Or snort. You know who you are.
Ugly Sweater Sugar Cookies
(The shape was inspired by Cookie Jar Bakery, but the recipe is mine.)
A standout sugar cookie starts with a dough that tastes good and performs well under adverse conditions (like a pack of preschoolers in a small kitchen). This one definitely does. The dough has a buttery, vanilla-scented flavor; is easy to roll out; and doesn’t spread during baking. The dough can also be frozen for up to three months, then can be rolled out, cut out, and baked into cookies. Once the dough is made, the process of cutting out the sugar cookies is a great opportunity for nostalgia and collecting. In our family, making holiday sugar cookies with the kids has always been fun—and messy. For the best results, sift the flour first, then measure it. Rolling out the dough between two sheets of parchment paper keeps the mess to a minimum and results in more tender cookies without that extra flour. Paint the cookies with Cookie Paint (royal icing). You can find meringue powder at hobby, craft, and cake supply stores or online.Makes 30 (3-inch) cookiesClassic Sugar Cookie Dough:3 cups (285 g) sifted unbleached all-purpose flour11/2 teaspoons baking powder1 teaspoon salt1 cup (227 g) unsalted butter, at room temperature1 cup (200 g) granulated sugar1 large egg1 teaspoon vanilla, almond, or lemon extractCookie Paint:2 tablespoons meringue powder1/4 cup (50 ml) cold water1 teaspoon vanilla, almond, lemon, or raspberry extract2 cups (240 g) confectioners’ sugarFood coloringFor the Classic Sugar Cookie Dough, sift (again) the flour with the baking powder and salt into a medium bowl; set aside. Cream the butter and sugar together in a large bowl with an electric mixer until very pale and fluffy, about 3 minutes. Beat in the egg and extract. Beat in the dry ingredients, a third at a time, until the dough just comes together. Gather the dough into a ball and knead for 1 minute. Cut it in half and form each half into a flattened disc. Use right away or wrap and freeze for up to 3 months. Let the dough come to room temperature before rolling out.When ready to bake, preheat the oven to 350°F. Line two large baking sheets with parchment paper and set aside.Have ready two large (11 by 17 inches) sheets of parchment paper or two silicon baking mats. Place one on a flat surface. Place one disc of dough in the center and cover with the second piece of parchment or silicon baking mat. Roll out the dough to a 1/4-inch thickness. Cut out the cookie shapes and place close to each other on the prepared baking sheet. Repeat the process with the remaining dough.Bake the cookies until the edges are golden brown, about 8 to 10 minutes. Cool on the baking sheet for a few minutes, then transfer to wire racks to cool completely.
For the Cookie Paint, whisk the meringue powder, water, extract, and confectioners’ sugar together in a medium bowl until smooth and of a paint-like consistency. If you like, divide the paint among separate bowls and tint each bowl a different color. Using a clean, large watercolor, paint, or pastry brush (or a squeeze bottle) paint the cookies and leave to dry for at least 1 hour. Serve right away or store in an airtight container for up to 1 week.
December 11, 2014
The 12 Days of Holiday Cookies: Day Four
Eggnog Florentines
I follow the Tasting Table, an online site full of great restaurants, wine, cocktails, and recipes that put a different spin on a classic dish.
Take holiday eggnog and Florentine cookies, for example.
For me, a little eggnog goes a long way, but as a filling for a crisp wafer sandwich cookie--perfect! The Tasting Table test kitchen adapted Chef Aaron Vandemark's recipe for the home baker, also a plus.
And what's even better, these virtual cookies have no calories, so no guilt! But I urge you to make a batch. They're delicious!
Eggnog Florentines Turn the classic holiday drink into a cookie
12/24/12|RecipesBy Kaitlyn Goalen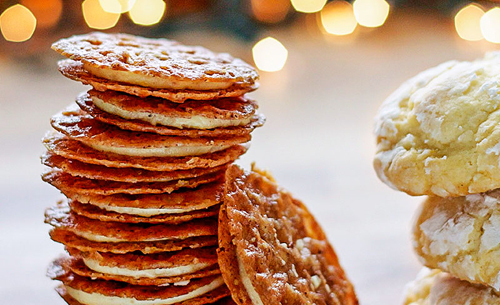 To learn more about this recipe, read the related story, "Not Yolking Around," in our National edition. For more holiday recipes and ideas, head this way.Florentine Cookie Sandwiches with Eggnog IcingRecipe adapted from Aaron Vandemark, Panciuto, Hillsborough, NCYield: 3 dozen cookies
Cook Time: 20 minutesINGREDIENTSCookies¼ cup plus 2 tablespoons all-purpose flour½ cup pecan halves¼ teaspoon ground cinnamon⅛ teaspoon kosher salt1 stick unsalted butter⅔ cup granulated sugar2 tablespoons heavy cream1 tablespoon corn syrup¼ teaspoon vanilla extractIcing4 large eggsIce4 tablespoons unsalted butter, at room temperature2½ cups confectioners' sugar1 tablespoon whole milk½ teaspoon vanilla extract¾ teaspoon freshly grated nutmeg¼ teaspoon ground cloves⅛ teaspoon kosher salt2 tablespoons dark rumDIRECTIONS1. Make the cookies: Preheat the oven to 350°. In a food processor, combine the flour, pecans, cinnamon and salt and pulse until very fine, about 1 minute. Turn the flour-pecan mixture out into a large bowl.2. In a small saucepan set over high heat, bring the butter, sugar, heavy cream and corn syrup to a boil. Boil for 1 minute, then turn off the heat, add the vanilla and pour the mixture over the flour-pecan mixture. Stir until completely combined and set aside to cool, about 40 minutes.3. Use a ½ teaspoon measure to portion the dough into small balls and place them 3 inches apart on a parchment paper-lined baking sheet. Bake until the cookies are thin and golden brown, 7 to 9 minutes, rotating the baking sheet midway through cooking (the Florentines will not set up into hard, lacy cookies until they have cooled).4. Remove the baking sheet from the oven and set aside to cool completely before using a metal spatula to carefully transfer the cookies to a paper towel to absorb any excess oil. Repeat with the remaining cookie dough.5. Make the icing: While the cookies bake and cool, boil the eggs for the icing. In a medium saucepan set over medium-high heat, add the eggs, cover with cold water and bring to a boil. Reduce the heat to medium and simmer for 10 minutes. Drain the hot water and refill the saucepan with ice and cold water. Once the eggs are cool enough to handle, peel and halve the eggs. Pop out the yolks (save the whites for another use).6. In the bowl of a stand mixer fitted with the paddle attachment, beat the butter on medium speed until pale yellow and airy, 2 to 3 minutes. Add the hard-boiled egg yolks, confectioners' sugar, milk, vanilla, nutmeg, cloves and salt. Increase the mixer speed to medium-high and beat until the texture is thick and frostinglike, scraping down the sides of the bowl as needed, about 3 minutes. Turn off the mixer, remove the bowl from the stand and stir in the rum.7. Assemble the Florentines: Turn a cooled cookie over so the flat side faces up and spoon a dollop of frosting in the middle (alternatively, use a piping bag fitted with a small metal tip). Top with another cookie, flat-side down, and press to squeeze the frosting to the edges of the cookie. Place the assembled Florentines on a rimmed baking sheet and repeat with the remaining cookies and icing. Chill the sandwiches for 10 minutes to set the frosting before serving.Make ahead: The dough and the icing can be refrigerated in an airtight container or up to 3 days before baking.Storing: The baked Florentines can be stored in a loosely covered container at room temperature for up to 2 days before filling. Once filled, serve the Florentines immediately.
Read more: http://www.tastingtable.com/entry_detail/chefs_recipes/11888/Florentine_Cookie_Sandwiches_with_Eggnog_Icing_Recipe.htm#ixzz3LdDBHPiz
I follow the Tasting Table, an online site full of great restaurants, wine, cocktails, and recipes that put a different spin on a classic dish.
Take holiday eggnog and Florentine cookies, for example.
For me, a little eggnog goes a long way, but as a filling for a crisp wafer sandwich cookie--perfect! The Tasting Table test kitchen adapted Chef Aaron Vandemark's recipe for the home baker, also a plus.
And what's even better, these virtual cookies have no calories, so no guilt! But I urge you to make a batch. They're delicious!
Eggnog Florentines Turn the classic holiday drink into a cookie
12/24/12|RecipesBy Kaitlyn Goalen
To learn more about this recipe, read the related story, "Not Yolking Around," in our National edition. For more holiday recipes and ideas, head this way.Florentine Cookie Sandwiches with Eggnog IcingRecipe adapted from Aaron Vandemark, Panciuto, Hillsborough, NCYield: 3 dozen cookiesCook Time: 20 minutesINGREDIENTSCookies¼ cup plus 2 tablespoons all-purpose flour½ cup pecan halves¼ teaspoon ground cinnamon⅛ teaspoon kosher salt1 stick unsalted butter⅔ cup granulated sugar2 tablespoons heavy cream1 tablespoon corn syrup¼ teaspoon vanilla extractIcing4 large eggsIce4 tablespoons unsalted butter, at room temperature2½ cups confectioners' sugar1 tablespoon whole milk½ teaspoon vanilla extract¾ teaspoon freshly grated nutmeg¼ teaspoon ground cloves⅛ teaspoon kosher salt2 tablespoons dark rumDIRECTIONS1. Make the cookies: Preheat the oven to 350°. In a food processor, combine the flour, pecans, cinnamon and salt and pulse until very fine, about 1 minute. Turn the flour-pecan mixture out into a large bowl.2. In a small saucepan set over high heat, bring the butter, sugar, heavy cream and corn syrup to a boil. Boil for 1 minute, then turn off the heat, add the vanilla and pour the mixture over the flour-pecan mixture. Stir until completely combined and set aside to cool, about 40 minutes.3. Use a ½ teaspoon measure to portion the dough into small balls and place them 3 inches apart on a parchment paper-lined baking sheet. Bake until the cookies are thin and golden brown, 7 to 9 minutes, rotating the baking sheet midway through cooking (the Florentines will not set up into hard, lacy cookies until they have cooled).4. Remove the baking sheet from the oven and set aside to cool completely before using a metal spatula to carefully transfer the cookies to a paper towel to absorb any excess oil. Repeat with the remaining cookie dough.5. Make the icing: While the cookies bake and cool, boil the eggs for the icing. In a medium saucepan set over medium-high heat, add the eggs, cover with cold water and bring to a boil. Reduce the heat to medium and simmer for 10 minutes. Drain the hot water and refill the saucepan with ice and cold water. Once the eggs are cool enough to handle, peel and halve the eggs. Pop out the yolks (save the whites for another use).6. In the bowl of a stand mixer fitted with the paddle attachment, beat the butter on medium speed until pale yellow and airy, 2 to 3 minutes. Add the hard-boiled egg yolks, confectioners' sugar, milk, vanilla, nutmeg, cloves and salt. Increase the mixer speed to medium-high and beat until the texture is thick and frostinglike, scraping down the sides of the bowl as needed, about 3 minutes. Turn off the mixer, remove the bowl from the stand and stir in the rum.7. Assemble the Florentines: Turn a cooled cookie over so the flat side faces up and spoon a dollop of frosting in the middle (alternatively, use a piping bag fitted with a small metal tip). Top with another cookie, flat-side down, and press to squeeze the frosting to the edges of the cookie. Place the assembled Florentines on a rimmed baking sheet and repeat with the remaining cookies and icing. Chill the sandwiches for 10 minutes to set the frosting before serving.Make ahead: The dough and the icing can be refrigerated in an airtight container or up to 3 days before baking.Storing: The baked Florentines can be stored in a loosely covered container at room temperature for up to 2 days before filling. Once filled, serve the Florentines immediately.
Read more: http://www.tastingtable.com/entry_detail/chefs_recipes/11888/Florentine_Cookie_Sandwiches_with_Eggnog_Icing_Recipe.htm#ixzz3LdDBHPiz
December 10, 2014
The 12 Days of Holiday Cookies: Day Three
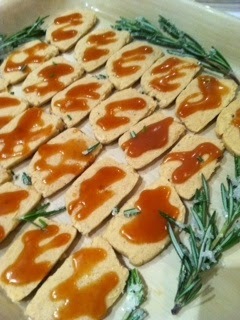
Browned Butter Cookies with Rosemary Caramel DrizzleIf you want to make a great gift from the kitchen, this is it. Browned butter gives these cookies an amazing flavor.Caramel = luxury, sort of like those Lexus commercials, but much less expensive.And sugared fresh rosemary branches add a little sparkle to your holiday cookie platter.These rich cookies underline one of the main concepts of next spring's Bake Happy. If a baked treat is full of flavor, you can feel satisfied nibbling one or two—not polishing off a platter full. Browning the butter with a vanilla bean adds a luscious flavor accentuated by a finishing aromatic drizzle of Rosemary Caramel , which you can make ahead and keep in the refrigerator.
Browned Butter Cookies with Rosemary Caramel DrizzleAdapted from my upcoming cookbook Bake Happy (May 2015).Makes about 48 cookies1 cup (227 g) unsalted butter, at room temperature 1 vanilla bean 1/2 cup (100 g) granulated sugar21/4 cups (281 g) unbleached all-purpose flour1 teaspoon salt1 cup Rosemary Caramel prepared (see below)In a heavy saucepan, melt the butter over medium-high heat. Slit the vanilla bean in half lengthwise and scrape out the seeds into the melted butter. Continue cooking until the butter bubbles, then turns medium brown with dark flecks, at around 250°F (120°C). Remove from the heat and let until opaque, about 15 minutes.Line 2 large baking sheets with parchment paper and set aside. Preheat the oven to 325°F (160°C).In a bowl with an electric mixer, cream the browned butter and sugar until fluffy, about 4 minutes. Add the flour and salt and beat until you have a stiff dough that comes together in a ball. Divide the dough in half. Form each half into a 16-inch long log. Cut each log into 1/4-inch slices. Place each slice about 1/2-inch apart on the prepared baking sheets.Bake for 25 to 28 minutes or until slightly firm to the touch. Let cool in the pans.Warm the caramel in the microwave and place in a plastic squeeze bottle. Drizzle each cookie generously with the warm caramel. The caramel will stay soft, so don’t stack cookies on top of each other.
So Happy TogetherRosemary + SugarSugared fresh rosemary adds a festive garnish to a platter of these rich cookies. Simply brush or dip the branches in beaten egg white or reconstituted powdered egg white, sprinkle with sparkling sugar, and let dry.

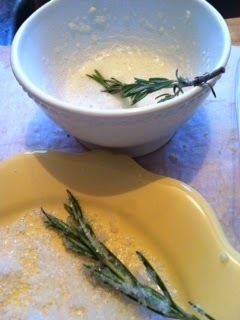
Rosemary CaramelWhat’s amazing is how such simple ingredients combine to make something so luxurious and versatile. When this caramel is warm, you can pour it like a sauce. When it’s warm, you can it on cookies or brownies; when it’s chilled, you can spread it on a cake layer. Artisan chocolatier Christopher Elbow makes toothsome truffles with this caramel.
Makes about 22/3 cups (650 ml)1 (3-inch) sprig fresh rosemary1 cup (250 ml) heavy cream2 cups (500 g) granulated sugar1 cup (250 ml) water12 tablespoons (170 g) unsalted butter
1 teaspoon fleur de sel or fine sea saltAdd one 3-inch sprig of fresh rosemary to the cream in a microwave-safe 4-cup measure or bowl. Microwave on high for 90 seconds. Cover and leave to infuse for 30 minutes. Remove the rosemary. Combine the sugar and water in a heavy-bottomed 3-quart saucepan over medium-high heat. Clamp a candy thermometer to the inside of the pan. As the sugar begins to melt, stir with a whisk or long-handled wooden spoon. When the syrup comes to a boil, stop stirring and remove the spoon. When bubbles that rise to the top get bigger and wider, the sugar is ready to turn color, usually in minutes after it first begins to boil. Have oven mitts and the remaining ingredients ready and be vigilant. The sugar mixture will turn pale tan, then get browner. Remove the caramel from the heat when it is dark amber and the candy thermometer registers 300°F.With oven mitts on to protect your hands from splatters, whisk in the butter until it has melted. The caramel will foam up, then subside. Wait for 30 seconds and then whisk in the cream and salt until the caramel is smooth. Let cool in the pan for several minutes, then serve right away or pour into a glass jar. The sauce will keep, refrigerated for up to 3 months. To reheat the caramel for later use, microwave on medium-high for 1 to 2 minutes or until warmed through.