
Beth Cato's Blog, page 45
May 29, 2019
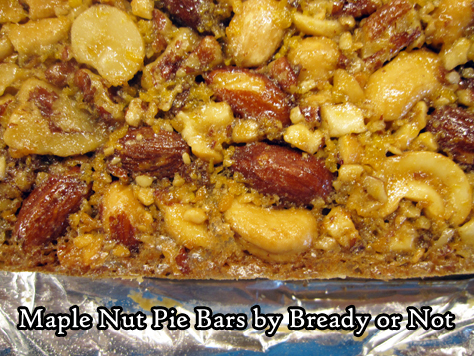
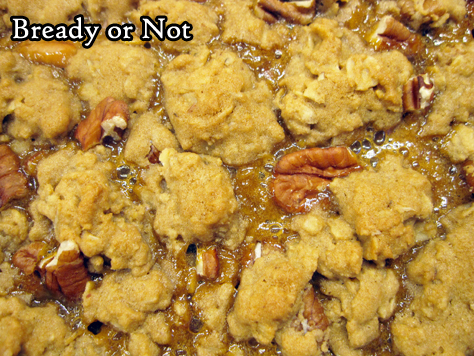
Bready or Not: Maple Nut Pie Bars
Bready or Not returns to the theme of maple goodness with these delicious Maple Nut Pie Bars.
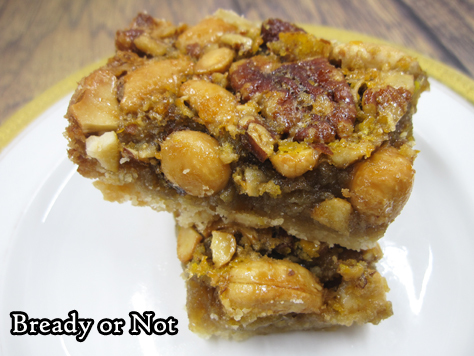
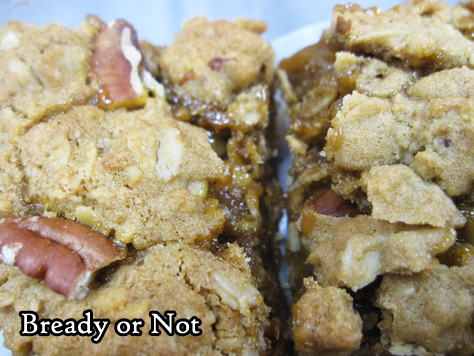
These are like pecan pie, but BETTER because they are portable and easily shared. And really, I love the variety of nuts.
That ‘easily shared’ bit is important, as this recipe bakes up an entire 13×9-inch dish of goodness. That’s quite a bounty to keep to oneself.
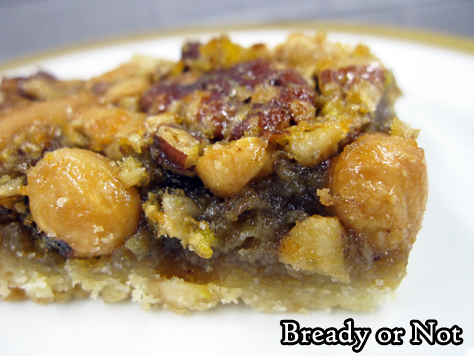
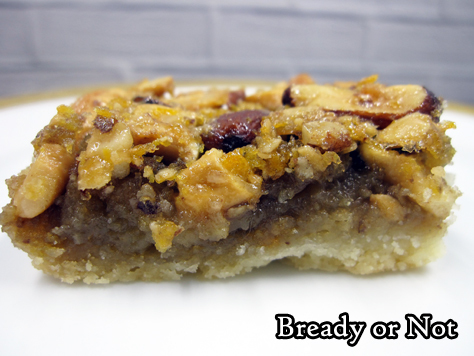
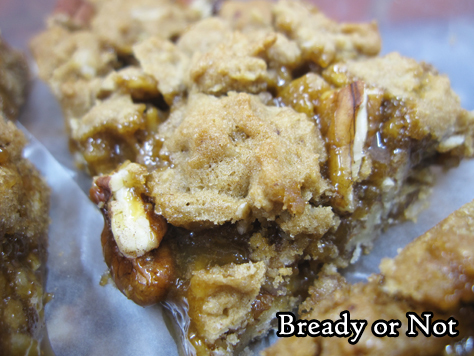
Each bar is exquisite, too: a shortbread base covered with sweetened mixed nuts. The variety of tastes and textures is perfection.

Store these in the fridge when all is done, and note that you can also freeze them for later. Make the goodness last even longer!
Modified from Brownies & Bars Magazine.
OM NOM NOM!\n","cookTime":"P","prepTime":"P","totalTime":"P"}
Bready or Not: Maple Nut Pie Bars
Save
These Maple Nut Pie Bars are similar to pecan pie, but in handy bar form. They consist of a shortbread crust topped with crunchy, sweet nuts. Perfect for the holidays and year-round.
1 1/2 cups all-purpose flour
2/3 cup confectioners' sugar
1/4 teaspoon salt
2/3 cup unsalted butter, room temperature
3 eggs, room temperature
1 1/4 cups chopped mixed nuts
3/4 cup brown sugar, packed
3/4 cup pure maple syrup
3 Tablespoons unsalted butter, melted
1/2 teaspoon maple flavoring (or substitute 1 teaspoon vanilla extract)
Preheat oven at 350-degrees. Line a 13x9 pan with foil and grease with nonstick spray or butter. Set aside.
In a medium bowl, stir together the flour, powdered sugar, and salt. Use a pastry blender or a knife and fork to cut in the butter until it resembles small crumbs. Evenly press into the bottom of the pan. Bake for about 20 minutes, until light brown.
As that bakes, make the filling. In a medium bowl, lightly stir the eggs. Add the mixed nuts, brown sugar, maple syrup, melted butter, and maple flavoring. Spread over the hot crust.
Bake for another 18 to 20 minutes, until top is golden and set. Cool in pan for several hours. Lift contents onto a cutting board using the foil and slice into bars.
Store with waxed paper between layers in a sealed container in fridge. Bars can also be frozen for later enjoyment.
OM NOM NOM!


May 23, 2019
What’s New in May
– The F is for Fairy anthology is out NOW! I wrote the story for the letter Z. Get the book in print or ebook.
– I can now say I’ll have stories in TWO Chicken Soup for the Soul books this year: Life Lessons from the Cat (released on May 14th) and It’s Beginning to Look a Lot like Christmas (October 14th).
– Future SF Issue 2 includes my story about a cat lady on the moon, “The Peculiar Gravity of Home.” Wulf Moon narrated a fantastic podcast version. Kirkus Reviews had incredibly nice things to say about it, too.
May 22, 2019
Bready or Not: Oreo Thins Cake Batter Blondies [cake mix]
I’m no baking snob. Cake mix has a place in my kitchen when I need quick-fix baked goods. This recipe for Oreo Thins Cake Batter Blondies is fantastic.
![Bready or Not: Oreo Thins Cake Batter Blondies [cake mix]](https://i.gr-assets.com/images/S/compressed.photo.goodreads.com/hostedimages/1558612395i/27559716.jpg)
I made a different variation of this back on my old LiveJournal lo those many years ago. In that one, I used regular Golden Oreos as Oreo Thins didn’t exist yet.
![Bready or Not: Oreo Thins Cake Batter Blondies [cake mix]](https://i.gr-assets.com/images/S/compressed.photo.goodreads.com/hostedimages/1558612395i/27559717.jpg)
Both styles of Oreos are great in this recipe. If you use Thins, use the entire package, chopped-up. For regular Oreos, use about 2 cups of chopped cookie.
There IS such a thing as too many Oreos in a recipe like this. They can overwhelm the batter and make everything (a delicious) crumbly mess when it’s cut. I speak from experience.
![Bready or Not: Oreo Thins Cake Batter Blondies [cake mix]](https://i.gr-assets.com/images/S/compressed.photo.goodreads.com/hostedimages/1558612395i/27559718.jpg)
Use whatever kind of Oreo you want here. I used Oreo Thins Salted Caramel when I took these pictures. Use Golden Oreos, regular Oreos, or any seasonal remix–and choose different color sprinkles to match!
![Bready or Not: Oreo Thins Cake Batter Blondies [cake mix]](https://i.gr-assets.com/images/S/compressed.photo.goodreads.com/hostedimages/1558612395i/27559719.jpg)
Sprinkles make everything better, right?
OM NOM NOM!\n","cookTime":"P","prepTime":"P","totalTime":"P"}
Bready or Not: Oreo Thins Cake Batter Blondies [cake mix]
Save
![Bready or Not: Oreo Thins Cake Batter Blondies [cake mix]](https://i.gr-assets.com/images/S/compressed.photo.goodreads.com/hostedimages/1558612395i/27559720.jpg)
This super-simple recipe uses cake mix to bake up a delicious dish of blondies. Use an entire package of Oreo Thins, whatever flavor you fancy (Salted Caramel is great if available)! Regular Oreos are also fantastic for this recipe, but use only about 2 cups of chopped Oreos or they will overwhelm the batter. Adding chocolate chips is an option, too, depending on the Oreos being used; with some kinds it may make the bars too sweet.
1 18.25-oz box yellow cake mix
1/4 cup canola oil
1 egg
1/3 cup milk or half and half
1 package Oreo Thins, crumbled
1/2 cup sprinkles
1/2 cup white chocolate or chocolate chips [optional]
Preheat oven at 350-degrees. Line a 13x9 dish with foil and apply nonstick spray or butter.
In a large bowl, mix together the cake mix, oil, egg, and milk. The batter should be thick. Fold in the Oreo Thins and sprinkles [and chocolate chips, if using].
Pour into pan and even out. Bake for 25 to 30 minutes, until middle passes toothpick test. Cool completely. Use foil to lift contents onto cutting board to slice into squares. Store in a sealed container.
OM NOM NOM!
May 15, 2019
Bready or Not: Slow Cooker Beef Chili
Make a big ol’ pot of meat with this recipe for Slow Cooker Beef Chili!
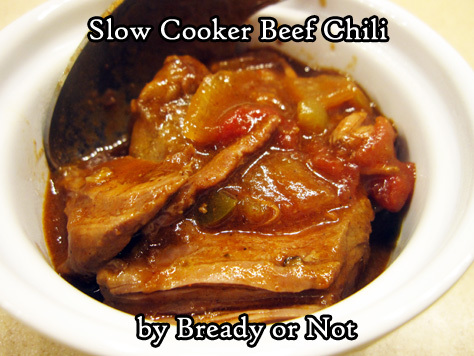
My husband loves a good, spicy chili. He does not like beans. This recipe is his favorite.
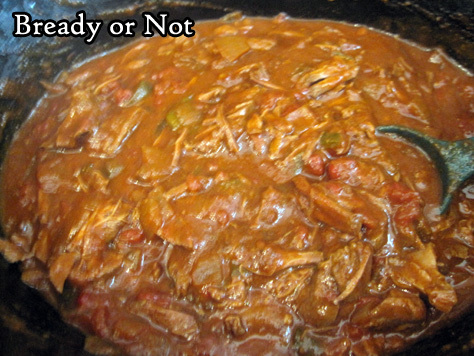
I find it simple to put together, too. The only fussy thing is taking the time to brown the meat, but I can typically do that in two batches.

There are several heat levels of Rotel-like canned tomatoes and chilies out there. There are also tomato sauce cans and boxes with added spice. In our case, I add a hefty sprinkle of a local Hatch New Mexican seasoning mix.
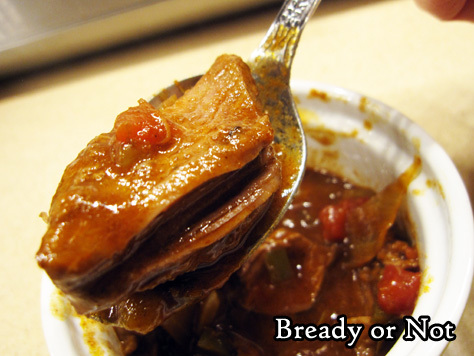
These make for great leftovers, too, and you can even throw some in a freezer bag to heat up later on!

Modified from The Everything Soup, Stew, & Chili Cookbook edited by Belinda Hulin.
OM NOM NOM\n","cookTime":"P","prepTime":"P","totalTime":"P"}
Bready or Not: Slow Cooker Beef Chili
Save
This all beef, no bean chili recipe makes a big pot of delicious chili! Make it as spicy as you want by using different types of Rotel and additional spices and sauces. Modified from The Everything Soup, Stew, & Chili Cookbook edited by Belinda Hulin.
2 to 2 1/2 pounds beef stew meat or chuck roast, chopped into 1-inch cubes
2 Tablespoons vegetable oil
1 whole onion, diced
1 green bell pepper, cored and diced
2 Tablespoons all-purpose flour
4 Tablespoons chili powder, hot or otherwise
1 teaspoon ground cumin
1 teaspoon salt
1/2 teaspoon garlic powder
1 10-ounce can tomatoes and green chilies, like Rotel
14-15 ounces canned or boxed tomato sauce
additional spices or sauces, to preference
In a skillet or wok, brown beef in vegetable oil over high heat. Use a slotted spoon to transfer beef to the crock pot. Add onion to pan and cook for just a few minutes to soak up the drippings. Add onion to the slow cooker, followed by the green bell pepper.
In a small bowl, combine the flour, chili powder, cumin, and salt. Sprinkle over the meat. Pour the cans of chili and tomatoes and the tomato sauce over the meat. Stir with a large spoon.
Place lid on slow cooker and cook on low for 6 to 8 hours, or on high for 3 to 4 hours. Turn heat to low, and break the meat into smaller pieces. It should flake apart under little pressure. Taste and adjust seasonings as desired.
Eat and enjoy. Keep leftovers in fridge up to 3 more days, or freeze for later enjoyment.
OM NOM NOM

May 8, 2019
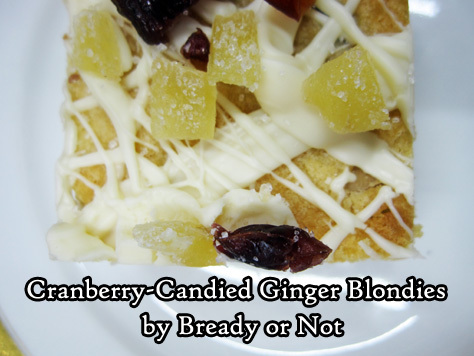
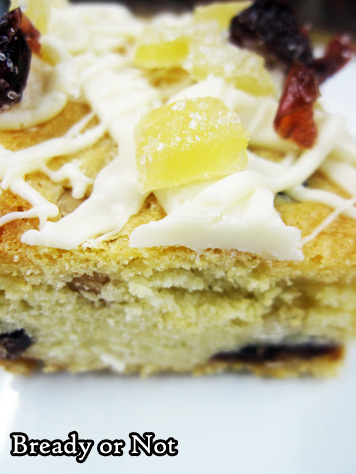
Bready or Not: Cranberry-Candied Ginger Blondies with Macadamia Nuts
Cranberry-Candied Ginger Blondies with Macadamia Nuts! The name is a mouthful, but I assure you, the goodies make for delicious mouthfuls, too.
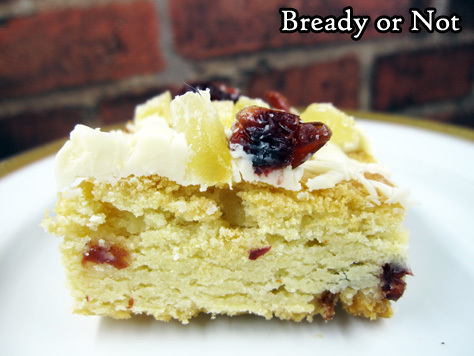
If the basic ingredients sound familiar, they should. I did a similar-sounding recipe just recently, but you’ll notice, they don’t look the same–nor do they taste the same, but both are excellent.
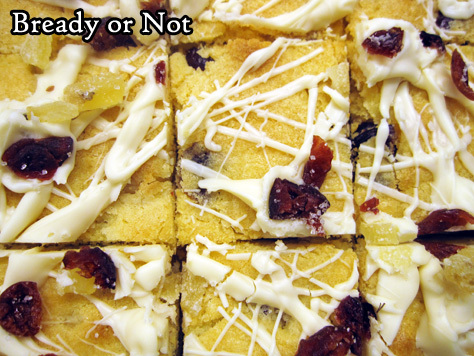
This recipe has a different sort of soft chewy texture, plus macadamia nuts. Macadamia nuts make almost everything better, right?
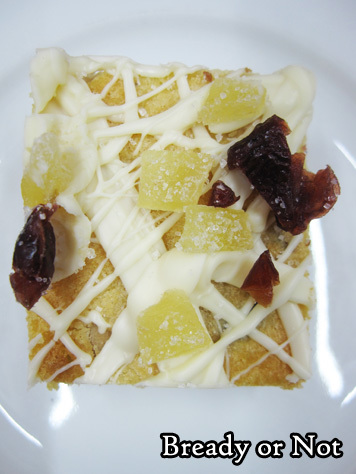
I think these look especially pretty because of the topping as well. You have to sprinkle on the cranberry and ginger bits fast at the end to make sure they stick in the melted white chocolate.
It’d be a tragedy if the pieces fell off. Then you have to eat them all. Darn.
Modified from Brownies & Bars Magazine.
OM NOM NOM!\n","cookTime":"P","prepTime":"P","totalTime":"P"}
Bready or Not: Cranberry-Candied Ginger Blondies with Macadamia Nuts
Save
These soft, chewy bars include dried cranberries, crystallized ginger, and macadamia nuts inside and out.
Blondies
1 bag (about 11 ounces) white chocolate chips
1/2 cup unsalted butter, room temperature
3 eggs
1/2 cup white sugar
1 3/4 cup all-purpose flour
1 teaspoon vanilla extract
1 cup macadamia nuts, coarsely chopped
1/2 cup dried cranberries
2 Tablespoons chopped candied ginger
Topping
4 ounces white chocolate chips
1 Tablespoon shortening
2 Tablespoons chopped candied ginger
1 Tablespoon dried cranberries
Preheat oven at 350-degrees. Line a 13x9 pan with foil and apply nonstick spray or butter.
In the microwave or in a saucepan on the stovetop, at low heat warm the bag of white chocolate chips until melted. In the microwave, that means brief bursts at low power and stirring well between each pass--watch it, as it can burn fast! Stir in the butter until it's melted. Set aside to cool for 15 minutes.
Whisk the eggs and sugar into the white chocolate mix followed by the flour and vanilla. Fold in the macadamia nuts, cranberries, and candied ginger. Spread evenly in the ready pan.
Bake for 28 to 30 minutes, until top is light brown and center passes the toothpick test. Cool pan completely.
In the microwave or in a saucepan on the stovetop, melt the white chocolate and shortening over low heat until smooth. Drizzle over the bars. Immediately sprinkle the remaining ginger and cranberries over the top and gently tap them into the drizzled chocolate. Let set at room temperature or fridge.
Use the foil to lift contents onto cutting board. Slice into bars. Store in sealed containers with waxed paper between the layers.
OM NOM NOM!
May 7, 2019
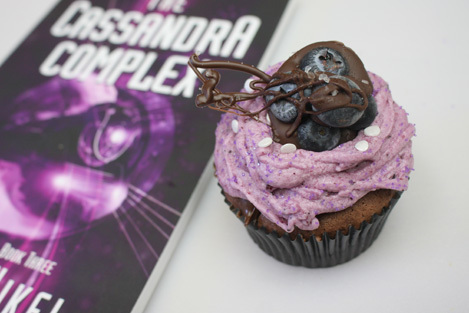
Bready or Not Guest: CASSANDRA COMPLEX author Wendy Nikel with Chocolate Blueberry Cupcakes
I’m happy to welcome back author Wendy Nikel for the release of the 3rd book in her time-traveling novella series with World Weaver Press. The Cassandra Complex is out TODAY. Be sure to print out her previous recipes for Continuum Coffee Cupcakes and Grandmother Paradox Cherry Cupcakes.
The third book in my Place in Time novella series, THE CASSANDRA COMPLEX, is now out into the world, which means it is once again time to make some celebration cupcakes!
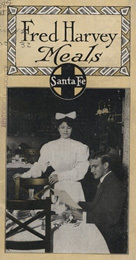 My original plan was to use one of the original Harvey Girls recipes, which have been collected online by Stephen Fried in the Harvey Girls Cookbook Project. The Harvey Girls were waitresses who worked at one of the “eating houses” (and later dining cars) of Fred Harvey, a restaurant pioneer of the late 19th and early 20th centuries. His goal was to serve good food to people traveling west on the new railroad lines, and he was very successful in doing so, thanks in part to the thousands of women who came out west to serve his food – including the protagonist of my story, Cass.
I soon found out, though, that in trying to bake from a classic recipe like this one for Homemade Blueberry Cake, I was biting off a bit more than I could chew. Even after doing all the math to figure out how much 5 ounces of sugar is in tablespoons and how much 1 gill of milk is, my dough didn’t rise as it was supposed to, and I ended up with a sticky mess.
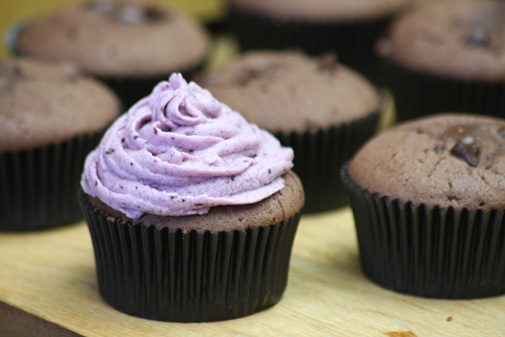
It was time for Plan B. I pulled out a tried-and-true cupcake recipe, made some tweaks, and created a chocolate cupcake, topped with blueberry frosting and fresh chocolate-covered blueberries for my own version of a blueberry cake.
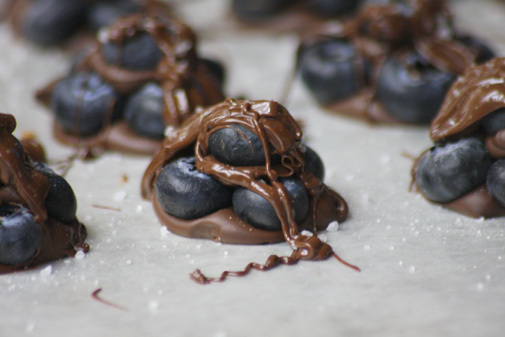
I started by melting down some chocolate chips with a tiny bit of coconut oil. I created my garnishes by dropping a nickel-sized dot of chocolate on waxed paper, then stacking five blueberries together and sprinkling with sea salt before throwing them in the freezer. These are some of my favorite snack treats, so I made a couple extra.
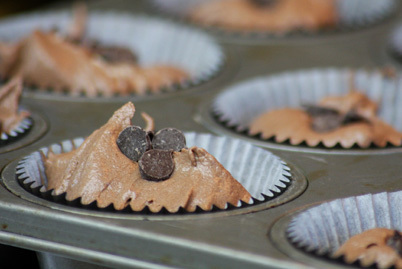
After that, I started on the cupcakes, mixing the dry ingredients (flour, cocoa, and baking powder) in one bowl and the wet ingredients (sugar, butter, and eggs) in another before combining them together, along with some milk. These then went in cupcake trays with a couple chocolate chips on top, and went into the oven for 16 minutes at 350 degrees.
While those were cooling, I made up my blueberry frosting. I started by blending a cup of butter until it was smooth and then alternated adding powdered sugar and blueberry pie filling until I had the consistency I wanted. I loved the color the blueberries turned the frosting – a perfect match for my new book!
Then, it was time for my favorite part: decorating! I added two kinds of sprinkles to the top.
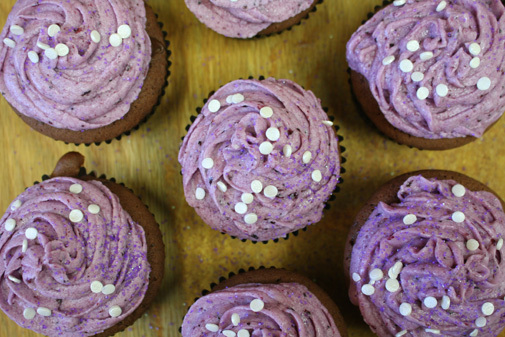
And, for the final touch, I pulled my frozen chocolate-covered blueberries out of the oven and plopped them on top. And there you have it: a tasty treat for an afternoon of train riding, reading, or traveling through time.
About The Cassandra Complex:
Cass is a 22nd century university student who – like most young adults – has always believed her parents were a bit stuck in the past. But on her eighteenth birthday she learns exactly how true this is: not only are her parents time travelers, living in an era different than either was born in, but now, to ensure that history plays out as it’s supposed to, she must travel to the year 1914 to live out her adult life.
Cass isn’t the type, though, to just sit back and watch while all the tragic events she’s learned about in her history courses play out in front of her. Not when she’s the only one in the world with the foreknowledge – and determination – to change it.
The Cassandra Complex: Amazon | Barnes & Noble | iTunes/Apple Books | World Weaver Press
About the author:
Wendy Nikel is a speculative fiction author with a degree in elementary education, a fondness for road trips, and a terrible habit of forgetting where she’s left her cup of tea. Her short fiction has been published by Analog, Nature: Futures, Podcastle, and elsewhere. Her time travel novella series, beginning with The Continuum, is available from World Weaver Press. For more info, visit wendynikel.com
THE CASSANDRA COMPLEX Chocolate Blueberry Cupcakes by Wendy Nikel
Save
A chocolate cupcake with blueberry buttercream frosting, inspired by THE CASSANDRA COMPLEX by Wendy Nikel
Cupcakes:
1 2/3 cup all-purpose flour
1/3 cup cocoa powder
1 teaspoon baking powder
1 cup sugar
1 cup (2 sticks) butter
4 eggs
3 Tablespoons milk
Chocolate chips
Frosting:
1 cup (2 sticks) butter
4 cups powdered sugar
6 Tablespoons blueberry pie filling
Topping:
Blueberries
Melted chocolate chips
Preheat oven to 350 degrees F.
Sift together flour, cocoa, and baking powder.
In separate bowl, blend sugar and butter.
Add eggs to sugar mixture one at a time.
Gradually add the dry mixture and milk into the sugar mixture until well blended.
Fill cupcake liners half full, add a few chocolate chips on the top, and bake for 15-17 minutes. Let cool.
Melt chocolate chips and make nickel-sized dots on waxed paper. Create a pyramid of blueberries on each dot, with 4 berries on the bottom and 1 on the top. Drizzle melted chocolate over them, sprinkle with sea salt, and freeze.
Beat butter until creamy. Alternate adding 1c powdered sugar and 2T pie filling, mixing well after each addition, until all ingredients are mixed in.
After cupcakes are cool, frost and top with frozen blueberries and sprinkles. Enjoy with a good book!
May 3, 2019
Book Blog: The Library of Ever by Zeno Alexander
I review everything I read and post reviews on Goodreads and LibraryThing. That’s not enough. Good books are meant to be shared. Therefore, I’m spotlighting some of my favorite reads here on my site.
The Library of Ever by Zeno Alexander
out now; Indiebound, B&N, and Amazon

Oh my goodness, I adored The Library of Ever. This book is everything a cozy middle grade book should be. I wish I could go back in time and press it into the hands of my ten-year-old self with a conspiratorial wink.
Lenora is ignored by her wealthy parents and her nanny, but this comes in useful sometimes–like at the library. She makes her escape to the children’s section where she confronts a man in a bowler hat who is trying to tell a young boy that books on science are too advanced for him. After seeing the boy get to the books he wants, a fantastic archway appears in what had been a blank wall. She walks through, and finds the Library of Ever.
I envisioned her adventures in the library like a Hiyao Miyazaki anime. Everything is fantastical and weird, yet within this world, absolutely believable. Lenora is quickly dubbed a library worker of low rank, bestowed a badge and everything, and happily goes to work. As she helps patrons–jumping ahead in time to resolve a calendar issue, wandering a massive globe and befriending whales and penguins (and finding out some purported facts about the longest town name and highest mountain aren’t true)–her rank advances, as do her responsibilities.
While the book is sure fun, there’s also a powerful message behind everything about the dangers of censorship and the power of knowledge. The men in bowler hats are a threatening force. As Lenora is scolded at one point, “I thought you were wise enough to understand that children must be discouraged from asking questions that will make them curious and fretful. Perhaps I overestimated you. After all, you’re just a child yourself.”
“Maybe,” said Lenora, with equal frost. “But I’m also a librarian. And I’m not going to hide the truth from anyone.”
Just typing that up again gives me chills. This book is powerful. It’s charming. It’s an inspiration. Plus, it’s hilarious. Sure, there’s a message, but it’s wrapped up in whimsy and joy. This would be a great book to read aloud to a group or class. I found it to be a fast read, too; I zoomed through in about 45 minutes.
May 1, 2019
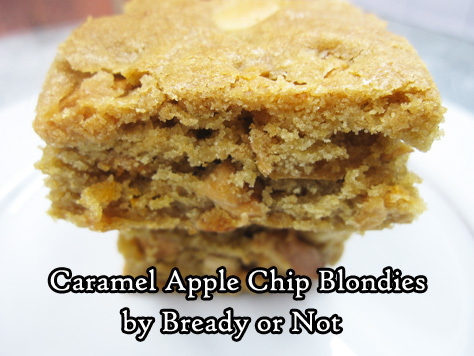
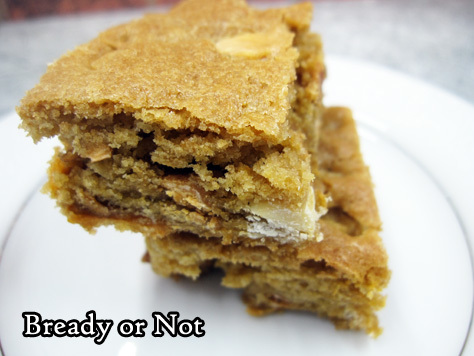
Bready or Not Original: Caramel Apple Chip Blondies
Caramel Apple Chip Blondies! This recipe is what happens for you buy a big bag of apple chips at Costco and your kid doesn’t like them.
Apple chips are pretty expensive at the grocery store, so buying them at a big membership club is a great way to get them. They are seriously delicious, crisp like potato chips but made of pure apples.
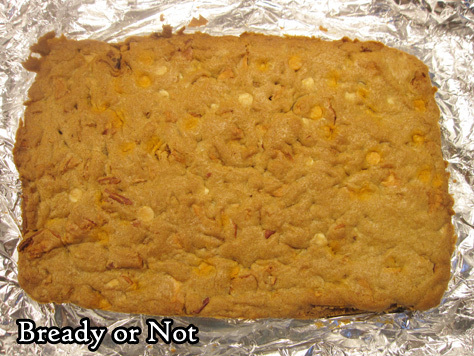
When baking with apple chips, break them into small pieces. They will soften up as they bake, taking on a raisin-like chewy texture with loads of apple flavor. Larger pieces will be even chewier, though, and get caught on the knife when slicing.
The chips are easy to break up. You can do it with your fingers or throw them into a sealed sandwich bag and smash them with a rolling pin of the bottom of a heavy glass.
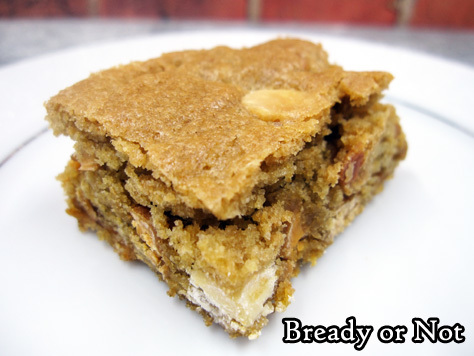
In the end, these blondies are sweet and chewy with a mild but very present apple flavor throughout that’s complemented nicely by the caramel and white chocolate chips.

OM NOM NOM!\n","cookTime":"P","prepTime":"P","totalTime":"P"}
Bready or Not Original: Caramel Apple Chip Blondies
Save
Apple chips are crisp like potato chips. For this recipe, break them small, to the size of raisins. Otherwise, larger pieces stay chewier and will be more likely to catch on the knife when the bars are sliced.
2 1/8 cups all-purpose flour
3/4 teaspoon sea salt
3/4 teaspoon baking soda
12 tablespoons unsalted butter (1 1/2 cubes), room temperature
1 cup light brown sugar, packed
1/2 cup granulated sugar
2 large eggs, room temperature
2 teaspoons vanilla extract
1/2 cup white chocolate chips
1/2 cup caramel chips
1 1/2 cup crumbled apple chips (Bare Brand recommended)
Preheat oven to 350-degrees. Line a 9×13-inch baking pan with aluminum foil and apply nonstick cooking spray.
In a medium bowl, whisk together flour, salt, and baking soda. Set aside.
In a large bowl, mix butter and sugars together until fluffy. Add eggs and vanilla. Slowly add dry ingredients. Stir in the white chocolate and caramel chips followed by the apple chips.
Pour blondie dough into the prepared pan and smooth out with uneven spatula.
Bake for 28 to 30 minutes or until the top of the blondies are light golden brown and the middle passes the toothpick test. Remove from oven and cool on a wire rack.
Once they are cool, use foil to lift blondies onto cutting board to slice into bars.
OM NOM NOM!

April 24, 2019
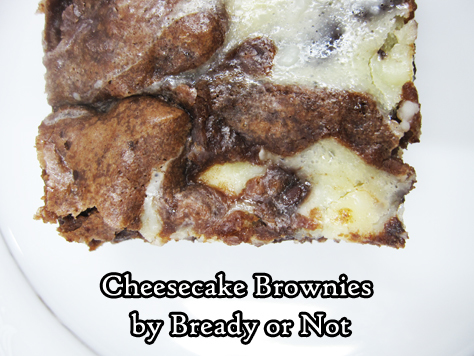
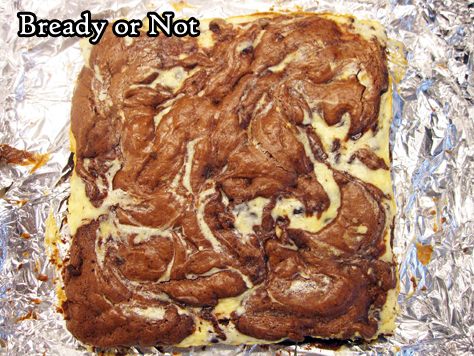
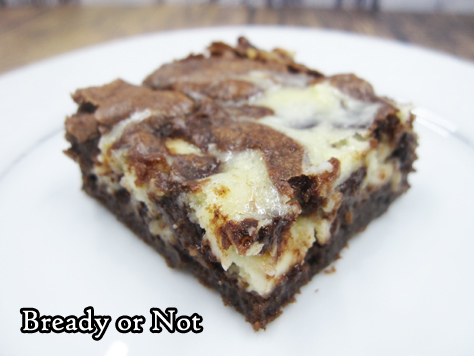
Bready or Not: Cheesecake Brownies
Cheesecake Brownies. Beautiful to behold. Delicious to eat.
I’m not a cheesecake person. But the pairing of chocolate and cheesecake? That makes it work.
This recipe is all about that balance of different kinds of sweetness. The addition of semisweet chocolate chips complements both and adds a different texture, too.
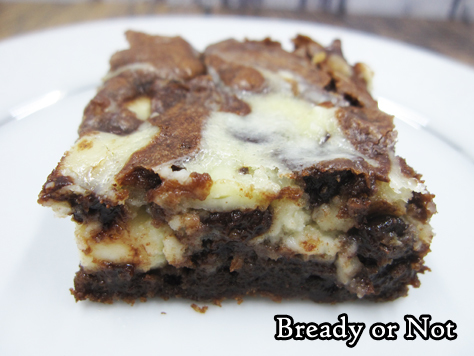
I have to say, I love the swirl effect on the top of these brownies. There’s something especially pleasing about food that looks as amazing as it tastes.
If you want a similar, stronger (and more expensive) pairing, my Swirled Goat Cheese Brownies will also interest you.

Modified from All Recipes Magazines, November 2017.
OM NOM NOM!\n","cookTime":"P","prepTime":"P","totalTime":"P"}
Bready or Not: Cheesecake Brownies
Save
This take on a classic pairs brownies with rich cream cheese. The semisweet chocolate chips throughout complement in a delicious way.
1 (8 ounce) package cream cheese, softened
3/4 cup white sugar, divided
3 eggs
2 cups semisweet chocolate chips, divided
1/4 cup (half cube) unsalted butter
2/3 cup all-purpose flour
1/2 teaspoon baking powder
1/4 teaspoon salt
Preheat oven at 350-degrees. Line an 8x8 or 9x9 pan with heavy foil and apply butter or nonstick spray.
Beat together cream cheese, 1/4 cup sugar, and 1 egg until fairly smooth; some small chunks are fine. Stir in 1 cup chocolate chips.
In a microwave safe bowl, heat the butter and remaining 1 cup chocolate chips in brief bursts until fully melted and smooth; watch it carefully and stir well between each burst. Stir in the remaining 1/2 cup sugar, followed by the 2 eggs, flour, baking powder, and salt.
Pour half the chocolate batter into the ready pan and spread into an even layer. Gently spread the cream cheese batter on top. Drop dollops of the rest of the chocolate batter on top. Use a butter knife or narrow spatula to swirl the layers together for a marbled effect.
Bake until the top is crinkled and edges are pulling away from the sides of the pan, about 25 to 30 minutes. Let cool at room temperature for an hour, then stash in the fridge for another few hours to completely cool.
Use the foil to lift the contents onto a cutting board to slice into bars. Store in a sealed container in fridge, waxed paper between stacked layers to prevent stocking, for up to three days, or freeze for later enjoyment.
OM NOM NOM!
April 17, 2019
Bready or Not: Cappuccino-Caramel Oat Bars
Cappuccino-Caramel Oat Bars are essentially a casserole-sized platter of delicious homemade candy bars. That is reason enough to make them.
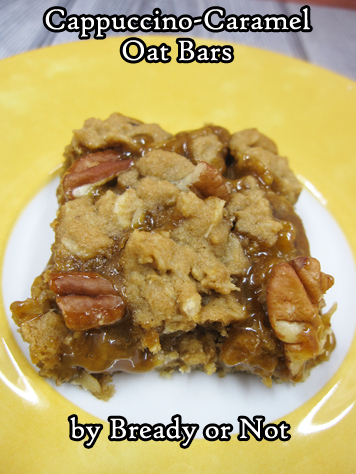
These are simultaneously chewy (from the oats), crunchy (because pecans), and sweet (caramel).
Oh yeah, then there’s the coffee flavor that is imbued throughout every bite. I don’t like drinking coffee, but espresso powder is sheer magic in baked goods.

Needless to say, these bars are perfect paired with a cup or coffee or tea.
Plus, if the number of bars seems excessive, the leftovers can be frozen. Just freeze and store them between waxed papers layers so you can easily thaw as many as you’d like at a time.
Modified from 100 Best Cookies Magazine.
OM NOM NOM!\n","cookTime":"P","prepTime":"P","totalTime":"P"}
Bready or Not: Cappuccino-Caramel Oat Bars
Save
These Cappuccino-Caramel Oat Bars are essentially a casserole-sized platter of delicious homemade candy bars with the distinct flavor of coffee throughout.
3 cups rolled (old fashioned) oats
2 1/3 cups all-purpose flour
1 1/2 cup chopped pecans, divided
1 teaspoon baking soda
1/4 teaspoon salt
1 cup (2 sticks) unsalted butter, softened
2 cups brown sugar, packed
2 eggs
1 Tablespoon instant coffee crystals or espresso powder
2 teaspoons vanilla extract
3/4 cup jarred caramel
Preheat oven at 350-degrees. Line a 13x9 pan with foil and apply butter or nonstick spray.
In a medium bowl, stir together oats, flour, 1 cup of pecans, baking soda, and salt. Set aside.
In a big mixing bowl, beat the butter until creamy, then add brown sugar. Follow up with the eggs, coffee/espresso powder, and vanilla. Carefully stir in the dry ingredients; it looks like a lot, but it will fit in the pan! Reserve 2 cups of the dough for the topping.
Spread the bulk of the oat mixture in the pan. Using floured hands or waxed paper and a heavy glass, press down the mix to form a solid even crust. Spread the caramel topping over it, bringing it to within 1/4-inch of the edges. Dollop the reserved oat mixture over the top, along with the remaining 1/2 cup pecans.
Bake for 20 to 25 minutes, until the edges are set. Cool completely in pan before using the foil to lift it onto a cutting board to slice into bars. Store in sealed containers with parchment or waxed paper between the layers. Bars can also be frozen.
OM NOM NOM!


