
Mary Quattlebaum's Blog, page 29
March 18, 2013
POETRY FRIDAY FOR POETRY MONTH
by Jacqueline Jules
 The
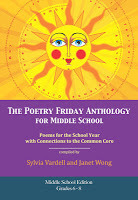
Poetry Friday Anthology for Middle School
is here! And just in time for April and Poetry Month. This lively compendium of poetry expertly selected by Janet Wong and Sylvia Vardell has poems by 71 poets including Jane Yolen, Lee Wardlaw, Joyce Sidman, Marilyn Singer, J. Patrick Lewis, Jack Prelutsky, and Nikki Grimes. I am honored to be included among such esteemed poets, along with fellow Pencil Tips blogger, Mary Quattlebaum. Like the K-5 edition of The Poetry Friday Anthology, the middle school edition has a poem and quick lesson for every week of the school year. Also included are tips for sharing poetry in the classroom, quotes about poetry, and the Common Core Standards for grades, 6, 7, and 8. Having all this information in one book is a great timesaver for busy teachers. And there are so many poems inside which could serve as models to inspire student writing. In “Advice to Rapunzel,” Eileen Spinelli warns this fairy tale princess to “Be cautious and wise/when you let down your hair.” After reading this poem aloud, you could challenge your students to write their own poem to a fairy tale character. Julie Larios’ poem “The Perfect Day” or Irene Latham’s “Biking Along White Rim Road” could jumpstart student poems about a special day outdoors with a friend. And there is a menagerie of wonderful pet poems to serve as inspiration for students to write about their own beloved animals. Many of the poems in this book are breath-taking —excellent demonstrations of the quote on the back cover by Ralph Waldo Emerson who said, “Poetry teaches us the power of a few words.” Teachers might find themselves putting this anthology by their bedside for pleasure reading.Equally impressive are the “Take 5 Activities” accompanying each poem. They include tips for introducing the poem’s subject matter, reading it aloud, and pairing it with other related poems. Particularly helpful is Tip #4 which highlights a specific poetic device used in the poem. These tips also point out the structure of individual poems and how the poet used line breaks to convey meaning. Teachers looking for quick examples of alliteration, onomatopoeia, metaphor, or personification only need flip through a few pages before finding exactly what they need. As the introduction to
Poetry Friday for Middle School
eloquently states, poetry is a wonderful vehicle for introducing vocabulary, figurative language, sensory details, and imagery. It stimulates the imagination and expresses strong emotion. What’s more, poems can be revisited, providing the reader with new insights and emotional connections. All of these add up to compelling reasons why every teacher should consider adding a weekly Poetry Break to his or her curriculum. Check out The Poetry Friday Anthologies to find out exactly how.
The
Poetry Friday Anthology for Middle School
is here! And just in time for April and Poetry Month. This lively compendium of poetry expertly selected by Janet Wong and Sylvia Vardell has poems by 71 poets including Jane Yolen, Lee Wardlaw, Joyce Sidman, Marilyn Singer, J. Patrick Lewis, Jack Prelutsky, and Nikki Grimes. I am honored to be included among such esteemed poets, along with fellow Pencil Tips blogger, Mary Quattlebaum. Like the K-5 edition of The Poetry Friday Anthology, the middle school edition has a poem and quick lesson for every week of the school year. Also included are tips for sharing poetry in the classroom, quotes about poetry, and the Common Core Standards for grades, 6, 7, and 8. Having all this information in one book is a great timesaver for busy teachers. And there are so many poems inside which could serve as models to inspire student writing. In “Advice to Rapunzel,” Eileen Spinelli warns this fairy tale princess to “Be cautious and wise/when you let down your hair.” After reading this poem aloud, you could challenge your students to write their own poem to a fairy tale character. Julie Larios’ poem “The Perfect Day” or Irene Latham’s “Biking Along White Rim Road” could jumpstart student poems about a special day outdoors with a friend. And there is a menagerie of wonderful pet poems to serve as inspiration for students to write about their own beloved animals. Many of the poems in this book are breath-taking —excellent demonstrations of the quote on the back cover by Ralph Waldo Emerson who said, “Poetry teaches us the power of a few words.” Teachers might find themselves putting this anthology by their bedside for pleasure reading.Equally impressive are the “Take 5 Activities” accompanying each poem. They include tips for introducing the poem’s subject matter, reading it aloud, and pairing it with other related poems. Particularly helpful is Tip #4 which highlights a specific poetic device used in the poem. These tips also point out the structure of individual poems and how the poet used line breaks to convey meaning. Teachers looking for quick examples of alliteration, onomatopoeia, metaphor, or personification only need flip through a few pages before finding exactly what they need. As the introduction to
Poetry Friday for Middle School
eloquently states, poetry is a wonderful vehicle for introducing vocabulary, figurative language, sensory details, and imagery. It stimulates the imagination and expresses strong emotion. What’s more, poems can be revisited, providing the reader with new insights and emotional connections. All of these add up to compelling reasons why every teacher should consider adding a weekly Poetry Break to his or her curriculum. Check out The Poetry Friday Anthologies to find out exactly how.
www.jacquelinejules.com
 The
Poetry Friday Anthology for Middle School
is here! And just in time for April and Poetry Month. This lively compendium of poetry expertly selected by Janet Wong and Sylvia Vardell has poems by 71 poets including Jane Yolen, Lee Wardlaw, Joyce Sidman, Marilyn Singer, J. Patrick Lewis, Jack Prelutsky, and Nikki Grimes. I am honored to be included among such esteemed poets, along with fellow Pencil Tips blogger, Mary Quattlebaum. Like the K-5 edition of The Poetry Friday Anthology, the middle school edition has a poem and quick lesson for every week of the school year. Also included are tips for sharing poetry in the classroom, quotes about poetry, and the Common Core Standards for grades, 6, 7, and 8. Having all this information in one book is a great timesaver for busy teachers. And there are so many poems inside which could serve as models to inspire student writing. In “Advice to Rapunzel,” Eileen Spinelli warns this fairy tale princess to “Be cautious and wise/when you let down your hair.” After reading this poem aloud, you could challenge your students to write their own poem to a fairy tale character. Julie Larios’ poem “The Perfect Day” or Irene Latham’s “Biking Along White Rim Road” could jumpstart student poems about a special day outdoors with a friend. And there is a menagerie of wonderful pet poems to serve as inspiration for students to write about their own beloved animals. Many of the poems in this book are breath-taking —excellent demonstrations of the quote on the back cover by Ralph Waldo Emerson who said, “Poetry teaches us the power of a few words.” Teachers might find themselves putting this anthology by their bedside for pleasure reading.Equally impressive are the “Take 5 Activities” accompanying each poem. They include tips for introducing the poem’s subject matter, reading it aloud, and pairing it with other related poems. Particularly helpful is Tip #4 which highlights a specific poetic device used in the poem. These tips also point out the structure of individual poems and how the poet used line breaks to convey meaning. Teachers looking for quick examples of alliteration, onomatopoeia, metaphor, or personification only need flip through a few pages before finding exactly what they need. As the introduction to
Poetry Friday for Middle School
eloquently states, poetry is a wonderful vehicle for introducing vocabulary, figurative language, sensory details, and imagery. It stimulates the imagination and expresses strong emotion. What’s more, poems can be revisited, providing the reader with new insights and emotional connections. All of these add up to compelling reasons why every teacher should consider adding a weekly Poetry Break to his or her curriculum. Check out The Poetry Friday Anthologies to find out exactly how.
The
Poetry Friday Anthology for Middle School
is here! And just in time for April and Poetry Month. This lively compendium of poetry expertly selected by Janet Wong and Sylvia Vardell has poems by 71 poets including Jane Yolen, Lee Wardlaw, Joyce Sidman, Marilyn Singer, J. Patrick Lewis, Jack Prelutsky, and Nikki Grimes. I am honored to be included among such esteemed poets, along with fellow Pencil Tips blogger, Mary Quattlebaum. Like the K-5 edition of The Poetry Friday Anthology, the middle school edition has a poem and quick lesson for every week of the school year. Also included are tips for sharing poetry in the classroom, quotes about poetry, and the Common Core Standards for grades, 6, 7, and 8. Having all this information in one book is a great timesaver for busy teachers. And there are so many poems inside which could serve as models to inspire student writing. In “Advice to Rapunzel,” Eileen Spinelli warns this fairy tale princess to “Be cautious and wise/when you let down your hair.” After reading this poem aloud, you could challenge your students to write their own poem to a fairy tale character. Julie Larios’ poem “The Perfect Day” or Irene Latham’s “Biking Along White Rim Road” could jumpstart student poems about a special day outdoors with a friend. And there is a menagerie of wonderful pet poems to serve as inspiration for students to write about their own beloved animals. Many of the poems in this book are breath-taking —excellent demonstrations of the quote on the back cover by Ralph Waldo Emerson who said, “Poetry teaches us the power of a few words.” Teachers might find themselves putting this anthology by their bedside for pleasure reading.Equally impressive are the “Take 5 Activities” accompanying each poem. They include tips for introducing the poem’s subject matter, reading it aloud, and pairing it with other related poems. Particularly helpful is Tip #4 which highlights a specific poetic device used in the poem. These tips also point out the structure of individual poems and how the poet used line breaks to convey meaning. Teachers looking for quick examples of alliteration, onomatopoeia, metaphor, or personification only need flip through a few pages before finding exactly what they need. As the introduction to
Poetry Friday for Middle School
eloquently states, poetry is a wonderful vehicle for introducing vocabulary, figurative language, sensory details, and imagery. It stimulates the imagination and expresses strong emotion. What’s more, poems can be revisited, providing the reader with new insights and emotional connections. All of these add up to compelling reasons why every teacher should consider adding a weekly Poetry Break to his or her curriculum. Check out The Poetry Friday Anthologies to find out exactly how.www.jacquelinejules.com


March 11, 2013
MYSTERY WRITING
by Mary Amato
 Writing a mystery can be a challenge for a professional writer, let alone a beginner. Not only do you have to write a story, but you have to keep track of clues. A fourth grade teacher brought me into her classroom to work on mystery writing with her students. In preparation, she shared with me the curriculum guide for this unit, which I felt was too complex.
I simplified the unit, asking students to focus on a theft (which made the action concrete), and using only the characters of villain, sleuth, and one suspect that turns out to be innocent.
Begin by having students create a graphic organizer: Who is the criminal/villain? What does your criminal/villain steal? Who is your sleuth/hero? Who is the suspect who turns out to be innocent?
Next, have your students write a short outline of what happens in each scene:
Scene 1: Describe the villain committing the theft.Scene 2: Describe the sleuth discovering that X has been stolen.Scene 3: Describe the sleuth searching for clues. A clue must lead the sleuth to believe that the suspect is guilty.Scene 4: Describe the sleuth interviewing the suspect. The suspect should have an alibi.Scene 5: Describe the sleuth setting a trap for another theft.Scene 6: Describe the villain trying to commit this left, and the sleuth catching the criminal in the act.
Having a simple structure allows students to focus on writing and character development.
After your students have outlined the story, then let them write it!
Here's my video showing my process for writing Edgar Allan's Official Crime Investigation Notebook.
www.maryamato.com
March 4, 2013
STORYTELLING IN 3-D
by Joan Waites
This week I will complete a five week artist-in-residence program at an area school. The program has involved working with four fourth grade classes on a large Before the first day, I wasn’t exactly sure how I would be able to work with 25-28 children at one time. Each would have to have something to work on, and the project would need to be completed in about a total of five hours time.
I decided to present the project as a “story” each class would tell, using three dimensional objects. When someone looked at the box years from now, what would they learn about this particular class and what memories they created during spring, summer, winter and fall.
We started the first day with a planning session. Each student was given a folder to write down ideas, make a list of materials to bring in, and paper to do a rough sketch or two of what they thought the display should look like. Next, each student had a chance to present their ideas to the class. About two or three similar themes seemed to emerge with each class such as the Halloween parade, the winter music concert, the last day of school, or the spring carnival. After a vote was taken on what theme the class wanted to work with, we proceeded to break up into five groups of about five children each.
I assigned each group a different portion of the display to work on. We had the “background painting group,” “the nature group,” “the structure group,” “the people group,” and “the hanging elements group.” The children were then responsible for dividing up tasks. I met with each group each week until all the separate parts were completed and the display assembled.
This same project could be applied to any number of 3-D storytelling assignments. An original story, a favorite picture book, an event in history or even a poem could be illustrated using found objects and a little paint. Displays could be worked on individually using shoe boxes, or on a larger scale as a group with a larger display case. After the projects are completed, have individual students or groups observe their classmates work and write about the “story” depicted in the display.
It will be hard to say goodbye to these wonderful fourth graders as we complete our work this week, but nice to know their stories will be shared and enjoyed by many in the coming years.
www.joanwaites.com
February 25, 2013
Getting to the Core of the Writing
by Jane Harrington
Too many words! You already said that!
I often want to scribble those complaints across essays I get from my College Composition students, so I was heartened to see that “Common Core” (the new standards program that’s “preparing America’s students for college and career”) includes some objectives to pare down habits of overwriting. In addition to the Core’s upper elementary standards for revising (Writing 4.5, 5.5 and 6.5), here’s one that really allows for quality time to break bad on verbosity:
CCSS.ELA-Literacy.L.7.3a—Choose language that expresses ideas precisely and concisely, recognizing and eliminating wordiness and redundancy.
When I saw that, an exercise I once did as a fiction student came to mind. I’ve never thought to use it with my Composition students because we write non-fiction, but I began to see how it could be a fun way to practice a skill that can and should be applied to all writing. It could work as follows, but you may think of some creative variations. (If so, please share in comments at the end of the post!)
First day: For homework, students write a short story of a prescribed length (ours was probably 1200 words, but it wouldn’t have to be that long) with a beginning, a middle, and an end. Perhaps this could follow a literary discussion after reading a novel and be focused on a character making a choice and changing. Or, it could be written to a specific prompt. The idea is that there is a complete story there and that it conforms to a word length requirement.
Second day: For homework, students are asked to cut down the story’s word count by half, without changing what happens in the story. (The groans and stares should be quite entertaining.)
Third day: This is probably a good day to read some of these aloud, because there will likely be students who are really excited by the accomplishment of this seemingly impossible task. Have them share some of the sentences that disappeared, and point out why those words weren’t necessary to make the points in the story. Congratulate them on a job well done and then give the final assignment, which is to cut the word count in half again. The caterwauling should be epic.
Fourth day: Have everyone read these, because they will surely be so cool! You may want to introduce the concept of “flash” or “micro” fiction and direct them to youth writing contests. (For some contest listings, click the “yo, publish!” tab on my website, www.janeharrington.com.)
Whether you’re using specific state standards or the Common Core, or old-fashioned common sense,www.janeharrington.com
February 18, 2013
HISTORY WITH A HISS (AND A BARK AND A SQUEAK)
by Mary Quattlebaum
Playful prompts can help students to explore history and writing in ways that reinforce lessons in both. Applicable at any time during the year, this exercise can be especially appropriate for Presidents’ Day.
1. Tell kids about the pets owned by U.S. Presidents. George Washington had a favorite horse, Nelson, whom he rode when the British surrendered to the Americans at Yorktown in 1781, which ended the Revolutionary War. Abraham Lincoln’s sons kept rabbits, goats, and a turkey named Jack at the White House. Calvin Coolidge had a pet raccoon, and Theodore Roosevelt’s six kids happily tended dogs, cats, guinea pigs, birds, snakes, a badger, and a bear during their father’s administration.2. Read and talk about First Dog Fala by Elizabeth Van Steenwyk, illustrated by Michael Montgomery (Peachtree 2008). Fala was Franklin Delano Roosevelt’s beloved Scottish terrier. She lived with him during his presidency from 1940 to his death in 1945; and her bronze sculpture sits beside that of her master in the Roosevelt Memorial in Washington, DC. Ask the class what a presidential pet like Fala might notice. How might he describe the president and an important historical event? Would a pet’s perception be different from what people might notice? Why or why not?
3. History/Writing Prompt #1: Choose a President or ask students to choose a favorite to research. Have children research the particular President’s important accomplishments as well as worries, mistakes, or low points of his term(s). Ask students to take the point of view of the President’s pet and, as that pet, to write about what they notice/feel about the President and about that historical event. Or they might write from the perspective of a “hidden” animal (spider, mouse).
4. History/Writing Prompt #2: Choose a historical event and discuss its importance with the class. Talk about what happened. Then ask students to become an animal witnessing that historical event or living during a certain point in time (an ox pulling a wagon West, the horse of a Pony Express rider, a dog welcoming his soldier master home from a specific war). Have students write from the point of view of that animal and describe what the animal saw, heard, smelled, and felt.
http://www.maryquattlebaum.com/Mary_Quattlebaum/Welcome.html
February 11, 2013
IN LIVING COLOR: Winter Poetry Ideas
by Laura Krauss Melmed
Midwinter landscapes in my part of the world yield mostly subdued tones of browns and dusty greens sometimes enlivened by a dazzle ofIt made me think of color as a good subject for winter poetry writing. Start by exploring two books of color poetry with your students. Hailstones and Halibut Bones by Mary O’Neill is a classic, first published in 1961, in which she explores the colors of the spectrum in ways still read fresh and original today. “Like acrobats on a high trapeze/ Colors pose and bend their knees/ Twist and turn and leap and blend/ into shapes and feelings without end…”
Red Sings From Treetops: A Year in Colors by Joyce Sidman uses color to explore each of the four seasons. In evocative, playful language, with much use of personification and rich sensory references, Sidman brings color alive. “Red sings / from treetops . . . / each note dropping / like a cherry / into my ear.” Green trills from trees” and “purple pours into summer evenings one shadow at a time.” Eloquent, quirky illustrations by Pamela Zagarenski perfectly capture the mood of wonder.
You could also show and discuss some famous paintings like Van Gogh’s Starry Nights (blue) or Sunflowers (yellow), or Monet’s Water Lilies (green) to further explore the feelings color can evoke.
Now students should select their chosen color. Have them write the color in the center of a blank page and surround it with 6 radiating circles. In circle 1, they should put emotions their chosen color evokes. In circle 2, random parts of the body. In circle 3, actions those body parts can perform. In circle 4, plants and flowers, trees, insects, animals, and other parts of nature associated with their chosen color. In circle 5, foods associated with their chosen color. In circle 6, a list of as many of the furniture and architectural features (doors, windows) of the classroom as possible.
Now, choosing a word or words from each of the circles, have students write a six-line poem starting with their selected color. Stress that by combining words from the various circles; they can come up with unique and interesting combinations of words to make a tribute to the color of their choice. Hang a large paper rainbow across one wall and tack the finished colors poems to it to brighten the grayest winter day!
www.laurakraussmelmed.com
February 4, 2013
SNOW GLOBES AND GRAPHIC ORGANIZERS
by Jacqueline Jules
I remember the first time I was introduced to graphic organizers. It was a professional development day early in my teaching career, probably twenty years ago. The presenter in the workshop was so excited to share them. He gushed on about their usefulness in the classroom as if they were the best thing since sliced bread. I yawned. Freshly baked whole loaves are my preference and I have never personally used a graphic organizer. That doesn’t mean I forgo pre-writing. My writing always flows better after scribbling down some rough ideas before beginning a story or a poem. It’s the graphic organization of those ideas that made me uncomfortable. My brain doesn’t seem respond to connecting circles and boxes.
So I never used it in my own teaching, figuring my students couldn’t possibly be motivated by something that didn’t work for me personally. What an arrogant mistake!
Recently, two second grade teachers at the school where I work showed me the power of pre-writing with graphic organizers. They found a delightful lesson on Deanna Jump’s teaching blog about snowglobes. Each child not only created a snowglobe for the bulletin board, he or she wrote a story about what it would be like to live in a snowglobe.
When I read these second grade stories, I was blown away by the details the children included. They imagined the sensation of having their homes shaken up. They described snowflakes flickering down. Some imagined ways to break out of the snow globe to return to the real world. Others wrote about an idyllic life of sledding and hot cocoa. The stories were detailed and filled with sensory images.
“How did you do this?” I asked my two colleagues. “How did you get your second graders to write such descriptive and imaginative stories?”
The answer was pre-writing with graphic organizers. Before beginning their stories, the class discussed snow globes at length and the children were asked to fill out two sheets.
One sheet asked the students to fill in ideas of what it might be like to live in a snowglobe using an organizer from Valerie Noles' blog.Another sheet asked the students to complete sentences. If I Lived in a Snow Globe, I would see…., I would hear …. , I would smell…, I would feel… from the First Grade Blue Skies blog
This humbling experience not only convinced me that graphic organizers are useful teaching tools for pre-writing, it reminded me of all the wonderful resources teachers generously share on the internet. I am a little embarrassed I didn’t embrace organizers before, but sometimes, even the best of us, overlook good teaching practices.
www.jacquelinejules.com
January 28, 2013
MINI DIARIES FOR WRITING AND RESEARCH
by Mary AmatoKeeping a mini diary is a fun way to encourage both writing and research. Share Cronin and Bliss’s funny picture books, Diary of a Worm, Diary of a Spider, and Diary of a Fly. First read for enjoyment. Then read it again and ask students to identify what facts they are learning about the animal. Next, invite students to create their own Diary of a…. Here’s how:1. Have students choose an animal that they really love. 2. Take students to the library and let them find books about their animals and/or do web research. 3. Ask students to create a fact sheet on the animal for reference. 4. Make a simple blank book by taking four sheets of paper, folding them in half and stapling at the fold with a long-arm stapler. 5. Invite students to pretend to be the animal and write one diary entry. Students can add illustrations and keep adding entries each day for a week. At the end of the week, share your diaries. www.maryamato.com
January 21, 2013
WORKING THROUGH MISTAKES
by Joan Waites
During class last week, one of my little art students was in tears because she made a mistake while working on a drawing exercise. She furiously scribbled over it, declaring that she wanted to throw it away. To make matters worse, she was sitting next to another student, who executed each drawing with ease. Though I gave her several pointers, assured her that this was just practice and encouraged her to not worry about it and just do the best she could, nothing eased her frustration. Switching gears, I showed her how to turn those unintended marks into something else….a fish, a flower, and a beach ball. The tears dried up and she happily completed the rest of the exercise.
Learning to turn a “mistake” into something that works in a painting, drawing or other artistic endeavor can be a hard concept for young children to grasp. Even an older child, who has worked diligently on a piece and then has a paint spill, can be just as upset. Ink blobs, paint splatters, or having a classmate accidentally knock your beloved sculpture to the floor can happen daily in any art room. So how can you teach children to roll with mistakes instead of giving up?
 A picture book I have found helpful in addressing this problem in the art classroom and beyond is:
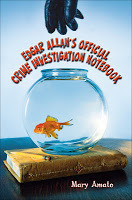
Beautiful Oops,
by Barney Saltzburg, (Workman Publishing Company; September 23, 2010)
A picture book I have found helpful in addressing this problem in the art classroom and beyond is:
Beautiful Oops,
by Barney Saltzburg, (Workman Publishing Company; September 23, 2010)
This book explains to children how a mistake--a ripped paper, a paint splatter, a smudge and more can be turned into an unexpected opportunity to make something beautiful.
A fun exercise to try with students that demonstrates this concept is the following:
Creating Imaginary Creatures
1. Using any type of fluid water based paint, place a large wet “blob” in the middle of the page. 2. Slowly turn the page upside down and left to right until you achieve anWhen a child makes a perceived mistake, first try to work with them to incorporate the “oops” into the art. Of course, as with all endeavors, sometimes you just have to start over. However, after working through a few mistakes and achieving positive results, students will likely be less frustrated and even proud when they come up with a solution to their “oops!”
www.joanwaites.com
During class last week, one of my little art students was in tears because she made a mistake while working on a drawing exercise. She furiously scribbled over it, declaring that she wanted to throw it away. To make matters worse, she was sitting next to another student, who executed each drawing with ease. Though I gave her several pointers, assured her that this was just practice and encouraged her to not worry about it and just do the best she could, nothing eased her frustration. Switching gears, I showed her how to turn those unintended marks into something else….a fish, a flower, and a beach ball. The tears dried up and she happily completed the rest of the exercise.
Learning to turn a “mistake” into something that works in a painting, drawing or other artistic endeavor can be a hard concept for young children to grasp. Even an older child, who has worked diligently on a piece and then has a paint spill, can be just as upset. Ink blobs, paint splatters, or having a classmate accidentally knock your beloved sculpture to the floor can happen daily in any art room. So how can you teach children to roll with mistakes instead of giving up?
 A picture book I have found helpful in addressing this problem in the art classroom and beyond is:
Beautiful Oops,
by Barney Saltzburg, (Workman Publishing Company; September 23, 2010)
A picture book I have found helpful in addressing this problem in the art classroom and beyond is:
Beautiful Oops,
by Barney Saltzburg, (Workman Publishing Company; September 23, 2010)This book explains to children how a mistake--a ripped paper, a paint splatter, a smudge and more can be turned into an unexpected opportunity to make something beautiful.
A fun exercise to try with students that demonstrates this concept is the following:
Creating Imaginary Creatures
1. Using any type of fluid water based paint, place a large wet “blob” in the middle of the page. 2. Slowly turn the page upside down and left to right until you achieve anWhen a child makes a perceived mistake, first try to work with them to incorporate the “oops” into the art. Of course, as with all endeavors, sometimes you just have to start over. However, after working through a few mistakes and achieving positive results, students will likely be less frustrated and even proud when they come up with a solution to their “oops!”
www.joanwaites.com
January 14, 2013
YEAH, WRITE
by Jane Harrington
Happy New Year to all you Pencil Tippers out there! For my own part, I’m resolving to be more resourceful with my writing time. To that end, my first post of 2013 will be more about recycling old words than producing new ones.
Specifically, I’m going to lead you to my website, where there are some fun tips for young writers. (Since I teach writing to college students these days, the page has been sadly neglected of late.) Be forewarned that one of my characters has intruded on this particular page of my website, but young minds will likely relate better to her than to me. And, hey, you can use it as a springboard to a discussion of that whole “meta” fiction thing—Lemony Snicket, Cornelia Funke, various comic books, too many TV shows…. Don’t despair, though, if that sounds too weird; the writing tips you’ll find on the site are quite straightforward: alliteration, exaggeration, onomatopoeia, and vocabulary. Sound usable? Go to www.janeharrington.com, and click on the “yeah, write” tab.
But, really, you don’t even have to leave this blog to reuse/recycle ideas for teaching some of these Best wishes for a year of wonderful wordsmithery!
(Hm…maybe neologisms would be a fun topic for next time.)
www.janeharrington.com
Mary Quattlebaum's Blog
- Mary Quattlebaum's profile
- 22 followers
Mary Quattlebaum isn't a Goodreads Author
(yet),
but they
do have a blog,
so here are some recent posts imported from
their feed.

