Robin Robertson's Blog, page 3
March 28, 2020
Quarantine Quesadillas and Stay-At-Home Menu Plan
I hope you’re prepared for cooking during quarantine. I know I am. But I owe my preparedness in the path of hurricanes for many years. Hurricane preparedness was so much a part of our lives, that we actually wrote a book about it! And now, that the same kind of preparedness is helpful during these strange days of self-isolation.
Even though we’re allowed to venture out for groceries, I prefer to keep my interactions with the outside world to a minimum. That’s why we made one trip to the store last week and shopped for enough food to last a month. The canned and dried beans and pasta was the easy part. I also stocked the freezer with an extra supply of frozen spinach, collards, broccoli, and other green veggies because I knew the fresh, more delicate produce would be the first things we needed to use up. I then loaded up the fridge with plant milk, tofu, and lots of fresh produce.
I planned menus that used the most delicate product first, so now, over a week since shopping, we’re nearly out of fresh greens — I have enough lettuce for about three more salads. But we still have a lot of other hardy veggies like cabbage, carrots, celery, winter squash, and of course, white and sweet potatoes. I bought a lot of fruit that I’m keeping refrigerated to last longer, pulling out only what we’ll use in a day each morning.
Here is a list of what I plan to cook in the weeks ahead using what I have on hand:
Stay-at-home Menu Plan
Chili Mac & salad
Tacos
Pizza & salad
Hakka noodle stir-fry
Lentil soup
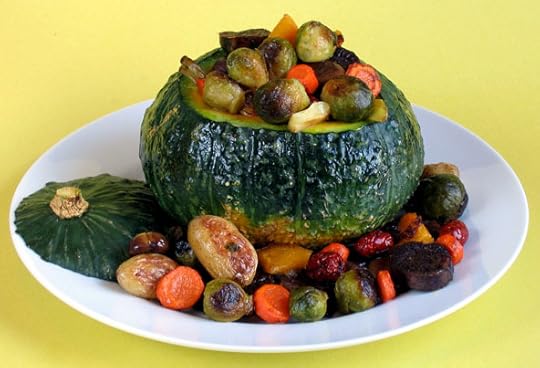
Stuffed kabocha squash
Shepherd’s Pie
Ramen bowls
Vegetable fried rice
Tofu tetrazzini with green beans
Saag with tofu and basmati rice
Enchiladas
Pasta Fagiole
Tofu scramble
15-bean soup
Seitan Pot Roast with Cabbage, Carrots & Potatoes
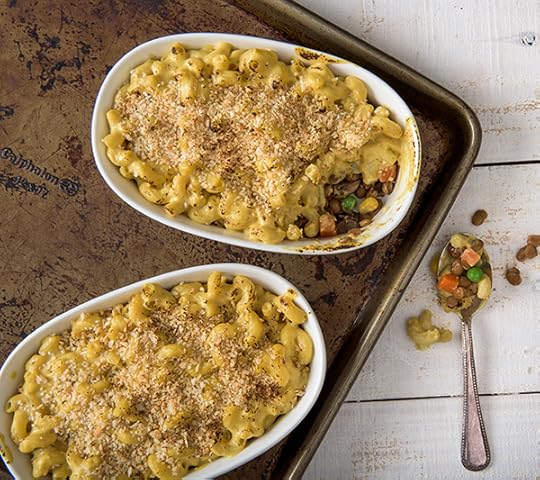
Artichoke Mac UnCheese
Three bean pasta salad
Veggie Dogs w/sauerkraut
Chickpea salad wraps
Singapore mei fun
Hoppin’ John
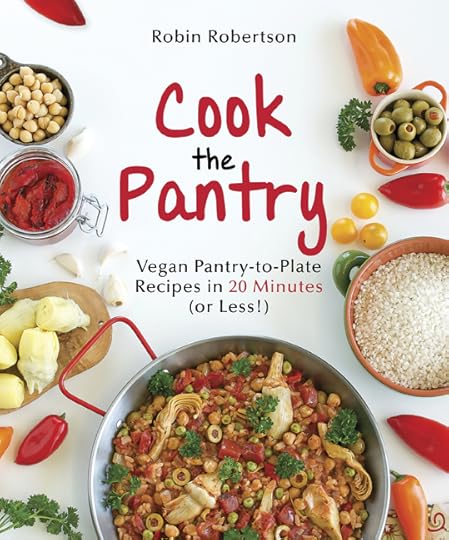
If you have a copy of my book Cook the Pantry or Vegan Unplugged, you’ll find lots of useful tips and recipes using pantry ingredients. I’ll be sharing some of those recipes in the weeks ahead. For now, I’ll leave you with the recipe from Cook the Pantry for Spinach and White Bean Quesadillas or as they are now known, Quarantine Quesadillas. Stay safe!
Spinach and White Bean Quesadillas aka “Quarantine Quesadillas”
Frozen spinach and canned white beans combine with garlic and spices to make a delectable filling for these hearty quesadillas. No cheese needed. Serve with your favorite salsa.
1 tablespoon olive oil (or 2 tablespoons water to water-saute)
2 or 3 garlic cloves, pressed or minced
10 ounces frozen chopped spinach, thawed and squeezed dry
Salt and ground black pepper
1 (15.5-ounce) can white beans, drained and rinsed
1 tablespoon lemon juice
1/2 teaspoon ground coriander
1/2 teaspoon ground cumin
Large flour tortillas
Heat the oil in a saucepan over medium heat. Add the garlic and cook until fragrant, 30 seconds. Add the spinach and season with salt and pepper to taste. Add the beans, lemon juice, coriander, and cumin. Cook, stirring, until the spinach is cooked and the flavors are blended, about 5 minutes. Mash the beans well while cooking. Set aside.
Place a large tortillas on a flat work surface. Spread a thin layer of the spinach mixture evenly over half of the tortilla. Fold the remaining half of the tortilla over the half with the filling and press gently to enclose and spread the filling close to the edges.
Heat a large nonstick skillet over medium heat. Place the quesadilla in the hot skillet. Flatten with a spatula and cook until lightly browned on the bottom, about 3 minutes. Flip the quesadillas and cook until the other side is golden brown. Cut into wedges. Repeat with more tortillas and filling as desired. Serve hot with salsa.
This recipe is from Cook the Pantry by Robin Robertson © 2015, published by Vegan Heritage Press. Photo by Annie Oliverio.
The post Quarantine Quesadillas and Stay-At-Home Menu Plan appeared first on Robin Robertson.


March 16, 2020
Mad Mocha Marbled Mousse Pie
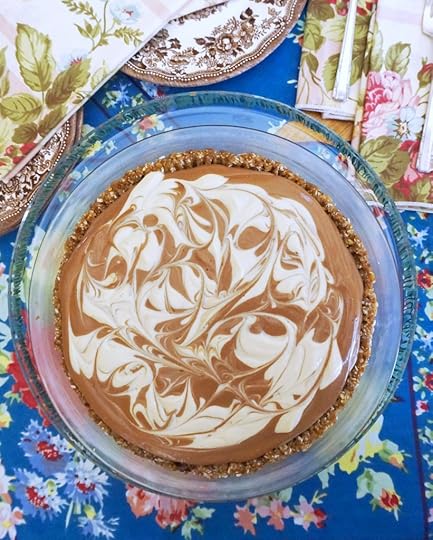
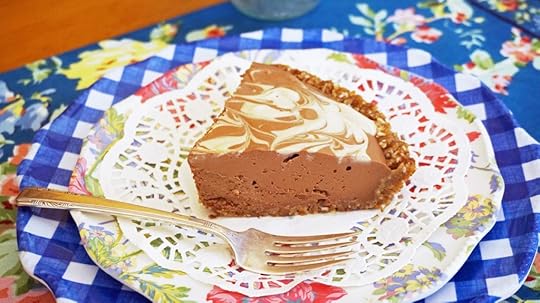
Chocolate mousse pie has long been a stalwart of vegan desserts, but leave it to Laura Theodore (PBS’s Jazzy Vegetarian) to “jazz up” this favorite with a few new (and delicious!) twists that are right in the recipe title: in this recipe chocolate teams up with coffee giving it a wonderful mocha flavor. And then, it gets all fancy with a beautiful marbled effect, making it off-the-charts gorgeous. Another thing to love about this pie is a crust made with dates, nuts, and coconut to add even more flavor and texture.
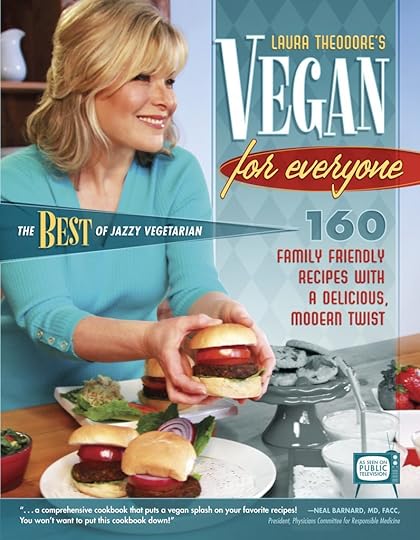
You can find this recipe and more in Laura’s latest book, Vegan for Everyone. In addition to many all-new recipes, the book features updated versions of 60 fan-favorite recipes from her earlier books. Check it out, but first, check out this pie…..
Mad Mocha Marbled Mousse Pie
MAKES 10 SERVINGS
This pie is gorgeous to look at, delicious to eat and a delight to serve! Your family and guests will think you slaved for hours creating the “fancy” marbled effect, but it’s actually super easy to do! You will please chocolate and coffee lovers alike with this impressive sweet indulgence!
CRUST
1 tablespoon extra-virgin olive oil, plus more to coat pan
11 Medjool dates, pitted and chopped
2/3 cup chopped pecans
½ cup chopped walnuts
½ cup unsweetened shredded dried coconut
FILLING
1 block (14 to 15 ounces) extra-firm regular tofu, drained and crumbled
5½ tablespoons vegan cane sugar
½ cup cold, strong brewed coffee
1½ cups vegan dark chocolate chips (55% to 70% cacao)
½ cup unsweetened or sweetened nondairy milk
Generously coat a 9-inch round pie pan with olive oil. Put all of the crust ingredients in a high-performance blending appliance and process into a dough, stopping the machine and scraping the bowl several times. The dough will be very sticky. Transfer the dough to the oiled pan and press it into the bottom and up the sides of the pan (see note). Put the pie pan in the freezer for 6 to 8 minutes, and then transfer to the refrigerator while you prepare the filling.
To make the filling, put the tofu, sugar and coffee into a blender and process until very smooth. Transfer 1/3 cup of the tofu/coffee mixture to a small bowl and reserve. Add the chocolate chips to the top of the remaining tofu mixture (that is still in the blender container).
Put the nondairy milk into a small saucepan and bring it to a simmer over medium-low heat. Immediately pour the simmering nondairy milk over the chocolate chip mixture and process for 30 seconds to 1 minute, or until it becomes completely smooth. Pour the chocolate filling into the chilled crust (it will mound up slightly, above the crust). Immediately drop 5 to 6 spoonfuls of the reserved tofu/coffee mixture onto the top of the pie. Then, using a wooden skewer or the tip of a knife, gently swirl the tofu/coffee mixture into the top of the pie in a pleasing, marbleized pattern. Refrigerate for at least 3 hours (or overnight), until completely set. Slice and serve!
Chef’s note: If you are cooking gluten free, make certain to purchase certified gluten-free tofu, available in most supermarkets.
Chef’s note: If desired, create a decorative edge to the crust. Using the tines of a fork, press gently down around the entire outer edge of the crust to form evenly spaced lines.
Photo Credit: Laura Theodore
Recipe from Vegan For Everyone by Laura Theodore Published by Scribe Publishing Company, ©2020. Reprinted by permission.
The post Mad Mocha Marbled Mousse Pie appeared first on Robin Robertson.


March 10, 2020
In Case of Quarantine: Cook the Pantry
With a possible pandemic on the horizon, I’ve stocked up on toilet paper and hand sanitizer — just in case. But I’ve also stocked up on enough food supplies to get us through the next couple of months, in case of quarantine.
I’ve been using the tips and recipes in my book, Cook the Pantry, to dictate my grocery list and keep my pantry full if the situation worsens. The quick and easy recipes in Cook the Pantry use mostly items from your pantry and freezer (along with some optional fresh produce, if you have it on hand).
One of my favorite recipes from the book is the Artichoke Muffaleta Po Boys. It’s the best of two popular New Orleans culinary icons joining forces to create the ultimate sandwich made with artichokes and a piquant olive relish. Here’s the recipe:
Artichoke Muffaleta Po’ Boys
Makes 2 servings
Recipe from Cook the Pantry © 2015 by Robin Robertson. Photo by Annie Oliverio. Used by permission Vegan Heritage Press LLC.
3 scallions, chopped
1 garlic clove, crushed
1/3 cup pickled vegetables, well-drained
1/3 cup pimiento-stuffed green olives, well-drained
1 tablespoon olive oil
1 (14-ounce) can artichoke hearts, well-drained and halved
1/2 teaspoon Cajun spice blend
3 tablespoons Creole mustard
3 tablespoons vegan mayonnaise
2 small sub rolls
1 cup shredded lettuce
1 large tomato, thinly sliced
Pickled sliced jalapeños
Tabasco or other hot sauce, to serve
1. In a food processor, combine the scallion and garlic and process until finely minced. Add the pickled vegetables, olives, and pulse to make a relish. Set aside.
2. Heat the oil in a large skillet over medium heat. Add the artichoke hearts, season with the spice blend, and cook until nicely browned, about 5 minutes per side.
3. To assemble the sandwiches, spread the mayonnaise and mustard on the inside top and bottom of the bread. Spread the lettuce onto the bottom of each sandwich, followed by tomato slices. Top with the relish mixture, a few slices of jalapeños, and the artichokes. Serve at once with Tabasco.
In case you don’t already own Cook the Pantry, below is a list of the 100 recipes in the book. Check it out — you don’t need to be quarantined to enjoy these easy and delicious recipes.
Cook the Pantry: Vegan Pantry-to-Plate Recipes in 20 minutes or Less
Soup, Stew, Chili
Tortilla Soup
Chipotle Corn Chowder
White Beans and Greens Soup
Hot and Sour Noodle Soup
Black Bean Soup with a Whisper of Sherry
Shiitake Happens Mushroom Soup
Pretty Good Gumbo
Minestrone Soup
Curry-Spiced Pumpkin Bisque
Creamy Peanut Soup
Pantry Plus Gazpacho
Vegetable Bricolage
Everyone’s Favorite Black Bean Chili
Red Bean Chili
Moroccan-Spiced Vegetable Stew
Chana Masala Bowls
Salad Savvy
Five-Minute Couscous Salad
Amazing Technicolor Chickpea Salad
Moroccan Couscous Salad
Tabbouleh Salad
Pantry Pasta Salad
Hearts of Palm Ceviche
Composed Marinated Vegetable Salad
Pinto, Corn, and Red Pepper Salad
“Three’s a Crowd” Bean Salad
White Bean Niçoise Salad
Taco Salad with Corn and Black Bean Salsa
Southwest Salmagundi
Asian Noodle Salad with Peanut Dressing
Zucchini “Pasta” Salad
Suddenly Sushi Salad
Asian Noodle Slaw
Avocado Goddess Salad
Three-Tomato Pasta Salad
Sesame Soba Salad
Sandwiches, Burgers, and Pizza
Crab-Free Sandwiches
Bean and Spinach Burritos
Artichoke Muffaleta Po Boys
BBQ Jack Sandwiches
Homestyle Hash Burgers
Black Bean and Walnut Burgers
Samosadillas
Artichoke Tartines
Black Bean and Spinach Quesadillas
Chunky Chickpea Sandwiches
Texas Caviar Wraps
Artichoke-Spinach Pizza
Pizza Nicoise
Black and White Pizza
BBQ Chickpea Pizza
Cheeseburger Pizza
Jalapeno-Hummus Pizza
Pinto Bean Nacho Pie
Stovetop Suppers
Hoppin’ John and Collards
Paella from the Pantry
Cheesy Grits and Greens with Smoky Mushrooms
Polenta Fiesta
Quick Quinoa Pilaf
Asian-Style Vegetable Pancakes with Dipping Sauce
Dinnertime Scramble
Tofu and Broccoli Stir-Fry
Layered Tortilla Skillet
Lemongrass Jasmine Rice
Greek Freekeh and Spinach with White Beans
Pantry Bulgur Pilaf
Tuscan Chickpea Fritatta
Red Beans and Quinoa with Chipotle Queso
Chickpea-Artichoke Cakes with Dill Aioli
Black Bean Picadillo
Jerk Tempeh with Coconut Quinoa
Top Shelf Couscous Pilaf
Pantry Pasta Plus
Giardiniera Mac and Cheese
Capellini with Palm-Heart Scampi Sauce
Penne and Broccoli with Red Bell Pepper-Walnut Sauce
Kitchen-Sink Capellini
Ramen Fagiole
Pasta Marinara
Puttanesca in a Pinch
Rotini with Creamy Pumpkin Sauce
Penne with White Beans and Olivada
Speedy Lasagna
Rice Noodles with Spicy Peanut Sauce
Spaghetti Lo-Mein
Artichoke-Cannelini Pasta
Manchurian Black Bean Noodles
Sweet Treats
Rawklava
Easy as Chocolate Pie
Peanutty Energy Balls
Almond-Cranberry Haystacks
Coconut Lime Drops
No-Bake Oatmeal Cookies
Bananas Foster Dessert Nachos
No-Fuss Chocolate Fondue
Stovetop Peach-Blueberry Crumble
Ginger-Walnut Rum Balls
Chocolate-Almond Truffles
Pecan Pie Squares
Mangos with Pistachios and Cranberries
Fudgy Brownie Mug
Pastry-Wrapped Chocolate and Walnut-Stuffed Dates
The post In Case of Quarantine: Cook the Pantry appeared first on Robin Robertson.


January 1, 2020
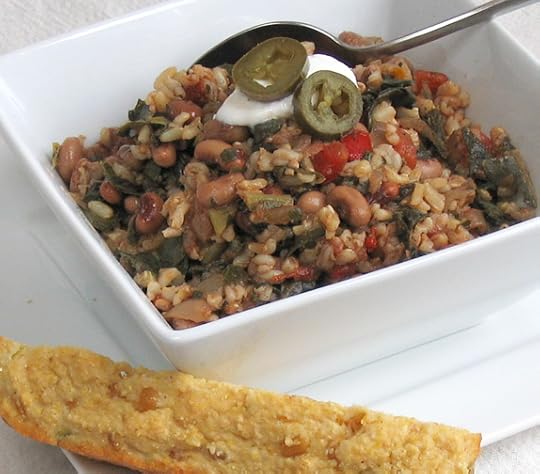
Happy New Year Hoppin’ John
If it’s January 1st, it must be time for Hoppin’ John. I love the tradition of making black-eyed peas with rice and collards so much! I first discovered it when we moved to Charleston SC from Pennsylvania in 1983. It’s been a New Year’s Day tradition ever since. Most people serve the collards on the side, but I love to combine them. I sometimes add diced tomatoes just because.
My favorite way to serve them is topped with vegan sour cream, Tabasco, sliced jalapenos, with cornbread on the side. I like to cook the collards and black-eyed peas a day in advance and then add them to the rice on New Year’s Day.
Here is my basic recipe (and more photos of Hoppin’ John variations from previous years). Happy New Year to all my friends. I wish you all the best in 2020!
Hoppin’ John with Collards
1 tablespoon olive oil or 3 tablespoons water
1 sweet yellow onion, chopped
2 garlic cloves, minced
1 cup long-grain brown rice
2 cups vegetable broth or water
Salt
3 cups cooked or 2 (16-ounce) cans black-eyed peas, drained and rinsed
3 cups chopped cooked fresh or frozen collard greens, well drained
1 (14-ounce) can fire-roasted diced tomatoes, drained (optional)
1 teaspoon Liquid Smoke
1 teaspoon Tabasco sauce, plus more to serve
1/4 teaspoon freshly ground black pepper
Vegan sour cream, to serve
Sliced pickled jalapenos (optional)
Heat the oil or water in a large saucepan over medium heat. Add the onion and garlic, cover, and cook until softened, about 5 minutes. Add the rice and broth or water and bring to a boil. Add salt to taste (the amount of salt needed depends on the saltiness of your broth or if you use water). Reduce the heat to medium-low and cook, covered, until the rice is tender, about 30 minutes. About 10 minutes before the rice is tender, stir in the cooked black-eyed peas, the cooked chopped collards, tomatoes (if using), Liquid Smoke, Tabasco, and black pepper. Add more salt, if needed.
To serve, spoon into bowls and accompany with vegan sour cream, jalapenos (if using) and Tabasco at the table.
Here are pics of two other favorites from my Hoppin’ John gallery:
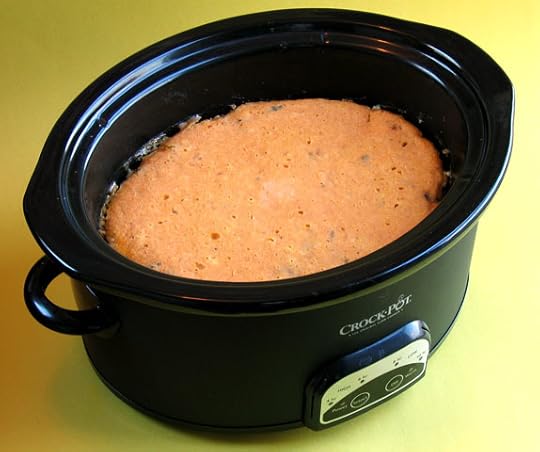
Made in a slow cooker with a cornbread topping….
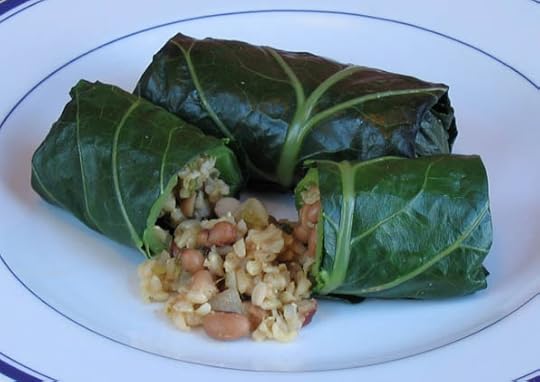
and Hoppin’ John Collard Rolls…. (serve with Tabasco-Sour Cream)…
The post Happy New Year Hoppin’ John appeared first on Robin Robertson.


December 16, 2019
Baked Tofu with 3-2-1 Sauce
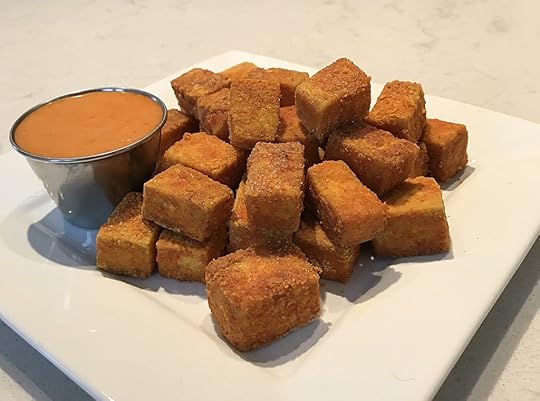
It’s no secret. I love tofu. I use it all the time to make everything from lasagna to cheesecake. Tofu scrambles are a weekly ritual at my house. I even like to dice and bake it to serve it as an appetizer with a flavorful peanut sauce or a zesty sriracha-laced sauce that I’ve come to refer to as my “3-2-1 Sauce.”
The sauce is named after the proportions of its three simple ingredients: 3 parts mayo, 2 parts chili sauce, 1 part sriracha: 3-2-1! If you happen to have some lime juice and cilantro on hand, a bit of each can only improve this flavorful sauce. I like to serve the dipping sauce on the side, but you can also make extra sauce and toss the tofu in the sauce, then serve it over rice.
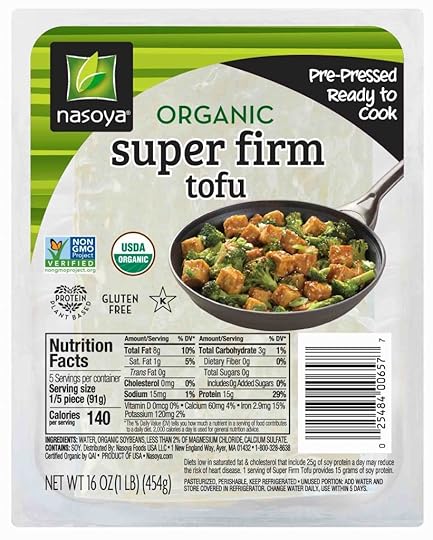
The nice people at Nasoya were kind enough to send me coupons for their tofu. The tofu I use for this recipe is Nasoya Organic Super-Firm Tofu. I’m thrilled that my supermarket now carries it because it saves so much time – no more tofu-pressing needed!
Baked Tofu with 3-2-1 Sauce
For the Tofu:
3 tablespoons cornstarch
1 teaspoon smoked paprika
1 teaspoon ground turmeric
1/2 teaspoon garlic powder
1/2 teaspoon onion powder
1/2 teaspoon salt
1/4 teaspoon ground black pepper
1 pound Nasoya Organic Super-Firm Tofu
For the Sauce:
3 tablespoons vegan mayonnaise
2 tablespoons Thai Sweet Chili Sauce
1 tablespoon sriracha sauce
Optional: squeeze of lime juice; minced fresh cilantro
For the tofu: Preheat the oven to 400 degrees F. Line a rimmed baking sheet with a silicone mat or parchment paper. Set aside.
Combine the cornstarch and spices in a large plastic zip lock food bag and shake to mix well. Cut the tofu into 1/2-inch cubes and add them to the bag with the seasonings. Close the bag and shake to coat the tofu. Spread the coated tofu in a single layer on the prepared baking sheet, keeping the tofu pieces separate from each other. Bake for about 20 minutes, turning once about halfway through.
For the sauce: In a small bowl, combine the mayo, chili sauce, sriracha, and a squeeze of lime juice, if using. Stir to mix well. Sprinkle with a little minced fresh cilantro, if desired.
To serve: When the tofu is done baking, transfer it to a plate and serve with the sauce on the side for dipping.
 This post was sponsored by Nasoya. All opinions are my own.
The post Baked Tofu with 3-2-1 Sauce appeared first on Robin Robertson.


December 12, 2019
Vegetable Curry
If this cold weather makes you want to cozy up to a curry, but you don’t have a lot of time to spend in the kitchen, this curry is for you. This fabulous looking curry is from a new book called Truly Healthy Vegan Cookbook by Dianne Wenz.
As a vegan lifestyle coach, Dianne is adept at showing how to prepare well-balanced meals that taste great. The opening chapter of the book is loaded with great tools and tips for eating a healthy vegan diet. Enticing recipes such as Carrot Cake Oatmeal, Cauliflower Banh Mi, Chickpea Pot Pie, and Key Lime Bars, insure that your menus will be as flavorful and fun to eat as they are good for you.
Truly Healthy Vegan Cookbook is ideal for the new vegan trying to navigate their way through unfamiliar territory. It’s also great for anyone looking to fine-tune their eating habits by eliminating processed ingredients and getting back to basics – including eating more vegetables. This cookbook features easy to find ingredients that are used to make simple and delicious recipes such as this Vegetable Curry.
About this recipe, Dianne says, “Vegetable curries are a favorite warming meal on cold days. I tend to make them with whatever stray bits of vegetables I have on hand to clean out the produce drawer of the fridge, but this combination of cauliflower, green beans, and carrots is my personal favorite. This is a Thai-style curry that uses red curry paste, but it can also be made with the green variety.”
Vegetable Curry
Serves 6 / Prep time: 10 minutes / Cook time: 20 minutes
1 teaspoon neutral-flavored oil (such as grapeseed or avocado), vegetable stock, or water
1 medium-sized yellow onion, diced
3 garlic cloves, minced
1 tablespoon grated or minced fresh ginger
1 (14-ounce) can light coconut milk
1 cup vegetable stock
3 tablespoons red curry paste
4 cups chopped cauliflower florets
1/2 pound green beans, trimmed and cut into 1-inch pieces
2 carrots, chopped
1 (15-ounce) can chickpeas, drained and rinsed
2 cups spinach
Sea salt
Black pepper
Heat the oil in a large stockpot over medium-high heat. Add the onion, garlic, and ginger and cook until they begin to brown, about 5 minutes.
Add the light coconut milk, vegetable stock, and red curry paste to the pot and stir to combine. Add the cauliflower, green beans, carrots, and chickpeas. Bring the mixture to a boil, and then reduce the heat to medium-low. Cover the pot and simmer for 15 minutes, or until the vegetables have softened.
Uncover the pot and stir in the spinach, continuing to simmer, while stirring frequently until the spinach wilts. Season with sea salt and black pepper to taste.
From Truly Healthy Vegan Cookbook, by Dianne Wenz, published by Rockridge Press. Copyright © 2019 by Callisto Media. All rights reserved.
The post Vegetable Curry appeared first on Robin Robertson.


December 9, 2019
Cheesy Mac Muffins
‘Tis the season for holiday parties and brunches and I have just the thing to serve at your next get-together. These Cheesy Mac Muffins from my cookbook Vegan Mac & Cheese are a fun way to enjoy everyone’s favorite comfort food.
They’re great as is, but the addition of chopped cooked veggies makes them even better. And of course, this time of year, those veggies should be red and green!
Two of my favorite holiday combos to add to the mac and cheese mixture are: finely minced and sauteed red and green bell peppers OR chopped steamed broccoli and finely minced oil-packed sun-dried tomatoes. (Simply fold in your veggies of choice when you combine the cheese sauce and macaroni.)
These muffins can be made in full-size muffin tins or in those tiny muffin tins for one-bite wonders. Note: If using the tiny muffin tins, you can reduce the baking time by about 5 to 7 minutes so they don’t dry out.
Enjoy!
Cheesy Mac Muffins
From Vegan Mac & Cheese: More than 50 Delicious Plant-Based Recipes for the Ultimate Comfort Food by Robin Robertson © 2019, Harvard Common Press.
2 tablespoons vegan butter, plus more for preparing the muffin tin
2 tablespoons dried bread crumbs
2 cups elbow macaroni
3 scallions, white and green parts, minced
2 tablespoons all-purpose flour
1/2 teaspoon salt
1/4 teaspoon ground black pepper
1/3 cup nutritional yeast
1 teaspoon Dijon mustard
2 1/4 cups plain unsweetened nondairy milk
2 teaspoons fresh lemon juice
Preheat the oven to 375°F (190°C). Coat a nonstick muffin pan with butter.
Divide the bread crumbs evenly among the bottoms of the cups. Shake and tilt the pan to coat the cups on the bottoms and sides. Discard any excess crumbs.
Bring a large pot of salted water to a boil over high heat. Add the pasta and cook according to the package directions until al dente. Drain well and return to the pot. Set aside.
In a saucepan over medium heat, melt the butter.
Add the scallions and cook for 1 minute. Whisk in the flour, salt, and pepper and cook, whisking, for 1 minute.
Add the nutritional yeast and mustard and then whisk in the milk. Bring to a boil. Reduce the heat to maintain a simmer and cook, whisking constantly, for 2 minutes, or until smooth and thickened. Stir in the lemon juice. Taste and adjust the seasoning, as needed. Pour the cheese sauce over the pasta and stir to coat. Divide the pasta mixture evenly among the muffin cups and press it down into the cups. Bake for about 15 to 20 minutes.
Remove the muffin pan and set aside for 10 minutes. Run a knife around the outer edge of each muffin and then pop them out of the cups.
Makes 8 to 12 muffins
The post Cheesy Mac Muffins appeared first on Robin Robertson.


November 12, 2019
Vegan Thanksgiving Recipes
It’s that time of year again when we decide what to make for Thanksgiving dinner. Most of the dishes I make have been part of our vegan holiday traditions for more than 30 years. So at the risk of repeating myself or trying to reinvent the wheel, I’m sharing some of my favorite Thanksgiving Recipe Round-up posts from over the years to give you lots of choices.
You can find some great recipes in my Vegan Holiday Hotline
Or check out some holiday favorites is the Thanksgiving Dinner Menu I developed for Vegan.com (has it been 10 years ago already?)
If you’re still looking for more ideas, how about this Tricked-Out Tofurky
There’s always my Butternut Mac and Cheese which is great as a main dish or a side:
And for dessert, lots of variations on my all-time favorite Thanksgiving dessert in this Pumpkin Cheesecake Round-Up
I hope you all have a wonderful and compassionate Thanksgiving!
The post Vegan Thanksgiving Recipes appeared first on Robin Robertson.


October 2, 2019
Vegan Mac and Cheese Blog Tour
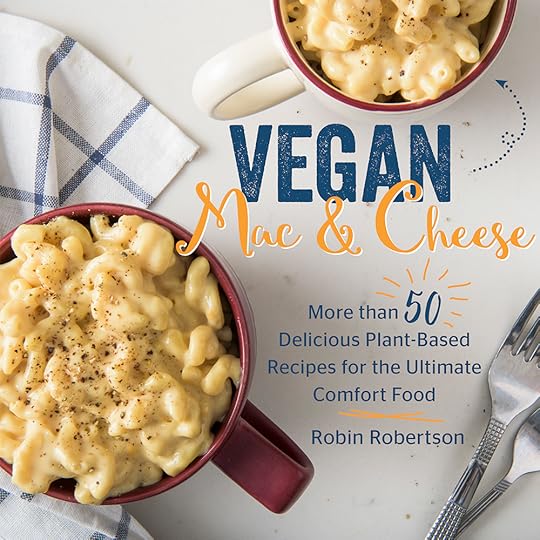 To celebrate the release of Vegan Mac and Cheese, I’m having a blog tour! Over the next few weeks, you can visit some fantastic blogs to check out some sample recipes, photos, and reviews of Vegan Mac and Cheese. You’ll also be able to enter giveaways for a chance to win a copy of the book.
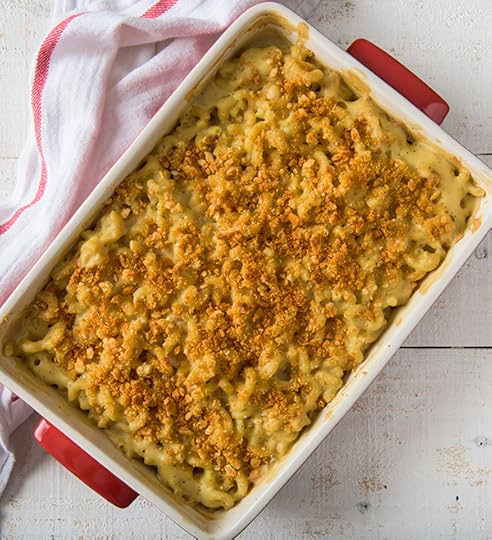 Here’s a list of dates and locations of the blog tour, beginning with Spabettie, where you’ll find my recipe for Mom’s Baked Mac & Cheese.
Check back here frequently for changes, updates, and direct links to the posts as they happen. Thanks in advance to everyone participating in this blog tour to celebrate the publication of Vegan Mac and Cheese!
 Vegan Mac and Cheese Blog Tour:
October 1 – Spabettie
October 2 – Thyme & Love
October 4 – Vegan Atlas
October 4 – Vegan Street
October 7 – The Real Vegan Housewife
October 9 – V Nutrition
October 10 – StephanieDreyer.com
October 11 – My Pure Plants
October 14 – Lisa’s Project Vegan
October 15 – This Healthy Kitchen
October 16 – Vegan Mos
October 17 – Go Dairy Free
October 21 – Chic Vegan
October 23 – FranCostigan.com
October 28 – Bad to the Bowl
November 4 – Veggie Fun Kitchen
November 1 – Kelli’s Vegan Kitchen
The post Vegan Mac and Cheese Blog Tour appeared first on Robin Robertson.


September 26, 2019
Cheesy Broccoli Mac Soup
By now, many of you have dug into your copy of Vegan Mac & Cheese and have begun making recipes from the book. I hope you’ll share pics on social media so I can see what everyone is making!
Today I’d like to share a recipe from Vegan Mac & Cheese from the final chapter of the book called “Fun with Mac & Cheese.” This chapter is loaded with recipes for using up leftover mac & cheese (or you can whip up a quick batch just to use in the recipes if you don’t have leftovers.)
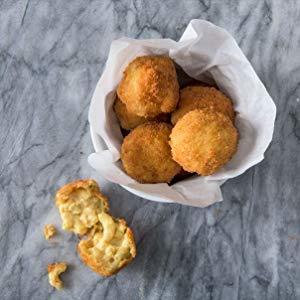 Among the recipes in that chapter are: Cheesy Mac Mug, Mac UnCheese Omelet, Waffled Mac UnCheese, Mac UnCheese Balls (above), Cheesy Mac Muffins (below), Mac UnCheese Quesadillas, and Mac UnCheese Pizza. There are even two dessert recipes: Sweet Noodle Kugel and Indian Vermicelli Pudding.
The recipe I want to share is for Cheesy Broccoli Mac Soup. It’s ideal for the fall weather that is bound to be just around the corner! I hope you enjoy it.
BTW… If you haven’t gotten your copy of Vegan Mac & Cheese, I hope you will. And if you already have the book, I hope you’ll do me a HUGE favor and write a brief review of the book on Amazon. It only takes a minute and will really help spread the word. THANK YOU!!!
Cheesy Broccoli Mac Soup
Cheesy broccoli soup is a cold weather favorite in our house, so it was a no-brainer to try it made with leftover mac uncheese. The results were so good, this is now our go-to way to make it. We especially like that the broth isn’t too thick (which it often is in cheesy soups). If you prefer a thicker broth, simply use less vegetable broth. To make this recipe without leftovers, I suggest using the quick and easy recipe for One-Pot Cheesy Mac from Vegan Mac & Cheese.
1 tablespoon olive oil
1 small yellow onion, minced
2 garlic cloves, minced
4 cups vegetable broth
3 cups (weight varies) leftover or homemade mac uncheese
11/2 cups Cheddary Sauce (recipe follows)
1/2 cup plain unsweetened nondairy milk
1/4 teaspoon smoked paprika
Salt, to taste
Ground black pepper, to taste
2 cups steamed small broccoli florets
1/4 cup Nut Parm (recipe follows)
In a large saucepan over medium heat, heat the olive oil.
Add the onion and cook until softened, about 5 minutes. Stir in the garlic and cook until fragrant, about 30 seconds.
Add the vegetable broth and bring to a boil. Reduce the heat to low, cover the pan, and simmer for 15 minutes.
Stir in the mac uncheese and then add the Cheddary Sauce, stirring until thoroughly combined.
Add the milk and paprika and season with salt and pepper. Cook, stirring, until hot.
Stir in the broccoli and serve hot, sprinkled with the Nut Parm.
Makes 4 to 6 servings
Cheddary Sauce
1 cup unsalted raw cashews
1 large russet potato, peeled and diced
1 small carrot, chopped
1/2 of a small yellow onion, chopped
1 garlic clove, chopped
1 teaspoon salt
1/3 cup nutritional yeast, plus more as needed
2 tablespoons vegan butter
1 tablespoon rice vinegar
1 tablespoon fresh lemon juice
11/2 teaspoons white miso paste
1/2 teaspoon prepared yellow mustard
1/2 teaspoon onion powder
1/2 teaspoon smoked paprika
1/4 teaspoon ground turmeric
1 cup plain unsweetened nondairy milk, or water
In a saucepan, combine the cashews, potato, carrot, onion, garlic, and salt with enough water to cover. Place the pan over high heat and bring to a boil. Reduce the heat to maintain a simmer and cook until the vegetables are soft, 10 to 15 minutes.
Using a slotted spoon, transfer the cooked vegetables and cashews to a high-speed blender, reserving the cooking water.
Add the remaining ingredients and blend until smooth and creamy, stopping to scrape down the sides, as needed. Add as much of the reserved cooking water as needed to achieve the consistency you prefer for the sauce. Taste and adjust the seasoning, as needed. The sauce is now ready to use.
Makes about 4 cups
Nut Parm
1 cup unsalted blanched almonds, or unsalted raw cashews
1/3 cup nutritional yeast
1/2 teaspoon salt
1/4 teaspoon onion powder
Combine all the ingredients in a food processor and pulse until the mixture has a fine crumbly texture, stopping to scrape down the sides, as needed. Transfer to a shaker jar or other container with a tight lid. Store in the refrigerator.
Makes about 11/3 cups
The post Cheesy Broccoli Mac Soup appeared first on Robin Robertson.


Robin Robertson's Blog
- Robin Robertson's profile
- 59 followers


