Robin Robertson's Blog, page 21
June 11, 2014
Blueberry-Chocolate Trail Mix Bark
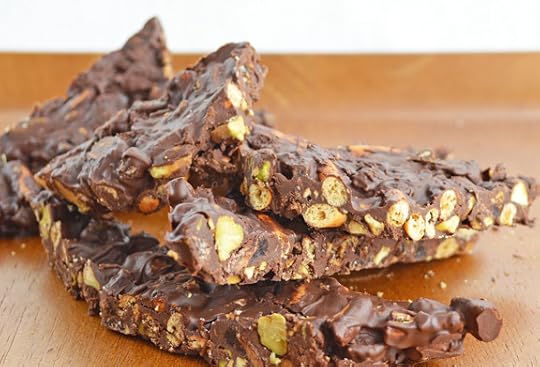
If you’re looking for a great gift for Dad this Father’s Day, how about a homemade treat? This Blueberry-Chocolate Trail Mix Bark from my book, More Quick-Fix Vegan is super-easy to make and because it’s made with nuts, fruit, pretzels, and chocolate, it hits all the right snack buttons: a little sweet, a little salty, a little chewy, a little crunchy — this stuff has it all! Plus, Dads love gifts that you make yourself — especially when they taste this good. (Of course Father’s Day is only one reason to make this treat — there are 364 other reasons each year when it would also be a good idea!)
Blueberry-Chocolate Trail Mix Bark
Yield: about 30 pieces
A new spin on old-fashioned almond bark, this version is the stuff dreams are made of. That is, if you dream about chocolate, nuts, pretzels, and blueberries! This recipe is from More Quick-Fix Vegan by Robin Robertson © 2014, Andrews McMeel Publishing. (photo by Zsu Dever)
Note: If dried blueberries are unavailable, or just for a variation, you can substituted dried cranberries, cherries, raisins, or other dried fruit in equal measure.
12 ounces vegan semisweet chocolate chips
1 1/2 cup chopped peanuts, pistachios, almonds, or a combination
1 1/2 cups thin salted pretzel sticks, coarsely chopped
1 cup chopped dried blueberries
Line a 9 x 13-inch baking dish with waxed paper.
Melt the chocolate in a heatproof bowl over a saucepan of boiling water or in the microwave. Stir in the remaining ingredients, then transfer the mixture to the baking dish. Spread the mixture evenly, smoothing out the top as much as possible. Refrigerate until firm, about 20 minutes. Invert the bark onto a cutting board and peel off the waxed paper. Cut the bark into pieces.
The post Blueberry-Chocolate Trail Mix Bark appeared first on Robin Robertson.


May 29, 2014
Memorable Memorial Day Weekend
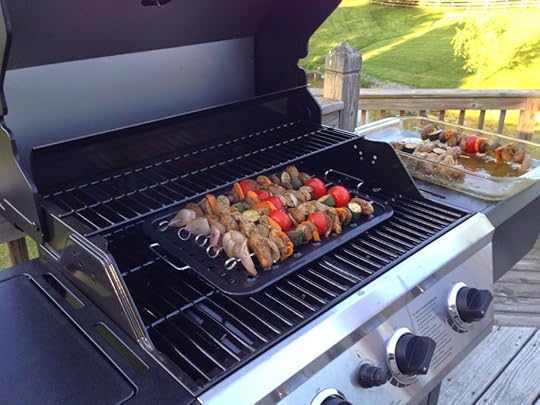
Memorial weekend was especially memorable this year. The weather was absolutely perfect and we got to spend time with lots of our favorite people and animal friends! And, of course, we enjoyed lots of great food, too. Because the weather was so great, there was lots of outdoor grilling going on. Here is a little pictorial tour of some of the highlights, thanks to my friend Elissa, who always seems to have her camera ready to capture the moment. (Thanks, Elissa!) We finally got a new grill. These spice-rubbed skewers featured Ray’s Seitan (the best seitan in the world!), fingerling potatoes, and lots of other great veggies. The secret to getting everything to be done cooking at the same time is to partially pre-cook the harder vegetables, such as the potatoes. I also like to partially cook the onions, since I don’t like raw-ish onion.
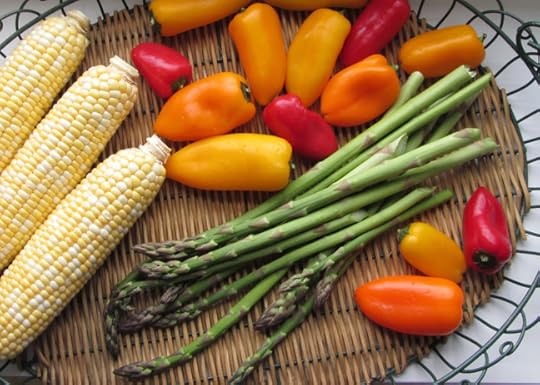
The asparagus in the photo below was actually found growing wild nearby! (It was given to a friend who shared some with me.)
For dessert, we had brownie sundaes made with Amy’s vegan ice cream. If you don’t know the story of Amy’s ice cream (and it’s origins at Plant restaurant in Asheville NC) read all about it here.
Another highlight was a visit to our friends who live nearby where she shared a great meal and visit on their lovely property.
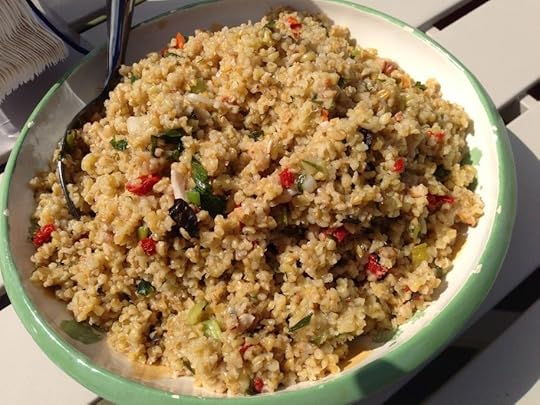
The food was outstanding and featured a wonderful freekeh pilaf. Freekeh is a fabulous grain that cooks up in 15 minutes and tastes so good.
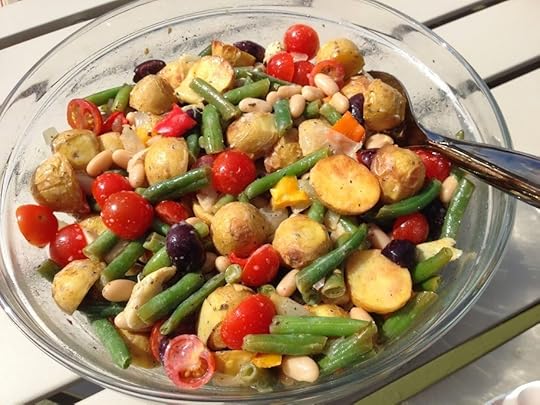
And my favorite Nicoise salad:
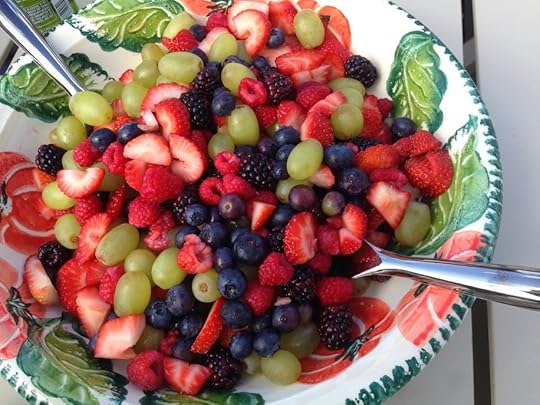
We also enjoyed this gorgeous fruit (the berries were so sweet!) and lots of other good food.
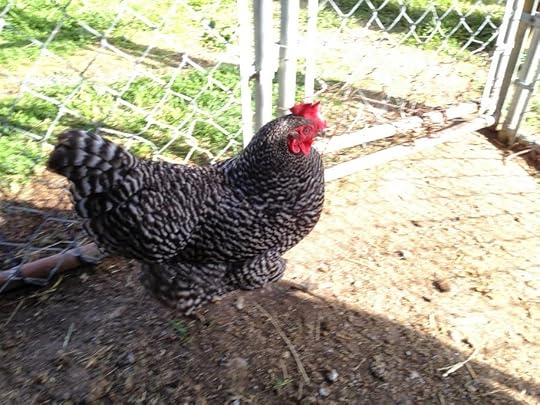
It was also super-fun to spend some quality time with these fantastic animal friends.
Aren’t they gorgeous? If the rest of the summer is even a fraction as good as this past weekend, it’s going to be terrific! Hope you all had a great weekend too!
The post Memorable Memorial Day Weekend appeared first on Robin Robertson.


May 23, 2014
Cookbook Giveaway Winner + Easy Peanut Butter and Banana Ice Cream
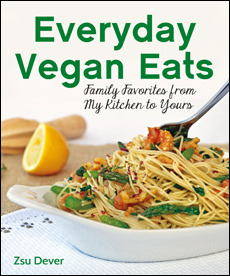
Thanks to everyone who entered my two-book giveaway to win a copy of my new book, MORE Quick-Fix Vegan (a new book in the “quick-fix” series) as well as a copy of Everyday Vegan Eats a terrific new book by Zsu Dever. It was fun to see what all of your favorite “everyday” meals are!
The winner of this giveaway, chosen at random, is Rika at Vegan Miam whose favorite go-to meals are “creamy kale salad….fried rice…[and] noodle soups!” Congratulations!!! Rika, please e-mail me with your mailing address and I’ll get these books out to you.
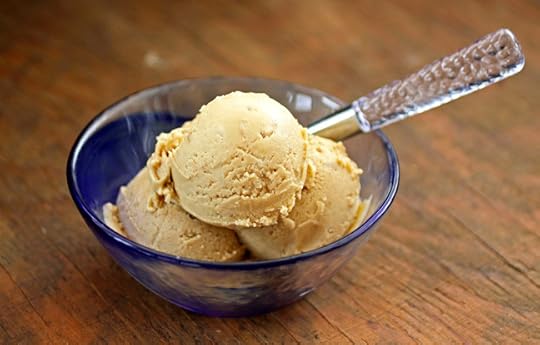
I’ll leave with with a super-easy recipe from More Quick-Fix Vegan that would make a great dessert over this holiday weekend. It’s the Peanut Butter and Banana Ice Cream. With only three ingredients, no dairy, no added sugar, and no ice cream maker, this ice cream treat seems almost too good to be true — but it is.
Peanut Butter and Banana Ice Cream
This recipe is from More Quick-Fix Vegan by Robin Robertson (c) 2014, Andrews McMeel Publishing.
3 to 4 very ripe bananas, peeled, cut into small chunks, and frozen
1/2 cup peanut butter
2 tablespoons almond milk
Remove the frozen banana chunks from the freezer about 5 minutes before using and place them in a food processor. Pulse to break up the bananas, then add the peanut butter and almond milk and process until well mixed, scraping down the sides of the food processor, as needed.
Scrape the mixture into a container. If you like soft-serve ice cream, it could be eaten immediately. If you prefer it a bit firmer, cover tightly and place in the freezer for 30 minutes to an hour, depending on how soft you like it. For a firmer ice cream, keep in the freezer for 3 to 4 hours or longer. If it freezes longer than 4 hours, it will be quite hard, in which case it should be removed from the freezer for about 10 minutes before serving so it can temper and become slightly softened.
I hope you all have a safe and relaxing Memorial Day weekend.
The post Cookbook Giveaway Winner + Easy Peanut Butter and Banana Ice Cream appeared first on Robin Robertson.


May 16, 2014
Everyday Vegan Eats: Recipe + Giveaway!
I’m super-excited to be part of the blog tour for Everyday Vegan Eats by Zsu Dever, not only because Zsu is a longtime recipe tester of mine and I’m thrilled to see this talented lady’s recipes in print, but also because my husband’s company, Vegan Heritage Press published her new cookbook. And what a great cookbook it is!
Everyday Vegan Eats is filled with Zsu’s very own family favorite recipes – the ones she’s been making for her family for more than a dozen years that keeps them happy and healthy vegans. The book is ideal for both beginners and longtime vegans. Some of my favorite recipes (so far) are: Broccoli Cheese Soup, Bánh Mì Burgers (a girl after my own heart!), German Potato Salad, Maple-Chipotle Crispers, Blueberry Scones, and the Soft Pretzels. There’s loads of other delicious comfort food recipes in the book, some of which you saw this week, if you’ve been following the blog tour. If you haven’t had time to do so yet, here are the links to the other posts so you can catch up:
Monday, May 12th – Canned Time
Tuesday, May 13th – VeggieGirl
Wednesday, May 14th – Cadry’s Kitchen
Thursday, May 15th – Vegan Appetite
Like the other blog tour participants, I’m also hosting a giveaway for this book (details below). Be sure to increase your chances to win by entering all five giveaways!
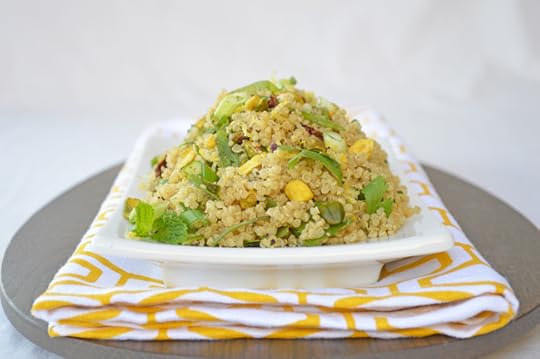
The recipe from Everyday Vegan Eats that I’m sharing with you features quinoa and fresh herbs. I love this recipe because I’m always looking for an easy and delicious way to serve this super-grain and I’m also keen on any recipes that uses more than one herb to pack a real flavor punch.
Another thing I like about this recipe is its versatility – you can add cooked (or canned) chickpeas or cannellini beans for extra protein, or even some sautéed tofu or seitan, and add in some extra veggies, if you feel like it for a fabulous one-dish meal. It’s equally good served cold or room temperature as a salad (with a drizzle of olive oil and a little lemon juice). Try it yourself and see what I mean. And don’t miss Zsu’s quinoa cooking tip in the headnote!
Mediterranean Quinoa with Fresh Herbs
SERVES 4
QUICK & EASY
GLUTEN FREE
SOY-FREE
Most recipes call for cooking quinoa in a 1:2 ratio—1 cup quinoa to 2 cups liquid. This leads to soggy and over-cooked quinoa. This recipe produces fluffy, tender quinoa. If your package of quinoa doesn’t specify that it is rinsed, make sure to rinse it well in a fine mesh strainer. This recipe is from Everyday Vegan Eats by Zsu Dever © 2014, Vegan Heritage Press.
1 cup quinoa, well rinsed
1 1/2 cups vegetable broth
1/4 teaspoon sea salt
2 garlic cloves, minced, divided
1/4 cup minced scallions or 2 tablespoons minced fresh chives
2 tablespoons finely chopped parsley
2 tablespoons finely chopped basil
2 tablespoons finely chopped mint
2 tablespoons finely chopped soft sun-dried tomatoes
1 tablespoon olive oil (optional)
1/2 teaspoon lemon zest
1 tablespoon fresh lemon juice
2 tablespoons minced pistachios or other nut
salt and fresh ground black pepper
Combine the rinsed quinoa, broth, 1/4 teaspoon sea salt and 1 clove minced garlic in a medium saucepan. Bring the broth to a boil, reduce to a simmer, cover, and cook for 15 minutes.
After 15 minutes, remove the saucepan from the heat and set the pan aside, still covered, for another 10 minutes to steam. Fluff the quinoa with a fork. Add the scallions or chives, parsley, basil, mint, tomatoes, oil, zest, lemon juice, and nuts to the quinoa fluffing the mixture with a fork. Add additional lemon juice, salt, and black pepper to taste.
Two for One Cookbook Giveaway: Since there are already lots of giveaways going on for this book this week, I decided to “sweeten the pot” and host a double giveaway! One lucky winner will receive TWO books: a copy of Everyday Vegan Eats by Zsu Dever PLUS a copy of my new book, More Quick-Fix Vegan. That’s a lot of great recipes in one prize.
To enter, leave a comment at the end of this post listing your favorite “everyday” meal. That’s it! A winner will be chosen on Thursday May 22 at midnight and announced on my blog on Friday morning, May 23. Good luck!
The post Everyday Vegan Eats: Recipe + Giveaway! appeared first on Robin Robertson.


May 6, 2014
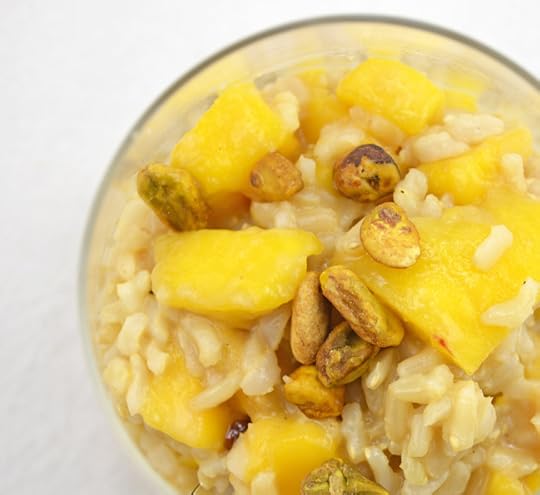
Mango Fried-Rice Pudding
This recipe came about when I was in the mood for the mango sticky rice you get at Thai restaurants, but not in the mood to make it from scratch. I happened to have a couple of ripe mangoes and some cooked basmati rice on hand (although jasmine rice would be more authentic). I got the idea to make a quick skillet “stir-fry” of the rice and mangoes, with coconut milk and sugar, topped with a sprinkling of pistachios for a bit of crunch. (photo by: Zsu Dever)
You’ll find this recipe (along with 149 other new “quick and easy” recipes) in my new book More Quick-Fix Vegan.
FUN FACT: More Quick-Fix Vegan (with the asparagus on the cover) is a completely different book from my earlier book Quick-Fix Vegan (with the eggplant on the cover) — so if you like Quick-Fix Vegan, you’ll LOVE More Quick-Fix Vegan.
Another fun fact: Quick-Fix Vegetarian (with the tomato on the cover) is another completely different book as well! That makes THREE separate books filled with recipes that require 30 minutes or less of your time to make!
Now, here’s the recipe for Mango Fried Rice Pudding. If you make it, come back and let me know what you think!
Mango Fried Rice Pudding
Serves 4
This twist on rice pudding (and fried rice) is made with leftover cooked rice that gets stir-fried with chopped mangoes and a little sugar. You them stir in as much coconut milk as you like to make it firm or creamy to your own taste. This recipe is from More Quick-Fix Vegan by Robin Robertson (c) 2014, Andrews McMeel Publishing.
1 tablespoon vegan butter
3 to 4 tablespoons light brown sugar or palm sugar
2 fresh ripe mangoes, peeled, pitted, and chopped
2 cups cold cooked basmati or jasmine rice
1/2 cup unsweetened coconut milk
2 tablespoons chopped pistachios, optional
Melt the butter in a medium skillet over medium heat. Add the sugar and stir until melted. Add the mangoes and the rice. Stir-fry until heated through. Stir in the coconut milk. Spoon into dessert glasses to serve. Sprinkle with pistachios, if using.
The post Mango Fried-Rice Pudding appeared first on Robin Robertson.


April 29, 2014
Banh Mi Crostini
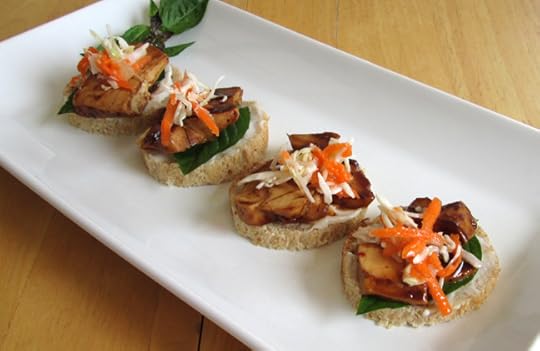
It was just a matter of time before I reinterpreted the elements of the classic Vietnamese banh mi sandwich to make these tasty little crostini. l For those of you who are keeping track, so far I have translated the beloved sandwich into a pizza, a salad, a noodle dish, spring rolls, and now… crostini.
This latest variation uses thin slices of baguette and piles the various fillings on top, for little mini open-faced sandwiches. They’re great alone or do as I did, and serve them as an accompaniment to a bowl of pho noodle soup.
Banh Mi Crostini
8 ounces extra-firm tofu, cut into thin slices
2 tablespoons hoisin sauce
1/4 cup vegan mayonnaise (I use Just Mayo)
1 teaspoon sriracha sauce, or more to taste
1 cup shredded cabbage and carrot (you can use some shredded slaw mix to save time)
2 teaspoons chopped pickled jalapeños
1 tablespoon rice vinegar
1/4 teaspoon salt
1/4 teaspoon sugar
1/2 cup fresh cilantro leaves (or Thai basil leaves)
1 baguette, cut into 1/4-inch thick slices, lightly toasted
Coat a nonstick skillet with cooking spray. Add the tofu and hoisin and cook over medium-high heat, turning the tofu to coat with the hoisin. Remove from the heat and set aside.
In a small bowl, combine the mayonnaise and sriracha. (You can omit the sriracha if you don’t like the heat.)
In a small bowl, combine the shredded cabbage and carrot with the jalapenos, vinegar, salt, and sugar. Toss to combine, then taste and adjust the seasoning, if needed.
Spread the mayonnaise mixture onto one side of the baguette slices. Top with the cilantro or Thai basil, followed by some tofu, and then some of the slaw. Arrange on a plate and serve.
Serves 4
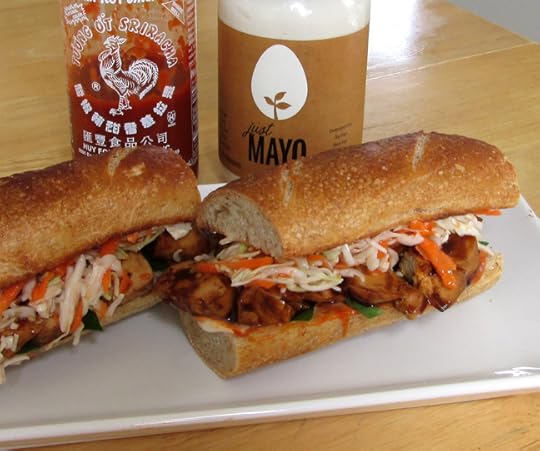
So what do you do if you have extra ingredients? I guess you could do what I did: make a banh mi sandwich!
The post Banh Mi Crostini appeared first on Robin Robertson.


April 24, 2014
Roasted Cauliflower with Caper Berries and Hollandaise
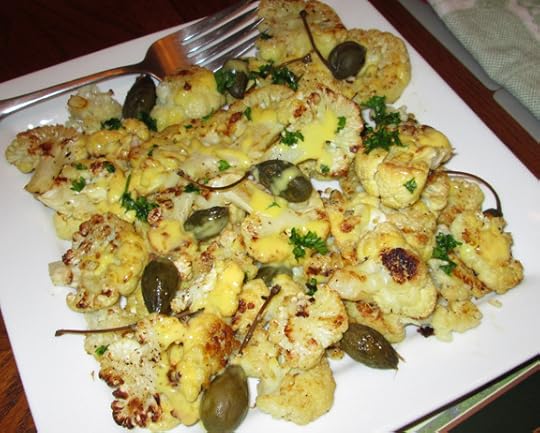
As you probably know if you read my blog or my cookbooks, I’m a fiend for cauliflower — especially ROASTED cauliflower! It’s like it becomes an entirely different (and even more delicious) vegetable when roasted. So when I added some caper berries while roasting, and then drizzled it with an easy-peasy hollandaise before serving, it became the best-tasting dish of a weekend filled with really great food. I mean, this stuff has been haunting my dreams, it’s so good.
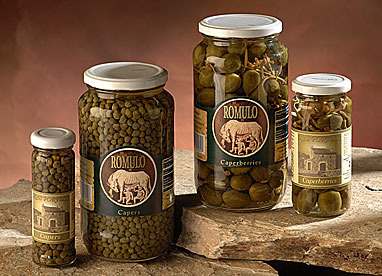
Before I share the recipe, let me tell you a bit about caper berries.The diminutive capers we all know and love are the edible flower buds of the caper bush, but if the caper bud is not picked and is allowed to flower, the resulting fruit will be the rather sizeable (and delicious) caper berry.
You may recall, I have a fondness for caper berries, having stuffed them and wrapped them in pastry in a previous blog post:
Here’s the brand of caper berries I use:
And, for comparison, this shows the relative size of capers and caper berries:
Now, on to the recipe…..
Roasted Cauliflower and Caper Berries with Hollandaise
Serves 4
1 large head cauliflower, core and leaves removed
2 tablespoons olive oil
Salt and freshly ground black pepper
2 shallots, finely minced
1/3 cup caper berries (see Note)
1/2 cup vegan mayonnaise (use Just Mayo brand, if available)
2 to 3 teaspoons fresh lemon juice
2 teaspoons nutritional yeast (optional)
1/2 teaspoon Dijon mustard
Pinch of ground annatto or turmeric (optional, for color)
Preheat the oven to 425°F. Lightly oil one or two large baking pans or rimmed cookie sheets or spray them with cooking spray. Set aside.
Place the cauliflower on a cutting board, cored-side down, and use a serrated knife to cut the cauliflower into 1/2-inch slices, as if you were cutting a loaf of bread. Some of the “slices” will fall apart – that’s okay.
Arrange the cauliflower slices and pieces on the prepared baking pans and drizzle with the olive oil, then season with salt and pepper to taste. Roast the cauliflower for 15 minutes, then remove from the oven and turn over the pieces with a large metal spatula. Add the caper berries to the pan, placing them in between the pieces of cauliflower. Return the pan to the oven and continue roasting until the cauliflower is tender and nicely browned, 10 to 15 minutes longer.
While the cauliflower is roasting, make the hollandaise. In a small bowl, combine the mayo, lemon juice, nutritional yeast, if using, mustard, and annatto, if using. Stir well until smooth and thoroughly combined.
When the cauliflower and caper berries are done roasting, transfer them to a platter or shallow serving bowl and drizzle with the hollandaise. Serve hot.
Note: if you don’t have caper berries, you can substitute about 2 tablespoons of regular capers.
The post Roasted Cauliflower with Caper Berries and Hollandaise appeared first on Robin Robertson.


April 17, 2014
Vegan Without Borders
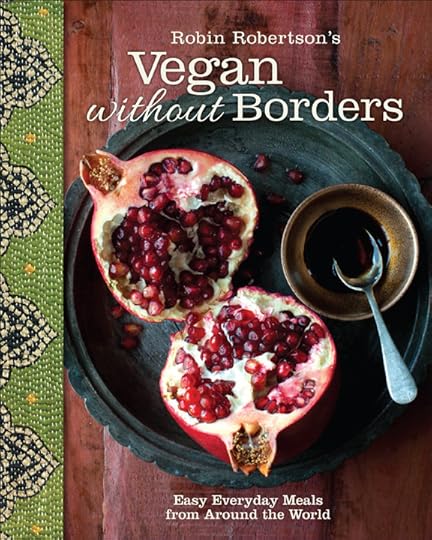
I am beyond excited to announce my upcoming cookbook, due to hit the shelves in early September. It’s called Vegan Without Borders and this hardcover full color book is truly a dream come true for me. Anyone who knows my work, knows that I’m crazy about international cuisines and I love the way vegan food has almost become synonymous with global fare.
For a long time, I’ve wanted to share my absolute favorite recipes from around the world and the phrase “vegan without borders” sat in my idea file for a long time. As I explain in the Introduction, I call the book Vegan Without Borders because while fantastic flavors know no boundaries, neither do most vegans when it comes to enjoying great-tasting food.
Another reason I’m especially excited about this book is the photos! The super-talented Sara Remington took the gorgeous photos for this book – each one more beautiful than the next. I just have to share one of my favorites so you can see why I’m so thrilled. Here’s Sara’s photo of the papri chat. I want this framed and hanging on my wall!
I hope you’ll love Vegan Without Borders as much as I do!
I’ll be sharing more about the book in the months to come, but for now, I just wanted to let you know about it.
It’s now available for pre-order on Amazon. (Did you know that if you order a book, for example, my current tome, More Quick-Fix Vegan, and also pre-order Vegan Without Borders, you’ll get free shipping for both of them.) Just sayin’….
The post Vegan Without Borders appeared first on Robin Robertson.


April 8, 2014
Chickpeas Nicoise
One of my favorite flavor combos is the one found in a Nicoise Salad: the melding of creamy potatoes, fresh green beans, sweet tomatoes, and piquant olives hits all the right flavor notes. And while the salad itself, served on a bed of crisp lettuce, is one of my go-to salads, I also like to let the ingredients play out in other arenas, including a main-dish saute like this recipe for Chickpeas Nicoise from my new book More Quick-Fix Vegan. The already quick and easy recipe can be made even faster if you use leftover roasted potatoes or steamed green beans.
The photo was taken by Zsu Dever who has her own fantastic book coming out soon entitled Everyday Vegan Eats. It’s available for pre-order on Amazon. While you’re on Amazon, be sure to check out How to be Vegan by Elizabeth Castoria — it’s a great book with lots of helpful info for vegans, new and old. Oh, and I wrote the recipes for the book!
And now for the recipe for Chickpeas Nicoise from More Quick-Fix Vegan.
By the way, if you’d like to see more photos of the recipes from More Quick-Fix Vegan, be sure to visit my Pinterest page for the book.
And if you already have More Quick-Fix Vegan (or any of my other books) please tell the world about them via a brief review on Amazon — it only takes a minute of your time, and I’d really appreciate it. (thanks!)
Chickpeas Nicoise
from More Quick-Fix Vegan by Robin Robertson (c) 2014, Andrews McMeel Publishing.
Serves 4
1 pound small red potatoes, quartered or sliced 1/4-inch thick
6 ounces green beans, trimmed and cut into 2-inch pieces
2 tablespoons olive oil
3 garlic cloves, minced
3 scallions, minced
Salt and freshly ground black pepper
1 1/2 cups cooked chickpeas or 1 (15.5-ounce) can chickpeas, drained and rinsed
1 cup cherry tomatoes, halved
2 tablespoons Kalamata or Niçoise olives, pitted and halved
1 tablespoon white wine vinegar
2 tablespoons minced fresh parsley
2 tablespoons minced fresh basil
Steam the potatoes for 5 minutes, then add the green beans and steam until both are just tender, about 5 minutes longer. Set aside.
Heat the oil in a large skillet over medium heat. Add the garlic and scallions and cook until fragrant, 30 seconds. Add the potatoes and green beans and season with salt and pepper to taste and sauté for 2 minutes. Add the chickpeas, tomatoes, and olives and heat through, about 2 minutes longer. Drizzle on the vinegar, add the parsley and basil. Toss gently to combine and serve.
The post Chickpeas Nicoise appeared first on Robin Robertson.


March 25, 2014
Three-Bean Pantry Chili
It’s been great to hear from so many of you who have been loving the recipes in my newest book, More Quick-Fix Vegan. One of the new features in this book that has been getting lots of attention is the chapter of “Pantry Makes Perfect” Recipes.
While all the recipes in More Quick-Fix Vegan can be prepared in 30 minutes or less, the recipes in this chapter go one step further by using only pantry ingredients. After all, sometimes we’re too busy to shop for ingredients to make dinner — even a quick one.
The recipes in the “Pantry Makes Perfect” chapter provide easy meal solutions because the ingredients to make them are as close as your own pantry. There are recipes in that chapter for hearty main dishes, such as Pantry Paella, Artichoke-Walnut “Quiche,” Pantry Burgers, and even a few “pantry-perfect” dessert recipes including Pantry Black Forest Cake.
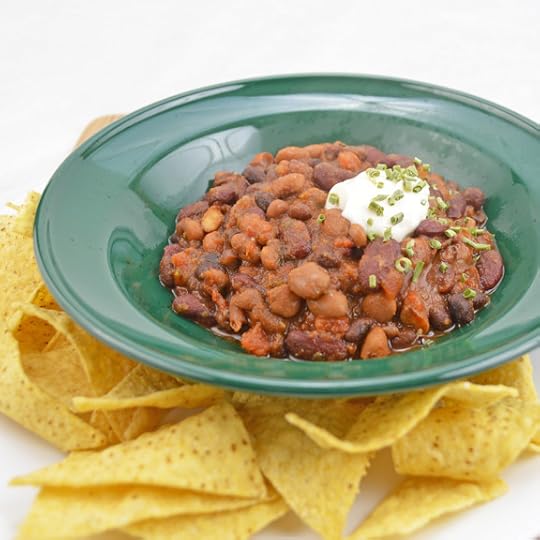
Here’s the recipe for one of my favorites from the chapter — Three-Bean Pantry Chili (photo by Zsu Dever) . This is my go-to chili when time is short.
Three-Bean Pantry Chili
Serves 4
A selection of canned beans combined with a jar of salsa and some chili powder are combined here for an almost effortless pot of chili. Vary the beans according to what’s on hand (lentils are great in this!) and add some TVP or chopped Soy Curls, if you like. The optional corn kernels make a tasty addition. Naturally, if you have any chili toppings on hand such as avocado, scallions, or vegan sour cream, feel free to use them at will. This recipe is from More Quick-Fix Vegan by Robin Robertson (c) 2014, Andrews McMeel Publishing.
1 (15.5-ounce) can black beans, drained and rinsed
1 (15.5-ounce) can dark red kidney beans, drained and rinsed
1 (15.5-ounce) can pinto beans, drained and rinsed
1 (24-ounce) jar salsa (hot or mild)
2 to 3 tablespoons chili powder
1 (8-ounce) can corn kernels, drained (optional)
Combine all the ingredients in a saucepan, reserving half the corn, if using. Cook over medium heat, stirring occasionally, until heated through and long enough to cook off any raw taste from the chili powder, 15 to 20 minutes. Add up to 1 cup of water if the chili is too thick. Serve hot, garnished with the remaining half of corn kernels.
The post Three-Bean Pantry Chili appeared first on Robin Robertson.


Robin Robertson's Blog
- Robin Robertson's profile
- 59 followers


