
Leya Delray's Blog, page 4
March 8, 2019
Costume Design: Cogsworth
Welcome to another post in my costume design series! Today we’ll be looking at my Cogsworth costume, which ended up turning out rather different than my original sketch, but was still a success!
Inspiration, Concept, and Materials
When I first started working on costume ideas for the theater production of Beauty and the Beast, I was a little overwhelmed trying to figure out how to make actors look like household objects. But google is my friend! Before I made my initial Cogsworth sketch, a quick internet search showed me all sorts of costume ideas. From boxy, 3D designs to more subtle versions.
[image error][image error][image error]
Since this was lighthearted kids production, I decided that going with big, boxy designs was the right choice. My early sketches imagined striped breeches, a clock-themed hat, and an overcoat, in addition to the 3D clock “body.”
[image error](This was one of my earliest sketches in the costume design process. Cogsworth and Lumiere were two of the first drawings I did.)
However, as the show dates got closer, I ended up needing to simplify some costumes a lot in order to accomplish everything (there are a LOT of specialized costumes in Beauty and the Beast). I never found striped fabric for the breeches, but I did find some nice brown tapestry fabric for a vest. I ended up skipping the overcoat, and left off the clock-hat (opting instead for a simple black tricorn hat he could wear with his “human form” too.
For the 3D clock, I knew I needed heavy-duty cardboard. A family member happened to find a refrigerator box for me, which was perfect (I was able to use that one box to do both Cogsworth and the Wardrobe lady, ‘Madame de le Grande Bouche’). I also found a gilded picture frame at the thrift store to dress up the clock opening on the front.
The final thing I needed was fabric for covering the box. (I considered paint, but decided fabric would give more texture and interest to the costume). I originally hoped to find a piece large enough to both cover the clock and make his human costume, so they would match. But I never found a large enough piece. Instead, I made use of this interesting curtain I found at a thrift store. The narrow raised velvet stripes ended up creating a great wood-panel effect.
[image error]Yeah I know, the photo quality is terrible. This was taken at like 2am.
In addition, I used some black spray-paint I had on hand, some shiny gold fabric I got at Habit for Humanity, and some heavy brown/gold fringe that I bought at the same place I found the fabric for the Bimbettes and Belle’s blue dress, the bolt of tulle I used Babette’s skirt, and even the gold chiffon for Belle’s ball gown! (I had a quite a haul from that thrift store!)
Construction
If you’ve been following this whole costume series, you’ve probably noticed I have a lot more (and better quality) “in-progress” photos for some costumes than others. That’s because the further into the project I got, the more of a time-crunch I had. By the time I was doing Cogsworth’s clock, the costumes were literally due the next day. I stayed up almost all night to finish them, and only went to bed for a couple of hours when my arm started to tingle and burn, and I concluded that if I didn’t sleep it was going to stop working all together. So I wasn’t taking many pictures by that point.
Suit
Anyway. The base layer of the costume was Cogsworth’s “human” form. As I mentioned above, I ended up simplifying my original design quite a bit. Since I never found striped fabric for the breeches, I went for a quick and easy replacement, simply altering a thrift-store pair of brown men’s pants. I cut them off below the knee, folded the cut-off edges over and sewed them into casing for elastic, then added elastic into the wait of the pants to make them wearable for a young teen.
I somehow did not get any good pictures of Cogsworth’s pants, but since I used this same method to make navy breeches for the beast/prince, I’ve included some photos of them below, showing how I added the elastic to the waistband. Cogsworth’s pants done the same way.
[image error][image error]
Then, just like with Lumiere, I used a thrifted white shirt and trimmed the collar down to look more historically accurate.
I skipped the overcoat and went with a long vest/waistcoat instead. I used the largest size in this historical pattern, and made it out of some brown tapestry fabric I purchased at a giant upholstery sale. I did not get many good photos of Cogsworth, unfortunately, but you can see the vest in this photo from dress rehearsal…
[image error](Photo credit: Amy Burns)
We used long white athletic socks to mimic 18th century hosiery, and some simple black loafers for shoes.
Clock
Building the actual “clock” was the fun part. Thought it would have been MORE fun if I had been slightly less sleep deprived at the time. Haha.
My Dad had nicely cut out and glued together the cardboard frame to my specifications. (After we figured out how to get the wardrobe and the clock out of that one refrigerator box). The basic form was two taller, tapered ends, joined by lower sides, and then an opening cut out in the front to accommodate the “pendulum box”.
[image error]
The first step in turning the cardboard frame into a clock was to cover it with the brown striped fabric. I did very little cutting for this step. The curtain was already about the right height, and I simply wrapped it around and folded the edges out of sight, securing the fabric with both hot-glue and brass paper fasteners like these. (I probably could have done it all with hot-glue, but I didn’t think of that at the beginning. The fasteners did look kind of like old-fashioned brass furniture tacks though, which was cool.)
[image error]Here you can see some of the brass fasteners. I had to poke holes in the fabric/cardboard with a knife before I put them in. So they were a lot of work. (If I had it to do over I probably would have just used hot glue.)
Next, I cut open the fabric that covered the square front opening, and tucked the edges inside, then glued on the picture-frame to make it look fancy. I also used some gorgeous fringe along the top edge of both back and front of the clock. I would have loved to use it in more places, but I ran out after I used it for this and the shoulder straps (getting to those in a bit.)
[image error]You can see how I carefully centered the stripes so that there are 3 “wooden panels” on the front of the clock. Did I mention I’m a perfectionist?
Once the basic frame was completed, I made the “pendulum box” for the front. It was basically a slanted shadow-box cut to fit inside that front hole, and painted black so that it would simply look like an opening. As you can see below, it wasn’t much to look like on it’s own.
[image error]
But it was perfect for the gold pendulum! I had originally had some grand ideas of a fancy, intricate pendulum, but I ran out of time. So I simply cut out two pieces of cardboard, one in a long narrow rectangle for the pendulum neck, and one in a circle for the bottom part. I covered them in some shiny gold fabric and glued them together (I have no idea how much hot glue I used for this show, but it was a LOT). Then I attached the pendulum in the black box , using more of the paper fasteners to hang it from some excess fabric I left at the top of rectangle.
[image error][image error]Finished pendulum[image error]Attached
Finally I glued the entire shadow box inside the clock, and reinforced with lots of duck tape. The effect was perfect! Exactly what I was going for.
[image error]
I didn’t get any in-progress photos of how I made the straps. (Though you can see the completed version below.) They were basically long strips of the same tapestry fabric I made Cogsworth’s vest out of, with their edges serged to avoid raveling. I wrapped and secured the ends around heavy-duty strips of cardboard which I then attached to the inside of the clock (lots of glue and more paper fasteners). I also added fringe on the outside edges to fancy them up.
[image error]This design ended up putting a lot of stress on the unsupported taller ends of the clock. If I were making another one, I would add in cardboard braces in the corners (where those triangular pieces of fabric are in the photo.)
Finished Costume
As I mentioned earlier, I did not get as many pictures of Cogsworth’s costume as I should have, and I don’t have any good full-length ones of his “human” form. But I’ll share what I’ve got.
Although the costume didn’t really match my original plans/sketch, I was pleased with the way it turned out. Particularly the clock part. It was adorably boxy and fun, and blended perfectly with the suit underneath, particularly with the matching shoulder straps!
[image error]
I LOVED the way the front turned out, with the pendulum that swung back and forth inside it’s frame as Cogsworth moved around the stage. You can see it in motion below, when poor Cogsworth was reacting to an outburst from the ill-tempered Beast.
[image error]Photo credit: Amy Burns
I have to say the young man who played Cogworth in our production did a PERFECT job of capturing the stiff, slightly awkward personality of the uptight “steward of the castle.” And he stayed in character backstage too. It was hilarious to see him perched on a chair in full costume, ignoring the rest of the rambunctious cast around him as he calmly read a book.
[image error]You can see how the top edge of the clock started to bend inward, due to the stress on the shoulder straps.
I loved the details on the costume. From the thick, textured tapestry and velvet-striped fabric, to the intricate swirls in the gilded picture frame and the luxurious fringe in the perfect brown and gold color-scheme. It’s amazing what you can find at a thrift store!
[image error][image error]
So there you have it. A DIY Cogsworth costume that cost less than $20!
What Beauty and the Beast character should I cover in my next costume post? Mrs. Potts? Chip? Madame de le Grande Bouche? Let me know in the comments!


March 2, 2019
So…Somebody Hates Your Book
Not all that long ago, I got my first negative review.
I’m not talking about a mediocre, “Ho hum, it was alright” kind of review. I’m talking about a full-blown, “It’s terrible, I hated it, and nobody should ever waste their time on this junk” review.
It was a little traumatizing.
I imagine it would be the same for most first-time authors. After all, you’re still getting your legs under you. When you’ve written six successful novels and are confident in your abilities, it’s easy not to worry about a couple negative reviews. But if this is your first published book, you aren’t accustomed yet to letting random people critique the things you pour your soul into. So how to do you deal with it when somebody reads your book…and hates it?
Well, first off, you could just avoid reading reviews.
But if you’re like me and can’t help yourself, here’s a couple other things to try…
#1: Remind yourself that no matter how good your book is, not everyone is going to like it.
There’s no way you’re going to please everybody. In fact, a few negative reviews are a good sign. They mean LOTS of people are reading your book. (After all, if only your friends and relatives read it, they’d leave all positive reviews, right?)
If you want to make money with your book, you’re going to need a lot of buyers/readers who aren’t the same people you send Christmas cards to. But the more readers you have, the more certain it is that at some point one of them will be disappointed.
#2. See if there is useful information in the reviews.
Sometimes criticism is the fastest way to find and correct our blind spots. For instance, if you regularly get negative comments on a certain aspect of your writing, (too much description, confusing dialogue, etc) it’s probably something you want to improve in your next book.
Keep an eye out for a common thread in the negative reviews, and determine if they are picking up on a weak point you should work on.
#3. Keep things in perspective.
As a certain wonderful person in my life pointed out, if only 1-5% of your reviews are negative, that should NOT define the way you view your book. Imagine if you bought a new sweater and polled all the people you encountered, asking what color it was. On the survey, 38% said it was red, 35% said it was maroon, 25% said it was dark pink…and 2% said it was lime green.
Would you panic, conclude that the 2% were correct, and get your eyes checked to see if you might be color-blind?
Of course not! So. If at least 95% of reviews put your book somewhere on the scale between pretty good and wonderful, and 1-5% say it’s garbage sandwiched between press-boards…who are you going to believe?
But if all else fails…
If, despite trying all that, you still feel traumatized and unsure of yourself, there’s one more thing you can do. (Which, I admit, I totally did.)
Get on Amazon and look up some well-known, well-rated books that you think are fantastic. Click on the “reviews” section, and select the bar that allows you to ONLY see the 1 (or 2) star reviews.
[image error]This is the review page from one of my favorite books,
Jocelyn Green’s The Mark of the King.
Now sit and read those wince-worthy, “this book stinks, I hate it, and no one should ever read it” messages that somebody left for a fantastic author you love. There, you see? Even award-winning authors can’t please everybody.
So don’t be discouraged if you can’t either.
February 22, 2019
Why Did You Leave That Out???
One of the most frequent comments/complaints I get about Where Daffodils Bloom involves the “gaps” in the story-line. Some readers are simply sad that they didn’t get to hear what happened in those holes, and others are annoyed with the “unnecessary” jumps. I’m writing this post to explain a little about why those gaps exist, and mention an idea I have for filling them in.
First: Why the gaps?
There are a couple of places in the book where multiple years go by in a matter of a few chapters. In the first half, this happens between the engagement and Fred’s return to England a couple of years later. In the second half, this happens between the wedding and Fred and Lily’s arrival in Canada. Both of these sections cover multiple years with a only a few chapters to break them up. So…why?
There are basically three distinct reasons.
#1. Time-Frame.
From start to finish, the story stretches over a total of 14 years (1944-1959). It’s impossible to cover that much time in a single book without some significant jumps over the less important segments.
To get around this, many authors who write biographical novels will compress the story-line, changing the dates of events so that they happen closer together and thus allow a more seamless time-frame for the book. I chose NOT to do that (except in one very specific instance, noted in the Afterword) because it was important to to me to be as accurate as possible with the facts, and not move dates and events around willy-nilly.
[image error]Lily, Fred, and Yvonne in England.
This photo was taken during years that are only skimmed over in the book.
#2. Pacing
To flow well, novels need to follow a certain pace/story-arc. Important highs and lows in the character development need to happen at fairly defined intervals. If an author wanders off in their writing, sharing interesting details and meandering scraps of story without any real movement in the character development, most readers will start to yawn.
#3. Missing Information
As I’ve already mentioned, it was my goal to write a book that was as accurate to the facts as possible. There are multiple time-periods in the course of the book which Fred and Lily simply did not leave us many details about. While other sections generated many family stories, these years are equivalent to the “dark ages” in history. We simply don’t know much about what happened in them.
I would have had to invent a LOT of fictional material to fill in the gaps, without any real knowledge of what actually happened there. In the interest of making the book as true to facts as possible, I chose not to do so.
Were any known facts left out?
You’re probably still wondering if there are pieces of the story that I left out, even though I knew about them.
The answer is…yes. There were certain family stories and details that simply did not make it into the final book (a few were in chapters that got cut when I trimmed the word-count down, and others were never written down in the first place).
For instance, there were some childhood stories that didn’t get into the book, since the story-line starts with both Lily and Fred as adults (though I referenced a few of them). There are also fascinating details about Lily’s uncles in WWI, which I just barely hinted at, and a few scattered stories here and there that I simply ran out of space for in the book.
[image error]Fred as a young teenager (driver’s seat) with friends in the truck he built.
So the question is, what becomes of those stories now? Should they be written down? Or left as family memories?
Some of my readers have begged for a sequel to Where Daffodils Bloom. And although I highly doubt I will write anything like a full novel, I am at least considering putting together a small companion book, (perhaps just in ebook form), that would share some of these missing stories.
What do you think? Would you like to find out more about Fred and Lily’s childhood? Are you curious about Lily’s Uncle George, who was determined to join the military even though it didn’t want him, and her Uncle Henry, who lied about his age in order to get into the trenches? (Spoiler alert! One of them never came back.) Would you enjoy the funny anecdotes about Lily’s first experiences in America, trying to read menus and find bathrooms in a country that calls things by different names?
Should I write a “missing stories” companion book to Where Daffodils Bloom?
Let me know in the comments!
Don’t forget to join the mailing list, so you’ll never miss a post!
February 15, 2019
Frog-Dodging and Bestsellers
If you’d been driving behind me on a certain country road a few night ago, you might have called the police.
It was dark and rainy, and as my headlights pressed a hazy glow into the mist, I was barrelling around curves as fast the speed-limit would allow…all while sporadically swerving like a drunken maniac in convulsions. And no. I was NOT on my may home from a wild party celebrating my best-seller status on Amazon. (Though I was pretty excited about it.)
I was frog-dodging.
Spring comes early in GA. The air is warming up, the rains smell of new life, and the frogs are going crazy after dark. On wet nights, they quickly cover roads in small, bouncing traffic hazards. Now, I don’t consider myself an animal rights activist. I still eat meat, and I’m not a member of PETA. But if I can avoid squashing small creatures while driving home on rainy nights, I think I should.
So there I went down the road, jerking the car left and right to avoid small, croaking projectiles, and somewhere along the way it struck me what a strange thing success is.
What does frog-dodging have to do with success? Let me explain.
When I started writing Where Daffodils Bloom, I didn’t have what you might call “big” goals. (Like making millions, or being a best-seller). I just didn’t imagine that sort of thing was within reach for a first-time author.
My goals were much simpler. I wanted to write a book that would accurately tell the amazing story of this real-life couple. I wanted it to exceed the expectations of their two daughters, who were giving me the material. I wanted to make it professional, skillful, and entertaining for readers. I wanted to pay off the money I put into it. And…if possible…I wanted to make a little profit to boot. I never really expected anything more than that.
Which is why I was in shock when a woman walked up to me at a meet-the-author event this week and commented, “Hey, did you know your book is an Amazon bestseller?”
Say WHAT ???
Now, I should explain that there are multiple kinds of bestsellers on Amazon. The highest possible rating would be hit the overall bestseller list (i.e. sell more than 95% of all other books on Amazon). The other option is to simply be a bestseller in a certain category. And, depending on the size of the category, being a bestseller in it might not mean much of anything.
In my case, I was the #1 bestseller in Historical Christian Romance. Which is a pretty decent-sized category. (It’s also updated hourly, so I’ve bounced back and forth between 1st and 2nd place multiple times in the past week).
[image error]
In any case, it was a pretty shocking experience to see my book at the top of a list that included works by Francine Rivers, Jocelyn Green, and other authors I’ve read and admired. Did I feel excited? Yes. Did I feel startled? Yes. Did I feel like I’d achieved success? Ummm…
No.
That’s the interesting part. Of course I was happy to see my book with a little orange flag next to it that said “bestseller.” And quite thrilled to get my sales report and find out I sold over 1,000 copies last month. But somewhere along that frog-infested road, I realized something sobering.
Material success is always a moving target.
Like a never-ending video game, there’s always another “level” waiting to be conquered as soon as you think you’ve made it. Did you navigate the frog-strewn obstacle course and arrive safely on the far side? Good. In the next level you get to dodge exploding starfish while swimming through peanut butter. Have fun!
You never really “win.” There’s always a bigger goal ahead. Sure, I’m a bestseller in Historical Christian Romance. But what about being a bestseller on ALL of Amazon? What about being a bestseller on the New York Times list? What about having my book made into a movie?
[image error]
There’s always more “success” flirting with you from just around the corner. (Which explains why some of the most “successful” people in the world end up loosing themselves to drugs, destroying their marriages, committing suicide, etc.) Material success can never satisfy. It only wets your appetite.
So…am I saying I’m unsatisfied?
Nope. Remember my original goals? I hit every one of them. And the ones that are the most satisfying are NOT the ones measured in sales, ratings, or acclaim. The most satisfying successes are the immaterial ones. The joy of giving this gift to Sharon and Susan, who get so see their parents’ story being shared with the world. The reviews I read from people saying how much the book blessed them. The friends of Fred and Lily who write in telling me how perfectly I captured the personalities of the couple they knew so well.
Those are the successes that leave me satisfied, instead of instantly wanting to achieve the next level.
Kind of like, (on a much smaller scale), the satisfaction I felt when I pulled up to my house without killing a single frog on my way home. I didn’t need to run out and try dodging bigger frogs on a faster road, or earn an award for being the best frog-dodger in GA. I was just happy I could drive home in the dark without killing tiny creatures along the way.
Would I still like Where Daffodils Bloom to end up a NYT bestseller? Sure. Would I still think it was cool if somebody made it into a movie? Of course. But is that what I want to get my satisfaction from? Not a chance.
Material success is never going to be satisfying if we don’t invest in the immaterial things along the way. Racing full-tilt up the road to fame won’t bring us joy if we recklessly crush everything in our path.
We were designed in the image of a personal, relational God, who is in the business of blessing, saving, preserving, and caring for His creation. We are most fulfilled when we follow in His footsteps, blessing, preserving, and caring for the people and world around us.
Whether that means writing books that impact thousands of readers or simply dodging frogs on a dark, rainy night, everything we do can either be a blessing or a curse, either bring more life or more death into our sphere of influence.
Am I saying we shouldn’t want/try to be skillful and successful in our work? No. Am I saying that if you accidentally run over a frog, or a turtle, or even a kitten on your way home tomorrow, you’re a terrible person? Of course not. I’m simply pointing out that if we walk through our lives focused on doing good, not just making records, we’ll end up far more satisfied in the long run.
So let’s set goals that matter. Let’s find our satisfaction in things that last. Let’s go through our world touching lives, not counting Amazon ratings.
And maybe even save a few frogs while we’re at it. 
February 9, 2019
Costume Design: Babette the Feather Duster
As I promised last week in my post on Lumiere, today I’m going to cover Babette’s feather duster costume.
As far as looks go, I was happy with the way it turned out, but when it comes to the wear and tear of theater, it did NOT hold up at all. So there’s definitely some things I’d change if I went back and did it again. (We’ll get to that later.)
Inspiration, Concept, and Materials
Just like Lumiere, Cogsworth, and the rest of the palace staff, Babette needed a costume that not only transformed her into a household object, but also allowed her to change quickly into a human again at the end of the play.
I spent some time scrolling through internet images from other theater productions, and noticed that Babette was usually done in one of two ways. Either with a short, flirty skirt, or a long, slender skirt (mimicking the duster handle), with feathers at the bottom.
[image error][image error][image error]
Neither of those were good options for me. The short, sexy version was NOT what I wanted for a kid’s production (or any production, to be honest; sexy is not my style). And the pencil skirt style, though a good feather-duster imitation, did not fit the historically-inspired look I was going for.
However as I’ve mentioned in several other costume posts, I am absolutely in love with the FANTASTIC costumes Jaqueline Durran created for the 2017 live action Beauty and the Beast.
In this case, it was actually the human version of the character that caught my attention. Right after the spell is broken and the palace staff become human again, the feather duster (called “Plumette” in the movie) is seen in the costume below, which cleverly captures the proper historical silhouette while using fluffy fabrics and a few feathers to hint at her previous feather-duster existence.
[image error]
I decided to go for a similar silhouette, though I wanted to incorporate more of the traditional black and white color-scheme. My idea was to have a fluffy, “feather-duster” over-skirt that could be removed quickly to reveal the human maid costume underneath.
[image error]
I was hoping to find a rich, black brocade fabric, but had to settle for some plain black garment fabric ($5), which was all I could find at the thrift store. For the white, blouse-style “chemise” worn as the base layer, I used a white curtain panel ($2) that was the same style (and bought at the same thrift store) as the sheer panels I used for the “Bimbette” skirts.
Originally my plan for the feather-duster skirt was to use a lot of fluffy tulle mixed with feathers. I thought I’d need to buy a used wedding dress for the tulle, but I was blessed (and shocked) to find an ENTIRE BOLT of white tulle at the thrift store for only $6!!!
When it came to buying feathers, I at first intended to order loose ostrich plumes, but found out they were quite pricey. So I ended up just getting cheap boas from my local dollar store, which were much simpler to attach anyway (I got 10 of them for $1 a piece). For the apron, I found a second-hand, lace-edged table runner for $0.50. I also bought second-hand shoes, and dressed them up black electrical with tape and buckles! All in all, I only spent about $25 on the entire costume.
I love making magical creations with just a few dollars and lots of creativity!
Construction
[image error]
The base layer of the dress was made similarly to Belle’s blue dress and the Silly Girl costumes. Basically the top half was a shortened version of the “chemise” pattern in this book, and then the black skirt fabric was attached to at waist level. (For more details, check out the post on Belle’s dress).
The only things I did differently from Belle and the Bimbettes was to cut each sleeve all in one piece, rather than with the square underarm gusset (since I was working with a striped fabric this time), and added a wide ruffle around the neckline instead of lace. Oh! I also lined the torso area this time, since the curtain fabric was quite transparent.
The black bodice was made using the same period-correct french bodice pattern I used for Belle and the Silly girls, but this time I added a peplum to the bottom of it, to smooth the transition from feathers to bodice. I basically cut out a doughnut-shaped piece of fabric and attached it to the bottom of the bodice, pulling in the fullness with box pleats. I used the same elastic cording (this time in black) that I used to lace the Silly Girl costumes.
[image error]Here you can see the box pleats and apron.
The last piece in the standard maid outfit was the apron, which I made by cutting the table-runner in half and using some hem tape to make the waistband and ties like I did for Belle’s apron. (I saved the other half of the runner for Mrs. Potts’ costume.)
Now it was time for the fluffy part! I started with a simple white skirt made out of some scrap fabric. It was pretty basic, just a casing and some elastic around the waist. Then I pulled out the bolt of tulle and tried to figure out how to attach it.
I wanted a somewhat random, fluffy mess. Nothing with recognizable layers or seams. To do that, I knew I needed to be able to work from the outside of the skirt, where I could see how the tulle was behaving as I tacked it in place. At first I considered pinning it, and then going back and stitching all the places I pinned. But that seamed like a long process, and I was in a hurry. So…I used a stapler.
Starting from the top of the skirt, I wrapped the tulle around and around, bunching it up and stapling it in place. By the time I got to bottom (and ran out of tulle) I had a fantastical poof of a skirt quite unlike anything I had made before!
[image error]Start with a base skirt…[image error]…add an entire bolt of tulle!
I originally planned to use boas with mixed black and white feathers, but they were more expensive and had to be ordered online. So I ended up just going with ten plain white ones from the local dollar store. I draped them around, bunching and stapling just like with the tulle. After I finished, I was actually glad I had gone with white, because it all blended together and just made the skirt into a fluffy, feathery poof. Black feathers would have stood out more, and you could have easily seen where they were (and also that there were places without them).
[image error]
The theater did have one black&white boa left over from another show, which I used to make feathery accent pieces for the actress to wear on her cuffs and head. I coiled pieces of the boa around elastic bands and sewed them down where they overlapped. This allowed them to stretch a bit for taking on and off.
For shoes, I found a pair of black high-rise pumps, and added some buckles, held on by “straps” of black electrical tape. (The buckles were ordered in bulk for the show.) I used a similar technique to do shoes for the Prince/Beast and Lumiere as well.
Watching Babette’s costume take shape was exciting. The tulle and feathers were fun to work with, and the entire process was quick. I did run into problems during the show though, which I’ll get to in the next section.
Finished Costume (and what I’d do different)
Over all I was very happy with the way Babette’s costume ended up looking. I just wasn’t too happy with how it behaved. (Or in other words, the feather skirt did not hold together well.)
[image error]
Above you can see how the maid costume looks in it’s “human” form. And below, the “feather-duster” version. Looks great, right? But there was a problem…
[image error]
Though it seemed sturdy enough hanging on my mannequin, the actual wear and tear of being walked around in, danced in, etc, quickly proved staples could NOT stand up to such use. All through rehearsals and backstage between scenes during performance, I was following Babette around with a stapler and re-tacking loose boas and dangling bits of tulle. The skirt swished around and looked lovely onstage…but only so long as I could keep ahead of it falling apart!
If I had it to do all over again, I would either find a more secure way to tack it, or change the design so that it was more like the skirt in the movie, which seems to be lots of smaller pieces all attached near the waist, rather than one long piece bunched and tacked everywhere.
Other than that issue though, the costume worked well. It was easy to transition from feather-duster to human, and the transparent, striped fabric I used for the chemise gave the sleeves a frothy, feminine look that blended well with the feathery vibe
[image error]
I also loved the feather cuffs and headband I made, particularly with the black and white tones mixed together.
[image error]
Despite the bad performance of the staples, I was still quite pleased with how this costume turned out. With a a sturdier construction, it would have been just about perfect. Maybe someday I’ll have a chance to do another version, and work out those kinks.
[image error]
Stay tuned for another costume post next! (I’m planning to write about my version Cogsworth, and how I created a giant clock costume with an actual moving pendulum for him to wear!)
February 2, 2019
Costume Design: Lumiere’s Gilded Suit & Candles
I’m so excited about this post! It’s going to cover one of my very favorite costumes. The charming and gilded Lumiere!
Of course, I loved every costume I made, but aside from Belle, Lumiere was definitely my favorite. I loved so many things about it. The glowing candles I was able to make with a few simple supplies, the absolutely PERFECT fabric I found….
[image error]Picture taken during dress rehearsal. (Photo Credit: Amy Burns)
But hold on. I’m getting ahead of myself.
Inspiration, Concept, and Materials
[image error] From the live-action film
Unlike Belle’s blue dress, I didn’t get much in the way of design for Lumiere from the live-action film. Although I loved the way they protrayed him, a computer generated image doesn’t exactly transfer to the stage well.
Instead, I looked to other theater productions for inspiration. A google search for images of “Lumiere theater costume” yields all sorts of great ideas. From costumes that try to make him look as much as possible like a candle-stick, to those that let him keep his human form mainly intact, and just use candles and shimmering fabrics to get the gilded look.
Since this was a youth theater production, I decided to go simpler (and easier for changing to become “human again) if I let him keep his human form. Besides there’s one thing I DID get out of the new movie, it was an image of how a candle-stick could look quite decidedly human!
So, I sat down with my colored pencils and started sketching again.
I’m very familiar with 1700’s clothing (having grown up doing re-enactments) and I’ve made period-correct clothing both men and women. So I felt pretty confident with the breeches, shirt and vest. The only part I was a bit intimidated by is a jacket, which I’ve never made before. Hence why I went with just a vest in my original sketches (though that changed later on, as did the candle hat idea).
[image error]I messed up his head in the original sketch and ended up drawing a new one, cutting it out and pasting it on, rather than redrawing everything else. (This was one of my early sketches, and I was slower at first. So I hated to redraw anything.)
Originally I was hoping I might find a gold brocade table-cloth at a thrift store to make the suit out of. But despite visiting quite a few stores, I never found one. I was getting a little desperate by the time I happened to walk past the fabric aisle in Walmart and spotted something that made me stop in my tracks…
[image error]
It was a bolt of shimmering gold brocade. Not the matte gold of a tablecloth, but luminous and sparkling! When I got up close I could see it was dusted with glitter that caught the light and gave the fabric a hint of metallic gleam. I knew at once that matching suit of that fabric would be SPECTACULAR! There was just one small problem… It cost $5 a yard!
Compared to the great deals I was getting on thrift store finds, that seemed crazy expensive! In the end though, I decided to go ahead and splurge. And I am SO glad I did. It was completely perfect for Lumiere, combined with some shimmering gold thread (which I bought for Belle’s gold gown but had excess of), and some metallic fabric and ribbons I found at various thrift store.
As for candle supplies, I used several things I had on hand (a cardboard tube, plastic bowls, hot-glue) as well as some thrifted gold fabric, white spray paint, and two battery-operated tapers.
[image error]
Because of the electric candles ($10.97) and the almost the 4 yards of fabric I got from Walmart ($20.91), Lumiere’s costume ended up being one of the more expensive ones I did for the show. With the additional ribbon/trim/gold fabric, the total came to around $35. But that was still a pretty good deal compared to buying or renting costumes. So I felt good about it.
Construction
Unlike Belle and the Bimbettes, Lumiere’s costume required two distinct kinds of construction. Sewing for the main costume, and lots of glue, paint and DIY craftiness for the candles. Let’s start with the suit.
Suite:
I already had this historical pattern on hand that I could use to make the knee breeches (pants) and vest. Somewhere during the planning process though, I decided Lumiere really needed a jacket. His elegant, suave persona just seemed to require coattails swishing behind him! So I started shopping for a jacket pattern on ebay.
[image error]
Sometimes you have to be creative to find the best deal. After searching for “historical”, “colonial”, “revolutionary war” and “George Washington” and finding all the kid’s patterns rather expensive, I eventually found a somewhat battered copy of this Pirates of the Caribbean pattern for just under $10 (including shipping). I figured I could easily adapt it to look less “pirate-y”. I ended up using both the vest and jacket pattern included, but went with the breeches from my historical pattern, if I am remembering right.
I cut out the jacket pieces first, because I wanted to make sure I had enough fabric for that if nothing else. Then I cut out the breeches, and finally got to the vest. I ended up not having quite enough for the whole vest, so I used some pieces of a striped gold tablecloth for the back of it.
The vest and breeches were both easy to put together. The breeches were cut out of two main pieces for the legs, and folded over at the waist and below the knees to create casings for elastic.
I didn’t bother lining the vest, since it was an under-layer anyway and only showed in front. I just serged all the edges instead. I had bought gold buttons in bulk off Ebay, since I knew I’d need a lot for the various men’s costumes. After adding those on, as well as some ties on the back made from gold I found at a thrift store, and the vest was complete.
[image error]I was looking for plain gold buttons, but these ended up being cheaper. And fancier too!
Although my historical pattern from Townsends included a shirt, I decided it was silly to spend time making shirts that would mostly be covered by vests and jackets anyway. Instead, I used an ordinary white dress shirt from the thrift store.
It was pretty easy to use fabric scissors and trim away the modern collar, leaving just the narrow collar band, which pretty much mimics the look of historical shirts like this one. If I’d had more time, I would have used a serger to make sure that raw edge didn’t ravel. But as it was, I just left it. There was definitely some raveling by the end of the show, but not enough to detect from the audience.
[image error]You can see the collar raveling where I cut it.
The jacket was the most challenging part. There were a lot more pieces to keep track of, and the instructions were a bit confusing when it came to finishing the slit in the back. I ended up basically making that part up, looking at the picture as a guideline. (I’m so glad I learned to create garments long before I learned to follow patterns. It makes improvising WAY easier.)
The pattern also called for pocket flaps, and buttons down each side of the front opening. But I ended up skipping both. I don’t like skimping on the details, but sometimes time/budget make it necessary.
[image error]My improvised back slit finishing.
Another change I made was on the sleeves. Instead of doing the wide cuffs from the pattern, I sewed in ruffle of lace poking out from the inside. Historically, this lace would actually have been attached to the shirt-sleeve. But it was simpler to just attach it to the jacket, so that whatever shirt is used the lace will still be part of the costume.
The final piece was a lace cravat, which I made from some gorgeous lace curtains I found at (you guessed it!) the thrift store. I made these for multiple characters in the show, and I’ll cover the construction in more detail when I do a post on the Prince/Beast.
[image error]
Now, on to my favorite part!
Candles:
To make the candles, I decided to go with a hot-glue technique I saw in several videos like this one. and use battery-operated tapers to create the flame. (I bought these off Amazon).
The first step was to enclose the tapers inside tubes to create the illusion of thicker candles. Rather than using paper towel rolls (which would have been delicate), I found a cardboard shipping tube in the corner of my craft room (score for hoarding random craft items!). The cardboard was so thick and dense that I used an electric saw to cut it! I made two pieces, each long enough to hide a taper inside, and then cut out small circles from a cardboard box to fit the top of the tubes. Next, I poked a hole in the middle of each circle, just big enough to squeeze the rubbery “flame” through.
[image error]Cardboard circle for top of candle[image error]Bottom of candle secured with wire[image error]Wire hot-glued on outside of tube
Using hot-glue, I secured the circle on the top of the tube, and then used wire to hold the candle steady near the bottom, threading a loop through holes on each side of the tube and pulling tension in both directions to keep the candle firmly in the center. The wire ends I twisted together tightly on the outside, and used hot glue to coat the twist and fill the holes for extra security.
[image error]
Next, I used LOTS of hot glue to cover the top of the candle and create “drips” down the sides. I usually use a low-heat gun for crafts, so I’m less likely to burn myself, but I switched to a really hot one for this step, because it was taking way too long the other-way, and the project had already dragged on after midnight.
Of course, I then forgot to pay attention and gave myself a second-degree burn at 1 a.m. in the morning.Thankfully it was quite small, so I just sort of wrapped it up with an ice-cube and kept working. (The show must go on, people.) I also ruined one of the tapers by accidentally pulling the rubbery cover off the flame bulb. Thankfully I had two spares. On the second try I made the tapers somewhat easier to take out, so that I could replace if anything went wrong.
Once I finished with the hot-glue and switched on the candle to see how it looked, I was really happy with how things were taking shape. Time for a paint job! I made little foil caps to protect the flames poking out the top and then used white spray-paint to coat the rest of the candle.
[image error]
The instructions said to hold the spray-can several feet from the surface while spraying, but after giving that a try and seeing thin the coat was and how long it would take to finish at that speed, I quickly abandoned rules and sprayed from about 4 inches away, thoroughly dousing the whole thing in paint. (It had all night to dry, so who cares?)
The last step was making the candle “holders.” I had already measured and cut two plastic bowls, ready for the candles to stick through. Now I just covered them in the same thrifted gold fabric I’d used to edge the jacket. Basically I just used a rectangle of fabric, long enough to fully circle the outside edge of the bowl. The excess I just folded down in pleats and glued to cover the bowls. I also added a wide ruffle on the bottom to cover the handle end and hide the actress’s hands when in use.
[image error]Batting-wrapped handle hidden under ruffle[image error]Finished candles
In the morning, when the paint was dry, I slide the candles into the holders and hot-glued them in place. Bottom ends of the tubes were supposed to be handles to hold onto, but they were slippery, and also poky due to the wires, so I cut some pieces of soft batting-type material leftover from something else, and wrapped and glued it around the handles. (This also gave the bowls something to rest on and keep them from sliding easily.)
Finished Costume
As I’m sure you could tell at the beginning of this post, I was extremely happy with how my Lumiere costume turned out. The fabric was so perfect, and so were the candles! The suit didn’t quite fit my mannequin, since it was designed for a girl in her early teens (yes, we didn’t have enough boys, so Lumiere was played by a girl), which is why the vest doesn’t button all the way up in the front on my woman-sized mannequin.
[image error]
The back of the vest was made from pieces of a gold-striped tablecloth (which I also used in the Prince/Beast jacket), since I ran out of the brocade. The gold ties were from a spool of gold tape stuff I found at the thrift store. It worked fine for this, but not so well when I tried to use it in the fork and spoon costumes later.
[image error]
The lace cravat was secured with a ribbon tie in the back. I opted for that over elastic because it was more adjustable and there was no danger of it looking too tight and/or choking the actress.
[image error]
I opted for a zigzag stitch to attach the gathered lace inside the sleeves, because I thought it would blend in better with the brocade. It worked pretty well. That particular lace was actually just some bulk stuff I had lying around. I would have liked to match the cravat, but there wasn’t enough, once I made all the cravats I need. As it turned out, they were close enough that unless you look close, you wouldn’t know they didn’t match.
[image error]
Although I didn’t add buttons to the edges of the coat, I did add strips of gold fabric that matched the candle-holders. This was part partly for decoration, but partly to give the front of the coat some weight since I didn’t fully line the jacket. This allowed the coat to “swish” but kept it fluttering around like a handkerchief. I didn’t want it to look TOO lightweight.
[image error]I serged the one edge, and stitched down the other side with a straight seam and zigzag.
I was happy with the way the back of the jacket turned out, despite the fact that I pretty much had to make up my own way of finishing the back slit. And the elastic in the hem of the knickers worked well to pull them in under the knee.
[image error]
The costume looked spectacular under the stage lights. The whole suit gleamed and shimmered when the actress moved, and the electric candle flames glowed perfectly. With the edition of a white colonial wig from the costume stash, white stockings, and black shoes with added buckles, the ensemble was perfect!
[image error]Picture taken during dress rehearsal. (Photo Credit: Amy Burns)
I guess you can see now why I loved Lumiere’s costume so much! Maybe next I’ll post about his companion, the feathery Babbette. (And why I ended up following her around the entire show with a stapler at the ready. Ugh. By far my biggest costume mistake!)
Lumiere’s Gilded Suit
I’m so excited about this post! It’s going to cover one of my very favorite costumes. The charming and gilded Lumiere!
Of course, I loved every costume I made, but aside from Belle, Lumiere was definitely my favorite. I loved so many things about it. The glowing candles I was able to make with a few simple supplies, the absolutely PERFECT fabric I found….
[image error]Picture taken during dress rehearsal. (Photo Credit: Amy Burns)
But hold on. I’m getting ahead of myself.
Inspiration, Concept, and Materials
[image error] From the live-action film
Unlike Belle’s blue dress, I didn’t get much in the way of design for Lumiere from the live-action film. Although I loved the way they protrayed him, a computer generated image doesn’t exactly transfer to the stage well.
Instead, I looked to other theater productions for inspiration. A google search for images of “Lumiere theater costume” yields all sorts of great ideas. From costumes that try to make him look as much as possible like a candle-stick, to those that let him keep his human form mainly intact, and just use candles and shimmering fabrics to get the gilded look.
Since this was a youth theater production, I decided to go simpler (and easier for changing to become “human again) if I let him keep his human form. Besides there’s one thing I DID get out of the new movie, it was an image of how a candle-stick could look quite decidedly human!
So, I sat down with my colored pencils and started sketching again.
I’m very familiar with 1700’s clothing (having grown up doing re-enactments) and I’ve made period-correct clothing both men and women. So I felt pretty confident with the breeches, shirt and vest. The only part I was a bit intimidated by is a jacket, which I’ve never made before. Hence why I went with just a vest in my original sketches (though that changed later on, as did the candle hat idea).
[image error]I messed up his head in the original sketch and ended up drawing a new one, cutting it out and pasting it on, rather than redrawing everything else. (This was one of my early sketches, and I was slower at first. So I hated to redraw anything.)
Originally I was hoping I might find a gold brocade table-cloth at a thrift store to make the suit out of. But despite visiting quite a few stores, I never found one. I was getting a little desperate by the time I happened to walk past the fabric aisle in Walmart and spotted something that made me stop in my tracks…
[image error]
It was a bolt of shimmering gold brocade. Not the matte gold of a tablecloth, but luminous and sparkling! When I got up close I could see it was dusted with glitter that caught the light and gave the fabric a hint of metallic gleam. I knew at once that matching suit of that fabric would be SPECTACULAR! There was just one small problem… It cost $5 a yard!
Compared to the great deals I was getting on thrift store finds, that seemed crazy expensive! In the end though, I decided to go ahead and splurge. And I am SO glad I did. It was completely perfect for Lumiere, combined with some shimmering gold thread (which I bought for Belle’s gold gown but had excess of), and some metallic fabric and ribbons I found at various thrift store.
As for candle supplies, I used several things I had on hand (a cardboard tube, plastic bowls, hot-glue) as well as some thrifted gold fabric, white spray paint, and two battery-operated tapers.
[image error]
Because of the electric candles ($10.97) and the almost the 4 yards of fabric I got from Walmart ($20.91), Lumiere’s costume ended up being one of the more expensive ones I did for the show. With the additional ribbon/trim/gold fabric, the total came to around $35. But that was still a pretty good deal compared to buying or renting costumes. So I felt good about it.
Construction
Unlike Belle and the Bimbettes, Lumiere’s costume required two distinct kinds of construction. Sewing for the main costume, and lots of glue, paint and DIY craftiness for the candles. Let’s start with the suit.
Suite:
I already had this historical pattern on hand that I could use to make the knee breeches (pants) and vest. Somewhere during the planning process though, I decided Lumiere really needed a jacket. His elegant, suave persona just seemed to require coattails swishing behind him! So I started shopping for a jacket pattern on ebay.
[image error]
Sometimes you have to be creative to find the best deal. After searching for “historical”, “colonial”, “revolutionary war” and “George Washington” and finding all the kid’s patterns rather expensive, I eventually found a somewhat battered copy of this Pirates of the Caribbean pattern for just under $10 (including shipping). I figured I could easily adapt it to look less “pirate-y”. I ended up using both the vest and jacket pattern included, but went with the breeches from my historical pattern, if I am remembering right.
I cut out the jacket pieces first, because I wanted to make sure I had enough fabric for that if nothing else. Then I cut out the breeches, and finally got to the vest. I ended up not having quite enough for the whole vest, so I used some pieces of a striped gold tablecloth for the back of it.
The vest and breeches were both easy to put together. The breeches were cut out of two main pieces for the legs, and folded over at the waist and below the knees to create casings for elastic.
I didn’t bother lining the vest, since it was an under-layer anyway and only showed in front. I just serged all the edges instead. I had bought gold buttons in bulk off Ebay, since I knew I’d need a lot for the various men’s costumes. After adding those on, as well as some ties on the back made from gold I found at a thrift store, and the vest was complete.
[image error]I was looking for plain gold buttons, but these ended up being cheaper. And fancier too!
Although my historical pattern from Townsends included a shirt, I decided it was silly to spend time making shirts that would mostly be covered by vests and jackets anyway. Instead, I used an ordinary white dress shirt from the thrift store.
It was pretty easy to use fabric scissors and trim away the modern collar, leaving just the narrow collar band, which pretty much mimics the look of historical shirts like this one. If I’d had more time, I would have used a serger to make sure that raw edge didn’t ravel. But as it was, I just left it. There was definitely some raveling by the end of the show, but not enough to detect from the audience.
[image error]You can see the collar raveling where I cut it.
The jacket was the most challenging part. There were a lot more pieces to keep track of, and the instructions were a bit confusing when it came to finishing the slit in the back. I ended up basically making that part up, looking at the picture as a guideline. (I’m so glad I learned to create garments long before I learned to follow patterns. It makes improvising WAY easier.)
The pattern also called for pocket flaps, and buttons down each side of the front opening. But I ended up skipping both. I don’t like skimping on the details, but sometimes time/budget make it necessary.
[image error]My improvised back slit finishing.
Another change I made was on the sleeves. Instead of doing the wide cuffs from the pattern, I sewed in ruffle of lace poking out from the inside. Historically, this lace would actually have been attached to the shirt-sleeve. But it was simpler to just attach it to the jacket, so that whatever shirt is used the lace will still be part of the costume.
The final piece was a lace cravat, which I made from some gorgeous lace curtains I found at (you guessed it!) the thrift store. I made these for multiple characters in the show, and I’ll cover the construction in more detail when I do a post on the Prince/Beast.
[image error]
Now, on to my favorite part!
Candles:
To make the candles, I decided to go with a hot-glue technique I saw in several videos like this one. and use battery-operated tapers to create the flame. (I bought these off Amazon).
The first step was to enclose the tapers inside tubes to create the illusion of thicker candles. Rather than using paper towel rolls (which would have been delicate), I found a cardboard shipping tube in the corner of my craft room (score for hoarding random craft items!). The cardboard was so thick and dense that I used an electric saw to cut it! I made two pieces, each long enough to hide a taper inside, and then cut out small circles from a cardboard box to fit the top of the tubes. Next, I poked a hole in the middle of each circle, just big enough to squeeze the rubbery “flame” through.
[image error]Cardboard circle for top of candle[image error]Bottom of candle secured with wire[image error]Wire hot-glued on outside of tube
Using hot-glue, I secured the circle on the top of the tube, and then used wire to hold the candle steady near the bottom, threading a loop through holes on each side of the tube and pulling tension in both directions to keep the candle firmly in the center. The wire ends I twisted together tightly on the outside, and used hot glue to coat the twist and fill the holes for extra security.
[image error]
Next, I used LOTS of hot glue to cover the top of the candle and create “drips” down the sides. I usually use a low-heat gun for crafts, so I’m less likely to burn myself, but I switched to a really hot one for this step, because it was taking way too long the other-way, and the project had already dragged on after midnight.
Of course, I then forgot to pay attention and gave myself a second-degree burn at 1 a.m. in the morning.
Thankfully it was quite small, so I just sort of wrapped it up with an ice-cube and kept working. (The show must go on, people.) I also ruined one of the tapers by accidentally pulling the rubbery cover off the flame bulb. Thankfully thankfully I had two spares. On the second try I made the tapers somewhat easier to take out, so that I could replace if anything went wrong.
Once I finished with the hot-glue and switched on the candle to see how it looked, I was really happy with how things were taking shape. Time for a paint job! I made little foil caps to protect the flames poking out the top and then used white spray-paint to coat the rest of the candle.
[image error]
The instructions said to hold the spray-can several feet from the surface while spraying, but after giving that a try and seeing thin the coat was and how long it would take to finish at that speed, I quickly abandoned rules and sprayed from about 4 inches away, thoroughly dousing the whole thing in paint. (It had all night to dry, so who cares?)
The last step was making the candle “holders.” I had already measured and cut two plastic bowls, ready for the candles to stick through. Now I just covered them in the same thrifted gold fabric I’d used to edge the jacket. Basically I just used a rectangle of fabric, long enough to fully circle the outside edge of the bowl. The excess I just folded down in pleats and glued to cover the bowls. I also added a wide ruffle on the bottom to cover the handle end and hide the actress’s hands when in use.
[image error]Batting-wrapped handle hidden under ruffle[image error]Finished candles
In the morning, when the paint was dry, I slide the candles into the holders and hot-glued them in place. Bottom ends of the tubes were supposed to be handles to hold onto, but they were slippery, and also poky due to the wires, so I cut some pieces of soft batting-type material leftover from something else, and wrapped and glued it around the handles. (This also gave the bowls something to rest on and keep them from sliding easily.)
Finished Costume
As I’m sure you could tell at the beginning of this post, I was extremely happy with how my Lumiere costume turned out. The fabric was so perfect, and so were the candles! The suit didn’t quite fit my mannequin, since it was designed for a girl in her early teens (yes, we didn’t have enough boys, so Lumiere was played by a girl), which is why the vest doesn’t button all the way up in the front on my woman-sized mannequin.
[image error]
The back of the vest was made from pieces of a gold-striped tablecloth (which I also used in the Prince/Beast jacket), since I ran out of the brocade. The gold ties were from a spool of gold tape stuff I found at the thrift store. It worked fine for this, but not so well when I tried to use it in the fork and spoon costumes later.
[image error]
The lace cravat was secured with a ribbon tie in the back. I opted for that over elastic because it was more adjustable and there was no danger of it looking too tight and/or choking the actress.
[image error]
I opted for a zigzag stitch to attach the gathered lace inside the sleeves, because I thought it would blend in better with the brocade. It worked pretty well. That particular lace was actually just some bulk stuff I had lying around. I would have liked to match the cravat, but there wasn’t enough, once I made all the cravats I need. As it turned out, they were close enough that unless you look close, you wouldn’t know they didn’t match.
[image error]
Although I didn’t add buttons to the edges of the coat, I did add strips of gold fabric that matched the candle-holders. This was part partly for decoration, but partly to give the front of the coat some weight since I didn’t fully line the jacket. This allowed the coat to “swish” but kept it fluttering around like a handkerchief. I didn’t want it to look TOO lightweight.
[image error]I serged the one edge, and stitched down the other side with a straight seam and zigzag.
I was happy with the way the back of the jacket turned out, despite the fact that I pretty much had to make up my own way of finishing the back slit. And the elastic in the hem of the knickers worked well to pull them in under the knee.
[image error]
The costume looked spectacular under the stage lights. The whole suit gleamed and shimmered when the actress moved, and the electric candle flames glowed perfectly. With the edition of a white colonial wig from the costume stash, white stockings, and black shoes with added buckles, the ensemble was perfect!
[image error]Picture taken during dress rehearsal. (Photo Credit: Amy Burns)
I guess you can see now why I loved Lumiere’s costume so much! Maybe next I’ll post about his companion, the feathery Babbette. (And why I ended up following her around the entire show with a stapler at the ready. Ugh. By far my biggest costume mistake!)
January 25, 2019
Costume Design: Three Silly Girls
Welcome to the second post in my series on Beauty and the Beast costume design!
After completing Belle’s blue dress, it made sense to move on to another costume that would be similar in construction. And as it happened, I actually needed THREE costumes that were similar in construction.
Yep. You guessed it. Gaston’s three “Silly Girls.”
[image error]Picture taken during rehearsal. (Photo Credit: Amy Burns)
This trio (also known as the “Bimbettes”) are comic relief characters, and spend the entire show swooning over the self-satisfied Gaston. Their costumes need to stand out enough for them to be easy to spot, and yet not look out of place with the other villagers.
Inspiration, Concept, and Fabric
The Silly Girls don’t have a certain “look” or even color scheme that their costumes must adhere to. The original animated film had them in dresses that were identically styled but in different colors (also NOT historically accurate). The live-action film gave them a much more historical look, but put them all in the same colors (white and pink). And a quick search on google images shoes the Silly girls wearing almost anything you can imagine. From striped stockings and giant hair-bows to more muted, historical styles.
[image error][image error][image error]
When I first went shopping for fabric, I had only a vague idea what I wanted for the Silly girls. I liked the idea of 3 different outfits of the same style but in different colors, and I knew I wanted something fairly historical. I also figured I could use the same bodice pattern I used for Belle’s peasant dress. But other than that, I didn’t have much of a plan. I had no idea what colors I wanted. And I never even made a sketch!
However, I ended up making some really great finds at a thrift-store about 45 minutes from my home. I found TONS of material there, including most of the fabric for Belle’s blue and gold dresses, an entire bolt of tulle for Babette, a TON of blue fabric for the operatic Wardrobe, and everything I needed for the Silly Girls. It was quite a haul!
[image error]All the fabric in this photo cost only $6.50!
In the warehouse at the back of the thrift store, I found reams of sewing fabric and odds ends, including some perfect, coordinating pieces that I used for the Silly girls. The skirts were made of curtain sheers in cream, sage, and gold, ($4.50 total) and right nearby I found a piece of striped fabric that had all three colors in it ($2), perfect for the bodices! For the cream-colored under-layer I ended up using an old sheet and a table-cloth. (And…I forgot to write down how much I spent on those. Probably about $2 a piece though).
Construction
[image error]
I started out with the bodices, since they were going to be more or less identical, and made from that same Townsends laced bodice pattern I used for Belle’s blue dress. I had a general idea of the size of the girls from pictures (and from measuring one of them), so I knew I needed to make two in a women’s small, and one in what I call “women’s tiny” (An altered version of the pattern which I made years ago when I was a very petite young teenager. Thankfully I saved the pieces!)
The first thing I noticed as I was cutting out the bodice` is that this fabric was MUCH harder to work with than the blue stuff I used for Belle. It was thin, slippery, and had a little stretch to it. Yikes! Not at all the kind of canvas-like fabric that is ideal for this garment. I looked around, wondering what I could line it with that would add the proper stiffness, and was quite happy to discover I already had an entire roll of stiff ivory canvas lying around (a thrift store find from years ago). It ended up working so well as a lining for these bodices, that I used it for several other costumes later on.
[image error] Here are the almost finished bodices, with lining and eyelets. I didn’t hem them until after the actresses tried them them on. (Torso length varies widely.)
After having had the practice on Belle’s costume, these bodices came together very quickly. I was much faster and neater with the machine-stitched eyelets, this time around, and the boning slid in smoothly with this fabric, It only took me a few hours to complete all three bodices. (For more details on the bodice construction, check out my post on Belle’s peasant costume.)
[image error]Sleeve elastic/lace
Next, I moved on to the main dresses. I had not originally planned to do an underskirt layer for the Silly Girls. But since I ended up with striped sheer curtains as the top layer, a solid under-layer became very important! At first I thought I could just make the full shift/chemise pattern from this book instead of the half-version I used for Belle, but the old fitted sheet I bought at the thrift store didn’t have enough fabric to it for that. So, just like with Belle, I made a “half-shift” blouse first. (For more in-depth details on the chemise, check out the post on Belle’s costume) Since there was no built-in lace this time around, I found a big roll of flat, cream-colored lace in my stash and used it around the sleeves, running elastic cording through it to make a ruffle.
[image error]Folding/sewing neckline edge to create casing over elastic cording.
The necks were slightly harder, because of how large the holes in the lace were, and how delicate it was. When I tried just stitching it to the edge and lacing through the holes, the strain of the elastic seemed like it was going to be too much on the lace (unlike when it was backed by fabric on the sleeve). I ended up folding the serged edge of the neckline over the elastic cord and stitching it down to create a tiny self-casing with the elastic inside. I had tried that with Belle’s dress, unsuccessfully, but this fabric handled it much better.
For the underskirts, I ended up using a thrifted, cream-colored tablecloth. I liked the weight it had, but wish there had been more of it. The underskirts ended up quite straight-cut, with hardly any gathers at the waist. I think some more fullness would have been nice. However, the fact that each petticoat was only about as wide as the bottom of the shift made it easy to attach the two pieces together without doing a bunch of gathering. I simply took a few tucks as I was sewing around the top, and it easily fit.
The over-skirts were super simple to construct. Since they were each made of a long, rectangular sheer that was already hemmed on all sides, I simply cut them in half, leaving two squarish pieces. Then I sewed them together at the side seams, serged the top (which was the only raw edge) and gathered it down to fit the shift. I made a double row of stitches about half and inch apart, and used the “tunnel” in between as a casing to run the elastic waistband through. I did this with the skirt lying the “wrong way” up over the top of the dress, so that when it was folded down the casing disappeared under the skirt.
[image error]Here what everything looked like before I folded the skirt down to hid the waistband. The extra row of stitches in the middle of the casing is left over from gathering the skirt fabric.
There was no need to finish the the side-seams or hem the bottom, as they were all pre-hemmed edges of the curtain. I slipped one of the main dresses onto Mandy (my mannequin), put the bodice over it, and laced it up. Then I stood back and took a look.
[image error]Main dress layer[image error]With bodice
Hmm. Not bad. But the silhouette was almost identical to Belle’s peasant dress. They were basically only different in color, and I realized I wanted the Sill Girls to have a slightly different look.
I wasn’t quite sure how to go about that though. So I took a break and googled internet images of styles from the time-period, looking for inspiration. Something I could add to the costumes I’d already made that would give them a bit more character. That’s when I noticed how popular “side bustling” was.
[image error][image error][image error](From Townsends catalog)
Big hips were a popular look at the time. And were sometimes created with “pocket hoops” under the dress. But a softer version could be achieved just by bustling the fabric on each side. I decided to try doing something similar with the Silly Girls.
[image error]Side bustle
It turned out to be pretty easy. I just grabbed a pinch of the fabric from underneath on each side seam and pulled it up, letting the fabric fold over itself in a soft “puff” and tacking the pinched part to the underskirt higher up. I was very happy with the results. I helped differentiate the Silly Girls from all the other peasants (none of whom wore this style), plus it gave them a “fussier” look, which made sense for girls so preoccupied with appearances that they would fall for the pompous (though handsome) Gaston.
You can see in this picture of the green version how the over-skirt is pulled up inside itself.
Once I made that change, I was quite happy with the look. I was even able to switch the ribbon lacing out for elastic cording, which made the bodices faster to take on and off. And since the skirt was made of such a thin, light fabric, it still pulled in nicely around the waist and didn’t look bulky.
Finished Costume
The finished Silly Girl costumes turned out very well. I liked the way the three different colored skirts differentiated the girls, but still blended well and looked perfect with the striped bodices.
[image error]Picture from rehearsal. (Photo credit: Amy Burns)
The elastic lacing turned out to be a fantastic costume hack! It looked completely authentic (like regular lacing) onstage, but made changing in and out of costumes much simpler backstage.
[image error] You can see in this picture how I used a zigzag stitch to hem the bodice.
Those curtain sheers were so perfect for the skirts! I really loved the satin stripes. They added a nice shimmer and texture that a plain solid would not have given.
The neckline worked well too. Unlike Belle’s version, the elastic cording was completely hidden inside the self-casing, and tied on the inside of the dress, rather than the outside. If you look closely in this picture you can spot the tail under the fabric.
[image error]
Adding the off-white lace gave the neckline a nice ruffled look, and allowed it to match the sleeve too. It was so handy that I had that giant roll of lace lying around!
[image error] More zigzag stitches on the sleeve hem! I used them a lot for hemming.
If I could have changed anything about the costumes, I would have added more fullness in the underskirts. Due to lack of fabric, they were more narrow than I liked and didn’t “swish” nicely when the girls moved. Thankfully, the light, gauzy over-skirts were very “swishy” and made up for it (though more fabric in those would have made the side bustles bigger and more fun too).
[image error]
Overall, I was quite pleased with the final costumes, especially considering they were so quick to make (I think all three took me only a day or two), and only cost about $10 total in material. Thrift stores rock!
If you enjoyed this post, stay tuned! I’m going to be posting about Gaston, Mrs. Potts, Lumiere, and the rest of the characters soon! (Also check out Belle’s blue dress, if you missed it.)
The Silly Girls’ Costumes
Welcome to the second post in my series on Beauty and the Beast costume design!
After completing Belle’s blue dress, it made sense to move on to another costume that would be similar in construction. And as it happened, I actually needed THREE costumes that were similar in construction.
Yep. You guessed it. Gaston’s three “Silly Girls.”
[image error]Picture taken during rehearsal. (Photo Credit: Amy Burns)
This trio (also known as the “Bimbettes”) are comic relief characters, and spend the entire show swooning over the self-satisfied Gaston. Their costumes need to stand out enough for them to be easy to spot, and yet not look out of place with the other villagers.
Inspiration, Concept, and Fabric
The Silly Girls don’t have a certain “look” or even color scheme that their costumes must adhere to. The original animated film had them in dresses that were identically styled but in different colors (also NOT historically accurate). The live-action film gave them a much more historical look, but put them all in the same colors (white and pink). And a quick search on google images shoes the Silly girls wearing almost anything you can imagine. From striped stockings and giant hair-bows to more muted, historical styles.
[image error][image error][image error]
When I first went shopping for fabric, I had only a vague idea what I wanted for the Silly girls. I liked the idea of 3 different outfits of the same style but in different colors, and I knew I wanted something fairly historical. I also figured I could use the same bodice pattern I used for Belle’s peasant dress. But other than that, I didn’t have much of a plan. I had no idea what colors I wanted. And I never even made a sketch!
However, I ended up making some really great finds at a thrift-store about 45 minutes from my home. I found TONS of material there, including most of the fabric for Belle’s blue and gold dresses, an entire bolt of tulle for Babette, a TON of blue fabric for the operatic Wardrobe, and everything I needed for the Silly Girls. It was quite a haul!
[image error]All the fabric in this photo cost only $6.50!
In the warehouse at the back of the thrift store, I found reams of sewing fabric and odds ends, including some perfect, coordinating pieces that I used for the Silly girls. The skirts were made of curtain sheers in cream, sage, and gold, ($4.50 total) and right nearby I found a piece of striped fabric that had all three colors in it ($2), perfect for the bodices! For the cream-colored under-layer I ended up using an old sheet and a table-cloth. (And…I forgot to write down how much I spent on those. Probably about $2 a piece though).
Construction
[image error]
I started out with the bodices, since they were going to be more or less identical, and made from that same Townsends laced bodice pattern I used for Belle’s blue dress. I had a general idea of the size of the girls from pictures (and from measuring one of them), so I knew I needed to make two in a women’s small, and one in what I call “women’s tiny” (An altered version of the pattern which I made years ago when I was a very petite young teenager. Thankfully I saved the pieces!)
The first thing I noticed as I was cutting out the bodice` is that this fabric was MUCH harder to work with than the blue stuff I used for Belle. It was thin, slippery, and had a little stretch to it. Yikes! Not at all the kind of canvas-like fabric that is ideal for this garment. I looked around, wondering what I could line it with that would add the proper stiffness, and was quite happy to discover I already had an entire roll of stiff ivory canvas lying around (a thrift store find from years ago). It ended up working so well as a lining for these bodices, that I used it for several other costumes later on.
[image error] Here are the almost finished bodices, with lining and eyelets. I didn’t hem them until after the actresses tried them them on. (Torso length varies widely.)
After having had the practice on Belle’s costume, these bodices came together very quickly. I was much faster and neater with the machine-stitched eyelets, this time around, and the boning slid in smoothly with this fabric, It only took me a few hours to complete all three bodices. (For more details on the bodice construction, check out my post on Belle’s peasant costume.)
[image error]Sleeve elastic/lace
Next, I moved on to the main dresses. I had not originally planned to do an underskirt layer for the Silly Girls. But since I ended up with striped sheer curtains as the top layer, a solid under-layer became very important! At first I thought I could just make the full shift/chemise pattern from this book instead of the half-version I used for Belle, but the old fitted sheet I bought at the thrift store didn’t have enough fabric to it for that. So, just like with Belle, I made a “half-shift” blouse first. (For more in-depth details on the chemise, check out the post on Belle’s costume) Since there was no built-in lace this time around, I found a big roll of flat, cream-colored lace in my stash and used it around the sleeves, running elastic cording through it to make a ruffle.
[image error]Folding/sewing neckline edge to create casing over elastic cording.
The necks were slightly harder, because of how large the holes in the lace were, and how delicate it was. When I tried just stitching it to the edge and lacing through the holes, the strain of the elastic seemed like it was going to be too much on the lace (unlike when it was backed by fabric on the sleeve). I ended up folding the serged edge of the neckline over the elastic cord and stitching it down to create a tiny self-casing with the elastic inside. I had tried that with Belle’s dress, unsuccessfully, but this fabric handled it much better.
For the underskirts, I ended up using a thrifted, cream-colored tablecloth. I liked the weight it had, but wish there had been more of it. The underskirts ended up quite straight-cut, with hardly any gathers at the waist. I think some more fullness would have been nice. However, the fact that each petticoat was only about as wide as the bottom of the shift made it easy to attach the two pieces together without doing a bunch of gathering. I simply took a few tucks as I was sewing around the top, and it easily fit.
The over-skirts were super simple to construct. Since they were each made of a long, rectangular sheer that was already hemmed on all sides, I simply cut them in half, leaving two squarish pieces. Then I sewed them together at the side seams, serged the top (which was the only raw edge) and gathered it down to fit the shift. I made a double row of stitches about half and inch apart, and used the “tunnel” in between as a casing to run the elastic waistband through. I did this with the skirt lying the “wrong way” up over the top of the dress, so that when it was folded down the casing disappeared under the skirt.
[image error]Here what everything looked like before I folded the skirt down to hid the waistband. The extra row of stitches in the middle of the casing is left over from gathering the skirt fabric.
There was no need to finish the the side-seams or hem the bottom, as they were all pre-hemmed edges of the curtain. I slipped one of the main dresses onto Mandy (my mannequin), put the bodice over it, and laced it up. Then I stood back and took a look.
[image error]Main dress layer[image error]With bodice
Hmm. Not bad. But the silhouette was almost identical to Belle’s peasant dress. They were basically only different in color, and I realized I wanted the Sill Girls to have a slightly different look.
I wasn’t quite sure how to go about that though. So I took a break and googled internet images of styles from the time-period, looking for inspiration. Something I could add to the costumes I’d already made that would give them a bit more character. That’s when I noticed how popular “side bustling” was.
[image error][image error][image error](From Townsends catalog)
Big hips were a popular look at the time. And were sometimes created with “pocket hoops” under the dress. But a softer version could be achieved just by bustling the fabric on each side. I decided to try doing something similar with the Silly Girls.
[image error]Side bustle
It turned out to be pretty easy. I just grabbed a pinch of the fabric from underneath on each side seam and pulled it up, letting the fabric fold over itself in a soft “puff” and tacking the pinched part to the underskirt higher up. I was very happy with the results. I helped differentiate the Silly Girls from all the other peasants (none of whom wore this style), plus it gave them a “fussier” look, which made sense for girls so preoccupied with appearances that they would fall for the pompous (though handsome) Gaston.
You can see in this picture of the green version how the over-skirt is pulled up inside itself.
Once I made that change, I was quite happy with the look. I was even able to switch the ribbon lacing out for elastic cording, which made the bodices faster to take on and off. And since the skirt was made of such a thin, light fabric, it still pulled in nicely around the waist and didn’t look bulky.
Finished Costume
The finished Silly Girl costumes turned out very well. I liked the way the three different colored skirts differentiated the girls, but still blended well and looked perfect with the striped bodices.
[image error]Picture from rehearsal. (Photo credit: Amy Burns)
The elastic lacing turned out to be a fantastic costume hack! It looked completely authentic (like regular lacing) onstage, but made changing in and out of costumes much simpler backstage.
[image error] You can see in this picture how I used a zigzag stitch to hem the bodice.
Those curtain sheers were so perfect for the skirts! I really loved the satin stripes. They added a nice shimmer and texture that a plain solid would not have given.
The neckline worked well too. Unlike Belle’s version, the elastic cording was completely hidden inside the self-casing, and tied on the inside of the dress, rather than the outside. If you look closely in this picture you can spot the tail under the fabric.
[image error]
Adding the off-white lace gave the neckline a nice ruffled look, and allowed it to match the sleeve too. It was so handy that I had that giant roll of lace lying around!
[image error] More zigzag stitches on the sleeve hem! I used them a lot for hemming.
If I could have changed anything about the costumes, I would have added more fullness in the underskirts. Due to lack of fabric, they were more narrow than I liked and didn’t “swish” nicely when the girls moved. Thankfully, the light, gauzy over-skirts were very “swishy” and made up for it (though more fabric in those would have made the side bustles bigger and more fun too).
[image error]
Overall, I was quite pleased with the final costumes, especially considering they were so quick to make (I think all three took me only a day or two), and only cost about $10 total in material. Thrift stores rock!
If you enjoyed this post, stay tuned! I’m going to be posting about Gaston, Mrs. Potts, Lumiere, and the rest of the characters soon! (Also check out Belle’s blue dress, if you missed it.)
January 18, 2019
Costume Design: Belle’s Blue Peasant Dress
My goodness, is it 2019 already?
This past year was crazy for me. I can hardly believe it’s over. So many things happened all at once, and there was hardly time to catch my breath (let alone keep up with this blog). I published a book, traveled all over the country, was part of multiple theater productions, and did all kinds of fascinating costume design projects.
Speaking of which…
At long last last, I’m finally starting my new blog series on costumes design! Every since I wrote my post about the “Portfolio Life” last March, I’ve been wanting to branch out and cover some of my other artistic endeavors (besides writing). But I was too swamped last year. Today marks the first of multiple posts in which I’ll be writing about the costumes I designed this past summer for a fantastic local theater production of Beauty and the Beast.
First up: Belle’s 18th century peasant dress.
[image error]
Picture taken during dress rehearsal. (Photo credit: Amy Burns)
When I volunteered to make these costumes, I knew I would NOT be patterning them after the original, animated film. In my opinion, trying to make live actors look like cartoon characters is both difficult and pointless. It always comes off looking unoriginal and a bit overdone. I’d much rather enjoy the special opportunity that live theater brings. It’s a medium where every show, actor, and costume can add something fresh and creative to the familiar story.
Inspiration, Concept, and Fabric
[image error]
My first step was to look around for inspiration, and I found it in Jacqueline Durran’s fantastic costumes in the new live action movie (made in 2017). I LOVED those costumes! Lush, spectacular, and amazingly detailed, they did a fantastic job capturing the time period. I knew I wanted our theater production to have the same textured, historical flavor.
The first costume I started on was Belle’s blue dress. I love how Jacqueline Durran’s left behind the historically-inaccurate, blue A-line dress and white apron of Disney’s original, and instead took the same color scheme and created a much more historical, textured look. However, I still didn’t want to just copy someone else’s idea. This was not cosplay, it was theater. So I pulled out my colored pencils and sketched out my own concept for an 18th century French peasant girl.
[image error]
Since I grew up doing colonial reenactments, I already have a lot of experience with making and wearing period accurate clothing from the 1700’s. However, theater costumes need to be much simpler to take on and off than period correct clothing is. The outfit I sketched, for instance, if constructed “correctly” would be at least 4 pieces. The white blouse/nightgown (called a “shift” or “chemise”) would be a bottom layer, followed by an underskirt then the blue over-skirt, and finally the laced bodice. But that kind of thing would never work for quick costume changes. So I had to brainstorm.
I remembered seeing a “costume” version of 1700’s clothing years ago, carried in the fantastic Townsend’s catalog (which is an amazing resource for re-enactors). Basically a one-piece shift/skirt combo, with just a separate laced bodice. But the look was not quite what I wanted. For simplicity, they had made the skirt only as wide as the shift. And it just looked wrong to me. I wanted more fullness. Finally it occurred to me that I could make just the “top half” of a shift, then stitch on a fully-gathered underskirt/skirt, and pull it in with an elastic waistband.
But the first step was finding fabric!
We had a modest costume budget, considering the elaborate nature of this kind of production ($500). So there was no way I was getting all the fabric new. But it’s amazing what fun and beautiful fabric you can find at thrift stores in the form of sheets, curtains, and table-clothes!
[image error]
For the shift and petticoat (underskirt) I found some white curtains edged with pretty eyelet lace ($2). The main skirt was made out of a patterned bed-sheet, which came with a lovely printed boarder ($4). For the bodice, I found some nice , textured blue garment fabric in the back room of a thrift store, already cut out into a dress but never sewn together ($1). And finally, I used a blue&white striped pillowcase ($0.99) to make a quick apron.
Construction
[image error]
All the pattern pieces were just simple squares and rectangles. So easy!
First step was the shift, which I made using a very simple pattern from this book. All the pieces are cut in easy squares and rectangles. (The full-length version had some triangles as well, but I was only doing the top half). Since the pattern in the book was marked out in inches, I was able to measure and cut all the pieces using my quilting mat, ruler, and cutter. No tracing required! I intentionally cut the sleeve at the curtain’s edge, using the already attached lace so there was no need to worry about adding a casing and ruffle. I simply wove some white elastic cording through the eyelets at the top of the lace, and BOOM! Instant sleeve ruffle.
Everything went together fast until it came to finishing the neckline. In period clothing, the neck would be gathered with cotton cording or ribbon. But I wanted to use elastic cording for the sake of quick costume changes. The problem came in when I was trying to figure out how to attach it (along with a lace ruffle). First I tried making a bias-cut casing, but it ended up looking bulky and awkward. Then I tried surging the raw edge and simply folding it over around the elastic to make a self-casing. But that didn’t work either. It puckered badly on the curve of the neckline, and ended up so tight that the elastic would hardly move. FINALLY it occurred to me that I could use the top of edge of the same lace that I used for the sleeve. I cut about an inch off the top, did a tiny rolled hem on it, and sewed it onto the serge-stitched neckline. Then I ran the elastic cording through the eyelets just like I did for the sleeves. Voila! The half-shift was complete.
[image error]
Neckline
(Weaving in the elastic cording.)
[image error]
Sleeve Ruffle
[image error]
Finished Half-Shift
Next came the underskirt. Since I had multiple panels of the lace-edged curtains, I decided to do a lace-edged petticoat that peeped out at the bottom. To make sure I got plenty of gathers and fullness, I used quite a bit of fabric. No hemming was required, as I just used the edge of the curtain that was already finished withe lace. I gathered the top edge down small enough to fit the raw edge of the shift, and sewed the two together. This gave me a rather odd, billowing white garment with a very wide, low waist.
[image error]
Next step was the blue over-skirt. I loved the wide strip of contrasting fabric along the top edge of the sheet, and thought it would make a great hemline. But there was one problem. I wanted the skirt very full, which meant I needed a hem TWICE the length of the twin sheet’s top edge. I thought about just cutting the strip off all together, but I so loved that fun contrast! So I ended up removing the double-sided strip, cutting it in half length-wise, backing it with more of the main sheet fabric to give it weight, re-attaching it to the skirt edge, and re-hemming. It was a lot of steps, but worth it.
For the the waist, I created a casing and ran elastic through the top of the skirt, tightening it up just enough to match the width of the shift and sewing it on like the petticoat (but higher up). Then I tightened the elastic the rest of the way to create a normal waist.
But…it didn’t work right. In the first place, the bulky, narrow waistband was not going to lay smoothly under the bodice, and in the second place, I realized the skirt needed to start a bit higher up (above the natural waistline) overlap underneath the bodice and not leave a white gap between them.
Thankfully, I was able to solve both problems at once by loosening the elastic again, folding the edge of the shift down to cover the casing, and stitching it in place. This hid the waistband and acted as a deep tuck in the shift, raising the waist up an inch or two. Once I re-tightened the elastic, the main dress was finished!
[image error]
Front and back of the hem boarder
[image error]
Original, bulky waistband
[image error]
Waistband covered
For the separate bodice, I used this historical pattern purchased years ago from Townsends. I opted for the French version (naturally, since the story is set in France), and made both the exterior and lining out of the blue dress fabric. It was nice and thick, which gave the bodice the stiffness it needed to lie smooth.
[image error]This bodice pattern went together extremely fast. The only complicated part was finishing the front. I always like to use boning in laced bodices, to help the edges lay smooth instead of pulling and puckering when you tighten the laces. I never buy actual boning though. Somebody pointed out to me years ago that I could I just use cheap plastic zip cords from the hardware store. (I’ve saved a lot of money with that trick!) To make a casing, I sewed a deep seam when I stitched the lining and outside fabric together there, then ran another seam closer to the edge of the fabric. This built a casing into the seam itself. Before hemming the bottom edge, I slid a zip-cord into each casing and cut them off short enough to fit, making sure to trim the ends into curves so there would be no sharp corners to rub holes in the fabric.
Last came the eyelets for the laces. I’ve never bothered with store-bought metal eyelets. They aren’t historically accurate, so I grew up hand-stitching every eyelet on every bodice I made for re-enacting. BUT… as I started mentally counting up how many eyelets I would need for all these costumes, I knew doing it by-hand wouldn’t work. Thankfully, I discovered it is quite possible to make eyelets using a home sewing machine. (There are multiple tutorial videos like this one on youtube.) I had to practice for a bit before I got confident enough to work on the actual bodice but it was so worth it!
[image error]
These eyelets still weren’t perfect. But I got much better as I went along.
Though my original drawing didn’t feature an apron, I ended up making one out of the blue-striped pillowcase I found. It was faded and a little yellowed, but after-all, a peasant girl’s apron is not going to look spotless and new! I cut off the wide hem around the pillowcase opening, but instead of ripping the side-seam and opening it up completely, I just made the apron the same width as the pillowcase, leaving it two layers thick for weight. The raw bottom edge I finished with my serger, then folded over and hemmed with a zigzag stitch. The top edge I gathered and pinned inside a long strip of hem tap that I folded in half and stitched down to create the waistband and ties. The whole thing probably took less than 30 minutes to make.
[image error]
(As a side note, my serger was incredibly useful during this entire costume adventure. I’m certain I could not have accomplished what I did without it, and I’m so grateful to the friend who gifted it, and to my gracious Lord who put it in her head just in the nick of time.)
The last step involved shoes (pun intended). My original drawing I had Belle wearing blue ballet flats like the animated film. But as it turned out, I had the perfect pair of period-correct, leather shoes left over from re-enacting days. They ended up being just the right size, and were a nice neutral beige color (which meant she could wear them with both of her costumes).
[image error]
[image error]
[image error]
The only problem was that they were never actually finished, and didn’t have the buckles they were supposed to. So I ended Jerry-rigging them with a lot of electrical tape and come small, rectangular buckles we had on hand. (I had to tape two together and cover up the tongue in each buckle since the leather had no holes to poke them through). I also used tape on the inside of the shoe to hold it closed, since the buckles didn’t actually do anything and were only decorative. They ended up looking really good on-stage!
Finished Costume
I was extremely happy with how the finished costume turned out. It was even better than I had pictured it in my head! Here you can see the completed version on my mannequin (her name is Mandy and I got her for $15 at a thrift store. Did I mention I like thrift stores???)
[image error]
[image error]
I was so glad I took all the extra time to do the contrasting boarder at the hemline. I love how the bottom of the dress is so layered, with the mixture of different blue fabrics in the skirt, and the lace petticoat peeping out underneath.
[image error]
I LOVE that contrasting boarder!
At first I had to keep reminding myself this was THEATER, not a re-enactment. Otherwise I would have been hamstrung, trying make everything period correct. And that would have meant no eyelet lace (hadn’t been invented yet), and probably no patterned fabric for peasants (only checks, stripes, and solids were cheap enough for the poorer classes. Other patterns had to be block-printed by hand. Kind of like using giant ink stamps.)
I used white ribbon to lace the bodice (and tied knots in the ends to keep it from pulling out during costume changes). I had originally planned to use more elastic cording (and I did later for the Silly Girls and Babette), but there was so much thick fabric around Belle’s waist that she needed the ribbon to pull it in firmly. Elastic stretched too easily.
[image error]
Mandy’s measurements are bigger than the actress who played Belle, so the bodice doesn’t quite come together in the in these pictures. But it fit the actress perfectly.
I considered sewing the apron onto the dress, (like I did later with Mrs. Pott’s costume) so there would be only two pieces to keep track of. But I’m glad I didn’t, because it allowed Belle to have two slightly different looks. (She took off her apron part way through the performance when she went to “get cleaned up” after the wolves attacked her.)
I was also very happy about how the neckline turned out, with the narrow lace creating a slight ruffle. And as you can see, the zip-cord boning did it’s job beautifully! The bodice front is smooth and straight.
[image error]
I also loved the sleeve ruffles. So simple to make, and yet so pretty! It was such a blessing that the lace came with that nice row of eyelets along the top. A perfect fit for the elastic cording!
[image error]
One of my favorite things about this costume is how all the different patterns and shades of blue and white give it so much depth and texture. Especially since it cost a total of maybe $10 (counting the shoe buckles, ribbon, and thread, which I actually didn’t have to purchase). It turned out even more unique and detailed than I had imagined and made me SO excited to move on to the next costume and see what else I could create!
[image error]
Speaking of the next costume…I’m trying to decide which I should post about next. Lumiere? Cogsworth? Gaston? So many to choose from. Do you have a favorite character/costume you want to see? Let me know in the comments!
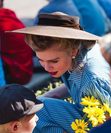


![[image error]](https://i0.wp.com/www.leyadelray.com/wp-content/uploads/2019/01/pirate-patter.jpg)
![[image error]](https://i2.wp.com/www.leyadelray.com/wp-content/uploads/2019/01/IMG_3706-e1547583967474.jpg)
![[image error]](https://i0.wp.com/www.leyadelray.com/wp-content/uploads/2019/01/IMG_3685-e1547827988540.jpg)