
Harold Davis's Blog, page 74
February 20, 2019
Paris from the 18th Arrondissement and Topaz discount code
I used my iPhone to snap this somewhat unusual view of the Parisian landscape from the heights of the 18th Arrondissement, a window high on the slopes of Montmartre, with the Eiffel Tour the only easily recognizable landmark. In a recent webinar for Topaz, I used the resulting iPhone JPEG to show the power of multi-RAW processing after turning the JPEG into a RAW (DNG) file using Topaz’s JPEG to RAW AI. I processed a darker verion for the sky, and a lighter version to bring out the detail in the foreground cityscape, and combined the two versions using a layer mask and gradient in Photoshop.
A 20% discount code applies to Topaz Lab products and upgrades through February 25, 2019. Use the discount code “Haroldweb219” [no quotes, and a capital H] at checkout. Here’s the link for the Topaz online store, and the direct link for JPEG to RAW AI.
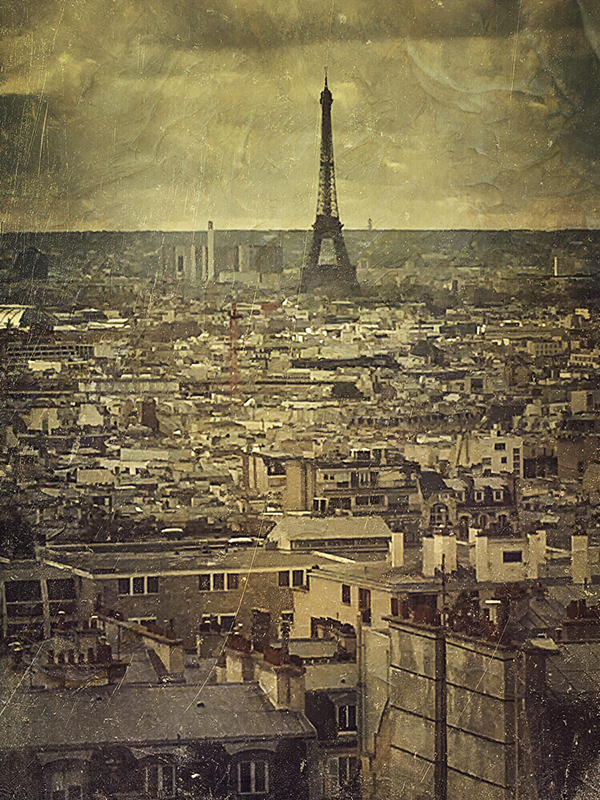
Eiffel Tower in Paris Landscape © Harold Davis


February 16, 2019
Curves Ahead
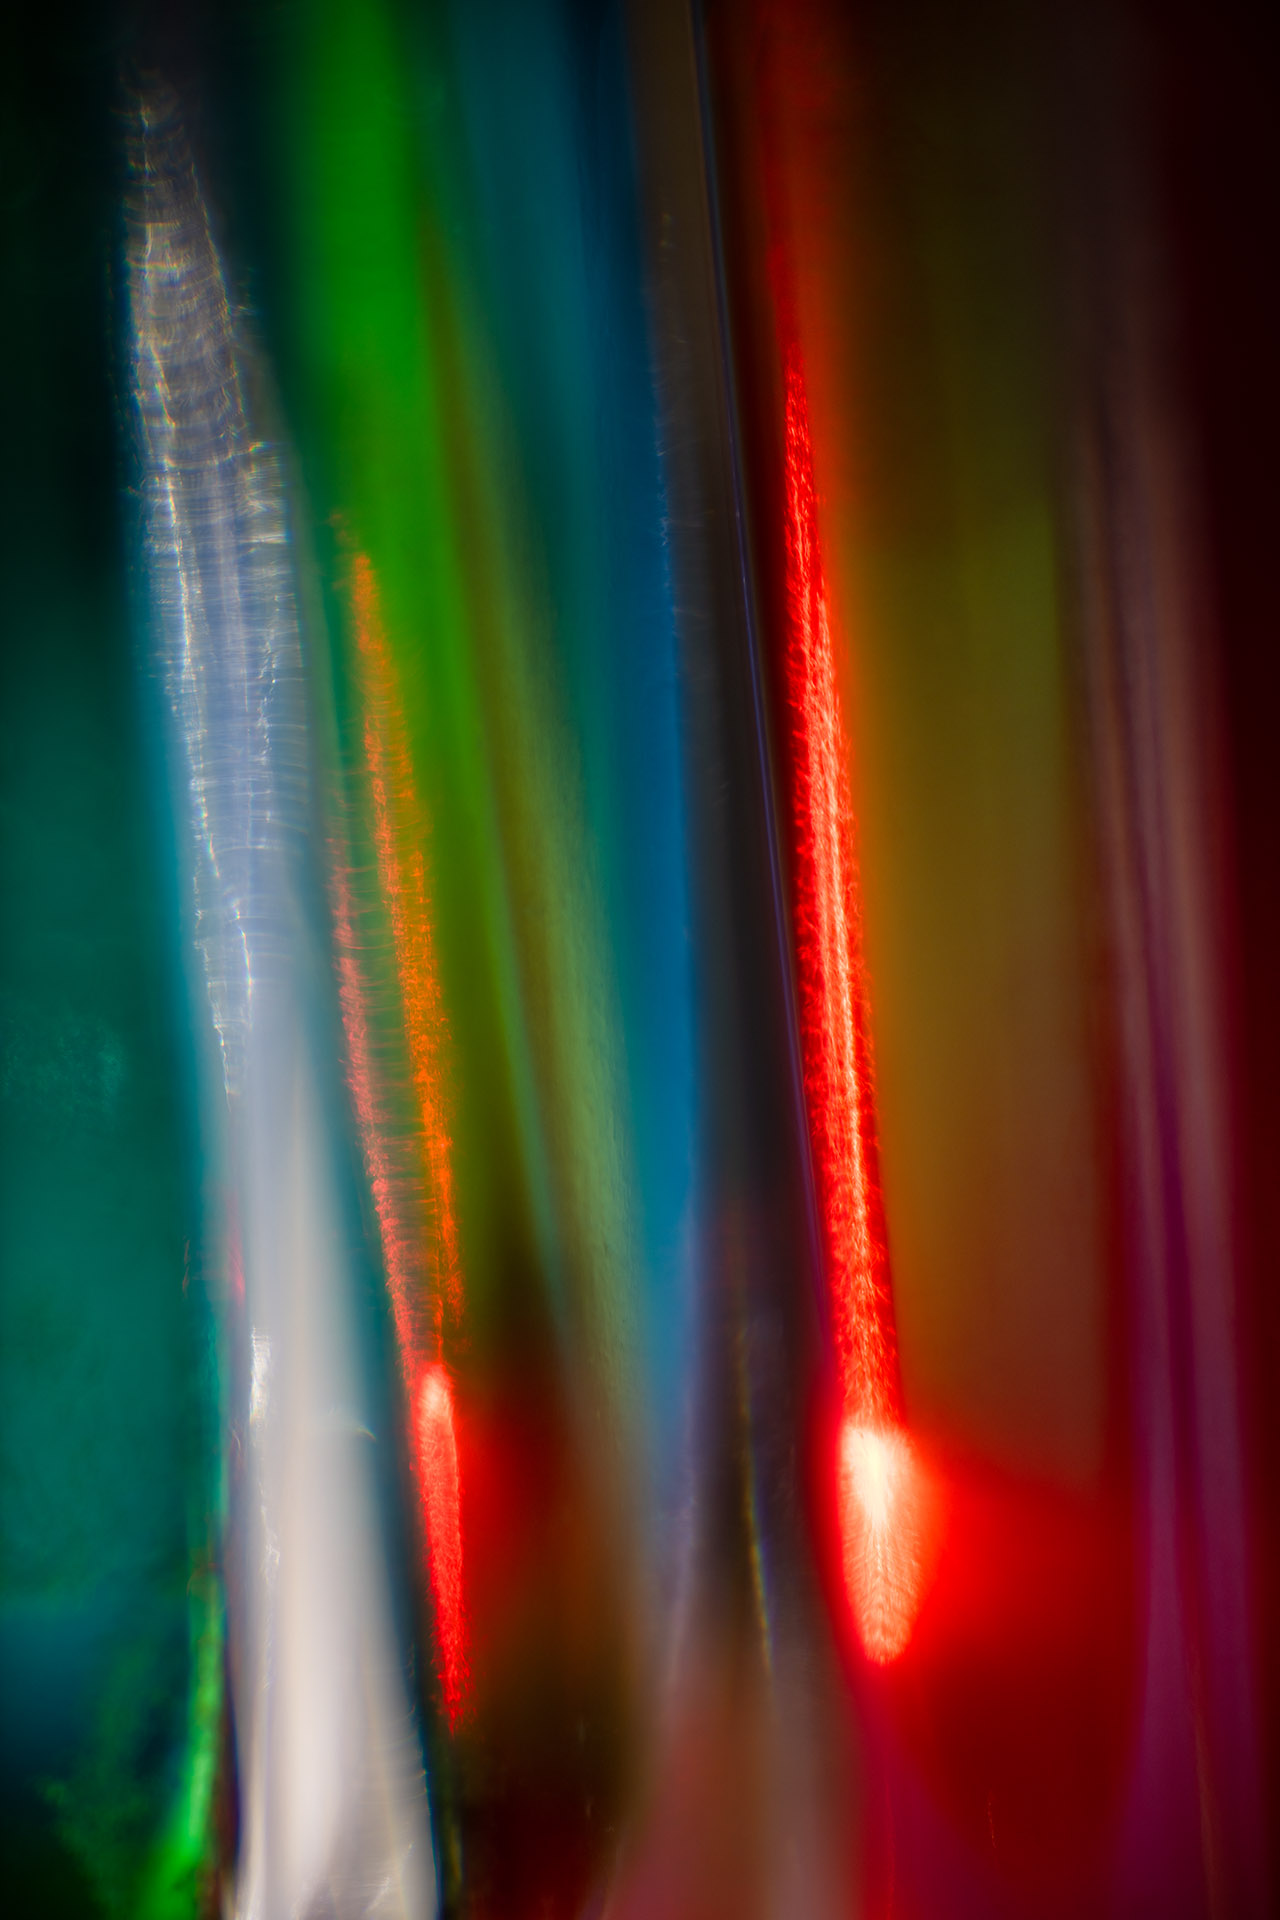
Starting with sunlight coming through vessels with color, I pared down my abstractions. But lately we have been under a river of rain. Sunlight is scarce. But it doesn’t take much to create an image. Just a camera, really. Simplicity is best. There are curves ahead.
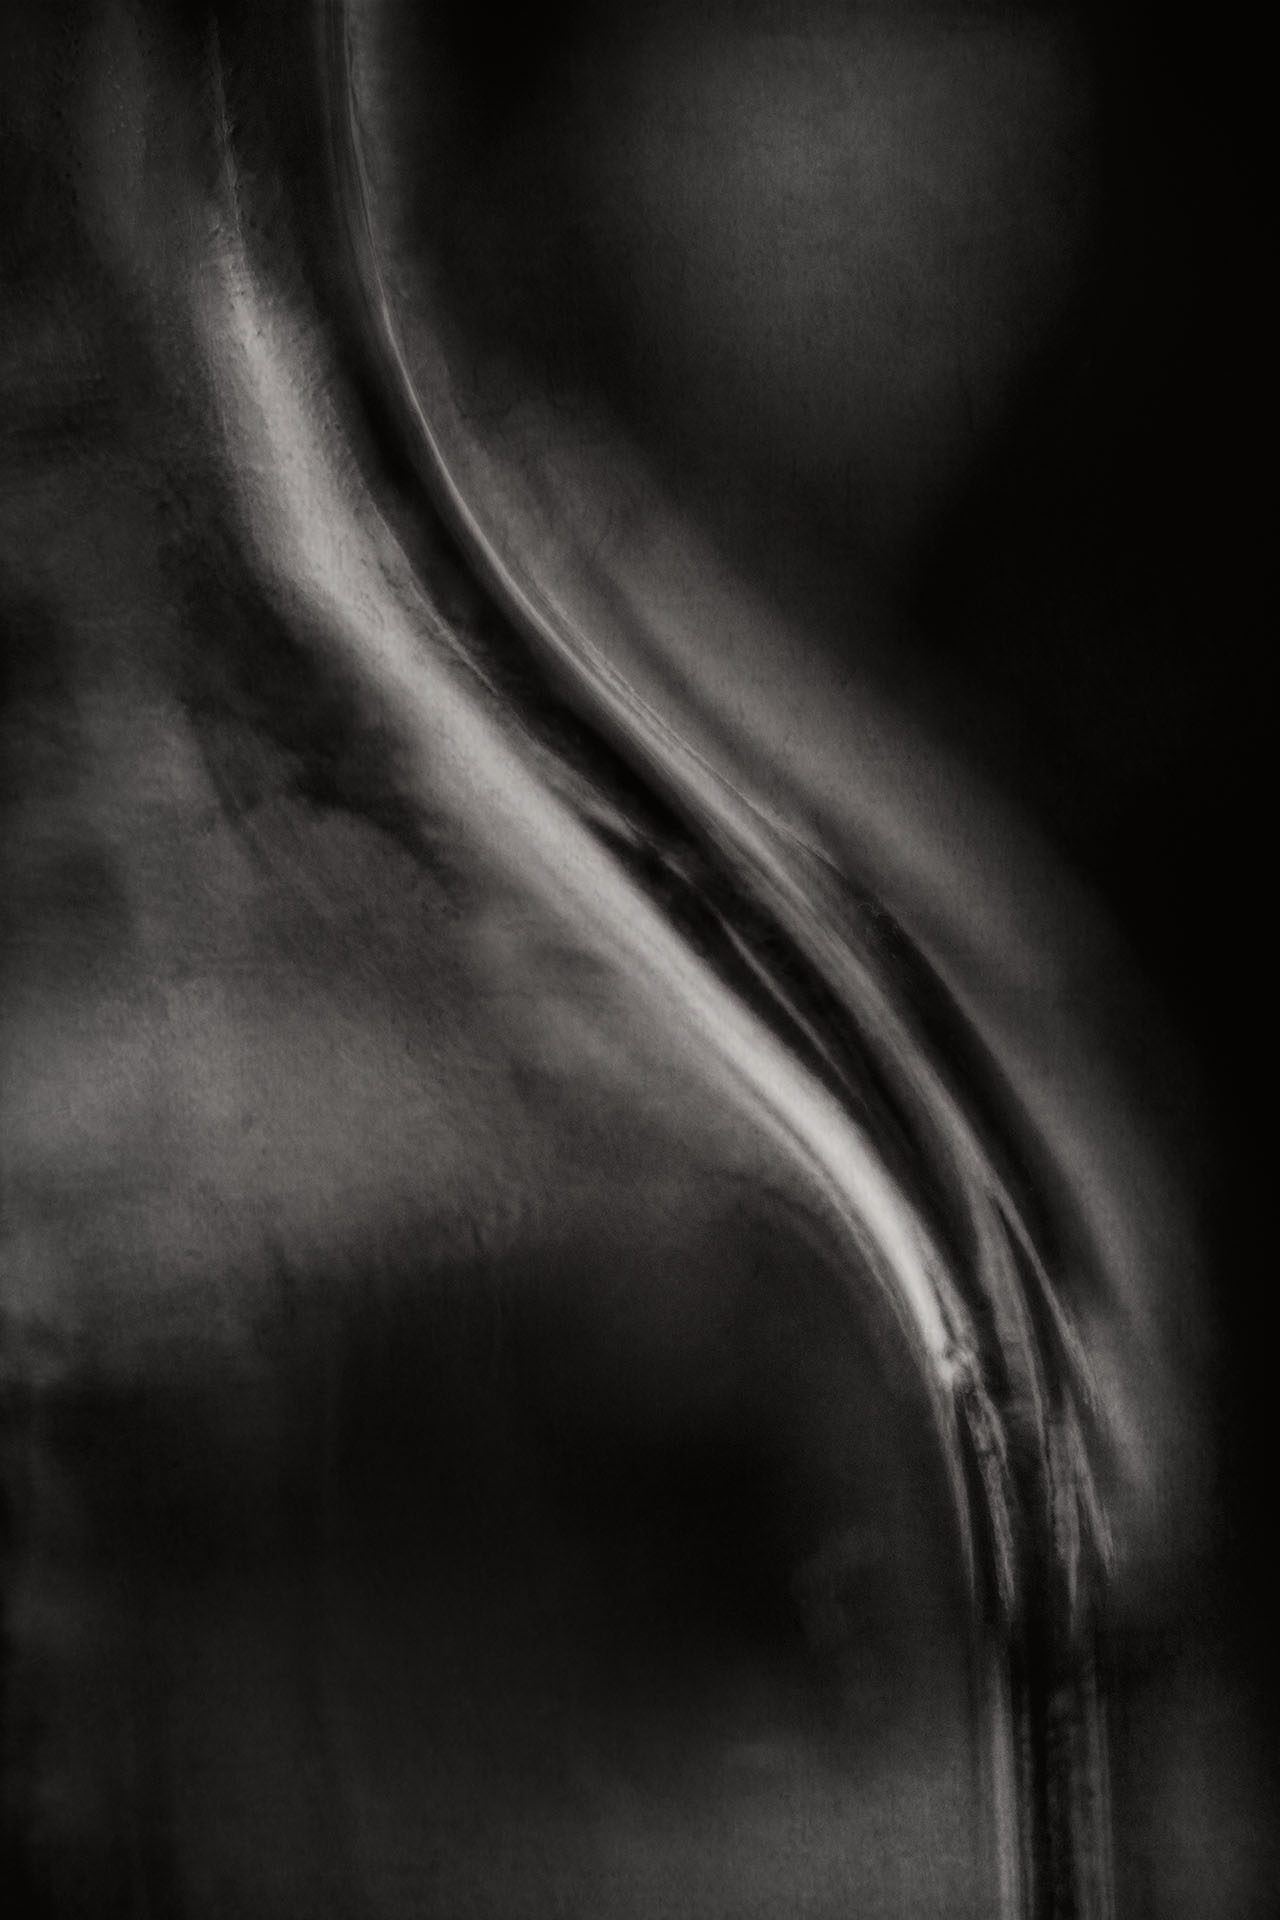
Curve #1 © Harold Davis

February 15, 2019
Free Topaz Webinar with Harold Davis on Tuesday Feb 19
Webinar with Harold Davis: Topaz As an Integral Part of Creative Post-Production
Tuesday February 19, 2019 at 2PM PT (4PM CT), 45 minute presentation with 15 minutes for Q&A. The webinar is free, but advance registration is strongly suggested. Click here to register for the webinar.
Webinar Description: In this all-new webinar, Harold Davis shows how he uses Topaz in conjunction with his digital workflow to polish and enhance his creative imagery. Davis will use some of his more popular recent images to demonstrate Topaz Studio, Topaz Adjust, Topaz Glow, and Topaz Simplify as an integral part of his creative Photoshop toolkit. Stand by for some tips, techniques, and post-production ideas that will knock your creative socks off!
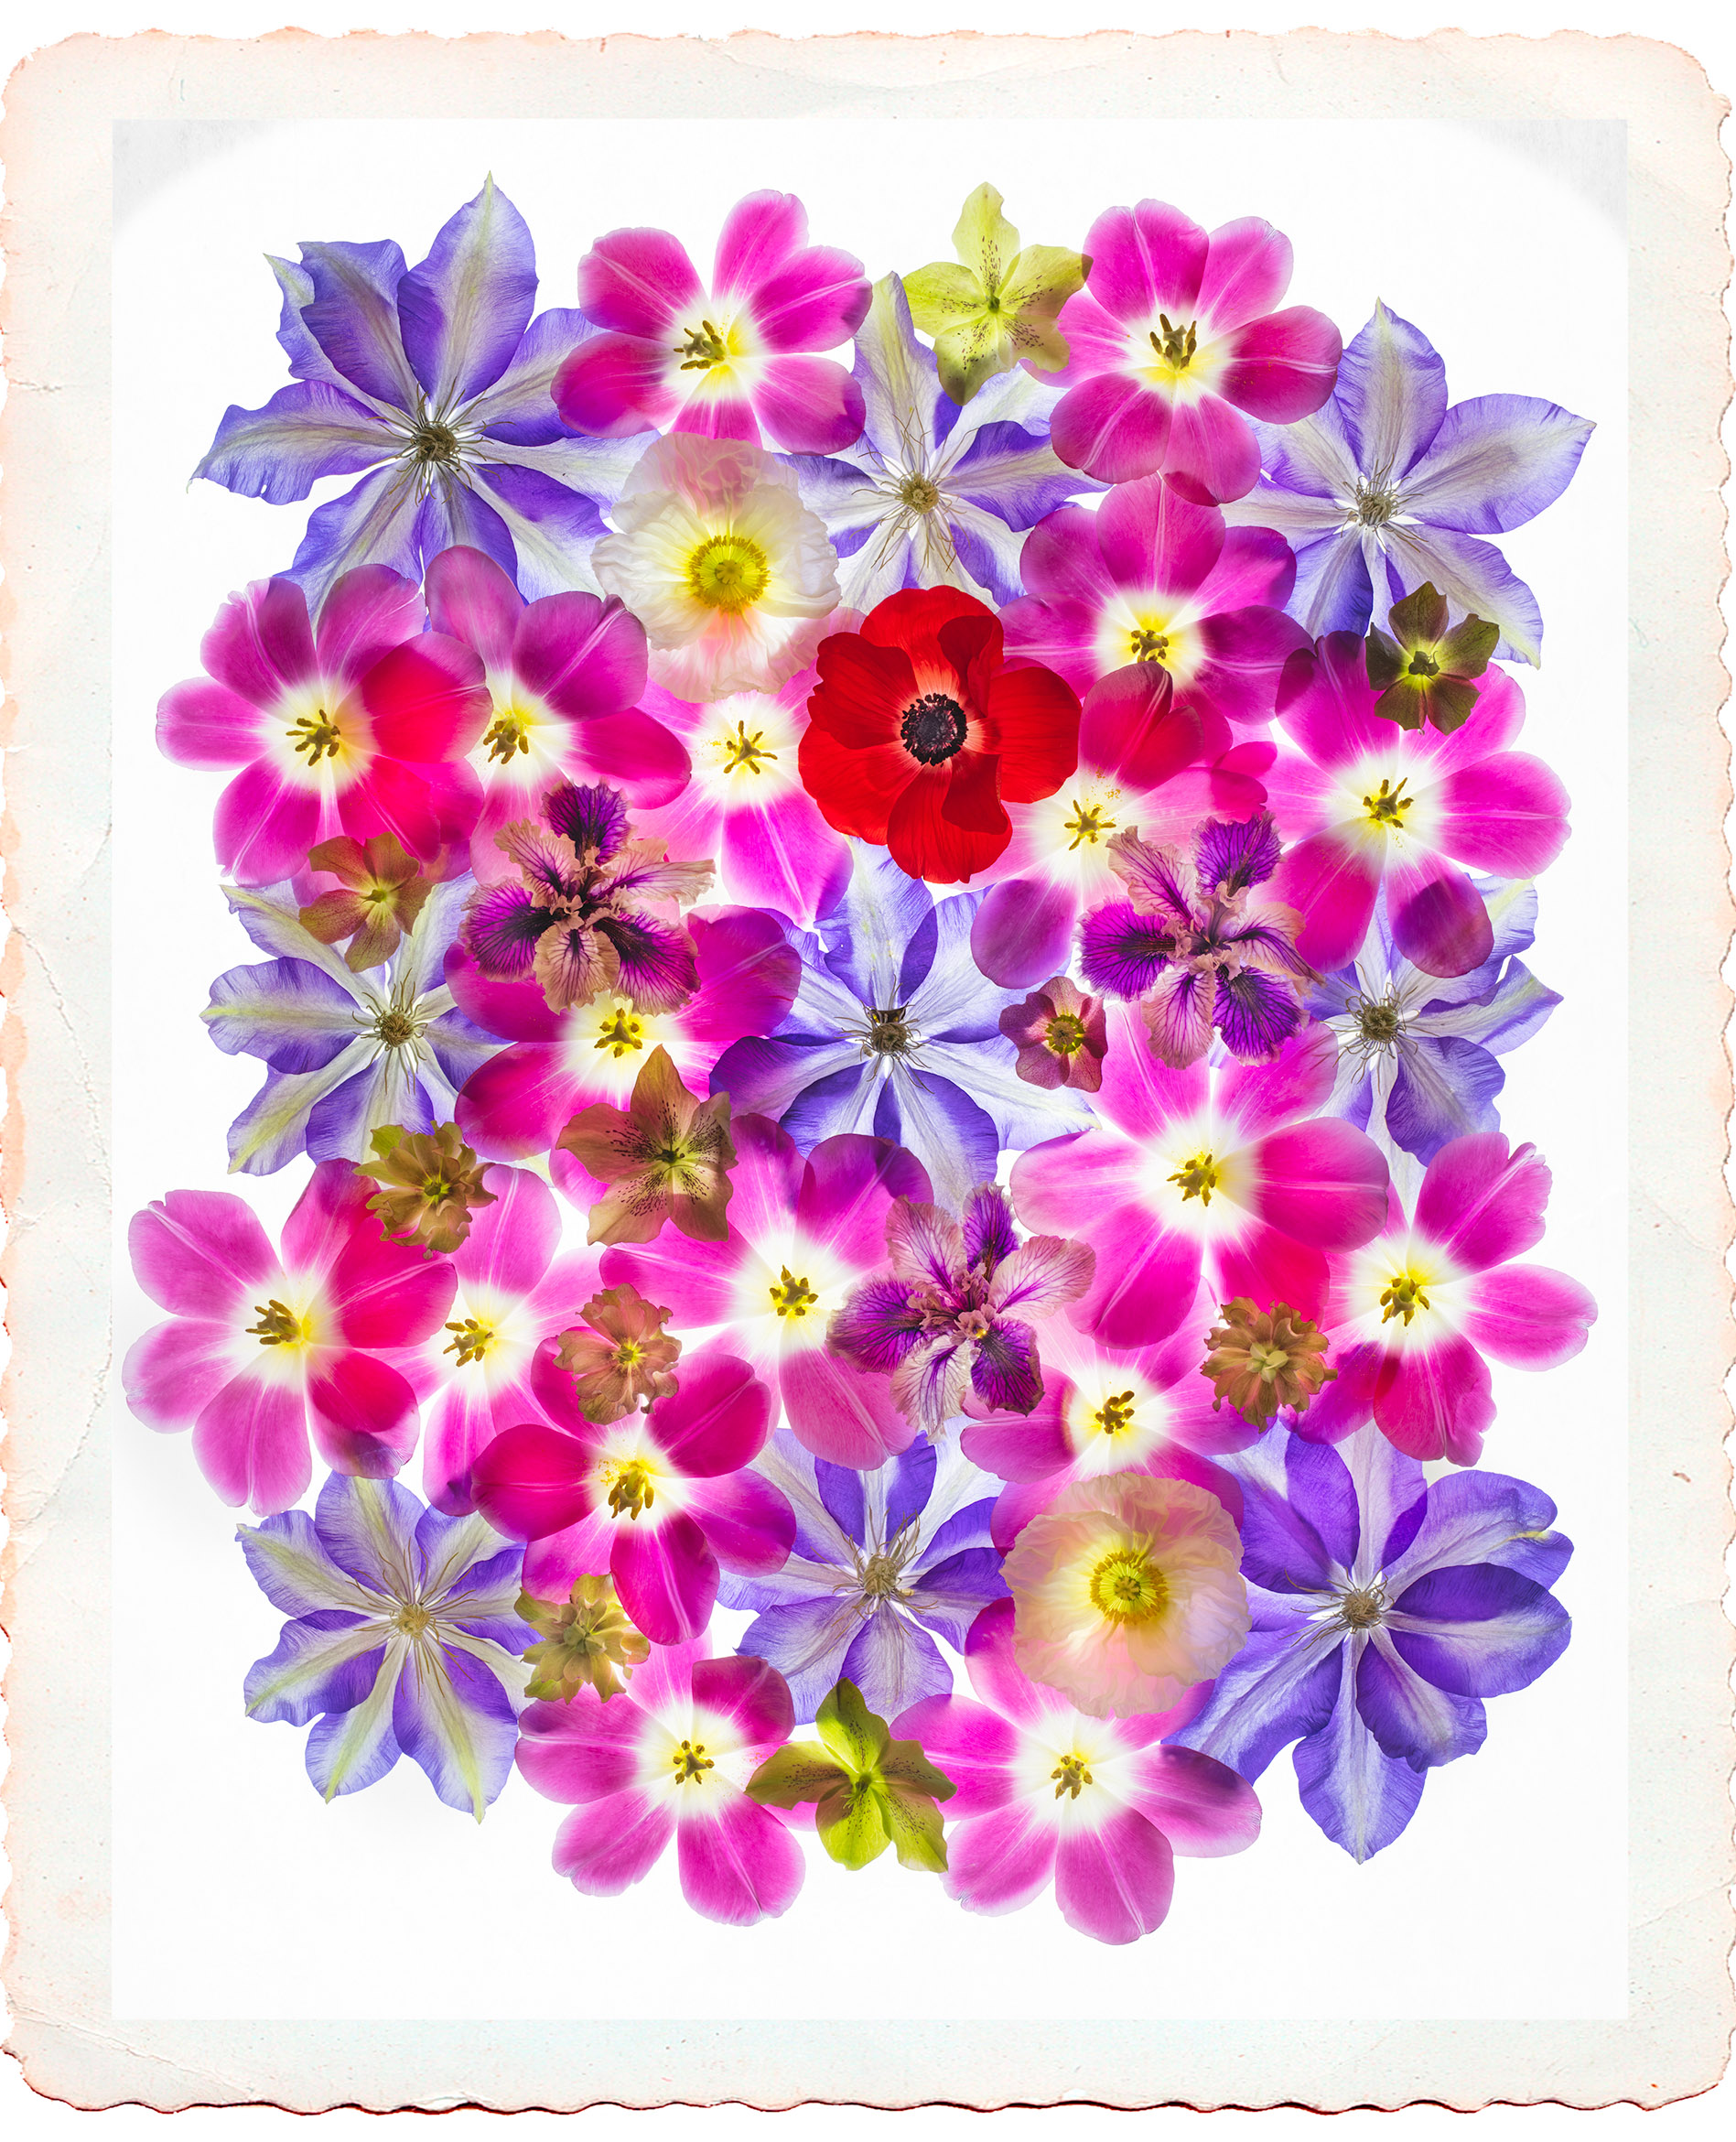
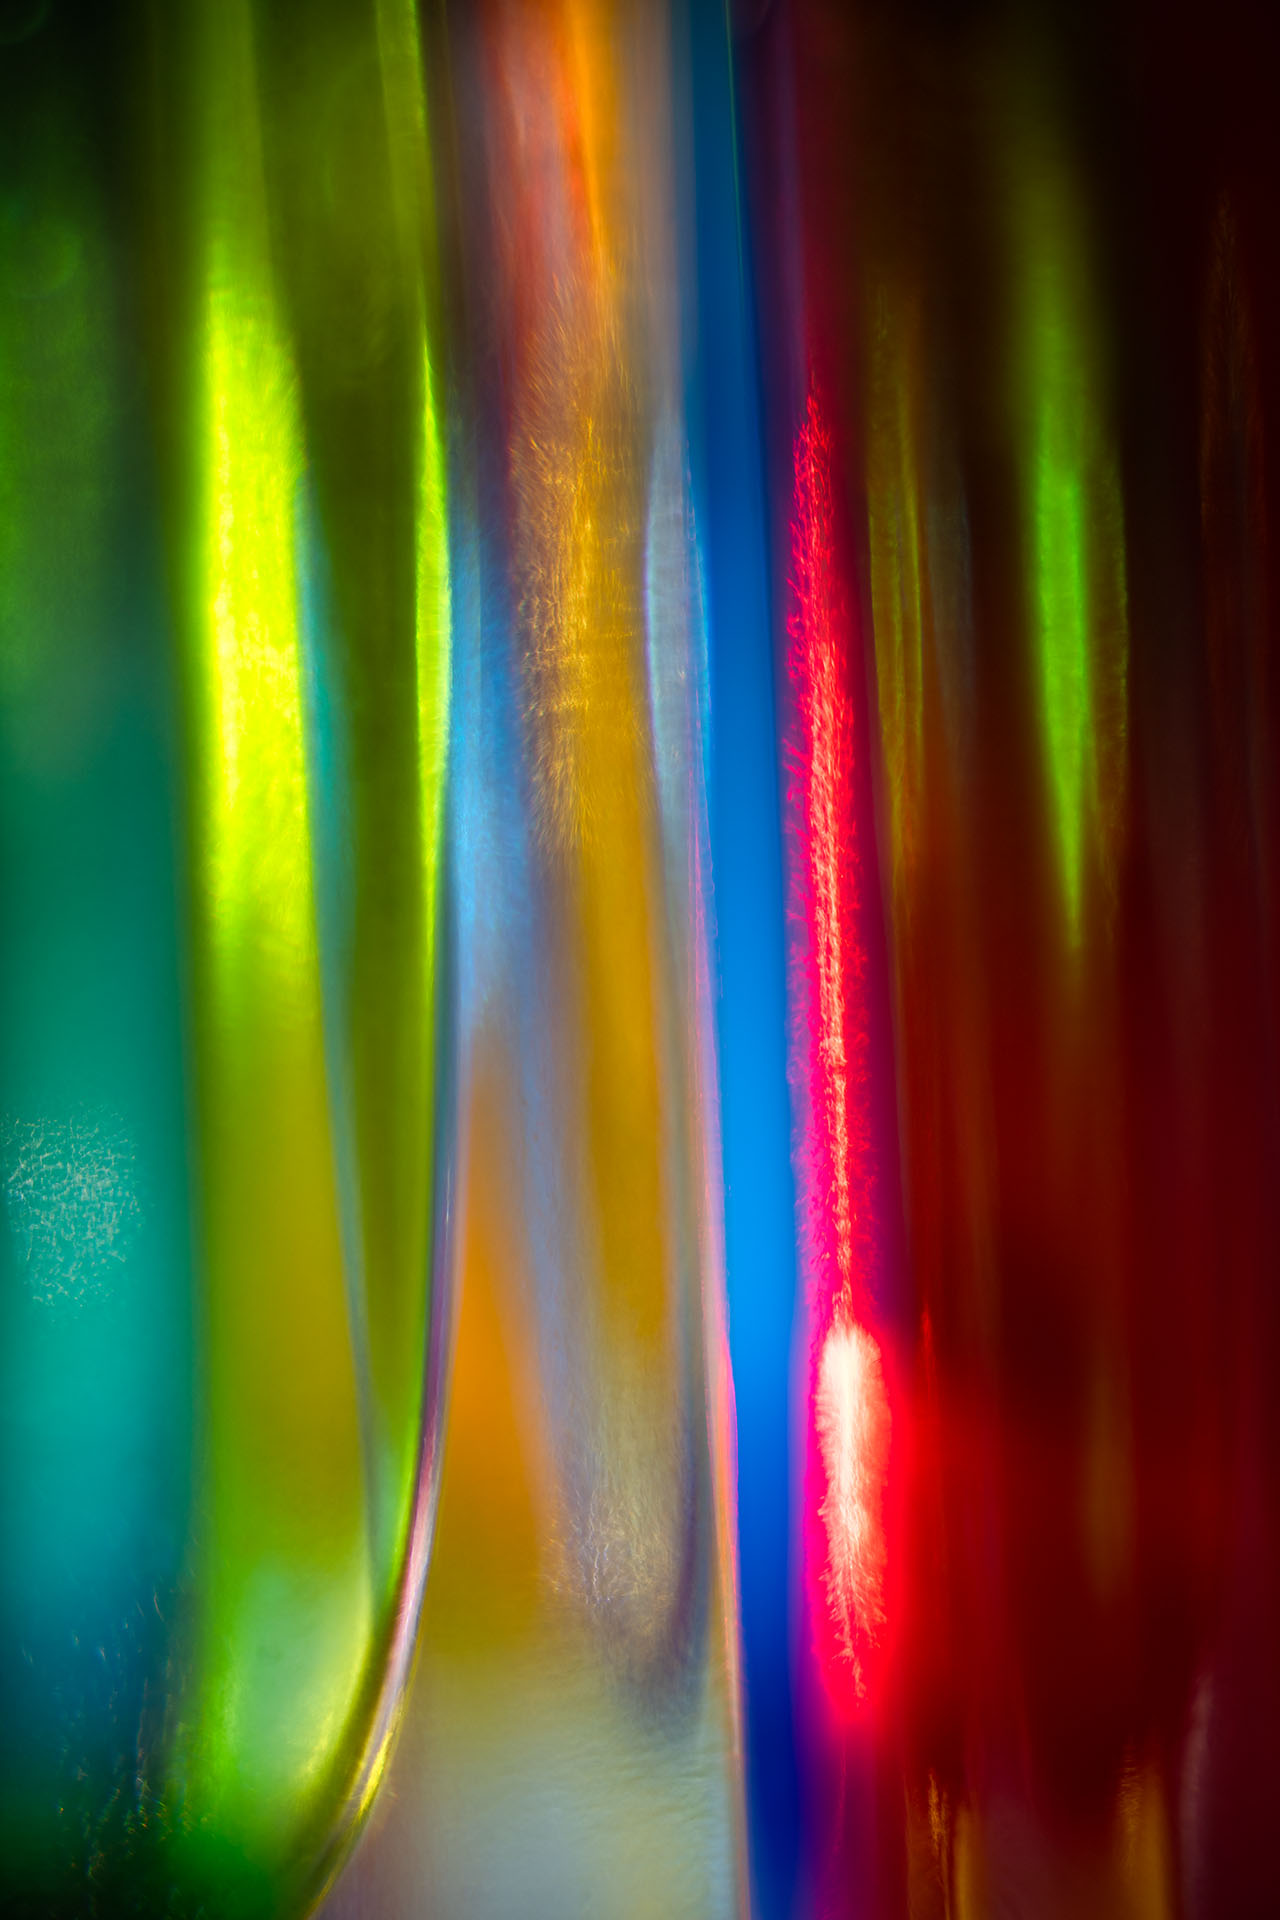
Color Field of Flowers © Harold Davis
Harold notes that “iPhonegraphy is an important part of my professional practice. In this light, JPEG to RAW AI offers a new and very welcome way to process my iPhone JPEGs.” Harold’s presentation will conclude with a few examples of how JPEG to RAW AI can enhance his iPhone imagery.
About Harold Davis: Harold Davis is an internationally recognized digital artist and photographer, the bestselling author of many books about photography, and a notable photographic educator and workshop leader. He is a Moab Master and a Zeiss Ambassador. His website is www.digitalfieldguide.com.

February 14, 2019
Happy Heart Day
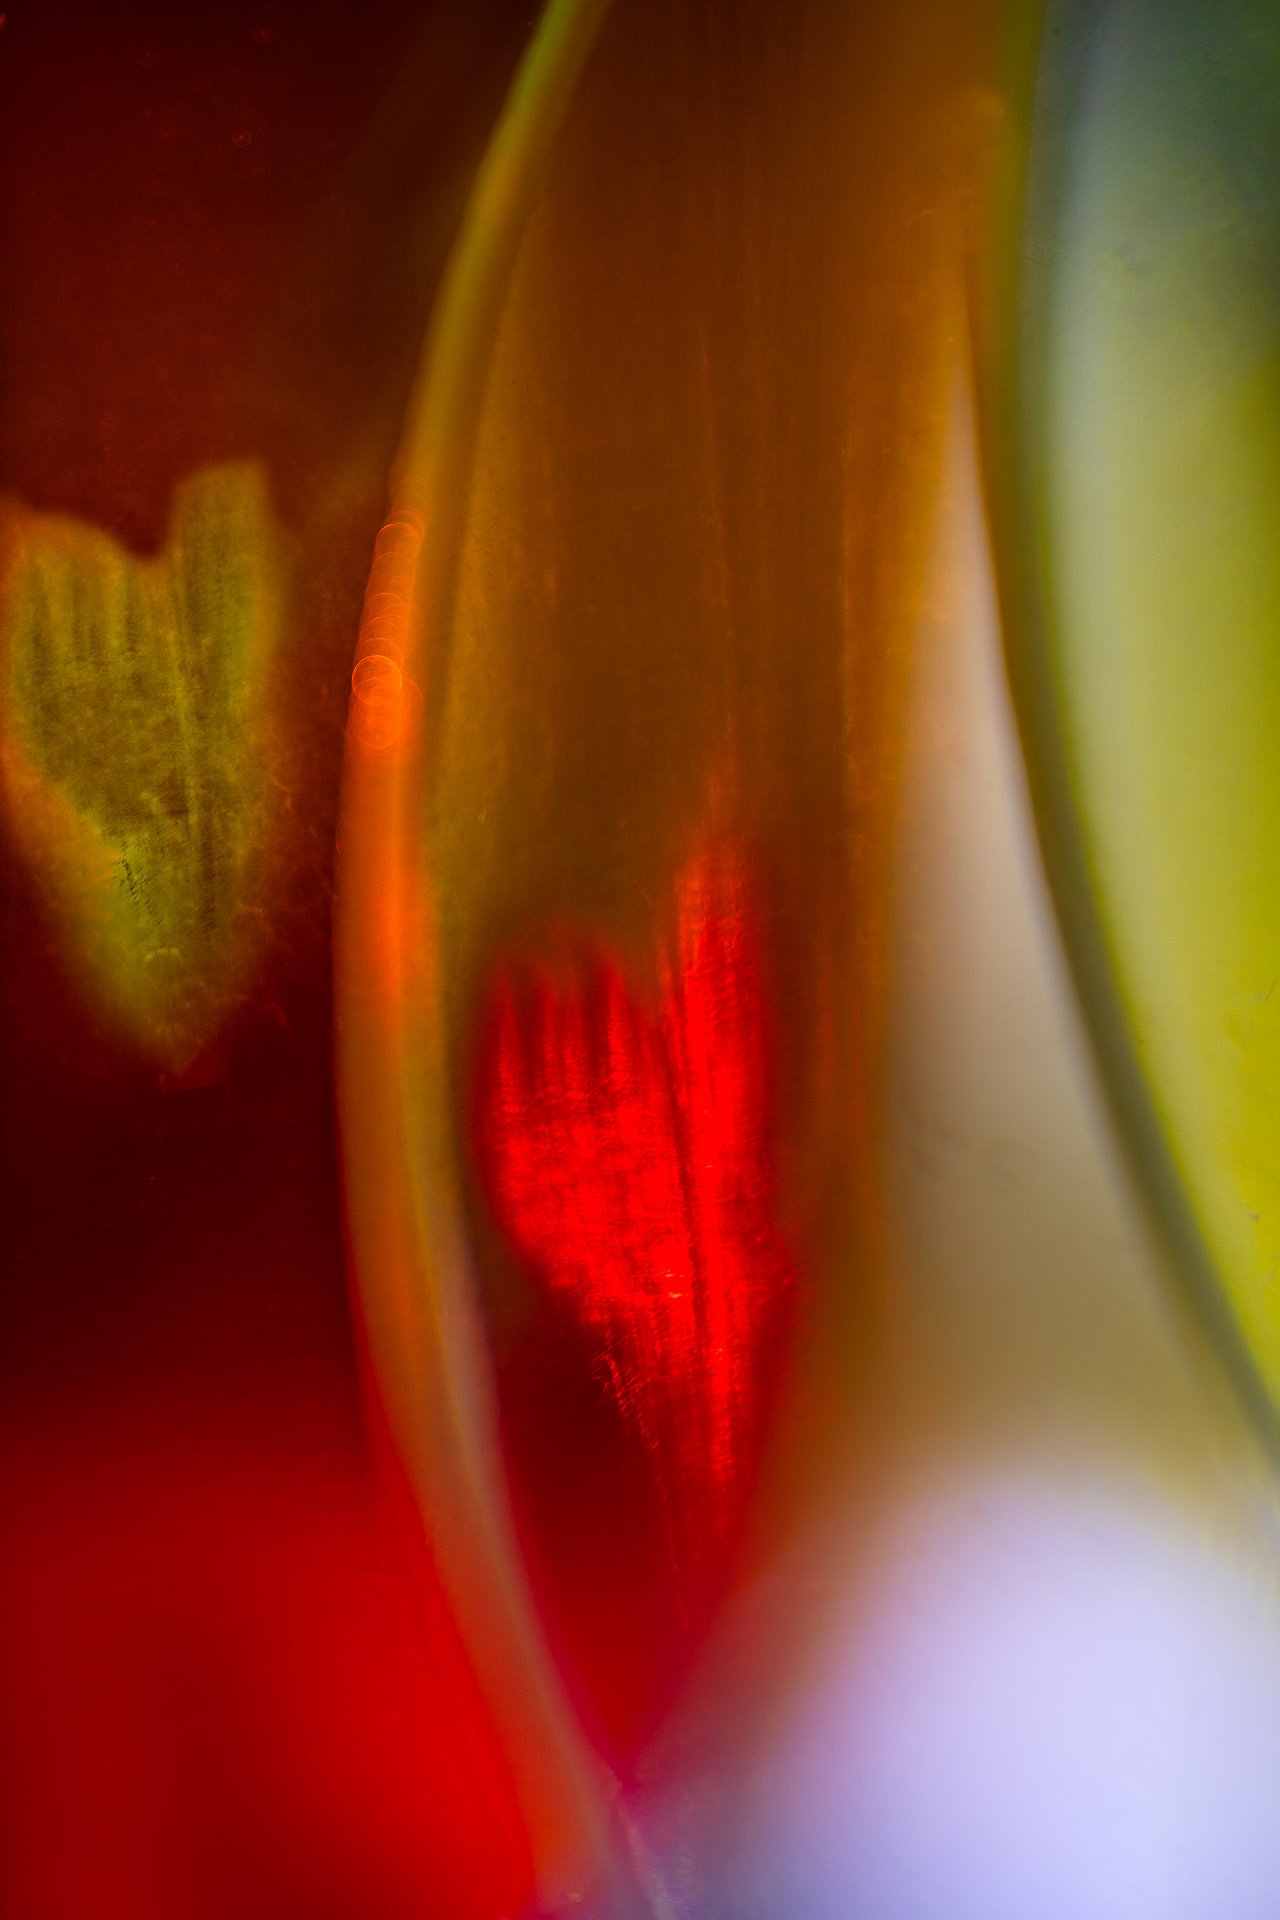
Heart Like a Wheel © Harold Davis

February 13, 2019
Apparently Home to Manatees and More
After my workshop in West Palm Beach, I had a morning to explore south Florida. I rented a car, and drove through scrub and pre-Everglades marsh inland to Lake Okeechobee—seemingly big enough to count as an inland sea with the further shore invisible in the distant horizon, and apparently home to manatees. Heading down the small road towards Canal Point on the shores of Lake Okeechobee, I was followed by a police car for miles, and meticulously kept to the speed limit as I passed through small hamlets. The dirt poor landscape was in striking contrast to the glitz and wealth of the high rises along the ocean shore.
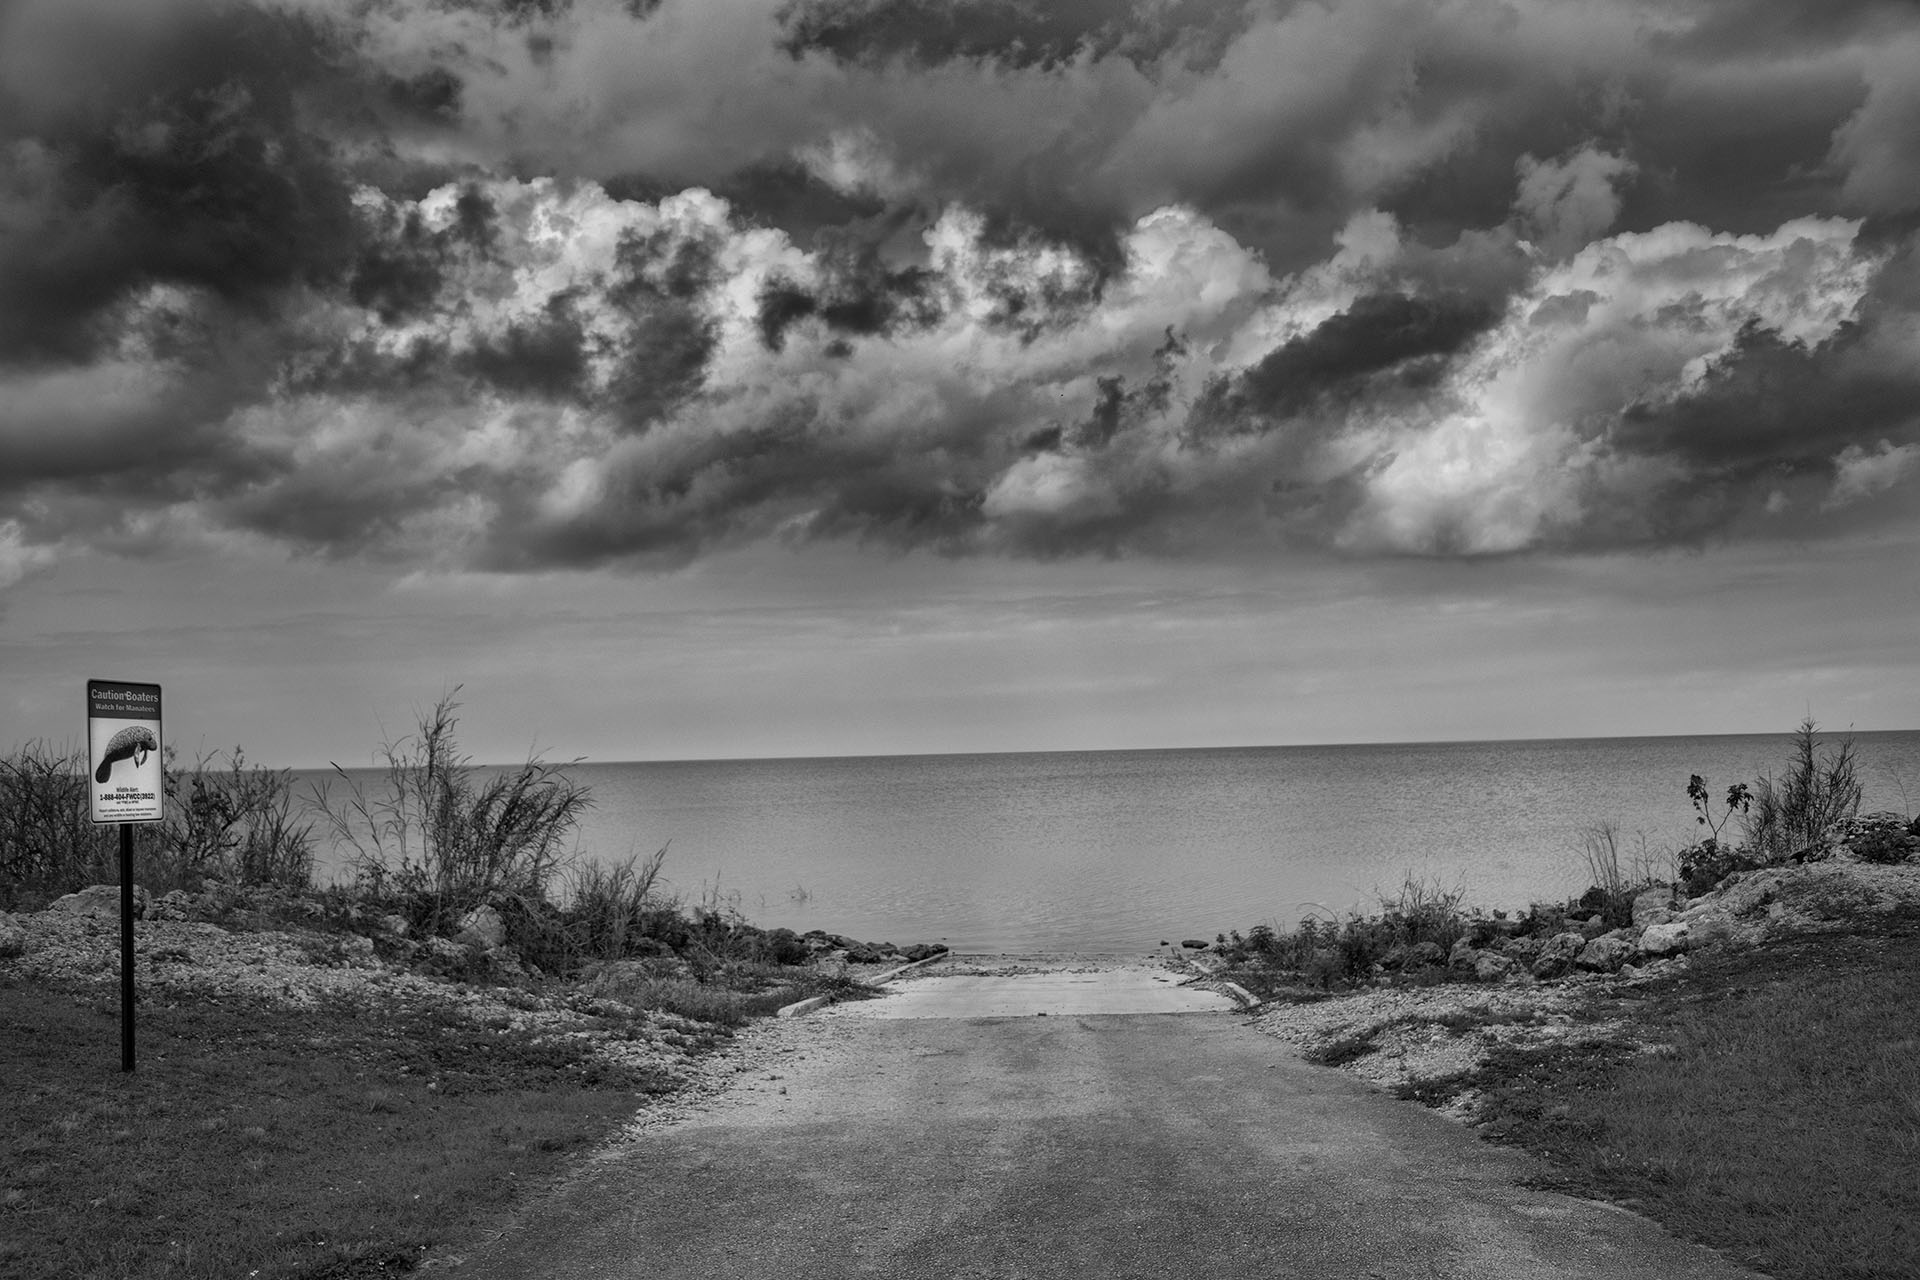
Lake Okeechobee © Harold Davis
Of course, one is not going to get the gist of any landscape or place in a short visit. And I had to start thinking about getting to the airport on time for my connecting flight (through Atlanta) home. But I hadn’t yet seen the Atlantic Ocean in my days giving the workshop, only the inside of a studio and the classroom, and the stealth metropolis—the Palm Beach cities have about a million people—plunked in a place that would seemingly be uninhabitable without air conditioning, even in February.
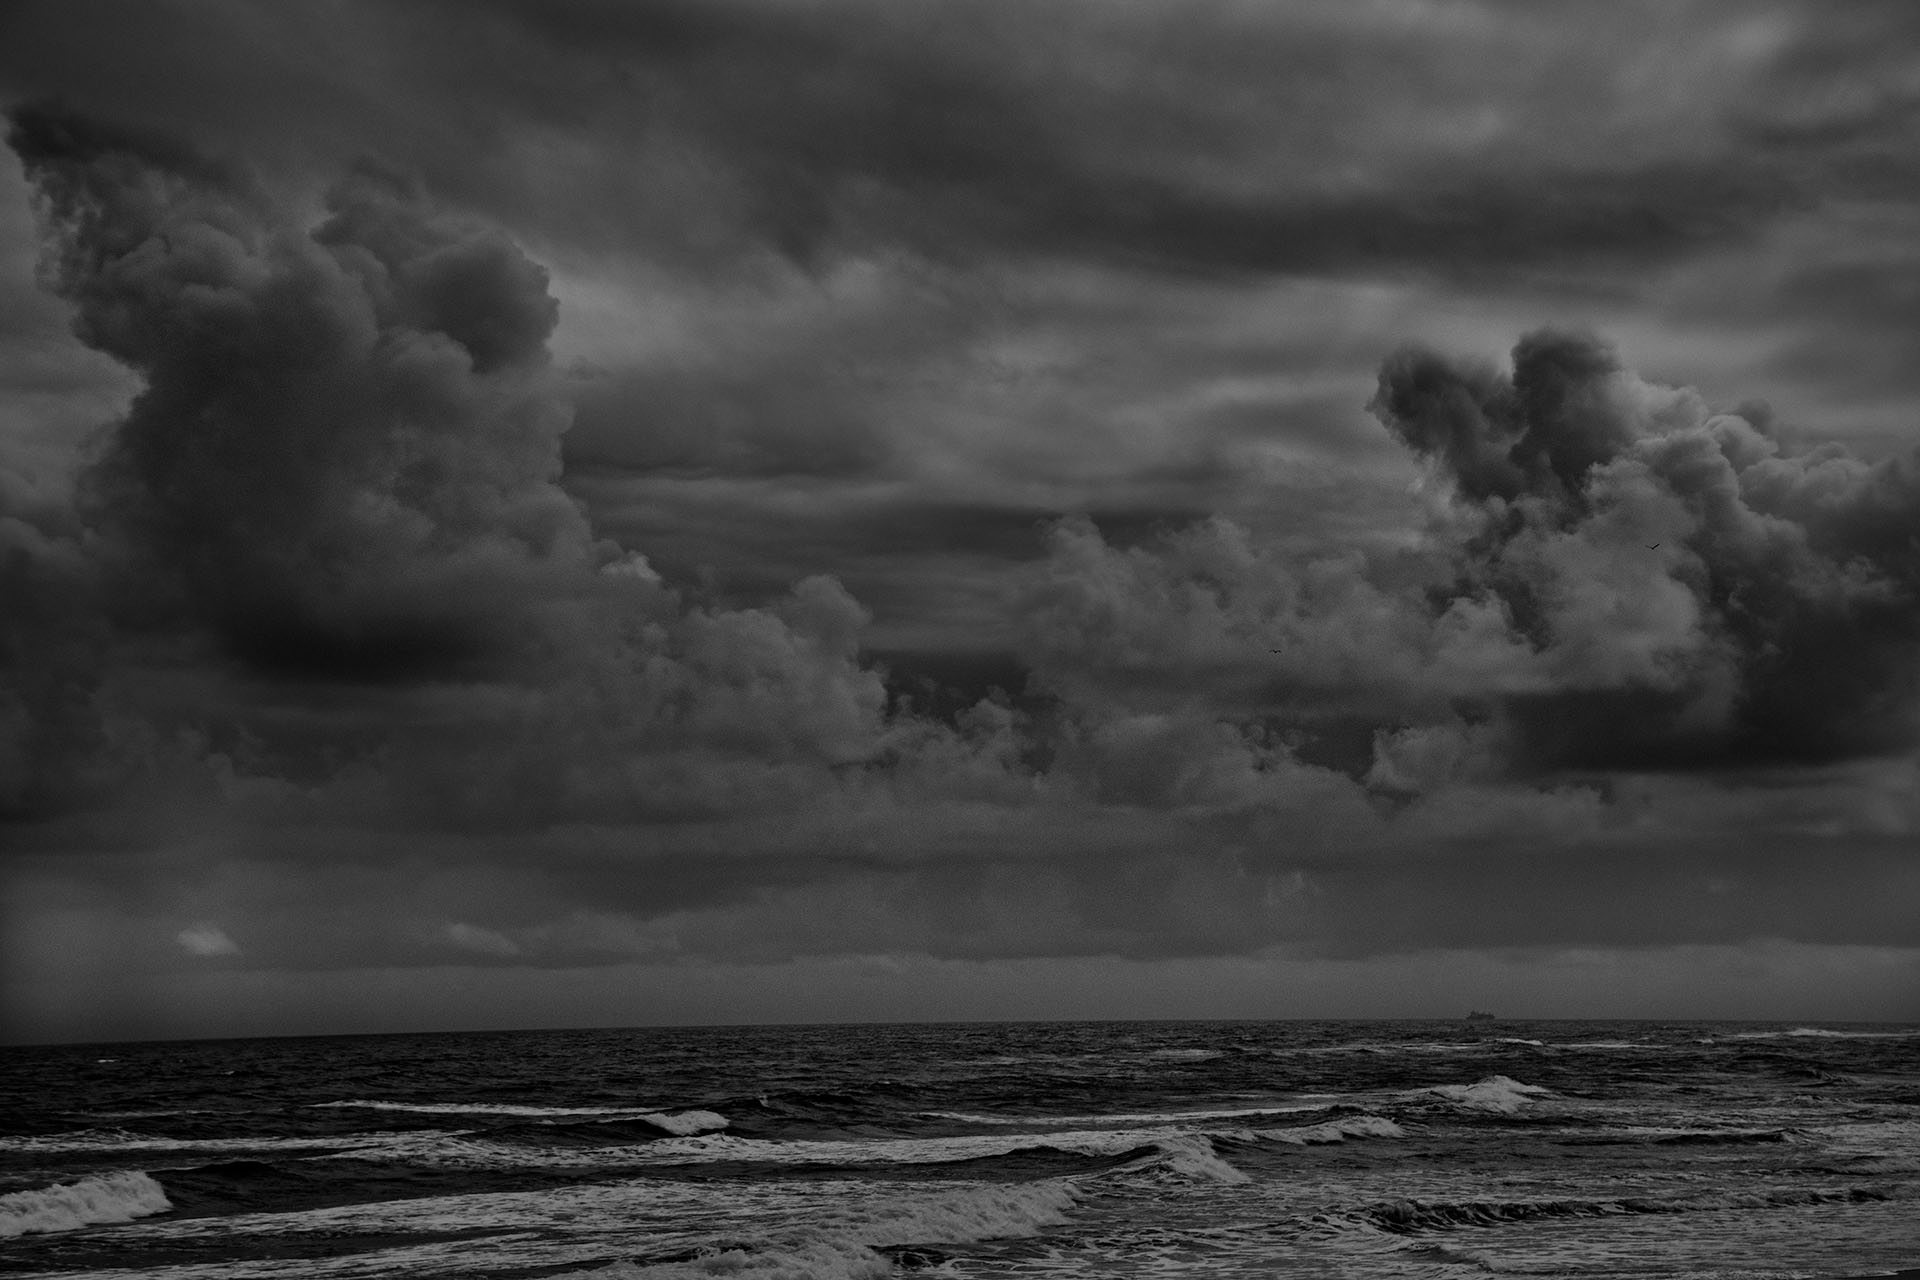
Atlantic © Harold Davis
So I turned the car towards the Atlantic coast, and took a long look at the waves and cloud-wracked sky before returning to the world of airport lounges and the cramped steerage of the backs of airplanes.

February 12, 2019
Cutting Corners
In Mounts Botanical Gardens of Palm Beach County, Florida an impressive exhibit of an installation by stick-work artist Patrick Dougherty was showcased when I visited recently. I’m always interested in doors, windows, and openings, particularly when they can be seen in progression one within the other, so it was great fun to photograph this stick work structure from within, emphasizing both the symmetry and repetition, and at the same time the anarchy and lack of linear structure.
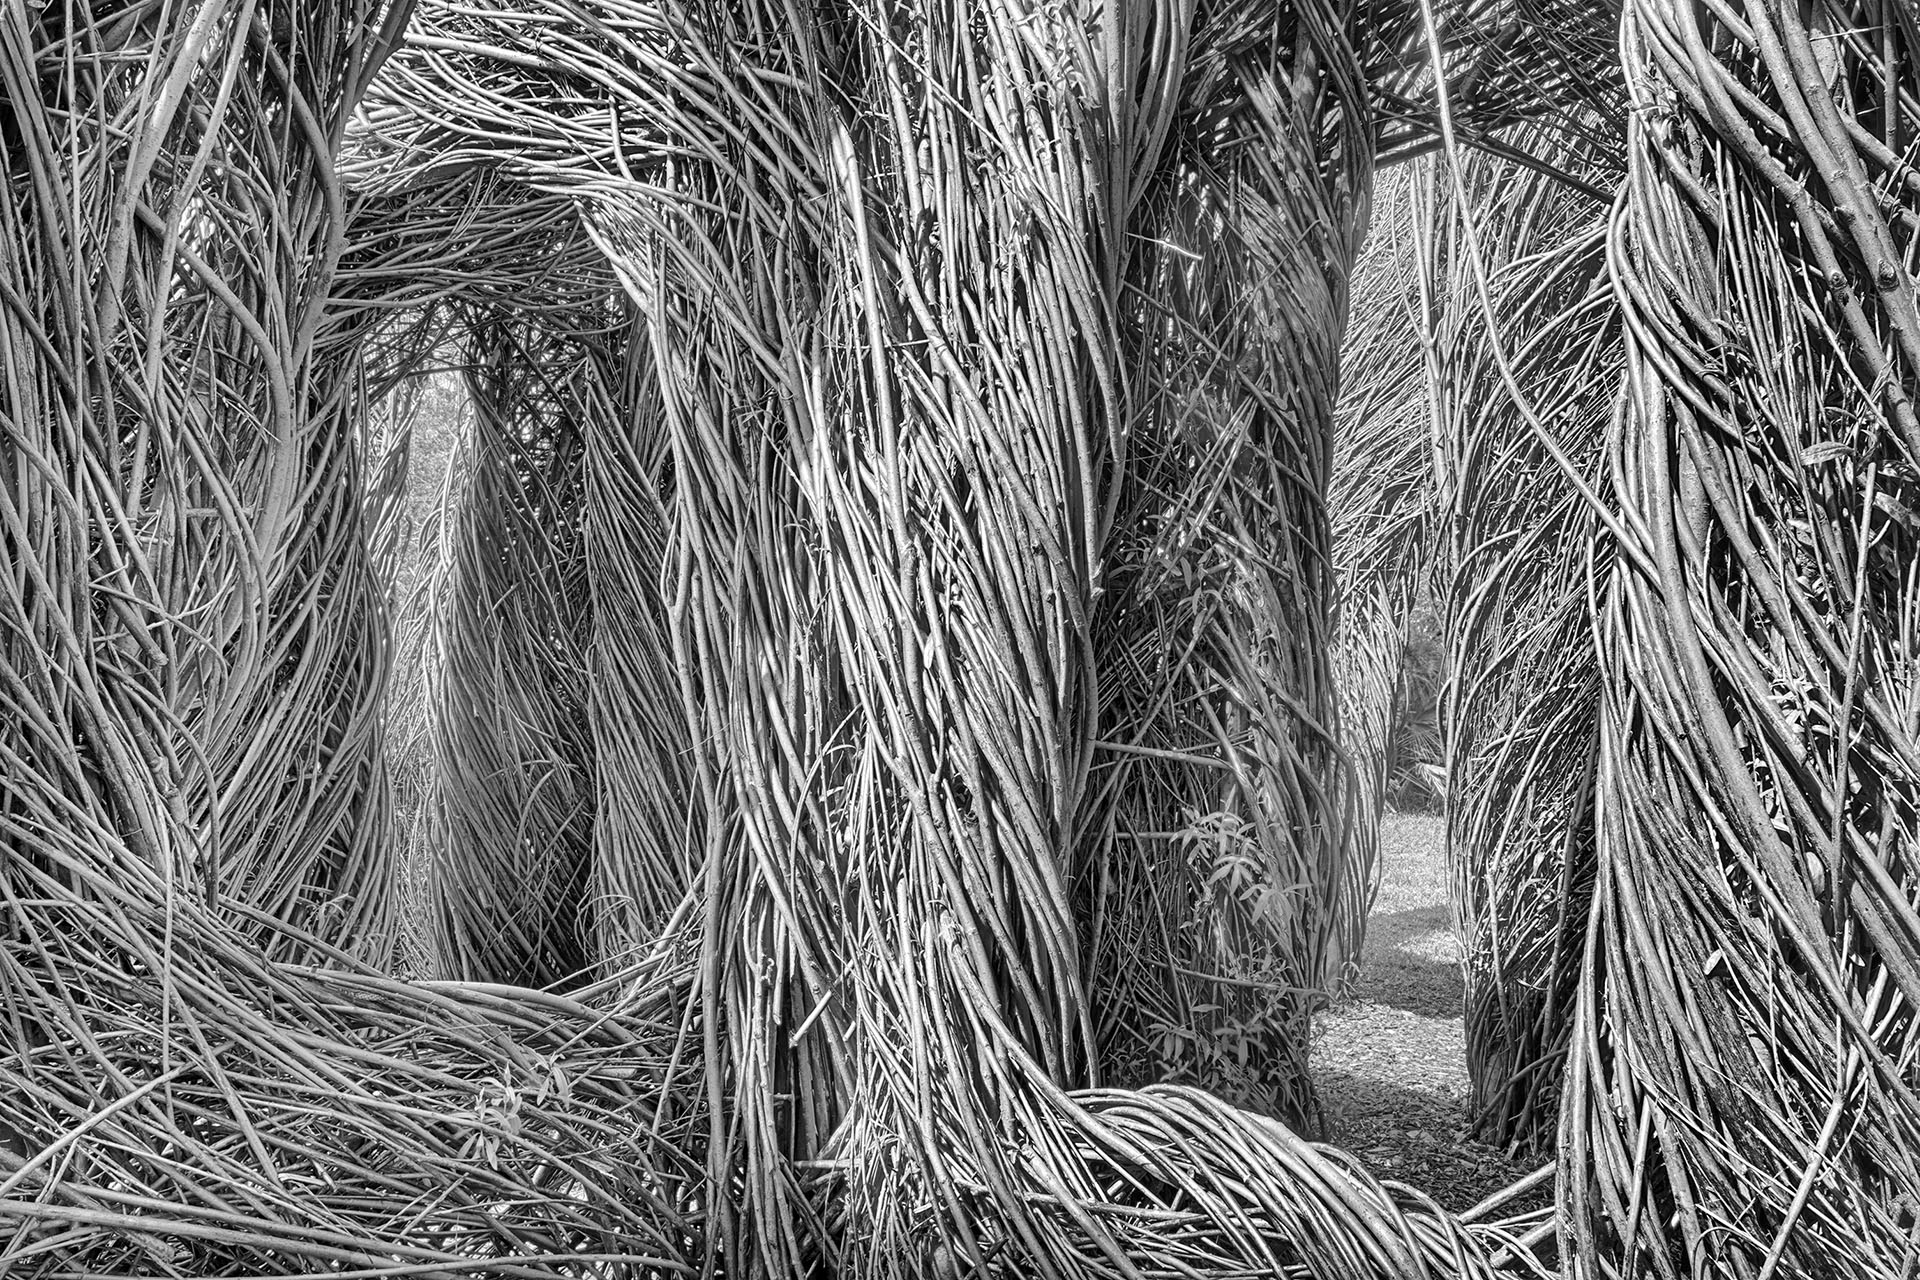
Windows in a Willow Twig House © Harold Davis
To create this image with as much contrast and resolution as I could, with my camera on a tripod, I made nine exposures stopped down to f/25 at ISO 64. Shutter speeds ranged from 2.5 seconds to /50 of a second. I carefully focused about 1/3 of the distance shown in the photo to get as many elements as possible in focus.
I combined the nine exposures in Nik HDR Efex Pro 2, then processed to monochromatic using Nik Silver Efex Pro 2 and Photoshop Adjustment Layers.
Also photographed at Mounts Botanical Garden with my class from the Palm Beach Photographic Centre: Looking down the frond—Been down so long it looks like up to me!

February 10, 2019
Looking down the frond—Been down so long it looks like up to me!
What you may find a little different about this photo of a palm frond is the viewpoint: my macro lens is looking straight down the frond, so that it looks almost like a causeway of some kind, with the vanishing point down where the frond meets earth, although this junction isn’t visible, and everything other than the frond itself is pretty dark.
I find the effect a bit disorienting in the final image, as it also was when I finally maneuvered my camera and tripod into position and looked through the view finder.
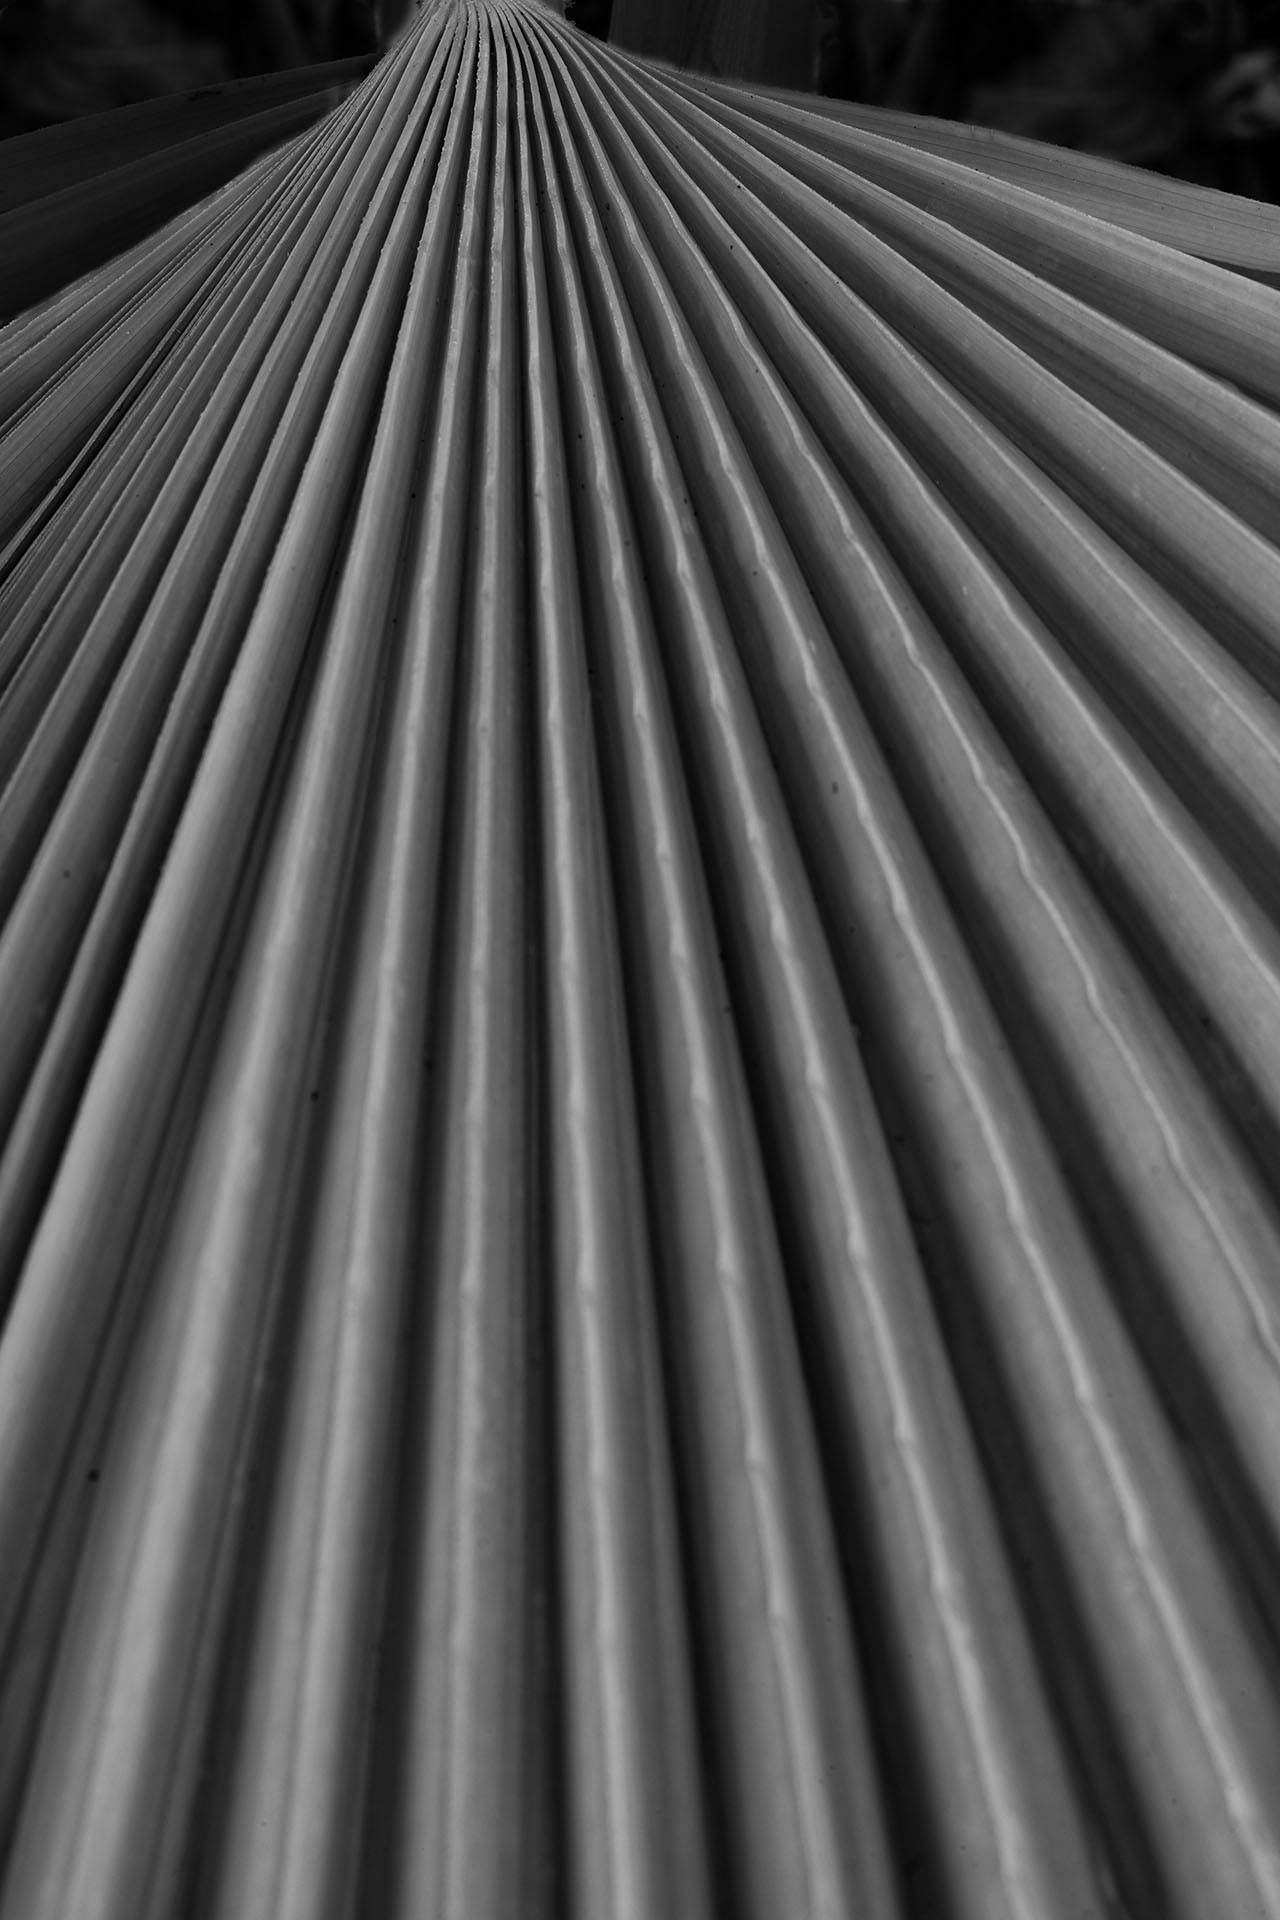
Frond © Harold Davis
I photographed this palm frond at Mounts Botanical Garden in West Palm Beach, Florida. I used my 50mm Zeiss macro lens stopped all the way down to f/22, with the camera as I mentioned on a tripod positioned at the top of the subject looking down. The shutter speed was 1/4 of a second, with the ISO set to 64. I converted the image to monochrome using the High Contrast Red preset in Photoshop’s B&W adjustments, as well as Nik Silver Efex Pro.

Looking down the frond
What you may find a little different about this photo of a palm frond is the viewpoint: my macro lens is looking straight down the frond, so that it looks almost like a causeway of some kind, with the vanishing point down where the frond meets earth, although this junction isn’t visible, and everything other than the frond itself is pretty dark.
I find the effect a bit disorienting in the final image, as it also was when I finally maneuvered my camera and tripod into position and looked through the view finder.
Frond © Harold Davis
I photographed this palm frond at Mounts Botanical Garden in West Palm Beach, Florida. I used my 50mm Zeiss macro lens stopped all the way down to f/22, with the camera as I mentioned on a tripod positioned at the top of the subject looking down. The shutter speed was 1/4 of a second, with the ISO set to 64. I converted the image to monochrome using the High Contrast Red preset in Photoshop’s B&W adjustments, as well as Nik Silver Efex Pro.
February 4, 2019
A point of information, not a point of honor
The triptych of photos shown in this story were made in my camera, not in post-production, with only small tweaks for slight retouching, exposure, and minor saturation adjustments. I say this entirely as a point of information, and not as a point of honor!

When all other lights go out 1 © Harold Davis
Personally, I like to learn about how an image was made as a matter of my own education. Perhaps learning about an artistic process will give me an idea for how to do something myself. But I care most about the final image, and it doesn’t matter to me if a photo was made using digital versus analog equipment, where it was heavily manipulated in Photoshop (or not), or even if the surface was painted upon. I’ve always had an eclectic attitude towards the art that inspires me, and feel photographers can learn much, and look with pleasure on (for example) paintings by Paul Klee as from any photograph.
When all other lights go out 2 © Harold Davis
Then again, photography has been burdened from the beginning as a mimetic discipline. It is naive to think that any kind of photography reproduces “real life”—but observers have made this mistake repeatedly. The reaction to this false equivalence was in the early years of the twentieth century the sappy aesthetics of “pictorialism”—which itself generated a counter-reaction in which only “straight” photography was morally acceptable to certain gatekeepers.
When all other lights go out 3 © Harold Davis
It has not generally been recognized how much the break with the analog photographic toolset brought about by digital photography has upended this perpetual debate. The photographic process is now, willy-nilly, a cyborg—with the computer portion of that equation residing in the camera, or in Photoshop, or in both. The entire production can be seamless, and bound only by the constraints of taste and meaning—which is, after all, the point of any fulfilling art.
All that said, it is fun to remember what can be done with simple photographic technique, control of the lighting, and a pinch of creativity!

February 1, 2019
Can you see color in black & white?
A client recently asked me to submit a series of monochromatic images of flowers. This happened after the client saw the black and white image of a begonia, shown below.

Begonia © Harold Davis
In the case of the begonia image, I originally pre-visualized the photo as monochromatic, and processed it to be a black and white image. With most of the others, the story was a bit different: I looked for floral imagery that I thought would work as back and white from my already processed color images. Then I either went back to the RAW file, or worked from the color version (or, in a couple of cases, picked up the workflow at a midpoint). The curves in the close-up of the center of a rose shown below remind me of a Georgia O’Keeffe painting.
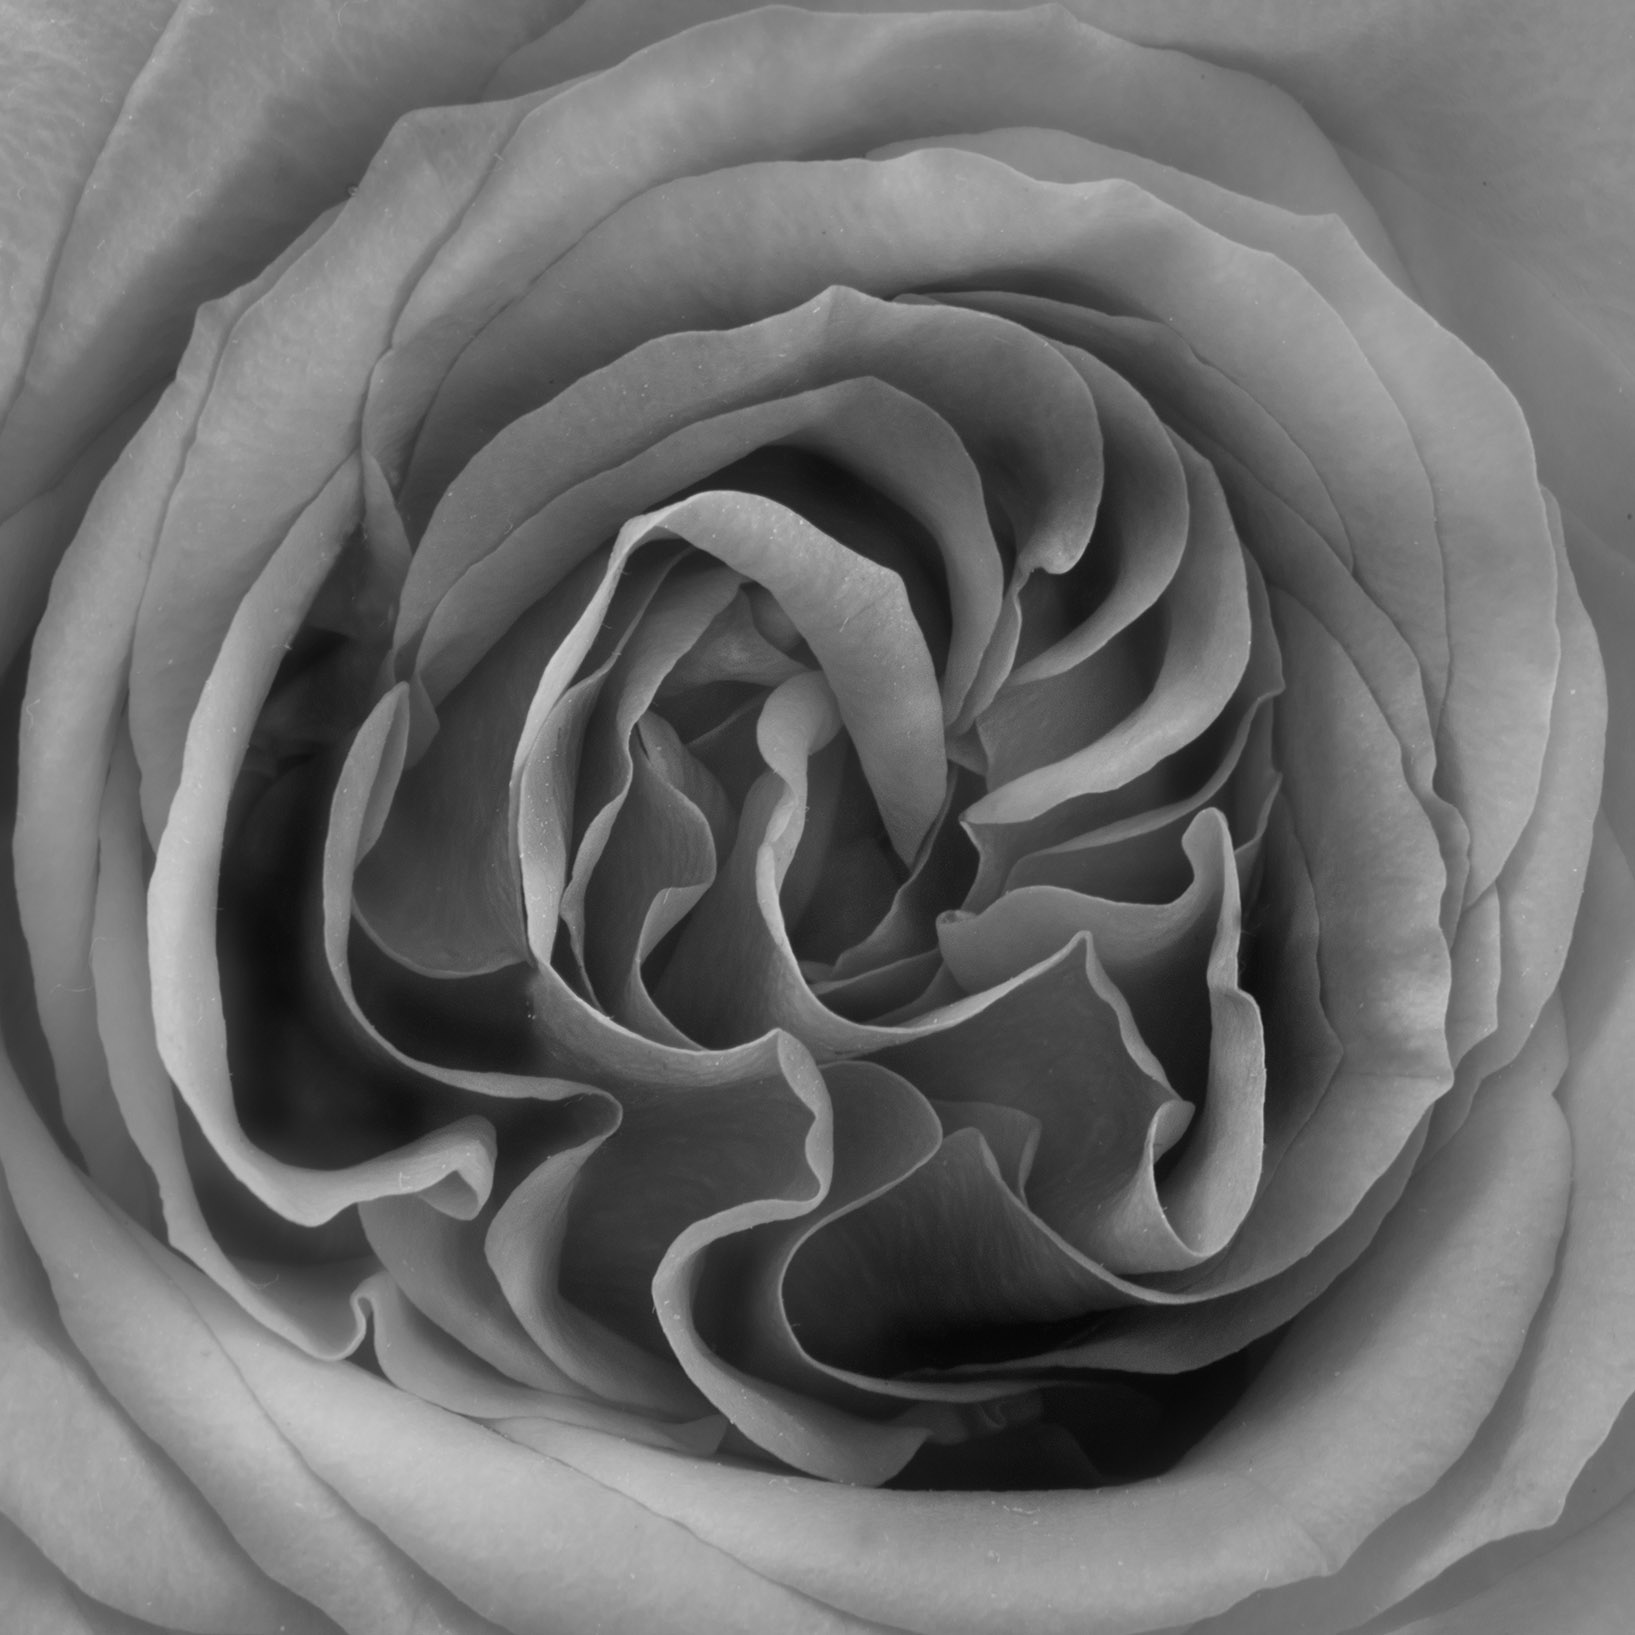
Rose Center Curves © Harold Davis
The interesting thing in my thinking is that we have strong opinions about flowers and color. So when a flower is presented in black and white, to some extent we see it in color. Since I made these photos, I know what the colors of the subject are. But to a hands-off viewer, are the imputed colors accurate? It is hard for me to say.
The camellia shown below was a light pink, but it also works in my opinion in black and white, and presents with a kind of luminescence.
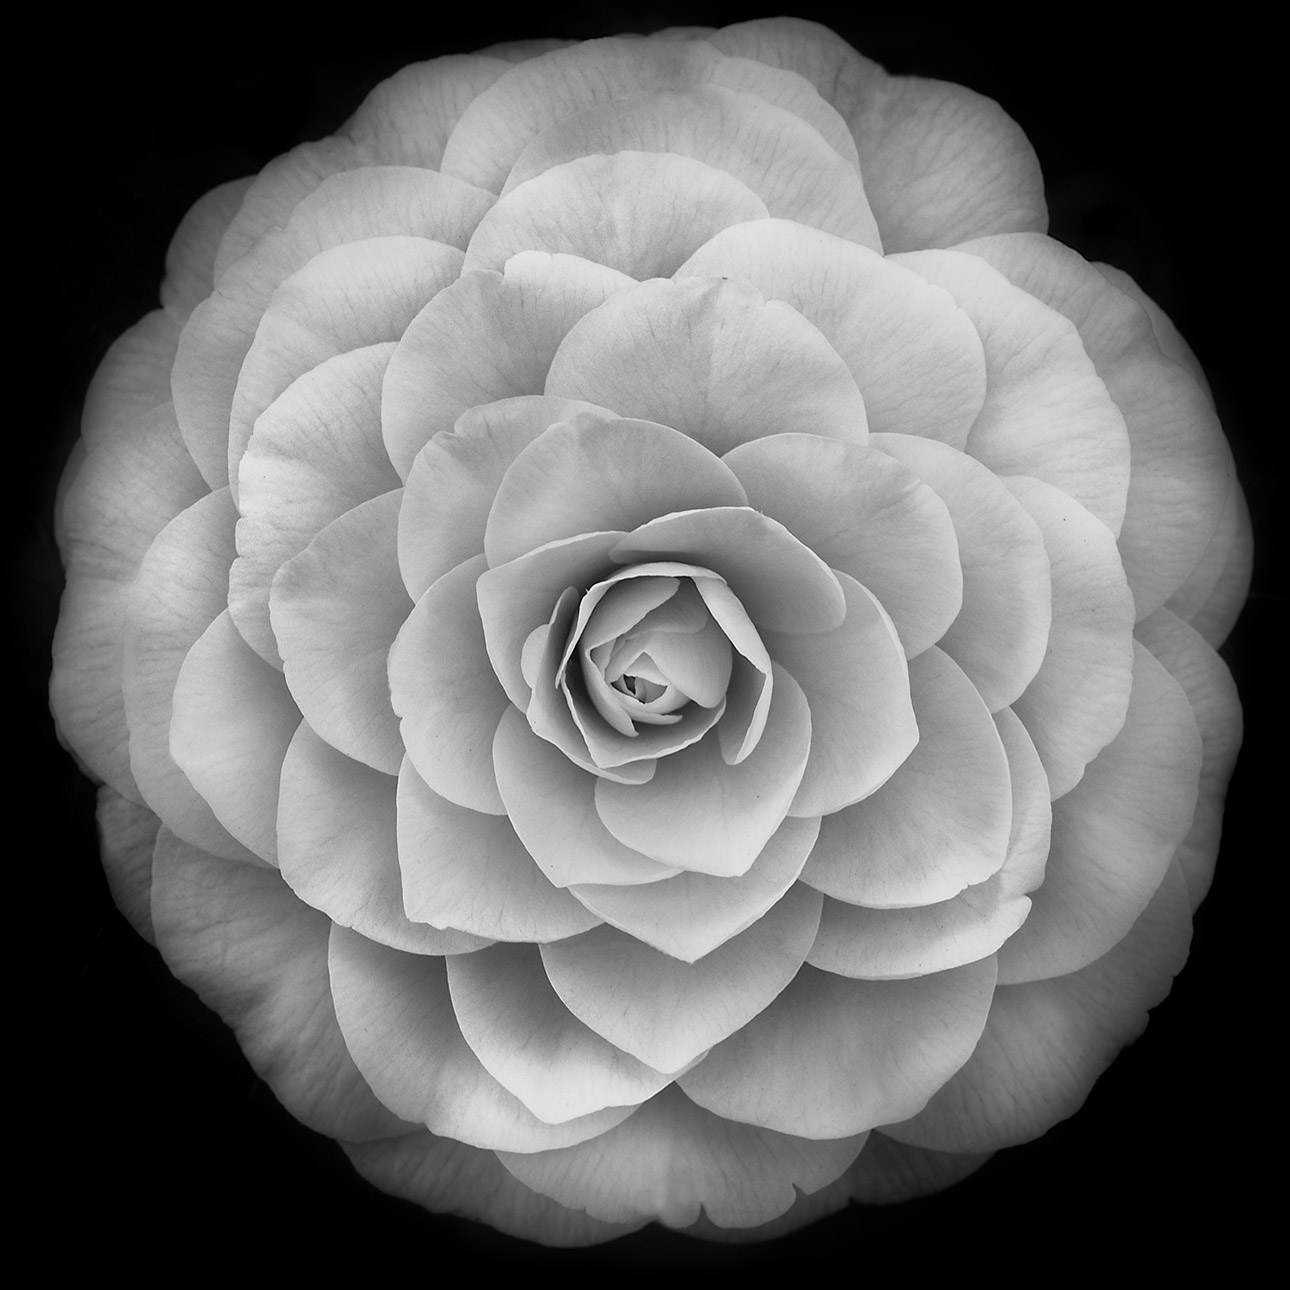
Camellia japonica © Harold Davis
Verily, there are many kinds of floral imagery that work well in monochromatic, as well as in color.


