
Cory Huff's Blog: The Abundant Artist Goodreads blog, page 16
November 21, 2018
Is it Time to Hire a Studio Assistant? Here’s How
Being an artist can be a lonely calling. Even if you aren’t an introvert by nature like many artists are, the reality of life as an artist is that you’re not often working around others. This idea that you have to do everything yourself, originally stemming from necessity, can become very ingrained and actually work to your disadvantage.
As your business grows, you may reach a crossroads where the strategic choices you make will cause you to either grow or wither. Eventually the cost of doing everything yourself will outweigh the cost of paying an hourly wage to an employee, and you’ll need to hire a studio assistant in order to see your business grow and avoid burnout.

So how do you make the leap from lone wolf to leader of a team? Let’s take a look at the signs that it may be time to hire a studio assistant (or other kind of help), and some key points you need to keep in mind to make a successful hire that will be good for your art business.
Signs that it’s time to hire a studio assistant:
You’re raising your prices regularly but are still too busy
This is a huge one, and a problem we often see in professional artists in the Association who have been implementing the lessons they’ve learned in How to Sell Your Art Online for several years and are seeing success- but haven’t yet taken the leap to scale up their business with an employee. If you are working hard, finding that you’re raising your prices again and again but still very busy, it may be time to hire help.
You’re meeting your sales goals but feeling burned out
This really ties in with the previous sign. If you’ve set ambitious but realistic sales goals and you’re meeting them, that’s great! There’s a lot you’re doing right! But if your success is accompanied with a feeling of burnout, it’s likely that you need to: a) take a vacation, and b) consider hiring an assistant.
How to hire help
Determine what you need.
Do you need an office manager to handle invoicing, supplies purchasing, and communications? Someone to clean and organize your space? A salesperson? Someone to prep and assemble parts of your work? All of these are different jobs with different skills required, so you need to have a clear picture of your expectations in mind before you begin the process of interviewing and hiring.
It’s tempting to think you can just hire a studio assistant and expect them to do everything you don’t want to do. But the reality is that some of the things you need done are just as specialized as your art, and take specific training and personality traits.
Take a look at the work you’re doing now: what is the most time consuming part of your job right now that doesn’t require the special skills you bring to the table as an artist? Hire someone else to do that job so you can give the time you need to actually making and marketing the art, and still find time for rest.
Know where to look.
The right place to look for the perfect employee will vary depending on what it is you need. Here are some ideas:
Classifieds like Craigslist
Put the word out on your blog/social media/mailing list that you’re hiring, and ask your audience to share your job listing with anyone they know who might be a good fit. Be careful you’re hiring someone who wants to do that job, not just a younger artist who wants to learn from you on your dime.
If you’re hiring someone just for communication, scheduling, and handling your digital marketing, you might consider sites like Upwork.com or PriorityVA.com (if you want a true professional).
Inquire through galleries
Ask artist organizations/advocacy groups
Ask other artists with employees directly (it’s really okay to do this!)
Know how much to pay them.
Once you’ve determined exactly what you need from an employee, do some research on a site like Glassdoor to figure out the median wage in your area for that job description.
Write a thorough job description.
Here’s an easy structure to follow:
1. 1-2 short paragraphs with the name of your business (studio name or just your name), what position you’re hiring for, a few lines describing the position in general terms, and pertinent/unique information about your studio and the position. Is the position full time or part time? Do you have a particular type of person in mind? Do they need to be located within a certain area radius? Example:
STUDIO NAME is hiring a Studio Manager to handle project management, collector communication, and art material logistics. We are looking for an experienced project manager with the ability to shepherd multiple large-scale art projects from the concept stage through fabrication and installation, as well as following up with wholesale accounts to ensure restocking orders.
Your primary job will be to protect the artists’ time and attention so they can focus on making more art. The ideal candidate is someone whose zone of genius is managing and organizing chaos into order. This is not a good fit for artists who are wanting a short stint somewhere to learn how to run an art business.
STUDIO NAME, located in LOCATION, is the art studio for ARTIST NAME, TYPE OF ARTIST.
This is a FULL TIME, PART TIME, CONTRACTOR or EMPLOYEE position based in LOCATION.
2. List out the duties in detail: what is everything you need this person to be able to do? Bullet points are good. Example:
Follow up, screen and evaluate inquiries for wholesale and custom artwork based on minimum criteria set by STUDIO NAME.
Collaborate with artists to create project plan for large-scale custom art delivered to private and public collectors world-wide. These can include months-long projects with many moving parts.
Once the project has been conceptualized and the collector has signed off, your job is to handle all communication regarding logistics and timelines, involving the artists only when changes to the art are necessary.
Be an amazing partner who is fun to work with. This is a small team and we spend a lot of time together.
Inventory and supply management with multiple vendors.
3. Employee requirements such as education, background, experience, essential personality traits, etc. Bullet points once again. Example:
A positive, can-do attitude with proactive attention to the tiniest details
The ability to keep your cool when others are stressed
5 years of demonstrated project management experience
Possibility of some travel, up to one or two days per month
Competence with basic website CMS (Shopify, WordPress)
Expert level skills with office software and project management tools
4. Finally, include instructions for how to apply for the job. Example:
If this sounds like a great fit, please submit a cover letter describing your interest in the position, as well as a resume. We will contact you for an interview, where you will be asked to demonstrate your communication and computing skills. When you apply for the job, please point out hte spelling mistake in this job description.
Hiring your first employee is a huge step. Ultimately, if your business is ready for it, hiring an employee can mean the difference between abundance and burnout. You’ll do well to do plenty of research in advance, have a solid idea of what you are looking for in an employee, and spend some time chatting with other artists who have hired employees to learn from their experiences.
Have you taken the plunge and hired an employee for your art business? We’d love to hear about your experiences in the comments!
The post Is it Time to Hire a Studio Assistant? Here’s How appeared first on Online Marketing for Artists.


November 19, 2018
Divi & Other Black Friday 2018 Deals
We wanted to do something a little different this year. We are rounding up some of the best Black Friday deals that are artist-specific. This email is a heads-up to look out for Friday.
Divi WordPress Theme
One of my favorite companies, Elegant Themes, is doing a week-long giveaway where you can win things like a brand new iMac just for entering, and their Divi theme is the best WordPress theme on the market.
If you are looking to build a WordPress website for yourself, we’ve recommended Divi for years (I use it for several sites – here’s our review). Now they’re offering 25% off on Friday, and a bunch of cool goodies. Check out the giveaway page (affiliate link).

Here’s a few more on the horizon. We’ll have a longer run-down on Friday, including Black Friday deals on several of our favorite books and other resources.
Other Tools & Supplies
For Digital Artists, the iPad Pro can be had at a substantial discount at Best Buy for $524.99. MacRumors has a comprehensive list of Apple discounts at this link. https://www.macrumors.com/roundup/black-friday/
Michael’s craft store has 40% off all regular priced items from noon to 10 on Friday and a bunch of great deals. Lots of artists recommended this sale.
Jerry’s Artarama has some killer deals on a wide variety of supplies as well. Do your planning here: https://www.jerrysartarama.com/promotions/black-friday-art-supply-deals
What Else You Got?
Got a Black Friday / Cyber Monday deal you want everyone to know about? Comment here and let us know before Wednesday morning so we can include it in Friday’s email.
The post Divi & Other Black Friday 2018 Deals appeared first on Online Marketing for Artists.
November 14, 2018
How to Make Time for Art (When You Really Don’t Have Time)
Even if you desire to make art your primary career someday, it can be incredibly difficult to fit it into your day. This gets even harder when you factor in adult responsibilities like a day job, children, and other time consuming obligations like looking after an elderly parent. But the desire never leaves; you can’t just let it go. So how in the world can you make time for art when there are already a hundred different things demanding your attention?

Tips for fitting more art into your day
In order to make the art you want to make, you have to prioritize your art time. This seems like a simple and obvious concept, but if you don’t make the conscious decision to prioritize your art, then at the end of a busy day (and if you’re anything like me) you’re likely to putter around checking off a mental to-do list: make school lunches, throw in another load of laundry, pick up the random detritus of life lying around the house, getting distracted with every new room you enter, and before you know it it’s midnight and you’ve certainly been busy… but you’re left unsatisfied.
You have to decide what is most important to you. Until someone invents a way to create more hours in a day, art will have to take the place of something else you’re currently doing. This is a hard pill to swallow in a culture that is obsessed with “doing it all” and being relentlessly busy, but jealously guarding your art making time is a necessary step in this journey. How can you make that happen? Here are some ideas.
Ask your partner/spouse to help you set aside time.
Even if you think it’s clear to everyone else how much your art means to you, don’t expect them to “get it”. Sit down and have a talk where you lay it out plainly: your art is extremely important to you, and will they please support you in your attempt to make time? This might look like agreeing to take on some of your usual tasks once or twice a week whether that’s mowing the lawn or cooking dinner. Or it might look like taking the kids to Grandma’s on a Saturday afternoon so you have peace and quiet to work.
Budget your time and consolidate tasks.
Treat your time like the precious resource that it is, and budget it carefully. Batch your errands together so you’re not spending more time than you need to driving around town. Plan your weekly meals in advance, and only grocery shop once per week.
Delegate things that you don’t absolutely have to do yourself.
Start saying no.
This is much easier if you are time blocking and can point to a greyed-out area on your schedule.
Switch to public transport for your commute and draw or paint on the train or bus.
Set hours that you’re in your studio.
Make it understood to the people you live with that during this time you’re not to be disturbed, and make sure everyone knows those hours and respects them, even if you start with just one hour a week.
Practice conscious decision-making.
Conscious decision-making is simply the art of owning your choices. It’s okay to veg out on the couch with Netflix sometimes- just be sure that you made the conscious choice to spend your time that way, and it’s not just a habit you’re engaging in without thinking. Learn more about this concept in our interview with Jessica Abel.
Block out your time.
Setting aside blocks of time to complete important tasks will ensure that the time you DO save by consolidating errands and delegating tasks is actually used for creating art, and isn’t just frittered away. Learn more about time blocking.
Put together a travel art kit.
If the only free time you can find is 15 minutes waiting in the car for a child to get out of school or during a bus commute, make the most of it by being prepared with a travel art kit. The easier it is to pull it out and immediately start making art in whatever precious few minutes you have, the more likely you are to actually do it. There are an abundance of travel art supplies on the market. Try these:
Travel watercolor set.* With a water brush, a travel watercolor kit doesn’t have to be messy or inconvenient. Sketch in watercolor on the bus or train, waiting to pick your kids up from school or activities, etc.
[image error] [image error]
Travel sketchbook.* Whatever kind of art you create, you’ll benefit from keeping a sketchbook with you at all times, even if it’s just to jot down ideas.
[image error] [image error]
Travel art supply case.* It doesn’t have to be fancy, but a few elastic bands for holding pens or brushes in place are helpful. This one is meant for coloring, but makes a perfect case making any kind of art on the go.
[image error] [image error]
Water brushes.* These handy brushes feature a small reservoir that you fill with water, eliminating the need for a jar of paint water. These are useful for acrylic, watercolor, and even ink washes. Great for keeping in a travel art kit.
[image error] [image error]
Fitting art into your schedule when you have a thousand other demands on your time can feel impossibly hard. But it’s not impossible. It requires intention and mindfulness of your schedule, and a willingness to let some of the less important stuff slide in favor of your art and your art career.
If you’re a busy artist with a lot on your plate, how do you set aside time to make art?
*Asterisk denotes affiliate link
Want more ways to increase your productivity? Why not try time blocking? And don’t forget to join us for a FREE call with productivity expert Charlie Gilkey on November 29! Sign up here: https://www.crowdcast.io/e/ujtcammc/register
The post How to Make Time for Art (When You Really Don’t Have Time) appeared first on Online Marketing for Artists.
November 9, 2018
Why Should You Plan Your Projects in Advance?
There’s an old adage that you can’t force creativity. And that may be true- but you can certainly coax it out with healthy habits and a framework that will enable you to succeed. Artists seeking to make a living from their work don’t have the luxury of waiting for the muse to speak. So how can you plan your projects in advance without stifling the creative spirit of your work?

Project planning doesn’t have to look like paper planners and spreadsheets if those methods aren’t useful for you (if they ARE useful… have at it!) But planning out your work in advance- in whatever way works for you- will lead your current and potential clients to see you as professional and trustworthy. Some amount of planning is useful for keeping track of your artistic process so you can replicate it if you need. It’s also useful for identifying snags in your workflow that may be slowing you down unnecessarily. Finally, planning your projects in advance can make it much easier to track and record your progress, which is very useful for marketing. Fans of your work love to see work-in-progress posts!
We’ve put together a list of ways you can incorporate some planning and organization into your projects- use these methods independently of one another, or combine them all and be a planning powerhouse!
Ways to plan out your next project
Try a tool like Dropbox Paper
If you’re often working on projects that involve a lot of steps and documentation (perhaps as part of a grant or for a government entity) or you often work with others, give Dropbox Paper a try. You can use their project planning template to assign tasks, add annotations to documents or images, and connect it to your calendar. Dropbox is a file-sharing platform that is very familiar and easy to use to share files even if the recipient doesn’t have a Dropbox account, so this is a logical next step and a great way to make yourself look just a little more professional.
The ability to assign tasks with due dates and tag specific project participants makes Paper a really useful extension of Dropbox. I can see it being useful for artists who do frequent commission work with some level of back-and-forth with their commissioners, or for artists who do a lot of collaboration work. The ability to add annotations to an image means you can upload a sketch and your commissioner can comment directly on the part of the image they want changed. If you can’t speak to them in person, this might be the next best thing.
This method is best for: Artists who often work collaboratively, either with commissioners/clients or on group projects with other artists. It’s a great tool for increasing your professionalism and keeping everything well organized and documented!
Plan to track your progress
One easy way to implement some strategic planning into your workflow is to plan in advance to document your progress. Do you like to journal about your process? Take copious work-in-progress photos? Even video blog about what you’re doing? Set up your journal, your camera, or your video camera in your work space ahead of time, and set a timer on your phone to remind yourself to document what you’re doing while you’re in the thick of it. You’ll be glad to be able to look back on the various stages of the process, and now you have plenty of fodder for social media and blog posts! It’s also helpful to have images of your art at every stage of the process to present to potential clients.
This method is best for: Artists who use social media to engage with their audience, and artists who keep a blog. So basically- this is a key step for just about any artist using the internet to promote their work.
Here’s a helpful link on how to take a great process video: https://blog.society6.com/shoot-great-timelapse-artwork-iphoneandroid/
Make accountability easy
Accountability is a game-changer. When embarking on a new project, do yourself a favor and set yourself up with some method of accountability from the very beginning. Different people prefer different methods of accountability. Some like to announce every new project on social media and expect their online friends to check up on their progress, or at the very least, use the potential embarrassment of not following through as motivation to push through and finish the project.
Others prefer a more structured (and private) approach such as a mastermind group. You can join an existing mastermind group, or start your own. Within a well-structured group, you can expect regular check-ins to report on your progress and receive feedback and encouragement from other artists working towards similar goals. Check out our conversation with The Abundant Artist mastermind facilitator Sarah Guthrie for some helpful tips on either joining an existing group, or starting your own.
This method is best for: Artists who are serious about being held to their commitments and growing professionally.
Consider a structured planning method
This is the point where some artists may get uncomfortable, but for those willing to take the plunge, a very structured planning method can make a world of difference when it comes to your productivity and overall success. There are probably as many different ways to approach planning out the steps required to achieve your goal as there are letters in this blog post, so it’s a matter of:
Finding a method that suits your lifestyle and your way of thinking and working
Just doing the work. The method that Cory uses and has mentioned many times is The Twelve Week Year, a method that breaks your goals down into manageable weekly actions, and hinges on weekly planning and accountability. Here’s a helpful breakdown of this method from a physician (but truly, anyone in any profession can use it with success.)
This method is best for: Artists who can make the commitment to a combination of weekly planning sessions and accountability meetings.
EXTRA CREDIT: Try scheduling in a creative ritual
Do you warm up before you begin creating art? An athlete wouldn’t dream of hitting the field without the requisite stretches, but it’s a factor that artists often overlook. As you plan for your next project, consider incorporating some time and space for a creative warm up. What that looks like will vary wildly from artist to artist; check out this helpful post on using a creative ritual to get your momentum going as a starting point. If you find that a warm up or “creative ritual” would be helpful for you, plan for it from the beginning of your project and incorporate it into your scheduled art-making time.
This method is best for: Anyone can benefit from warming up before getting started. Planning it out beforehand is optional, but you may find it’s easier to remember to do it if you include it on your to-do list!
The stereotype of the scatterbrained artist doesn’t have to be reality. Thanks to the internet, there is an easily-accessible abundance of software, apps, and programs designed to help you succeed in planning your next project. So whether you’re using an online application like Dropbox Paper or just keeping track of your progress on pencil and paper, there’s no reason not to take a step toward better planning. Not only will it make your life easier, but it will make you look more professional to your clients and audience.
This is a sponsored post for Dropbox. All opinions are my own. Dropbox is not affiliated with nor endorses any other products or services mentioned.
Are you a planning pro or are you flying by the seat of your pants? Share your own project planning tips in the comments!
The post Why Should You Plan Your Projects in Advance? appeared first on Online Marketing for Artists.
November 7, 2018
How to Create a Daily Art Habit
You’re a creative type, and it can be hard to restrict yourself to a firm schedule. When you’re in a rut or in between projects, it can be especially hard to make it into the studio every day. Why bother on those off days, right?
But maintaining a daily art habit is about more than just productivity- it’s about cultivating a lifestyle that helps you move through those off days (weeks? months?) without completely losing your momentum or getting stuck in a true rut that’s hard to pull yourself out of.
A daily art practice can also be an easy way to consistently show up for your audience whether you’re communicating with them through email, Facebook, Instagram, or something else. The key to getting your art-making to be as automatic as brushing your teeth and walking the dog is to treat it just like those mundane activities; that is, to treat it like a habit.
What is a habit?
We all have habits. Some good, some bad. A habit isn’t always something that’s bad for you like smoking or biting your fingernails. Making your morning coffee or tea, reading a novel before bed, and brushing your teeth might all be habits that you have as well- they’re behaviors you perform on a regular basis without thinking about them beforehand. You just do them.
But you didn’t emerge from the womb with an instinct propelling you to brush your teeth twice a day. Some time in your early life that habit was formed (perhaps with some measure of cajoling from your parents). And the great thing about habits is that it’s entirely within our power throughout our entire life to eliminate bad habits and start new good ones.
How long does it really take to form a habit?
Conventional wisdom says that it takes 21 days to form a new habit. This is actually a pretty significant underestimation. Although it’s possible to form a habit in that timeframe, it’s unlikely. In fact it can take up to 250 days depending on the details of the habit, its complexity, and the individual. The good news is that the routine for establishing a new habit is fairly straightforward. You can use habits or other daily events that are already an established part of your life to introduce a new art-making habit that sticks.
How to start a new art habit
Start small
If your art-making is currently sporadic or variable in terms of how long you spend in the studio or what you spend your time working on, you’ll set yourself up to fail by trying to do too much at once. So rather than deciding that you’re going to paint a complete 20×20 canvas every morning (unless you’re a speed painter,) set a smaller goal like sketching for 5 minutes.
Decide on a habit trigger
Your habit trigger is what reminds you to get started every day. For example, if you eat eggs for breakfast every morning out of habit, it’s likely that your habit trigger is waking up in the morning. It happens every day automatically, and upon waking you’re reminded to make your eggs.
When starting a new art habit, decide on a reminder that occurs on a daily basis. Make sure it’s during a time of day and in a location where you have the ability to sit down and focus for at least a few minutes. Some examples of a trigger that might work for you:
Cleaning up your dishes after a meal
Going on your lunch break at your day job
Getting the kids in bed
Checking your emails
Identify the reward
The reason we develop habits is because they provide some reward for us, whether it’s a bad habit or a good habit. The reward for the daily breakfast of eggs from the previous example is a warm and healthy meal that keeps you feeling satisfied until lunch. You feel good after you do it, so it’s easy to do it again and again.
There are tremendous potential rewards for a daily art habit:
An increase in skill
More regular attention from your collectors (if you choose to publicize your daily art making)
More work in your inventory which you can then sell
The intangible rewards of satisfaction and enjoyment that come from creating
If you’re concerned about whether rewards with a longer-term benefit will offer enough incentive as you build your habit, you can track your habit and reward yourself when you reach milestones.
Track your progress
When you’re in the habit-building stage, it’s a good idea to track your progress. This gives you insight into whether the reminder you’ve chosen is an effective one, whether your initial habit goal is too ambitious, etc. A simple spreadsheet with dates and a space to place an “X” every day that you perform your new habit is all you need. It’s a good idea to print it out and hang it somewhere prominent as another reminder.
Scale up when you’re ready
When you’ve been at it for a while (at least a month, perhaps longer) and you’re finding that you no longer have to stop and think about your art habit before you start doing it, you can step it up. Maybe instead of sketching for five minutes, you’re ready to make it 15 minutes, or add inking or painting into the process to produce a finished piece. Increase the complexity, difficulty, and/or length of your new habit in increments so that you don’t get overwhelmed. The idea is to create a sustainable long-term behavior, so it’s better to spend months getting where you want to be and then staying there rather than jumping in to the deep end immediately and finding that you can’t stick with it after a few days.
Examples of Artists with a Daily Art Habit
Melissa Dinwiddie’s 15 Minutes-A-Day Challenge
Crystal Moody’s Year of Creative Habits
Austin Kleon’s Daily Dispatch
Want to read more about habits? Check out James Clear’s comprehensive guide to building and breaking habits: https://jamesclear.com/habits
A daily art habit is good for your mental health, and great for your business. Building a daily art habit doesn’t have to be an intimidating “all or nothing” bandwagon approach. No matter how much time you have available in a day, whether you work a demanding day job or not, creating art every day is an achievable goal. The keys to success are to start small, set yourself up for success with clearly defined reminders and rewards, and track your progress.
Want more ways to increase your productivity? Why not try time blocking? And don’t forget to join us for a FREE call with productivity expert Charlie Gilkey on November 29! Sign up here: https://www.crowdcast.io/e/ujtcammc/register
The post How to Create a Daily Art Habit appeared first on Online Marketing for Artists.
October 31, 2018
How Artists Can Get More Done with Time Blocking
November is productivity month here at The Abundant Artist! We’re excited to be offering a free webinar on Productivity for Artists webinar with productivity expert Charlie Gilkey on November 29- sign up here!
We’re kicking off the new month on the very last day of October with something a little spooky: time blocking! Okay, time blocking isn’t spooky. In fact, it’s an incredibly easy way to structure your time more effectively. If you’re a busy artist who may or may not be working a day job and are certainly struggling to balance other life commitments and still give your art practice and business the attention it needs, time blocking is a productivity method worth trying. In fact, Cory swears by it!

What is Time Blocking?
Time blocking is simply another way of organizing your to-do list. Instead of moving down a checklist every day, you place everything that you need to do into a time slot on your calendar, with a few constraints. The big idea behind time blocking is to eliminate multitasking and interruptions so that you can focus deeply and truly get stuff done.
It’s a fairly simple translation from a list of to-dos to time blocks on a calendar.
From this:
TO DO:
Work on commissioned painting
Answer emails
Work on email marketing campaign
Organize new paints
Call 5 galleries
To this:
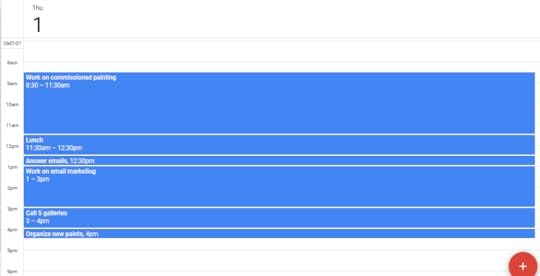
(This is just to illustrate the point. Most experts would advise against scheduling every block back to back without a buffer in between, so keep that in mind when creating your own calendar.)
What Problems Does Time Blocking Solve?
Interruptions
Whether those interruptions are phone calls, coworkers or family members who want something from you, or the allure of email or social media, time blocking serves as a barrier between your work and the non-emergency interruptions of everyday life. In response to little requests (or demands) for your time, it’s easy to point to the blocks on your calendar and say “I’m all booked up until 4:30, can we talk then?”
Multitasking
Multitasking can be a real enemy to productivity. Trying to do multiple things at once feels ultra-productive, but the truth is that you get less done on each project than if you had focused deeply for a few hours on just one thing. When you block out your time, dedicate that time to just one action item per time block. If you know there are smaller pressing tasks that need to be done, schedule them into your day. This gives you the peace of mind to know that later in the day you’ve set aside time to call the insurance company, mail the card to Grandma, and write the checks for your kid’s soccer uniform. You can then focus deeply on spending three hours doing nothing but painting or working on your marketing.
Time Vampires
These can be looped in with interruptions and multitasking, but it’s important to recognize them for what they are. Pointless meetings, social media, checking and re-checking your email outside of a dedicated time. They suck away your time little by little until you’re wondering where the day has gone and why you haven’t gotten anything done. Time blocking is like a necklace of garlic to protect you from the vampires.
How to Get Started With Time Blocking
Choose your calendar
If you’re using a digital calendar, it’s ideal to use one that can sync with your phone and your email. An example of this is Google Calendar- it’s free, and you can accept emailed invites that will automatically be input into your calendar and send you alerts. It’s a pretty intuitive interface to use, and you can even color code your various projects if you’re into that. There are dozens of free calendar apps out there, so you can easily find one that works for you.
If you don’t need the extra connectivity between your devices or would prefer to have a hard copy, you can just as easily use Excel or a regular paper or whiteboard planner. You need something that can be broken down by hour, so a monthly calendar won’t cut it.
Get ready for a little trial and error
Time blocking requires you to estimate how much time a task will take you. It’s possible that you might not block enough time, or you might overestimate and block out too much time. Allow yourself some grace to make mistakes and figure out what works for you. The great thing about a digital calendar is the ability to rearrange on the fly. Finish your task in 2 hours instead of three? Shift everything else up by an hour and enjoy the free time at the end of your day.
Time blocking helps you prioritize what’s important
A visualization of the most important tasks you need to accomplish in a day makes it easier for you to drop everything for an emergency and come back to your tasks later with clarity on what still needs to be done. Unexpected events come up, but they don’t have to completely derail your momentum. Time blocking allows you to see at a glance what pressing tasks need to be done and how much time (approximately) they’re going to take, so if you need to shift everything to make room for a surprise visit to urgent care, or even just a surprise lunch with a friend, your calendar is organized enough that you can pick up where you left off with relative ease.
Start small
The idea of scheduling out your whole day can be really overwhelming, especially for those of us who are more accustomed to flying by the seat of our pants. An easy way to get started with time blocking is to begin with just one scheduled block of focused work each day, and work your way up as you get into the swing of things and realize how effective time blocking can be.
Read more on time blocking
Computer science professor Cal Newport’s blog post on time blocking, believed to be where the term was coined: http://calnewport.com/blog/2013/12/21/deep-habits-the-importance-of-planning-every-minute-of-your-work-day/
Try The Twelve Week Year by Brian Moran*, which makes use of time blocking in conjunction with disciplined short term goal-setting.
If you’re fighting the black hole of social media, try a time-management app. We’ve got a helpful list of some of the best here: https://theabundantartist.com/best-time-management-apps/
Looking for more productivity tips? Check out 13 Ways to Be a More Productive Artist
*Denotes affiliate link
Have you ever tried time blocking? Did it work for you? Let us know in the comments!
The post How Artists Can Get More Done with Time Blocking appeared first on Online Marketing for Artists.
October 24, 2018
Forget Newsletters: How to Use Your Email List to Sell Art
How are you making use of your email list? Sending out a monthly newsletter is great, but if that’s all you’re sending out, you may be missing out on a lot of sales. While social media is awesome, your email list is still the most powerful tool you have for marketing.
But why? What gives your mailing list more potential power than, say, a paid Facebook ad? The answer is that if people are receiving your emails, it means they signed up to your list. That’s essentially them raising their hand and saying “Yes, I like your stuff and I WANT to hear from you!” Social media ads can be a powerful tool, but there is a lot of guesswork and refining involved in getting it “right”. Your email list is a perfectly curated list of people who have already expressed their interest in your work and the desire to hear from you again. So if you can figure out the most effective way to communicate with those people, you have a seriously great opportunity on your hands to forge good relationships with them and ultimately sell more art.
Why the Email Newsletter is Failing You
You may object to this- “but I DO send out emails to my list! I send a bi-monthly newsletter with pictures of what I’m working on and a list of events where people can see my art!”
This is great! But let’s step back and imagine receiving this information via snail mail. When you receive a newsletter from an organization, what do you do with it? You may scan it for interesting info and look at the pictures. But then? Into the recycling it goes. This is likely so even if the newsletter has a place at the back for your to order a product, send in a donation, or sign up for an event. There is just no appeal. You don’t feel a real need or a sense of urgency to take action.
Now imagine that instead you receive a letter from the same organization in a conversational tone. It’s not a letter asking for money or trying to make a sale. It’s just a story. The story the letter tells you is actually interesting. It’s not too long, and it’s focused. It ends leaving you wanting to hear more. And when, in three days, you receive another letter in the mail, you open it immediately because you remember that you were intrigued by what you read.
The latter example is much closer to the way successful email marketing works these days. The landscape email marketing has changed dramatically in the past 10 years- think about how many emails you receive and don’t even bother to open because you already know it’s going to be uninteresting: another 20% coupon or an announcement of a sale and nothing else?
In order to compete with the constant influx of promotional newsletters, you need to give your readers an intriguing reason to keep opening your emails.
The 3 Keys to an Effective Email Marketing Campaign
An email marketing campaign is different from a newsletter: it’s typically sent in a series of emails over intervals of days or weeks, and these emails are usually linked together by a common theme- often the marketer will choose to tell a continuing story that doesn’t conclude until the last email. The key elements you need in order to get started crafting your own campaign?
A good story. Not sure what your story is? HTSYAO 101 can help you figure it out. Learn more about how to tell your story with the framework of the hero’s journey here: https://theabundantartist.com/art-storytelling-monomyth/
An end goal for your emails. What do you want people to do? This goal can be different for different sequences at different times. Perhaps you want to sell a new series of originals, or you want to offload some prints. Maybe you want to get people to come to a gallery opening. Whatever action it is you want your readers to take by the end of the email sequence, have it firmly in mind before you start writing.
A good email marketing platform. You’ll want something that will allow you to break down your email list into smaller groups based on how often they open emails, whether or not they have purchased from you, etc. This is called “segmenting” and it’s a really powerful tool for targeting your email marketing. Our Recommended Tools and Resources page has a few email marketing platforms that we recommend in the Organization & Business Tools for Artists section. Check it out!
Learn How to Send Emails That Will Actually Sell Your Art
Understanding the difference between a targeted email marketing campaign and a basic email newsletter, and knowing the three basic things you need to send a good email marketing campaign is a good starting point. If you want to delve deeper into learning how to write really awesome emails that will get your readers interested in becoming collectors, here are a few suggestions:
Research effective tactics by signing up for email lists: Sign up for some email lists (they don’t have to be other artists’ lists, but if you know of some artists doing well selling their art online it doesn’t hurt to take a peek at what they’re doing!) and take notes on the emails you receive. Note the frequency, the intervals between emails, and the way they write. You’ll probably notice that they normally write in a very conversational tone- more conversational than a standard blog post. They may leave you with a cliffhanger, or really “buddy up” to you in these emails and make it feel like they’re sharing intimate secrets. Take note of how this makes you feel, because they’re doing it on purpose!
Get in-depth teaching on writing and setting up email sequences: How to Sell Your Art Online 201 is a course all about sales funnels and email marketing for artists. Learn more and sign up fo the course here: https://theabundantartist.com/htsyao-options/htsyao201
Try the Email Marketing Challenge: This is a challenge we run once or twice a year, but you can try it out whenever it works for your schedule! This is a simple 5-day challenge set up to help you jump-start your email marketing with 5 short lessons with quick actions you can take each day. See the lessons here: https://theabundantartist.com/email-marketing-challenge-lessons/
The key takeaway is that your email marketing sequence is a chance for you to both intrigue and connect emotionally with your collectors. People who feel a real emotional connection with your art are much more likely to buy it, and those kinds of relationships are the ones that keep collectors coming back as well as recommending you to others. If you’ve never tried connecting to your collectors through your email list in this way, it’s worth a try!
How has your email marketing been going? Let us know in the comments!
The post Forget Newsletters: How to Use Your Email List to Sell Art appeared first on Online Marketing for Artists.
October 18, 2018
Strategies for Gallery Success with Photographer Jeffrey Stoner


In this episode, we cover:
0:35- How Cory met Jeffrey
1:45- How Jeffrey made the decision to go into full-time photography
3:45- How Jeffrey leverages a specific kind of tourism- grown adults without kids in tow- to increase his gallery sales
4:35- How Jeffrey identifies which galleries may fit well with his business plan
5:45- Jeffrey’s “secret shopper” method of evaluating galleries
6:30- There is no way to accurately judge a person’s amount of wealth and likelihood of buying art simply by their appearance
10:20- A different gallery model charges artists a small rent, then takes a smaller commission than a conventional gallery and encourages artists to market themselves. This model is more collaborative- is it better?
12:40- Being reliable and easy to work with will improve your overall opportunities with galleries. The “basics” of professionalism will help artists stand out.
17:20- Including personal extra touches in shipped art is always a good idea
18:05- Which social media platforms Jeffrey is spending the most time on
19:00- Jeffrey shares how he got involved in producing published photo books
22:25- Jeffrey’s advice for up and coming artists: make art that resonates with a large group of collectors, and be willing to create a series of art with a theme
Download Transcript
PDF: Conversation with Jeffrey Stoner Transcript PDF
Word Doc: Conversation with Jeffrey Stoner Transcript docx
Links:
The post Strategies for Gallery Success with Photographer Jeffrey Stoner appeared first on Online Marketing for Artists.
October 17, 2018
8 Ways to Save Money on Art Supplies
Art supplies can be expensive. Early in your art career it might feel a bit like a catch-22: you have to sell art to make money, but you need money to buy supplies to make art. Your best bet for making the most of your supplies and not overspending is to establish some thoughtfully frugal habits. Regularly using coupons, recycling materials, and making the most of what you have are habits that are good for both your art practice and your business. Here are 8 ways to start saving money on art supplies right now:
Coupon apps. Some big-box craft stores like Michael’s and Hobby Lobby have their own coupon apps. Input your zip code for digital coupons specific to your closest store. There is often at least one coupon for a percentage off a full-priced item or your entire order- if you time your trips right you may never have to pay full price again.
If there is an art store you use regularly, it also pays to get on their mailing list. Often you’ll receive a discount code just for signing up!
Reuse materials. Priming or painting over old canvas paintings that you don’t like is an easy way to save on the cost of canvas.
Some artists recommend an organization system for keeping track of paintbrushes in various stages of life. Even older, more “threadbare” brushes are still useful for mixing colors, applying texture, underpainting, etc. Try using colorful stickers to code your brushes so you can easily reference where they are in their life cycle, and therefore use them for as long as possible.
Keep your studio clean and care for your supplies. This one seems obvious, but it takes some diligence to form good habits in the studio. I once got in trouble from an illustration teacher for leaving my paintbrush tip-down in a jar of water. (This is terrible for the brush!) Now I can never clean my paintbrush without remembering his words, and I am much more careful to treat my supplies well. Don’t give in to the stereotype that artists are scattered and messy. Take good care of your studio and your supplies and you’ll be glad you did. Unclutter your studio, and you may even discover some unused supplies you had forgotten about!
If you have purchased any TAA courses, you also have access to Melissa Dinwiddie’s The Great Clutterbust, a helpful hour-long guide to decluttering your studio. This is a great time to grab HTSYAO 101!
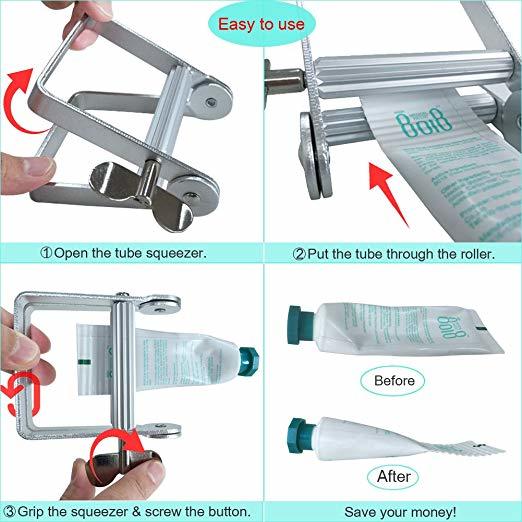
Try a tube wringer. If you use a lot of paint, you’ll want to make sure you’re getting every last drop out of your tubes. The good stuff ain’t cheap! A tube wringer is a nifty little contraption that helps you wring out every last bit of paint before you move on to a new tube. You can get them for around $10* so they pay for themselves pretty quickly if you move through a lot of paint!
Use student-grade materials while experimenting and trying new things. If you have the itch to try a new medium or want to experiment with a new style or method, you may want to begin your experimentation with student-grade materials. Student-grade materials are cheaper and lower-quality, perfect for learning and experimenting. Will Kemp has a really useful breakdown of all the differences between student-grade and artist-quality paint and when it’s most appropriate to use each kind.
Go dumpster diving! Alright, this one won’t apply to everyone. But the key takeaway is to think outside the box when it comes to procuring supplies. If you’re working very traditionally with paint on paper or canvas this may not be right for you. But multimedia artists may find that their most beautiful and memorable materials come from unexpected places. Dorothea LeBlanc creates upcycled art from recyclables and trash and has used this aspect of her art to her advantage.
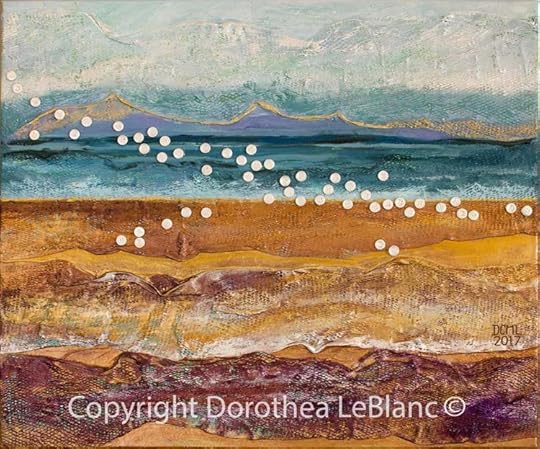
“Button Bird Landscape”, Dorothea LeBlanc
Scour the Internet for discounts before you buy. Don’t skimp on the important supplies where quality makes a significant difference, but do a quick search for online discounts and coupon codes before purchasing. Companies of niche products often offer discount codes for bloggers and influencers to pass on to their audiences. In fact, you can find one right here: ARTristic recently partnered with The Abundant Artist to provide a 10% discount on their awesome rotating easels!
Write off your purchases on your taxes (if you can). There are some specific criteria you need to meet in order to write off your art supplies purchases, namely that you can demonstrate that your business has made a profit or that you’re working diligently toward profitability, but if you meet them you absolutely should. Artwork Archive has a helpful breakdown of what you can write off.
Saving money on art supplies in a way that’s healthful for your business is a matter of consistency. Use your materials entirely before throwing them out, get familiar with the sales and discounts offered by your favorite art supply stores, and keep an eye out for supplies in unconventional places. We’d love to hear from you: what are your favorite ways to save money on art supplies? Let us know in the comments!
*Asterisk denotes affiliate link
The post 8 Ways to Save Money on Art Supplies appeared first on Online Marketing for Artists.
October 10, 2018
How to Ship a Sculpture
Are you a 3D artist who wants to ship your art to collectors, but is terrified of sending your baby through the postal service? Shipping sculpture art is a very different beast from packing and shipping 2D art like paintings. We’ve all heard horror stories of art that arrived in horrible condition due in part to poor packing and partly to poor treatment. Unfortunately you can’t control the actions of anyone else in the chain that gets your art from studio to collector, but there is a lot you can do to safeguard your art as it makes the journey to its final destination.
For the purposes of this article, “sculpture” includes all 3-dimensional art- glass art, ceramics, clay, mixed-media, recycled/found object, etc.
The primary factors you’ll be taking into consideration when shipping 3D work are:
Keeping the work upright
Protecting it from shaking/jostling
Protecting it from impacts, whether from bumping or dropping
How to Safely Ship a Sculpture
How to ship a sculpture that is under 12” tall and around 5 lbs or less:
Bubble wrap. Wrap the top of the sculpture securely in bubble wrap, and secure with tape. If the surface of the work is delicate, use artist tape to protect it from tape residue or being damaged when you pull the tape off. Seal all seams with tape. Next wrap the bottom of the sculpture in bubble wrap, sealing all seams with tape in the same fashion. Wrap extra bubble wrap around the middle of the work if necessary, and secure all seams with tape. When you’re finished, the work should be completely wrapped with bubble wrap and completely sealed with no openings.
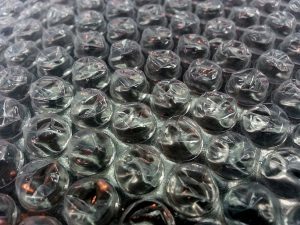 “Bubble wrap”, public domain image
Prepare your box. Your box should be several inches larger than your sculpture on all sides. This is to protect the sculpture from impact against the sides of the box. Fill the bottom of the box with several inches of your selected packing material. Many artists use packing peanuts, but be aware that these can shift around in transit. For this reason, some shipping professionals suggest tightly packed shredded paper. The bottom of the box should be filled with a material that will not allow the sculpture to shift through and down to settle on the bottom of the box.
Place the sculpture and fill in the spaces. Place the work inside the prepared box, ensuring that the sculpture won’t wiggle through to the bottom of the box. Begin to carefully fill in all empty spaces in the box with packing material. There should be 2-3 inches around all sides of the work as well as at the top to completely insulate it from being jarred or bumped through the side of the box. Tape the top shut (see note below.)
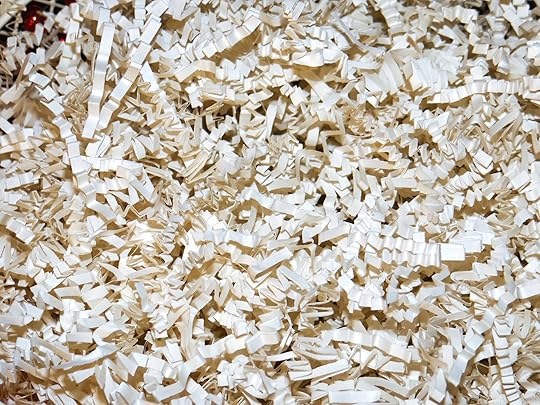 “Shredded white paper”, public domain image
Optional: double box method. For especially fragile works, some artists prefer to double-box their art. Wrap the artwork and pack the first box as described, then prepare a second, larger box with several inches of packing material at the bottom. Place the first box (with a taped top) into the second box, and fill in all space between the two boxes tightly with packing material. This adds an extra barrier between your work and the outside world and keeps the work as stable and still as possible. Tape the top of the second box (see note below.)
Mark the box. Use labels or a thick marker to mark the outside box as FRAGILE, and clearly label on each side which way is up: THIS SIDE UP, with an arrow pointing up to the top of the box.
Tape Your Box with the H-Tape Method
The H-tape method is widely considered the most secure way to tape boxes shut for shipping. It’s simple: just tape along all the seams along the sides and in the center. This will result in an H-shape along the top of the box.
How to ship a sculpture over 12” tall and/or over 5 lbs:
Bubble wrap. Bubble-wrap the work using the same method described above. Wrap the piece in sections, and seal all seams with tape.
Use a wooden crate. For heavier and larger works that have a greater surface area and thus are more likely to be bumped or jostled, a wooden crate provides better protection. Saatchi art has a useful guide to building a custom wooden crate here: https://support.saatchiart.com/hc/en-us/articles/205288907-How-do-I-pack-work-in-a-crate-. Pack the work inside the crate as described above, first preparing the crate with several inches of packing material at the bottom, then filling in all spaces around the work with packing material.
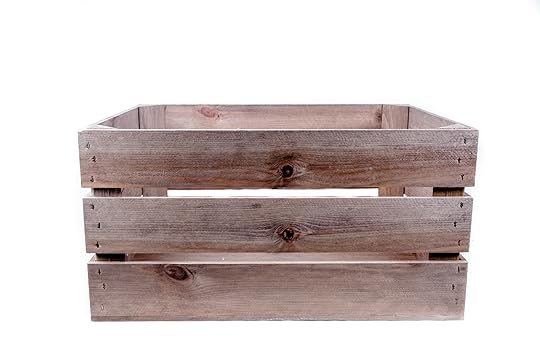 “Wooden crate”, public domain image
Optional: double box method. For extra protection, you can double-box your work as described above. In this case, the interior box can be made of cardboard as its primary purpose is to hold the packing material in place around the work and prevent it from shifting. The exterior box will be your wooden crate, which provides the first line of defense against impacts.
Optional: Strap Your Work to a Pallet
If your work is exceptionally fragile or asymmetrical, you can strap the box down to a pallet. This prevents it from being directly bumped, shaken, or turned upside down. Randy Strong’s website gives some good advice for shipping his work which is useful for other artists with especially fragile work.
Whether you’re shipping a small clay sculpture or a huge piece of recycled art, the main point to keep it mind is that you can’t control how other people treat your art during the shipping process. So you need to do everything in your power to ensure that the art stays upright and protected from bumps, falls, and being shaken. And even though it’s unlikely, be prepared for the worst with a clear return policy on your website.
Compare notes with other pro sculpture artists in The Association
Do you have any tried-and-true tips for shipping 3D artwork? We’ve love to hear from you in the comments!
The post How to Ship a Sculpture appeared first on Online Marketing for Artists.
The Abundant Artist Goodreads blog

- Cory Huff's profile
- 31 followers

