Jocelyn Delk Adams's Blog, page 8
January 23, 2025
Fruit Dip
 The Lowdown on This Cream Cheese Fruit Dip
I’ll keep this short and sweet boos, just like this fruit dip recipe. This lil’ bowl of goodness is a total chameleon. Oh, and did I mention it takes just 5 ingredients and less than 10 minutes to make!
I’ve even whipp this up when I needed a sneaky way to get Harmony to eat more fruit, and let me tell you, it works every time. But don’t spill my secret, okay?
AND, it’s so simple you can’t mess it up. Mix it, dip it, love it. Get into it y’all!
 Ingredients you’ll need to make Cream Cheese Fruit Dip
 Cream Cheese: Full-fat is best for a velvety texture.Sour Cream: Adds a tangy zing and keeps the texture light. You can use Greek yogurt instead if that’s what you have on hand.Powdered Sugar: You don’t want to use granulated here. Ground Cinnamon: All you need is a little.Vanilla Extract: Use the good stuff for max flavor.Kosher Salt: To balance out all that sweetness and bring out the flavors.How to make Cream Cheese Fruit Dip Step 1: Mix Everything and Serve It Up!
  1 Add the cream cheese and sour cream in a medium bowl mix until smooth and evenly combined.
  2 Add in remaining ingredients.
  3 Whisk together.
  4 Scoop into serving bowl and serve with fresh fruit and graham crackers! What to serve with this easy fruit dipBreakfast Spread: Make this dip the star of your breakfast board! Pair it with a spread of fresh fruit, mini pancakes, or some fluffy strawberry cinnamon rolls.After-Dinner Appetizer: Serve it alongside a dinner of lemon roasted chicken, pot roast, or blackened salmon, then bring out a platter of graham crackers, strawberries, and pineapple chunks for dipping.Snack Board Goals: Build the ultimate dessert or snack board! Add cubes of your favorite pound cakes (hello, cream cheese or lemon!), mini donuts, or peach fritters, then pile on seasonal fruits like apples, kiwis, and berries. Menu Option: Snack Board With Cream Cheese Fruit Dip
 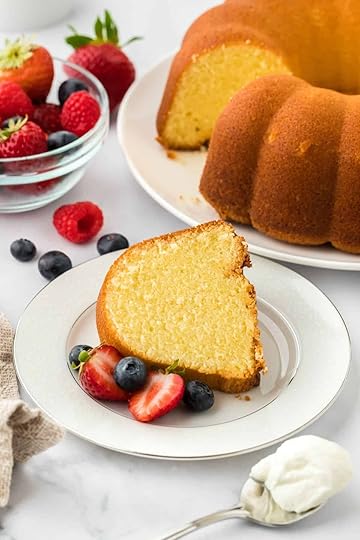 This whipping cream pound cake is light and downright irresistible! Cube it up and pair it with your cream cheese fruit dip.
  These blueberry waffles are crispy on the outside and tender on the inside. Cut them into little waffle bites to dip into the dreamy dip!
  My sugar cookies are buttery, soft, and oh-so-good for a snack board!
  These banana fritters are the ultimate treat for your sweet tooth boos! Recipe SubstitutionsCream Cheese: You can use reduced-fat cream cheese if you want to lighten the dip a bit. Just skip the fat-free kind, it doesn’t mix well.Sour Cream: Greek yogurt is a great stand-in here boos! It keeps things tangy and smooth.Powdered Sugar: If you only have granulated sugar, blend it and make your own homemade powdered sugar.Cinnamon: Don’t like cinnamon? Leave it out or use a pinch of nutmeg instead.Vanilla Extract: If you’re a vanilla lover, feel free to double the amount for even more flavor.Recipe Variations and AdditionsBerry Bliss: Stir in 1-2 tablespoons of strawberry sauce or preserves. Just keep an eye on the consistency so it doesn’t get too runny.Chocolate: Sprinkle in a handful of mini chocolate chips for a little crunch and chocolatey goodness.Nuts: Add a drizzle of peanut butter or almond butter on top for a rich, nutty vibe. Warm it up first so it’s easier to mix!Cocoa: Mix in 1-2 teaspoons of cocoa powder for a chocolate-flavored cream cheese fruit dip that’s ideal for graham crackers or bananas.
 Tips for making the best fruit dipRoom Temp Ingredients: Always use softened, room-temperature cream cheese for the creamiest, lump-free dip. If you’re in a rush, place the foil-wrapped cream cheese in a hot water bath for 5-7 minutes to soften it.Real Vanilla, Real Flavor: Since this recipe is super simple and vanilla shines through, always use real vanilla extract for the best taste. Skip the imitation stuff, boos!Easy Does It: Don’t over-whisk the dip after adding the powdered sugar and vanilla. A few quick mixes are all you need to keep it smooth.Clean As You Go: Use a rubber spatula to scrape down the sides of the bowl as you mix. This ensures everything gets evenly blended and there aren’t sneaky lumps hiding in the corners.How to store Cream Cheese Fruit Dip
It’s easy, y’all! Just store it in an airtight container and pop it in the fridge.
How long will Cream Cheese Fruit Dip last in the fridge?It’ll stay fresh and creamy for up to 5 days… If the midnight cravings don’t wipe it out first. Quick reminder: if you’re snacking straight from the serving bowl, don’t double-dip boos! Once you’ve got fruit juice or cracker crumbs in there, it’s game over for long-term storage.
Can I freeze creamy fruit dip?Yep, you can freeze this dip! Pour it into a freezer-safe container, leaving some room for expansion, and freeze for up to 2 months. When you’re ready to serve, thaw it in the fridge overnight and give it a quick mix with a hand mixer to bring back the smooth texture.
Frequently asked questionsMy dip is too runny! What can I do? Easy fix boo! Just chill it in the fridge for 30 minutes or so until it firms up.
Can I make this dip ahead of time?Absolutely! This dip can be made up to 2 days ahead of time. Just store it in an airtight container in the fridge, and give it a quick stir before serving.
Can I double the recipe?For sure! You can double or even triple it.
 More Snack RecipesElote DipEasy Lemon Mousse RecipeGuacamoleCaramel PopcornFried Pickles
  PrintFruit Dip#wprm-recipe-user-rating-0 .wprm-rating-star.wprm-rating-star-full svg * { fill: #343434; }#wprm-recipe-user-rating-0 .wprm-rating-star.wprm-rating-star-33 svg * { fill: url(#wprm-recipe-user-rating-0-33); }#wprm-recipe-user-rating-0 .wprm-rating-star.wprm-rating-star-50 svg * { fill: url(#wprm-recipe-user-rating-0-50); }#wprm-recipe-user-rating-0 .wprm-rating-star.wprm-rating-star-66 svg * { fill: url(#wprm-recipe-user-rating-0-66); }linearGradient#wprm-recipe-user-rating-0-33 stop { stop-color: #343434; }linearGradient#wprm-recipe-user-rating-0-50 stop { stop-color: #343434; }linearGradient#wprm-recipe-user-rating-0-66 stop { stop-color: #343434; }My Cream cheese fruit dip is easy to make and legit takes 5 mins tops to mix everything together. It's great with you guessed it… Fruit!Course AppetizerCuisine AmericanPrep Time 5 minutes minutesTotal Time 10 minutes minutesServings 8 servingsCalories 126kcalAuthor Jocelyn Delk AdamsEquipmentMixing BowlsIngredients8 ounces cream cheese softened2 tablespoons sour cream room temperature5 tablespoons powdered sugar¼ teaspoon ground cinnamon¾ teaspoon vanilla extract1/8 teaspoon kosher saltInstructionsIn a medium bowl, whisk together the cream cheese and sour cream until smooth and evenly mixed.Add in remaining ingredients and whisk together.Scoop into serving bowl and serve with fresh fruit and graham crackers.NotesRoom Temp Ingredients: Always use softened, room-temperature cream cheese for the creamiest, lump-free dip. If you’re in a rush, place the foil-wrapped cream cheese in a hot water bath for 5-7 minutes to soften it.Real Vanilla, Real Flavor: Since this recipe is super simple and vanilla shines through, always use real vanilla extract for the best taste. Skip the imitation stuff, boos!Easy Does It: Don’t over-whisk the dip after adding the powdered sugar and vanilla. A few quick mixes are all you need to keep it smooth.Clean As You Go: Use a rubber spatula to scrape down the sides of the bowl as you mix. This ensures everything gets evenly blended and there aren’t sneaky lumps hiding in the corners.NutritionCalories: 126kcal | Carbohydrates: 7g | Protein: 2g | Fat: 10g | Saturated Fat: 6g | Polyunsaturated Fat: 0.4g | Monounsaturated Fat: 3g | Cholesterol: 30mg | Sodium: 126mg | Potassium: 42mg | Fiber: 0.03g | Sugar: 6g | Vitamin A: 400IU | Vitamin C: 0.03mg | Calcium: 31mg | Iron: 0.04mg
The post Fruit Dip appeared first on Grandbaby Cakes.


January 22, 2025
Buffalo Chicken Dip
I’m a girl that loves buffalo wings so it’s only natural that I would have to create a buffalo chicken dip. It’s got that kick so you can’t be scared to go all in on the spice. It’s what makes this buffalo chicken dip pop! I also love the cheesy texture and the ease of using rotisserie chicken. For reals, it’s the only way to get the game day party started right.
 The Lowdown on the Best Chicken Buffalo Dip
I ain’t a football fan but I’m definitely a game day menu fan. I love a good spread with all the dips and chips. If you can give me cheesy, meaty and spicy dip, I’m even more impressed.
This buffalo chicken dip is absolutely perfect. If you love flavors on flavors, this dip delivers all of that and more! Get into it boos.
Ingredients you’ll need to make this Frank’s buffalo chicken dip recipe Base: I use a mix of cream cheese and Velveeta to build a rich foundation for the dip.Seasoning: A bend of Ranch dressing, garlic powder, and onion powder brings all that tangy savory flavor to the pot! Buffalo Sauce: This is what delivers that signature spicy kick we love.Cheesy Vibes: A combo of sharp cheddar and Monterey Jack cheese adds that melty, gooey quality.Shredded Chicken: We keep it low-key by using rotisserie chicken so this gets prepped in no time.How to make Buffalo Chicken Dip Step 1: Melt it Up!
  1 In a medium saucepan, stir together cubed cream cheese and processed cheese, ranch dressing, onion and garlic powders.
  2 Heat Heat over medium low heat, stirring occasionally. Cook for about 5-6 minutes, until the cheeses begin to melt. Once melted, whisk everything together until smooth. Step 2: Mix it Up
  3 In a medium bowl, toss together both cheeses.
  4 Remove your melted mixture from the heat and whisk in 1 cup of the shredded cheese.
  5 Fold buffalo wing sauce, chicken and the second cup of the cheese.
  6 Mix until combined. Step 3: Bake it Up
  7 Add mixture to the casserole dish.
  8 Top top with the remaining ½ cup of shredded cheese.
  9 Bake for 30-35 minutes until the dip is melted, and browning and bubbly on top.
 Remove from the oven and let rest for 5 minutes, then serve with tortilla chips, celery sticks, and/or toast rounds. What to serve with Chicken Buffalo DipGo Classic: Sometimes a tortilla chip or even a cracker is all you need boos. Veggie it Up: Carrot or celery sticks will also serve as a nice refreshing contrast to that heat boos!Bring out the Taters: I love serving some dip over baked potatoes or sweet potato fries. It’s so delish! Menu Option: Complete Game Day Menu With Buffalo Chicken Dip
 This southern chili is the best one you will ever taste, and it couldn’t be easier to pull off.
  Honey garlic jerk wings will get the game day party turned up a notch.
  Shrimp nachos are the ultimate seafood twist on the classic.
  Philly cheese steak pizza is my fave pizza to make on game days!! It’s so so good! Recipe Substitutions, Variations and AdditionsCheesy Swaps: Switch out the Velveeta for other shredded cheeses like gouda, more Monterey, or cheddar.Creamy Option: You can switch out the cream cheese for sour cream or even greek yogurt to lighten it up some.Add Bacon: It will give some fun texture and smoky flavor.Swap the Chicken: Turkey or even roasted cauliflower can be used instead.Fun Swap: Swap out half of the ranch dressing for some blue cheese dressing!!
 Expert Tips and Tricks Adjust the Spice Level: This dip delivers that signature spicy kick but feel free to adjust the amount of spice to suit your heat level by gradually adding more sauce.Chicken Shredding Shortcut: I love to add chicken to a bowl and use a hand mixer to shred it quickly.Room Temp: It helps if you start with room temp cream cheese and Velveeta for melting down smoothly.How to store & reheat Buffalo chicken dip
Make sure you cool it down to room temp then transfer leftovers to an airtight container or freezer bag removing the air.
You can reheat in a microwave in 30 second intervals, stirring together in between until warmed through. You can also pop back into the oven at 350 for about 20 minutes.
How long will it last in the fridge?It should last in the fridge for up to 3 days.
Can I freeze leftovers?Pop it in a freezer bag. It should last for up to 3 months. Just make sure you add the date.
 Frequently asked questionsCan I make this buffalo chicken dip ahead?
 For sure boos! Just follow steps 1-4 then refrigerate the covered, unbaked dip overnight. About an hour before serving, remove from the fridge and let it sit at room temp for 30 minutes. Then resume with step 5 of baking.
Can I make this in a slow cooker?Absolutely y’all! Just combine everything in a slow cooker and heat on low for 2-3 hours stirring occasionally until nice and bubbly.

Y’all this Buffalo Chicken Dip is bringing all the bold, crave-worthy flavor you’re dreaming of! You will love how creamy, cheesy and spicy it is. We are talking flavors on flavors here. Perfect for game day, parties, or anytime snacking, this dip is a total crowd-pleaser boos.
More Dip recipesGuacamoleElote DipRotel DipSalsa Verde PrintBuffalo Chicken Dip#wprm-recipe-user-rating-0 .wprm-rating-star.wprm-rating-star-full svg * { fill: #343434; }#wprm-recipe-user-rating-0 .wprm-rating-star.wprm-rating-star-33 svg * { fill: url(#wprm-recipe-user-rating-0-33); }#wprm-recipe-user-rating-0 .wprm-rating-star.wprm-rating-star-50 svg * { fill: url(#wprm-recipe-user-rating-0-50); }#wprm-recipe-user-rating-0 .wprm-rating-star.wprm-rating-star-66 svg * { fill: url(#wprm-recipe-user-rating-0-66); }linearGradient#wprm-recipe-user-rating-0-33 stop { stop-color: #343434; }linearGradient#wprm-recipe-user-rating-0-50 stop { stop-color: #343434; }linearGradient#wprm-recipe-user-rating-0-66 stop { stop-color: #343434; }This Buffalo Chicken Dip is bringing all the bold, crave-worthy flavor you’re dreaming of! It’s creamy, cheesy, and packing that signature spicy buffalo heat in every bite. Tender shredded chicken gets mixed with zesty buffalo sauce, smooth cream cheese, ranch dressing, and plenty of melty cheddar, then baked to bubbly, golden perfection. Course AppetizerCuisine AmericanPrep Time 10 minutes minutesCook Time 40 minutes minutesTotal Time 50 minutes minutesServings 10 servingsCalories 424kcalAuthor Jocelyn Delk AdamsEquipmentsaucepanBaking DishIngredients8 ounces cream cheese softened, cut into cubes4 ounces processed cheese such as Velveeta, cut into cubes1 cup ranch dressing¼ teaspoon onion powder½ teaspoon garlic powder½ cup buffalo wing sauce up to 3/4 cup, depending on your heat preference (I use Frank’s Red Hot)1 ½ cup sharp cheddar cheese shredded1 cup Monterey jack cheese shredded2 cups shredded rotisserie chickenInstructionsPreheat the oven to 350°F and prepare a 9×7 or 8×8 inch casserole dish by spraying with nonstick spray.In a medium saucepan, stir together cubed cream cheese and processed cheese, ranch dressing, onion and garlic powders. Heat over medium low heat, stirring occasionally. Cook for about 5-6 minutes, until the cheeses begin to melt.Meanwhile, in a medium bowl, toss together both cheeses.Once melted, whisk the cheese and ranch dressing mixture together until smooth. Remove from the heat and whisk in 1 cup of the shredded cheese. Fold in buffalo wing sauce, chicken and the second cup of the cheese.Add mixture to the casserole dish. Finally, top with the remaining ½ cup of shredded cheese and bake for 30-35 minutes until the dip is melted, and browning and bubbly on top.Remove from the oven and let rest for 5 minutes, then serve with tortilla chips, celery sticks, and/or toast rounds.NutritionCalories: 424kcal | Carbohydrates: 4g | Protein: 24g | Fat: 35g | Saturated Fat: 15g | Polyunsaturated Fat: 7g | Monounsaturated Fat: 7g | Trans Fat: 0.1g | Cholesterol: 113mg | Sodium: 1188mg | Potassium: 85mg | Fiber: 0.02g | Sugar: 2g | Vitamin A: 678IU | Vitamin C: 0.01mg | Calcium: 352mg | Iron: 0.3mg
The post Buffalo Chicken Dip appeared first on Grandbaby Cakes.
January 21, 2025
Rotel Dip
I didn’t even know what rotel dip was until I moved to Texas. The first time I tried it, I straight up fell in love. It’s the creaminess and spices for me! Now, I love to pull out this rotel dip whenever I’m entertaining for game days. It’s a hit boos. I just toss everything into the slow cooker so I can focus on making other eats. It makes the whole thing so effortless. So serve it up for game days, hangouts, or solo snack sessions (I ain’t judging) and get your whole life like I did.
 The Lowdown on The Best Rotel Dip Recipe
Y’all, this ain’t just any dip—this is THE dip. I wanted to create a rotel dip that had that signature creamy texture but I had to add a kick of spice.
It’s filled with meat and some cajun seasoning. Once the meat is browned, I add everything into the slow cooker so it melts down and combines. The whole thing just slays. I know you will end up loving it as much as any native Texan does.
Ingredients you’ll need to make Rotel Dip Cheeses: A mix of both Velveeta and cream cheese creates the ultimate melty, creamy and rich foundation for the dip.Savory: Browned ground beef with a hint of bold cajun spices pairs perfectly with the cheeses.Veggie: We add diced yellow onion cooked until tender in olive oil and rotel tomatoes to get a nice savory and tangy veggie combo.Fresh Garnish: We love a pop of freshness and those sliced green onions give us some subtle texture and earthiness to balance the richness.How to make Rotel Dip Step 1: Melt and Brown
  1 Spray the inside of your slow cooker then add in both cheeses. Set to medium and let it melt.
  2 Then add olive oil and onion to a skillet over medium heat and cook for 5 minutes then add ground beef, season with salt and pepper and break up and cook.
  3 Cook until he ground beef is browned with no pink remaining. Step 2: Mix it Up and Cook it Up!
  4 Add the rotel with the juices, the cajun seasoning if you want, and the ground beef to the slow cooker.
  5 Stir together. The cheeses should be melty by now. Give another 15 minutes and another stir then let cook for 45 minutes to an hour then add green onions.
  6 Stir everything together and get ready to serve it up. What to serve with Rotel Cheese DipGo Classic: Ain’t nothing like pairing this dip with warm tortilla chips boos. Lighter Option: Swap the chips for carrot or celery sticks.Load Up Your Nachos: Drizzle some of this liquid gold over these steak nachos or shrimp nachos.Over Potatoes: Spoon some of this rotel cheese dip directly over baked potatoes. Go with baked sweet potatoes to really punch up the various flavors. Menu Option: Game Day Menu With Rotel Dip
  Cheesy breadsticks bring the fun to a game day and are good cheesy finger food.
  Orange honey bbq wings are so fun and saucy to go along with the savory flavors of the rotel dip.
  Brisket chili brings all the savory, meaty deliciousness to the party.
  Oreo bars combine brownie and delish cheesecake into one! And easy to pick up! Recipe Substitutions, Variations and AdditionsLighten It Up: Swap out the ground beef with ground turkey or chicken and use Greek yogurt instead of cream cheese.Add Texture: Stir in some black beans or some canned corn kernels for a pop of heartiness.Go Buffalo Style: Replace the ground beef with shredded chicken and add some buffalo or hot sauce to the mix.Layer it Up: Pull out the punch bowl and add layers of refried beans, guacamole, sour cream and salsa.
 Expert Tips and Tricks for making the best Rotel Velveeta DipSpray the Slow Cooker: Sometimes the cheese can stick to the sides so doing a quick spray of non-stick spray helps lower the clean up time.Don’t Skip the Sauté: Making sure those onions cook in the oil before adding in enhances the flavor and richness.Spice it Up: To give this rotel dip a little more flavor, add the optional cajun seasoning. But make sure you go with the no salt versions because processed cheeses add plenty of salt to the mix.How to store & reheat rotel dip
Make sure you cool it down completely. Then scoop any leftovers into an airtight container. When you want to reheat, you can either microwave in 30 second intervals stirring in between to make sure it’s warm and smooth. Or you can reheat on low heat on the stovetop. If it looks a lil’ thick, add a bit of milk or broth to thin it out some.
How long will rotel cheese dip last in the fridge?It should last stored in the fridge for 3-4 days.
Can I freeze Velveeta rotel dip?You definitely could but I don’t really recommend it boos. The texture will change. But if you must, toss leftovers in a freezer bag removing all air. It should stay ok for up to 2 months.
 Frequently asked questionsCan I make this rotel dip without Velveeta cheese?
 For sure boo. Just swap in a mix of shredded cheeses like cheddar and colby and add milt to really get it smooth.
What should I do if my dip is too thick?You can thin it out with some cream or broth.

There’s nothing like some rotel dip on a game day boos. That flavor is popping, that smooth creamy texture is hitting, and those cheese pulls will have you going back for more. It’s a hit anytime you serve it up. Get into it.
More dip recipesElote DipGuacamoleSalsa Verde PrintRotel Dip#wprm-recipe-user-rating-0 .wprm-rating-star.wprm-rating-star-full svg * { fill: #343434; }#wprm-recipe-user-rating-0 .wprm-rating-star.wprm-rating-star-33 svg * { fill: url(#wprm-recipe-user-rating-0-33); }#wprm-recipe-user-rating-0 .wprm-rating-star.wprm-rating-star-50 svg * { fill: url(#wprm-recipe-user-rating-0-50); }#wprm-recipe-user-rating-0 .wprm-rating-star.wprm-rating-star-66 svg * { fill: url(#wprm-recipe-user-rating-0-66); }linearGradient#wprm-recipe-user-rating-0-33 stop { stop-color: #343434; }linearGradient#wprm-recipe-user-rating-0-50 stop { stop-color: #343434; }linearGradient#wprm-recipe-user-rating-0-66 stop { stop-color: #343434; }This Rotel Dip is the creamy, cheesy, and zesty MVP of any snack spread, guaranteed to steal the show. With a slow cooker doing all the work, you get max flavor for minimal effort. Prep Time 10 minutes minutesCook Time 45 minutes minutesTotal Time 55 minutes minutesServings 6 servings, 1 quartCalories 424kcalAuthor Jocelyn Delk AdamsEquipmentSlow CookerIngredients1 lb Velveeta diced4 oz cream cheese diced2 tsp olive oil1/2 cup diced yellow onion1 lb ground beefsalt and pepper to taste10 oz rotel tomatoes2 tsp no-salt Cajun seasoning optional3 green onions sliced thinlyInstructionsSpray the inside of the slow cooker with nonstick cooking spray. In your slow cooker, add both cheeses. Set to medium or high (depending on the settings of your slow cooker) and allow to soften and melt. Meanwhile, in a large nonstick skillet, add your olive oil and onion and cook over medium heat until the onions are translucent, about 5 minutes. Stir occasionally. Add ground beef, season with salt and pepper, break it up, and cook until no pink remains and it’s thoroughly browned, about 5-6 minutes. Remove from heat. Add the Rotel with the juices, cajun seasoning if using and the ground beef to the slow cooker. Stir together. By now the cheeses may not have fully melted. Check again in about 15 minutes to give it another good stir. Let cook for about 45 minutes – 1 hour. *If cooking on high, it may only need to cook for 45-50 minutes once the beef mixture is added to the slow cooker.Stir in and garnish with sliced green onions and serve with tortilla chips. NotesNote: If you prefer a thinner dip, you can add ¼ cup of milk along with the Rotel and beef.How to store & reheat rotel dip Make sure you cool it down completely. Then scoop any leftovers into an airtight container. When you want to reheat, you can either microwave in 30 second intervals stirring in between to make sure it’s warm and smooth. Or you can reheat on low heat on the stovetop. If it looks a lil’ thick, add a bit of milk or broth to thin it out some. How long will rotel cheese dip last in the fridge? It should last stored in the fridge for 3-4 days. Can I freeze Velveeta rotel dip? You definitely could but I don’t really recommend it boos. The texture will change. But if you must, toss leftovers in a freezer bag removing all air. It should stay ok for up to 2 months.NutritionCalories: 424kcal | Carbohydrates: 14g | Protein: 31g | Fat: 27g | Saturated Fat: 14g | Polyunsaturated Fat: 1g | Monounsaturated Fat: 8g | Trans Fat: 1g | Cholesterol: 102mg | Sodium: 1314mg | Potassium: 634mg | Fiber: 1g | Sugar: 9g | Vitamin A: 1112IU | Vitamin C: 7mg | Calcium: 486mg | Iron: 2mg
The post Rotel Dip appeared first on Grandbaby Cakes.
January 20, 2025
Pulled Pork Mac and Cheese
 The Lowdown on This Pulled Pork Mac and Cheese
This Pulled Pork Mac and Cheese is an absolute bomb dish, no lie!
It’s loaded with my special blend of mac and cheese spices, tangy Carolina BBQ sauce (if ya know, ya know), and a crazy amount of cheese. Cause you know I couldn’t get away with one, two, or three types… I’m using 5 y’all. Yeah, five types of cheese. But trust me boos, it’s worth every single calorie. Get into it!
Mac happens to be one of my TOP comfort foods, like “I’d eat a bowl of it every day if it were socially acceptable” status. And don’t even get me started on tender, smoky pulled BBQ pork… That bad boy lives rent free in my Southern heart (and belly).
Combine the two and what do you get? The most insanely creamy, meaty, and cheesy pulled pork mac and cheese recipe evah! If you’re a meat lover and you went crazy over my brisket mac and cheese, oh boo, you’re about to have a brand-new obsession!
 Ingredients you’ll need to make Pulled Pork Mac and Cheese
 Elbow Pasta: Cus I keep it classic over here.Water & Kosher Salt: Crucial for boiling our pasta just right.Butter & All-Purpose Flour: This duo whips up the roux that makes our cheese sauce rich and velvety.Half and Half & Cream Cheese: These bring major creaminess.Cheese: Sharp cheddar, gruyère, fontina, and parmesan. You can’t make BBQ pulled pork mac and cheese without cheese, boo!Spices: Garlic powder, onion powder, ground nutmeg, black pepper, smoked paprika, cayenne pepper, and salt. They all give that familiar mac and cheese comfort.Carolina BBQ Sauce: A tangy, slightly sweet sauce that rounds out our cheesy mixture. North Carolina-style has a bit of a zesty mustard bite, so grab your favorite kind (or ask for extra sauce from your local spot) and add it in for even more flavor.Fresh Italian Parsley: A sprinkle for freshness and color on top.Pulled Pork: You can pick some up from your fave BBQ spot, make your own or hit up the grocery store for another premade option. Just get it sauce free. How to make Pulled Pork Mac and Cheese Step 1: Boil the Pasta
  1 Fill a large stockpot with water and salt, then place over high heat and bring to a boil. Add in elbow macaroni and salt, then cook, stirring occasionally.
  2 Drain pasta in a colander and set aside. Step 2: Make the Cheese Sauce and Add Your Pasta
  3 Add butter to the same pot and melt over medium heat. Once melted, sprinkle in flour. Whisk until a light paste forms, and cook.
  4 Slowly pour in all of the half and half, whisking until smooth.
  5 Add in cream cheese and spices and whisk until smooth and combined.
  6 Add in half of the shredded cheese.
  7 Whisk until completely melted and smooth.
  8 Remove from heat and stir in barbeque sauce
  9 Add cooked elbows to the cheese sauce and mix well. Step 3: Assemble with the Pulled Pork and Bake It Up!
  10 Pour half of the pasta into your prepared pan.
  11 Add half of the pulled pork and stir together.
  12 Pour the rest of the elbows and cheese sauce on top of the first layer. Sprinkle the rest of the pulled pork on top and then finish it off by sprinkling remaining shredded cheese across the top.
  13 Place in the oven and bake until cheesy and browned on top.
  14 Remove from the oven and garnish with parsley. Let sit, then serve immediately. What to serve with bbq pulled pork mac and cheeseKeep It Light: If you add a couple of lighter sides like a coleslaw or a cucumber and onion salad to your plate, this mac basically becomes a full-blown meal.Carb Love: Cornbread, hush puppies, or biscuits. Pick one (or all three) and watch your table go wild!Southern Mains & Sides: Fried chicken, smothered pork chops, collard greens, or baked beans? Yes, please!Pulled Pork Mac and Cheese Sliders: Toss a scoop of that cheesy, pork-packed goodness on potato rolls. Top with a lil’ coleslaw or pickles, and enjoy! Menu Option: Comfort Dinner with Pulled Pork Mac and Cheese
  These Collard Greens are braised in a savory meat flavored and perfectly spiced pot liquor resulting in an amazing tender silky texture.
  This Creamed Corn recipe use real cream, butter, parmesan cheese, and lots of sweet corn to make the BEST you’ve ever had!
  This honey cornbread is tender, moist, and almost cake-like. The ultimate side dish for pulled pork mac, boos!
  This classic pound cake recipe is a 100-year-old family recipe. Passed down by generations of Southern women. From my grandmother to me, this recipe as authentic as you can get to a classic pound cake. Recipe SubstitutionsHalf and Half: If you’re out, use whole milk or heavy cream for a similar creamy vibe.All-Purpose Flour: For a gluten-free macaroni and cheese with pork, swap in a 1:1 gluten-free flour blend. And don’t forget GF pasta while you’re at it!Fontina Cheese: Can’t find it? Monterey Jack works great, or go for Pepper Jack.Pulled Pork: If you’ve got leftover chicken or brisket, throw it in instead. It’s all fair game in comfort food land boos!Recipe Variations and AdditionsSwitch Up the BBQ Sauce: My Chipotle BBQ sauce is sweet, smoky, and ridic easy. You can also use your fav brand of store-bought. Switch Up the Pasta: Elbows are classic, but shells, cavatappi, or whatever you’ve got in the pantry works just as fine.Add a Little Heat: A drizzle of hot sauce is never a bad idea! Or toss diced jalapeños on top for a spicy bite.Up the Flavor: Make this pork mac and cheese yours, boos! Throw in sautéed onions, roasted peppers, or chopped bacon.
 Tips for making the best pulled pork mac and cheeseDon’t Dump All the Cheese at Once: Stir in your cheese by small handfuls, letting each addition melt fully before adding more. That’s how you’ll dodge those pesky lumps and get a silky-smooth finish.Skip Pre-Shredded Cheese: It’s coated in a powder to prevent clumping, which also prevents a smooth cheese sauce. Instead, purchase blocks of cheese and shred them yourself on the large holes of a box grater or with your food processor.Freeze Softer Cheeses: If your cheese is on the softer side (lookin’ at you, Fontina), stick it in the freezer for 10 minutes to firm it up. You’ll get more control and less mess when you grate.Undercook Your Pasta: Remember, it’ll keep cooking in the oven, so pull it off the stove a couple minutes early. That way, your mac stays perfectly al dente instead of turning mushy.How to store & reheat Pulled Pork Mac and Cheese
After the mac cools, cover it tightly with foil or transfer it into an airtight container. Store it in the fridge, and you’re good to go!
You can warm it back up in the oven at 350°F until it’s nice and bubbly (about 20 minutes), or pop a portion in the microwave for a quick fix.
How long will Pulled Pork Mac and Cheese last in the fridge?This baby will be good in the fridge for about 3 to 4 days, if it even makes it that long. Oh boos, around here, leftovers disappear FAST.
Can I freeze macaroni and cheese with pork?You absolutely can freeze this dish! Cool it completely, then wrap it well or store it in freezer-safe containers. It’ll keep for up to 2 months. When you’re ready to eat, thaw it overnight in the fridge and reheat.
 Frequently asked questionsCan I make this BBQ pulled pork mac and cheese ahead of time?
 Well yes! You can assemble everything (minus the final cheese topping) the day before, cover it tightly, and pop it in the fridge. When you’re ready to bake, sprinkle on that extra cheese, then slide it into the oven and bake.
Why is my mac and cheese dry?Usually, that means it needed more sauce. Make sure your pasta is coated generously before baking, and don’t let it cook too long in the oven.
What if I only have cheddar on hand?Go ahead and use it boo! Cheddar can handle the job solo, though you’ll miss out on those other cheese flavors.
 More Mac and Cheese RecipesBrisket Mac and CheeseSlow Cooker Mac and CheeseLobster Mac and CheeseWhite Cheddar Mac and CheeseCauliflower Mac and CheeseSouthern Baked Macaroni and Cheese! (With Video!)Velveeta Mac & Cheese
  PrintPulled Pork Mac and Cheese#wprm-recipe-user-rating-0 .wprm-rating-star.wprm-rating-star-full svg * { fill: #343434; }#wprm-recipe-user-rating-0 .wprm-rating-star.wprm-rating-star-33 svg * { fill: url(#wprm-recipe-user-rating-0-33); }#wprm-recipe-user-rating-0 .wprm-rating-star.wprm-rating-star-50 svg * { fill: url(#wprm-recipe-user-rating-0-50); }#wprm-recipe-user-rating-0 .wprm-rating-star.wprm-rating-star-66 svg * { fill: url(#wprm-recipe-user-rating-0-66); }linearGradient#wprm-recipe-user-rating-0-33 stop { stop-color: #343434; }linearGradient#wprm-recipe-user-rating-0-50 stop { stop-color: #343434; }linearGradient#wprm-recipe-user-rating-0-66 stop { stop-color: #343434; }This Pulled Pork Mac and Cheese is loaded with my special blend of mac and cheese spices, tangy Carolina BBQ sauce, and a crazy amount of cheese! Course Main CourseCuisine AmericanPrep Time 30 minutes minutesCook Time 45 minutes minutesTotal Time 1 hour hour 15 minutes minutesServings 15 servingsCalories 515kcalAuthor Jocelyn Delk AdamsEquipmentLarge Pot9×13 Baking DishIngredientsFor the Pasta1 pound elbow macaroni8 cups water3 tablespoons kosher saltFor the Cheese Sauce2 cups sharp cheddar cheese shredded 1 ½ cups gruyere shredded 1 ½ cups fontina shredded ½ cup parmesan cheese shredded 4 tablespoons unsalted butter¼ cup all-purpose flour4 ½ cups half and half room temperature4 ounces cream cheese softened2 teaspoons garlic powder1 ½ teaspoons onion powder¼ teaspoon ground nutmeg1 teaspoon black pepper¾ teaspoon smoked paprika1/8 teaspoon cayenne pepper2 teaspoons kosher salt4 tablespoons Carolina barbeque sauce1 tablespoon fresh Italian parsley finely chopped 1 pound pulled pork pre-cookedInstructionsPrepare a 13×9 baking dish by spraying the bottom and sides with nonstick spray.Combine all the shredded cheese in a large bowl and mix gently.Fill a large stockpot with 8 cups of water and salt, then place over high heat and bring to a boil. Add in elbow macaroni and salt, then cook for 6 minutes, stirring occasionally. Remember the pasta will continue cooking once in the oven, so you don’t want to cook it completely in the first step.Drain pasta in a colander and set aside. Preheat the oven to 375°F and set a rack in the middle position.Using the same pot, add butter and melt over medium heat. Once melted, sprinkle in flour and whisk until a light paste forms. Cook for 1 minute.Slowly pour in all of the half and half, whisking until smooth. Add in cream cheese and spices and whisk until smooth and combined. Finally, add in half of the shredded cheese and whisk until completely melted and smooth, about 4-5 minutes. Remove from heat and stir in barbeque sauce. Add cooked elbows to the cheese sauce and mix well.Pour half of the pasta into your prepared pan, then half of the pulled pork and stir together. Pour the rest of the elbows and cheese sauce on top of the first layer. Sprinkle the rest of the pulled pork on top and then finish it off by sprinkling remaining shredded cheese across the top.Place in the oven and bake until cheesy and browned on top, about 40-45 minutes. Remove from the oven, garnish with parsley. Let sit for 10 minutes, then serve immediately.NotesDon’t Dump All the Cheese at Once: Stir in your cheese by small handfuls, letting each addition melt fully before adding more. That’s how you’ll dodge those pesky lumps and get a silky-smooth finish.Skip Pre-Shredded Cheese: It’s coated in a powder to prevent clumping, which also prevents a smooth cheese sauce. Instead, purchase blocks of cheese and shred them yourself on the large holes of a box grater or with your food processor.Freeze Softer Cheeses: If your cheese is on the softer side (lookin’ at you, Fontina), stick it in the freezer for 10 minutes to firm it up. You’ll get more control and less mess when you grate.Undercook Your Pasta: Remember, it’ll keep cooking in the oven, so pull it off the stove a couple minutes early. That way, your mac stays perfectly al dente instead of turning mushy.NutritionCalories: 515kcal | Carbohydrates: 36g | Protein: 23g | Fat: 31g | Saturated Fat: 18g | Polyunsaturated Fat: 1g | Monounsaturated Fat: 8g | Trans Fat: 0.1g | Cholesterol: 101mg | Sodium: 2363mg | Potassium: 234mg | Fiber: 1g | Sugar: 10g | Vitamin A: 1010IU | Vitamin C: 2mg | Calcium: 468mg | Iron: 1mg
The post Pulled Pork Mac and Cheese appeared first on Grandbaby Cakes.
January 12, 2025
Lemon Roasted Chicken
When you need an easy weeknight dinner that won’t quit, make my Lemon Roasted Chicken recipe boos. Tender, juicy chicken gets a bold flavor boost with a generous mix of seasonings and citrus zest kick. We bake it to perfection with tender golden potatoes and caramelized onions that soak up all those savory, perfectly spiced, lemony juices creating the ultimate comfort food. Get into this lemon roasted chicken. I promise you won’t be disappointed.


They’re Lovin’ It! Here’s what They’re Sayin’:
“Loved it!! Husband said it’s a keeper.”
—JUDY S.
The Lowdown on This Lemon Roasted Chicken recipeFor us busy mamas, throwing together an easy, fuss free yet delish dinner is the ultimate skillset. That’s exactly why I fall back on this lemon roasted chicken recipe more times than I can count.
I’ve probably made it at least once a week for several years. I thought my fam would get tired of it but they love it just as much as I do. The flavors are undeniable, and it couldn’t be easier to make. It is the ultimate recipe without a recipe because you can do your own thang, swap out spices, add your faves or have some fun, and it will still turn out perfectly. Let’s get into it.
Ingredients you’ll need to make lemon roast chicken Potatoes: Peeled then sliced then ready to soak up all those juicy flavors.Onion: A large, chopped onion to add some savory depth to the dish.Olive Oil: A nice healthy drizzle of extra virgin olive oil adds that silky, rich touch.Seasoning: Salt, pepper, and lemon pepper are what we bring to the table here. This trio brings the zing, the zang, and the zesty!Garlic & Paprika: A teaspoon of garlic powder for that aromatic warmth, paired with a hint of paprika for a subtle smoky undertone.Chicken: Chicken pieces that are about to get a lemony makeover, turning them into the main event.Lemon: Small lemons, sliced in half, ready to shower this dish with their citrusy, tangy joy.How to make lemon roasted chicken Step 1: Prep the Potatoes and Onions
  1 Add potato slices and onions to the bottom of the dutch oven.
  2 Drizzle with olive oil and season with salt, pepper and lemon pepper to taste.
Season with half of garlic powder and paprika. Step 2: Prep Chicken and Bake
 3 Season both sides of chicken pieces with salt, pepper and lemon pepper.
  4 Place chicken facing up on top of potatoes and onions. Season with remaining garlic powder and paprika.
  5 Sprinkle with lemon juice then add lemon slices to pan.
Cut butter into small pats and add to the top of the chicken.
 6 Cover dutch oven and bake for 1 hour or until chicken is cooked through and potatoes and onions are tender and caramelized.
  7 If you want to brown the top of the dish further and add more color, place under a broiler for a few minutes until it reaches the color you prefer.
Cool for 10-15 minutes, sprinkle with parsley and serve. What to serve with roasted lemon chickenKeep it Simple: For a simple weeknight meal, serve this up with some harvest salad and easy garlic bread.Southern Vibes Sunday Supper: This lemon roast chicken is great with succotash, a pan of honey cornbread and turnip greens. And don’t forget the sweet potato pie.Comfort Food Dinner: Entertaining your boos? Make this dinner along with a delish lobster mac and cheese, creamed spinach and angel biscuits. Menu Option: Rustic Spring Complete Meal With Roasted Lemon Chicken
 Cobb salad with shrimp is full of fun flavors and perfect for starting your spring menu off right.
 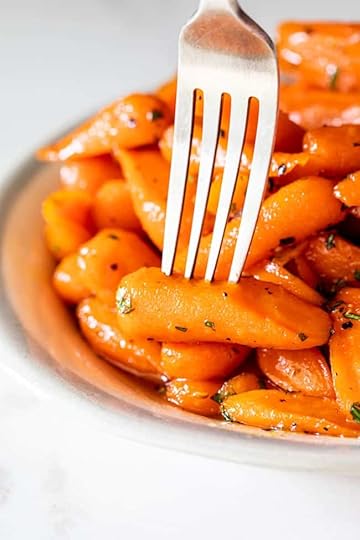 These honey glazed carrots are the perfect side dish for this meal. They scream spring!
  Green bean casserole is the ultimate side dish for getting your spring veggies in.
  Pineapple upside down cake is the perfect way to end this meal. Recipe SubstitutionsYukon Gold Potatoes: You can swap these out with russet for a fluffier texture. Or use sweet potatoes for a touch of sweetness.Olive Oil: You can replace this with another neutral oil like avocado oil or even vegetable oil. Ghee can also add a nice buttery flavor.Chicken: Select any pieces you want from chicken breasts and thighs to a whole chicken. Just spatchcock it so it stays juicy and cooks evenly over the potatoes.Lemons: Go with another citrus like limes or oranges for another zesty note.Recipe Variations and AdditionsToss in the Veggies: Add in zucchini, bell peppers, carrots along with the potatoes for a nice mix of vibrant flavors.Get Herby: Use a mix of thyme, parsley and rosemary for an earthy fragrant touch.Spice it Up: Get some smoked paprika, crushed red pepper flakes or cayenne in the mix.
 Expert Tips and Tricks Cut those potato uniformly: Make sure you thinly slice the potatoes the same size so they bake evenly and also cook faster.Pat Dry: Make sure you dry that chicken with paper towels before you season and bake. It will help that seasoning stick and brown perfectly.Season everything: I like to season the chicken, onions and potatoes separately so each component has poppin flavor.Be Careful: For that perfect browning, you can have the chicken under the broiler for a few seconds. Watch carefully so. you get that nice golden caramelized finish.How to store & reheat roasted lemon chicken
To store leftovers, first let it cool to room temp, then place it in an airtight container. For reheating, warm it in the oven at 350°F for about 10-15 minutes, or until it’s heated through and the skin is crispy again. This method helps to retain the flavors and keeps the chicken moist and delish boos!
How long will lemon roast chicken last in the fridge?It should last for up to 3-4 days.
Can I freeze roast lemon chicken?For sure boos. Just make sure you bring the entire meal to room temp then divide the potatoes and chicken separately. They should last for about 3 months.
 Frequently asked questionsCan I use boneless chicken instead for this roasted lemon chicken?
 The simple answer is yes however the bone definitely provides more moisture so it stays juicy while cooking. Just know that it also may cook faster too so check after 40 minutes of cooking.
Should I marinate the chicken?If you have time for this extra step, it will give you more flavor. You can marinate in lemon juice, garlic, olive oil and herbs for a little something extra!
Help! My chicken is done but my potatoes aren’t tender yet!No worries boos. Just remove the chicken from the dutch oven, then cover and continue cooking the potatoes until they are tender.

Y’all this lemon roasted chicken recipe is it boos! Grab the simple ingredients and get ready for a flavor bomb of epic proportions. I love throwing this together on a busy weeknight and letting the oven do the heavy lifting. Get into it boos.
More easy chicken recipesChicken BogFrench Onion ChickenSpanish Chicken and RiceLemon Chicken and Rice CasseroleSouthern Baked Chicken PrintLemon Roasted Chicken#wprm-recipe-user-rating-0 .wprm-rating-star.wprm-rating-star-full svg * { fill: #343434; }#wprm-recipe-user-rating-0 .wprm-rating-star.wprm-rating-star-33 svg * { fill: url(#wprm-recipe-user-rating-0-33); }#wprm-recipe-user-rating-0 .wprm-rating-star.wprm-rating-star-50 svg * { fill: url(#wprm-recipe-user-rating-0-50); }#wprm-recipe-user-rating-0 .wprm-rating-star.wprm-rating-star-66 svg * { fill: url(#wprm-recipe-user-rating-0-66); }linearGradient#wprm-recipe-user-rating-0-33 stop { stop-color: #343434; }linearGradient#wprm-recipe-user-rating-0-50 stop { stop-color: #343434; }linearGradient#wprm-recipe-user-rating-0-66 stop { stop-color: #343434; }This Lemon Roast Chicken starts with fresh chicken that is highly seasoned and sprinkled with citrus flavor that’s roasted in delicious juices, onions and potatoes.Course Main CourseCuisine AmericanPrep Time 20 minutes minutesCook Time 1 hour hourTotal Time 1 hour hour 20 minutes minutesServings 4 servingsCalories 246kcalAuthor Jocelyn Delk AdamsIngredients6 medium gold potatoes peeled and thinly sliced (can also use russet)1 large onion chopped2 tablespoons extra virgin olive oilSalt, pepper and lemon pepper to taste2 teaspoons garlic powder1 teaspoon paprika1 pound chicken pieces2 small lemons sliced in half4 tbsp unsalted butterparsley for garnishingInstructionsPreheat oven to 425 degrees.Add potato slices and onions to the bottom of the dutch oven.Drizzle with olive oil and season with salt, pepper and lemon pepper to taste.Season with half of garlic powder and paprika.Season both sides of chicken pieces with salt, pepper and lemon pepper.Place chicken facing up on top of potatoes and onions.Season with remaining garlic powder and paprika.Sprinkle with lemon juice then add lemon slices to pan.Cut butter into small pats and add to the top of the chickenCover dutch oven and bake for 1 hour or until chicken is cooked through and potatoes and onions are tender and caramelized. If you want to brown the top of the dish further and add more color, place under a broiler for a few minutes until it reaches the color you prefer.Cool for 10-15 minutes, sprinkle with parsley and serve.NotesHow to store & reheat roasted lemon chicken To store leftovers, first let it cool to room temp, then place it in an airtight container. For reheating, warm it in the oven at 350°F for about 10-15 minutes, or until it’s heated through and the skin is crispy again. This method helps to retain the flavors and keeps the chicken moist and delish boos! How long will lemon roast chicken last in the fridge? It should last for up to 3-4 days. Can I freeze roast lemon chicken? For sure boos. Just make sure you bring the entire meal to room temp then divide the potatoes and chicken separately. They should last for about 3 months.NutritionCalories: 246kcal | Carbohydrates: 4g | Protein: 14g | Fat: 18g | Saturated Fat: 4g | Cholesterol: 57mg | Sodium: 56mg | Potassium: 209mg | Sugar: 1g | Vitamin A: 230IU | Vitamin C: 4.3mg | Calcium: 17mg | Iron: 0.9mg
The post Lemon Roasted Chicken appeared first on Grandbaby Cakes.
January 10, 2025
Tomato Basil Soup Instant Pot
 The Lowdown on This Tomato Basil Soup
My Instant Pot has been my kitchen BFF for years, I’m talkin’ through thick soups and thin budgets. I’ve slow cooked, sautéed, steamed, and pretty much let that robot do the work for me when I’m juggling a million things. Heck, if it had arms, I’d let it do my laundry too!
But hands down boos, my favorite thing to make with it is soup, especially this easy tomato basil soup. It’s literally one pot, one push of a button, and you’ve got a bowl so warm it could snuggle ya right back.
P.S: If you don’t have an Instant Pot, no worries boos! I’ve got a stovetop version of tomato soup that’s just as yummy and easy, minus the fancy gadget.
Ingredients you’ll need to make Tomato Basil Soup Butter: To sauté everything.Onion: Diced nice and fine y’all. Canned Diced Tomatoes: I use canned tomatoes for convenience, but take my word boos, the soup tastes like it was made with fresh tomatoes!Tomato Juice: The liquid gold that gives our soup its signature luscious texture.Granulated Sugar: Sugar cuts the tang of the tomatoes. It’s a must!Chicken Bouillon Cubes: These little guys pack a flavorful punch. If you’re keeping it veggie, just swap them out for vegetable bouillon cubes.Salt: Just a little to enhance all the flavors. Always taste and adjust as you go, you know your soup best!Black Pepper: To give it a bit of a kick.Sherry: My secret ingredient boos! I use cooking sherry, which you can find in the vinegar aisle, but feel free to use any type of sherry you like.Heavy Whipping Cream: This is what makes this soup creamy.Fresh Basil: You can’t have homemade tomato basil soup without fresh basil!Fresh Parsley: Adds a pop of color and a fresh, slightly peppery flavor.Parmesan for Garnish: For those who like their soup with a touch of salty, nutty goodness.How to make Tomato Basil Soup in the Instant Pot
  1 Set your Instant Pot to saute and allow to warm. Add butter to melt, then add onions and cook until translucent.
  2 Add the diced tomatoes and tomato juice, stirring to combine. Mix in the sugar, bouillon cubes, salt, and pepper, then lock the lid in place. Cook on manual, let it naturally vent, and then allow a little extra time before opening.
  3 Add in sherry, heavy cream, basil and parsley.
  4 Stir to combine.
  5 Sprinkle on parmesan if desired before serving. What to serve with creamy tomato basil soup3 G’s (Grilled Cheese Goodness): If there’s one thing that goes with tomato soup, it’s grilled cheese y’all. Whether you go classic with melty cheddar or get fancy with a pizza grilled cheese, or an Italian Beef Grilled Cheese these are perfect for dunking.Bready Bites: Try warm garlic bread, garlic cheese stuffed rolls, or cheddar bay biscuits to soak up all that delicious soup.Fresh Salads: Toss together a cucumber and onion salad, a harvest fall salad, or go crunchy with some classic coleslaw.Protein Picks: Add a lil’ extra to your meal with protein! Grill up a ribeye, make hot honey chicken, or mix in some savory meatballs. Menu Option: Complete Meal With Homemade Tomato Basil Soup
  This lemon roast chicken is packed with bright citrus flavor, roasted to perfection with juicy onions and tender potatoes. These cheese breadsticks are the perfect side to dip into your homemade tomato basil soup or just enjoy on their own!
  My shrimp Caesar salad is fresh, flavorful, and a total winner for any meal! I mean, it’s got juicy creole-spiced shrimp y’all. Get into it.
  My cinnamon roll butter swim biscuits are soft, buttery, and packed with cinnamon roll flavor in every bite. The coziest ending to a bowl of tomato basil soup IMO. Recipe SubstitutionsOnion: Shallots are a great swap and bring a slightly sweeter flavor to this instant pot tomato basil soup.Tomato Juice: If you don’t have it, mix some tomato puree with a splash of water.Sherry: To keep it booze free skip the sherry or use red wine vinegar or apple cider vinegar instead.Make It Vegan: Swap out the butter for a vegan margarine or good ol’ olive oil, use vegetable bouillon cubes instead of chicken ones, and replace the heavy whipping cream with coconut milk or another dairy-free cream alternative.Recipe Variations and AdditionsCheese It Up: Top your creamy tomato basil soup with different cheeses like pecorino Romano instead of parmesan.Sun-Dried Tomatoes: Toss in some chopped sun-dried tomatoes for an extra burst of flavor.Herbs: Add more fresh basil or throw in some thyme. They’ll give your soup that “just picked from the garden” feel.Toppings: Top your soup with homemade or store-bought croutons! It’s a no-brainer boos. I mean, who doesn’t love a good crunch?
 Expert Tips and Tricks for making the best homemade tomato basil soup recipeTake Your Time with the Onions: Don’t rush those onions y’all! Let them sauté until they’re nice and golden.Blend for Smoothness: For that crazy velvety texture, grab your trusty Vitamix or an immersion blender and blend your soup until it’s smooth as silk. If you’re feeling extra and want it super-duper ultra smooth, strain it after blending.Taste as You Go: Don’t be shy, taste your soup before adding the cream. Adjust the seasoning with a bit more salt, pepper, or sugar if needed.Let It Chill: After cooking, let your soup sit for a few minutes before serving so all the flavors mingle and settle. Plus, it gives you a chance to set the table!How to store & reheat Tomato Basil Soup
After you’ve slurped down that bowl of soup, let it cool before transferring it to some airtight containers. Pop those containers in the fridge, and you’re all set!
When you’re ready to enjoy it again, reheat it on the stovetop or give it a whirl in the microwave. Pro tip: give it a good stir to keep everything nice and mixed!
How long will Homemade Tomato Basil Soup last in the fridge?It will last 3-4 days if stored properly… And if your fam doesn’t eat the whole pot in one sitting!
Can I freeze instant pot tomato basil soup?You sure can! Actually, this soup is great for meal prep. You can freeze a bunch in freezer-safe containers or heavy-duty freezer bags. It’ll keep its yummy goodness for up to 3 months in the freezer. Just label your containers so you don’t end up with a “mystery soup” surprise.
 Frequently asked questionsCan I use any other electric pressure cooker?
 Absolutely y’all! I love my trusty Instant Pot, but you can use any electric pressure cooker you have on hand. The brand doesn’t matter.
My soup is too runny. How can I thicken it?Let it simmer a bit longer with the lid off to let some of that excess liquid evaporate. Or you can also stir in a slurry made from cornstarch and water! Mix about a tablespoon of cornstarch with two tablespoons of water, then add it to the soup and let it simmer until it thickens up.
Can I add other vegetables to the soup?Why not? Get creative with your veggies! Add chopped carrots, bell peppers, spinach, or whatever you have on hand.
 More Soup RecipesChicken and Dumpling SoupSweet Potato SoupPotato Soup Recipe with Crunchy KaleCarrot Ginger Soup (Easy & So Comforting!)Vegetarian Tortilla SoupCreamy Chicken Noodle Soup RecipeTaco Soup Recipe (Easy, Ready in 30 Minutes & Vegetarian Option)
  PrintInstant Pot Tomato Basil Soup Recipe#wprm-recipe-user-rating-0 .wprm-rating-star.wprm-rating-star-full svg * { fill: #343434; }#wprm-recipe-user-rating-0 .wprm-rating-star.wprm-rating-star-33 svg * { fill: url(#wprm-recipe-user-rating-0-33); }#wprm-recipe-user-rating-0 .wprm-rating-star.wprm-rating-star-50 svg * { fill: url(#wprm-recipe-user-rating-0-50); }#wprm-recipe-user-rating-0 .wprm-rating-star.wprm-rating-star-66 svg * { fill: url(#wprm-recipe-user-rating-0-66); }linearGradient#wprm-recipe-user-rating-0-33 stop { stop-color: #343434; }linearGradient#wprm-recipe-user-rating-0-50 stop { stop-color: #343434; }linearGradient#wprm-recipe-user-rating-0-66 stop { stop-color: #343434; }Instant Pot Tomato Basil Soup is rich and comforting. The incredible flavors of tomato, sherry, butter, and cream create the perfect soup recipe done quickly in an Instant Pot!Course AppetizerCuisine AmericanPrep Time 10 minutes minutesCook Time 20 minutes minutesTotal Time 30 minutes minutesServings 8 servingsCalories 275kcalAuthor Jocelyn Delk AdamsEquipmentInstant PotIngredients6 tablespoons unsalted butter1 medium onion diced2 14.5 ounce can diced tomatoes 1 46 ounce bottle or can tomato juice3 tablespoons granulated sugar2 chicken bouillion cubes1/2 teaspoon kosher saltblack pepper to taste1 cup sherry1 1/2 cups heavy whipping cream1/4 cup fresh basil chopped 1/4 cup parsley chopped Parmesan for garnishInstructionsSet your Instant Pot to saute and allow to warm. Add butter to melt. Add onions and cook until translucent.Add the diced tomatoes and tomato juice and stir to combine. Add in sugar, bouillion cubes, salt and pepper, then stir and lock lid in place.Set cooker to manual then set timer for 3 minutes. When timer is up set to Naturally vent then add an additional 10 minutes.Stir in sherry, heavy cream, basil and parsley. Sprinkle on parmesan if desired before serving.NotesTake Your Time with the Onions: Don’t rush those onions y’all! Let them sauté until they’re nice and golden.Blend for Smoothness: For that crazy velvety texture, grab your trusty Vitamix or an immersion blender and blend your soup until it’s smooth as silk. If you’re feeling extra and want it super-duper ultra smooth, strain it after blending.Taste as You Go: Don’t be shy, taste your soup before adding the cream. Adjust the seasoning with a bit more salt, pepper, or sugar if needed.Let It Chill: After cooking, let your soup sit for a few minutes before serving so all the flavors mingle and settle. Plus, it gives you a chance to set the table!NutritionCalories: 275kcal | Carbohydrates: 8g | Protein: 2g | Fat: 25g | Saturated Fat: 16g | Polyunsaturated Fat: 1g | Monounsaturated Fat: 6g | Trans Fat: 0.3g | Cholesterol: 73mg | Sodium: 163mg | Potassium: 100mg | Fiber: 0.3g | Sugar: 7g | Vitamin A: 1117IU | Vitamin C: 4mg | Calcium: 42mg | Iron: 0.3mg
The post Tomato Basil Soup Instant Pot appeared first on Grandbaby Cakes.
January 6, 2025
Best Carrot Cake Recipe

They’re Lovin’ It! Here’s what They’re Sayin’:
“The one, and only, recipe for carrot cake in my house.
Brown butter frosting is a revelation and the cake is so flavorful.”
—PAM
The Lowdown on The Best Carrot CakeBig mama made fantastic carrot cakes. They were so wonderful to enjoy during the Spring. Her mix of fresh shredded carrots with hints of pineapple, spices, and roasted nuts with a smearing of creamy cream cheese frosting is absolutely perfect!
I added a slight remix by browning the butter to make that frosting pop even more, and let me tell ya, it’s an absolute hit!
Ingredients you’ll need to make Southern Carrot Cake Self-Rising Flour: To avoid a super dense cake, I use a self-rising flour which has baking powder. The additional leavening prevents the development of too much gluten so it stays nice and tender boos. Thank you to
Mama Dip
for this amazing tip!Spices: Cinnamon, cloves, nutmeg and allspice are all in the mix. They layer in warmth, a sweetly pungent aroma and peppery overtones.Vegetable Oil: Oil keeps this cake super moist y’all. Grated Carrots: I personally prefer to freshly grate my own carrots because there’s a cleaner, more prominent earthy and sweet flavor. Roasted Walnuts: They add a smoky, nutty essence with a hint of texture.Crushed Pineapples: This gives us a lil’ extra fruity sweetness with a hint of texture. I also like the extra moisture it gives.Cream Cheese: If your carrot cake ain’t got tangy, smooth and rich cream cheese frosting, I don’t want it! Butter: I brown it to let that nuttiness add some depth to the frosting making it unlike anything you have ever tasted boos.How to make Carrot Cake Step 1: Make the Cake Batter
Self-Rising Flour: To avoid a super dense cake, I use a self-rising flour which has baking powder. The additional leavening prevents the development of too much gluten so it stays nice and tender boos. Thank you to
Mama Dip
for this amazing tip!Spices: Cinnamon, cloves, nutmeg and allspice are all in the mix. They layer in warmth, a sweetly pungent aroma and peppery overtones.Vegetable Oil: Oil keeps this cake super moist y’all. Grated Carrots: I personally prefer to freshly grate my own carrots because there’s a cleaner, more prominent earthy and sweet flavor. Roasted Walnuts: They add a smoky, nutty essence with a hint of texture.Crushed Pineapples: This gives us a lil’ extra fruity sweetness with a hint of texture. I also like the extra moisture it gives.Cream Cheese: If your carrot cake ain’t got tangy, smooth and rich cream cheese frosting, I don’t want it! Butter: I brown it to let that nuttiness add some depth to the frosting making it unlike anything you have ever tasted boos.How to make Carrot Cake Step 1: Make the Cake Batter  1 Sift flour, spices, and baking soda.
  2 In a stand mixer, combine sugar, oil, and vanilla.
  3 Next, add eggs, one at a time, blending after each addition.
  4 Next slow down the mixer to lowest speed and add flour mixture in increments.
 5 Fold in carrots, crushed pineapple if desired and walnuts if desired. Step 2: Bake Your Layers
  6 Evenly pour batter into cake pans.
  7 Bake for 35-40 minutes or until a toothpick inserted in the center comes out clean. Step 3: Make the Frosting
  8 In a small saucepan, add butter and melt over medium heat.
  9 Brown until it turns a nice amber color then pop in the fridge to get solid again.
  10 Add cooled brown butter and cream cheese to the bowl of your mixer and beat on high speed until thick and fluffy.
  11 Slow down mixer and carefully add in confectioner’s sugar. Once all sugar has incorporated, turn mixer back to high to continue whipping.
  12 Add salt and vanilla extract and continue whipping until it is smooth. Step 4: Frost it Up!
  13 Add frosting to each layer and stack on each other.
  14 Frost the top of the cake then.
  15 Then finally frost the sides of the cake and get ready for the best carrot cake of your life. Sprinkle with nuts for a decorative touch. What to serve with this carrot cake recipeSouthern Comfort: Get into these beef tips, baked macaroni and cheese, candied yams and Southern green beans. They are the perfect start before you diving into your carrot cake.Sunday Supper: Smothered pork chops, sour cream mashed potatoes, turnip greens and Jiffy cornbread make the perfect dinner to serve along with your cake.Spring Entertaining: Impress your guests with some crab stuffed salmon, creamed spinach and Jollof rice. Menu Option: Complete Easter Meal With Carrot Cake
  Deviled eggs are the ultimate start to your Easter dinner.
  Honey glazed ham is a fan fave for Easter for a reason, and this one is the best you will try. Honey glazed carrots are a nice nod to the carrot cake you will enjoy later.
  These yeast rolls are just magical pillows that taste amazing! Recipe SubstitutionsWalnuts: Swap out the nuts completely if you don’t like them or replace with pecans or almonds.Spices: Keep the spice needs down by swapping in a tablespoon of apple pie spice or pumpkin pie spice instead.Granulated sugar: You can replace with some homemade brown sugar to add a bit more depth.Crushed Pineapple: You can play around with apple sauce which will keep the cake moist and fruity as well.Recipe Variations and AdditionsGluten-Free: Swap in a good gluten-free self-rising flour so your gluten intolerant boos can enjoy this.Add Citrus: Tossing in some orange zest or lime zest will really make the flavors pop with brightness.Add Coconut: Add a 1/2 cup of shredded coconut to the mix for some island vibes.
 Expert Tips and Tricks for making the best carrot cake recipeDon’t Drain ALL the Pineapple: You want to keep that juice. It adds moisture and more flavor.Toast the Nuts Boos!: It really brings out more texture and richer flavors.Grate Finely: A food processor is a great tool to use to get those carrots small so they blend perfectly into the batter.Don’t Overmix: Overmixing makes a super tough and overly dense cake.How to store carrot cake
Keep your freshly baked Carrot Cake in a dry, cool area and cover with foil or plastic wrap to keep from drying out. At room temperature, the cake will last for 1-2 days.
How long will it last in the fridge?It will last up to a week in the fridge.
Can I freeze carrot cake?Absolutely boos, wrap it tightly in plastic wrap then place it in a heavy-duty freezer bag. The quality will stay great for 4-6 months.
 Frequently asked questionsCan I make this carrot cake ahead of time?
 Absolutely boos! Bake the layers and wrap in plastic wrap tightly. You can keep them at room temp for about 2 days before frosting and serving up.
Help! My frosting is too thin/thick?If your cream cheese frosting is too thin, add in more powdered sugar a tablespoon at a time until you reach the consistency. If it’s too thick, add a teaspoon of milk until it thins out to be spreadable.

This seriously is the best carrot cake eva! I wouldn’t lie to ya. The flavors are earthy, fruity, spiced and nuanced. Super moist, tender and melt in your mouth, it is the ultimate cake. And that brown butter cream cheese frosting is everything! Get into it.
More Carrot RecipesMango Carrot Cake Swirl BarsCarrot Cake Cupcake RecipeEasy Carrot Pound Cake PrintCarrot Cake Recipe#wprm-recipe-user-rating-0 .wprm-rating-star.wprm-rating-star-full svg * { fill: #343434; }#wprm-recipe-user-rating-0 .wprm-rating-star.wprm-rating-star-33 svg * { fill: url(#wprm-recipe-user-rating-0-33); }#wprm-recipe-user-rating-0 .wprm-rating-star.wprm-rating-star-50 svg * { fill: url(#wprm-recipe-user-rating-0-50); }#wprm-recipe-user-rating-0 .wprm-rating-star.wprm-rating-star-66 svg * { fill: url(#wprm-recipe-user-rating-0-66); }linearGradient#wprm-recipe-user-rating-0-33 stop { stop-color: #343434; }linearGradient#wprm-recipe-user-rating-0-50 stop { stop-color: #343434; }linearGradient#wprm-recipe-user-rating-0-66 stop { stop-color: #343434; }This Amazing Carrot Cake is perfect for Easter or year round! Made incredibly delicious and moist with fresh carrots, pineapple, a blend of warm spices and a homemade brown butter cream cheese frosting, this Carrot Cake Recipe is truly the BEST dessert EVER!Course DessertCuisine American, SouthernPrep Time 30 minutes minutesCook Time 35 minutes minutesTotal Time 1 hour hour 5 minutes minutesServings 16 servingsCalories 511kcalAuthor Jocelyn Delk AdamsEquipment9 inch round cake pansStand mixerOffset SpatulasIngredientsFor the Cake2 1/2 cups self rising flour self rising flour usually has salt in it which is why it was omitted here but if you want a bit more you can add 1/4 tsp of salt as well1 1/2 tsp ground cinnamon1/2 tsp ground nutmeg1/2 tsp ground cloves1/4 tsp ground allspice1 tsp baking soda2 cups granulated sugar1 1/4 cups vegetable oil1 tbsp vanilla extract4 large eggs3 cups grated carrots finely1/2 cup crushed pineapple with juice1 cup chopped roasted walnuts optionalFor the Frosting1/2 cup unsalted butter16 oz cream cheese somewhat softened but still a little stiff/ 16 oz is 2 (8 oz) packages3 1/2 cups confectioner's sugar if you want the frosting more stiff, add another 1/2 cup going up to 4 cups totalpinch of salt1 tsp vanilla extractUS Customary – MetricInstructionsFor the CakePreheat oven to 350 degrees.Sift together flour, cinnamon, nutmeg, cloves, allspice and baking soda and set aside.Next line the bottoms of 3 9” inch round cake pans with parchment paper and lightly grease.In the bowl of your stand mixer, beat sugar, oil and vanilla together at medium speed. Next add eggs, one at a time, blending after each incorporation.Next slow down the mixer to lowest speed and add flour mixture in increments.Fold in carrots, crushed pineapple if desired and walnuts if desired.Evenly pour batter into cake pans.Bake for 35-40 minutes or until a toothpick inserted in the center comes out clean.Cool cake layers in pans for 10 minutes then flip cakes onto cooling racks to cool completely.For the FrostingIn a small saucepan, add butter and melt over medium heat. Once the butter has fully melted, a white foam will begin to appear over the top of the butter.Watch carefully as the butter’s color changes to brown and the smell of the butter becomes somewhat nutty.As soon as the butter is an amber brown color, remove from heat and cool in the refrigerator until it the butter has become solid again (can take about an hour or so).Add cooled brown butter and cream cheese to the bowl of your mixer and beat on high speed until it begins to thicken and fluff.Next slow down mixer and carefully add in confectioner’s sugar. Once all sugar has incorporated, turn mixer back to high to continue whipping.Add salt and vanilla extract and continue whipping until it is smooth.Spread frosting between layers and around cake and serve.NotesHow to store carrot cake Keep your freshly baked Carrot Cake in a dry, cool area and cover with foil or plastic wrap to keep from drying out. At room temperature, the cake will last for 1-2 days. How long will it last in the fridge? It will last up to a week in the fridge. Can I freeze carrot cake? Absolutely boos, wrap it tightly in plastic wrap then place it in a heavy-duty freezer bag. The quality will stay great for 4-6 months.NutritionCalories: 511kcal | Carbohydrates: 71g | Protein: 7g | Fat: 23g | Saturated Fat: 11g | Cholesterol: 87mg | Sodium: 194mg | Potassium: 192mg | Fiber: 2g | Sugar: 54g | Vitamin A: 4631IU | Vitamin C: 2mg | Calcium: 57mg | Iron: 1mg
The post Best Carrot Cake Recipe appeared first on Grandbaby Cakes.
January 1, 2025
Shrimp Po Boy
This authentic Shrimp Po Boy recipe is the type you will find on the streets of New Orleans. It’s got crispy cajun-fried shrimp loaded onto a soft French baguette that’s drizzled with a bold and creamy Creole remoulade sauce making it the real deal boos. One bite, and you’ll swear you are in NOLA! It just doesn’t get better than this.

They’re Lovin’ It! Here’s what They’re Sayin’:
“Amazing recipe!! I recently moved to New Orleans and have tried many shrimp po’ boys, but I have to say, this is one of the best ones!”
—A.M.
If you’ve tried an authentic shrimp po boy in New Orleans before, you’ve probably grabbed one at a small-cash only restaurant outside of The French Quarter. It more than likely had plump, crispy fried shrimp that tasted so fresh it must have been swimming in the Gulf of Mexico that morning. And don’t forget that New Orleans French bread made by a local baker and brought to the restaurant just after sunrise. And let’s not ignore the impossibly juicy, ripe tomato and perfectly spiced creamy remoulade “dressing” the whole thing and taking it over the top. Making this classic perfectly for you boos wasn’t a hard feat but I think we may have nailed it.
The Lowdown on the best Shrimp Po BoyCuisine Inspiration: Classic New Orleans street food
Primary Cooking Method: Frying
Dietary Info: all the Southern cajun vibes. Can be made gluten-free with some ingredient swaps
Key Flavor: Spicy, crispy shrimp on a sandwich with a creamy, tangy kick
Skill Level: Easy y’all (No Sweat Fam!)
Ingredients you’ll need to make this shrimp po boy recipe Remoulade Sauce: A remoulade sauce is a jazzed up mayo that brings a little more heat and spice to the party. We create that iconic sauce by mixing together creamy mayo, dill pickle relish, zesty lemon juice, a kick of hot sauce, chopped capers, paprika, Creole mustard, Worcestershire sauce, and minced garlic. This sauce brings all the flavor and then some!Fried Shrimp: We season fresh juicy shrimp with kosher salt, paprika, garlic powder, cayenne, and black pepper. Coated in a crispy flour and cornmeal mix, it gets dunked in buttermilk spiked with hot sauce, then fried to golden perfection. Po’ Boy Fixings: We load fresh French bread loaves up with shredded lettuce, juicy tomato slices, and dill pickles. Iceberg lettuce is really the only way to go for the cool, crisp crunch an authentic po’ boy requires. Shred the iceberg lettuce thin and pile it on. Use a plump, ripe, juicy and locally grown beefsteak tomato if you can get one. Dill pickle slices add the perfect slightly sour tang to balance the the shrimp.Oil for Frying: Canola or vegetable oil to get the shrimp perfectly crispy.How to make shrimp po boys Step 1: Make the Remoulade
  1 Add all remoulade ingredients to a bowl.
  2 Mix everything together and chill in the refrigerator until you are finished frying the shrimp. Step 2: Prep and Fry the Shrimp
  3 Add the salt, paprika, garlic powder, cayenne pepper, and black pepper.
  4 Mix together then divide the spice mixture in half.
  5 Season the shrimp with half of the spice mixture.
  6 Add the flour, cornmeal and the rest of the spice mixture together in a bowl.
  7 Mix until combined.
  8 In a separate bowl, mix the buttermilk and hot sauce together.
  9 Dip seasoned shrimp in the buttermilk.
  10 Coat with the cornmeal mixture shaking off any excess. If you like a thicker coating you can repeat this step.
  11 Once breaded, chill the shrimp in the refrigerator for 20 minutes.
  12 Pour the oil into a deep, wide pot to the depth of about 2 inches. Heat the oil to 350° Fahrenheit.
Working in batches, fry shrimp until golden brown about 3-4 minutes per batch.
 13 Transfer to paper towels to drain. Step 3: Dress Your Po Boy
  14 Build your sandwich by adding remoulade to the bread then dress your sandwich with lettuce, tomato, and pickles then finally pile on the shrimp. What to serve with fried shrimp poboysClassic Sides: Serve these fried poboys up with traditional sides like hush puppies, Southern potato salad and fried okra.Chill Drinks: Make a big ole pitcher of lemonade or sweet tea to serve along with these.Game Day Party: Get your poboys on a platter and serve along with lemon pepper wings, Southern chili, and salted caramel chocolate chip cookies. Menu Option: Mardi Gras Entertaining With Shrimp Po Boys
  Seafood gumbo is a great way to start off your party and get everyone to NOLA vibes.
  Dirty rice is a great side to serve along with your po boys to give some authentic flavor.
  New Orleans hurricanes are the perfect drink recipe to serve along with these.
  New Orleans pralines are excellent for ending this meal. Wrap them up for your guests to take home as a favor. Recipe SubstitutionsShrimp: Catfish nuggets, oysters or chicken pieces work well here.Mayo: Swap out the mayo for Greek yogurt. Bread: Crusty beads like brioche buns are good as a replacement for french bread.Hot Sauce: Go with a spicier sauce vibe with sriracha instead.Spices: Streamline the spices with an Old Bay seasoning.Recipe Variations and AdditionsGluten-Free: Swap out the flour in the shrimp batter for gluten-free and replace the bread with your fave gluten-free option.Add Blackened Flavor: Coat the shrimp in this delish homemade blackened seasoning and sear for some serious spicy kick.Use Garlic Bread: Instead of regular French bread, use homemade garlic bread for your bread base.Add Fried Green Tomatoes: Replace the tomato slices with fried green tomatoes.
  Expert Tips and Tricks for making the best shrimp poboyGet the Right Shrimp: You want plump shrimp you can eat in one bite. If your shrimp are too big, they make your sandwich difficult to eat. Look for size 16/20 shrimp (basically this means there are 16-20 shrimp per pound). Buy shrimp that are peeled and deveined with the tails off.Oil Temp is Important: Heat the oil to 350°F to ensure the shrimp fry quickly and come out super crispy and not soggy from absorbing oil.Make the Remoulade Ahead: I would make this a few hours or even a day ahead so those flavors can really come together and pop.Let the Batter Rest: Let the shrimp rest in the refrigerator for 20 minutes before frying. This helps the coating to stick to the shrimp better. You don’t want all of your delicious, crispy coating falling off the shrimp as you fry them. How to store & reheat shrimp po boys
It’s best to store all of the components separately. Add the shrimp to an airtight container after it cools and pop in the fridge. Keep the fresh veggies and remoulade in separate containers in the fridge. Finally, add your bread to a ziptop bag and keep at room temp. When you want to reheat the shrimp, I prefer using an air fryer at 350°F for 4-5 minutes or oven at 375°F for 8-10 minutes flipping halfway to keep the crunch popping. Just don’t microwave boos.
How long will shrimp po boys last in the fridge?The shrimp should last up to 2 days. The bread should stay fresh about 1-2 days, and the remoulade lasts the longest staying all good for about 5 days.
Can I freeze this shrimp po boy recipe?You can freeze the fried shrimp but keep in mind that they will overcook once you reheat and chance the texture. Just keepin it real.
If you still want to move forward, place them in a single layer on a baking sheet to freeze individually, and then transfer them to a ziplock freezer bag. They can last up to 2 months in the freezer.
 Frequently asked questionsWhat’s the best bread for a shrimp po’ boy?
 The bread for a shrimp po’boy sandwich is almost as important as the shrimp boos. It will be difficult to find the French bread loaves used in New Orleans because it doesn’t travel well. Look for French bread loaves with thin, crisp crusts and fluffy interiors.
Can I make shrimp poboys ahead of time?I suggest making the remoulade a day in advance and popping in the fridge. You can also make your spice blend and cornmeal mixture ahead as well. For the best shrimp flavor, don’t fry until you are ready to serve.

Listen boos, when you create the bomb flavors of authentic New Orleans, get into this shrimp po boy that gets it perfectly right. From the crispy spiced shrimp to the creamy savory remoulade, everything hits setting off flavor fireworks ya dig? Y’all gotta get into this one.
More New Orleans inspired recipesBananas FosterRed Beans and RiceShrimp CreoleShrimp EtouffeeShrimp and GritsBeignetsThank you to Demetra of Sweet Savant for this incredible recipe!
 PrintAuthentic New Orleans Shrimp Po’ Boy#wprm-recipe-user-rating-0 .wprm-rating-star.wprm-rating-star-full svg * { fill: #343434; }#wprm-recipe-user-rating-0 .wprm-rating-star.wprm-rating-star-33 svg * { fill: url(#wprm-recipe-user-rating-0-33); }#wprm-recipe-user-rating-0 .wprm-rating-star.wprm-rating-star-50 svg * { fill: url(#wprm-recipe-user-rating-0-50); }#wprm-recipe-user-rating-0 .wprm-rating-star.wprm-rating-star-66 svg * { fill: url(#wprm-recipe-user-rating-0-66); }linearGradient#wprm-recipe-user-rating-0-33 stop { stop-color: #343434; }linearGradient#wprm-recipe-user-rating-0-50 stop { stop-color: #343434; }linearGradient#wprm-recipe-user-rating-0-66 stop { stop-color: #343434; }Crispy cajun fried shrimp are piled on a french baguette and topped with a creole inspired creamy remoulade sauce creating the most delicious and authentic po'boy you will ever taste outside of NOLA! Course Main CourseCuisine Cajun/Creole, SouthernPrep Time 40 minutes minutesCook Time 20 minutes minutesTotal Time 1 hour hourServings 4 servingsCalories 2044kcalAuthor Jocelyn Delk AdamsEquipmentMixing BowlsDutch OvenIngredientsFor the Remoulade Sauce1 cup mayonnaise2 tbsp dill pickle relish1 tbsp fresh lemon juice2 tsp hot sauce 2 tsp capers roughly chopped1 1/2 tsp paprika1 tsp Creole mustard or Dijon 1 tsp Worcestershire sauce2 garlic cloves mincedFor the Fried Shrimp3 tsp kosher salt2 tsp smoked paprika1 tsp garlic powder1/2 tsp cayenne pepper1/2 tsp black pepper2 lbs raw medium shrimp (about 45), peeled, deveined and tail offCanola or Vegetable oil for frying1 1/2 cup all-purpose flour1 cup yellow cornmeal1 cup buttermilk3 tbsp hot sauceFor the Po'Boy Assembly4 French loaves 8 inches long, split horizontally dill pickles for garnishShredded iceberg lettuceSliced tomatoesInstructionsFor the Remoulade SauceMix everything together and chill in the refrigerator until you are finished frying the shrimpFor the Fried ShrimpMix the salt, paprika, garlic powder, cayenne pepper, and black pepper together then divide the spice mixture in halfSeason the shrimp with half of the spice mixtureMix the flour, cornmeal and the rest of the spice mixture together in a bowlIn a separate bowl, mix the buttermilk and hot sauce togetherDip seasoned shrimp in the buttermilk, then coat with flour mixture shaking off any excess. If you like a thicker coating you can repeat this step. Chill the shrimp in the refrigerator for 20 minutes.Pour the oil into a deep, wide pot to the depth of about 2 inches. Heat the oil to 350° Fahrenheit Working in batches, fry shrimp until golden brown about 3-4 minutes per batch. Transfer to paper towels to drain.To Assemble Po'BoyBuild your sandwich with on the French bread with mayonnaise or Remoulade, dress your sandwich with lettuce, tomato, and pickles then pile on the shrimp.NotesHow to store & reheat shrimp po boys It’s best to store all of the components separately. Add the shrimp to an airtight container after it cools and pop in the fridge. Keep the fresh veggies and remoulade in separate containers too in the fridge. Finally add your bread to a ziptop bag and keep at room temp. When you want to reheat the shrimp, I prefer using an air fryer at 350°F for 4-5 minutes or oven at 375°F for 8-10 minutes flipping halfway to keep the crunch intact. Just don’t microwave boos. How long will shrimp po boys last in the fridge? The shrimp should last up to 2 days. The bread should stay fresh about 1-2 days, and the remoulade lasts the longest staying all good for about 5 days. Can I freeze this shrimp po boy recipe? You can freeze the fried shrimp. Place them in a single layer on a baking sheet to freeze individually, and then transfer them to a ziplock freezer bag. They can last up to 2 months in the freezer. Just keep in mind that they will more than likely overcook so they won’t be the same texture after reheating. Just keepin it real.NutritionCalories: 2044kcal | Carbohydrates: 281g | Protein: 101g | Fat: 58g | Saturated Fat: 11g | Polyunsaturated Fat: 30g | Monounsaturated Fat: 13g | Trans Fat: 0.1g | Cholesterol: 395mg | Sodium: 5299mg | Potassium: 1442mg | Fiber: 15g | Sugar: 23g | Vitamin A: 1138IU | Vitamin C: 11mg | Calcium: 450mg | Iron: 21mg
The post Shrimp Po Boy appeared first on Grandbaby Cakes.
December 30, 2024
Cinnamon Roll Butter Swim Biscuits
The Lowdown on These Cinnamon Roll Butter Swim BiscuitsWhat’s better than a cinnamon roll or a butter swim biscuit? Smashin’ ’em together, boos!
These Cinnamon Roll Butter Swim Biscuits are the stuff breakfast dreams are made of. Soft, fluffy biscuits baked in a pool of melted butter, brown sugar, cinnamon and vanilla, then crowned with a luscious cream cheese glaze that’ll have you licking the spoon clean.
Perfect for lazy mornings or any morning you’re craving a sweet treat but don’t wanna put in the work!
Y’all already know my OG butter swim biscuits are the truth. Big Mama’s homemade biscuits were the blueprint, and hers are the bomb dot com! But one Sunday morning I got a little curious, so I started tinkerin’ with the recipe to see if I could give it a sweet twist.
When I spotted that cinnamon sitting in my cabinet, I swear she was like “hey girl, let’s make magic”, and who was I to argue?! A little brown sugar cinnamon butter here, a drizzle of vanilla glaze there, and boom! These fluffy, cinnamony beauties were born. Now they’re basically breakfast royalty in my house. Dangerously delicious!
Ingredients you’ll need to make Cinnamon Roll Butter Swim Biscuits For the Cinnamon ButterSalted Butter: The base for your brown sugar cinnamon butter!Light Brown Sugar: Sweetens the butter mixture with a rich, molasses-y flavor.Ground Cinnamon: Brings all that warm, cozy spice to the mix.Vanilla Extract: Adds depth to the cinnamon butter.For the BiscuitsAll-Purpose Flour: The foundation for that fluffy biscuit dough.Baking Powder and Baking Soda: These ensure your biscuits bake up tall and fluffy.Granulated Sugar: Just a touch of sweetness!Kosher Salt: Don’t skip it boos! it adds flavor to the dough.Buttermilk: Keeps your cinnamon butter biscuits soft and tender.For the GlazeCream Cheese: Any brand will do, but full-fat gives you the creamiest results.Salted Butter: Adds richness to the glaze.Confectioners’ Sugar: For that smooth, sweet finish.Milk: Loosens the glaze to the perfect drizzling consistency.Vanilla Extract: A lil’ extra flavor boost!How to make Cinnamon Roll Butter Swim Biscuits Step 1: Mix the Cinnamon Butter
  1 Add brown sugar, cinnamon, and vanilla to a small bowl.
  2 Stir together and set aside.
  3 Add the chunks of salted butter to a baking pan. Then, sprinkle the sugar mixture on top of the butter in the pan and place it in the oven until the mixture is fragrant and the butter has melted. Step 2: Make the Biscuit Dough and Bake It Up
  4 Stir together flour, baking powder, baking soda, salt, and sugar in a large bowl until evenly combined.
  5 Stir in the buttermilk.
  6 Fold with a spatula or wooden spoon until you have a biscuit dough.
  7 Add in biscuit dough to the pan once the butter has melted.
  8 Carefully and gently fold the cinnamon butter mixture into the dough and spread evenly into the corners.
  9 Place the pan back in the oven and bake until the top is crusty and golden brown. Step 3: Whisk the Glaze and Glaze the Biscuits!
  10 Whisk together the cream cheese, butter and milk first to loosen the heavier ingredients.
  11 Add the vanilla extract and confectioner’s sugar.
  12 Mix until creamy and smooth.
  13 Smear glaze onto the biscuits once cooled.
  14 Cut into 9 even squares and enjoy warm! What to serve with cinnamon butter swim biscuitsSweet and Fruity: Add some fresh fruit, smear on some strawberry preserves, or drizzle warm strawberry sauce over yo biscuits!Warm Drinks: Pair ’em with hot cocoa, wassail, or warm apple cider to keep it cozy.Breakfast Classics: Bacon, chicken potato frittata, or some grits on the side will make these cinnamon roll butter swim biscuits the MVP of your breakfast spread.Dessert After Dinner: These biscuits work as dessert too! Pair ’em with a scoop of coffee ice cream, pecan pie, or white chocolate bread pudding for a sweet finish after a hearty Southern meal. Menu Option: Breakfast Spread With Cinnamon Roll Butter Swim Biscuits
  This chipped beef gravy on toast is a classic, comforting recipe. Old-fashioned goodness that pairs perfectly with cinnamon buttermilk biscuits for an easy breakfast win!
  This cheese grits casserole is creamy, garlicky, and loaded with cheddar and parmesan, baked to Southern perfection.
  My crispy hash browns are everything you want in a breakfast side. Easy to make, full of flavor, and so delicious you won’t miss the diner version!
  This homemade apple butter is tangy, sweet, and spiced to perfection. Apple and cinnamon are a match made in heaven! Recipe SubstitutionsButter: Salted or unsalted both work here. If you’re using salted, just cut back on the added salt in the recipe.Brown Sugar: You can swap light brown sugar for dark brown sugar if you like a deeper molasses flavor. And if you don’t have brown sugar, just mix white sugar with a touch of molasses.Buttermilk: Y’all know my homemade buttermilk hack! Mix regular milk with a splash of vinegar or lemon juice and let it sit for 5 minutes.Flour: To make this gluten-free, grab a 1-to-1 gluten-free baking flour.Glaze: Use different extracts in the glaze. In case you wanna be adventurous you can try using lemon, coconut or rum extract!Recipe Variations and AdditionsExtra Spiced Butter: Add a pinch of nutmeg or a sprinkle of cardamom to the cinnamon butter.Nutty Surprise: Stir in some finely chopped pecans or walnuts to the biscuit dough or sprinkle them on top of the glaze.Caramel Drizzle Finish: Instead of the cream cheese glaze, drizzle caramel sauce over the top. It’s decadent, sticky, and dayum good!Make It Vegan: Use plant-based butter, almond milk, and a vegan cream cheese for the glaze. Swap the buttermilk with almond milk and lemon juice, and boom! You’ve got vegan cinnamon butter swim biscuits.
 Expert Tips and Tricks for making the best cinnamon buttermilk biscuitsSpin That Pan: About halfway through the bake, give your pan a spin in the oven. This helps the biscuits bake up and brown evenly.Go Easy on the Mixing: Be gentle with the dough, boos. Overmixing can make your biscuits tough, and nobody wants that!Room Temp Ingredients: Let your cream cheese and butter for the glaze come to room temp before mixing. Cold ingredients can make the glaze lumpy.Don’t Rush the Cool Down: I know y’all wanna dig right in, but let the biscuits rest for about 10 minutes after baking before adding the glaze. It gives the cinnamon butter time to settle in and keeps the glaze from melting off too fast.How to store & reheat Cinnamon Roll Butter Swim Biscuits
If you haven’t glazed them yet, you can keep the biscuits at room temp in an airtight container and store the glaze separately in the fridge. But if you’ve already gone full-on with the glaze, they need to chill in the fridge to keep that cream cheese fresh. Just pop them in an airtight container, and you’re good!
To reheat from the fridge, zap the biscuits in the microwave for about 10-15 seconds. They’ll be warm, soft, and ready to devour!
How long will Cinnamon Roll Butter Swim Biscuits last?These biscuits will stay fresh for up to 2 days at room temp (unglazed) or about 4-5 days in the fridge (glazed).
Can I freeze cinnamon butter biscuits?Absolutely, boos! Store the unglazed biscuits in a freezer-safe bag or container, and they’ll stay fresh for up to 3 months. Then thaw them at room temp, reheat for a few seconds in the microwave, and glaze them fresh.
 Frequently asked questionsCan I make these biscuits ahead of time?
 Fo sho! You can prep the brown sugar cinnamon butter and the biscuit dough the night before. Store the butter mixture covered in the fridge, and keep the dough chilled too. When you’re ready to bake, just assemble it all in the pan and pop it in the oven.
Can I use a bigger pan for this recipe?Yup! I used an 8×8 pan, but a 9×9 works just as well.
Do I have to use cream cheese for the glaze?Not at all! You can make a simple powdered sugar glaze with milk and vanilla.

These Cinnamon Roll Butter Swim Biscuits are my sweet, cinnamony twist on the classic. Same buttery goodness, but now with a swirl of brown sugar and cinnamon baked right in, and let me tell ya, they’re the kinda biscuits that’ll make you cancel all your plans!
More Roll & Biscuit RecipesBlueberry Lemon BiscuitsEasy Cinnamon RollsPumpkin Cinnamon Rolls with Maple FrostingLemon Cinnamon Rolls (NO YEAST!)Honey Butter BiscuitsCathead BiscuitsCinnamon Roll Biscuits (With How To Video!) PrintCinnamon Roll Butter Swim Biscuits#wprm-recipe-user-rating-0 .wprm-rating-star.wprm-rating-star-full svg * { fill: #343434; }#wprm-recipe-user-rating-0 .wprm-rating-star.wprm-rating-star-33 svg * { fill: url(#wprm-recipe-user-rating-0-33); }#wprm-recipe-user-rating-0 .wprm-rating-star.wprm-rating-star-50 svg * { fill: url(#wprm-recipe-user-rating-0-50); }#wprm-recipe-user-rating-0 .wprm-rating-star.wprm-rating-star-66 svg * { fill: url(#wprm-recipe-user-rating-0-66); }linearGradient#wprm-recipe-user-rating-0-33 stop { stop-color: #343434; }linearGradient#wprm-recipe-user-rating-0-50 stop { stop-color: #343434; }linearGradient#wprm-recipe-user-rating-0-66 stop { stop-color: #343434; }Say hello to the mashup of Cinnamon Roll Butter Swim Biscuits! It's got all the cinnamon roll flava in a buttery, butter swim biscuit!Course DessertCuisine AmericanPrep Time 20 minutes minutesCook Time 30 minutes minutesCooling Time 10 minutes minutesTotal Time 1 hour hourServings 9 servingsCalories 397kcalAuthor Jocelyn Delk AdamsEquipmentMixing Bowls9×9 baking panIngredientsFor the Cinnamon Butter6 tablespoons light brown sugar1 ½ teaspoons ground cinnamon1 teaspoon vanilla extract½ cup salted butter cut into chunksFor the Biscuits2 ½ cups all-purpose flour4 teaspoons baking powder½ teaspoon baking soda½ teaspoon kosher salt2 tablespoons granulated sugar1 ¾ cup buttermilkFor the Glaze4 ounces cream cheese softened2 tablespoons salted butter softened2 tablespoons milk¾ cup confectioners’ sugar½ teaspoon vanilla extractInstructionsPreheat the oven to 350°F and set the rack in the middle position.To make the cinnamon butter, stir together brown sugar, cinnamon, and vanilla and set aside.Add the chunks of salted butter to a 8×8 baking pan or 9×9 baking pan. Sprinkle the sugar mixture on top of the butter in the pan. Place the pan in the oven until the mixture is fragrant and the butter has melted, about 6-8 minutes.Meanwhile begin on the biscuits. In a large bowl, stir together the flour, baking powder, baking soda, salt, and sugar until evenly combined. Slowly stir in the buttermilk and fold gently with a spatula or wooden spoon until you have a biscuit dough. Do not overmix. It will look wet.Once the butter has melted in the oven, remove the pan from the oven and add in biscuit dough. Carefully and gently fold the cinnamon butter mixture into the dough and spread evenly into the corners.Place the pan back in the oven and bake until the top is crusty and golden brown, about 25-28 minutes.Remove from the oven and let cool for 10 minutes.Meanwhile, make the glaze. Whisk together the cream cheese, butter and milk first to loosen the heavier ingredients. Then add the vanilla extract and confectioner’s sugar, mixing until creamy and smooth. Once cooled, smear glaze onto the biscuits. Cut into 9 even squares and enjoy warm!NotesSpin That Pan: About halfway through the bake, give your pan a spin in the oven. This helps the biscuits bake up and brown evenly.Go Easy on the Mixing: Be gentle with the dough, boos. Overmixing can make your biscuits tough, and nobody wants that!Room Temp Ingredients: Let your cream cheese and butter for the glaze come to room temp before mixing. Cold ingredients can make the glaze lumpy.Don’t Rush the Cool Down: I know y’all wanna dig right in, but let the biscuits rest for about 10 minutes after baking before adding the glaze. It gives the cinnamon butter time to settle in and keeps the glaze from melting off too fast.NutritionCalories: 397kcal | Carbohydrates: 51g | Protein: 6g | Fat: 19g | Saturated Fat: 12g | Polyunsaturated Fat: 1g | Monounsaturated Fat: 5g | Trans Fat: 1g | Cholesterol: 52mg | Sodium: 573mg | Potassium: 139mg | Fiber: 1g | Sugar: 23g | Vitamin A: 645IU | Vitamin C: 0.01mg | Calcium: 194mg | Iron: 2mg
The post Cinnamon Roll Butter Swim Biscuits appeared first on Grandbaby Cakes.
December 23, 2024
Chicken and Dumpling Soup
 The Lowdown on This Chicken and Dumpling Soup
When the weather’s got you bundling up and craving something warm and cozy, a big ol’ pot of Chicken and Dumpling Soup is exactly what you need in your life!
It’s loaded with tender chunks of chicken, nutritious veggies, and the fluffiest Parmesan dumplings you ever did taste. It’s pure liquid comfort boos, and WAY easier than you’d think to pull together. Y’all are gonna wanna bookmark this one!
Before y’all say “boo, don’t you already have a Southern chicken and dumplings recipe on the page?”, hear me out! That one’s made with rotisserie chicken and classic buttermilk dumplings, and it’s still a total keeper.
But this version? Oh, it’s on a whole other level boos! Juicy chicken thighs, pillowy Parmesan dumplings, and all that cozy goodness in one pot. And the best part? You can whip it up just as fast! Even my daughter Harmony goes wild for it, and y’all know kids are the toughest food critics.
Ingredients you’ll need to make Chicken and Dumpling Soup For the SoupChicken Thighs: Boneless, skinless chicken thighs. They stay juicy and tender while simmering away.Butter: Adds richness and helps everything sauté beautifully.Veggies: You’ll need yellow onion, celery, and carrots. These three are the holy trinity of soup bases.Garlic: Minced garlic is non-negotiable y’all! It’s the key to that deep, savory flavor that makes the broth irresistible.Chicken Stock: A good-quality broth or homemade stock will make all the difference here.Half and Half: Adds just a touch of creaminess without making the soup heavy.Spices: Dried thyme and turmeric add warmth and earthy flavor. Plus, turmeric gives the broth that gorgeous golden color. Add salt and black pepper to taste.For the Parmesan DumplingsAll-Purpose Flour: The base for your dreamy homemade dumplings.Baking Powder: This is the secret to big, pillowy dumplings that practically melt in your mouth. Some folks like their dumplings flat and chewy, but I’m team thick and fluffy all the way!Parmesan Cheese: Because life is great, but cheese makes it better!Buttermilk: Keeps the dumplings tender and flavorful.Egg: The binder for the dumplings.Italian Parsley: Chopped fresh parsley adds a pop of color and herby flavor.How to make Chicken and Dumpling Soup Step 1: Cook the Chicken and the Veggies
  1 Season the chicken thigh pieces with kosher salt and black pepper.
  2 Melt butter in large Dutch oven over medium high heat. Add seasoned chicken.
 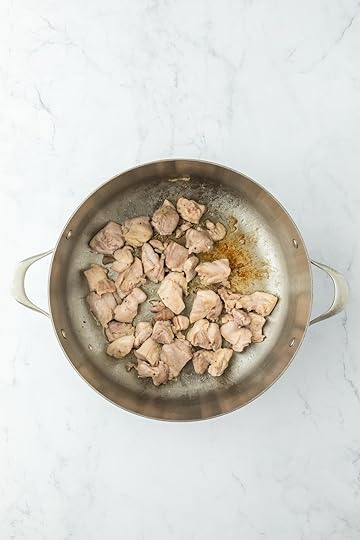 3 Cook until it starts to brown, then flip on the other side and continue to cook. Brown bits should appear at the bottom of the pot. Then, remove the chicken onto a plate and set aside.
  4 Add butter, diced onion, celery, and carrot along with kosher salt and black pepper. Cook until vegetables become translucent around the edges.
  5 Add in minced garlic, thyme, and turmeric and cook. Step 2: Build the Broth
 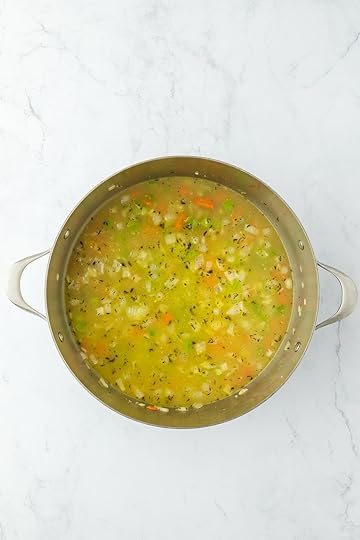 6 Slowly pour in chicken stock while scraping the brown bits from the bottom of the pan, incorporating them into the soup.
  7 Bring to a boil, then add chicken back to the pot and kosher salt. Reduce heat to medium low and continue cooking until chicken is cooked and broth is flavorful. Step 3: Make the Dumplings and Add ‘Em to the Broth!
  8 Whisk together flour, baking powder, salt, black pepper, parsley, and Parmesan into a medium bowl.
 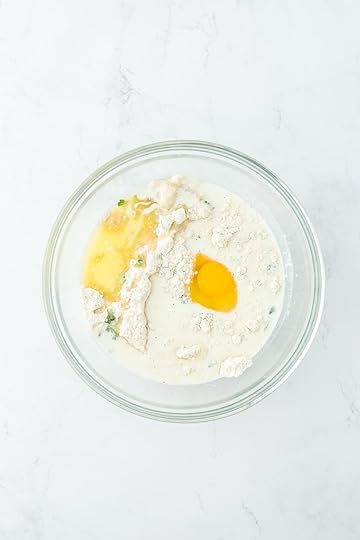 9 Pour in buttermilk, egg, and melted butter.
  10 Mix until a wet dough forms.
  11 Scoop 2 tablespoon-sized spoonfuls of the dumpling dough into the simmering broth.
  12 Cover and cook until the dumplings are puffed and cooked through.
  13 Gently stir half and half into soup and let cook, not allowing the soup to come to a boil. Taste and add additional salt and pepper, if needed, then serve immediately and enjoy! What to serve with this easy chicken and dumpling soupWith Salad: Keep it fresh with a cucumber and onion salad, a tangy coleslaw, or a harvest fall salad depending on the season.Get Bready: Soup and bread just go together! Whip up some Jiffy cornbread muffins, buttery yeast rolls, or a skillet of Mexican cornbread for dunkin’.Southern Sides: Go all in with classic sides like fried okra, creamy mashed potatoes, or some savory collard greens.Get Your Dessert On: End on a sweet note with a slice of whipping cream pound cake, peach cobbler, or creme brulee pound cake. You really can’t go wrong! Menu Option: Cozy Dinner With Chicken and Dumpling Soup
  This broccoli cheese casserole is creamy, cheesy, and loaded with tender broccoli, onions, garlic, and buttery crackers.
  These fried cornbread patties are crispy on the outside, soft on the inside, and an easy Southern side that’s perfect with chicken and dumpling soup!
  This Southern sweet tea is the real deal, y’all! Easy to make with simple ingredients.
 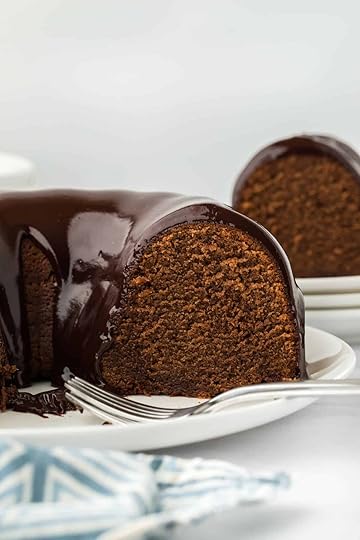 My chocolate pound cake is rich, fudgy, and full of that deep chocolate flavor! A great ending for a cozy weeknight dinner. Recipe SubstitutionsChicken Thighs: If you’ve only got chicken breasts on hand, go ahead and use them. Just know they’re a little leaner, so keep an eye on cooking time to avoid drying them out.Half and Half: A splash of whole milk works for a lighter broth, or go richer with heavy cream.Parmesan Cheese: Swap in Pecorino Romano if you want a sharper, saltier flavor in your dumplings.Flour: For gluten-free dumplings use a 1:1 gluten-free baking flour that’s meant for biscuits or pancakes.Buttermilk: Mix a tablespoon of lemon juice or vinegar into regular milk and let it sit for 5 minutes. Boom, homemade buttermilk!Recipe Variations and AdditionsAdd More Veggies: Toss in peas, green beans, or even diced potatoes to make this chicken dumpling soup recipe heartier.Amp Up the Herbs: A sprinkle of fresh thyme, rosemary, or even parsley in the broth will take the flavor up a notch.Turkey Swap: Switch up the chicken for turkey, especially if you’ve got leftovers from the holidays. Turkey and dumplings? Yes please!Spice It Up: If it’s extremely chilly outside, add a pinch of cayenne or smoked paprika to the broth for sum heat!
 Expert Tips and Tricks for making the best chicken dumpling soup recipeChop Veggies Small: Dice those veggies nice and small, boos. It helps them cook evenly and blend into the soup.Don’t Overwork the Dough: When mixing your dumpling dough, keep it gentle. Overworking it can make your dumplings dense and tough.Keep It Simmering: Let the broth stay at a gentle simmer while cooking the soup and dumplings. If it starts boiling like crazy, it can scorch the soup or make the dumplings fall apart.No Cookie Scoop? No Biggie: If you don’t have a cookie scoop, just use two spoons. Scoop a little dough with one, and use the other to push it into the simmering broth. Easy peasy y’all!How to store & reheat Chicken and Dumpling Soup
Cool down those leftovers to room temp before storing. Then, place the soup in an airtight container and pop it in the fridge. When reheating, keep it gentle on the stove boos! No wild boiling, or you might curdle the dairy.
How long will Chicken and Dumpling Soup last in the fridge?In the fridge, this soup is good for about 3 days, but you’ll probably polish it off before then!
Can I freeze homemade dumplings for chicken and dumplings ?Yup! You can freeze the broth and dumpling dough separately. The broth will stay good for up to 3 months in the freezer. The dumpling dough can be frozen for about a month, just thaw it overnight in the fridge before using.
 Frequently asked questionsCan I make this easy chicken and dumpling soup ahead of time?
 Yes! To make ahead and freeze, complete the soup through step 4, then let it cool to room temperature. Store the soup base in an airtight container and freeze for up to 1 month. When you’re ready to serve, reheat it at a gentle simmer, then pick up where you left off with steps 5-7.
What biscuits are better? Flat noodle dumplings or drop biscuit dumplings?That’s all personal taste boos! Some people love flat, chewy noodle-style dumplings, but I’m all about those thick, fluffy drop biscuit dumplings. Just go with what you love!
Why aren’t my dumplings cooking through?Make sure you’ve got a tight-fitting lid on your Dutch oven, and keep the soup at a steady simmer. If the heat’s too low, the dumplings won’t puff up or cook all the way.
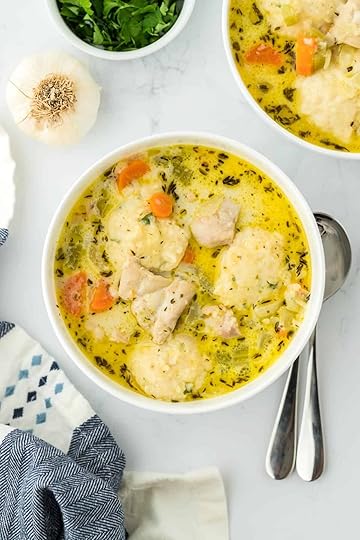
This Chicken and Dumpling Soup is sprinkled with Southern love and perfect for those nights when you need something warm, cozy, and easy to make. When the weather starts actin’ up or you’ve only got a few minutes to throw dinner together, this recipe’s your saving grace. Get into it boos!
More Soup RecipesSouthern Chicken and DumplingsSlow Cooker Chicken Noodle SoupCreamy Chicken Noodle Soup RecipePotato Soup Recipe with Crunchy KaleItalian Wedding Soup PrintChicken and Dumpling Soup#wprm-recipe-user-rating-0 .wprm-rating-star.wprm-rating-star-full svg * { fill: #343434; }#wprm-recipe-user-rating-0 .wprm-rating-star.wprm-rating-star-33 svg * { fill: url(#wprm-recipe-user-rating-0-33); }#wprm-recipe-user-rating-0 .wprm-rating-star.wprm-rating-star-50 svg * { fill: url(#wprm-recipe-user-rating-0-50); }#wprm-recipe-user-rating-0 .wprm-rating-star.wprm-rating-star-66 svg * { fill: url(#wprm-recipe-user-rating-0-66); }linearGradient#wprm-recipe-user-rating-0-33 stop { stop-color: #343434; }linearGradient#wprm-recipe-user-rating-0-50 stop { stop-color: #343434; }linearGradient#wprm-recipe-user-rating-0-66 stop { stop-color: #343434; }This chicken and dumpling soup is the bee's knees y'all! It's crazy good and super easy to make, it's pretty much it's own food group!Course Main CourseCuisine AmericanPrep Time 10 minutes minutesCook Time 45 minutes minutesTotal Time 55 minutes minutesServings 10 cupsCalories 369kcalAuthor Jocelyn Delk AdamsEquipmentDutch OvenIngredientsFor the Soup1 ½ pounds boneless, skinless chicken thighs trimmed, cut into 1-inch pieces4 tablespoons unsalted butter divided1 ½ cups yellow onion diced 1 ½ cups celery diced, about 5 ribs1 cup carrots diced, about 4 medium carrots4 cloves garlic minced1 teaspoon dried thyme¾ teaspoon ground turmeric7 cups chicken stock1 1/3 cup half and halfKosher saltBlack pepperFor the Parmesan Dumplings1 ½ cups all-purpose flour1 ½ teaspoon baking powder½ teaspoon kosher salt¼ teaspoon black pepper1/3 cup Italian parsley finely chopped 4 tablespoons Parmesan cheese grated¾ cup buttermilk1 large egg3 tablespoons unsalted butter meltedInstructionsSeason the chicken thigh pieces with ½ teaspoon kosher salt and ¼ teaspoon black pepper.Then melt 1 tablespoon butter in large Dutch oven over medium high heat. Add seasoned chicken. Cook for 3-4 minutes until it starts to brown, then flip on the other side and continue to cook for another 3 minutes. Brown bits should appear at the bottom of the pot.Remove the chicken onto a plate and set aside. Add in remaining 3 tablespoons butter, diced onion, celery, and carrot along with 1 teaspoon kosher salt and another ¼ teaspoon black pepper. Cook for about 3-4 minutes until vegetables become translucent around the edges. Do not overcook the vegetables. (Reduce heat if the brown bits start to get too dark to avoid burning.)Add in minced garlic, thyme, and turmeric and cook for an additional 30 seconds. Slowly pour in chicken stock while scraping the brown bits from the bottom of the pan, incorporating them into the soup. Bring to a boil, then add chicken back to the pot and 1 teaspoon kosher salt. Reduce heat to medium low and continue cooking until chicken is cooked and broth is flavorful, about 8-10 minutes.Meanwhile, start preparing your dumplings by whisking together the flour, baking powder, salt, black pepper, parsley, and Parmesan into a medium bowl. Stir in the buttermilk, egg, and melted butter until a wet dough forms.Scoop 2 tablespoon-sized spoonfuls (#40 scoop) of the dumpling dough into the simmering broth. Cover and cook for 15 -18 minutes until the dumplings are puffed and cooked through. (To test the doneness of dumplings, remove one and cut into it to see that it’s fully cooked inside. If not, continue cooking for a couple more minutes.)Gently stir half and half into soup and let cook another 5 minutes, not allowing the soup to come to a boil. Taste and add additional salt and pepper, if needed, then serve immediately and enjoy!NotesChop Veggies Small: Dice those veggies nice and small, boos. It helps them cook evenly and blend into the soup.Don’t Overwork the Dough: When mixing your dumpling dough, keep it gentle. Overworking it can make your dumplings dense and tough.Keep It Simmering: Let the broth stay at a gentle simmer while cooking the soup and dumplings. If it starts boiling like crazy, it can scorch the soup or make the dumplings fall apart.No Cookie Scoop? No Biggie: If you don’t have a cookie scoop, just use two spoons. Scoop a little dough with one, and use the other to push it into the simmering broth. Easy peasy y’all!NutritionCalories: 369kcal | Carbohydrates: 28g | Protein: 23g | Fat: 18g | Saturated Fat: 9g | Polyunsaturated Fat: 2g | Monounsaturated Fat: 6g | Trans Fat: 0.3g | Cholesterol: 122mg | Sodium: 585mg | Potassium: 579mg | Fiber: 2g | Sugar: 7g | Vitamin A: 2831IU | Vitamin C: 7mg | Calcium: 150mg | Iron: 2mg
The post Chicken and Dumpling Soup appeared first on Grandbaby Cakes.