Tuesday Tutorial: Bublish
All right everyone. I will take the plunge and try my hand at a tutorial. Let me tell you about Bublish and guide you through how to use it. Hey, if I can do this, anyone can. No, really, I mean it. Please do forgive the lack of artistry on the arrows. I am no artist.
Bublish has been around only since June of this year, so I had the good luck to be an early subscriber. Bublish is the brainchild of Kathy Meis and Charles Wyke-Smith. I have had extensive email contact with Kathy and she was kind enough to spend 40 minutes one-on-one with me when I hit a snag. (Thanks Kathy.) I have nothing but praise for the support I have received.
What makes Bublish unique is that it has the author take snippets of text from their book and asks them to write an insight about that snippet, then share it on Facebook and Twitter. Do this regularly and you will have tweets going out that are non-repetitive, interesting and – my favourite – not pushy buy my book spam messages. They are little hooks meant to entice a prospective reader to take a closer look at your work. Heck, they might even want to buy it. The links for buying are on the site, so that is just a click away.
Here’s where to start. Go to their site at www.bublish.com. There you will see a screen with an invitation to ‘sign up’ at the bottom left. Click on that button, which will bring you to the screen that asks you to set up your profile with your personal information, your password, bio, and your gravatar or author pic. So far this is much like any other set up page, so I did not see the need for a screen shot.
The next screen asks you to upload your book. This might make you hesitate at first, but be assured that your baby is safe from predators here. The upload is necessary, as you will see. With me so far?
Now your dashboard is set up. Mine looks like this. Note the arrow pointing to the “Create a Bubble” box. On mine there are two options; one for each book. 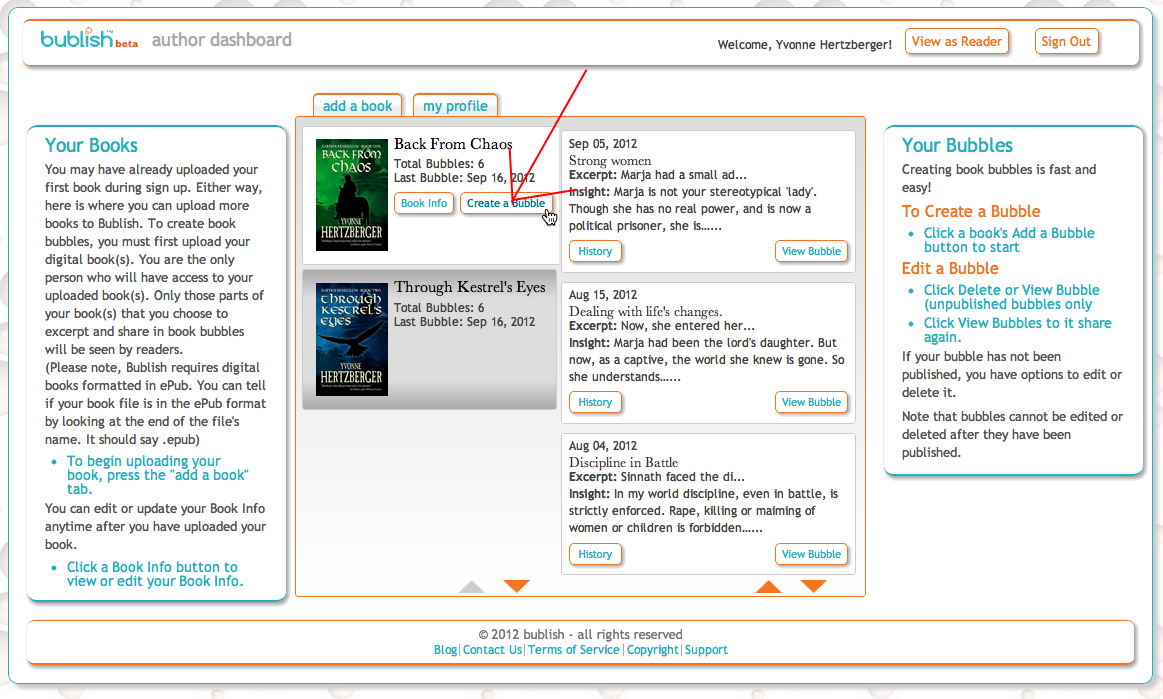
Click on the one for the book you wish to focus on.
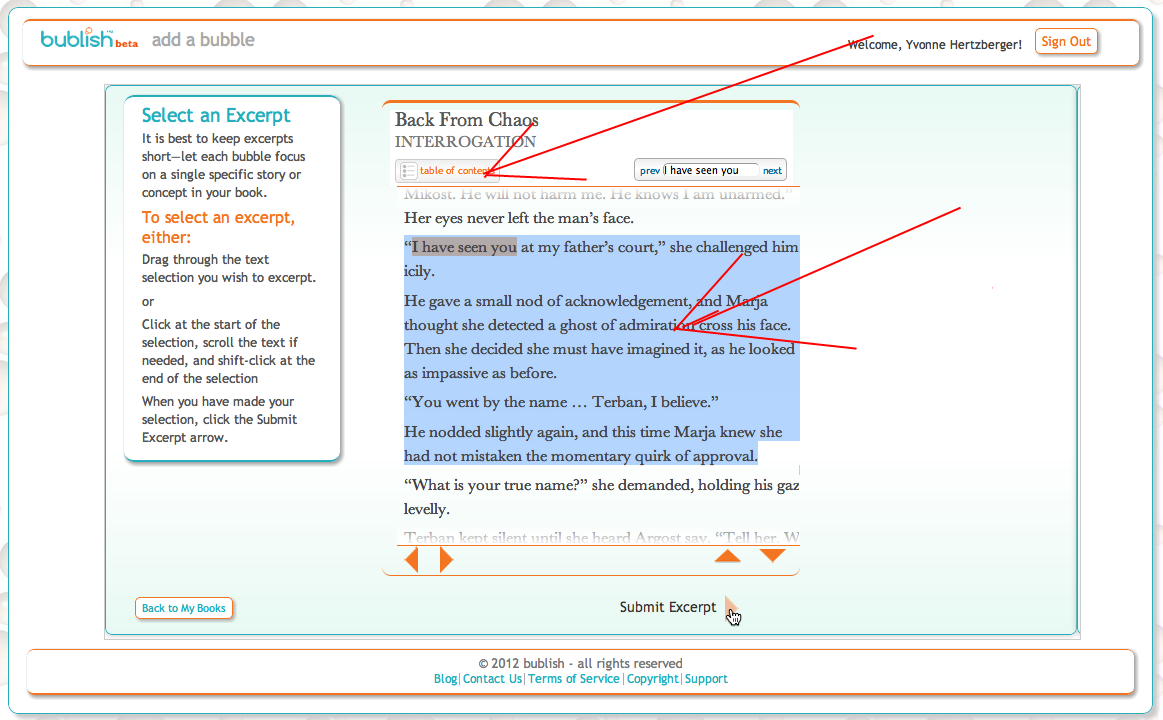
The next screen looks like this (below). The top arrow points to your Table of contents. Click this to scroll until you find the excerpt you wish to use for your Bubble. Highlight the excerpt (right click on the mouse to highlight) and click the “submit excerpt” box below.
 This takes you to the next screen which looks like this. On the left is the excerpt you chose. At the right, top, is a space for the title of your “insight”. The box below is where you will say something about your excerpt that will entice the reader to take a closer look. In my opinion this is the most important element of the whole exercise. This is where you can speak to your motivation for that piece, share a tidbit about the personality of a character, the importance of that scene to the story – anything you choose. Its purpose is to entice the reader to dig just a bit deeper.
If you are happy with the result click on the “publish and preview” box at the bottom of the screen. (red circle)
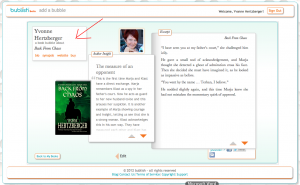 The next screen gives you a look at what the reader who visits your bubble will see. Note the square at the top left. This is where your reader can find how to buy your book. Your mug shot is here, as well as the cover of the book and both the excerpt and insight you chose. If you don’t like what you see you can click “edit” and go back to fix things. If you are happy with the result click “publish”. You may choose either facebook or twitter.
That’s all there is to it. It doesn’t take much time to set up. After that creating bubbles is a few minutes once or twice weekly. Have fun.
I did ask Kathy about using longer excerpts. I chose to follow her advice and keep them short. I have since come to see the wisdom in that. It allows you to send more bubbles over a longer period to keep up interest. And it prevents you from giving away too much at once. The bubbles are meant to be little aha’s, not essays.
What the Bublish team does with your bubble is to tweet phrases from it. You will receive notifications for these which you can retweet. This is why I choose to publish my bubbles to Facebook. My friends get to see them there, and I retweet the notices Bublish sends me. Since the tweets are far enough apart it allows my followers on both Facebook and Twitter more than one opportunity to see my bubbles without bombarding them with promos and spamming them.
If you wish to watch a video tutorial in the event that I have been unclear or you are in need of more than I have provided here, Kathy at Bublish has provided me with this link. http://www.serendipitestudios.com/2012/08/bublish-premiers-first-demo-video/ If you ever run into difficulties or questions Kathy will respond to you promptly.