
Animations & Interactions in Design: Creating the Navigation Drawer

The navigation drawer is one of the most popular, modern, web and mobile patterns. When the space is limited and your primary navigation pattern isn’t crucial for the business goal, nothing works better than the good ol’ drawer.
In this post, we’ll take you step-by-step on building one.

The drawer panel allows you to hide the navigation beyond the left or right edge of the screen and reveal it only after a user’s actions. This pattern can be particularly useful if you want your user to focus on the main content.
Prototyping the drawer used to require certain code skills, but with the latest addition of advanced animation editor, UXPin made it as easy as 1-2-3. It takes no more than 10 minutes to create a full-blown navigation drawer. Log in to your UXPin account (or start a free trial) and let’s get started.
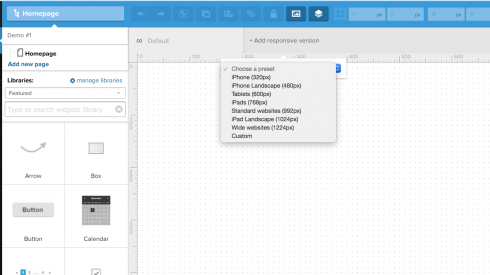
1. First, we have to specify the width of the canvas. We’ll do it with the responsive breakpoint. If you’re designing for the iPhone 5s then choose 320px.
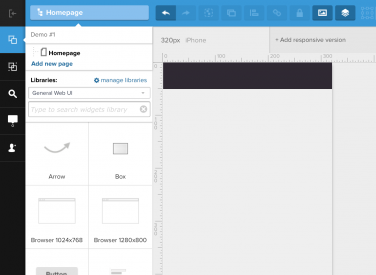
2. With the canvas ready, it’s time to start designing. Add the top bar and background using “Box” elements. The box is available in “General Web UI library.” Using a variety of UXPin’s libraries you can quickly build whatever you want.
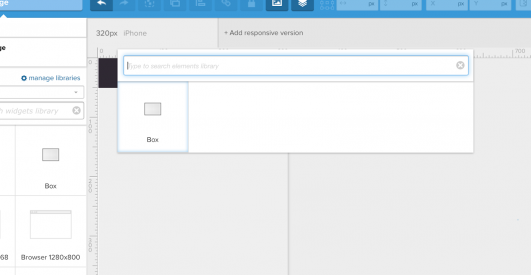
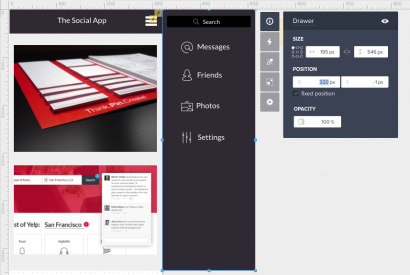
3. For a quick navigation, use “search” (shortcut: cmd+f on Macs, ctrl+f on PCs).
4. Don’t forget to add the infamous “hamburger icon” or any other symbol representing menu (use search to browse all the icons libraries in UXPin).
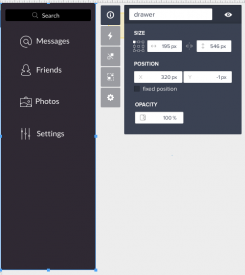
5. When your main screen is ready, build the drawer menu. Place it outside of the canvas. To start with, it should touch the right edge of your main screen.
6. Select every element constituting the menu and group them together (cmd+g on Macs, ctrl+g on PCs; or button in the top menu). For easy future reference, change the group’s name “Drawer.” Depending on your design of the “main screen” you might also want to group to help with the fluidity of the animation.
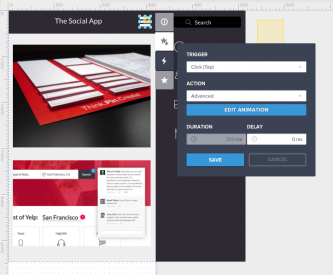
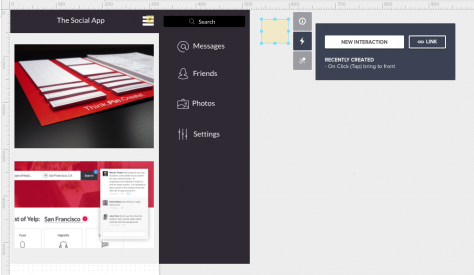
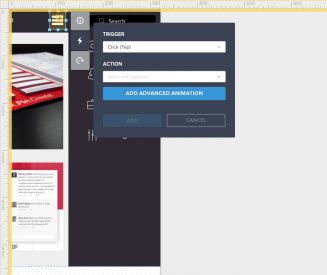
7. Time for interactions. Left-click on the hamburger icon and from the properties manager menu choose “interactions” with the “click (tap)” trigger and “add advanced animation” instead of “action.” That’s your first step to a great navigation drawer.
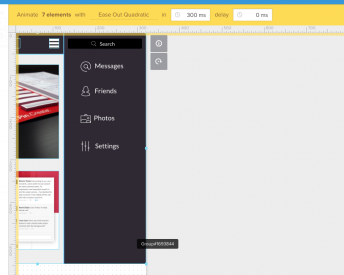
8. In the advanced animations editor, select all of the elements and drag them to the left. The far right edge of the menu should touch the edge of the 320px-width canvas.
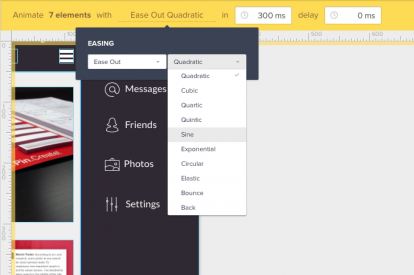
9. We’re almost there. Time to make things smoother. In the top menu choose the kind of animation, you would like to use. I’m going to use “Elastic” with “Ease In.”

10. You got it. Just click “save” and simulate your design using UXPin Preview or send it directly to your mobile phone.
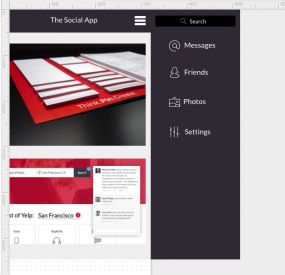
It’s ready!
[image error]
Do you want to make it even better? Take a look at some advanced options for the navigation drawer.
How to add “a come back”
We have to start with something slightly counter-intuitive. Bear with me.
1. Since each element can only have one advanced animation with the same trigger assigned, we need to drop “a hot spot” (element available in General Web UI library) anywhere outside of the canvas.
2. Now click on your hamburger icon and enter into edit mode of your advanced animation.

3. While in “Advanced Animations Editor” move your hotspot directly above “the hamburger icon” and add Advanced Animation to it.
4. You just entered advanced animation within advanced animation. Sounds scary, right? Have no fear. UXPin will automatically add a “come back” as the second step in the animation, so just click “save.”
5. Might be hard to believe, but you’re done! Check your design in UXPin preview. Smooth, huh?
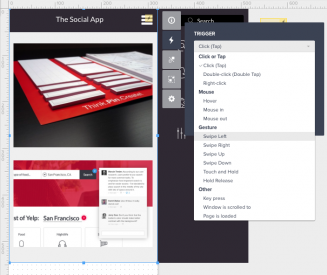
How to show the navigation drawer on swipe to the left and hide it on swipe to the right
Ah, swipes! They used to be impossible for prototyping tools. Not for UXPin though! Let me walk you through the process.
1. Click on the main content group and add interaction: trigger “on swipe left” with action: “advanced animation.”
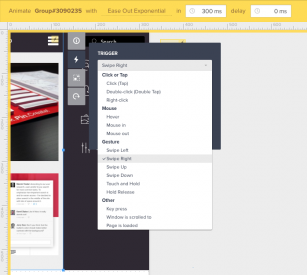
2. In the advanced animation editor, move all of the content to the left. The right edge of the navigation drawer should touch the right edge of the canvas. Click on the main content group and add interaction: trigger “on swipe right,” action “advanced animation.” UXPin will automatically generate a “come back” to the previous state. Click “save.”
3. Done! Test it on the UXPin preview, or send it to your mobile phone.
How to make “left-side” navigation drawer
Time for the real troublemaker. Let’s create “left-side” navigation drawer.
Click on the drawer navigation and set horizontal position (x) to –200 in its properties. It will disappear from the screen, but don’t worry! Trust me, everything will be fine.
3. Add an advanced animation to the hamburger icon.
4. In the advanced animation editor, open “layers.”

5. Select “Drawer” from the list of layers and change its horizontal position (you can use the top bar) to 0px.

6. Now, just move the main content group to the left and click “save.”
7. To add a come back on the left-swipe, edit the advanced animation attached to the main screen and add swipe-left animation while inside of the animations editor.
8. Done! Test it on UXPin preview, or send it to your mobile phone.

Hope you enjoyed this tutorial. Now play with UXPin on your own! The possibilities are endless.


UXpin's Blog

- UXpin's profile
- 68 followers

