Making Your First FastPass+ Reservations
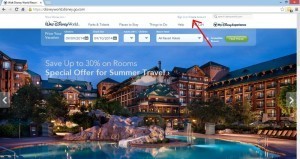
Photo 1
FastPass+ is not only the future of trip planning at Walt Disney World, it is the present. For those of you who have grown familiar with FASTPASS since its introduction in 1999, FastPass+ is a similar system although using more current technology. In short, what FastPass+ does is allow you to make a reservation for a ride or show at Disney World from a computer, smart phone, or in-park kiosk. So, how does all of this work?
When Can I Make FastPass+ Reservations?
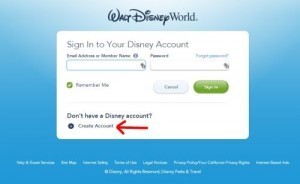
Photo 2
The answer is…it depends. Disney can’t just make it easy, can they? There are a few different options depending on where you are staying and what type of ticket you have. If you have not purchased park tickets you will not be able to make FastPass+ reservations.
If you are…
- Staying at a Disney World resort: You can make your FastPass+ reservations 60 days in advance in addition to a 10 day grace period. For instance, if your check in day is December 1, you may make FastPass+ reservations for your first day on October 2. The 10 day grace period means that on October 2 you may also make reservations for all days up to December 10, even though they are more than 60 days away.
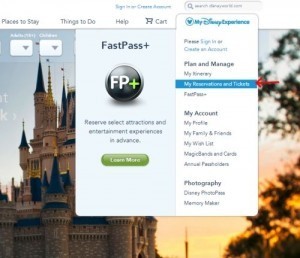
Photo 3
- Staying at a non-Disney resort: You will be able to make your FastPass+ reservations 30 days in advance.
- An Annual Pass holder: You will be able to make your FastPass+ reservations 30 days in advance.
How Do I Make FastPass+ Reservations?
FastPass+ reservations can be made from home using either an internet-accessible computer or a smartphone. Unless you are very comfortable with the My Disney Experience smartphone app, we suggest you make your reservations on a computer via the Walt Disney World Website. To do that takes quite a few steps, but is very easy to do.
Navigate your web browser to Disneyworld.disney.go.com
Photo 4
Click on “Sign in or Create Account” on the top left as pictured in photo 1.
If you already have a Disney account, sign in. Otherwise, select “Create Account” as pictured in photo 2. If you already have a Disney account skip to step 6.
You will need an email address in order to create an account with Disney. If you do not have an email address, we suggest setting up a free Gmail account, although there are also other free services such as Yahoo and Hotmail.
Photo 5
Before creating your account you will fill out very pertinent information such as name, address, and the serial number of the bicycle you had when you were 8 years old (not really, but Disney does ask for a lot). Once you create security questions and accept the terms of use, click “Done” at the bottom. This will take you back to the main Disney World page, where you will already be logged in. Please keep track of your email address and password as you will need it to log in every time you need to make any FastPass+ changes.
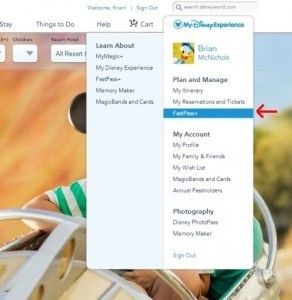
Now you will need to link your tickets to your Disney account. From the main page, hover the mouse over “MyDisneyExperience” at the top right and click on “My Reservations and Tickets,” as pictured in photo 3.
Photo 6
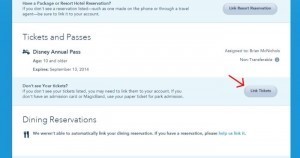
On the next screen, scroll down until you see the header “Tickets and Passes.” If your tickets are already listed there, go back to the main page and skip ahead to step 10. If not, click on “Link Tickets” as pictured in photo 4.
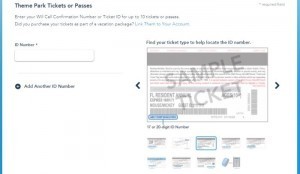
If you have a Magic Band you can type the 12 digit number from the inside of it in the box on the left. Otherwise, scroll through the various types of tickets (as shown in photo 5) to find the one that looks like yours and type the highlighted ID Number into the box. Click Next.
Before you get back to Fastpasses you will need to assign the ticket to yourself, which is done easily by checking the mark next to your name then clicking Next.
Now we are finally ready to make some FastPass+ reservations! From the main page, hover over “MyDisneyExperience” at the top right and click on “FastPass+,” as seen in photo 6.
Photo 7
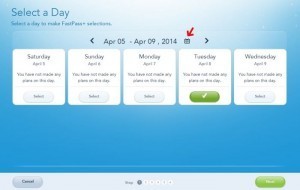
The next screen will ask you to select a day that you would like to choose FastPasses for (photo 7). You will only be able to select days that you are eligible for FastPasses. Clicking the calendar icon (indicated by the arrow in the photo) will allow you to select a specific day. Once you click “Select” on a day, the oval will turn green. Click Next.
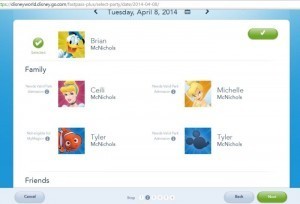
Next, select who the selected FastPasses will be for as shown in photo 8 (Note that only those who have tickets assigned to them will be eligible). Click Next.
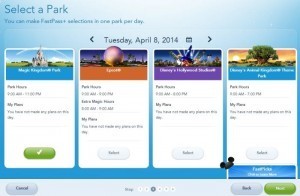
On the following screen, shown in photo 9, you can select the park you want the FastPasses for. As of this writing you may only select FastPasses for one park per day. Click Next.
Photo 8
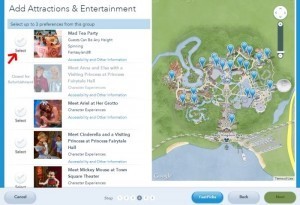
Finally, it’s time to start selecting FastPasses! As shown in photo 10, the selection screen is split into two sides with the rides, shows, and character meetings on the left and a map on the right. Scrolling through the list on the left will show you all of your options. Clicking on the “Select” checkmark (the arrow in the photo) will select that FastPass+ for you. If there is no “Select” checkmark, that FastPass+ is not available for that day.
As you select your FastPasses, the checkmarks will turn green and the map will move to show you where that particular attraction is, as shown in photo 11. You are allowed to select 3 FastPass+ reservations in any one day and a weird quirk is that you must select 3. If you only select 1 or 2, Disney will automatically assign you a third, so you are better off just picking 3. Once you have chosen your 3, click Next.
Photo 9
The next screen, shown in photo 12, gives you four options of FastPass+ times for the attractions you selected. In general, the options will give you a range from all morning times, to all afternoon times, to times spread throughout the day. By clicking on the tabs at the top (indicated by the red lines in the photo) you can see the different options. When you see one you like best, click Next.
Congratulations! You have now confirmed your FastPass+ reservations (photo 13)! If you would like to make more reservations for a different day, click “Plan Another Day” and go back to Step 11. Otherwise, click Next.
Photo 10
How do I See What FastPass+ Reservations I Have?
Compared to all the steps you just went through to make your FastPass+ reservations, checking them is easy. From the main screen, hover over “MyDisneyExperience” and click “My Reservations and Tickets,” as shown in photo 3.
Now, when you scroll down to the FastPass+ section you will see all of your FastPass+ reservations, as shown in photo 13.
That’s it! Only 17 steps and you are all set up with your FastPass+ reservations. Coming next will be a guide on how to use your smartphone to make changes or new reservations. Please let us know if you have any questions.
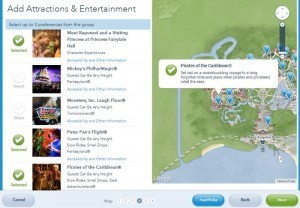
Photo 11
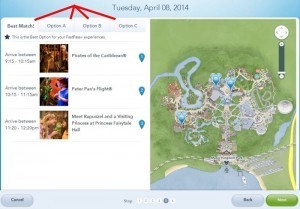
Photo 12
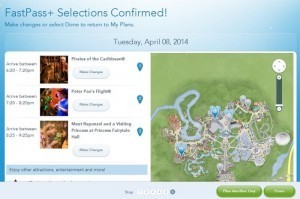
Photo 13
• Facebook • Twitter • Google Plus • Pinterest
Making Your First FastPass+ Reservations is a post from the TouringPlans.com Blog. Signup for a premium subscription today! Or get news via Email, Twitter, & Facebook.

Bob Sehlinger's Blog
- Bob Sehlinger's profile
- 30 followers


