
We Discovered the Easiest Way to Mock-Up a Room Design Plan (It’s Not Photoshop)
When I was 16 I decided I wanted to start learning about interior design for the same reason everyone wants start to learning about interior design: my room was ugly and I wanted to redecorate. So I bought two interior design books: Domino’s Book of Decorating and Elements of Style (obviously because Emily’s book wasn’t out yet, okay???) and googled “what computer program do professional interior designers use?” The Google led me straight to a program called AutoCAD so I immediately downloaded the free trial. My thought process was: if I could teach myself photoshop, so how hard could it be to teach myself this? Well, after watching hours of free tutorials online and playing around with it, I realized it was VERY HARD, so I used an old fashioned sketchbook to draw out my room design. Flash forward 6 years later, I landed a job working for an interior design blog –– neigh –– THE INTERIOR DESIGN BLOG –– and I have a confession to make: I walked into the EHD office STILL not knowing what computer programs interior designers actually use.
So I’ll start by answering that million dollar question: what program do interior designers actually use?? Here at EHD, we use a bunch of different programs. Julie (who went to real interior design school) uses SketchUp and AutoCAD, but the vast majority of us use Photoshop and Google Slides. I’ll say that one more time in terms that are more relevant for this post. The EHD team uses 3 professional programs that cost money AND GOOGLE SLIDES. I couldn’t believe this news. This is a FREE program most people already have on their computers and know how to use. If you don’t know how to use it, it works the same way as PowerPoint or Keynote, and IT’S VERY EASY TO LEARN. So, when it came to designing my studio apartment, I revved up my Google Slides skills and got going. Here’s what I ended up with:

Now I have a couple of things to say here. First off, if you’ve been following my studio apartment saga at all, you may have noticed that this mood board looks completely different from the two versions I’ve shown you before. That’s because I’ve designed and redesigned this mood board probably 300 times. I know I just said “probably” but 300 is actually not an exaggeration. But THAT’S one of the main benefits to doing something like this on Google Slides, it makes switching around furniture pieces SO easy and it allows you to see the entire evolution of a room, so if you want to go back to where you started you can. I’ll get more into the details in a bit, but how we typically layout a room with Photoshop and Google Slides is by “wall” or “perspective” since these aren’t 3-D renderings. As you can see above that’s my bedroom wall or the perspective from the living room. Now let me show you another wall in my apartment where I took it from real life to a real design plan:
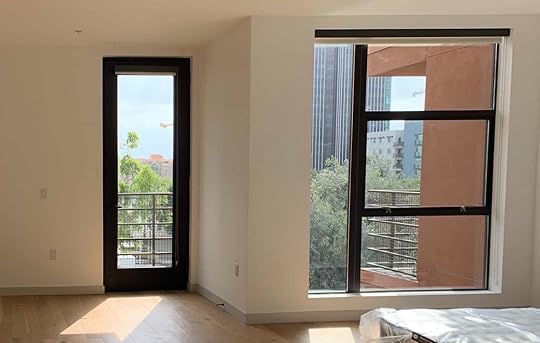
REAL LIFE ROOM:
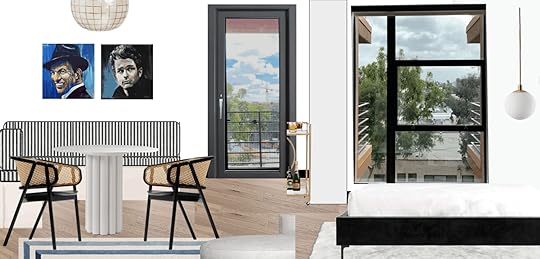
DESIGN PLAN MOCKUP:
I’m sure you get it at this point, but you can make as many of these as you want. I have almost every wall from every angle, but that’s just because I’m very visual and I want to see every detail laid out before I make any big design calls. So, now that you understand what it is exactly that I’m going to teach you how to do, it’s time to actually show you! I made a video tutorial if you’re into that sort of thing (note: it will play after the ad) but if not then, just skip it because I’m going to outline it all too.
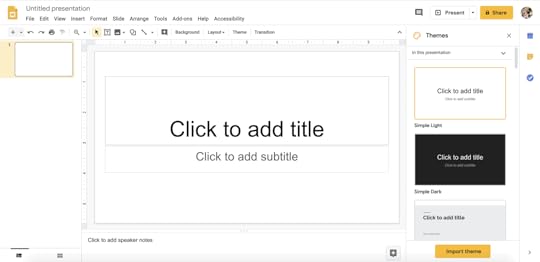
START A NEW GOOGLE SLIDE PRESENTATION
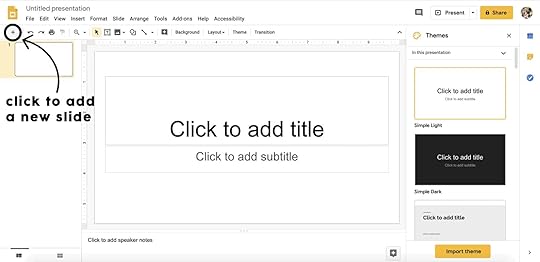
Google Slides is free and easy to use. Like I said, it’s basically PowerPoint or Keynote (which you could use instead if you’d rather), but Google Slides is a little easier to share with others and have them edit (which is especially helpful if you’re designing with roommates or a significant other that cares). So, the first thing you need to do is start a new presentation –– it should look something like this when you begin:
I like to give it a title and a title page, but obviously, you don’t have to. Click the little plus sign in the top left corner and make a new blank slide (not text boxes), then you’re pretty much set up to start adding in the goods (yup, it’s that easy).
START BUILDING YOUR SPACE
The next step is to start creating your space from the ground up (literally) so start with the floor. Take a photo of your apartment, OR…
Hot Tip
If your house or apartment or whatever you're designing has EVER been listed online, just google it, and find those professional real estate photos to pull from.
So, I found a professional picture of my apartment listing and took a screenshot of the floor. If you can only screenshot one small section of the floor because of furniture and what not in the photo, don’t worry. Just screenshot as much as you can, then drag that jpeg into your google slide presentation, and then copy and paste your image a bunch of times (like I did below) until you create the whole floor. This will apply to a lot of things once you start adding in furniture pieces (like wallpaper, tile, etc), so just remember that it’s more important to get the scale of your floor (or wallpaper, tile, etc) right than to stretch and morph your photo to try to make it fit across your screen.
If you don’t know how to take a screenshot on your computer, here you go (this is important). If you’re on a mac, press ‘SHIFT’ ‘COMMAND’ and ‘4’ all at the same time, then drag and select the area you want to screenshot. If you’re using a PC or iPad or something else, here’s an article that teaches you how to screenshot on any device, or you can just search for a YouTube tutorial for your specific device. Once you’ve taken a screenshot, it will usually automatically end up on the desktop of your computer and you can access it there.
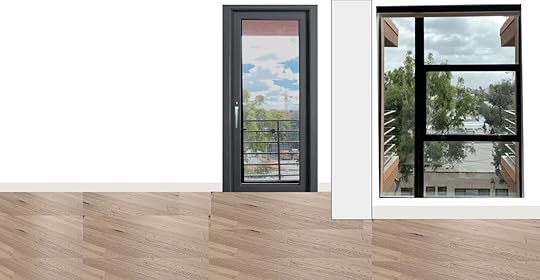
So once you know how to screenshot (and where to find your screenshot), you can do the same thing you did with the floors with the walls (my walls are white, so I just left the background blank). Then, the next thing to do is to add any architectural features into the space. So, for example, if you have a window, take a photo of the window, (or again, screenshot your apartment/house’s online listing photo), upload it to your computer, then drag it into your google slide presentation, crop, and adjust the size to scale it to the room. You can also use the “shapes” tool on Google Slides to add in any walls, poles, smoke detectors, trim (don’t forget your trim), etc. Then once you have that basis, it should look something like this (but obviously, it will look more like your space, not mine):
Now you have the foundation, so you can fill your room with WHATEVER YOUR LITTLE HEART DESIRES. Sounds easier than it is – trust me, I get it – and I’m going to give you some VERY helpful tips for how to do this (and make it look good). We made it to the fun part, guys!
SCREENSHOT ONLINE FURNITURE PIECES
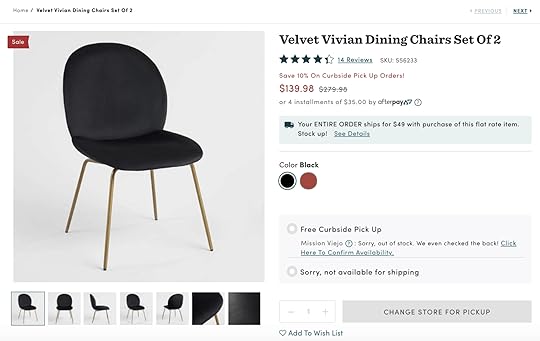
First, I’d recommend starting with the furniture you already have/want to still use in your space, which, you can either take photos of your items in your apartment, OR if you have anything that’s sold online, you can screenshot the furniture pieces there (the second option will look cleaner and better). For example, we have 2 pieces of art and a World Market dining set that we got off Craigslist, but luckily they were all still being sold online, so I just took screenshots of each item from their respective online stores. Here’s what our current dining chairs look like online (ooh, by the way, they’re on SALE if you’re into them. They’re very comfortable and I highly recommend). Then I’ll ONLY screenshot the chair on the grey background (not the whole page):
Hot Tip
I HIGHLY recommend finding pictures that have the most MINIMAL background possible, before you take your screenshot (like this plain grey background in the above photo). This will make the next step MUCH MUCH easier.
So now you should have a screenshot of your furniture item on the desktop of your computer, but it’s not quite ready to go into your Google Slides presentation just yet, here’s what you have to do next…
MAKE THE BACKGROUND TRANSPARENT
“How do you take the backgrounds out of the screenshots?” That is yet another million dollar question, people. You may be shocked to find out the answer is NOT Photoshop (although you can use photoshop to take out a background –– and I often do), this option I’m about to show you is actually EASIER and FREE. These are the instructions for mac users, but if you have a PC, you can follow this video to achieve the same thing 


Emily Henderson's Blog

- Emily Henderson's profile
- 10 followers

