
How to do Combat Side Stroke
Learn how to do Combat Side Stroke. The Navy Seals developed the Combat Side Stroke (CSS) as a stealth and efficient way of swimming long-distance. It is a mix of freestyle, breaststroke, and sidestroke.
The information in this post is from the book “Swim Workouts and Water Rescue Skills” by Sam Fury.
GET YOUR FREE SWIM WORKOUTS TRAINING SCHEDULE
Pin This for Later!


How to do Combat Side Stroke
There are 4 basic stages to the CSS. The streamline position, two catch and pull movements, and the recovery. The recovery involves a scissor kick paired with a breaststroke-like arm movement.
Note: A lot of the terminology used in this chapter is explained in the freestyle section.
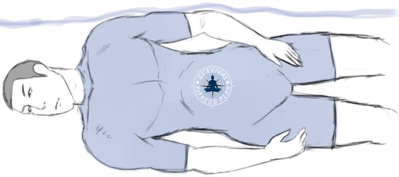
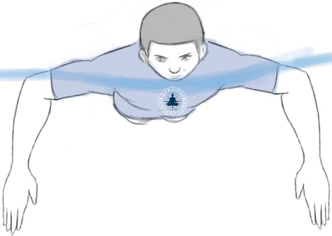
Streamline Position
Get some initial propulsion and adopt the streamline position.

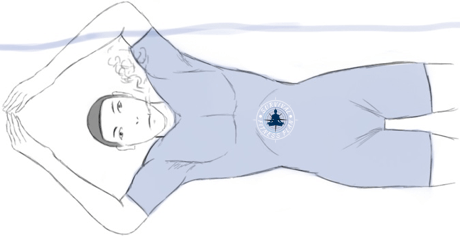
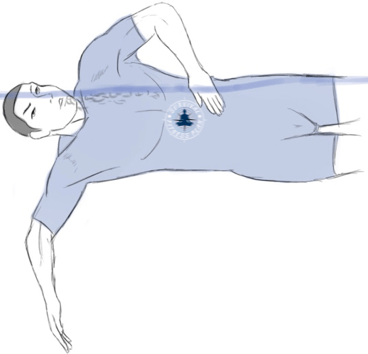
First Catch and Pull
Do your first catch by pressing the palm of your top hand down. If you are rolling to your right then your right hand is/will be on top. Bend your arm at the elbow.
Ensure to keep your arm aligned at a downward angle. Your shoulder is at the top, your elbow below that, then your wrist, and finally your fingers at the bottom. Doing this will maximize your first pull.

Continue the catch as you rotate onto your side. Your forearm is vertical, elbow above your wrist.
Stay on your side until your recovery stage.

Flow into the pull by continuing the movement of your top arm until your hand is in line with your upper thigh. Your hand follows your midline. Be careful not to raise your elbow too high.
At this stage, your arm is almost fully extended. Do not let your hand come out of the water.
Now is a good time to take a breath. When you exhale, do so in a slow and steady manner.

Second Catch and Pull
Start your second catch and pull with your other arm by sweeping it down. Your palm faces down and stays fixed in that position. As you sweep down it creates resistance against the water, propelling you forward.

When your arm is vertical, your palm will be facing to your rear.

Continue the arc of your bottom arm until your hand is on your thigh.
The catch, pull, and recovery of your lower arm is almost identical to a breaststroke motion.
Note: As you do the second pull you can either leave your head up breathing or look back down. If you have a tendency to sink you are better off looking back down.
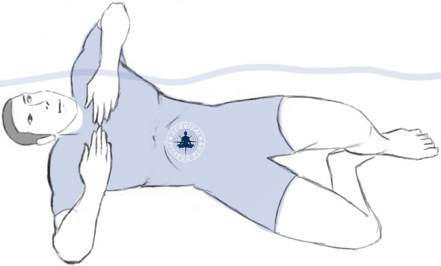
Recovery
Start the recovery with a simultaneous scissor kick and arm movement.
Bring both your arms up through the center-line of your body. They then travel back into the streamline position, like breaststroke. Keep your arms and hands underwater and as close to your body as possible.

Continue your arms forward past your face as you do the scissor kick. Finish in the streamlined position.
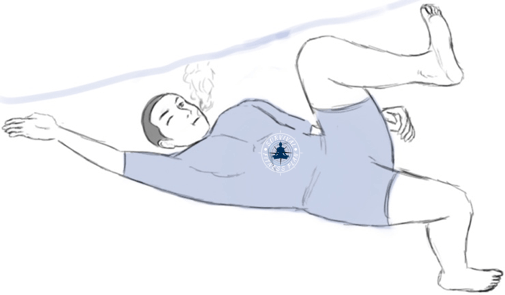
Scissor Kick
Do the scissor kick as you bring your arms forward. This helps with propulsion and corkscrew’s your body back into the streamline position.
Move your top leg forward and your bottom leg backward at the same time. Bring them back together in the streamlined position. Keep your toes flexed towards your shin until you adopt the streamlined position.
Draw your top knee up so there is a 90º angle at your hip and knee. At the same time, bend your bottom leg back at the knee.
Extend the lower part of your top leg in front of your torso as you kick your bottom leg back.
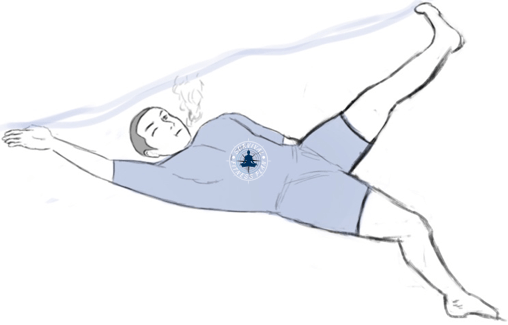
Point your toes once you have extended your legs, then draw them into the streamline position.

Slowly exhale as you glide in the streamline position. Be sure to get the most out of the glide before starting the next arm cycle.
If speed is more important you can flutter kick before initiating your first pull again. You could also use the sprinter’s CSS.
Sprinter’s CSS
Use the sprinter’s CSS when you need to go faster. The tradeoff is that you will use more energy since will use a greater stroke count over the same distance.
To do the sprinter’s CSS do a half stroke on your second pull. Everything else stays the same.
From the start of the second pull, bring your arm down as normal until it is almost at a right angle to your body.
Instead of pulling it all the way to your thigh, scoop it up into your armpit.
From here, push it forward into a full extension as normal.
Guide Stroke
Use the guide stroke to check your direction when using the CSS to swim a long distance.
It uses a breaststroke-type movement for your arms and the dolphin kick for your legs.
Start in the streamline position. Push your palms out against the water to a position a little wider than your shoulders.
LEARN THE DOLPHIN KICK

Press your palms against the water as you rotate your hands and lower arms into a vertical position. Your finger-tips point down and your palms angle toward your chest.
Pull your palms towards your chest. This creates forward propulsion and allows you to raise your head above the surface. Now you can breathe and look around.
Try not to lift your head too far out of the water. This will cause your hips and legs to sink, which will decrease your momentum.
LEARN HOW TO TREAD WATER
Recover your arms back to the streamline position as you would with breast-stroke. Keep them close to your body along your centerline.
As you recover your arms, use the downward motion of the dolphin kick. This helps with propulsion back into the streamline position. From here you can continue into CSS or another guide stroke.
Note: For more instruction on the dolphin kick, see the underwater fly-kick section.
If you get disorientated, tread water until you figure out which direction you need to swim in.
GET YOUR FREE SWIM WORKOUTS TRAINING SCHEDULE
Photo Credit: By Cpl. Christina Oneil (https://www.dvidshub.net/image/1254958) [Public domain], via Wikimedia Commons
Did you find this article about how to do the combat side stroke useful? If so, please share it and/or leave a comment below.
The post How to do Combat Side Stroke appeared first on Survival Fitness Plan.


