Jump Into UXPin in 3 Easy Steps

In our recent #UXPinChat Twitter discussions, in which we sometimes work with a live prototype, people have been curious about creating their own quick mockups on the fly. There’s no time to lose: here’s how to start using UXPin in three easy steps.
If you don’t have one, get a free trial. All you need is your email address and the desire to design.
1. Create a new project
The Dashboard contains all of your prototypes organized into project folders. Create a new project folder by clicking the “plus” icon.

Inside of that, make a new prototype.

2. Build with the Editor
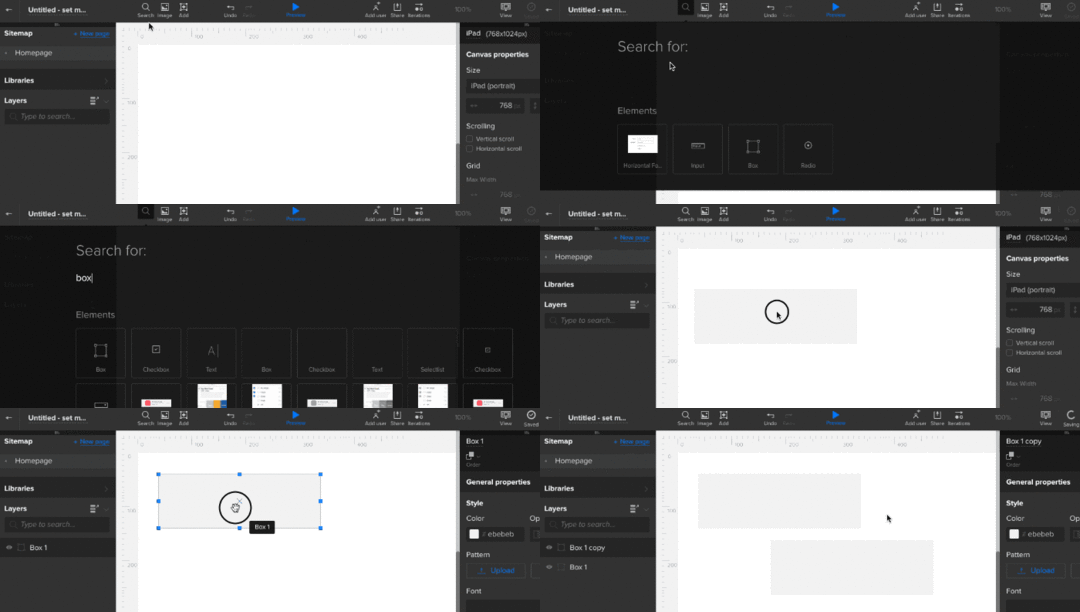
The Editor is where you’ll create your prototype. Find (cmd-F Mac, ctrl-F Windows) text, boxes, or other shapes. There are more than 900 elements to choose from — but it’s best to start simply.

Hold down option/alt and drag an element to make a quick copy.
3. Share
Tap the blue “preview” button at the top of the editor to see your project live. The preview will update automatically as you make changes — just refresh the preview tab.

To share with the conversation in #UXPinChat, copy/paste its URL into Twitter with hashtag #UXPinChat. To share with anyone, just give them the URL. Anyone with the preview URL can view the prototype, even if they don’t have a UXPin account.

Just copy the URL and go.
Bonus: Collaborate With Comments
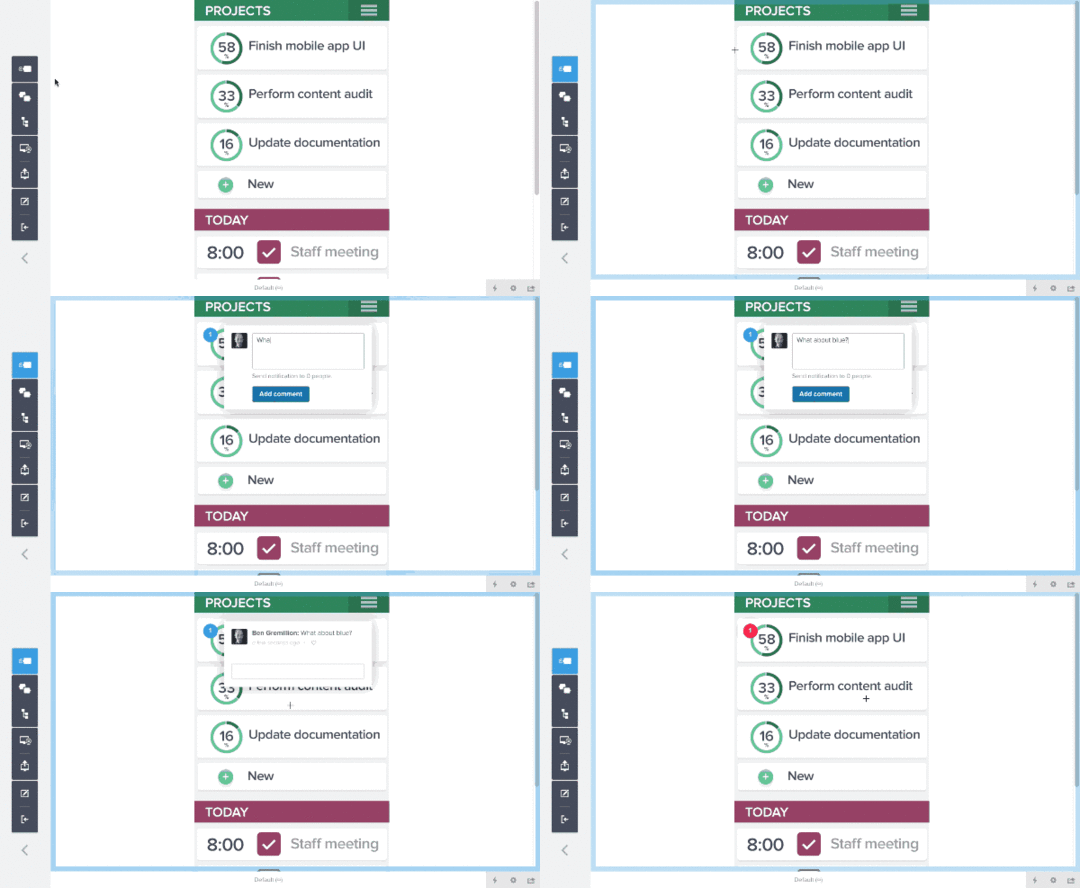
You can leave a note anywhere on the canvas by clicking the “comment mode” button on the left, then clicking anywhere on the canvas. Comments are immediately available to anyone watching the preview.

Learn to Do More
Whew. That’s a quick look at UXPin. If you want a more detailed read, check out these “getting started” posts and videos to learn the ins and outs of designing interactive mockups with UXPin.
Introducing UXPin
App overview, creating a project, importing from Sketch and Photoshop, and adding basic actions.
Discover the Editor
The sitemap, adaptive breakpoints, hotspots, shapes & symbols, multistate elements, and advanced animations.
Workflow
Smart elements, custom libraries, team management, and sharing prototypes.
Build Something Cool
Navigation drawers, interactive carousels, hover effects, and more.
#UXPinChat
Weekly live conversations about UX design on Twitter.
Free Webinars
From guided tours to active demos, you’ll learn fundamentals that get you prototyping quickly.
Join the world's best designers who use UXPin.Sign up for a free trial.Your e-mailTry it for free!
The post Jump Into UXPin in 3 Easy Steps appeared first on Studio by UXPin.
UXpin's Blog
- UXpin's profile
- 68 followers


