
Shirley Jump's Blog: Eating My Words, page 14
October 6, 2010
New Book Out This Week!

I have a new book out today, a retelling of the classic Cinderella tale, though all focused on shoes (oh, and a romance, too!). Anyone who knows me knows this is the perfect kind of story for me! So look for If the Red Slipper Fits in a store near you, or buy it online. And if you're like me, you'll treat yourself to not just a new book, but a new pair of shoes, too! ;-) Shirley


September 5, 2010
Tyler's Ultimate Barbecued Ribs
 Tyler Florence is amazing. I have always liked his shows and his recipes, and lately have been on a kick to try his "ultimate" recipes from Tyler's Ultimate.
 I have yet to be disappointed. Last night, I made the Ultimate Ribs. They were AMAZING. The sauce alone...OMG. Incredible. Sweet, sticky, a tiny bit of spice...exactly what a good barbecue sauce should be. These take some time (two hours total) and I did them in the oven since we were out of propane and the directions call for oven cooking. There's a video of him cooking the ribs on the Food Network site. I made these exactly as the recipe said (I know, for once I followed a recipe exactly, LOL). And they were the best ribs I've ever cooked, probably the best ones I've had. I'm not a huge fan of ribs (not a fan of messy meals, really) but I couldn't stop eating these ones. It was only me and DH last night for dinner (he loved them too) so no kid opinions.
Tyler Florence's Ultimate Ribs
NOTE: For mine, I used red vinegar and had Dijon mustard so I used that, not the dry mustard. It makes more sauce than you need, which is great for another dinner. I'm going to put it on some chicken next week. But truly, I loved the sauce so much I could eat just that, LOL.
2 slabs baby back ribs (about 3 pounds)
Kosher salt and freshly ground black pepper
Extra-virgin olive oil
2 bacon slices
4 sprigs fresh thyme
1/2 onion (NOTE: NOT CHOPPED UP, just leave it whole or cut it in half)
3 smashed garlic cloves
2 cups ketchup
1 cup peach preserves
2 tablespoons Dijon mustard or 1 tablespoon dry mustard
2 tablespoons brown sugar
1/4 cup molasses
2 tablespoons red or white wine vinegar
1 teaspoon ground cumin
1 teaspoon ground paprika
Preheat the oven to 250 degrees F. Put the ribs on a baking sheet, season with salt and pepper and drizzle with olive oil. Stick them in the oven, and let the ribs bake, low and slow for 1 1/2 hours.
Meanwhile, make the sauce. Wrap the bacon around the middle of the thyme sprigs and tie with kitchen twine so you have a nice bundle. Heat a 2-count of oil in a large saucepan over medium heat. Add the thyme bundle and cook slowly for 3 to 4 minutes to render the bacon fat and give the sauce a nice smoky taste. Add the onion and garlic and cook slowly, without coloring (NOTE: I THINK HE MEANT STIRRING), for 5 minutes. Add all of the rest of the sauce ingredients, give the sauce a stir, and turn the heat down to low. Cook slowly for 20 minutes to meld the flavors. Put some sauce in a separate bowl for basting, reserving the remaining sauce for serving.
Baste the ribs with the sauce and let them continue cooking, basting twice more, for 30 more minutes. When the ribs are cooked, take them out of the oven. You can let them hang out like this until you're ready to eat.
When ready to eat, preheat the broiler for 5 minutes and broil the ribs, basting with the sauce. They should become crisp and charred, about 5 minutes on each side. Pick the onion and garlic out of the sauce and serve with ribs. (NOTE: I broiled 5 minutes on one side, 5 on the other, then basted once more on the "pretty" side and broiled another 3 minutes).
I've had great success with the Tyler Florence's recipes. My whole family loved the Ultimate Chicken and Dumplings. I'm dying to make that one again! I saw he has a Fried Chicken recipe, so that one's going on my list to try. FYI, he also has a blog and website. What I like most about his "ultimate" recipes is that they are rarely complicated, and become those kind of stand-by dishes you'll make over and over again.
 The Ultimate Chicken Cordon Bleu was also awesome. The only change I made was serving it with a cherry chutney, which was truly the perfect complement to the dish. It's another dish I'm already craving again! I haven't posted his Ultimate Roast Chicken yet but trust me, it was INCREDIBLE. I highly recommend it. I made two at a time, so I had a ton of leftover chicken for other dishes. And then I made stock out of the bones. Yum all around!
Today I'm making a Tyler wings recipe for an appetizer. I'm figuring they'll be just as fabulous as all his other dishes. That man can definitely cook :-)
Shirley

September 3, 2010
Easy Appetizer: Feta Tomato Crostini
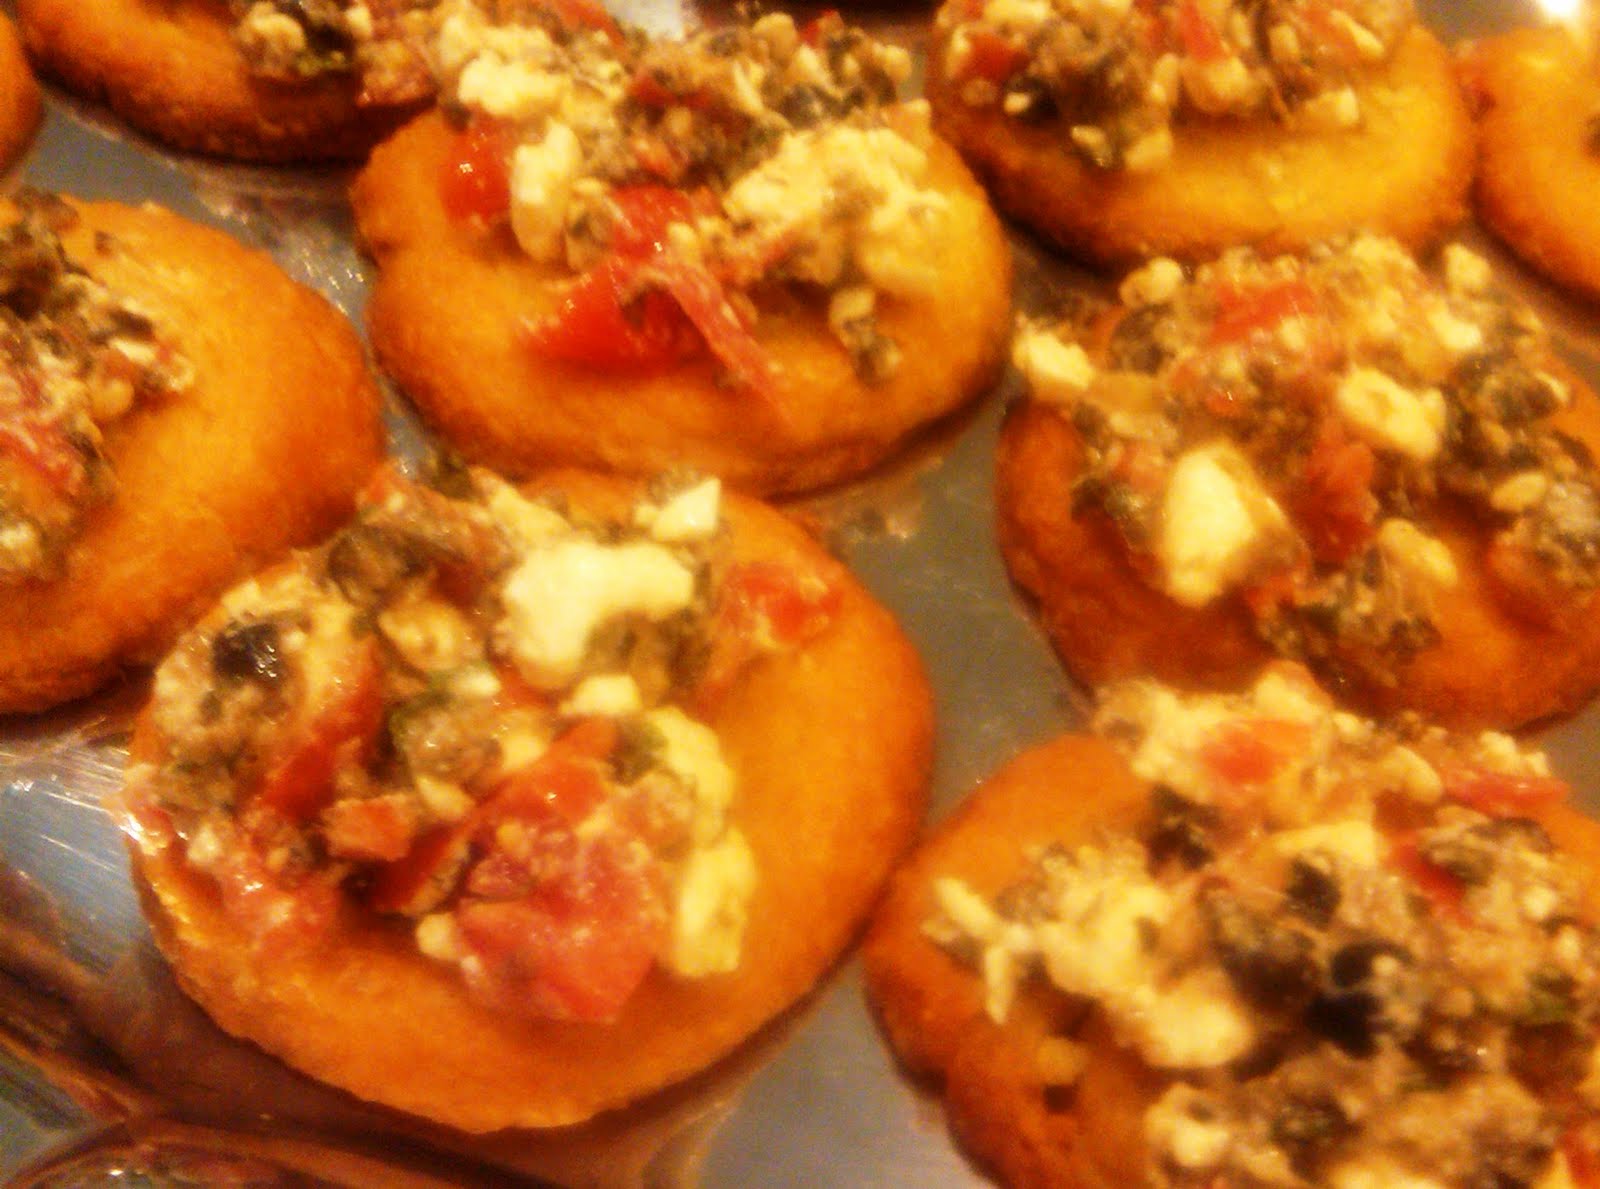
Tonight, I was invited to something last minute, and had to figure out what I could bring based on the ingredients I had on hand. I nearly always have crescent rolls, because I know that good ol' Pillsbury website will give me something good :-).
Tonight's appetizer was no different--I did make far more topping than the recipe called for (basically doubled it but tasted as I went and ended up not doubling the olives) and I still had to steal some from this one and that one at the end to make enough for all 16. Very easy, very fast and very good: Feta Tomato Crostini (click on title for original recipe...below is how I made it) 1 package crescent rolls2 tablespoons olive oil1 clove garlic, minced 2 Roma tomatoes, diced1/4 cup diced Kalamata olives (black olives; you can buy a small can of them already chopped up)1/2 cup Feta cheese, crumbled2 teaspoons olive oil1 tablespoon chopped fresh Basil leaves or 1 teaspoon dried (I used dried; rarely am I out of basil but I was today)
1/2 teaspoon salt1/4 teaspoon pepper Preheat oven to 375 degrees. Open crescent rolls and DON'T unroll (I rolled the roll of them back and forth on a cutting board to tighten the roll before cutting). Cut in half, then cut each half in half, cut those halves in half, and so on, to get 16 slices. Spray two cookie sheets with non-stick spray. Lay out the circles, and press them out into 2-inch diameter circles.
Mix 2 tablespoons olive oil and minced garlic in a small bowl. Brush over crescent circles. Put in oven and bake for 10-15 minutes, until golden brown.
Meanwhile, in another bowl, mix remaining ingredients. When crescents are cooked, remove from oven, let cool for one minute, then spoon on topping.
Shirley

August 29, 2010
Yummy Peanut Butter and Chocolate Cookies

I was in a cooking mood today! I made monkey bars (from a recent issue of Woman's Day), 7 quarts of homemade chicken stock (more on that in another post), my Creamy Wild Rice and Mushroom Soup and White Chicken Chili. I had already made Tyler Florence's Ultimate Roast Chicken (two chickens) so that produced all the stuff for the stock. I'll write about the chicken in another post. But because I'm the kind of girl who believes in dessert first, LOL, I made these low-fat Peanut Butter and Chocolate Cookies from Cooking Light's Annual Recipes for 2009.
They. Were. Amazing.
I love peanut butter, I love chocolate (I'm a pushover for a Reese's) and this was PERFECT. Just the right amount of everything, and best of all, they're only 96 calories a cookie. Several steps involved, but you can do a lot of the frosting prep while the cookies are baking and cooling.
Cooking Light's Peanut Butter and Chocolate Cookies
Cookies:
1 1/2 cups all-purpose flour1 1/2 teaspoons baking powder1/2 teaspoon regular salt
1 cup granulated sugar
1/4 cup creamy peanut butter
2 tablespoons butter, softened
1/4 cup low-fat milk
2 large eggs1/2 teaspoon vanilla extract Icing: 1 1/2 cups confectioners' sugar, divided3 1/2 tablespoons low-fat milk, divided2 tablespoons half and half (I used lowfat), divided3 tablespoons creamy peanut butter1 ounce chocolate chips1 teaspoon unsweetened cocoa
Preheat oven to 375 degrees. Either line two cookies sheets with parchment paper or spray them with non-stick spray. In a separate bowl, mix flour, baking powder and salt, stirring well. In a mixer, combine sugar, peanut butter, butter, eggs and beat at medium speed about 2 minutes. Add 1/4 cup milk, then add eggs, one at a time, until well blended. Add vanilla. Then add flour to sugar mixture and beat on low until well mixed. This is a thin-ish dough, not at all thick like chocolate chip cookie dough. That's okay--it makes light, fluffy cookies.
Put dough mixture into a big zip-type bag. Snip off a 1/2 inch on one corner, then pipe 1 1/2 inch circles onto the cookie sheets (makes about 36, so 18 cookies per sheet). Bake at 375 for 11 minutes (mine took 12 1/2). Cool for 1 minute on the pans, then remove to wire racks and let cool completely. To prepare icing: in a bowl, stir together 3/4 cup of the powdered sugar, 2 tablespoons of milk, 1 tablespoon of cream and peanut butter. It should be thin, but not runny (you can always add a tad more milk or powdered sugar to get the right consistency). Put it into a quart-size zip-type bag. In another bowl, melt the chocolate chips in the microwave at 30-second intervals, until almost melted. Stir until smooth. Add remaining 3/4 cup of confectioners' sugar, 1 1/2 tablespoons of milk, 1 tablespoon of cream and cocoa (add extra liquid if necessary). Stir well, then put the chocolate icing into a separate quart-size zip-type bag. When the cookies are COMPLETELY cool, you can ice them. Snip off a small corner of the peanut butter icing, then drizzle on the cookies. Do the same with the chocolate. Let stand until icing is set (about 10 minutes).
Eat. :-)
Shirley

August 27, 2010
Beer Battered Fish and Onion Rings with Low-Fat Tartar Sauce
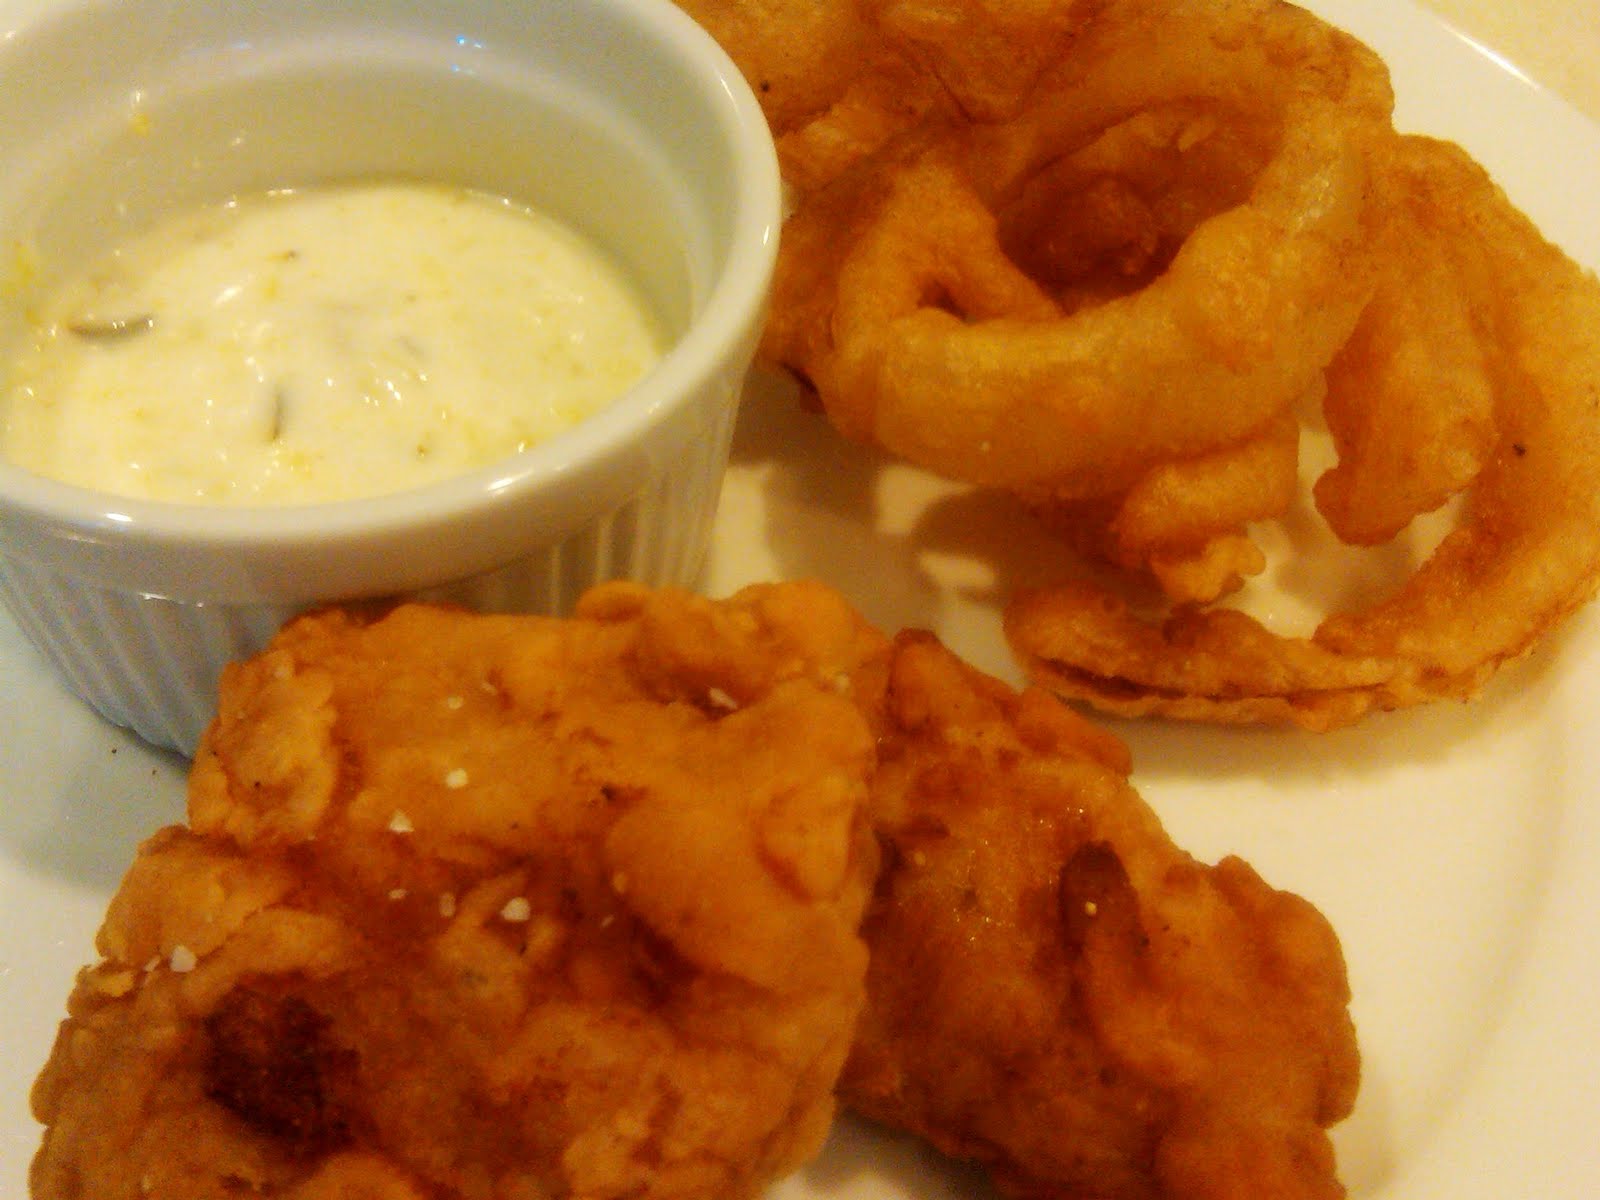
My son pronounced this my "best dinner ever." I think it's because I put Red Robin seasoning on the fries and onion rings, LOL (I baked up some fries too, but they weren't on my plate, hence, not in the photo). And yes, I made a vegetable, too, but it was just broccoli, so I didn't put it in the picture.
I was going to make baked fish. Then realized I had all the ingredients for beer batter, and a hankering for some fried food. So I made this, and made the low-fat tartar sauce to kinda offset the calories (it's the Big Mac and Diet Coke theory ;-).Beer Battered Fish
1 pound of cod or other whitefish
1 12-ounce bottle of beer
2 cups of flour, divided
1/4 teaspoon salt1/8 teaspoon pepper
1/8 teaspoon garlic powder
more salt and pepper
Canola oil
Heat about an inch of the oil in a thick bottomed pan to 375 degrees Fahrenheit. Also preheat the oven to 200 degrees and put a piece of parchment paper on a cookie sheet.
Cut the cod into two-inch pieces. Mix the beer and 1 1/2 cups of flour in a bowl. Add salt, pepper and garlic powder. In a separate bowl, mix the remaining 1/2 cup flour with some salt and pepper to season it.
Dredge the fish in the beer batter, then shake gently to remove the big bits of batter. Dredge in the flour. Fry, a few pieces at a time, about 4 minutes per side, turning once. Remove and drain on paper towels. Sprinkle with salt while it's still hot. While other pieces are cooking, put the first pieces on the cookie sheet and into the oven, to keep them warm.When the cod is done, if you happen to have a sweet white onion (like a Vidalia), cut into 1/2 inch rings, dredge in the batter (skip the flour), then fry, about 3 minutes per side. You might need to add more oil and reheat the oil to 375 before cooking the onions. Drain on paper towels and sprinkle with salt.For the low-fat Tartar Sauce, mix 1 small container plain yogurt with 3 tablespoons relish (I used my zucchini relish :-), a dash of hot sauce, a little lemon juice, and a tablespoon or so of lite mayonnaise to thicken it.Shirley

August 26, 2010
Baked Coconut Chicken Nuggets

I've had two dinner winners this week, according to my youngest. This recipe, Baked Coconut Chicken Nuggets served with a cherry chutney (leftover from another dinner) was a huge hit. My oldest was disappointed not to find any leftovers the next day. Everyone had at least two helpings, maybe more. They are sweet, but not too sweet, and let me use up a lot of the buttermilk from the Ultimate Chicken and Dumplings (why doesn't buttermilk come in tiny containers, like heavy cream????).
These ones are quick and easy, and if you don't have cherry chutney, I'd recommend any other kind of sweet topping--cherry preserves, a raspberry chutney, whatever you have on hand. The sweetness really made the dish and made me think of the amazing Monte Christo sandwiches I used to get at Magic Pan a thousand years ago. That restaurant is no longer there, sob sob, but they made a great sandwich and awesome pea soup.Anyway, I digress ;-)
Baked Coconut Chicken Fingers(note: the chicken marinates for an hour so leave time for that)
2 boneless skinless chicken breasts, cut into 1/2 inch strips (a tip: freeze your meat for a half hour before slicing it. You'll get much cleaner cuts and with less effort!)1 1/2 cups buttermilk1/2 cup flour2 eggs, beaten3/4 cup Panko breadcrumbs3/4 cup sweetened coconut flakes1 teaspoon garlic powder3/4 teaspoon salt1/2 teaspoon curry powder (which I was out of, so I used this substitute: a dash of cumin, coriander and tumeric)1/4 teaspoon cayenne pepper
Combine chicken and buttermilk in a shallow dish or zip-type bag. Chill ONE HOUR. Then drain chicken.Preheat oven to 475 degress. Place baking sheet in the oven to get it nice and hot. In three bowls (I prefer pie plates), put flour in first one, beaten eggs in second, and all remaining ingredients in third. Dredge the chicken in flour, then eggs, then coconut mixture.
Spray cookie sheet with cooking spray. Lay chicken on hot cookie sheet, in a single layer. Bake at 475 for 6-8 minutes, turning once, until done.
Serve with a cherry chutney :-)
Shirley

August 24, 2010
Mom's Zucchini Relish

My mom has been gone for almost 5 years now but I still miss her like crazy. I also miss her cooking. She was a fabulous cook, particularly of those basics that most everyone craves--chili, baked beans, baked ziti, homemade bread. And her famous Zucchini Relish, which I haven't had in years and years.
So when I came across the recipe, and had a huge number of zucchini from the local farmer's market (one of these days, I'll plant my own garden, LOL), I decided to try this. It turned out EXACTLY like I remembered my mom's. It was my first time canning, too, and all the little jars sealed perfectly. I was quite proud of myself, LOL.
Mom's Zucchini Relish (makes 5-6 pints)6 cups or 4 medium zucchini, chopped (FYI, I used a food processor for all the veggies)
4 cups or 4 big onions, chopped5 tablespoons table salt or 3 tablespoons kosher salt (I always use kosher salt)4 green peppers, chopped1 red pepper, chopped (optional; and I had already used my red pepper so I didn't use one)2 1/2 cups white vinegar6 cups sugar (I know, I know, but it's not like you eat the whole jar of relish at once)1 tablespoon dry mustard (that's the spice, not the stuff you throw on a hot dog ;-)3/4 teaspoon nutmeg3/4 teaspoon cornstarch3/4 teaspoon tumeric1 1/2 teaspoons celery seedblack pepper to tastegreen food coloring (optional) if you want the relish to be really green
In a large bowl, mix the zucchini, onions and salt. Cover with plastic wrap and let sit overnight. The next day, drain the zucchini well (I also squeezed out as much liquid as I could). Add all the remaining ingredients and stir. Adjust seasonings as needed. This makes 5-6 pints (I got 6), depending on the size of your vegetables. For canning tips, here's a website with lots of info. It was way easier to can than I expected, so count on me to do more of that in the future!
Shirley

August 22, 2010
Lime-Coconut Granita
 This one was SUPER easy, SUPER fast and very low in calories (1/2 cup is only 85 calories). That's my kind of dessert :-) I've never made granita before but now that I know how easy it is, I'll try other combinations. IMO, this also has a great presentation and is the perfect follow-up to a heavy dinner, so I'm putting it on my party menu list. Lime-Coconut Granita 2 1/2 cups water3/4 cup sugar1 tablespoon grated lime rind (I use a microplane)1/2 cup fresh lime juice (2-3 large limes or 4 small)1/2 cup lite coconut milk
Put all ingredients in a saucepan over medium heat. Simmer 3 minutes or until sugar dissolves, stirring often. Remove from heat and cool completely. When cool, pour into a 9 X 13" pan. Cover and freeze for 8-10 hours, or until firm. Remove from freezer, let sit on the counter for 10 minutes, then scrape mixture with a fork until fluffy (it looks like sno-cone filler).
I had this as a snack...perfect light treat for those hot days that are still lingering! :-)
Shirley

August 21, 2010
Mom's Spaghetti Sauce and Eggplant Parmigiana
 My mom made the best spaghetti sauce ever, at least to me :-). I've made lots of different kinds over the years (Ina Garten's Marinara, Giada's tomato sauce, Mario's quick one) but when I want real, thick, homemade goodness, I turn to Mom's. I do just a couple things different--my own little touches--but more or less, this is Mom's.
Tonight, I served it with Eggplant Parmigiana, which my kids refuse to touch, but I love. So I'll freeze the leftover and have it whenever I'm in the mood for a multi-step dinner :-)
Mom's Spaghetti Sauce
2 tablespoons olive oil
1 onion, diced
1 green pepper, diced
1 large clove garlic, minced
1 pound button mushrooms, sliced
1 28-ounce can whole tomatoes (San Marzanno are the best but tough to find)
2 8-ounce cans tomato sauce
1 6-ounce can tomato paste
1 teaspoon dried Italian seasoning
1/2 teaspoon dried basil (or 1 tablespoon fresh)
1/2 teaspoon dried oregano (or about 1 tablespoon fresh)
salt (I use about a teaspoon)
pepper (to taste)
1 tablespoon brown sugar (that's my addition; Mom didn't use the sugar. I think it cuts the acidity of the tomatoes)
Heat the oil in a Dutch oven. Add peppers, onion and garlic and cook until onions are translucent. Add mushrooms and cook until mushrooms are softened. Add whole tomatoes, crushing each one in your hand as you put it in (this yields chunkier tomato bits (and tastier, because they've been processed less) than if you use diced), and all other ingredients except sugar. Simmer for up to an hour, tasting and adjusting seasoning as necessary. Add sugar and simmer another 10 minutes.
Eggplant Parmigiana
olive oil
1 eggplant, peeled and sliced thin
3 eggs
1 tablespoon freshly grated Parmesan cheese
1/4 teaspoon garlic powder
dash ground black pepper
1 1/2 cups bread crumbs (I use seasoned)
6 ounces shredded mozzarella cheese
2 cups spaghetti sauce
Preheat oven to 350 degrees. Heat about 3 tablespoons oil in a large skillet (enough to coat the bottom thickly). Mix the eggs, Parmesan, garlic powder and pepper in a pie plate or bowl. Put bread crumbs in another. Dredge the eggplant first in eggs, then in bread crumbs, then fry in the olive oil until golden brown on each side. Remove eggplant and let drain on paper towels. I refresh the olive oil after each batch, to keep the frying even.
Spread 1/2 cup of sauce in the bottom of a 13 by 9 baking pan. Lay eggplant in pan, in one layer. Top with more sauce, and sprinkle with mozzarella. Layer another layer of eggplant, sauce and cheese (one eggplant made just two layers for me). Bake at 350 until cheese is golden brown and bubbly--about 20 to 25 minutes.
This was so darn good, I had THREE (!!) servings of the eggplant parm. I couldn't keep myself away from it, LOL. DH is on his second helping. I'm thinking he'll end up having three too :-)
Shirley

Eating My Words

- Shirley Jump's profile
- 743 followers

